Cooking On The Ranch

  • Home
  • About
  • Recipe Roundup
  • Contact Me
  • Join Community
menu icon
go to homepage
  • Home
  • Soups and Stews
  • About
  • Recipes
  • Contact Me
    • Facebook
    • Instagram
    • Pinterest
  • search icon
    Homepage link
    • Home
    • Soups and Stews
    • About
    • Recipes
    • Contact Me
    • Facebook
    • Instagram
    • Pinterest
  • ×
    Home

    Microwave Cauliflower, Easy and Cheesy

    March 17, 2021 By Lea Ann Brown 22 Comments

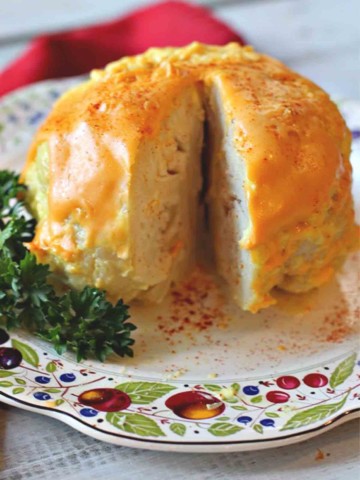
    A whole head of cauliflower cooked in the microwave topped with a cheese and mayonnaise sauce

    This tangy creamy, cheesy microwave cauliflower recipe is one even cauliflower haters will love. Cooking a whole head of cauliflower in the microwave is a super easy side dish. Topped with a mixture of mayonnaise, mustard and slices of American cheese.
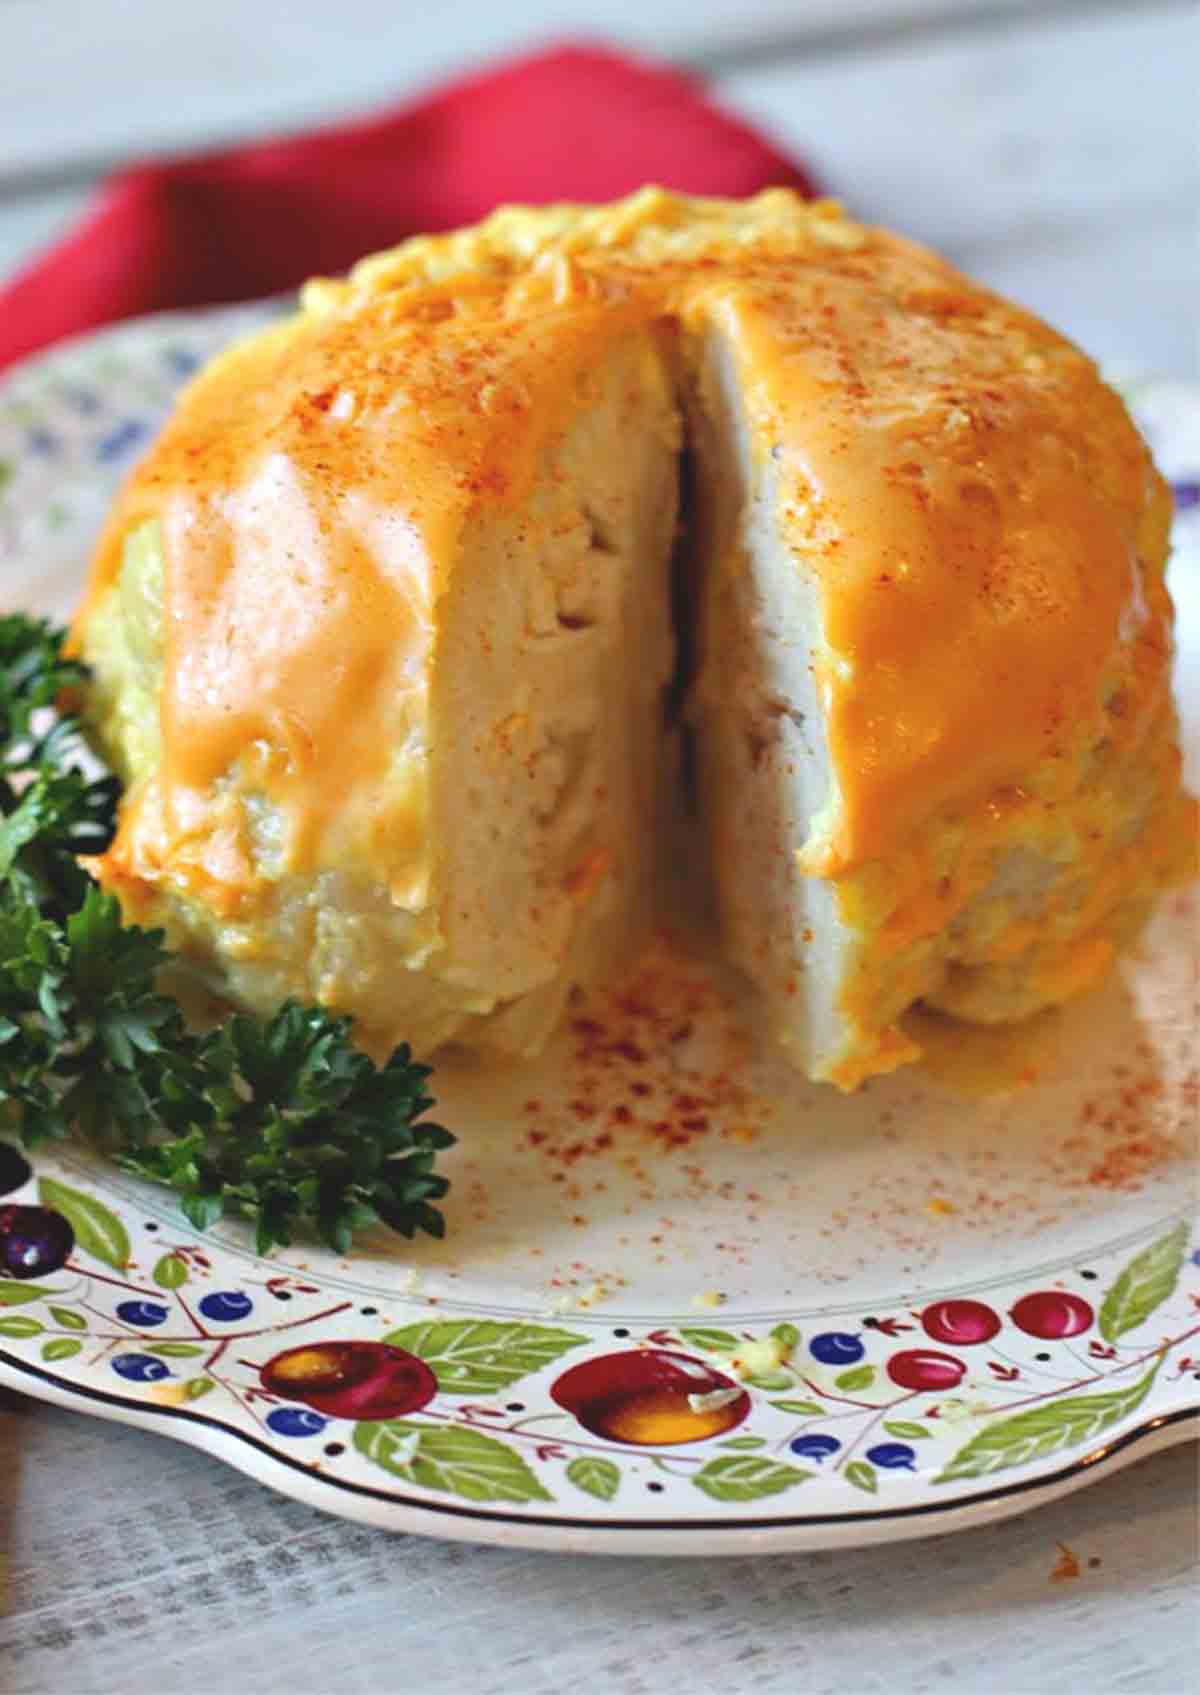
    A whole head of cauliflower cooked in the microwave topped with a cheese and mayonnaise sauce

    I’ve always claimed that even cauliflower haters would cozy up to this microwave cauliflower recipe. And being married to a cauliflower hater, I can attest that even the Ranch Hand likes this one.

    Way back in the dark ages, when microwave ovens were first available for purchase for our home kitchens, I got one for Christmas.

    It was a Radar Range and I wish I had a photo of it. Compared to our sleek modern versions, it’s probably somewhat laughable. The appliance came with a cookbook illustrating how you could magically prepare anything from pot roast to desserts …in a flash.

    This new appliance seemed so daunting, I was compelled to take a class offered at our local Sears store. A demonstration type class, that lasted a couple of hours. This is where I learned of this microwave cauliflower with cheese recipe, a recipe to microwave a whole head of cauliflower. I’ve been making it ever since, and regularly for over 40 years.

    What You Can Expect From This Recipe

    Some nights everyone just needs a vegetable on the table fast. No roasting pan. No oven preheating. No pile of dishes waiting for me afterward.

    • Ready in about 15 minutes = easy vegetable side dish for busy weeknight dinners.
    • Uses simple pantry ingredients.
    • To steam cauliflower in the microwave yields a tender texture and sweet flavor.
    • Once the topping of mayonnaise, mustard and American cheese are added the tangy, creamy cheesy flavors truly enhance the entire experience.
    • A great way to get cauliflower skeptics to eat their vegetables.
    • Naturally low carb and gluten free

    How Long Does It Take To Microwave Cauliflower?

    A whole head of cauliflower takes about 8 to 12 minutes to cook in the microwave. Place it in a covered microwave-safe dish with 2 to 3 tablespoons of water and cook on high until fork tender. Cooking time varies based on the size of the cauliflower and the power of your microwave. Adding water to the dish acts as a steam bath.

    Microwave on High:

    • Small head (1½ pounds): 8-9 minutes
    • Medium head (2 pounds): 10-11 minutes
    • Large head (2½+ pounds): 11-12 minutes

    How Do You Know When It’ s Done?

    Insert a knife or fork into the thickest part near the stem. It should slide in fairly easily but still meet a little resistance. If it’s completely soft, you’ve probably gone a bit too far. But it will still be good.

    Let’s get started:

    Ingredients To Make Microwave Cauliflower
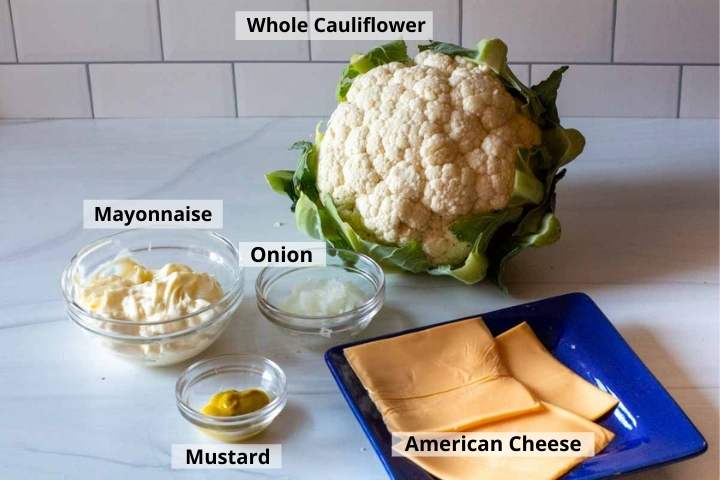
    Ingredients to make microwave cauliflower recipe
    • Cauliflower: 1 whole head. Any size will do. I always grab a large sized head of cauliflower for more servings and leftovers.
    • Mayonnaise: A good quality mayo works well for cooking. Dukes or Best Foods are good here.
    • Mustard: Plain yellow prepared mustard.
    • Onion: Fine diced sweet or yellow onion.
    • American Cheese: Individual slices of American Cheese is a beautiful melting cheese.

    Pro Tip: To keep the sauce nice and creamy smooth, try grating the onion. Use your old fashioned box grater.

    Ingredient Substitutions:

    • Cheese: Substitute grated cheese for the American Slices. A medium cheddar works well. I highly recommend grating the cheese yourself as the pre-grated bags of cheese contain ingredients to keep it from sticking together in the bag. In turn, those ingredients will keep the cheese from melting as well.
    • Onion: To make things even easier, I’ve used dried onion flakes for this recipe. Just mix the flakes into the sauce and let it sit a few minutes to soften before cooking.

    How To Make Cauliflower In The Microwave
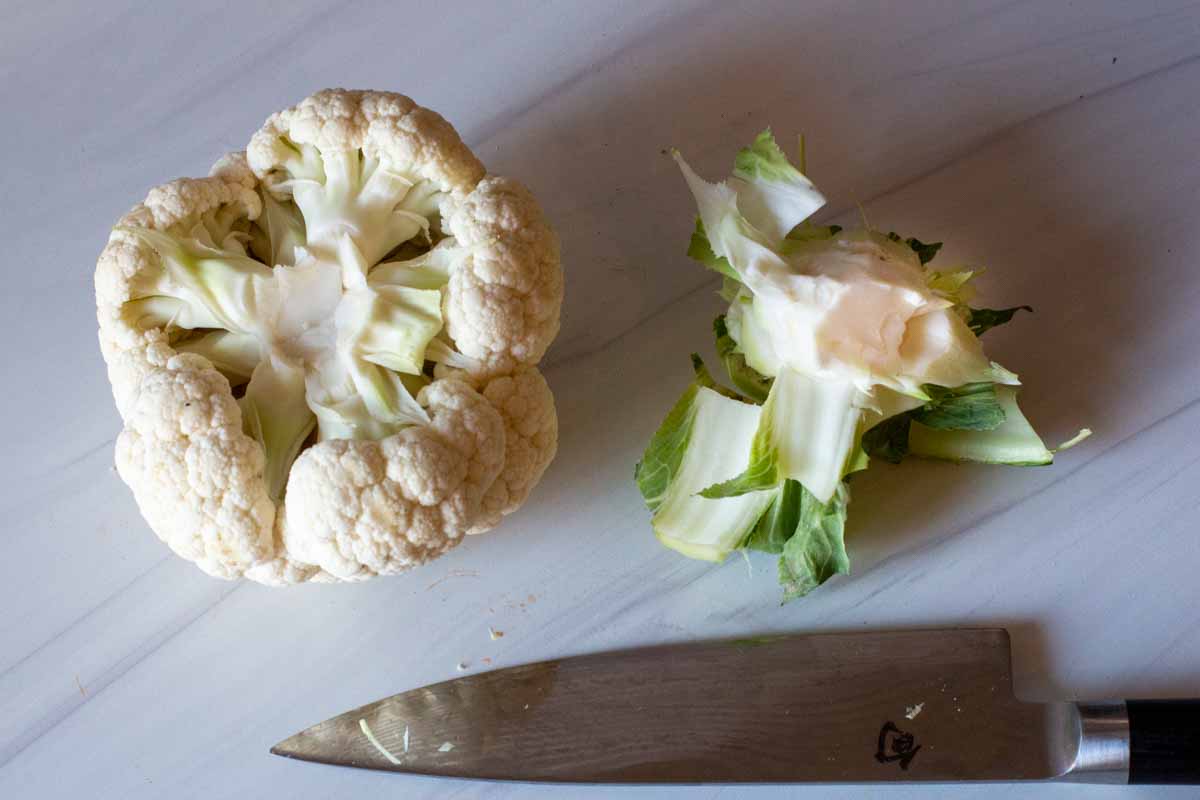
    Whole head of cauliflower with core and outer leaves removed
    1. Step 1: How to remove the cauliflower core. Using a sharp large chef knife, cut around the core area and remove the protruding core and outer leaves of the cauliflower.
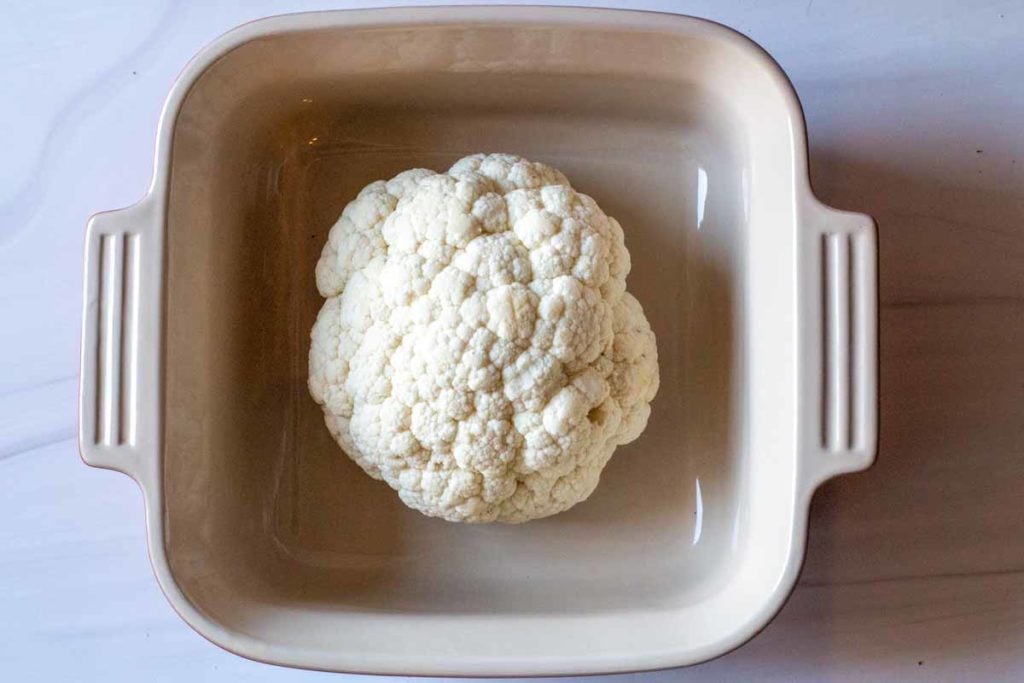
    Whole head of cauliflower in a deep casserole dish ready to cook in the microwave
    1. Step 2: Ready to microwave: Place the cauliflower, core side down in a deep 2 – 3 quart microwavable casserole dish. Add 2 tablespoons of water, cover and cook for 8 – 10 minutes on high.
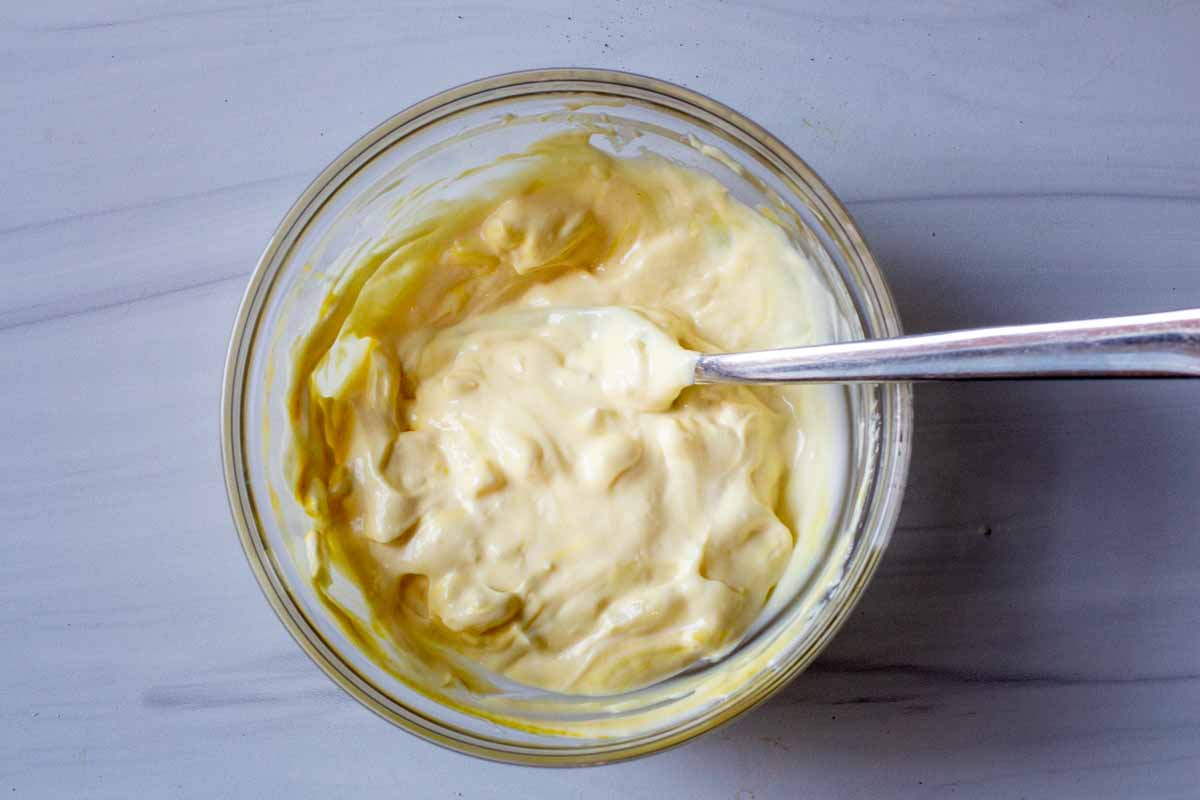
    Mustard mayo sauce for cauliflower cooked in the microwave
    1. Step 3: Make the cheese sauce. While the cauliflower is cooking, combine the mustard, mayo, and onions and blend together with a fork.
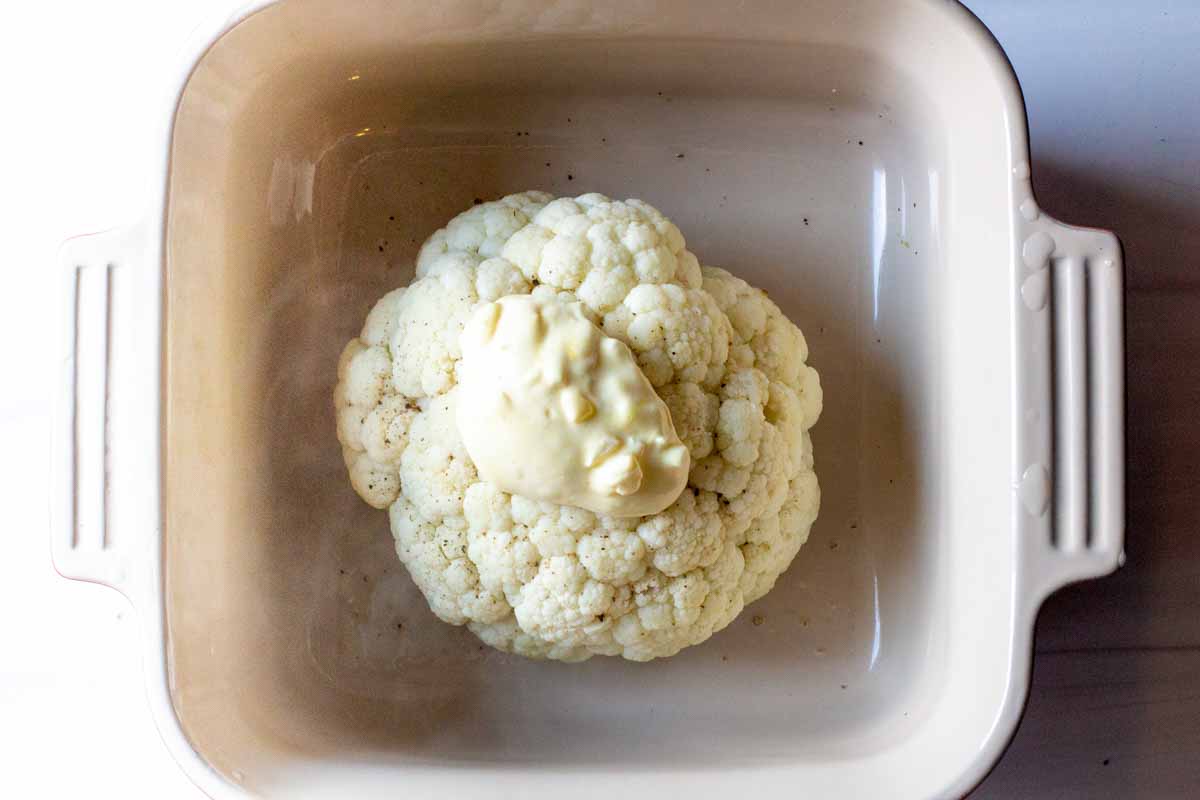
    A whole head of cauliflower cooked in the microwave
    1. Step 4: Remove the cooked cauliflower from the microwave and spoon the sauce over the top. Drain any excess water if necessary.
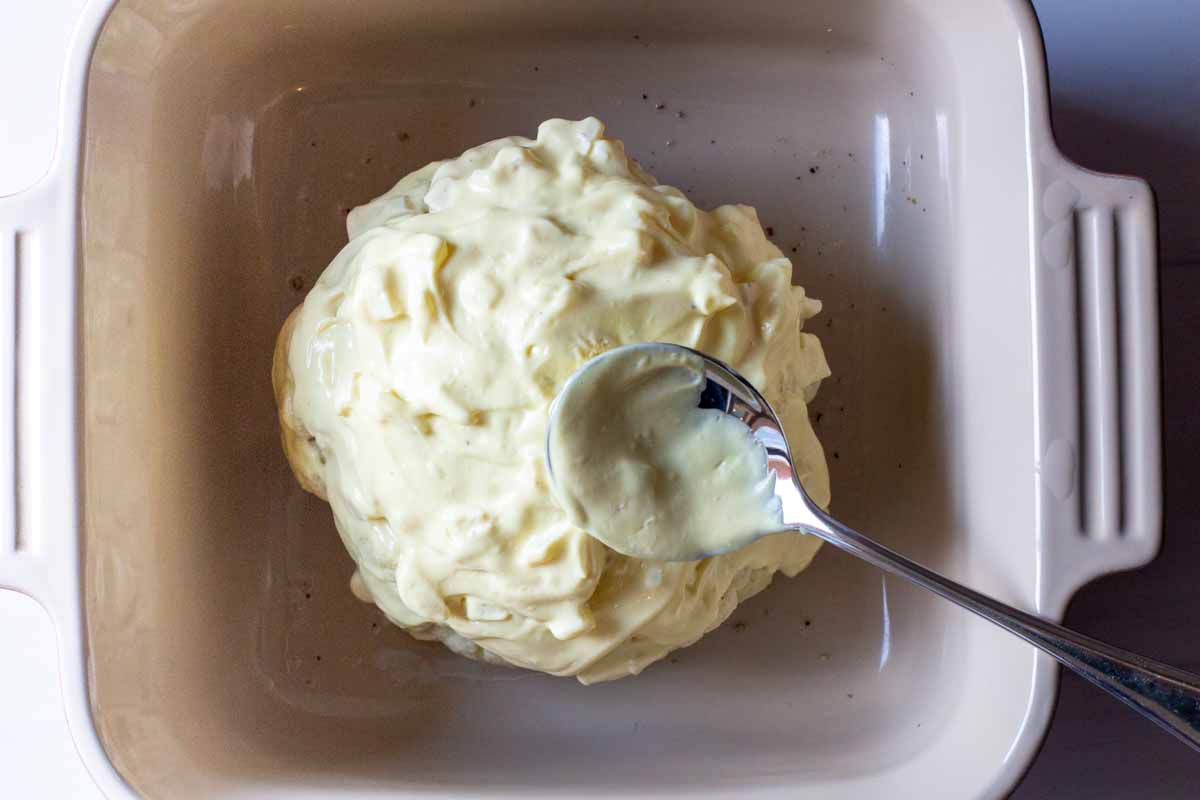
    spreading mayo sauce over a whole head of cauliflower that's been cooked in the microwave
    1. Step 5: Add the Sauce: Using the back of a spoon, coat the cooked cauliflower with the mayo, mustard sauce. Make sure to coat the cauliflower as far down the sides as you can.
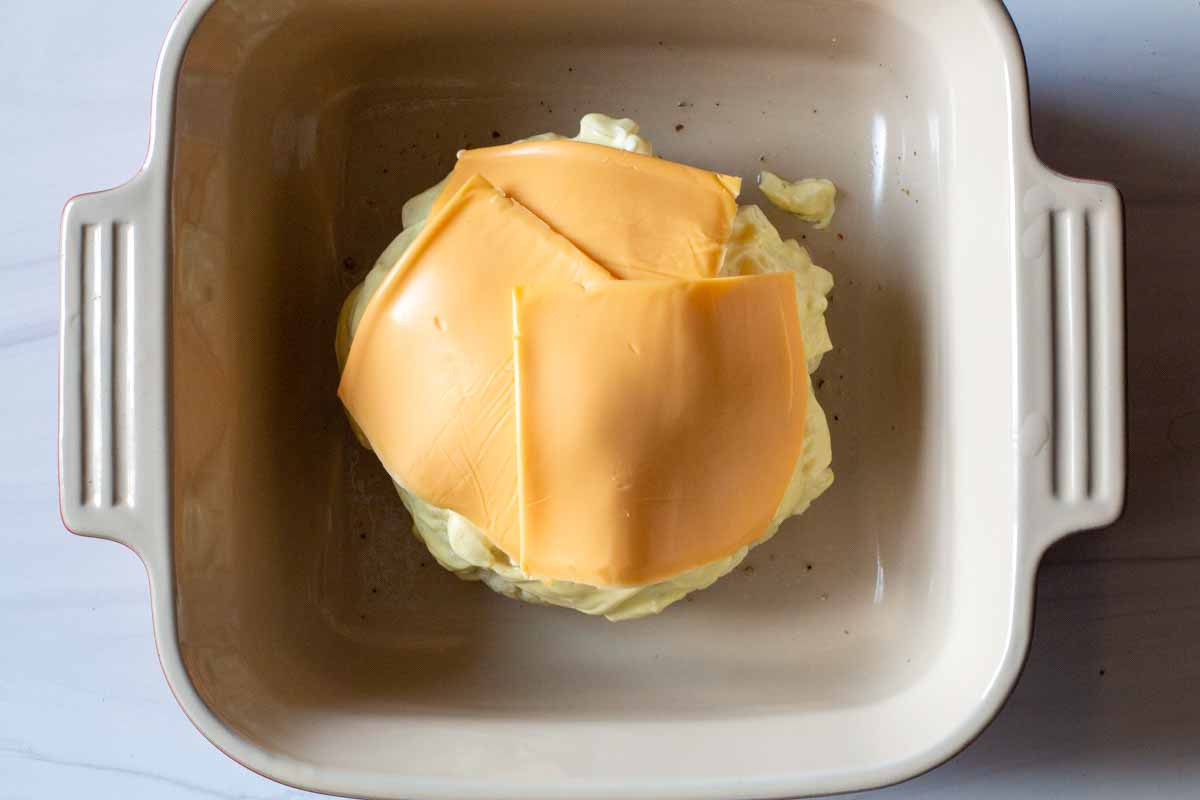
    Adding american cheese slices to microwave cauliflower
    1. Step 6: Add the Cheese: Place the slices of American Cheese on the top of the sauced cauliflower. Alternate the angle of the cheese slices for even melting.
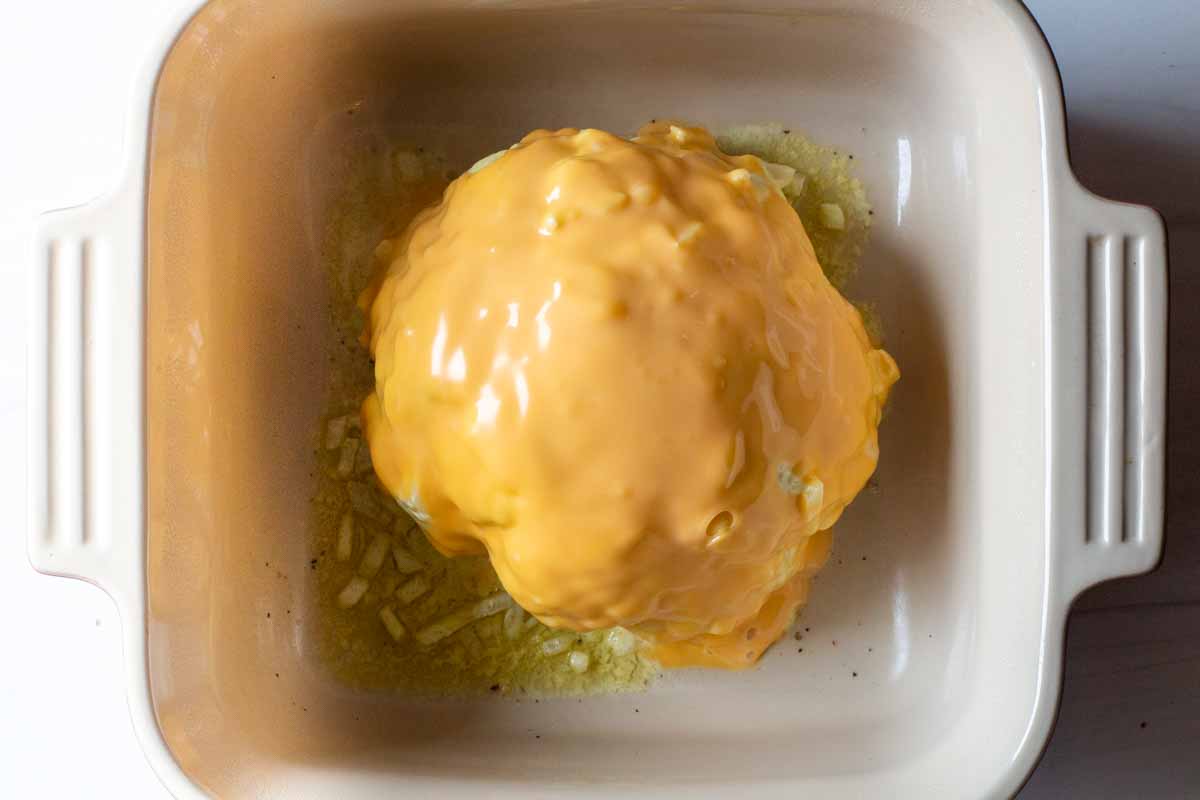
    Whole cauliflower thats been cooked in the microwave topped with a mayonnaise cheese sauce
    1. Step 7: Cover the pan with the lid and return the cauliflower to the microwave. Cook on high for 2 minutes to melt the cheese and heat the mayonnaise mustard sauce. Let the cauliflower stand, covered, for two minutes before slicing.
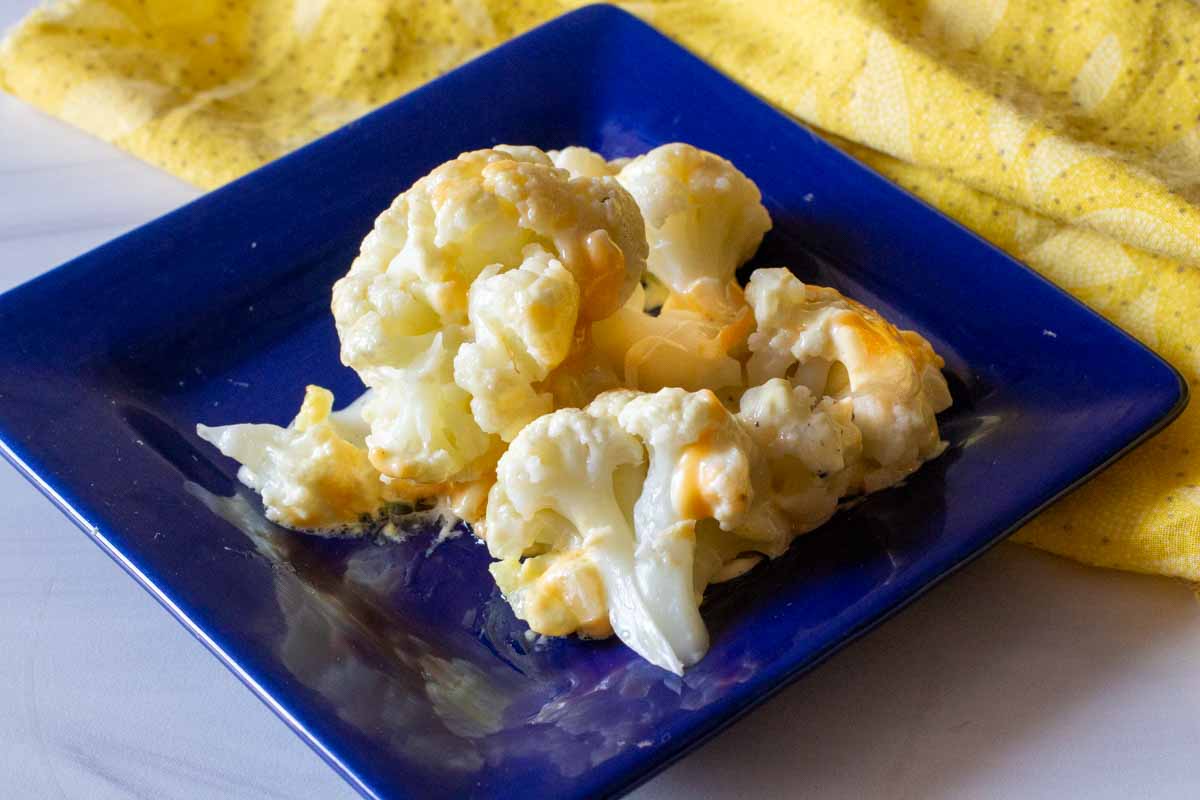
    Whole cauliflower cooked in the microwave served on a blue plate
    1. Step 8: How to Serve Microwave Cauliflower: Using a sharp knife, slice the cauliflower in wedges and serve immediately.

    Variations:

    Living in Colorado most certainly has had a big influence on how I cook. Green Chile peppers seem to find their way into so many traditional recipes. And you bet they’re good with cauliflower. For a Southwestern version try switching things up a bit:

    • Add some diced green chiles to the mayo mustard sauce.
    • Sprinkle in some New Mexico Red Chile Powder
    • Switch out the American cheese for sliced or shredded Pepper Jack cheese

    Tips for Success

    • Don’t try to make this recipe without a covered dish. You need that steamy atmosphere for the cauliflower to cook evenly.
    • If there’s excess water after cooking the cauliflower, drain it before adding the sauce and proceeding with the recipe.
    • Overcooking the cauliflower will cause the texture to be mushy.

    Storage and Reheating

    • Refrigerator: Store any leftovers in an airtight container in the refrigerator for up to 4 days.
    • Freezer: Due to the mayonnaise sauce, this is not a good candidate for the freezer. You’ll be disappointed in the texture of the sauce and the cauliflower once thawed.
    • Reheating: To reheat, simply microwave individual servings in 20 second increments at 50% power. The 50% power feature is your best friend here, it will keep the sauce and cauliflower from overcooking and keep the sauce from separating.

    What To Serve It With

    The creamy cheesy sauce turns this simple head of cauliflower into an All-American Comfort Food side dish. Here are some comfort food pairings to complete your meal.

    • Old Fashioned Meatloaf = perfect.
    • Roast beef, like this Chuck Eye Roast or Sunday Pot Roast With Gravy.
    • Pan Fried Chicken with Fried Chicken Gravy.
    • Or Beef Tournedos Steak with Red Wine Mushroom Sauce.

    FAQ’s

    Do You Have To Use American Cheese Slices?

    By the way, did you read that the Millennials are throwing American Cheese out of their diets? If you are one that simply doesn’t like processed American cheese, you can most certainly substitute grated cheddar cheese. But it doesn’t melt as beautifully.

    Can I Cook Whole Cauliflower in a Pressure Cooker?

    I tried cooking this in my Instant Pot and it took longer than in cooking cauliflower in the Microwave. Due to pre-heating, coming to pressure, and releasing pressure, the microwave had it beat by about eight minutes. Score one for the microwave. But yes, you can cook a whole head of cauliflower in the Instant Pot. Just follow the same steps for the microwave recipe.

    How Do I know When The Cauliflower is Done?

    Microwave powers vary as do the size of a full head of cauliflower. After 8 minutes of cooking the cauliflower in the microwave, remove it and use a fork to test its doneness. If the fork inserts into a tender vegetable, the cauliflower is done. If it feels too crisp, return to microwave and cook 1 – 2 minutes longer.

    What If My Casserole Dish Doesn’t Have a Lid?

    Did your perfect deep casserole dish not come with a lid? Simple, just cover tightly with plastic wrap. Using a fork , poke a few holes in the plastic wrap.

    Recipe for Microwave Cauliflower
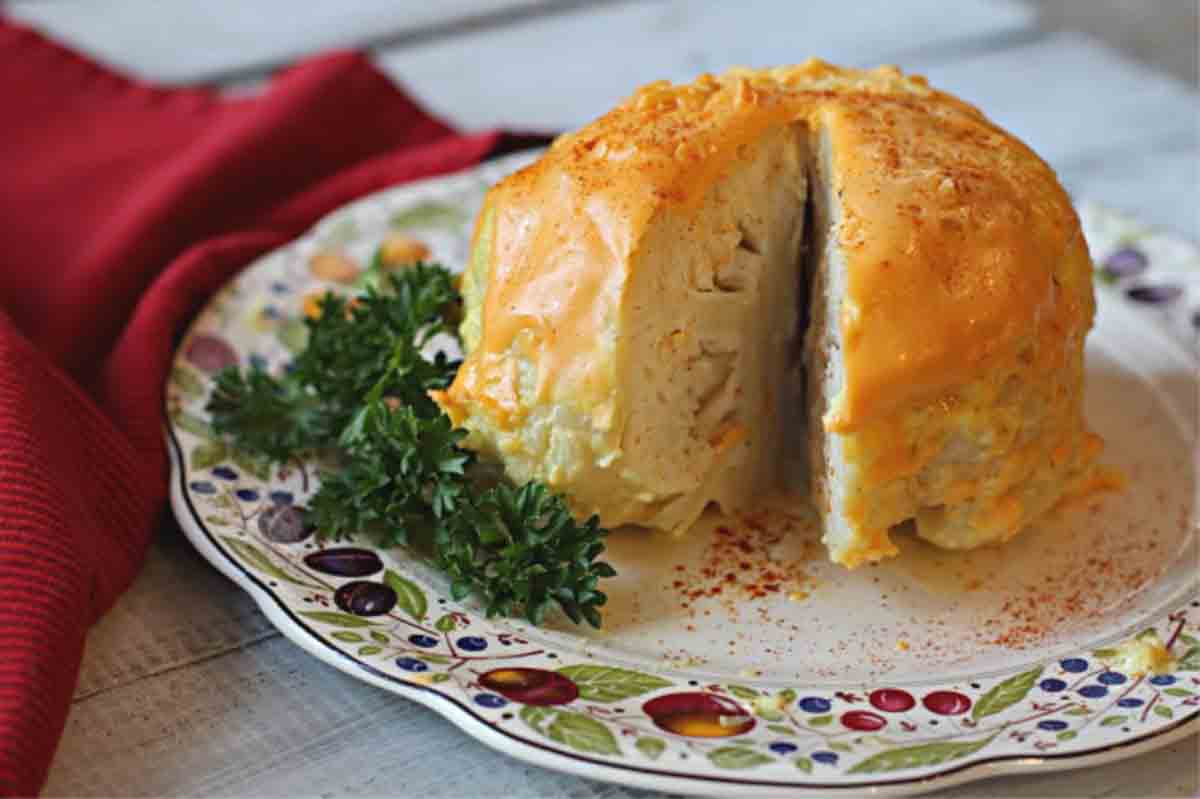
    Microwave cauliflower with a cheese, mayo, mustard sauce

    Pro Tip – Garnish: I like to sprinkle this microwave cauliflower with something red to enhance the presentation. A pinch of chile powder or paprika works well here.

    I hope you give this microwave cauliflower recipe a try. It’s a super easy way to cook a whole head of cauliflower and it’s surprisingly delicious. This is a recipe that you’ll want to make over and over again. It’s that easy.

    Explore More Popular Vegetable Side Dishes
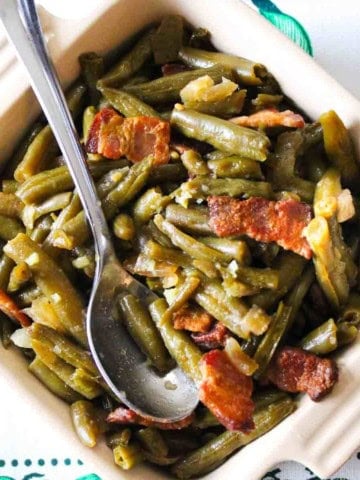
    • Brown sugar green beans with bacon in a casserole dish.
      Green Beans With Bacon and Brown Sugar
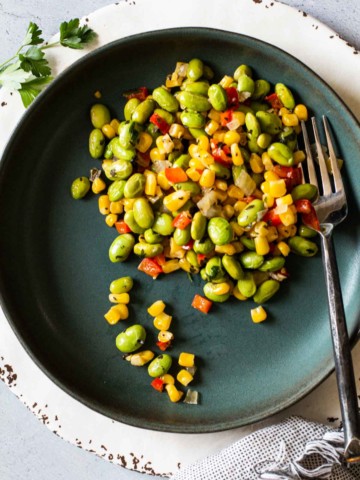
    • Corn succotash with edamame and red bell pepper on a blue plate.
      Sweet Corn Succotash with Edamame
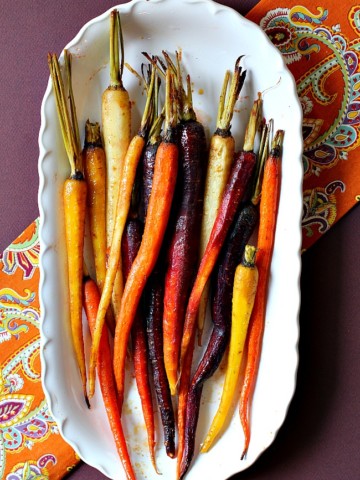
    • Roasted Glazed Carrots on a white serving platter
      Roasted Glazed Carrots, Honey-Lime and Cumin
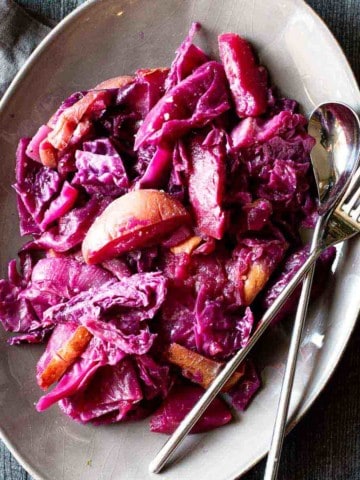
    • A plate of roasted braised red cabbage, Rode Kool.
      Rode Kool, Dutch Red Cabbage Recipe

    And if you’re looking for more side dish recipes, don’t miss my Side Dishes Category. You’ll find lots of tasty recipes, including the most popular side dish recipe on my site for Broccoli Cheez Whiz Rice Casserole.

    If you liked this recipe, please leave a star ⭐⭐⭐⭐⭐ rating in the recipe card below and leave a comment. I always appreciate your feedback and hearing how everything went.

    And, don’t forget to subscribe to my newsletter for more delicious recipes and cooking tips. Make it a delicious day … every day.
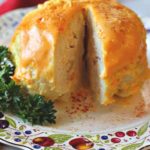
    A whole head of cauliflower cooked in the microwave topped with a cheese and mayonnaise sauce
    Print Recipe
    4.96 from 21 votes

    Tangy Mustard Cauliflower, Microwave Cauliflower

    This is a recipe for microwave cauliflower. A whole baked cauliflower with a topping of mayo, mustard and cheese. Quick, easy and tangy in flavor, in a creamy cheesy sort of way. Heads up cauliflower haters, you might want to try this one.
    Prep Time10 minutes mins
    Cook Time12 minutes mins
    Resting Time2 minutes mins
    Total Time22 minutes mins
    Course: Side Dish
    Cuisine: American
    Diet: Gluten Free
    Servings: 6
    Calories: 190kcal
    Author: Lea Ann Brown

    Ingredients

    • 1 head head cauliflower rinsed, core and bottom leaves removed
    • 2 tablespoons water
    • ½ cup mayonnaise
    • 1 teaspoon onion — finely chopped
    • 1 teaspoon mustard
    • 3 slices American cheese or ½ cup grated cheddar cheese

    Instructions

    • Place cauliflower in microwavable 2 – 3 quart casserole with lid. Add water and cover with lid or plastic wrap. 
    • Microwave on high 8 – 9 minutes or till tender crisp. Use a fork to test doneness. If it feel too crisp, return to microwave for 1 – 2 minutes longer.
    • In the meantime, combine mayonnaise, onion, and mustard in small mixing bowl. Use a fork to blend into a smooth sauce.
    • Once the cauliflower has completed its first cook in the microwave, drain any excess water and spoon mustard sauce on top of cauliflower. Use the back of the spoon to smooth the sauce evenly over the top of and sides of the cauliflower.
    • Lay slices of cheese over the top, alternating the way they face so they melt evenly. 
    •  Microwave for 1 – 2 minutes more, covered, to heat topping and melt cheese. Let stand two minutes before serving.

    Notes

    You can use grated cheddar cheese in this recipe to replace sliced American Cheese. I like American because of it’s melting qualities and sweet flavor. 
    To make things even easier, I’ve used 1 heaping teaspoon of dried onion flakes to replace the chopped onion. Just stir them into the mustard mayo combo before spreading over the cauliflower.
    Did your perfect deep casserole dish not come with a lid? Simple, just cover tightly with plastic wrap. Using a fork , poke a few holes in the plastic wrap.

    Nutrition

    Calories: 190kcal | Carbohydrates: 5g | Protein: 3g | Fat: 17g | Saturated Fat: 4g | Cholesterol: 18mg | Sodium: 332mg | Potassium: 300mg | Fiber: 1g | Sugar: 2g | Vitamin A: 110IU | Vitamin C: 46.2mg | Calcium: 131mg | Iron: 0.5mg

    Microwave Cauliflower Recipe … It’s whats for an easy side dish
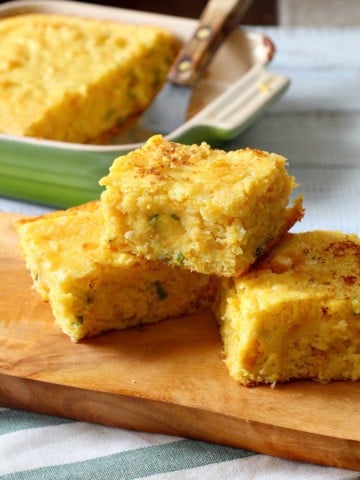
    Super Moist Cheesy Cornbread with Creamed Corn

    March 2, 2021 By Lea Ann Brown 108 Comments

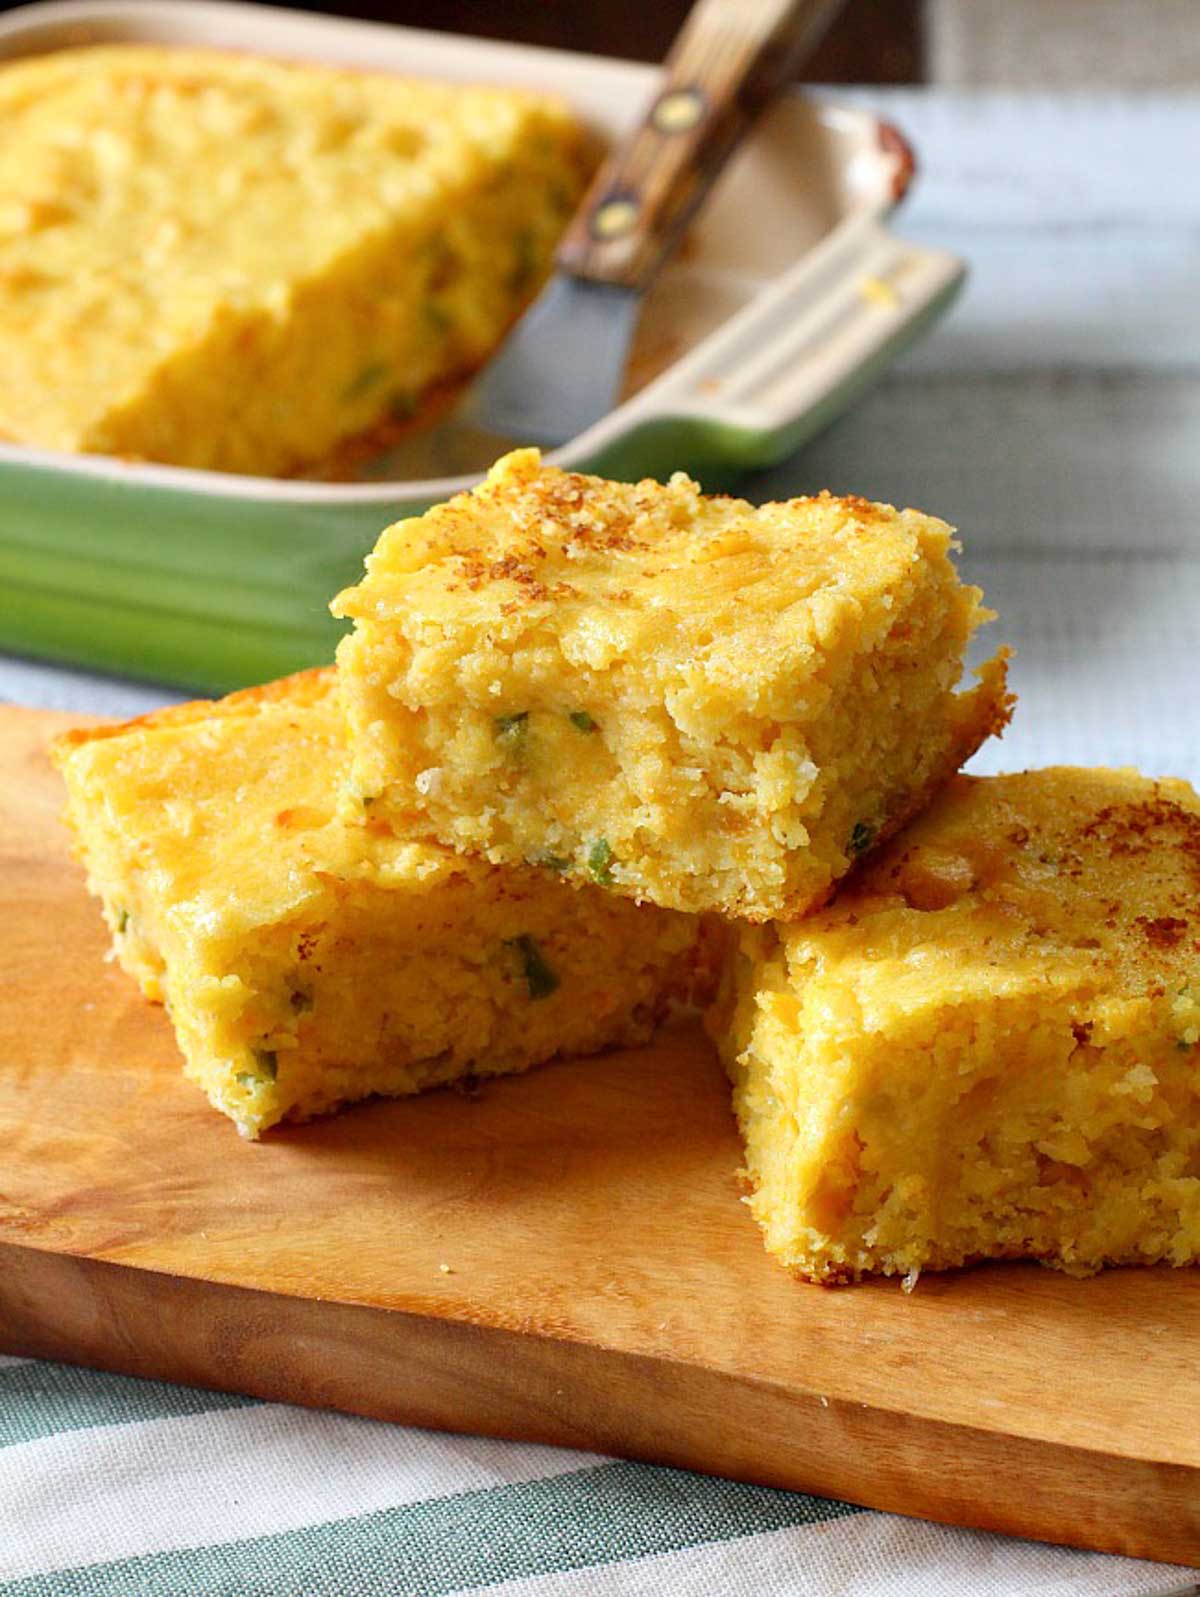
    This is a super moist cornbread with creamed corn recipe that bakes up fluffy and sweet and will become your family favorite. You’d almost swear there was pudding in this easy cheesy cornbread.

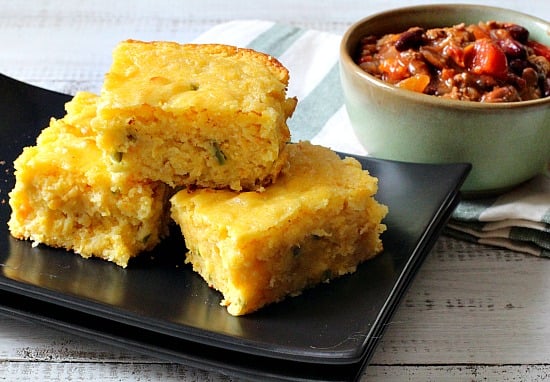
    Serve this cornbread with Anthony Bourdain’s Southwestern New Mexico Beef Chili. A perfect combo for a cozy meal.

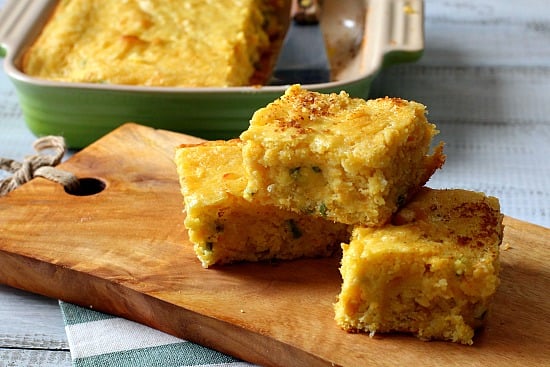
    Super moist cornbread cut into squares on a wooden cutting board

    How To Make Cornbread Moist

    What’s up with flaky, sad, dry cornbread? My love affair with corn bread got off to a very long, dry, grainy, stick in the throat start. Most recipe I tried found me wondering what the big attraction was. 

    One day, out of the blue,  my good friend Linda, unwittingly brought over a pan of the most delicious Texas style moist homemade buttermilk cornbread that I have ever tasted. 

    I was an instant fan and finally understood what all the fuss was about. If you’ve never had corn bread with creamed corn, you’re in for a real treat.

    And now thanks to that, I’m a convert. There’s never a bowl of chili served without a slice of this cheesy cornbread alongside.

    And it’s so easy, that instead of grabbing a box of Jiffy, I grab a container of corn meal and make this cornbread recipe from scratch. It only take a few minutes.

    I have taken Linda’s Texas cornbread recipe and with a couple of tweaks, made it even moister, creamier and more Southwestern. I simply turned it into a cornbread with creamed corn.

    • It’s easy
    • No electric mixer required
    • Simple ingredients
    • Moist and cheesy
    • Fluffy
    • Just right spicy

    Once you’ve made this easy recipe, you’ll wonder why you don’t make cornbread more often. You’re going to learn how to make homemade cornbread, and make super moist cornbread.

    Move over crushed saltines or tortilla chips. This is what belongs next to every bowl of chili you serve up!

    Let’s take a look.

    Ingredients You’ll Need

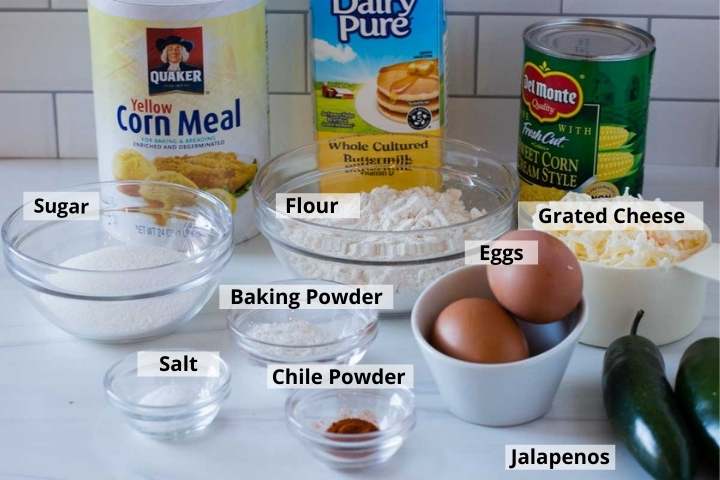
    Mise en place. Always gather ingredients before starting any recipe. It will save you time and organize your mind.

    Ingredients to make cheesy cornbread with creamed corn and buttermilk.
    • Yellow Corn Meal: The back bone of this recipe. What is cornmeal? Corn meal is dried, ground corn. It’s found on the baking aisle of your grocery store and should not be confused with polenta, which is a medium grind cornmeal used to make a side dish. If you’re interested in learning more, I like this article which explains the differences of cornmeal, polenta, grits and more.
    • Buttermilk: Adds a slightly tangy flavor and adds fluffiness and a better rise to baked goods.
    • Creamed Corn: Making this cornbread recipe with creamed corn rather than kernels is one of my secrets. Make sure to drain a most of the liquid from the creamed corn, or it will be too moist.
    • Cheese: I’m a big fan of Muenster for any Mexican, Southwestern recipe. Give it a try.
    • The Batter: Sugar, Flour, Baking Powder, Eggs and Salt
    • Chile Powder: I prefer New Mexico Red Chile Powder. Its flavor is simply outstanding in an earthy and just right spicy way.
    • Jalapeno Peppers: If you want less heat, be sure to remove veins and seeds from the peppers before chopping.

    RECIPE SWAPS:

    • Cheese: Substitute mild, medium or sharp Cheddar. Monterey Jack or Pepper Jack would be a good choice here and any would turn regular cornbread into cheesy cornbread.
    • Milk: If you want to substitute 1 cup of milk for the buttermilk, add 1 Tablespoon of vinegar. There’s science behind that, take a look at this great article I found about Buttermilk and substitutions.
    • Chile Powder: If you don’t have New Mexico Red Chile Powder, Ancho chile powder is a good substitute. I wouldn’t substitute chili (with an i) powder, as it is a blend of spices that will change the entire flavor profile.
    • Jalapeno Peppers: Roasted Pueblo Chile Peppers are similar on the heat scale to Jalapeno.

    How To Make Cornbread with Creamed Corn

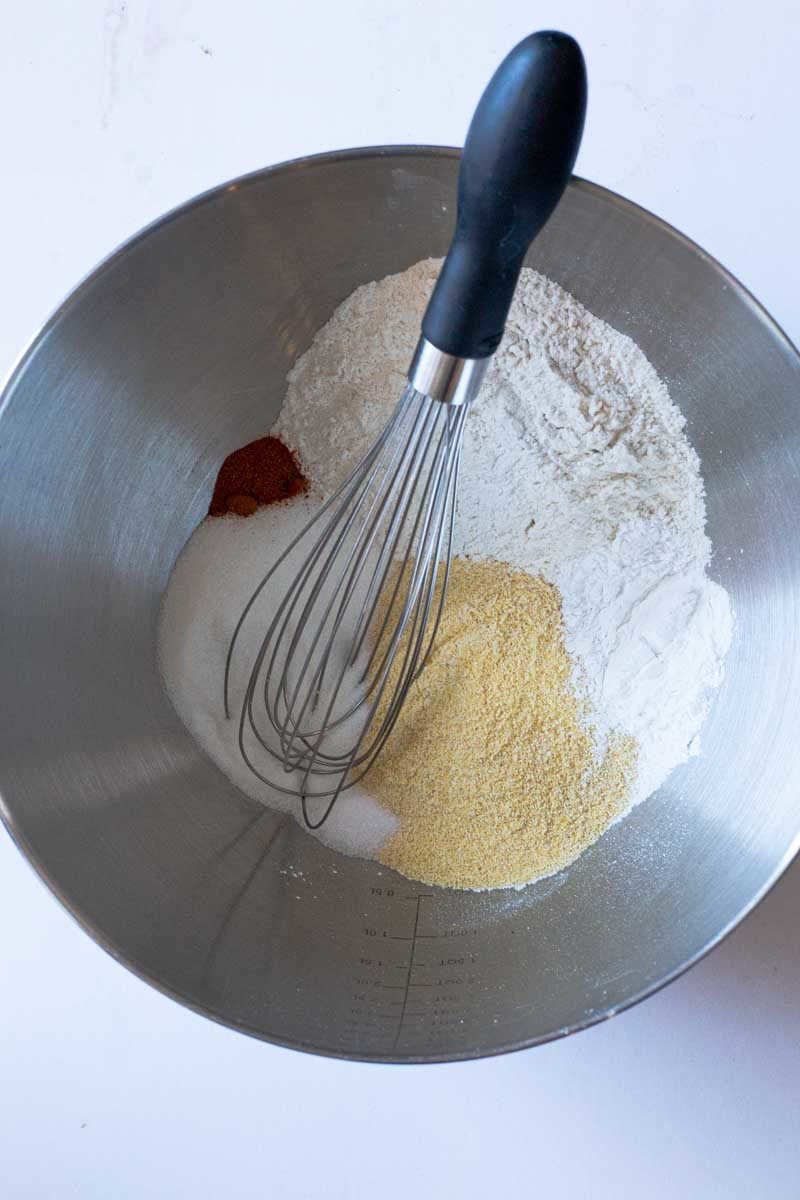
    dry ingredients to make cornbread
    Step 1
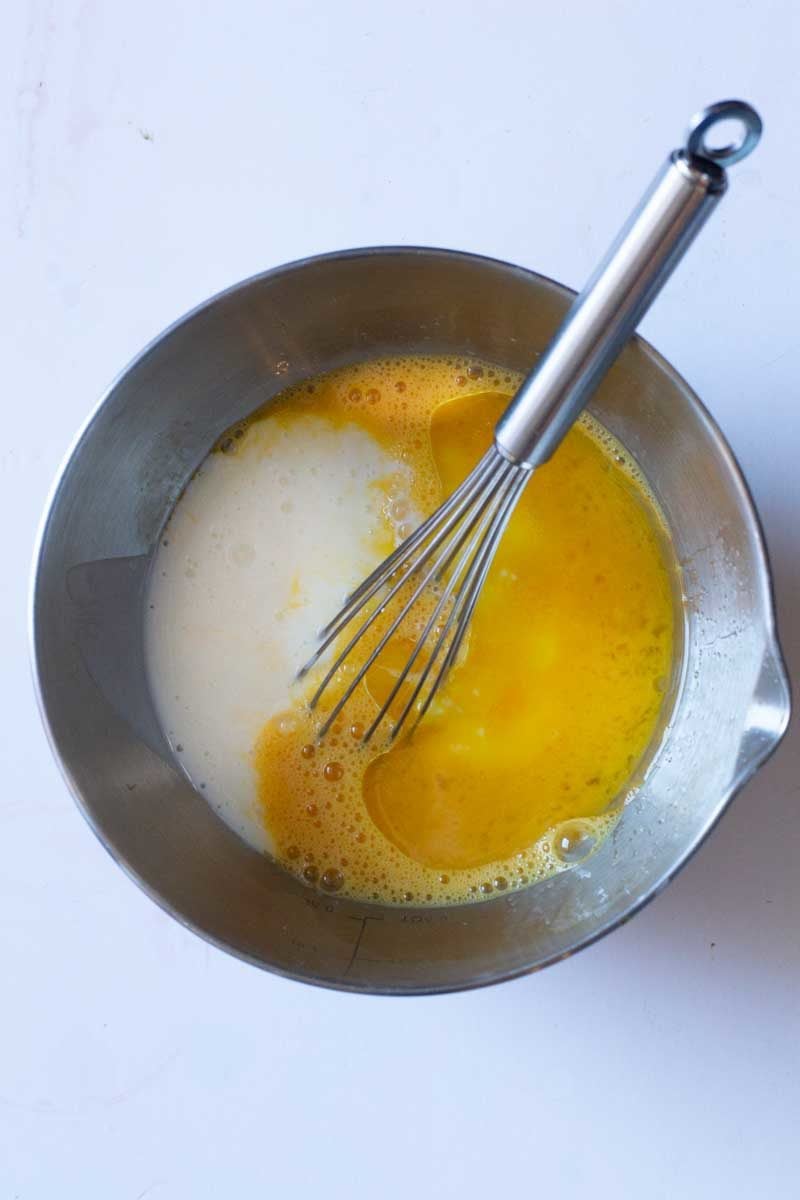
    wet ingredients to make cornbread
    Step 2
    • Step 1: Combine the cornmeal, flour, sugar, baking powder and salt in a mixing bowl. Also add chile powder if using. (Use a pure chile powder, not chili seasoning as you would put in a pot of chili)
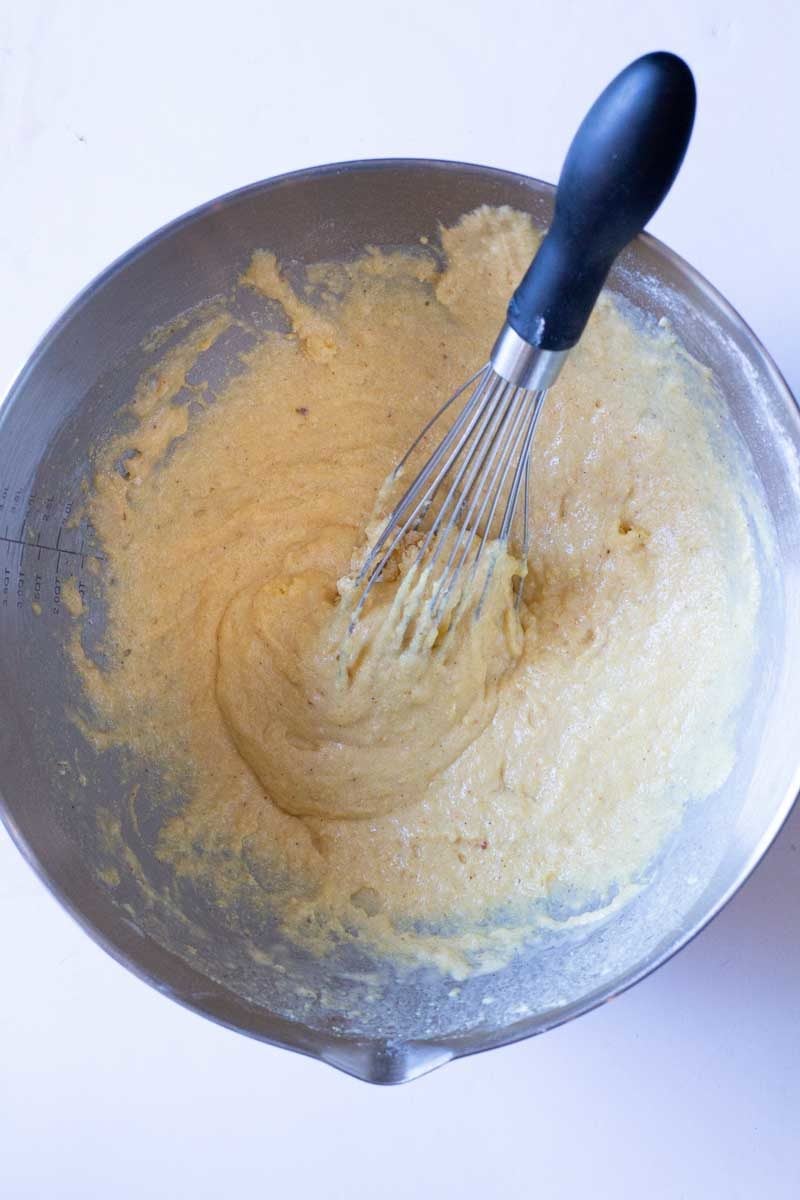
    • Step 2: In a separate bowl, whisk together the eggs, milk, and oil. 
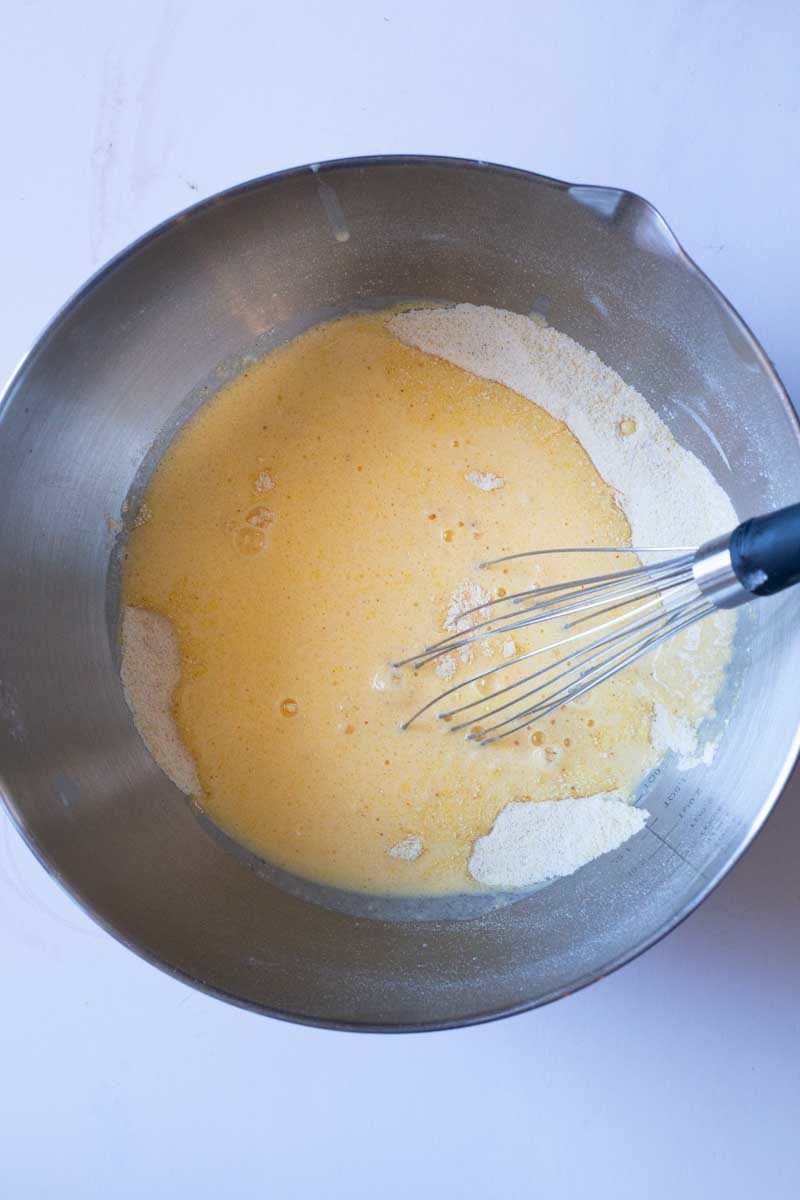
    Mixing wet and dry ingredients together to make cornbread
    making cornbread batter
    • Step 3: Gently fold the liquid ingredients into the dry ingredients.
    • Step 4: Stir until a batter is formed and no dry ingredients remain dry. Don’t over mix.
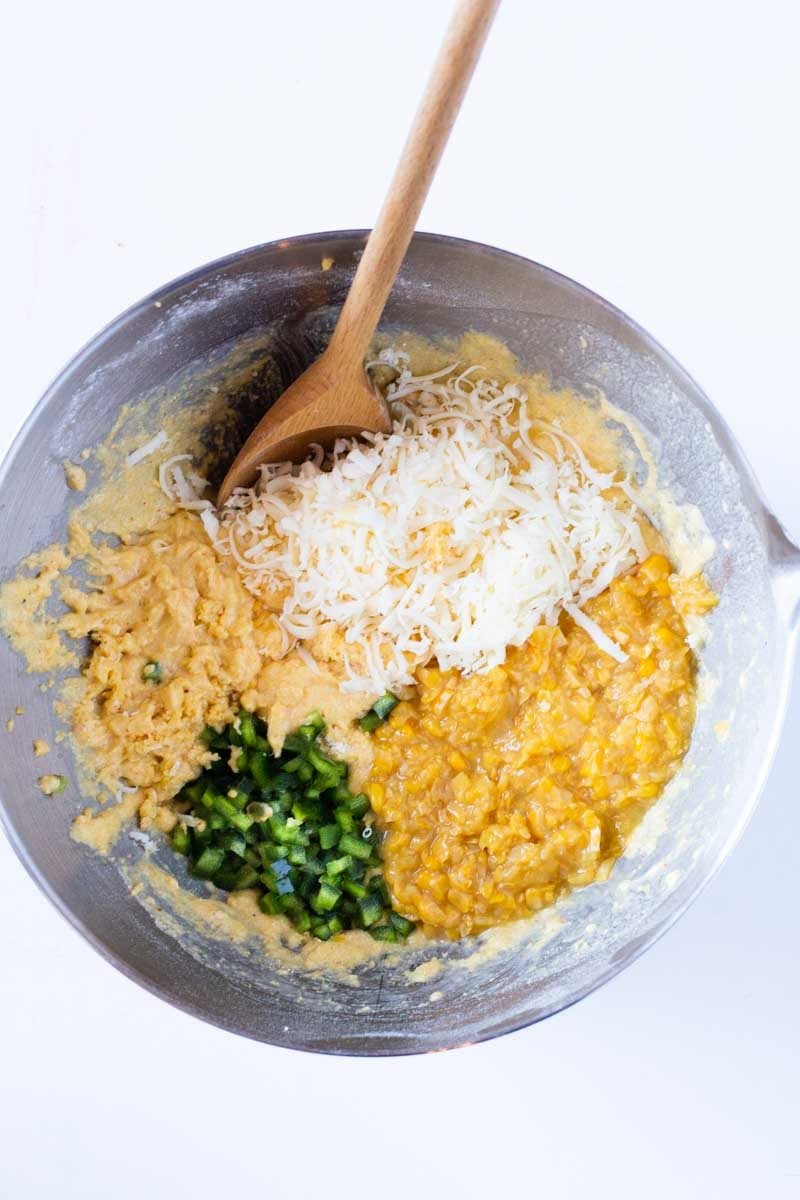
    mixing creamed corn, peppers and cheese into cheesy cornbread
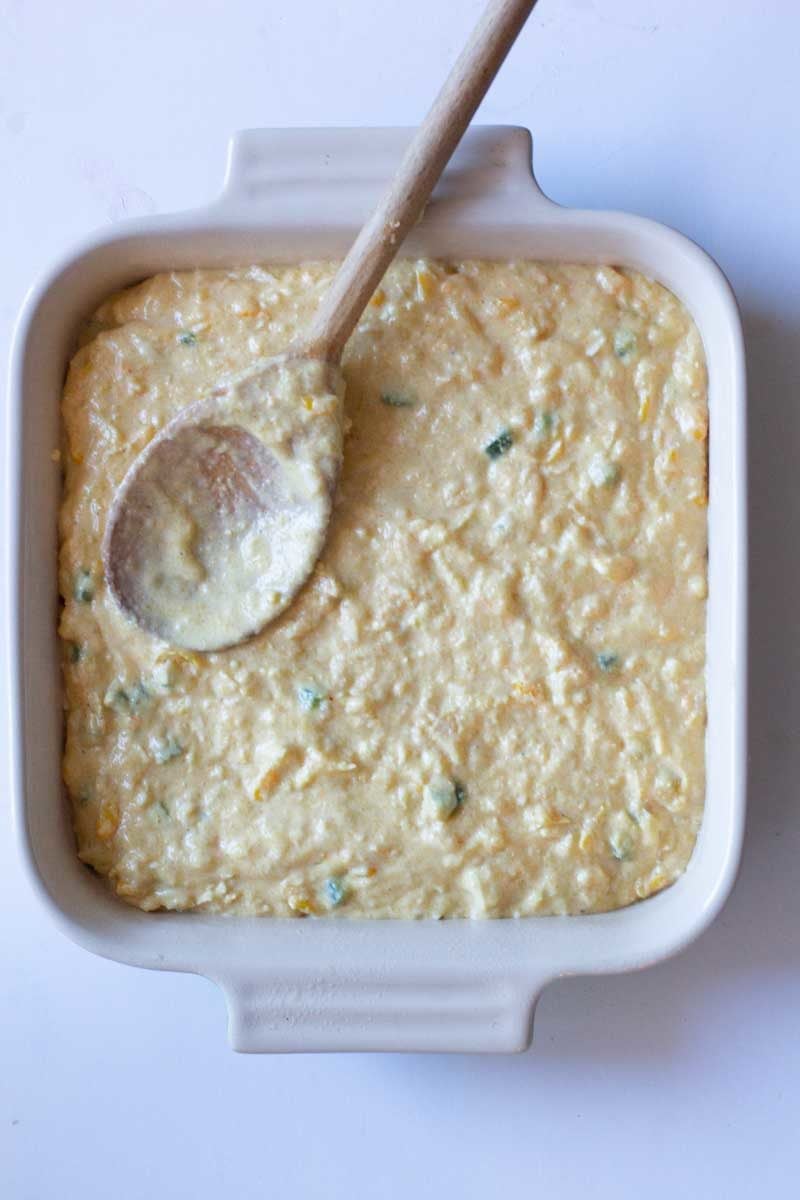
    placing batter for cornbread into a le creuset baking dish
    • Step 5: Using a large spoon, fold in the drained creamed corn, cheese, and jalapenos.
    • Step 6: Pour batter into a lightly greased 9-inch square baking pan. Use the back of the spoon to smooth batter into the pan. I like to use my 9″ square Le Creuset baking dish. It’s pretty enough to go from oven to table. I’ve included an affiliate link for your convenience. I am a member of the Amazon Affiliate program. If you purchase the dish, I make a small commission at no extra charge to you.
    Super Moist Jalapeno Buttermilk Corn bread recipe. Creamed Corn and Muenster cheese is the secret.
    • Step 7: Bake at 375 degrees, for 20-30 minutes, or until the crust is light-brown and a toothpick inserted in the center comes out clean. Remove from the heat and let cool for about an hour before slicing.

    Can I Make This A Cast Iron Skillet Cornbread?

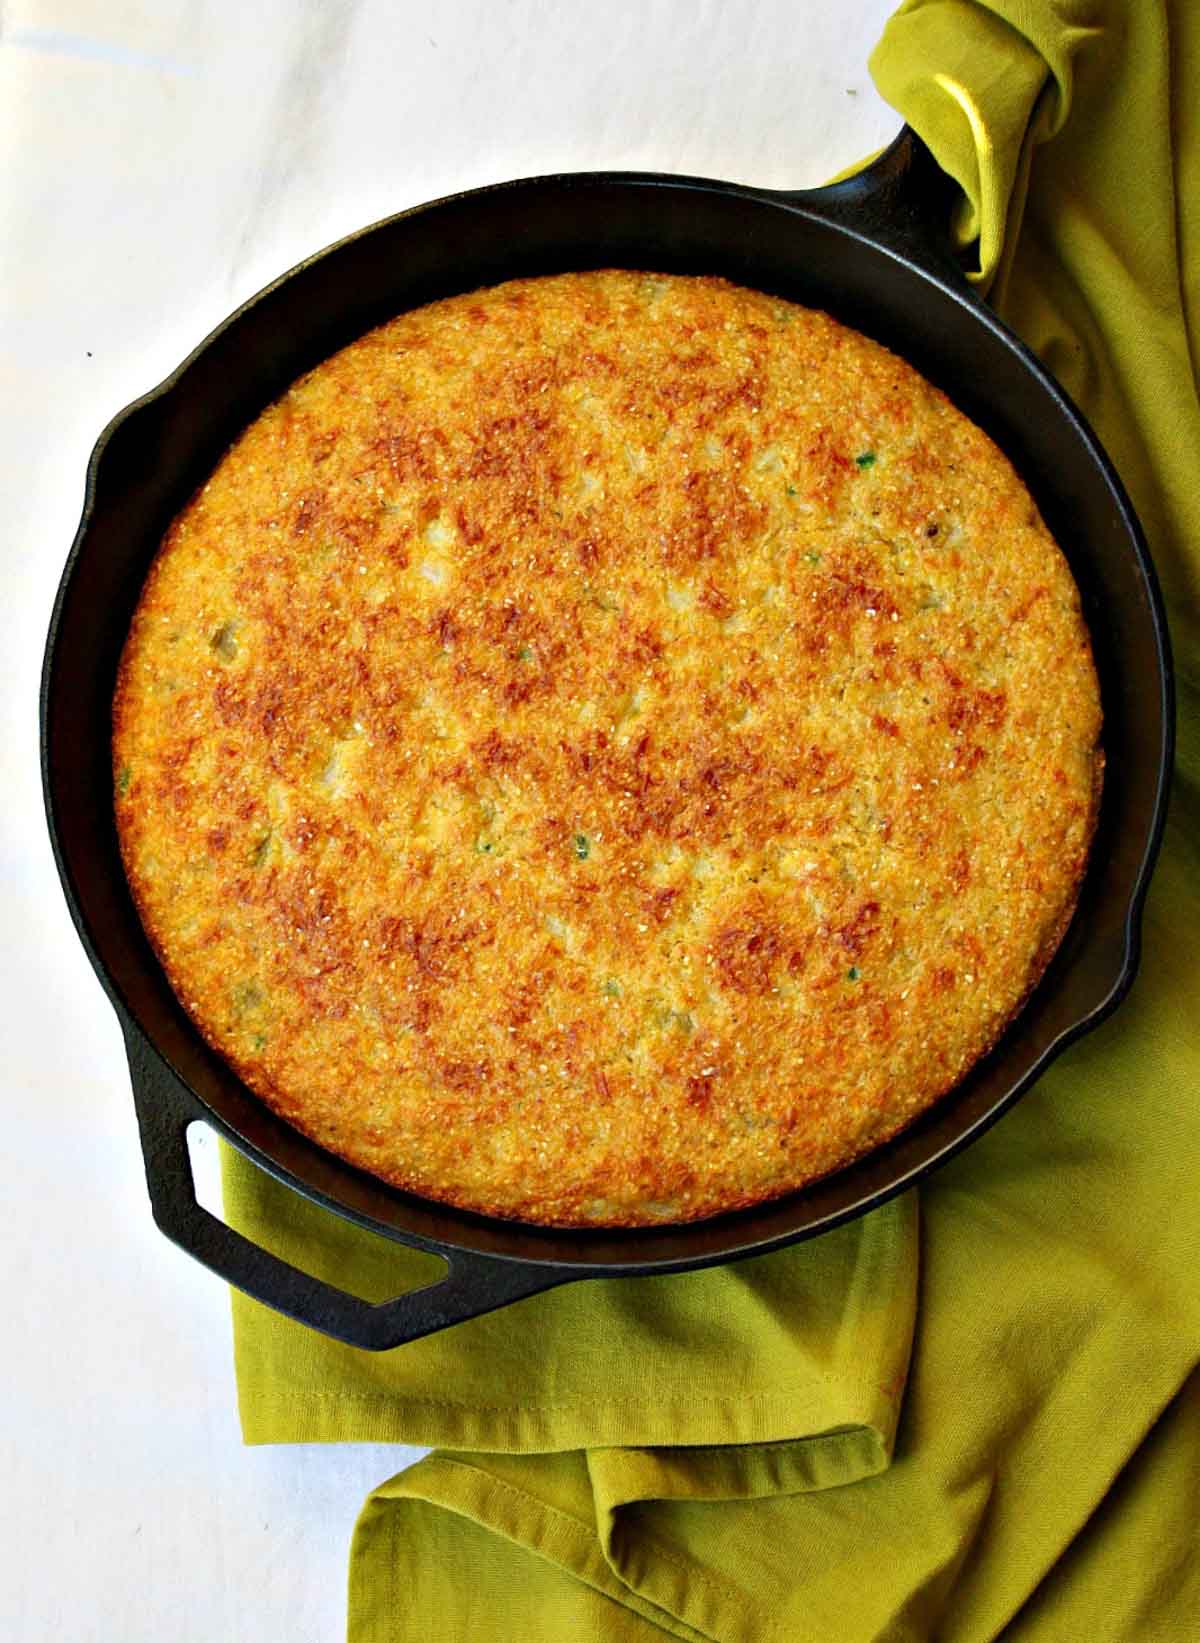
    Moist cornbread made in a cast iron skillet.
    • Yes. I like to heat the skillet in the oven for about 10 minutes before pouring in the batter. It helps get that little bit of crisp on the bottom. Tip: Add a ½ Tablespoon pat of butter to the hot pan before adding the batter, you’ll get an even crispier bottom crust.
    • A 9″ cast iron skillet works best. If using a 12 inch, double the recipe. And adjust cooking times. Just keep using the toothpick method to insert into batter. When the toothpick comes out clean, the bread is done.
    • A cast iron skillet will cook hotter than a baking dish, so check the cornbread and test with a toothpick after about 15 minutes of cooking. And it’s fun for a rustic presentation.

    Cornbread FAQ’s

    How Long Will This Cornbread Last?

    Tightly covered cornbread will last on the counter for 2-3 days. Or about a week in the refrigerator. Cover with a clean dish towel.

    Can I Make This Recipe Gluten Free?

    Yes, this homemade cornbread can be made gluten free by swapping out the all purpose flour for gluten free all purpose flour. You can also use oat flour.

    Can I Reheat Cornbread?

    Cornbread is best when it’s warm. Just put a slice or two in the microwave and heat it in 15 second increments, or until warm.

    Does Cornbread with Creamed Corn Need To Be Refrigerated?

    Because this cornbread has buttermilk, I personally would refrigerate it after a couple of days. Just cover the pan with a clean dish towel and refrigerate. Don’t use plastic wrap, it will create too much moisture which will compromise the texture of the bread.

    Tips for Success:

    • Canned creamed corns are not created equal. Some brands have more liquid and some are of a very thick consistency. If you’ve chosen a brand that has a lot of liquid, try to drain off a good portion of it from the creamed corn. Leaving too much will make the cornbread too moist, and could cause it to fall apart.
    • Let the cornbread rest for about 15 minutes before slicing and serving. Serving it too hot will cause it to fall apart.
    • To control the heat of the jalapeno pepper, remove the seeds and veins. This is where the spicy heat lies.

    Moist Cheesy Cornbread With Creamed Corn

    Jalapeno Buttermilk Cornbread Recipe. The best recipe I've found. Moist and wonderful.

    I hope you give this cornbread with creamed corn recipe a try. And if you do, please come back and let me know how you liked it and give the recipe a star rating.

    What To Serve With Cornbread

    Chili … chili and more chili …

    • New Mexico Style Cowboy Chili
    • Chipotle Bison Chili with Lime Crema
    • Award Winning Beef and Bean Chili

    This Cornbread recipe is also great served alongside my recipe for Hatch Green Chile with Pork. What a great combo.

    More Quick Bread Recipes

    • Buttermilk Corn Muffins filled with Jalapeno Jelly Center
    • Pumpkin beer bread sliced on a plate.
      Moist Pumpkin Bread Made With Pumpkin Beer
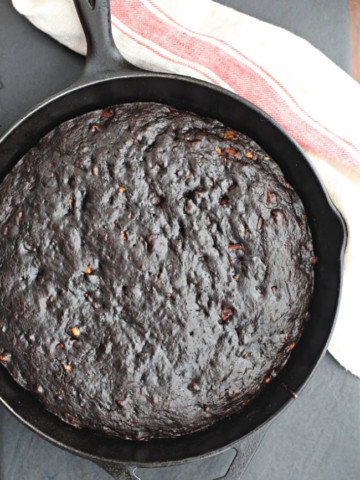
    • dark chocolate banana bread recipe baked in a cast iron skillet
      Cast Iron Skillet Dark Chocolate Banana Bread Recipe
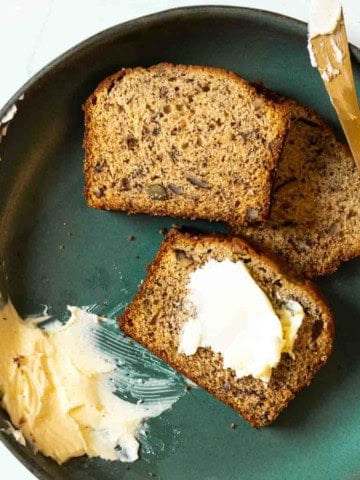
    • Old fashioned banana nut bread using buttermilk.
      Old Fashioned Banana Bread Recipe Using Buttermilk

    And if you like making bread, don’t miss my bread category. You’ll find lots of fun ideas including the most popular bread recipe on my site for Herbed Tomato Bread. A stunning bread recipe using tomato paste.

    If you liked this recipe, please leave a star ⭐⭐⭐⭐⭐ rating in the recipe card below and leave a comment. I always appreciate your feedback and hearing how everything went.

    And, don’t forget to subscribe to my newsletter for more delicious recipes and cooking tips. Make it a delicious day … every day.

    Super moist jalapeno buttermilk corn bread recipe. You'd swear there was pudding in the recipe.
    Print Recipe
    4.92 from 82 votes

    Super Moist Cornbread with Creamed Corn

    You’d almost swear there was pudding in this recipe. Using creamed corn and Munster cheese is the secret to this super moist cornbread recipe.
    Prep Time15 minutes mins
    Cook Time25 minutes mins
    Resting time15 minutes mins
    Total Time15 minutes mins
    Course: Bread, Mexican
    Cuisine: American
    Servings: 12
    Calories: 206kcal
    Author: Lea Ann Brown

    Ingredients

    • 1 cup yellow corn meal
    • 1 cup all-purpose flour
    • ⅓ cup sugar
    • 1 Tablespoon baking powder
    • ½ teaspoon salt
    • ⅛ teaspoon New Mexico Red Chile Powder (optional) or ancho chile powder
    • 2 large eggs beaten
    • 1 cup buttermilk
    • 3 Tablespoons canola oil
    • 1-14 ½ ounce can creamed corn half drained
    • 1 cup muenster cheese shredded
    • 5-6 Tablespoons jalapenos deseeded, chopped. 1 – 2 jalapenos depending on size

    Instructions

    • Preheat oven to 375.
    • Using a whisk, combine the cornmeal, flour, sugar, baking powder and salt in a mixing bowl. Also add chile powder if using. (Use a pure chile powder, not chili seasoning as you would put in a pot of chili)
    • In a separate bowl, whisk together the eggs, milk, and oil. 
    • Using a large spoon, gently fold the liquid ingredients into the dry ingredients until a batter is formed. Don't over mix.
    • Using a colander, or mesh strainer, drain the creamed corn. Let the corn sit in the colander for 2 minutes. Give it a couple of shakes to remove more of the liquid before adding to the batter. You don't want it completely drained.
    • Using a large spoon, fold in the corn, cheese, and jalapenos to the batter.
    • Pour batter into a lightly greased 9-inch square baking pan. Use the back of the spoon to smooth batter into the pan.
    • Bake for 25 minutes, or until the crust is light-brown and starting to brown around the edges. And a toothpick inserted in the center comes out clean. Remove from the heat and let cool for about an hour before slicing.

    Video

    Notes

    Tips for Success:
      • Canned creamed corns are not created equal. Some brands have more liquid and some are of a very thick consistency. If you’ve chosen a brand that has a lot of liquid, try to drain off a good portion of it from the creamed corn. Leaving too much will make the cornbread too moist, and could cause it to fall apart.
      • Let the cornbread rest for about 15 minutes before slicing and serving. Serving it too hot will cause it to fall apart.
      • Remove seeds and most of veins from the jalapeno. This will control the heat level.You can also use cheddar or Monterey Jack Cheese instead of the Muenster.
      • To store simply cover with a clean dish towel. Refrigerate overnight if not using that day. Don’t cover with plastic wrap or too much moisture will accumulate and compromise the texture. 
    Making this in a cast iron skillet:
    I like to heat the skillet in the oven for about 10 minutes before pouring in the batter. It helps get that little bit of crisp on the bottom. Tip: Add a ½ Tablespoon pat of butter to the hot pan right before adding the batter (swirl it around) , you’ll get an even crispier bottom crust.
    A 9″ cast iron skillet works best. If using a 12 inch, double the recipe. A cast iron skillet will cook hotter than a baking dish, so check the cornbread and test with a toothpick after about 15 minutes of cooking. And it’s fun for a rustic presentation. 
    Friday Night Cozy Dinner In Front Of The Fireplace
    • Mexican Deviled Eggs with Chorizo
    • Tossed Salad with Blue Cheese Dressing
    • Award Winning Beef and Bean Chili
    • Super Moist Cheesy Cornbread
    • Mexican Orange Chile Brownies

    Nutrition

    Calories: 206kcal | Carbohydrates: 26g | Protein: 6g | Fat: 9g | Saturated Fat: 3g | Cholesterol: 46mg | Sodium: 203mg | Potassium: 218mg | Fiber: 2g | Sugar: 7g | Vitamin A: 210IU | Vitamin C: 3mg | Calcium: 141mg | Iron: 1.2mg

    Super Moist Cheesy Cornbread With Creamed Corn … It’s what’s for dinner with a bowl of chili

    This article was first published February of 2011. It was republished with step by step instructions March 2021.

    Creamy Caper Sauce For Salmon

    February 27, 2021 By Lea Ann Brown 6 Comments

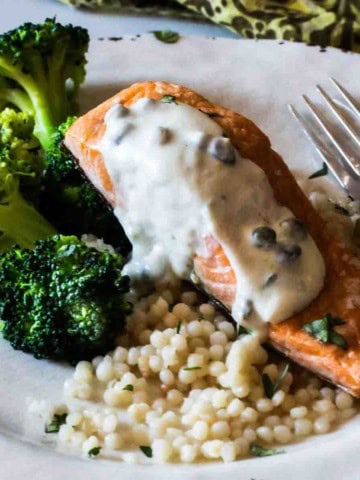
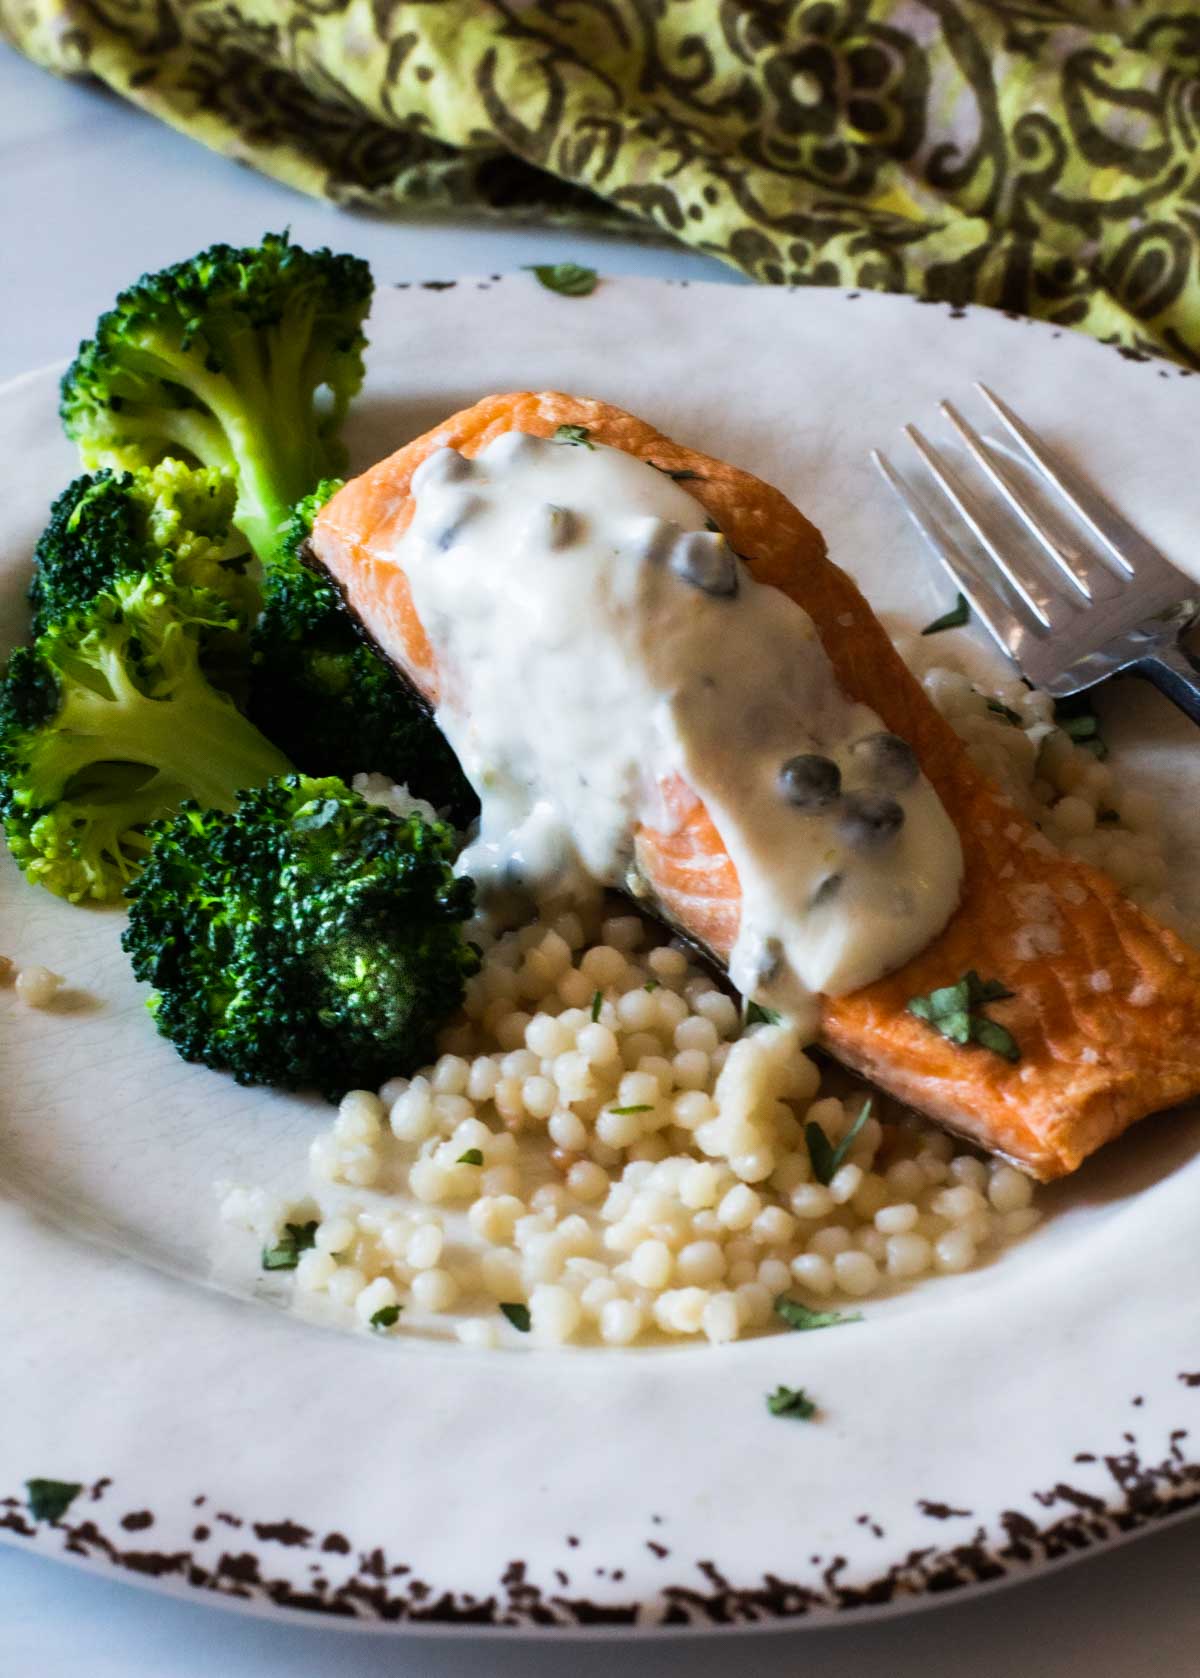
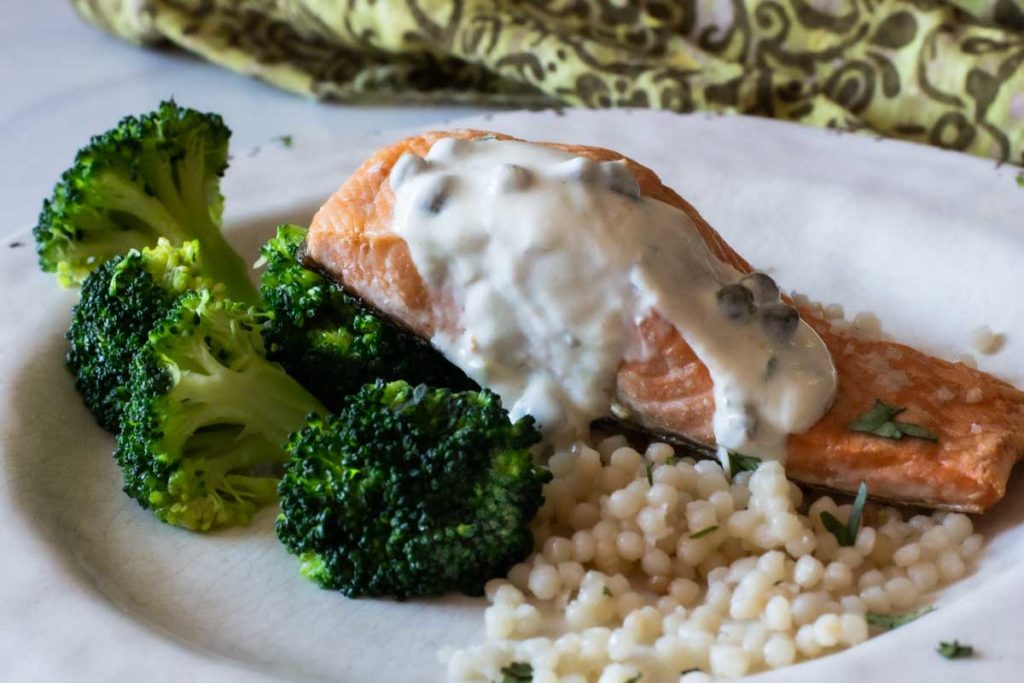
    Creamy caper sauce for salmon served over salmon with broccoli.

    Whether you’re looking for a fast healthy dinner, or an easy salmon recipe for entertaining, this Creamy Caper Sauce For Salmon is a recipe worth looking into. Adding orange juice and capers to plain Greek Yogurt brings a smooth creamy citrus topping for roasted Salmon.

    Salmon with yogurt sauce on a rustic plate served with broccoli and pearl couscous

    What To Expect From This Recipe

    This creamy caper sauce for salmon is a super easy family dinner.

    Buttery salmon is roasted to perfection with a topping of grated orange zest to bring a bright flavor. Then topped with creamy tangy Greek Yogurt that’s been spiked with briny capers and orange juice.

    The textures work together and the flavor profile is spot on.

    And one of the best things about this recipe?…. It’s easy.

    For this recipe, the salmon is roasted using salt and orange zest. The salmon retains its natural flavor with a hint of sunshine from the orange zest.

    While the salmon is roasting, you can stir together the simple caper sauce and prepare side dishes of your choice.

    This caper sauce for salmon makes a lovely combination both in flavor a texture. It looks and eats fancy.

    But don’t save this easy salmon recipe for weekends. This is quick enough for a weekday dinner. After all, even hectic days deserve balanced healthy delicious meals just as much as slower paced weekend dinners.

    Ingredients You’ll Need

    Mise en place. Always gather ingredients before starting any recipe. It will save you time and organize your mind.

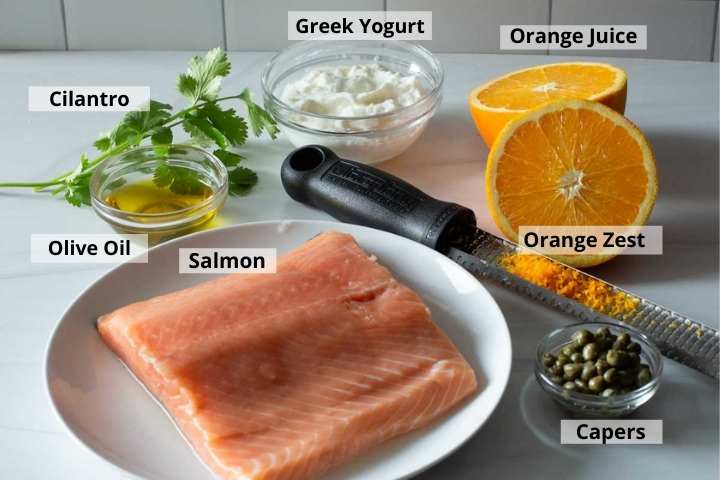
    Ingredients to make orange salmon with caper sauce.
    • Greek Yogurt: I’m all about full fat for most recipes. Of course you can use low fat Greek Yogurt, but the flavor and texture will be compromised.
    • Orange Juice: You’ll need an orange for the orange zest. Use the juice from the orange for the best fresh squeezed experience.
    • Cilantro: Fine chopped.
    • Orange Zest: You’ll need two oranges for enough zest for the salmon and the caper sauce.
    • Salmon: This is a recipe for two people. So purchase ½ to ¾ pound of salmon. I used a Coho Salmon fillet and cut it in half after it was cooked.
    • Olive Oil: We’ll use olive oil both to rub over the salmon fillet to keep it from drying out in the oven and the rest will go into the recipe for yogurt sauce.

    Ingredient swaps

    • If you don’t have or don’t like Greek Yogurt, substitute with a mixture of half sour cream and half mayonnaise.
    • Any type of salmon will work for this salmon with caper sauce recipe. Use Alaskan King Salmon, Coho Salmon, or Sockeye Salmon.
    • If you don’t have oranges, turn this recipe into a lemon yogurt sauce by substituting lemon zest and lemon juice. The sauce will be too tart, so add a teaspoon of honey to sweeten things up.
    • Parsley. If you don’t like or don’t have cilantro, substitute with parsley.

    Step by Step Instructions, It’s Easy!

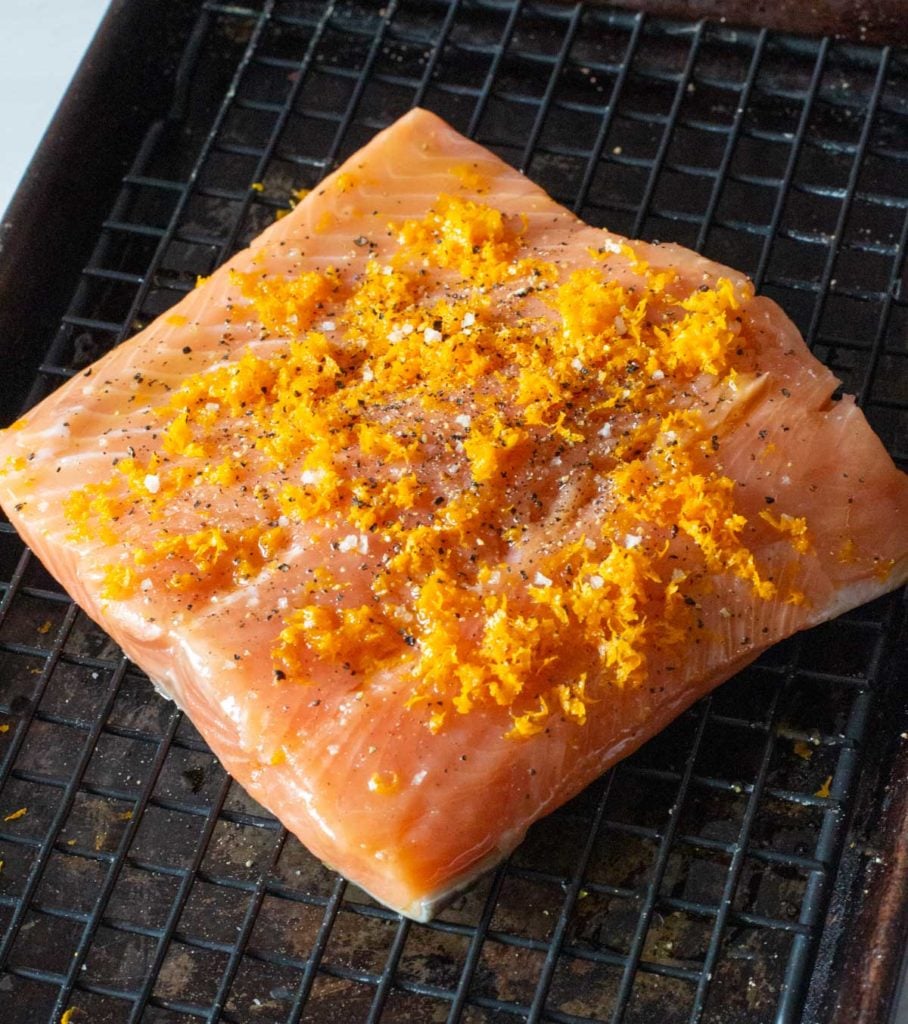
    Salmon fillet sprinkled with orange zest salt and pepper to make orange salmon recipe
    1. Step 1: Place the salmon fillet on a sheet pan that’s been lined with parchment paper or oiled. Sprinkle with salt and a generous helping of freshly grated orange peel. I like to use my sheet pan with a wire rack. Having the salmon elevated helps air to circulate around the meat for more even cooking. Preheat oven to 400 degrees and cook salmon 15 – 20 minutes, or until the fish flakes when pressed with the back of a fork.

    PRO TIP if you start to see albumin seeping out of the flakes of fish, that means the salmon is done. Albumin is the white protein that exists in the raw salmon fillet. When the salmon starts to cook, the albumin becomes semi-solid and turns white. Once you start to see albumen it’s time to remove it from the heat. Too much albumin will indicate that the fish will be dry.

    How to make the creamy caper sauce.

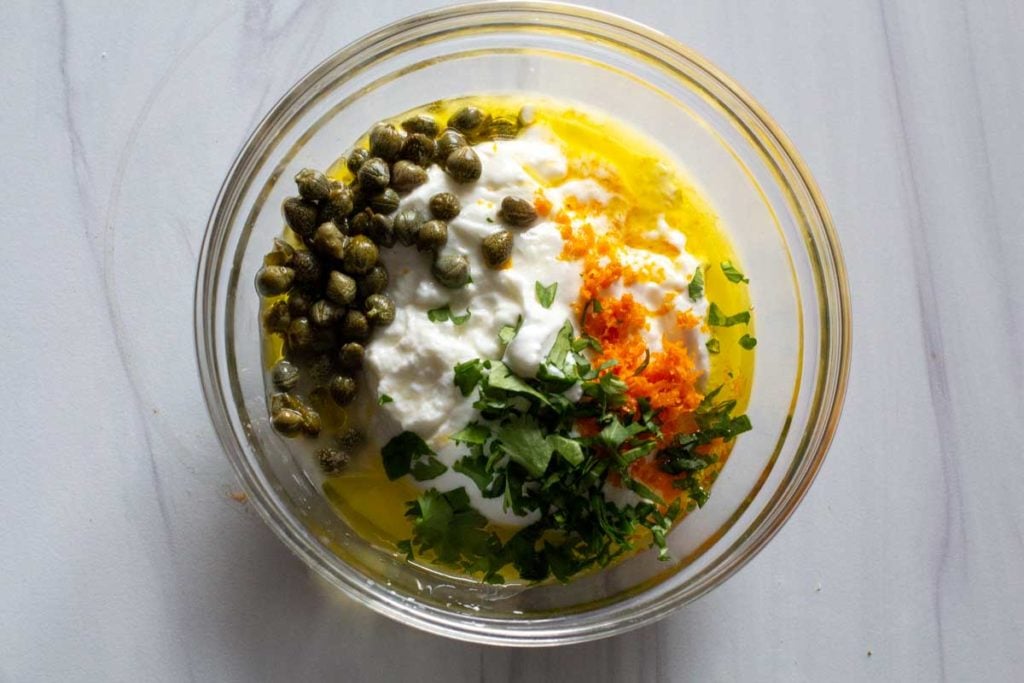
    Ingredients to make yogurt caper sauce with capers, orange zest, orange juice and greek yogurt
    1. Step 2: While the salmon is cooking, stir together the yogurt sauce recipe. It’s easy with plain greek yogurt, capers, chopped cilantro, orange zest, olive oil and orange juice.
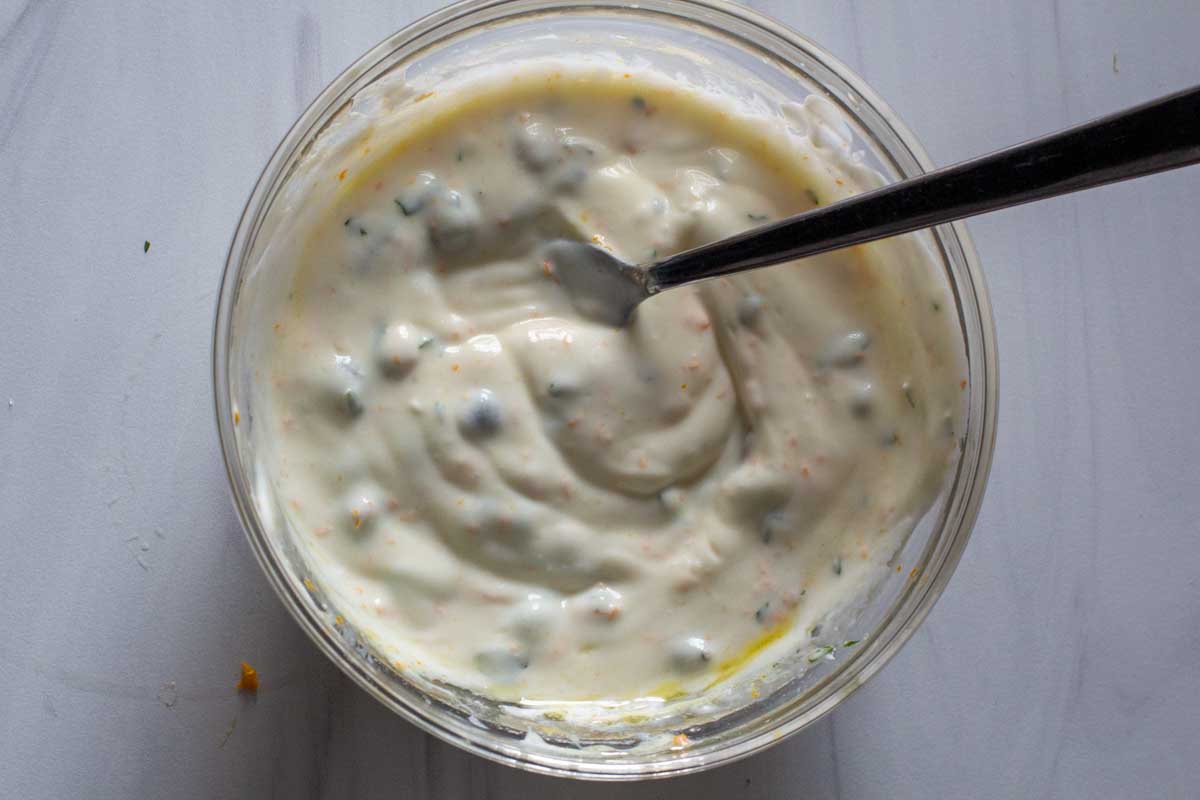
    Salmon caper sauce with orange juice and greek yogurt
    1. Step 3: Using a fork, stir until the ingredients are well blended.

    To serve, simply plate the salmon fillets with a generous dollop of the caper sauce.

    Salmon FAQ’s

    Where’s The Best Place to Buy Wild Salmon

    The best option to purchase wild salmon is through a company that blast freezes the meat soon after the catch at its peak of freshness insuring that beautiful fresh flavor. Look for wild caught frozen salmon in your super market, or there are several companies in Alaska such as Sitka Salmon Market . An Alaskan community supported fishery of small-boat fishermen that takes the experience further, by delivering the delicious seafood right to your doorstep.

    Is It Better To Bake or Pan Fry Salmon?

    Oven roasting takes the fuss out of cooking salmon. There’s no turning the fish to make sure it cooks through through properly. This is particularly important with thicker fillets. Seasonings and herbs stay put because you’re not turning the fish. Herbs can also burn in that oil in a hot pan, transferring a bitter flavor to the fish. Most important its hands off. As you roast salmon in the oven you’re free to prepare side dishes while it cooks.

    How Do I Tell When Salmon is Done Baking?

    I like the fork test. Simple pull out the oven rack enough to have access to the salmon. Using the back of a fork, press gently on the top of the salmon. It it pulls apart and starts to flake, the salmon is done. If albumen is present (the white protein that seeps from the seams) the salmon is just starting to over-cook. Remove it from the oven immediately. You can also use an instant read thermometer. Insert it into a thick part of the meat. When the thermometer reads 145 degrees, the salmon is done.

    Should You Cook Salmon With The Skin On or Skin Off?

    I always leave the skin on the salmon. That layer of skin will aid in locking in moisture to keep that salmon filet tender and flaky. The skin easily pulls away from the fish once it’s cooked.

    Tips for Success

    • Using a paper towel, pat salmon dry before roasting. Removing any access moisture will help the salmon get a bit of a crispy outer layer on the top.
    • The best temperature for baking salmon: 400 – 425 degrees. But know your oven. Ovens are not created equal. Temperatures may not be true, Some cook slower, some cook hotter. Cooking salmon at high temperatures insures that it will sear the outside while keeping the inside moist and tender. Depending on the thickness of your fillets, your salmon could take anywhere from 10 – 20 minutes to cook. I like to rub the fillets with olive oil before adding spices. It helps keep the salmon moist and helps the herbs and spices to cling to the meat.
    • Ideas for left overs and reheating salmon. This recipe is best enjoyed the day it is made. However, if you do have leftovers, a great idea is to use the cold left-over salmon on top of salad greens. You can use a little of the sauce for dressing. If you want to reheat the salmon, please do so ever so gently. Using the microwave and heating in 15 second increments on 50% power. You don’t want to cook the meat, you just want it warm enough to enjoy.
    Roasted salmon topped with greek yogurt sauce served with broccoli and pearl couscous

    Salmon with capers is a true flavor treat. I hope you give this creamy caper sauce for salmon a try.

    What to serve with Salmon with Caper Sauce?

    You’re preparing a very easy salmon dinner recipe, so keep things simple. I served the salmon with steamed broccoli and pearl couscous. Garlic Butter Baked Potatoes would be divine, or even just a special tossed salad would make this a light meal.

    And if you’re looking for more seafood recipes, don’t miss my Seafood Category, you’ll find lots of recipe ideas, including the most popular on my site for Heavenly Halibut.

    Explore More Easy Oven Salmon Recipes

    • Palisade Peach Salmon Baked and Glazed
    • Glazed Maple Syrup Salmon served over yellow rice.
      Oven Glazed Mustard Maple Syrup Salmon
    • A salmon fillet cooked in parchment paper with Southwestern spices.
      Southwestern Salmon en Papillote
    • Mexican salmon with salsa served with rice and beans.
      Mexican Salmon with Salsa Verde Sauce

    If you liked this recipe, please leave a star ⭐⭐⭐⭐⭐ rating in the recipe card below and leave a comment. I always appreciate your feedback and hearing how everything went.

    And, don’t forget to subscribe to my newsletter for more delicious recipes and cooking tips. Make it a delicious day … every day.

    Creamy caper sauce for salmon served over salmon with broccoli.
    Print Recipe
    5 from 1 vote

    Easy Creamy Caper Sauce for Salmon

    Salmon filets are flavored beautifully with an orange zest and topped with a creamy caper sauce. An easy and healthy salmon dinner recipe.
    Prep Time10 minutes mins
    Cook Time20 minutes mins
    Total Time30 minutes mins
    Course: Main Course Seafood
    Cuisine: American
    Servings: 2
    Calories: 176kcal
    Author: Lea Ann Brown

    Ingredients

    • 2 Tablespoons extra-virgin olive oil plus more for the baking sheet
    • ½ – ¾ pound salmon fillets thick cut, skin-on, center-cut, pin bones removed
    • 1 Tablespoon orange zest finely grated
    • 1 teaspoon kosher salt
    • Freshly ground black pepper
    • ¾ Cup plain Greek Yogurt
    • 2 Tablespoons Cilantro fine chopped, or parsley
    • 1 ½ Tablespoons capers drained, rinsed, and chopped
    • 1 Tablespoons fresh orange juice

    Instructions

    • Position a rack in the center of the oven and heat the oven to 400°F. Lightly oil a heavy-duty rimmed baking sheet.
    • Arrange the salmon skin side down on the baking sheet, drizzle with 1 Tbs. of the olive oil, and sprinkle with 1 tsp. of the orange zest, the salt, and a few grinds of black pepper. Gently rub the seasonings into the fish. Let sit at room temperature while the oven heats.
    • Combine the yogurt in a small bowl with the remaining 1 T, of olive oil, ½ t. orange zest, and the parsley, capers, and orange juice. Stir to combine. Season to taste with salt and black pepper. The sauce can be made up to several hours ahead and kept refrigerated.
    • Roast the salmon until just cooked through, with a trace of bright pink in the center (cut into a piece to check), 10 to 15 minutes. Serve immediately, drizzled with the yogurt sauce.

    Notes

    If you don’t have or don’t like Greek yogurt, use a mixture of half sour cream and half mayonnaise.
     
    How to tell when salmon is done? I like the fork test. Simple pull out the oven rack enough to have access to the cooking salmon. Using the back of a fork, press gently on the top of the salmon. It it pulls apart and starts to flake, the salmon is done. If albumen is present (the white protein that seeps from the seams) the salmon is just starting to over-cook. Remove it from the oven immediately. You can also use an instant read thermometer. Insert it into a thick part of the meat. When the thermometer reads 145 degrees, the salmon is done.
     
    This salmon is best enjoyed the same day it is cooked. However, leftover salmon at room temperature sprinkled over salad greens is a lovely lunch. Or mixed in with scrambled eggs for breakfast.

    Nutrition

    Calories: 176kcal | Carbohydrates: 4g | Protein: 8g | Fat: 14g | Saturated Fat: 2g | Cholesterol: 4mg | Sodium: 957mg | Potassium: 128mg | Fiber: 1g | Sugar: 3g | Vitamin A: 337IU | Vitamin C: 10mg | Calcium: 88mg | Iron: 1mg

    Yogurt Creamy Caper Sauce for Salmon … It’s whats for dinner

    Old Fashioned Orange Slice Bars Recipe

    February 25, 2021 By Lea Ann Brown 61 Comments

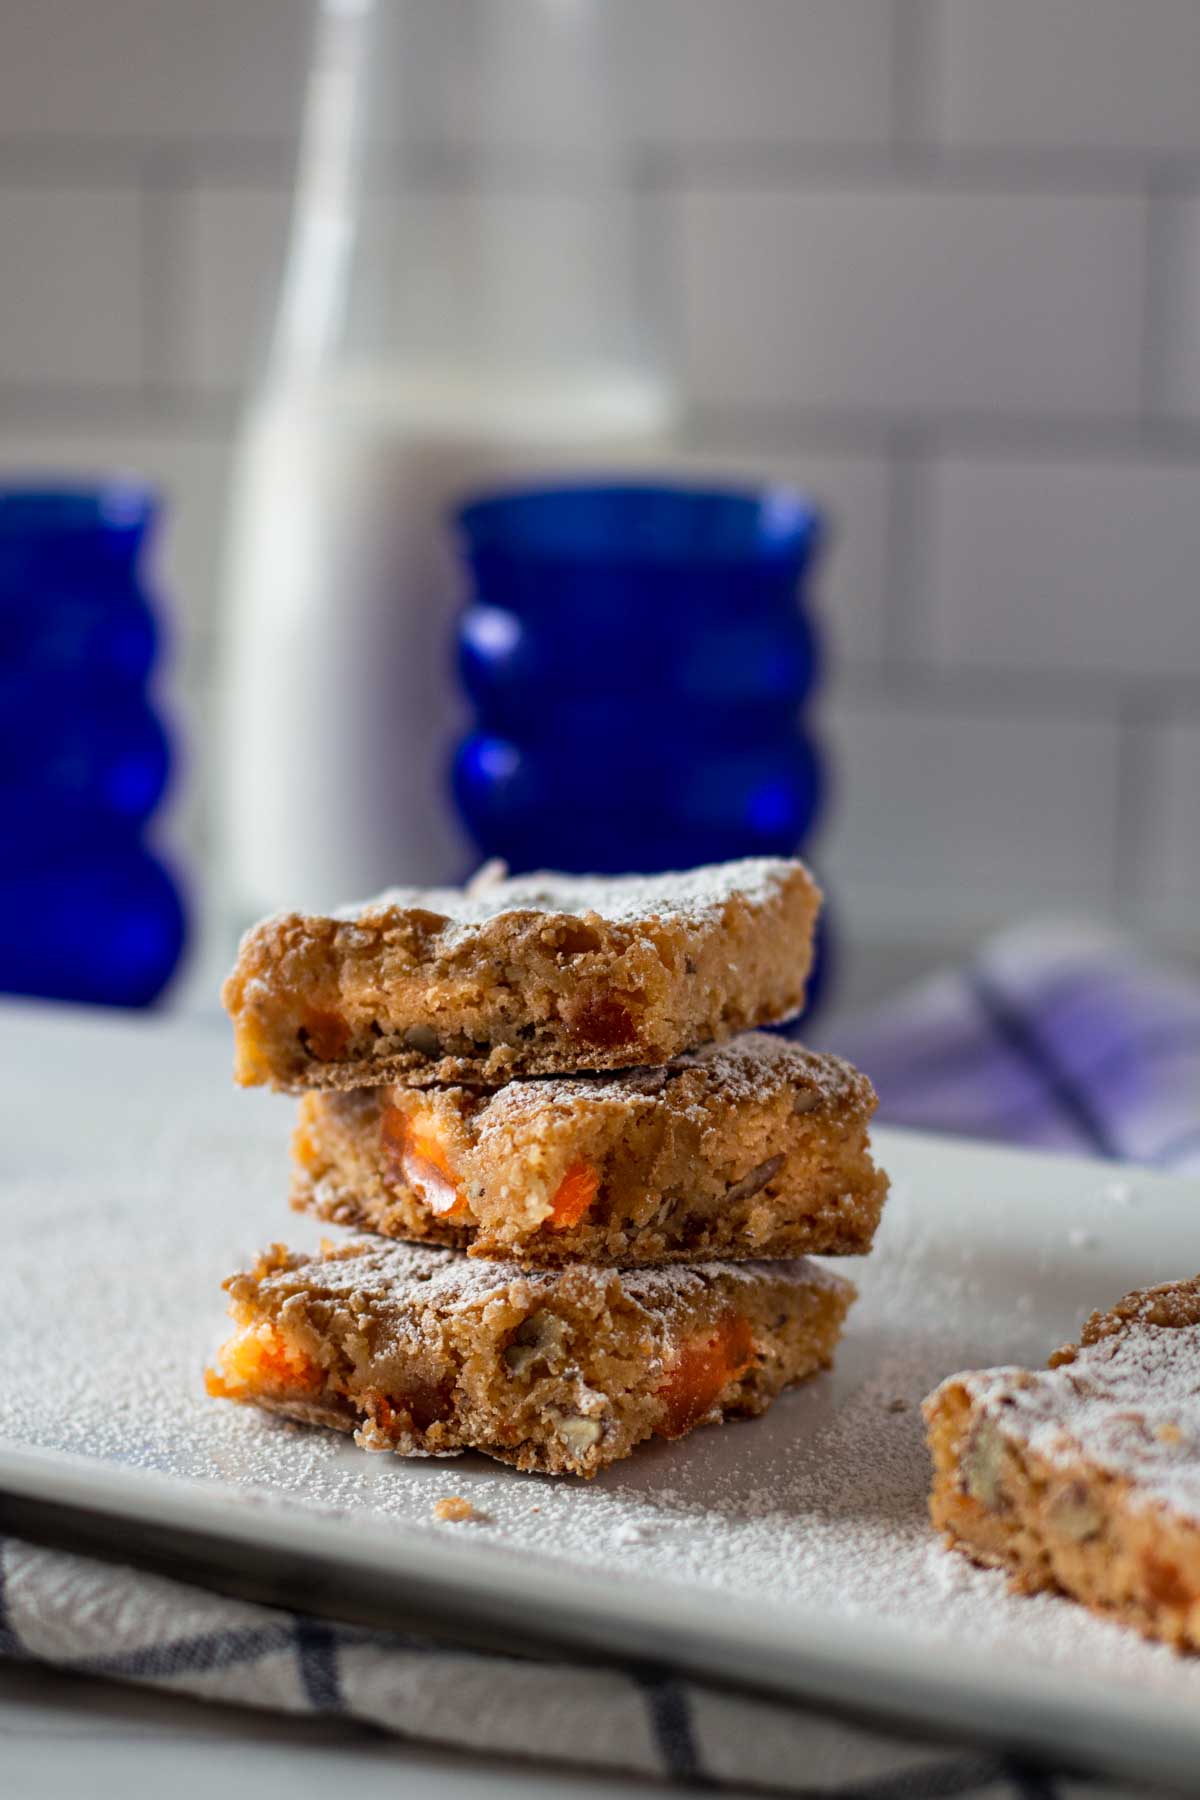
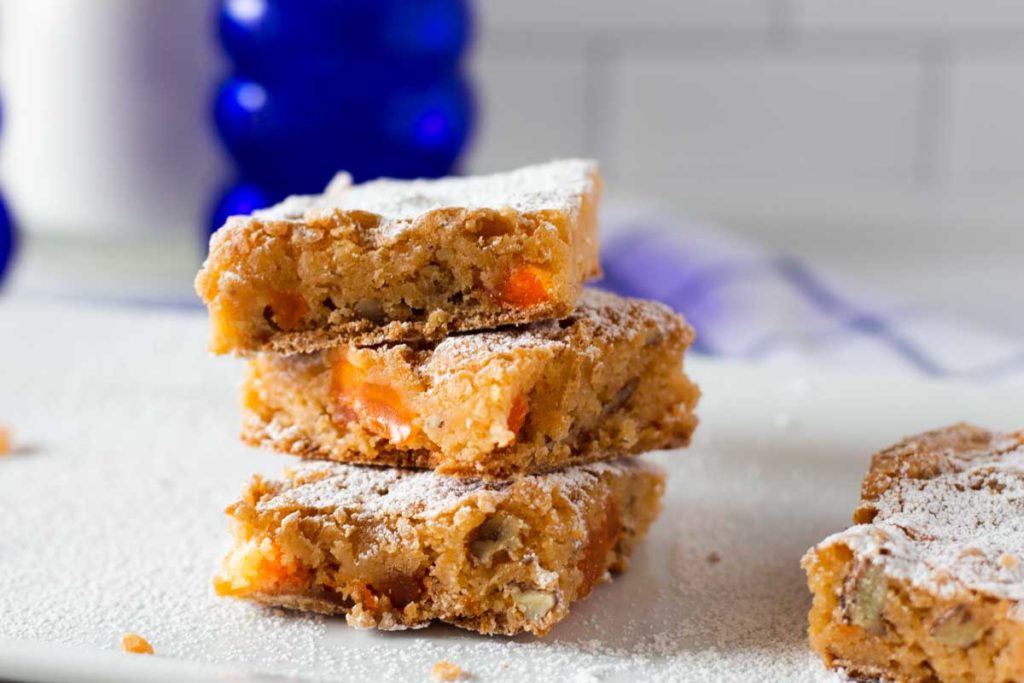
    A stack of orange slice bars with orange slice candy

    Adding pieces of cut up orange slice candy to snack bars is a delicious treat. This is a recipe for old fashioned Orange Slice Bars. If you’re a fan of orange slice candy, you’re going to go crazy over these chewy dessert bars. They’re over the top kid friendly and popular for any age.

    Snack bars made with orange slice candy served on a white plate with milk and blue depression glasses

    About This Recipe and Why It Works

    When’s the last time you had some of those sugary gooey orange slice jelly candy???

    I used to love those things as a kid. So no wonder I would love these orange slice bars.

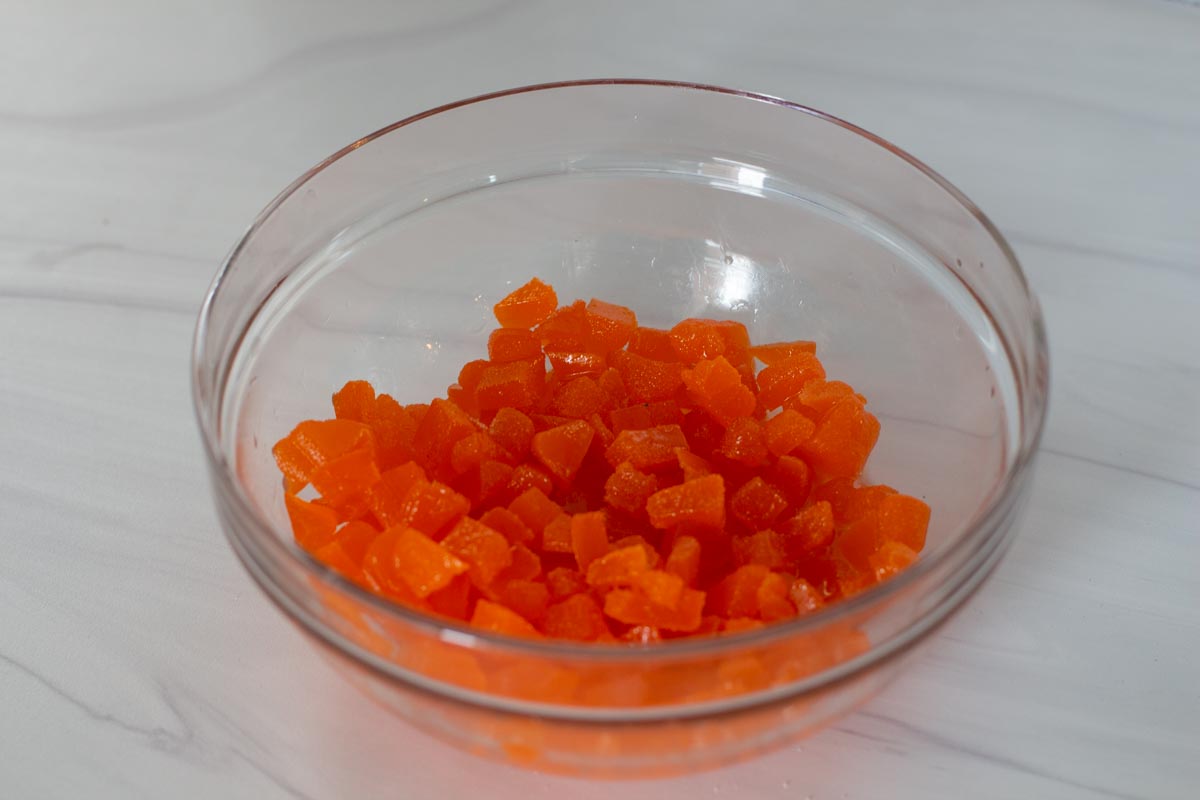
    Orange slices are chopped and then soaked in water before mixing with the dough and baking. 

    The dough isn’t too sweet which compliments the bright taste of the orange slice candy.

    The end result is chewy cake like bar that has a crunch of pecan. Dusted with powdered sugar and everyone you make these for will flip.

    History of Orange Slice Bars

    My mom has had this recipe for as long as I can remember. Notes indicate the recipe came from our neighbor who lived about a mile from us. They made an appearance at every church supper pot luck plus my mom made them often.

    My memory tells me that the recipe came from the manufacturer of this candy.

    With all that said, these Orange Slice Bars recipe is a crowd pleaser.

    Easy Way To Cut Up Orange Slice Candy

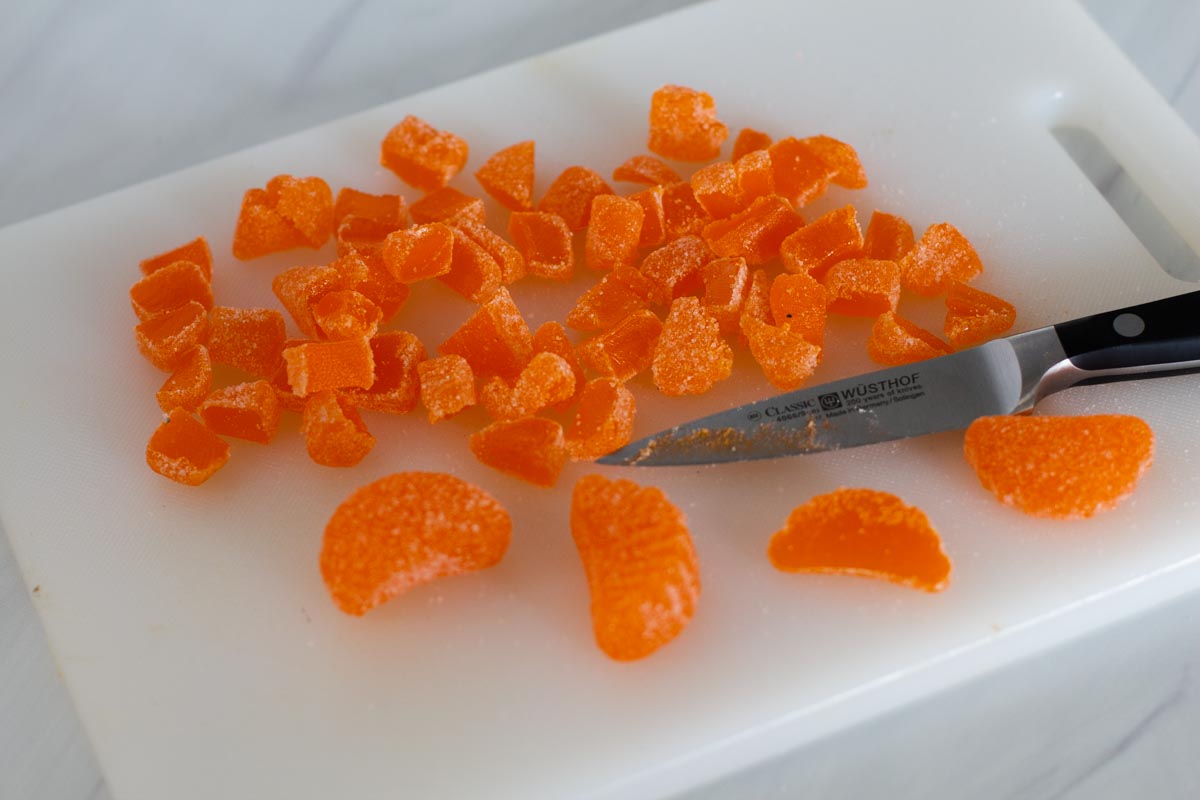
    The hardest thing about this recipe is chopping up those packaged orange slice candies.  Even the sharpest of knives doesn’t work well against that thick gooey sugary candy.

    I find that if you place the candy in the freezer for about 20-30 minutes. They’re easier to chop. Use a knife or a good pair of kitchen shears to cut the candy into eight pieces. Dipping the shears or knife in cold water helps with the process.

    How To Make This Recipe

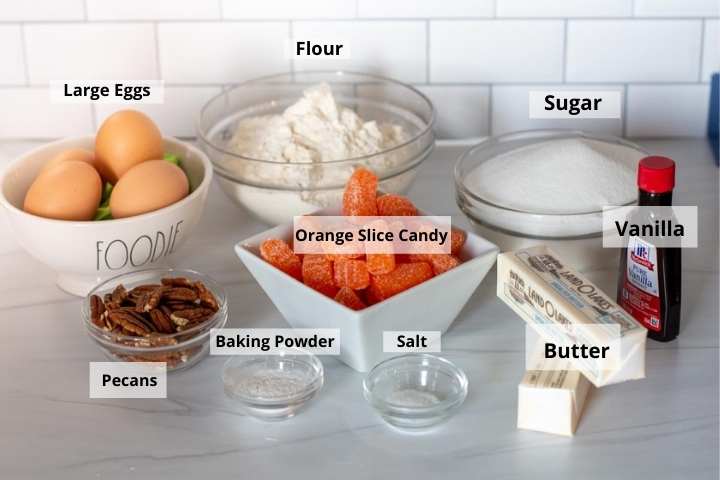
    Mise en place. Always gather ingredients before starting any recipe. It will save you time and organize your mind.

    • Large Eggs
    • Flour
    • Sugar
    • Vanilla
    • Unsalted Butter
    • Orange Slice Candy
    • Pecans
    • Baking Powder
    • Salt
    Cutting orange slice candy into pieces
    Step 1
    soaking orange slice candy pieces in water
    Step 2
    • Step 1: Freeze whole orange slice candy for 20 – 30 minutes. With a very sharp knife, cut the candy into eights.
    • Step 2: Place the pieces of candy in a bowl and pour 6 tablespoons of boiling water over the candy. Let it stand for at least 2 hours and even overnight if you’re not in a hurry.
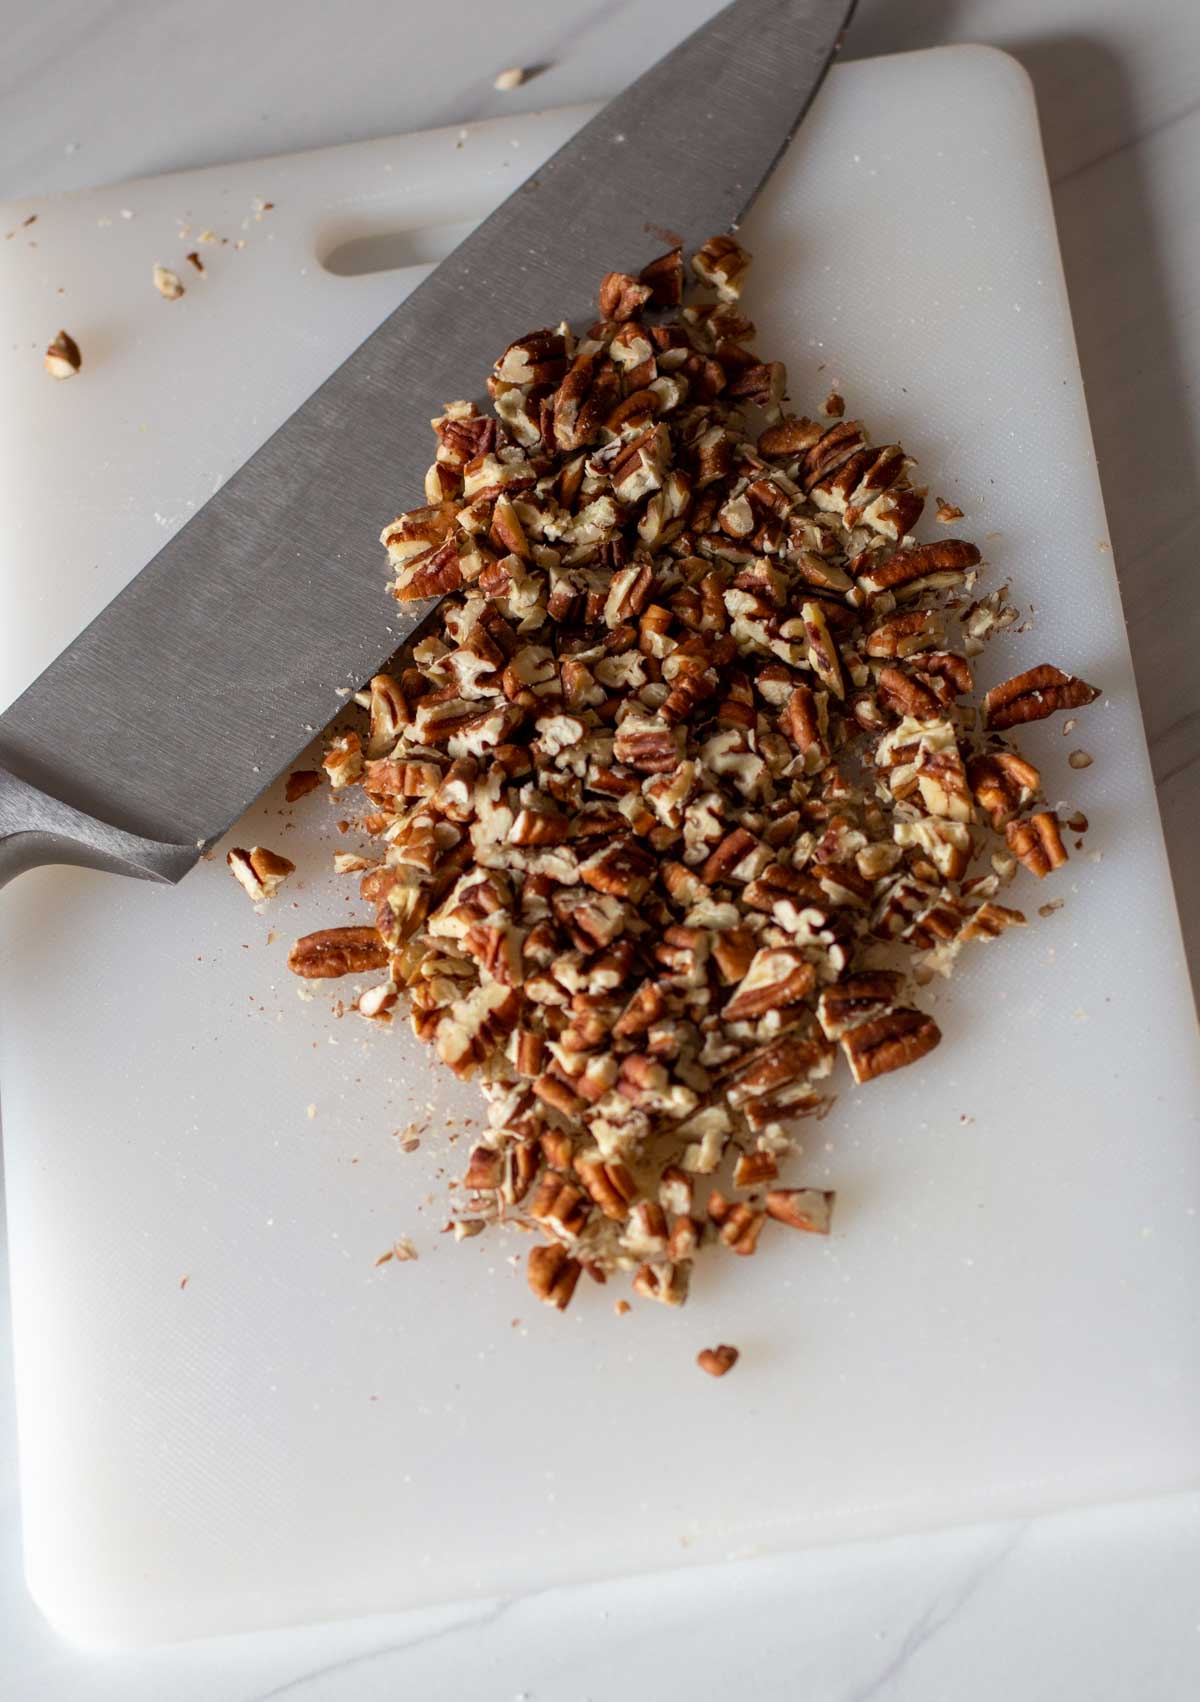
    Using a chef knife to chop pecans
    Step 3
    Batter for orange slice bars
    Step 4
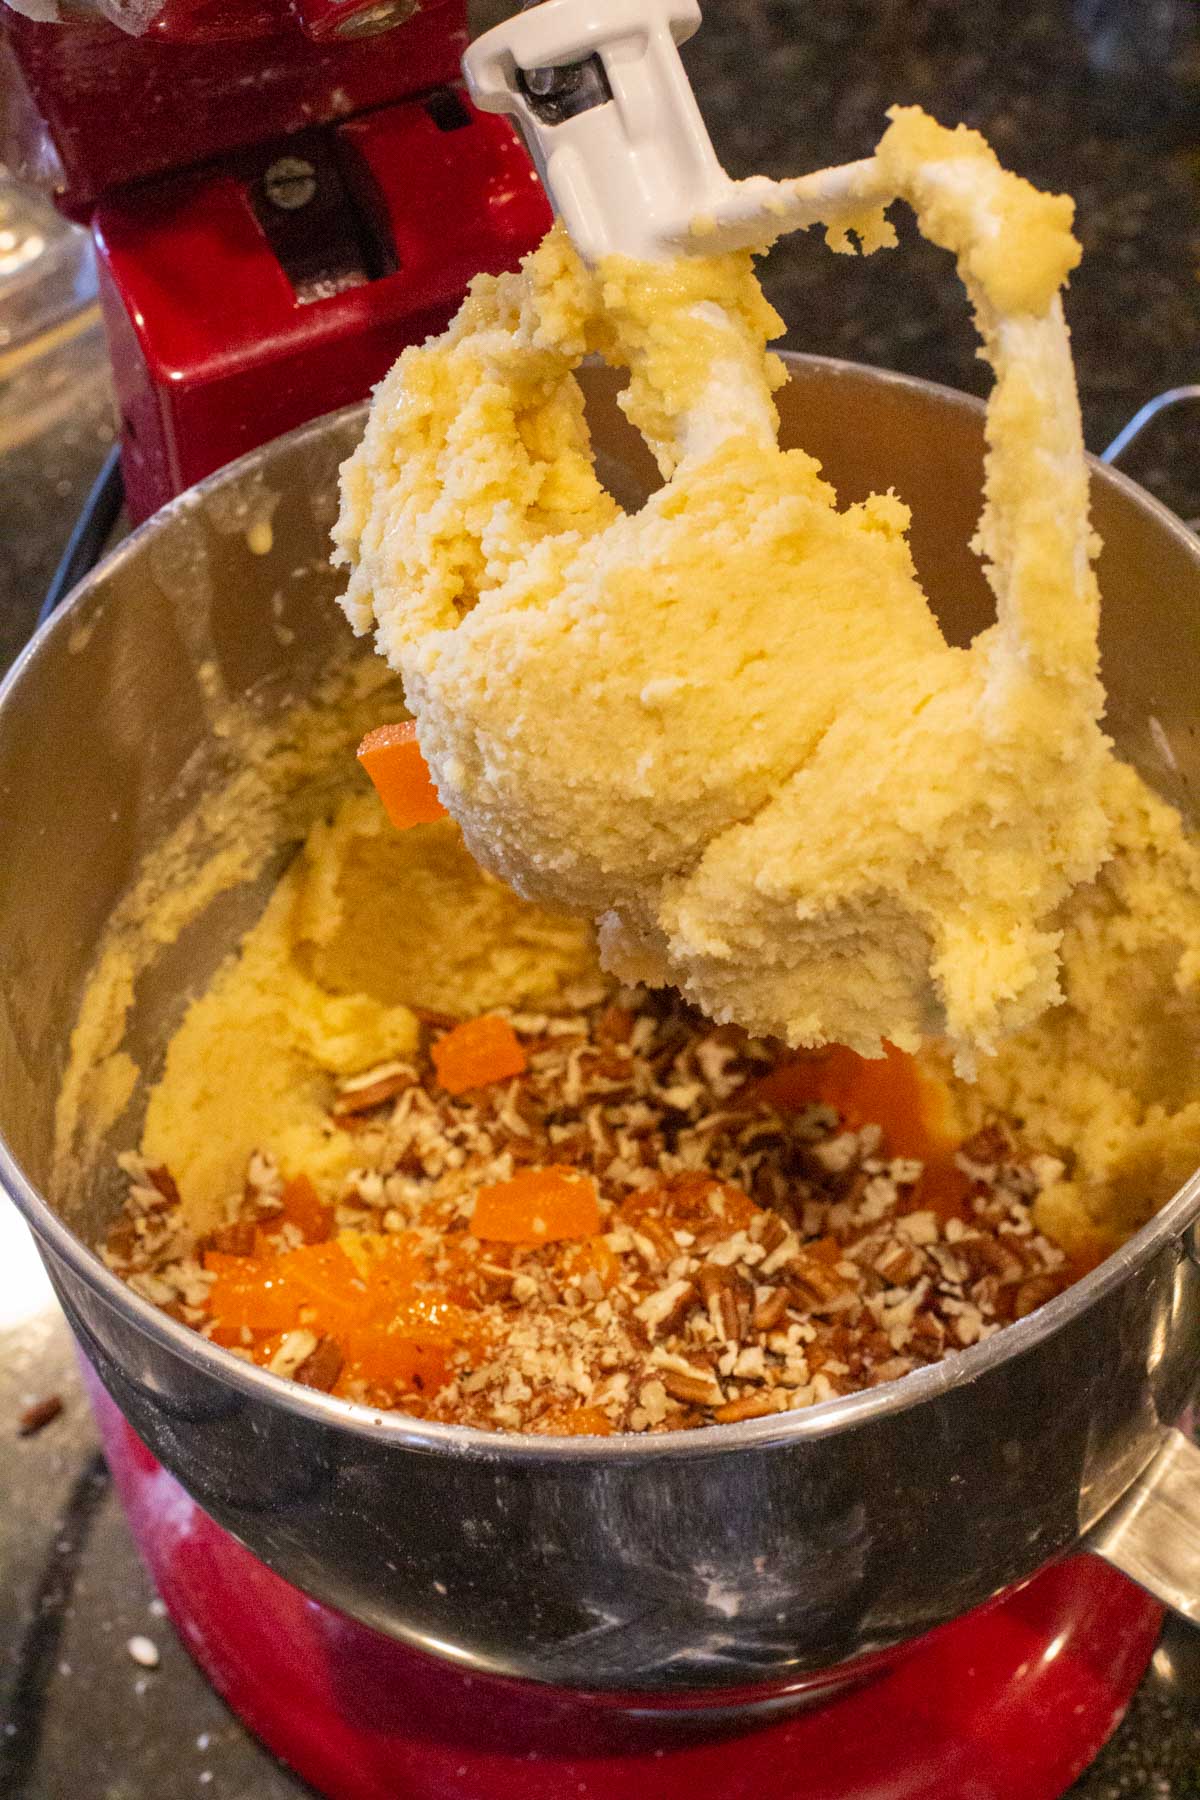
    Making orange slice bars in a kitchen aid mixer
    Step 5
    •  Step 3: Chop the pecans. I like using my chef’s knife.
    • Step 4: Using a mixer, cream butter and sugar; add eggs and blend well.
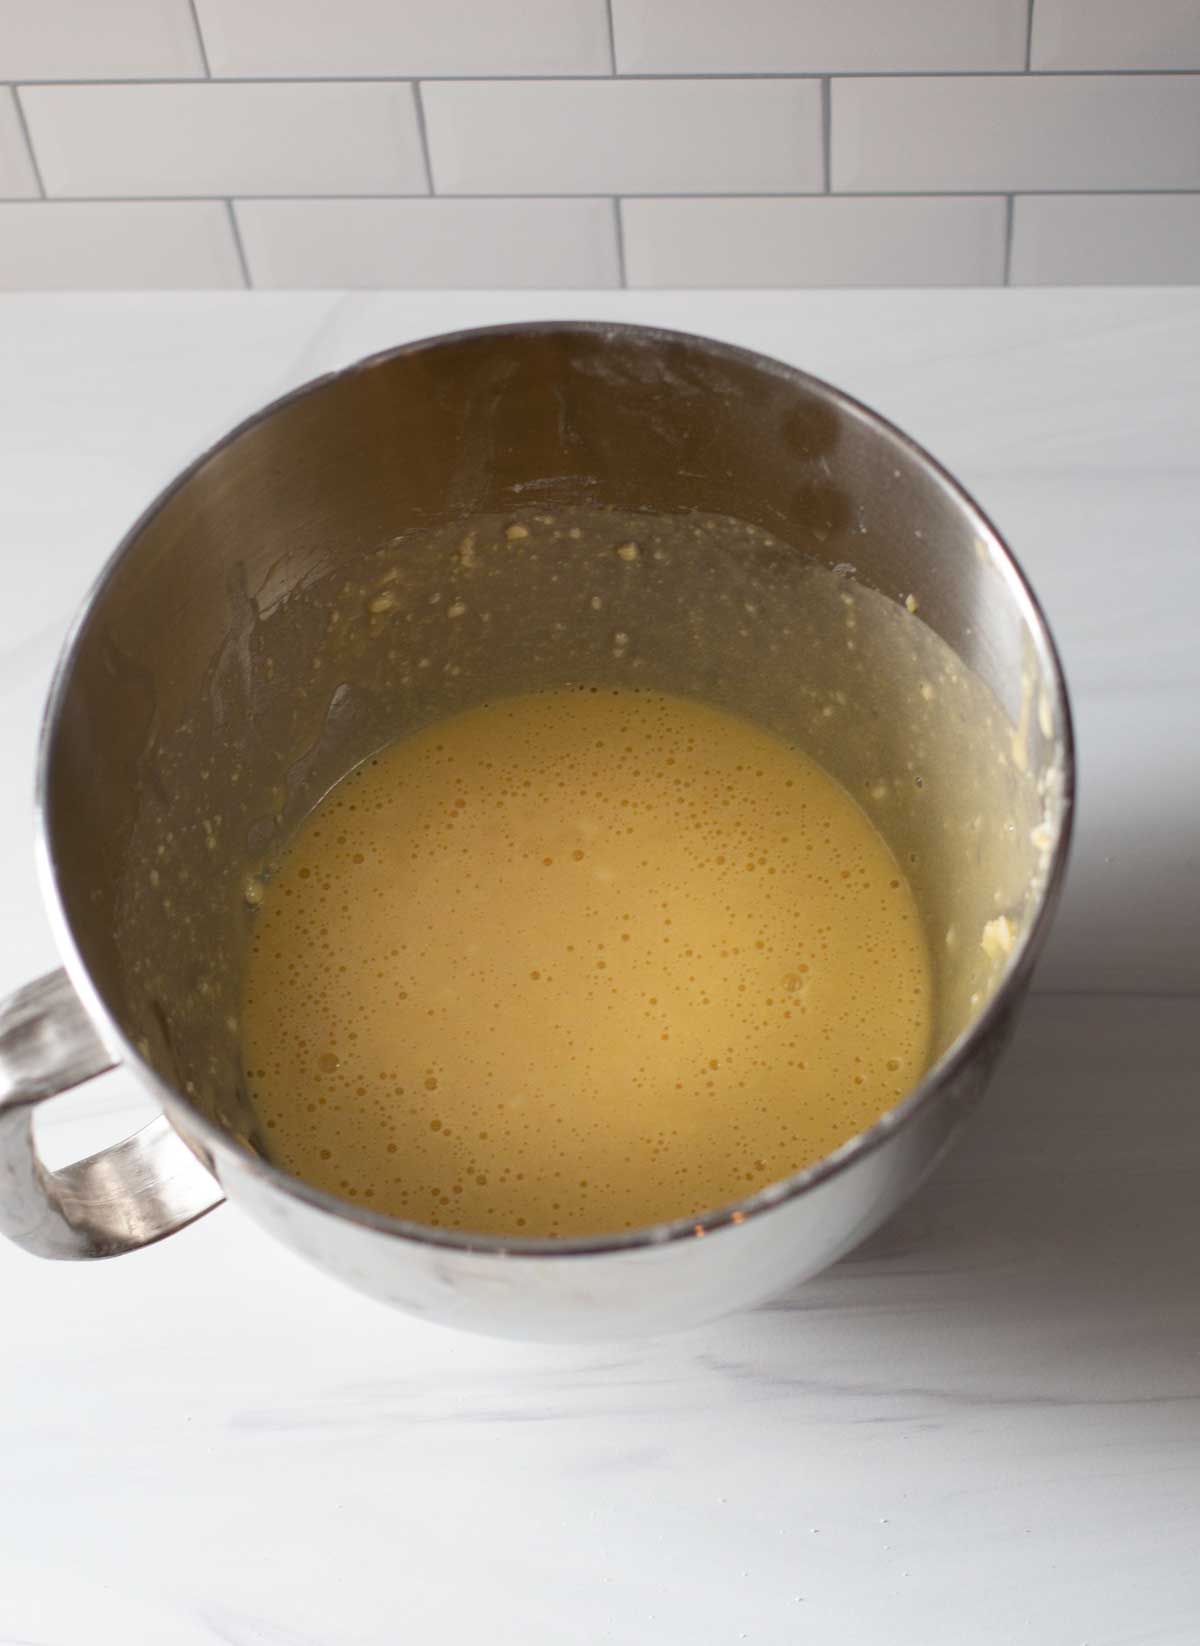
    • Step 5: Mix together dry ingredients and add to egg mixture. Using the paddle attachment, gently mix together and then add orange candy and pecans.

    Spread the batter into greased and floured 15 ½ x 10 ½ inch jelly roll pan. Bake 34 – 40 minutes at 325 degrees.

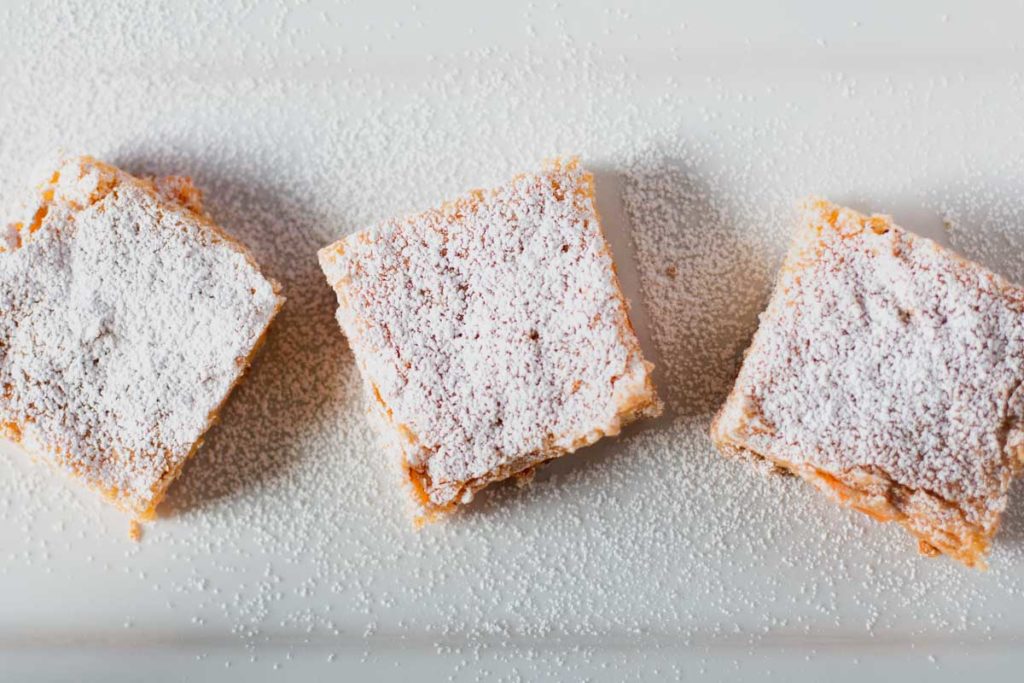
    While the bars are still warm, sprinkle with confectioner’s sugar. Let the bars cool completely before slicing.

    Storage:

    • Orange slice bars can sit covered at room temperature for up to three days. Refrigerate in an air-tight container after that. They will stay fresh for up to a week.
    • They will also freeze very well. Wrap in plastic wrap and then in aluminum foil. Freeze for up to six months. Defrost in refrigerator overnight.

    Recipe for Orange Slice Bars

    3 orange dessert bars stacked. With a blue glass benind.

    I hope you give this recipe a try, and if you do, please come back and give it a star rating. And leave a comment about your experience with the recipe.

    And if you have any favorite recipes using orange slice candy or for dessert bar recipes, let me know, I’d love to give it a try.

    Related Recipes

    • Churros Cheesecake Bars
    • Orange Chocolate Brownies
    • Vanilla Roasted Peaches with Mascarpone Cheese
    • Old Fashioned Cherry Delight

    And if you’re looking for even more dessert recipes, don’t miss my Dessert Category. You’ll find lots of mouthwatering recipes including the most popular dessert recipe on my site for No Bake Key Lime Pie.

    If you liked this recipe, please leave a star ⭐⭐⭐⭐⭐ rating in the recipe card below and leave a comment. I always appreciate your feedback and hearing how everything went.

    And, don’t forget to subscribe to my newsletter for more delicious recipes and cooking tips. Make it a delicious day … every day.

    A stack of orange slice bars with orange slice candy
    Print Recipe
    5 from 6 votes

    Orange Slice Bars Recipe

    If you’re a fan of orange slice candies, you’re going to go crazy over these chewy bars
    Prep Time20 minutes mins
    Cook Time40 minutes mins
    Total Time1 hour hr
    Course: Dessert
    Cuisine: American
    Servings: 12
    Calories: 480kcal
    Author: Lea Ann Brown

    Ingredients

    • 1 pound orange slice jelly candies
    • 6 Tablespoons boiling water
    • ½ cup butter
    • 2 ¼ cups sugar
    • 4 whole eggs
    • 2 ½ cups flour
    • 2 teaspoons baking powder
    • ½ teaspoon salt
    • 1 teaspoon vanilla
    • ½ cup pecans chopped

    Instructions

    • Cut orange slice candies into eights;  pour boiling water over candy slices and let stand 2 hours or overnight.  
    • Using a mixer, cream butter and sugar until it seems fluffy. Add eggs and mix on low until blended.
    • Sift dry ingredients together; add to creamed mixture. Add orange slices and pecans and gently mix until well blended. Batter will be thick.
    • Using a spatula, put into greased and floured 15 ½ x 10 ½ inch jelly roll pan. 
    • Bake for 35-40 minutes at 325 degrees or until done. Sprinkle with powdered sugar while warm. Let the bars completely cook before cutting into squares.

    Notes

    The hardest thing about this recipe is chopping up those packaged orange slice candies.  Even the sharpest of knives doesn’t work well against that thick gooey sugary candy.
    I find that if you place the candy in the freezer for about 20-30 minutes. They’re easier to chop. Use a knife or a good pair of kitchen shears to cut the candy into eight pieces.

    Nutrition

    Calories: 480kcal | Carbohydrates: 89g | Protein: 5g | Fat: 12g | Saturated Fat: 5g | Cholesterol: 74mg | Sodium: 224mg | Potassium: 153mg | Fiber: 1g | Sugar: 68g | Vitamin A: 325IU | Calcium: 53mg | Iron: 1.7mg

    Old Fashioned Orange Slice Bars … They’re what’s for dessert.

    Louisiana Sunburst Salad, A New Orleans Salad Recipe

    February 23, 2021 By Lea Ann Brown 32 Comments

    Louisiana Sunburst Salad served on a black salad plate from target

    Soaking dried cranberries in Port wine brings a unique layer of flavor to this New Orleans themed salad. Louisiana Sunburst salad is a recipe made famous by the Palace Cafe in New Orleans.

    Louisiana Sunburst Salad served on a black salad plate from target

    About this Recipe and Why It Works

    A few years ago, we hosted a New Orleans themed Super Bowl Party with a buffet dedicated to Creole and Cajun dishes. Our friend Teri brought this New Orleans salad, a very, tasty recipe from the Palace Cafe in New Orleans.

    A little bit of History about this Louisiana Sunburst Salad: The Palace Cafe is located at the foot of the French Quarter, in the Werlein’s Music Building and has earned national and local critical acclaim since it opened in 1991. Owners include members of the legendary Brennan family.

    So as you can see, this salad comes with quite the pedigree which explains it’s elegant and intoxicating flavors.

    The salad starts with an impressive idea to soak dried cranberries in port wine. And as we all know, port and blue cheese are a classic pairing, so the salad is sprinkled with crumbled Stilton Cheese to add to its charm.

    Toasted sliced almonds bring a nice crunch, and the sweet tangy raspberry vinaigrette which includes a healthy dose of hot sauce, makes this an exciting flavor profile.

    A perfect side dish for any Cajun or Creole main dish, or in my humble opinion, this works well alongside a big beautiful grilled beef sirloin steak or BBQ Chicken. And of course a perfect salad for this Easy Gumbo Recipe.
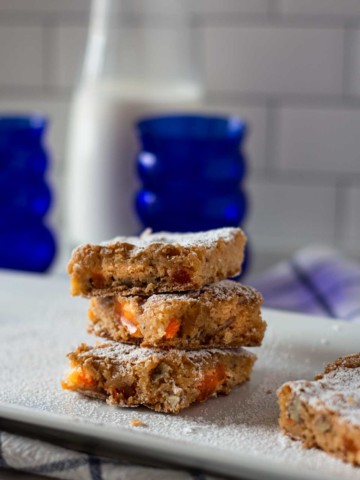
    Let’s get started.

    Noteworthy Ingredients You’ll Need

    Ingredients to make a New Orlean's themed salad
    • Port Wine: We used a Tawny Port. You can also use a Ruby Port.
    • Tabasco Sauce: We can’t have a New Orleans salad without a kick of Tabasco.
    • Dried Cranberries: Ocean Spray Craisins are readily available for purchase.
    • Sliced Almonds
    • Raspberry Vinegar
    • Olive Oil: Extra Virgin Olive Oil always works best, as the flavor isn’t too strong or too mild.
    • Cinnamon
    • Sugar
    • Stilton Cheese: Stilton is an English semi-soft, crumbly, creamy cheese. With a bold rich flavor it will bring an intense and complex flavor to this salad.
    Ingredient Swaps:

    • Wine: If you don’t have Port, you can substitute Sherry, which is a cousin of port, Marsala, an Italian fortified wine or Madeira is a substitute. Even Vermouth would work. Unsweetened fruit juice would be an option here. But please, give that rich elegant Port a chance, even if it means a special trip to the liquor store.
    • Hot Sauce: Tabasco is probably the most well-known Louisiana Hot Sauce, but you can also substitute Louisiana Brand Hot Sauce. Or your favorite Cajun or Creole Hot Sauce.
    • Nuts: If you don’t have almonds, you can substitute pecans. Just follow the directions to toast them as you would the almonds.
    • Sweetener: This recipe calls for sugar, but you can substitute equal amounts of honey or even agave syrup.
    • Blue Cheese: You can substitute a creamy blue cheese for the Stilton. Award Winning Point Reyes Blue Cheese is my absolute favorite blue cheese on earth. Creamy and bold in flavor, it would work well in this salad. Maytag blue cheese is also a quality choice. Maytag blue cheese is produced in Iowa and is a cow's milk cheese with exceptional blue cheese flavor and creamy texture.

    How To Make This Salad

    soaking dried cranberries in port wine
    Toasting almonds on a sheet pan covered with parchment paper
    S
    1. Step 1: Soak the cranberries. Place the dried cranberries in a small bowl. Cover with the port wine, cover with plastic wrap and let them soak overnight in the refrigerator.
    2. Step 2: Toast the Almonds. When you’re ready to prepare the salad. Preheat oven to 350 degrees. Scatter almonds on a baking sheet covered with parchment paper. Bake them 5 – 7 minutes or until just starting to turn golden and are fragrant. Watch them closely, as they can burn easily.
    1. Step 3: Build that salad. Place the ingredients for the vinaigrette in a large wooden salad bowl. Using a whisk, briskly mix together until the salad dressing is emulsified. Which basically means that the oil, water and vinegar has become one. You can also put the ingredients into a mason jar, seal with the lid and shake the daylights out of it.
    2. Step 4: Add the greens to the salad bowl and with tongs, mix well to coat the greens with the dressing.
    Step 5

    Serve the salad: Place greens on a chilled salad plate, and sprinkle with cranberries, almonds and blue cheese.

    Tips for Success

    Can I prepare this salad ahead of time?

    Yes and No. You can prepare the dressing in advance, either the day of or even a couple of days ahead of time. But you can’t dress the salad ahead of serving. The vinaigrette will cause the salad greens to wilt and become soggy.

    Chill Those Salad Plates

    Chill the plates in the refrigerator a few hours ahead of time. A crisp salad stays crisper when served on chilled plates.

    Will this salad keep as leftovers?

    No. Again, even if stored in the refrigerator in a sealed container, the greens will wilt once dressed with the vinaigrette.

    Recipe for Louisiana Sunburst Salad

    I hope you give this Cajun themed salad a try, and if you do, please come back and give the recipe star rating and leave a comment about your experience with the recipe. Bookmark this one and thank you Brennans.  I’m interested to know, have you been to The Palace Cafe?

    And if you have a favorite New Orleans, Louisiana themed salad recipe, let me know, I’d love to give it a try.

    More Salad Side Dish Ideas
    • Southwest Salad with Black Beans
    • Tossed Salad with Creamy Blue Cheese Dressing.
    • Company Lettuce Salad with Chow Mein Noodles
    • Avocado Mango Salad with Blue Cheese

    And if you’re looking for more salad recipes, don’t my salad category. You’ll find lots of ideas for side salad, vegetable salads and dressing and vinaigrettes. Including the most one of the most popular salad recipe on my site for tossed salad with Red Wine Vinegar Salad Dressing.

    If you liked this recipe, please leave a star ⭐⭐⭐⭐⭐ rating in the recipe card below and leave a comment. I always appreciate your feedback and hearing how everything went.

    And, don’t forget to subscribe to my newsletter for more delicious recipes and cooking tips. Make it a delicious day … every day.

    Louisiana Sunburst Salad served on a black salad plate from target
    Print Recipe
    5 from 12 votes

    Louisiana Sunburst Salad

    This is a recipe for Louisiana Sunburst Salad. A beautiful salad made famous by the Palace Cafe in New Orleans. There's a lot of special flavors in this salad, but the port poached cranberries are a stand out. 
    Prep Time30 minutes mins
    Total Time30 minutes mins
    Course: Side Dish
    Cuisine: Cajun
    Servings: 6
    Calories: 328kcal
    Author: Lea Ann Brown

    Ingredients

    • For the Salad
    • 4 Tablespoon Dried cranberries Craisins
    • 4 Tablespoons Ruby port wine
    • 12 ounces Salad Greens Mesculin micx, mixed baby lettuces like mache, frisee, radicchio, spinach. or a Spring Mix works well here
    • 2.25 ounce almonds sliced, toasted. A small package from the baking section at the grocery store.
    • ½ cup Stilton cheese crumbled, or blue cheese
    • For the Vinaigrette
    • ½ cup vegetable oil
    • ¼ cup Raspberry vinegar
    • 1 Tablespoon water
    • 5-10 dashes Tabasco sauce
    • 1 teaspoon ground cinnamon
    • 1 Tablespoon sugar or honey
    • Salt and pepper to taste

    Instructions

    • Soak the cranberries overnight in the port. Or for at least 6 hours.
    • To toast the almonds: Preheat oven to 350 degrees. Scatter almonds on a baking sheet covered with parchment paper. Bake them 5 – 7 minutes or until just starting to turn golden and are fragrant. Watch them closely, as they can burn easily.
    • In a large mixing bowl, or wooden salad bowl, add the oil, water, vinegar, Tabasco, cinnamon and sugar. Whisk until emulsified. Add the lettuce and toss. Season with salt and pepper. You can also add the vinaigrette ingredients to a mason jar and shake the jar to emulsify.
    • Place the greens on serving plates and garnish with the crumbled cheese, cranberries, and almonds. Serve immediately.

    Notes

    Prepare this salad just before serving. If you mix the greens with the vinaigrette too soon, the lettuce will wilt and become soggy.
    Chill the plates in the refrigerator a few hours ahead of time. A crisp salad stays crisper when served on chilled plates.
    You can substitute a creamy blue cheese for the Stilton. Award Winning Point Reyes Blue Cheese is my absolute favorite blue cheese on earth. Creamy and bold in flavor, it would work well in this salad. Maytag blue cheese is also a quality choice. Maytag blue cheese is produced in Iowa and is a cow’s milk cheese with exceptional blue cheese flavor and creamy texture.

    Nutrition

    Calories: 328kcal | Carbohydrates: 18g | Protein: 6g | Fat: 26g | Saturated Fat: 17g | Trans Fat: 1g | Cholesterol: 7mg | Sodium: 171mg | Potassium: 317mg | Fiber: 2g | Sugar: 10g | Vitamin A: 1365IU | Vitamin C: 26mg | Calcium: 101mg | Iron: 1mg

    New Orleans Salad … It’s what’s for dinner

    « Previous Page
    Next Page »

    I'm Lea Ann

    Welcome to my Colorado kitchen. If you're a fan of rustic homestyle cuisine, you've come to the right place. I'm a Culinary School Grad with a passion to inspire you to cook as often as you can. I offer reliable, approachable and easy to follow recipes. So grab that skillet and let's cook.

    More about me

    Soup and Stew Recipes

    • Southwest chicken soup with hominy and potatoes.
      Sopa Ranchera, Southwest Chicken Soup
    • Creamy chicken tortilla soup with rotel tomatoes.
      Southwestern Creamy Chicken Tortilla Soup
    • Cowboy chili garnished with grated cheese and jalapeno pepers.
      New Mexico Style Cowboy Chili
    • Ground chicken chile with white beans.
      Giada’s Ground Chicken Chili with White Beans
    • Beef stew with mushrooms served in a skillet.
      Beef Stew With Mushrooms – Crock Pot Method
    • 7-can taco soup with ranch dressing.
      Original 7 Can Taco Soup with Ranch Dressing

    Reader Favorites

    • Super Moist Cheesy Cornbread with Creamed Corn
    • Flemings steakhouse macaroni and cheese in a white bowl.
      Flemings Steakhouse Mac and Cheese
    • A slice of Layered Mexican Casserole with ground beef and corn tortillas.
      Mexican Casserole with Ground Beef and Corn Tortillas
    • Beef Tagliata, thin sliced flank steak served over arugula and cherry tomatoes.
      Beef Tagliata (Italian Steak)
    • Ham and cheese quesadilla made with corn tortillas and topped with a fried egg.
      Crispy Ham and Cheese Corn Tortilla Quesadillas
    • Spinach chicken mushroom skillet dinner.
      Chicken Mushroom and Spinach Skillet

    Footer

    • Contact
    • About
    • Privacy Policy
    • Accessibility Statement
    • ↑ back to top

    Copyright © 2024 Cooking on the Ranch • Powered by Feast+

    Rate This Recipe

    Your vote:


    A rating is required
    A name is required
    An email is required