Cooking On The Ranch

  • Home
  • About
  • Recipe Roundup
  • Contact Me
  • Join Community
menu icon
go to homepage
  • Home
  • Soups and Stews
  • About
  • Recipes
  • Contact Me
    • Facebook
    • Instagram
    • Pinterest
  • search icon
    Homepage link
    • Home
    • Soups and Stews
    • About
    • Recipes
    • Contact Me
    • Facebook
    • Instagram
    • Pinterest
  • ×
    Home

    Juicy Grilled Chicken Halves: The Ultimate Backyard Guide

    July 10, 2021 By Lea Ann Brown 12 Comments

    Grilled chicken halves served with potato and a salad.

    Grilled chicken halves makes grilling a whole chicken is easier than you’d think. Using an irresistible bbq chicken rub and a zesty basting sauce, this recipe teaches you how to use a grilling technique to insure even cooking for both white and dark meat.
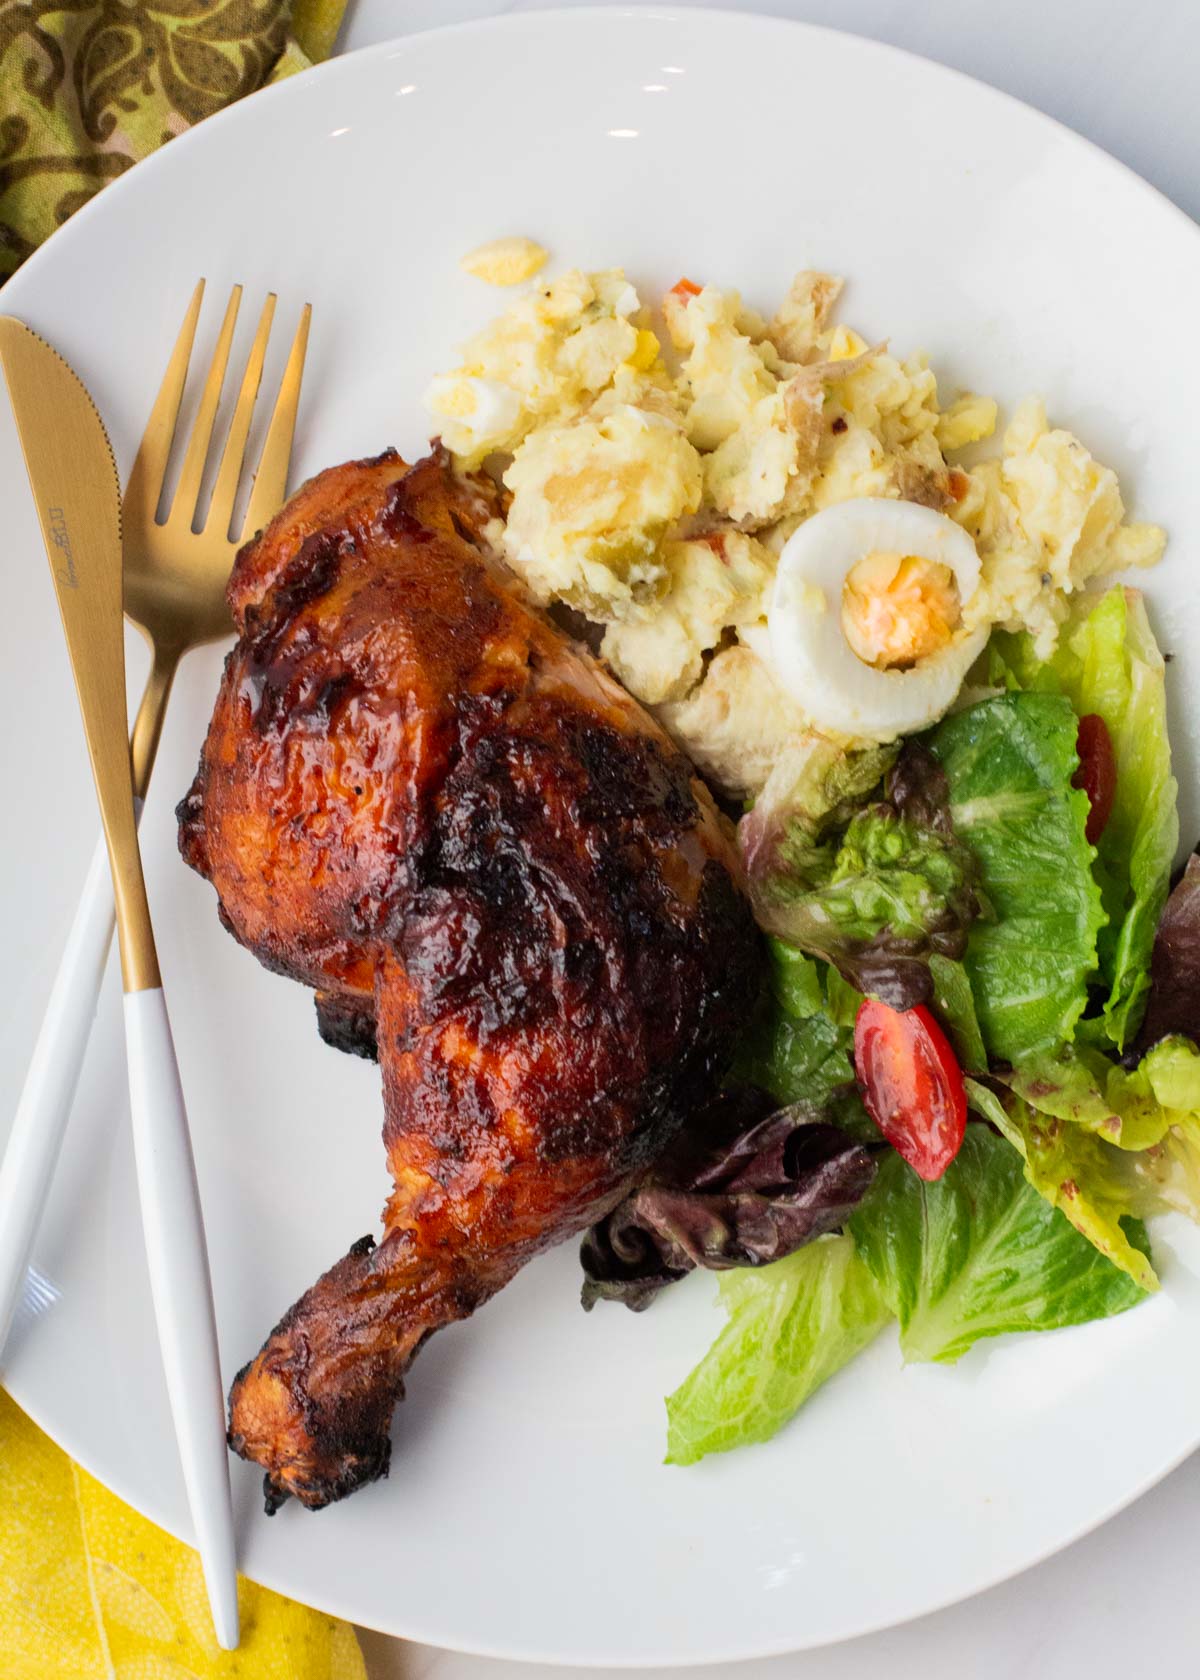
    Grilled chicken served with potato salad and a tossed salad.

    This recipe was originally published July 2009 and republished July 2021 with new step by step photos.

    Why Grill Chicken Halves?

    Don’t you just get flat out grumpy when you’ve cooked over the hot grill, turning, moving, babying each piece of chicken only to bite into a thigh to find that pinkish, not quite done thing going on? Shudder. Or a grilled chicken breasts that are over-cooked and dry?

    Try grilled chicken halves for a fool-proof method to grill a whole chicken. A technique for a where every piece turns out tender and juicy and evenly cooked. EVERY time.

    The secret is in how you cut the chicken, how to make a flavorful bbq chicken rub and a bright basting sauce that elevates the flavor to fabulous. And how often to turn the chicken for even cooking results.

    Simply stated, chicken halves cook more uniformly, and retains moisture better than grilling a whole chicken that’s been cut into pieces. They’re ideal for grilling because there’s more skin exposure for that extra crispy skin and better penetration for marinades and rubs.

    Just finish with a mop with your favorite bbq sauce and dig in. Grilled chicken halves makes grilling chicken a breeze.

    Let’s take a look.

    How To Prepare Chicken Halves
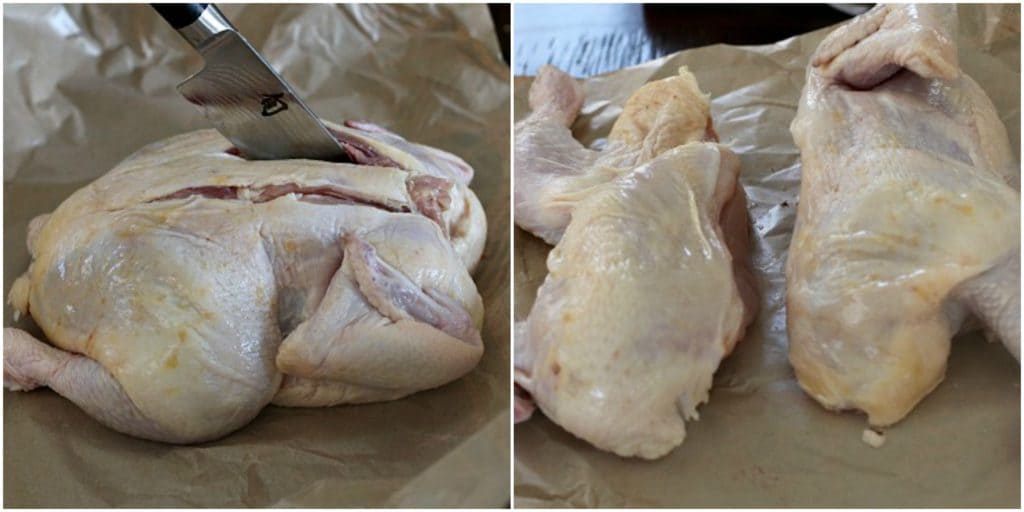
    How to cut a chicken in half to grill a whole chicken.

    Splitting The Chicken For Grilled Chicken Halves

    Tools Needed: A sharp chef’s knife, or kitchen (poultry) shears. Kitchen shears provide more controlled cutting.

    • There’s no need to buy separate chicken pieces, or cut a whole chicken into individual pieces. Buy a whole fryer and with a good sharp knife, or shears cut the chicken into two pieces.
    • To do that, use the tip of the knife, or kitchen shears, and cut along each side of the back bone. Once the back bone is removed, turn the chicken over and cut the chicken into two pieces. You’ll be cutting the breast bone in half. You’ll have two separate chicken halves. Each with the leg section, a wing attached.
    • You’ll find this is easier to manage on the grill and the grilled chicken halves will cook more evenly.

    Chicken Tips:

    • Your butcher will gladly cut your whole chicken into two pieces for you.
    • How To Choose A Whole Chicken For The Grill. Look for a fryer chicken or a broiler chicken. A weight of 4 – 5 pounds is a good size for grilling.

    Seasoning Strategy: BBQ Chicken Rub

    Let’s start with the bbq chicken dry rub for this grilled half chicken. I like using a bbq chicken rub that doesn’t contain sugar. With a cook time of one hour for this recipe, a no sugar dry rub will keep the skin from burning.
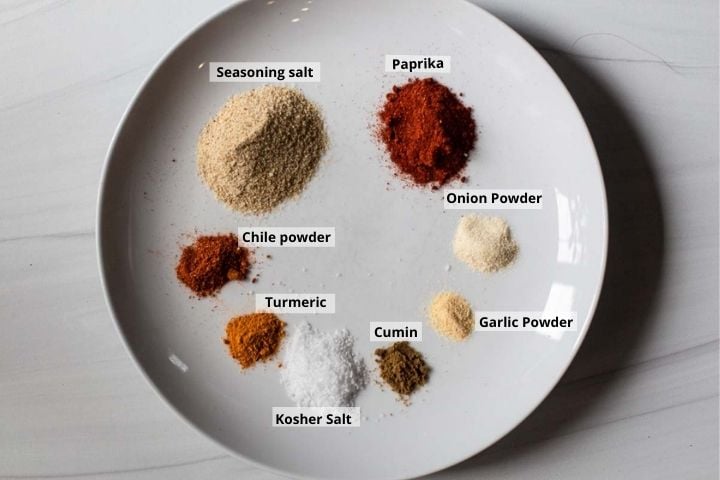
    ingredients to make dry rub for grilled chicken
    • Seasoning Salt: Any brand of seasoning salt will work, with Lawry’s being the most well known, and is what I use.
    • Paprika: Plain paprika is what is called for in this recipe. If you want, use smoked paprika for an even deeper layer of flavor.
    • Onion Powder
    • Garlic Powder
    • Cumin
    • Kosher Salt: Kosher salt is preferred by chefs due to the pure salty flavor it imparts to food. Sea salt is said to sit on the food rather than penetrate and season.
    • Turmeric
    • Chile Powder: Please note, use a pure chile powder rather than a chili seasoning. A chili seasoning contains other spices such as cumin.
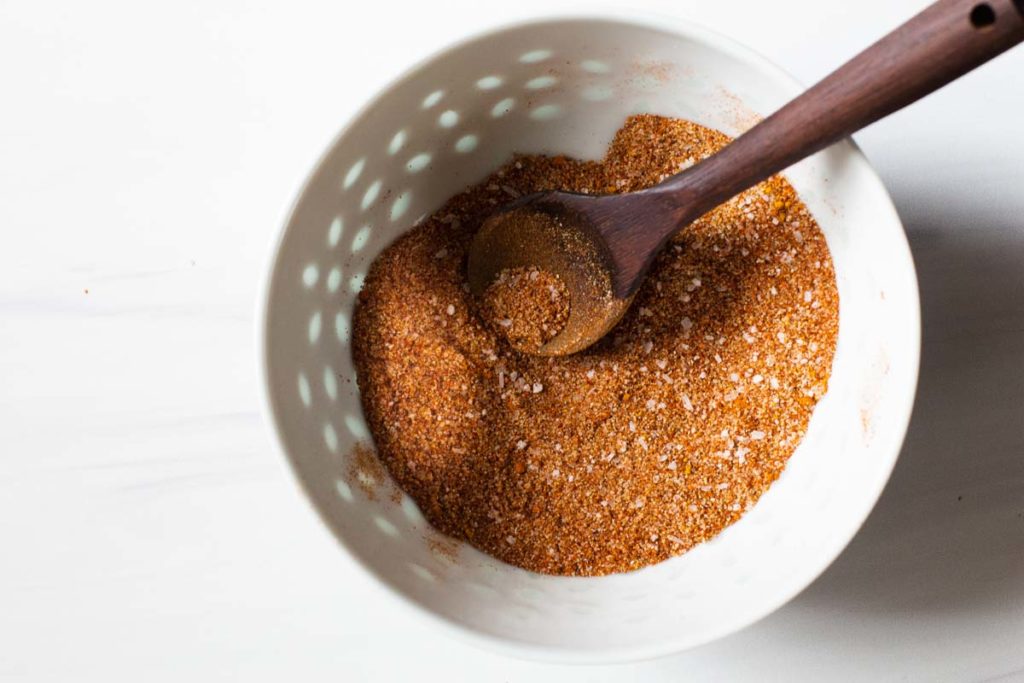
    Rub mix for grilled chicken
    1. Step 1: Mix the ingredients for the bbq chicken rub in a small bowl, until well blended.

    Pro Tip: Pat the chicken dry before applying the rub to ensure a crispy skin.
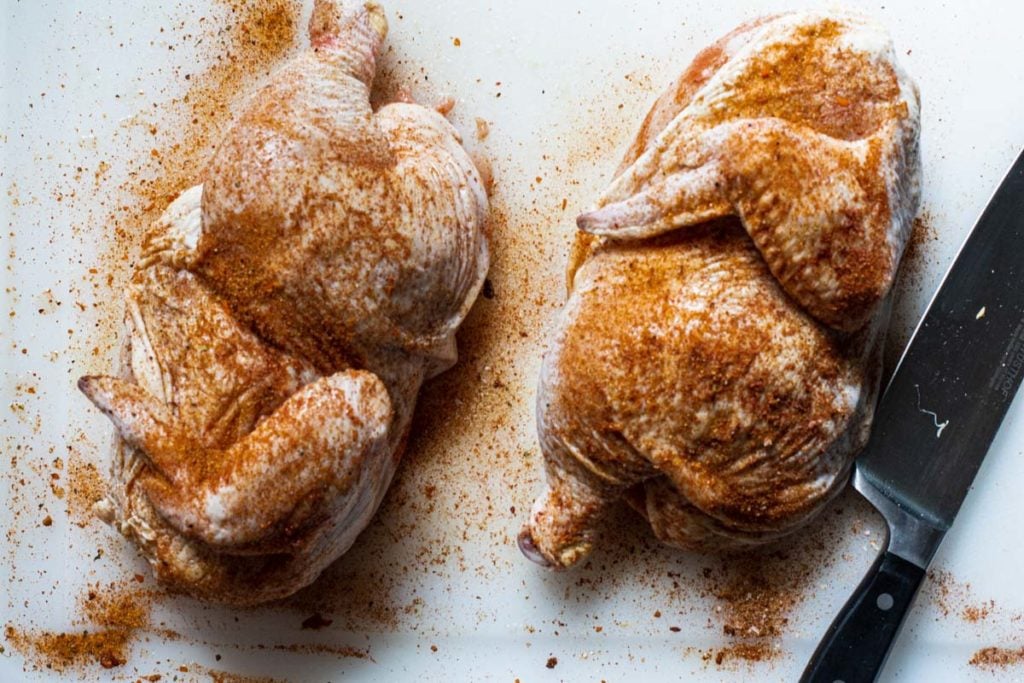
    Using dry rub on whole chicken before grilling
    1. Step 2: Spread the bbq chicken rub in every nook and cranny and on and under the skin of the chicken halves.  Do this three hours before grilling. Let the rubbed chicken sit in the refrigerator until ready to cook.
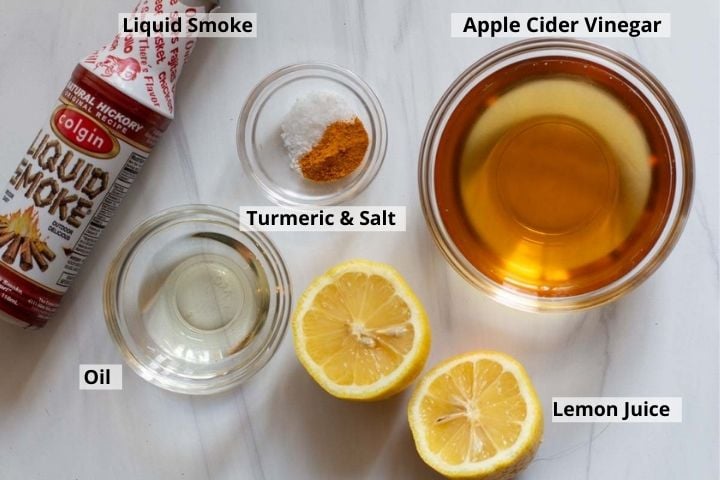
    basting sauce ingredients for grilling chicken
    1. Step 3: Baste for Grilled Chicken: And finally a good chicken baste sauce with vinegar, oil, turmeric for color, lemon juice and a drop of liquid smoke. Using this flavorful basting sauce eliminates the need to pre marinade the chicken.

    Expert Tip: Use a neutral flavored oil with a higher smoking point. It will help the skin crisp faster. Canola oil or grape seed oil is a good choice here.
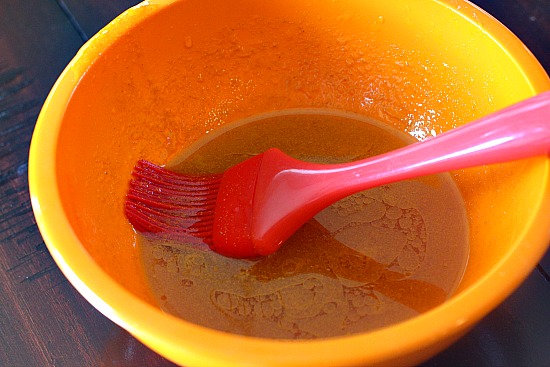
    Basting sauce for the best grilled chicken ever.
    1. Step 4: Place the basting sauce ingredients into a small bowl and whisk until well blended. Pro Tip: Use a silicone brush for even sauce application.

    We’re Ready to Grill
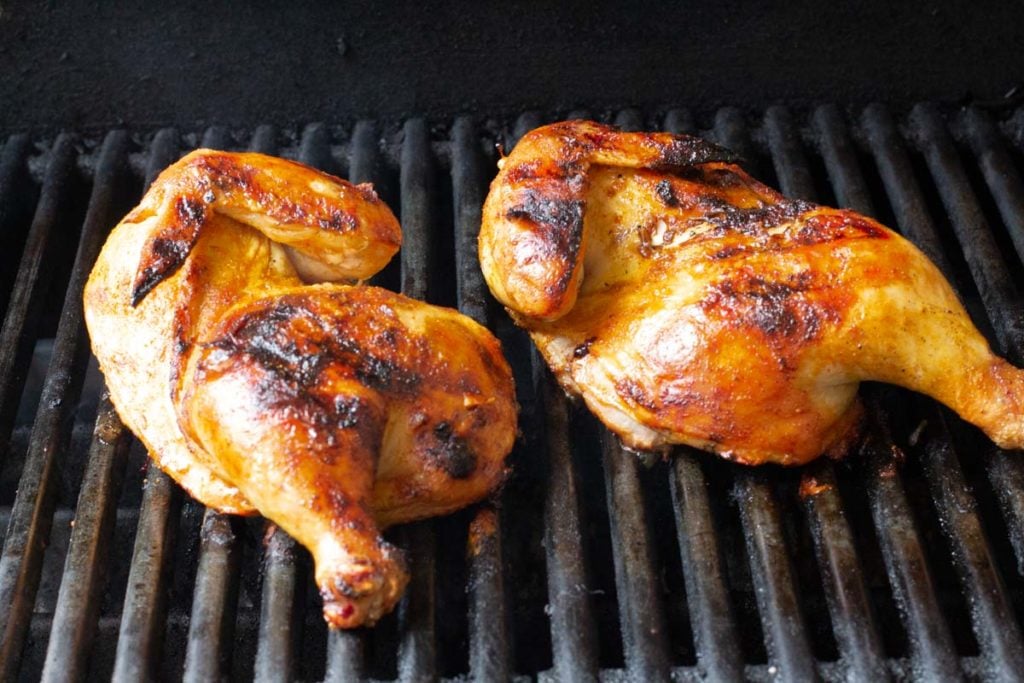
    how to grill a whole chicken
    1. Bring the chicken to room temperature.
    2. Preheat your grill to 450 degrees. Turn the heat down to 375 degrees and place the chicken halves, skin side down, on those sizzling grates.
    3. Generously baste the chicken with the basting sauce and let it cook (lid down) for 15 minutes. Turn the chicken every 15 minutes, basting each time you turn. The total cooking time should be 1 hour.
    4. Use a reliable meat thermometer for reliable accuracy. Internal temperature should read 165 degrees.
    5. Finish and mop with your favorite BBQ Sauce. Apply barbecue sauce the last 5 minutes of cooking to avoid burning.

    FAQ’s and Tips

    How Long Does It Take To Grill Chicken Halves?

    Using this “turn and baste: method for grilled chicken halves, the whole chicken will be cooked in one hour.

    How Do I Prevent Skin From Sticking To The Grill?

    I like to make sure the grill grates are clean and well-oiled.

    What’s The Best BBQ Sauce To Use?

    The best is your favorite brand. And if you’re looking for a homemade bbq sauce recipe, take a look at this recipe I use for bbq meatballs. We love the smoky flavor for this bbq chicken recipe.

    Can I Make This Recipe On A Charcoal Grill?

    I don’t own a charcoal grill, so I’m going to direct you to the experts, Kingsford. Take a look at this recipe for grilling a whole chicken on a charcoal grill. These instructions are for a whole, uncut chicken, but the article shows you the indirect heat method that will work for this recipe.

    What’s The Best Way To Reheat Leftover Chicken Halves?

    Reheat in your oven at 325°F, covered with foil, until warmed through. This method helps retain moisture.

    Tip: Let the chicken rest before serving. Remove the grilled chicken halves from the grill and let sit 10 minutes before cutting and serving. This will help the juices redistribute and keep the meat tender and moist.

    Common Mistakes To Avoid

    • Overcooking: Leads to dry meat; use a thermometer.
    • Flare-Ups: Trim excess fat and monitor grill closely.
    • Skipping Rest Time: Essential for juicy, flavorful chicken

    Serving and Pairing Suggestions

    My absolute favorite sides to go with grilled chicken is my recipe for Old Fashioned Potato Salad or Mac and Cheese with Tomatoes. Here are some other ideas.

    • Jalapeno Pineapple Cole Slaw
    • Perfect Tossed Salad Recipe
    • Pioneer Woman’s Best Macaroni Salad
    • Cheese Tortellini Pasta Salad

    Beverage Pairings

    • Wines: Chardonnay or Pinot Noir.
    • Beers: Pilsner or amber ale.
    • Non-Alcoholic: Lemonade or iced tea.

    Perfect Grilled Chicken Halves

    Grilling chicken halves is a rewarding technique that yields juicy, flavorful results. By following this guide, you’ll master the art of grilling chicken halves, impressing friends and family at your next cookout.

    And if you’re looking for more chicken recipes, you won’t want to miss my Chicken category. Lots of great recipe ideas, including the most popular chicken recipe on my site; Chicken Macaroni Salad. It’s easy and it’s fab. 

    More Easy Grilled Chicken Recipes
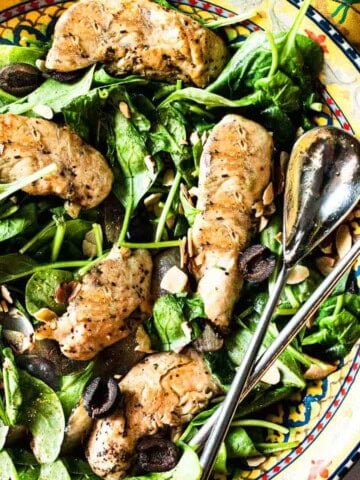
    • Maple syrup glazed grilled chicken breast kabobs served over spinach greens.
      Maple Syrup Glazed Grilled Chicken Breast Kabobs
    • Wilted spinach salad with grilled chicken.
      Wilted Spinach Salad With Grilled Chicken
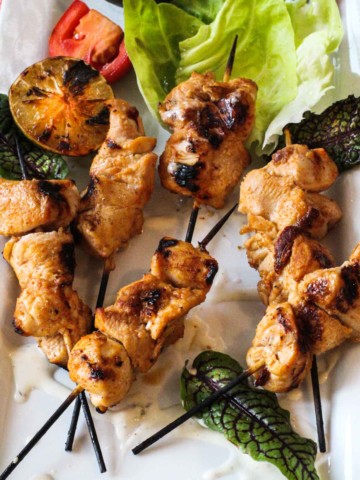
    • easy grilled chicken kebabs on a platter garnished with lettuce
      Ancho Chile Lime Marinade for Grilled Chicken
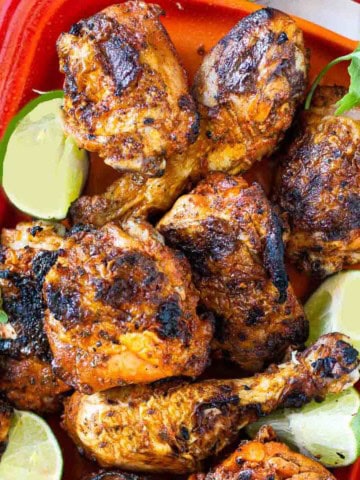
    • Pollo Asado recipe.
      Authentic Pollo Asado Recipe (Mexican Grilled Chicken)
    Grilled chicken halves served with potato and a salad.
    Print Recipe
    5 from 2 votes

    Juicy Grilled Chicken Halves: The Ultimate Backyard Guide

    Grilling a whole chicken is easier than you'd think. With an irresistible bbq chicken rub and a zesty basting sauce, this recipe teaches you how to use a grilling technique to insure even cooking for both white and dark meat. How to make grilled chicken at home, perfect every time.
    Prep Time20 minutes mins
    Cook Time1 hour hr 10 minutes mins
    Total Time1 hour hr 30 minutes mins
    Course: Main Course Chicken
    Cuisine: American
    Servings: 6
    Calories: 573kcal
    Author: Lea Ann Brown

    Ingredients

    • 1 whole chicken cut in half (backbone removed)
    • FOR THE DRY RUB
    • 1 Tablespoon seasoning salt any brand
    • 1 teaspoon paprika
    • ½ teaspoon kosher salt
    • ¼ teaspoon onion powder
    • ¼ teaspoon chile powder
    • ⅛ teaspoon ground black pepper
    • ⅛ teaspoon ground turmeric
    • ⅛ teaspoon garlic powder
    • ⅛ teaspoon ground cumin
    • FOR THE BASTING SAUCE
    • ½ cup apple cider vinegar
    • 1 Tablespoon canola oil
    • ½ teaspoon kosher salt
    • ¼ teaspoon turmeric
    • Juice of one lemon
    • 1 drop liquid smoke no more than a drop, it’s concentrated, optional
    • ½ cup BBQ Sauce your favorite brand

    Instructions

    • Cut the chicken in half by removing back bone. Your butcher can do this, or cut along side each side of the back bone and remove. This will avoid trying to grill different sized pieces of chicken.
    • Using paper towels, pat the chicken dry.
    • Next take your fingers and loosen the skin in as many places as you can. Take the dry rub and rub all over chicken and under the skin. Do this three hours before grilling. And bring the chicken to room temperature before grilling.
    • Heat grill to 500 degrees. Lower heat to 375. I turn off the middle burner and cook chicken in the middle of the grill.
    • Place both sides of chicken on grill. Using a grill brush, baste with basting sauce. Cover grill and cook for 15 minutes. Repeat this step 4 times for total cook time of 1 hours. Turning the chicken each time you baste.
    • When the hour is up, generously coat one side of chicken with your favorite BBQ or grilling sauce. Close lid and cook for 2 minutes, turn chicken and repeat. Cook two more minutes with grill lid closed.
    • Remove from grill and let sit 10 minutes before serving. This will help the juices redistribute and keep the meat tender and moist.
    • Using a sharp knife, separate the breasts from the leg portions and serve.

    Notes

    Tip:How To Choose A Whole Chicken For The Grill.Look for a fryer chicken or a broiler chicken. A weight of 4 – 5 pounds is a good size for grilling.
    Watch that grill temperature closely and don’t let it fall below 375 degrees. Keeping that grill temperature hot will crisp that skin. Crispy skin means that the meat inside will stay moist and tender.
    For the basting sauce, use a neutral flavored oil with a higher smoking point. Canola oil or grape seed oil is a good choice here.
    When in doubt, always use an instant read thermometer to make sure the chicken is properly cooked. Insert the probe between in the joint between the leg and the thigh. 165 degrees is recommended for poultry.
    Cutting the chicken in half allows you to lay the chicken flat. It exposes the legs and thighs, which will cook faster than the breast. This means the dark meat will be cooked at the same time as the white meat. With each coming out juicy and tender.

    Nutrition

    Calories: 573kcal | Carbohydrates: 30g | Protein: 36g | Fat: 33g | Saturated Fat: 9g | Cholesterol: 143mg | Sodium: 3198mg | Potassium: 559mg | Fiber: 1g | Sugar: 24g | Vitamin A: 710IU | Vitamin C: 3.5mg | Calcium: 45mg | Iron: 2.4mg

    If you liked this recipe, please leave a star ⭐⭐⭐⭐⭐ rating in the recipe card below and leave a comment. I always appreciate your feedback and hearing how everything went.

    And, don’t forget to subscribe to my newsletter for more delicious recipes and cooking tips. Make it a delicious day … every day.

    This recipe was adapted from my friend Cathy at Noble Pig.

    BBQ Chicken Rub for BBQ Grilled Chicken Halves … It’s what’s for Summer.
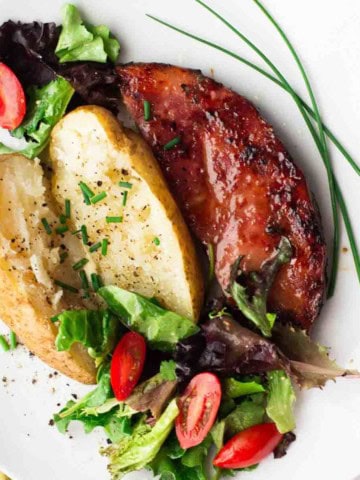
    Grilled Ham Steak Brown Sugar Horseradish Glaze

    July 3, 2021 By Lea Ann Brown 32 Comments

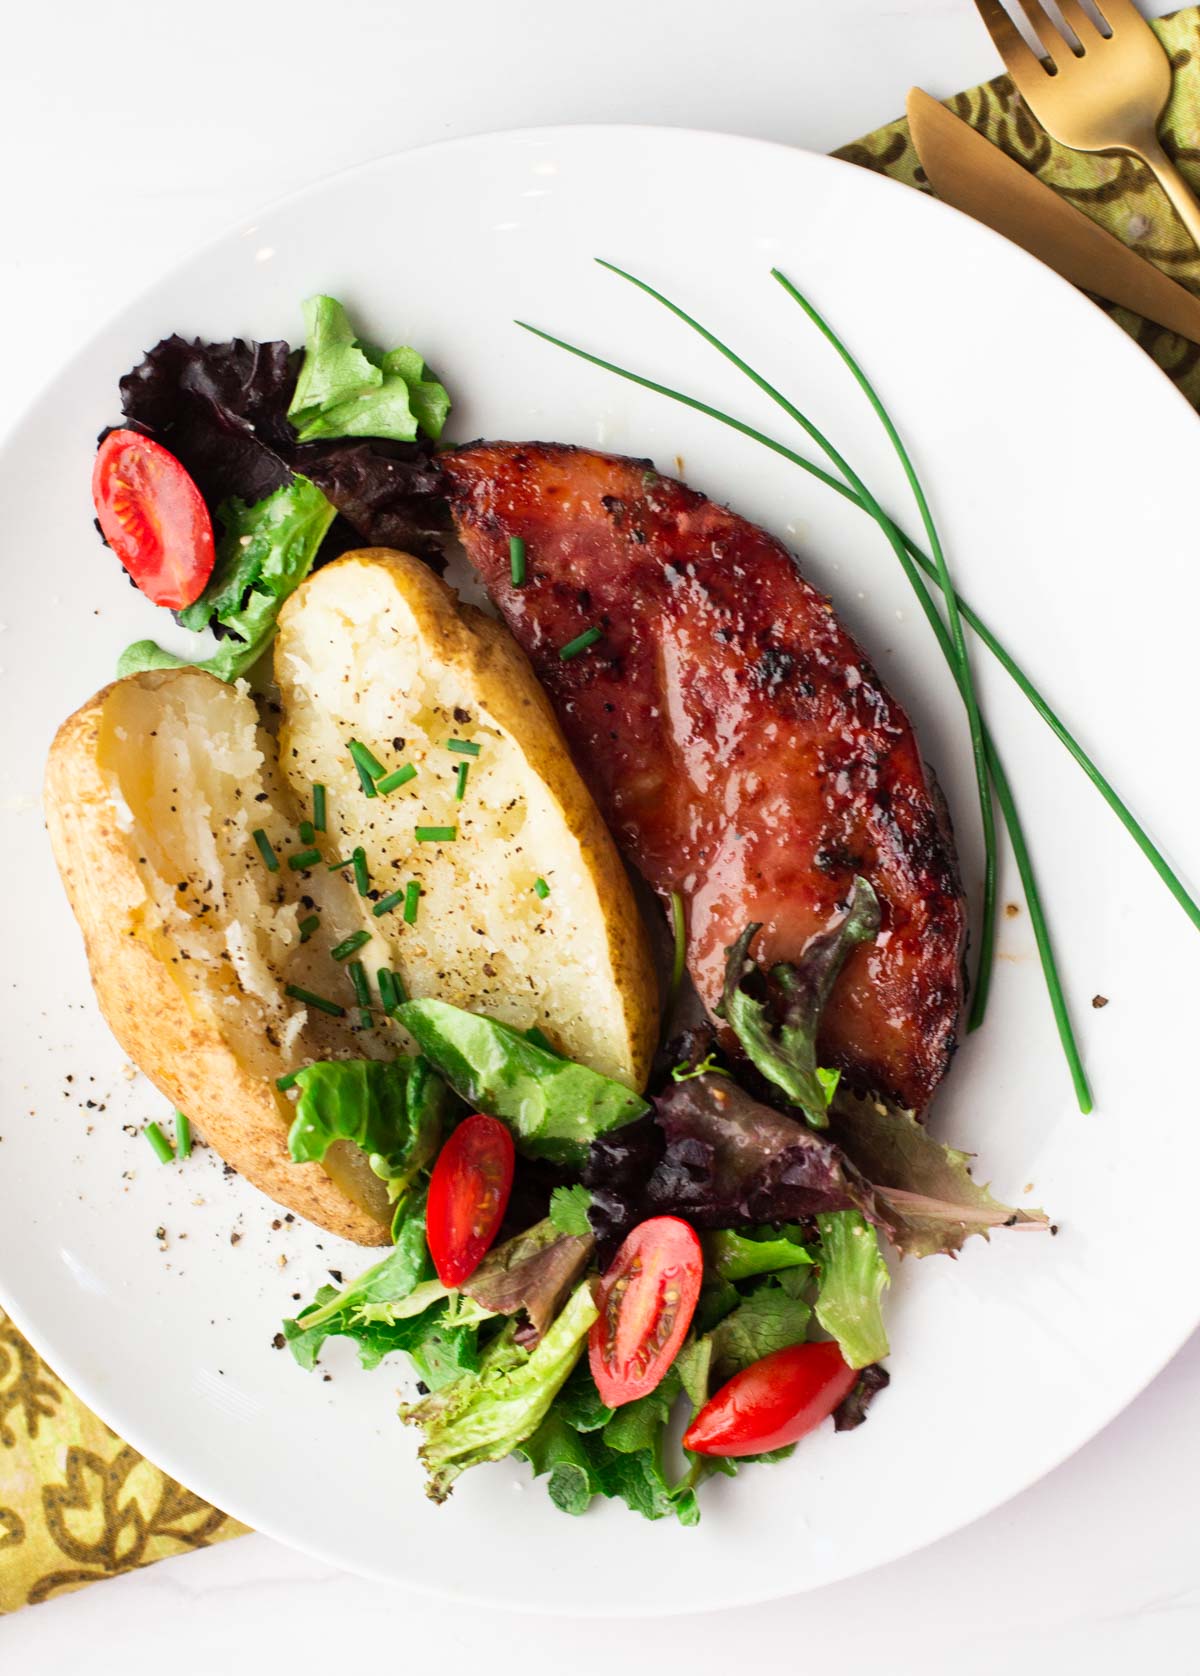
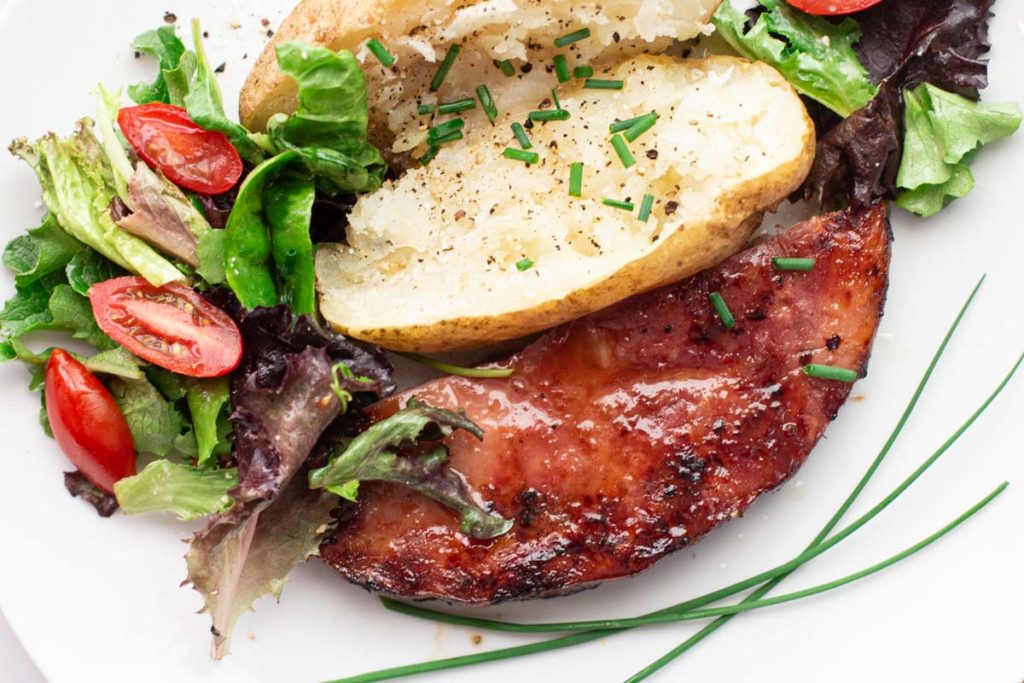
    Grilled ham steak served with a salad and baked potato.

    When firing up that grill for your next meal, don’t forget about a grilled ham steak. Basted with a brown sugar glaze, this is a 4 ingredient meal that’s ready in under 30 minutes. Grilling a ham steak is a great choice for either breakfast or a quick dinner. Let’s take a look at this super easy recipe.

    Glazed grilled ham steak with baked potato and lettuce salad garnished with chives

    Quick Look: Grilled Ham Steak

    • 🧁 Serves: 4
    • ⭐ Features: Easy✓ Smoky ✓ Quick ✓
    • ⌛️ Prep Time: 10 minutes
    • 🍪 Cook Time: 20 minutes
    • 🕑 Total Time: 30 minutes
    • 👩‍🍳 Skill Level: Beginner
    • 🏆 Why make THIS version? With a glaze of brown sugar, horseradish and lemon juice, Grilled Ham Steak never had it so good.

    SUMMARIZE AND SAVE THIS POST ON

    ChatGPT
    Google AI
    Perplexity
    Claude
    Add As a Trusted Google Source

    Do you ever purchase those packaged ham steaks at the grocery store?

    You can find them in the meat department, next to the fresh pork cuts and they usually weigh in at a pound. They’re lean, delicious and a nice choice for a quick meal. And grilling a ham steak is super easy.

    What Is A Ham Steak?

    A ham steak is a thick, cross-cut slice of ham, usually cut from a whole cured ham roast. Think of it as a "steak-style" portion of ham that's ready to cook quickly.

    Key things to know

    • Pre-cooked: Most ham steaks you buy are already fully cooked (cured and often smoked), so you're just reheating and adding flavor.
    • Cut style: They're sliced about ½ to 1 inch thick from the leg of the pig.
    • Bone-in or boneless: Some include a small round bone in the center; others are fully boneless.
    • Quick to prepare: Since it's already cooked, it only takes a few minutes in a skillet, on the grill, or in the oven.

    How It Tastes

    Ham steak has that classic salty, smoky, slightly sweet ham flavor. Because it's thicker than deli ham, it's meatier and juicier, more like a main dish than a sandwich filling.

    Grab one next time you’re at the store, mix together this easy horseradish, brown sugar and lemon glaze. Ham steaks on the grill turns into a work of art and a flavor combo you’ll never forget.

    And with minimal cleanup. It’s a winner.

    I’ve had this recipe for the grilled ham steak for nearly thirty years. It’s a regular on our Summer grilling routine. And it’s even fun to grill for breakfast.

    Let’s take a look.

    Ingredients You’ll Need

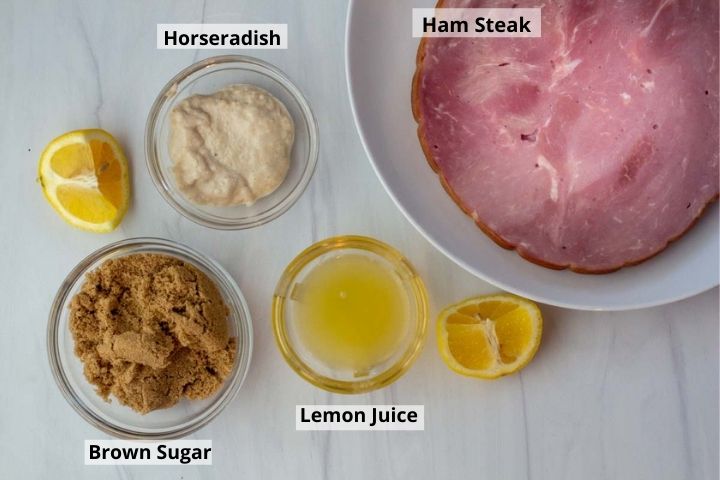
    Ingredients for grilling a ham steak
    • Ham Steak: A ham steak is simply a slice of ham cut from a whole ham roast. You can either purchase it with or without the bone. And they come cooked or uncooked. I’ve purchased Niman Ranch Uncured ham steak at Whole Foods and Sprouts, and less expensive Cooks and Kentucky Legend brands at King Soopers. They’re all very good.
    • Horseradish: I purchase creamed style horseradish for this recipe. Cream style is smoother in texture and milder in flavor than prepared horseradish, making it easier to blend for the glaze. Be careful not to purchase creamy horseradish sauce, which contains either sour cream or mayonnaise and seasonings. Save that for your Prime rib dinner.
    • Brown Sugar: Use either light brown sugar or dark brown sugar.
    • Lemon Juice: About 1 – 1 ½ lemons

    Step By Step Instructions – It’s So Easy

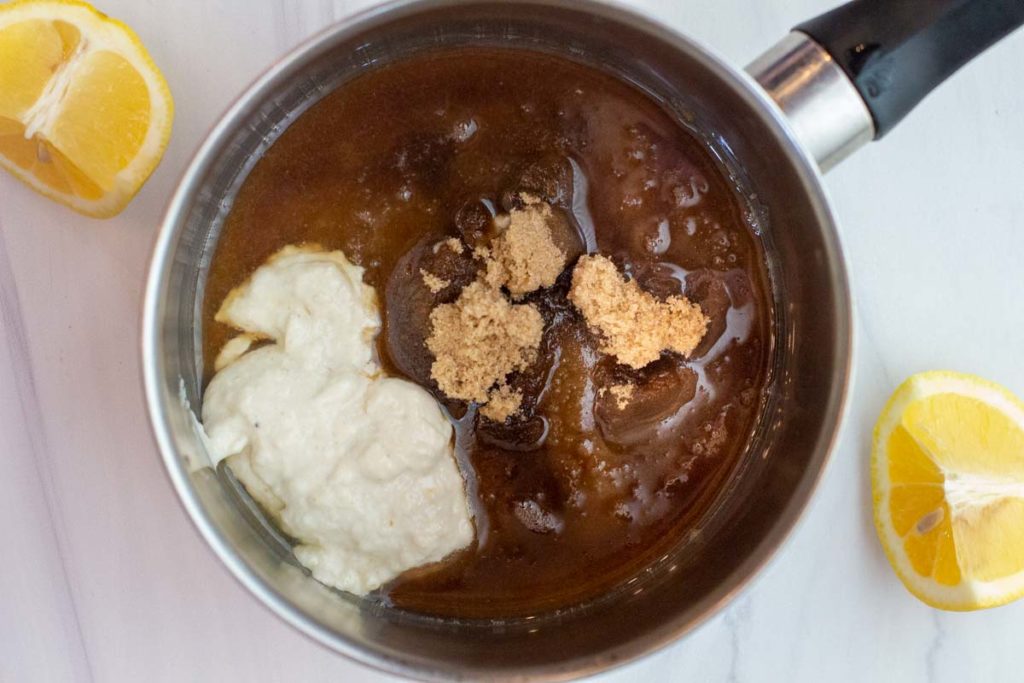
    Grilled ham steak glaze in a small sauce pan
    1. Step 1: Make The Brown Sugar Horseradish Ham Steak Glaze: Place the horseradish, brown sugar and lemon juice in a small saucepan.
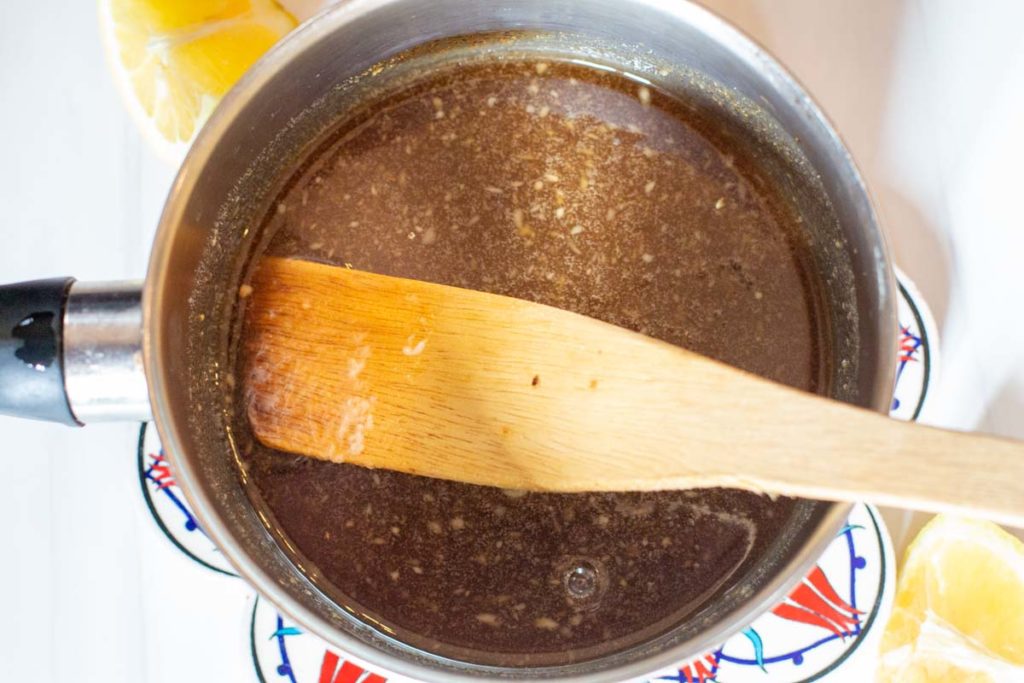
    Grilled ham steak glazed cooking in a small saucepan
    1. Step 2: Cook over medium heat until very warm, starting to simmer and well blended.
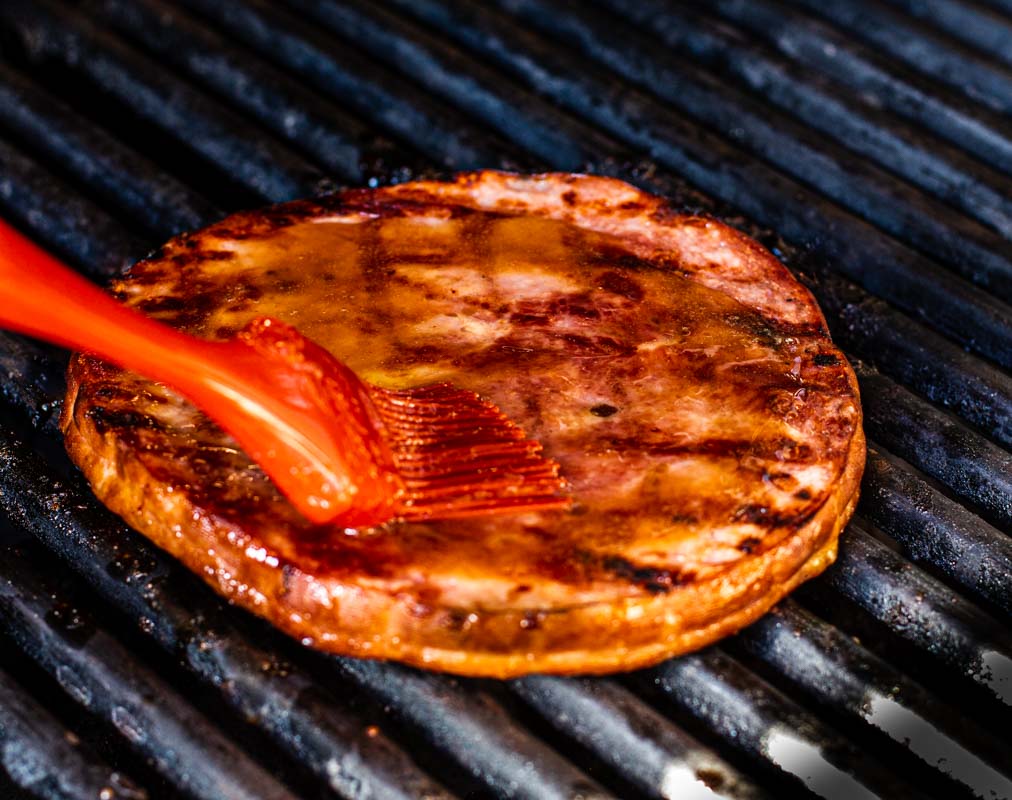
    cooking ham steak on the grill
    1. Step 3: How to grill a ham steak? It’s easy. Preheat your grill to 450 degrees. Turn the heat down to 350 degrees and add the ham steak. Cook about 4 – 5 minutes per side, basting with the glaze at least every minute.
    2. Step 4: Cut into portions and serve.

    Tips for Cooking Grilled Ham Steaks

    • I love grilling both bone-in and boneless ham steaks. However, look for bone-in ham steaks. They’re typically more tender and flavorful.
    • Pre-cooked ham steaks can be injected with a solution to keep them moist. With that said, that solution won’t keep the ham steaks from drying out on the grill. Pre-cooked ham steaks grill up fast, as soon as you see defined grill marks, they’re ready to eat.

    More Sauce Options

    Grilled Ham Steaks don’t have to live by a sweet horseradish sauce glaze. Here are some more options to glaze that ham.

    • Southwestern: Go Southwestern and baste it with a New Mexico specialty, Red Chile Sauce.
    • If you’re smack dab in the middle of peach season, baste the ham steak with Peach BBQ Sauce.
    • If you’re looking for rich sultry flavor, try this Balsamic Fig Glaze. It’s simply wonderful.

    A Question You Might Have

    Is Ham Steak Already Cooked?

    IMPORTANT: Please be aware that some ham steaks are not cooked when purchased. They must be cooked before eating and USDA recommends an internal temperature of 145 degrees. If the package indicates that the ham steak is fully cooked, reduce the grilling time to just until grill marks appear, the ham is glazed and heated through.

    What to Serve It With

    • My favorite thing to serve with this is my recipe for Amish Macaroni Salad. The flavors just seem to be a match made in heaven.
    • Potatoes are also a logical choice for a side dish for ham. In the photo you’ll see I’ve sided it with easy Crockpot Garlic Butter Baked Potatoes. Throwing a few potatoes in the crockpot earlier in the day, keeps this meal super easy once you’re ready to prepare dinner.
    • Another choice, if cooking this grilled ham steak for breakfast, try Cast Iron Skillet Potatoes. A very popular recipe on my site.
    • And nothing defines Summer better than a good old fashioned Old Fashioned Potato Salad.
    • If you’ve got left overs, simply chop into cubes the next morning and mix it into scrambled eggs or an omelette. The flavor of the glazed ham elevates eggs to a new level.

    Easy Grilled Ham Steak

    Grilled ham steak with baked potato and tossed salad

    This easy grilled ham steak recipe is great for a quick and delicious breakfast or dinner. And you’re going to love the ease in grilling a ham steak and this recipe for the grilled ham steak glaze.

    And if you’re interested in grilled breakfast recipes, take a look at this Ina Garten recipe for Grilled Breakfast Sausage Hotdogs. Delicious! And Fun.

    And don’t miss my Breakfast Category, you’ll find lots of eye opening recipes like the most popular on my site for Southwestern Hatch Green Chile Quiche with Bacon.

    Explore More Recipes Using Ham Steak

    • Ham and cheese quesadilla made with corn tortillas and topped with a fried egg.
      Crispy Ham and Cheese Corn Tortilla Quesadillas
    • Ham salad sandwiches with lettuce topped with a pickle.
      Old Fashioned Ham Salad For Sandwiches
    • Fried ham and potaotes (country potatoes) on a white platter.
      Country Potatoes With Ham
    • Ham Hash with mustard cream sauce topped with sliced hard boiled eggs.
      Ham Hash with Mustard Cream Sauce

    If you liked this recipe, please leave a star ⭐⭐⭐⭐⭐ rating in the recipe card below and leave a comment. I always appreciate your feedback and hearing how everything went.

    And, don’t forget to subscribe to my newsletter for more delicious recipes and cooking tips. Make it a delicious day … every day.

    Grilled ham steak served with a salad and baked potato.
    Print Recipe
    5 from 5 votes

    Easy Grilled Ham Steak with Tangy Ham Steak Glaze

    The grilled ham steak glaze is going to knock your socks off. Ready in less than 30 minutes.
    Prep Time10 minutes mins
    Cook Time20 minutes mins
    Total Time30 minutes mins
    Course: Breakfast Recipes
    Cuisine: American German
    Servings: 4
    Calories: 360kcal
    Author: Lea Ann Brown

    Ingredients

    • 1 cup brown sugar packed
    • ⅓ cup creamy horseradish or prepared horseradish
    • ¼ cup lemon juice 1 – 1 ½ lemons
    • 1 pound fully cooked ham steak fully cooked, ½ inch thick

    Instructions

    • For The Grilled Ham Steak Glaze
    • In a small saucepan mix together brown sugar, horseradish and lemon juice.
    • Over medium heat, heat the glaze to where it's just coming to a simmer, stirring so the ingredients are well blended.
    • For The Grilled Ham Steaks
    • Heat your grill to 450 degrees. Turn heat down to 350 degree. Place the ham steak on the grill and cook 4 – 5 minutes per side.
    • Using a brush, baste both sides of ham with the glaze often. Grill over medium-hot until heated through and well glazed.
    • Cut into portions and serve immediately.

    Notes

    IMPORTANT: Please be aware that some ham steaks are not cooked when purchased. They must be cooked before eating and USDA recommends an internal temperature of 145 degrees.
    If the package indicates that the ham steak is fully cooked, reduce the grilling time to just until grill marks appear, the ham is glazed and heated through.
    • Ham Steak: A ham steak is simply a slice of ham cut from a whole ham roast. You can either purchase it with or without the bone. I’ve purchased Niman Ranch Uncured ham steak at Whole Foods and Sprouts, and less expensive Cooks and Kentucky Legend brands at King Soopers. They’re all very good.
    • Horseradish: I purchase creamed style horseradish for this recipe. Cream style is smoother in texture and milder in flavor than prepared horseradish, making it easier to blend for the glaze. Be careful not to purchase creamy horseradish sauce, which contains either sour cream or mayonnaise and seasonings. Save that for your Prime rib dinner.

    Nutrition

    Calories: 360kcal | Carbohydrates: 57g | Protein: 23g | Fat: 5g | Saturated Fat: 2g | Polyunsaturated Fat: 1g | Monounsaturated Fat: 2g | Cholesterol: 51mg | Sodium: 1539mg | Potassium: 507mg | Fiber: 1g | Sugar: 55g | Vitamin A: 1IU | Vitamin C: 48mg | Calcium: 62mg | Iron: 2mg

    Zesty Grilled Ham Steaks …It’s What’s for Breakfast.

    Chicken And Sweet Potato Soup

    June 30, 2021 By Lea Ann Brown 18 Comments

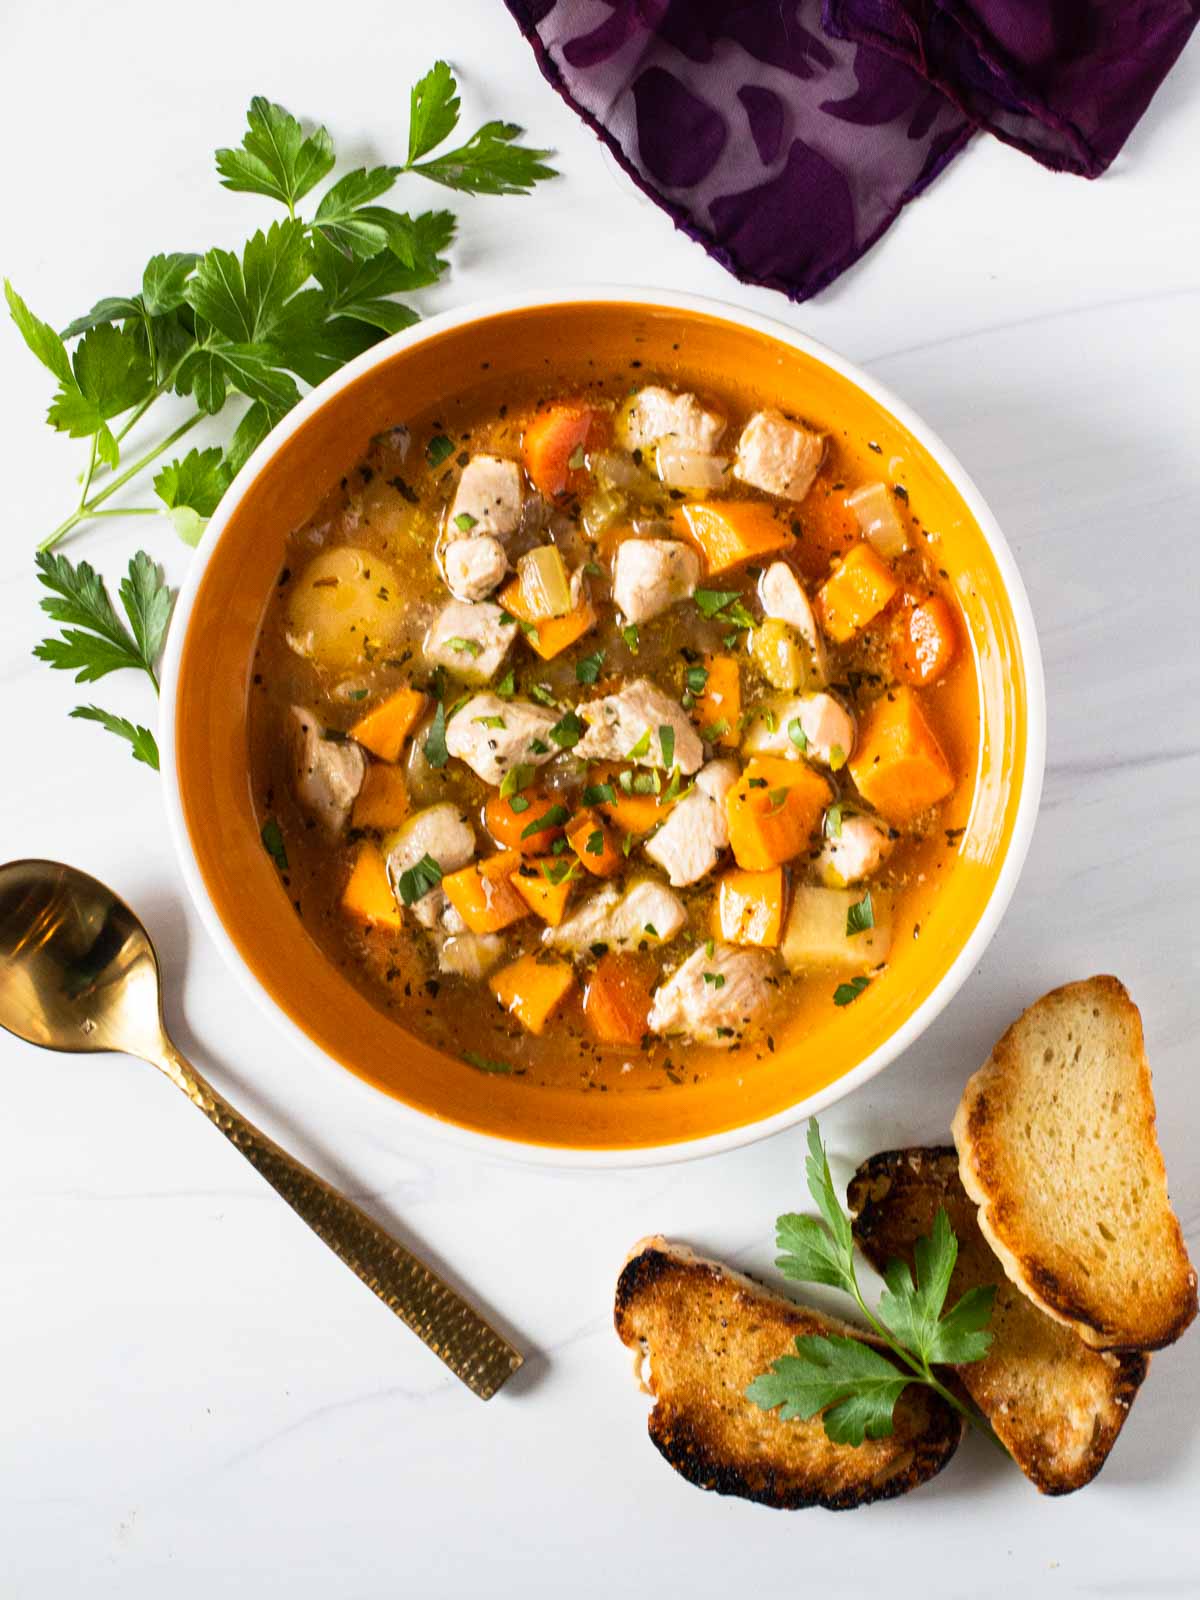
    Chicken sweet potato soup served with bread.

    Chicken soup with sweet potatoes is simple, hearty, healthy, gluten free, Whole 30 and paleo friendly. Inexpensive and on the table in about 30 minutes. Keeping the seasonings simple allow the sweet, salty and savory flavors shine. Simply stated, you’re going to love this comfort food soup.

    When you’re craving something warm and comforting, take a look at my recipe for White Wine Chicken and Vegetable Soup, it’ a delicious way to feed the family.

    Chicken soup with sweet potatoes garnished with fresh parsley and toasted baguette

    About This Recipe and Why It Works

    Chicken soup has a way of showing up whenever comfort is on the menu, but adding sweet potatoes takes it in a completely different direction. They add a natural sweetness that balances savory chicken while creating a heartier bowl than traditional chicken vegetable soup. Every spoonful feels satisfying without being heavy, making this the kind of meal you’ll crave when the weather cools or a busy weeknight calls for something nourishing.

    What You Can Expect From This Recipe

    • Ready in about 30 minutes.
    • Naturally hearty and brothy.
    • Loaded with traditional soup vegetables.
    • Great for meal prep.
    • Comfort food that’s filling but not overly rich.
    • Simply seasoned. Dill, basil and tarragon come together for a simple yet delicious flavor combo.

    What Makes This Recipe Different?

    • My recipe contains both carrot and parsnip.
    • Perfect cook time instructions so sweet potatoes don’t become mushy.
    • Layers of flavors without relying on a long simmer.
    • If you’re looking for an easy, wholesome dinner that’s packed with tender chicken, colorful vegetables, and cozy comfort, this recipe delivers exactly that.
    • Healthy: About 300 calories per serving.

    Key Ingredients You’ll Need

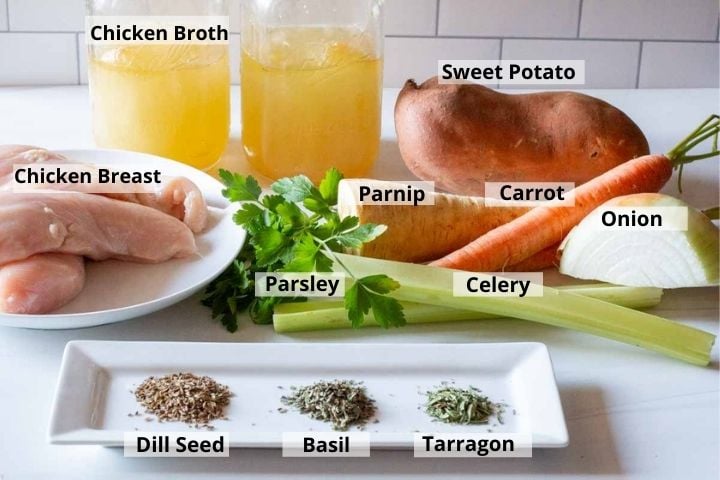
    Ingredients to make chicken soup with sweet potatoes
    • Chicken Broth: Homemade is always best, but canned or boxed will work just fine.
    • Sweet Potato: 1 medium to large. Creamy sweet potato adds such a beautiful layer of flavor and texture to this soup. You won’t want to put your spoon down.
    • Parsnip and Carrot: 1 each, peeled and sliced
    • Spices: Dill seed, basil and tarragon.
    • Chicken Breast: Boneless, skinless and chopped.

    Recipe Swaps and Substitutions

    • Parsnip: Parsnip and carrots have a similar flavor profile. With parsnip having a stronger and less sweet flavor. If you don’t have parsnip, just add another carrot. However, ditching the carrot and adding another parsnip would be a stronger flavor decision that you might not like.
    • Chicken: Boneless skinless chicken thighs would be a great substitution for the chicken breast. And want to make this easy chicken sweet potato soup even easier? Use left over rotisserie chicken. Just add it in the end and let it heat through.
    • Spices: I’ve also made this using two teaspoons of my special soup spice mix. It’s a glorious riff on flavor.
    • Butternut Squash: Try swapping out butternut squash for the sweet potatoes. It will actually save you a few calories.

    How To Make Sweet Potato Chicken Soup

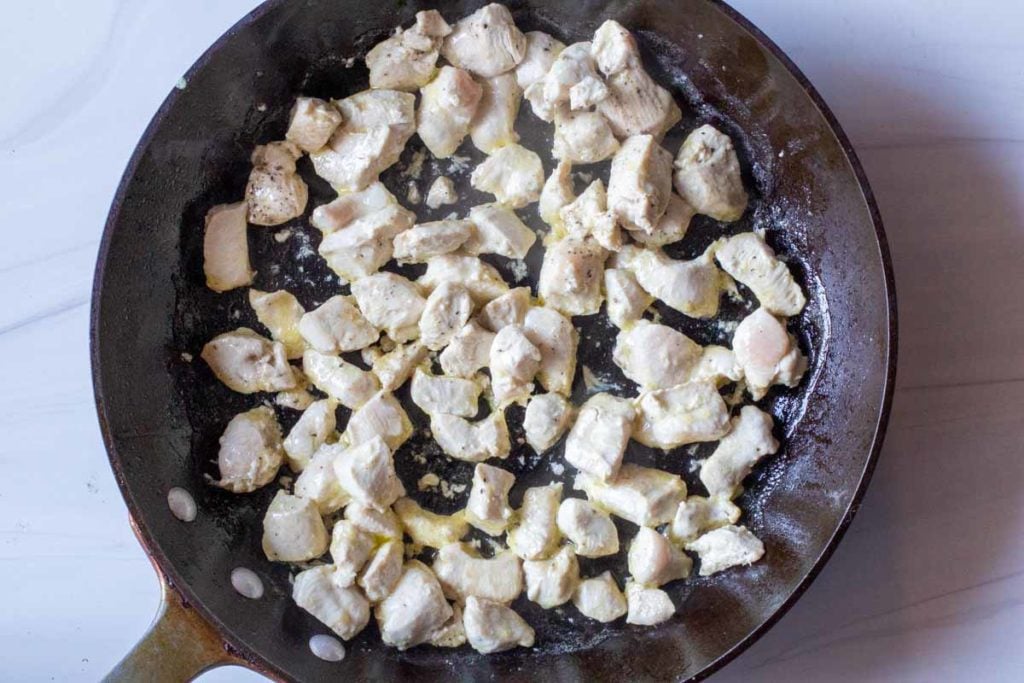
    sauteeing chicken breast in a large black skillet
    1. Step 1: Start by cutting the chicken into bite sized pieces. Heat a pan over medium high heat. Once the pan is hot, add olive oil. Once the olive oil is shimmering and hot, add the chicken pieces and saute them until just starting to brown. Remove from heat and set aside.
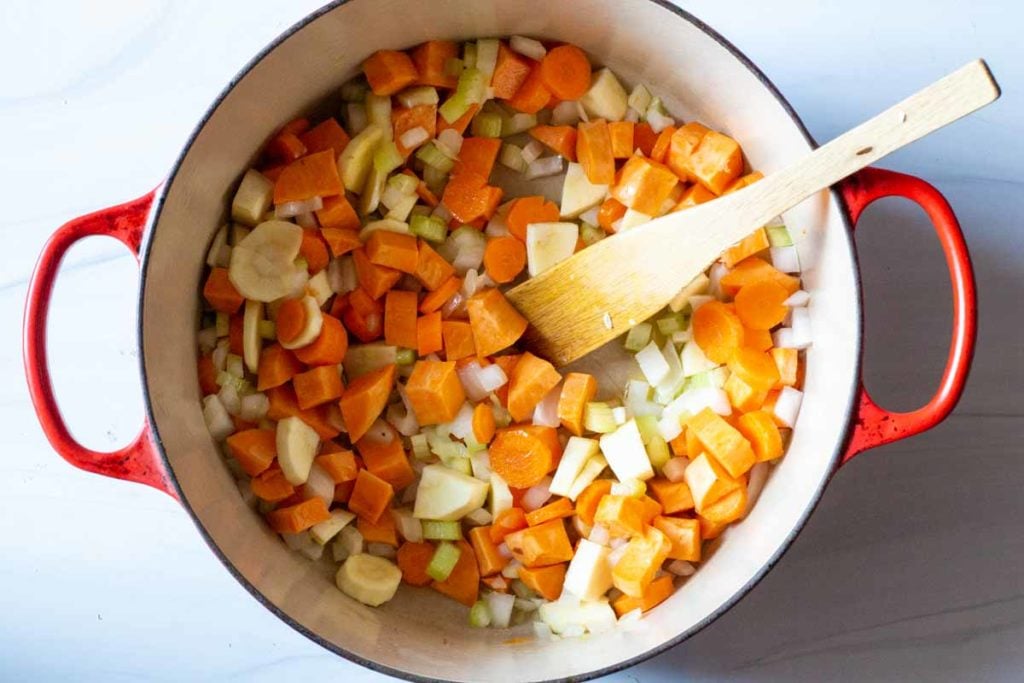
    Sauteeing carrots, celery, onion, sweet potato and parsnip in a red le creuset dutch oven
    1. Step 2: Cook the vegetables: Heat a Dutch oven over medium high hat, add oil and once the oil is hot, add the chopped vegetables and sweet potato, and sautee for about 10 minutes, or until they’re just starting to smell flavorful and just starting to brown. This will bring out the sweetness in each and every piece. We’re actually making a chunky version of Mirepoix, which is a classic combination of aromatics used for successful soups and braised recipes.

    Pro Tip: Recipes like this are a perfect opportunity to concentrate on honing your knife skills. Cutting the parsnip, carrot, celery and sweet potato into like sizes will insure even cooking, a smart appearance and pride in technique.

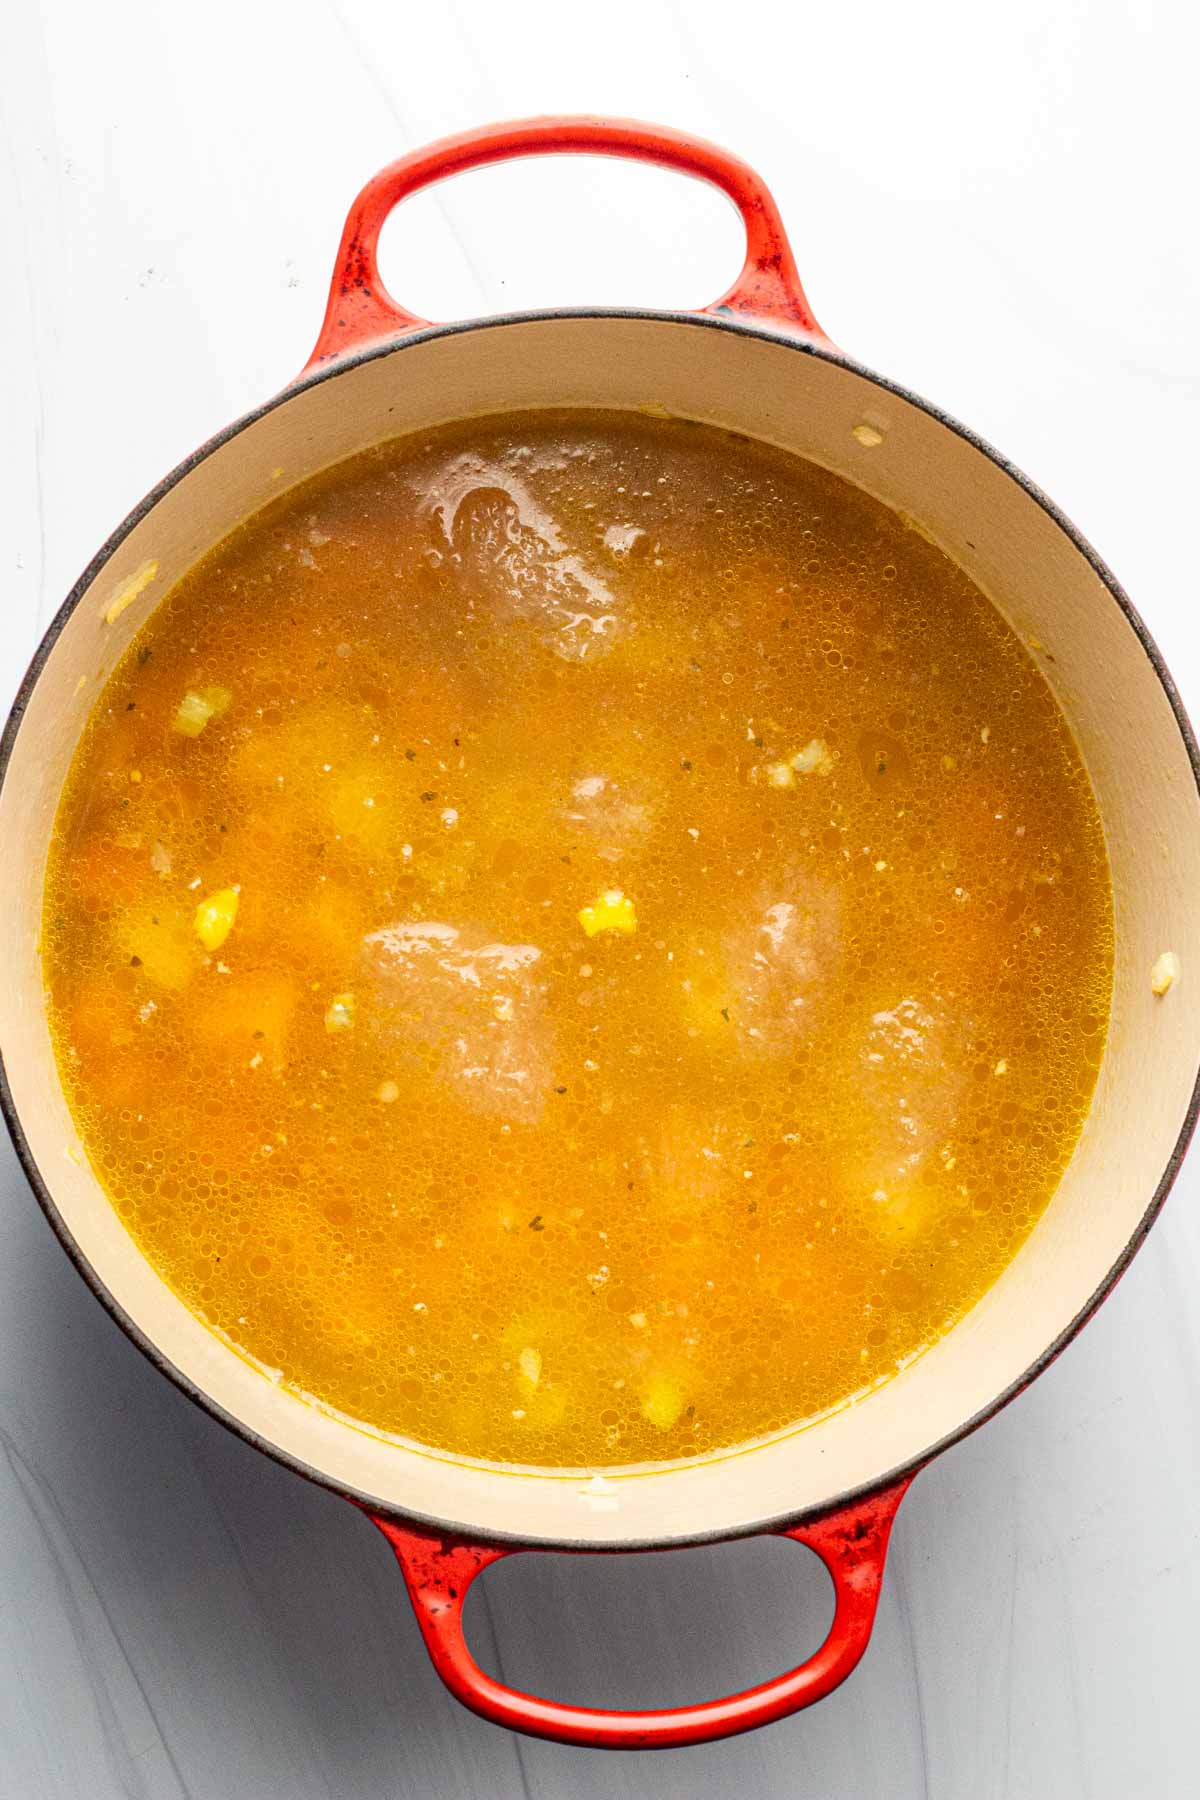
    Adding chicken broth to chicken soup with sweet potatoes
    1. Step 3: Add the chicken broth to the pot of vegetables.
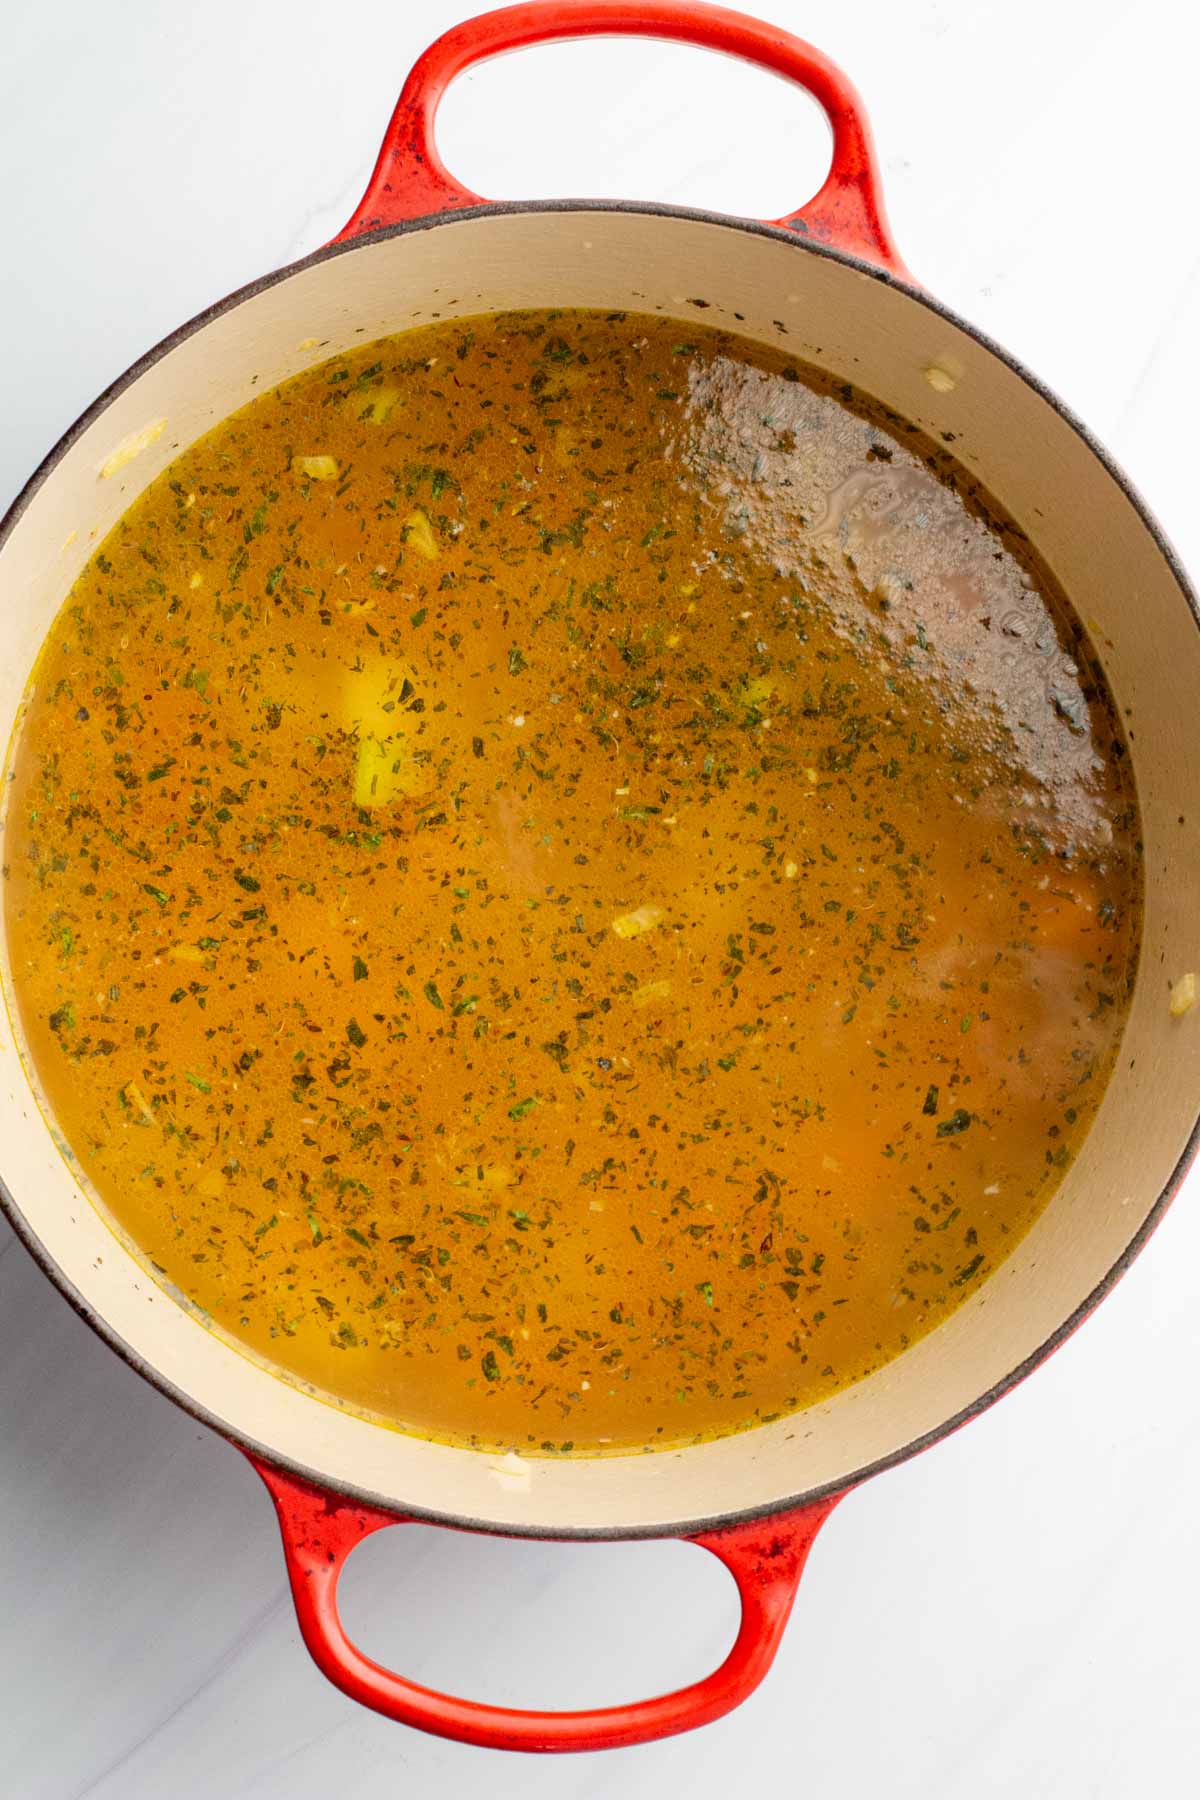
    Adding spices to sweet potato chicken soup.
    1. Step 4: Add seasonings and simmer on low for about 20 minutes. Add in chicken and cook until chicken is nice and hot. It’s ready to serve.

    My Tested Method For Perfect Texture

    • Dice sweet potatoes evenly.
    • Don’t boil aggressively, simmering the soup is important here.
    • Add cooked chicken near the end and it won’t become rubbery.
    • Taste before serving, add more salt if needed.

    I tested this soup using both chicken breast and thighs. While both worked well, thighs stayed noticeably juicier after reheating, making them my favorite if you’re planning leftovers.

    Tips For Success

    • Don’t skip sauteeing the chicken. And don’t over-crowd the pan when doing so. A hot skillet will brown the chicken a bit which will add flavor. We call this Maillard Reaction. It’s basically the chemical reaction that browns foods which adds flavor. Think about toast, your humble toaster may be king of browning.
    • I learned years ago that sweet potatoes continue cooking long after the burner is turned off. I now stop cooking them when they’re just barely tender so they finish naturally in the hot broth instead of falling apart.
    • Celery Leaves: When chopping the celery use some of those tender leaves. They’re nutritious and add a pop of pure celery flavor. Just rough chop them and throw them in the soup when you add the dry seasonings.

    Variations

    • Spinach: Got some fresh spinach you need to use. Trim the stems and toss some in towards the end of cooking. Those leaves will soften quickly and add even more vitamins to this already healthy bowl of soup.
    • Noodles: Make this a chicken noodle soup by adding some quick cooking egg noodles. They only take about 8 minutes to cook, so add them towards the end of the cooking time.
    • Chicken Soup with Potatoes: Switch out those sweet potatoes for white potatoes. I’d recommend using Yukon Gold. They’re not as starchy as Russet and will hold their shape better.
    • Use a Rotisserie Chicken. To save time, you can use the meat from a rotisserie chicken. Simply add it about the last 10 minutes of cooking time. Enough to heat the meat and bring some of that famous rotisserie flavor to the soup.
    • Canned Beans: To make this even heartier and keep it healthy, add a can of cannellini beans, drained and rinsed. Add them at the same time you add the cooked chicken.

    What To Serve It With

    • Soup and bread are a great combo. My recipe for Sweet Oatmeal Molasses Bread is a good choice here. Cheesy Cornbread is also a popular choice.
    • I serve this easy recipe for Pan Fried Biscuits with a lot of my soup recipes. Super easy, flavorful and popular.
    • Soup and salad are a traditional combo. Take a look at my recipe for Blue Cheese Wedge Salad. A unique version of a classic.

    Storing and Freezing

    • Soup is one of those meals that always tastes better the next day. This chicken sweet potato soup is great for leftovers and will keep in the fridge in an air-tight contained for about 4 – 5 days.
    • It’s also one of those dishes that freezes well. Just let the soup cool and store in the freezer for about 4 months. Using either sweet potatoes or white potatoes will freeze well.
    • Reheat stove-top or in the microwave. If cooking from frozen leftovers, let the soup thaw in the refrigerator overnight.

    Questions You Might Have

    Should Sweet Potatoes Be Peeled?

    You do not have to peel sweet potatoes. The skin is completely edible, full of fiber and nutrients.

    Is This Soup Gluten Free?

    Everything about this soup is naturally gluten free.

    Recipe for Chicken And Sweet Potato Soup

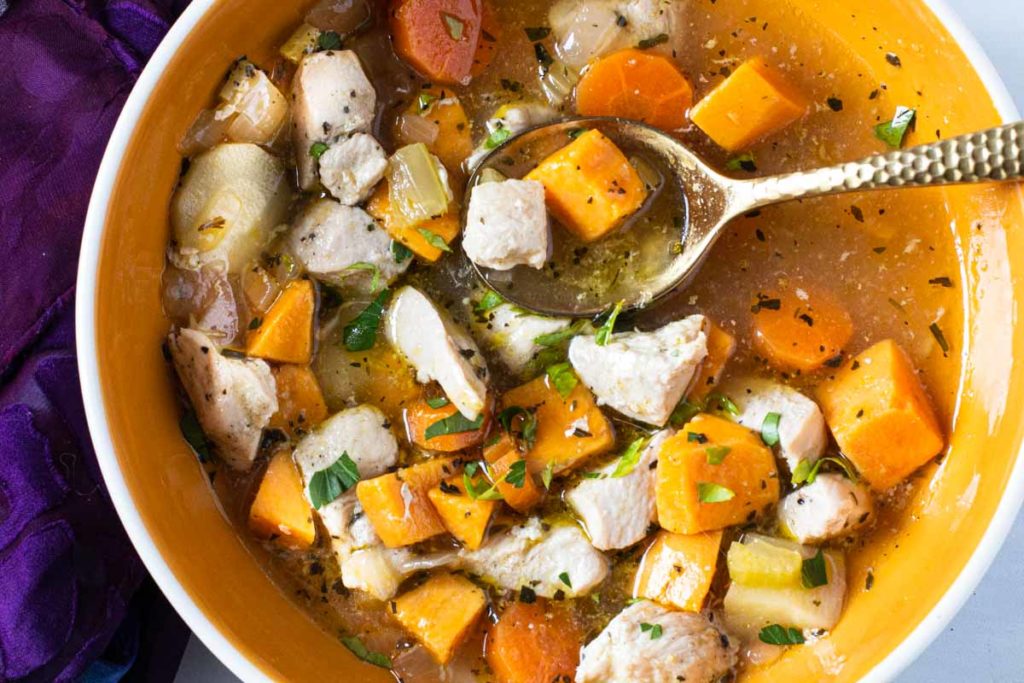
    Chicken soup with sweet potatoes in an orange bowl with a gold spoon

    Chicken soup with sweet potatoes is an easy and hearty dinner the whole family will love.

    And if you’re looking for even more soup recipes, check out my Soup Category. I consider soup recipes to be my expertise. You’ll find lots of mouthwatering soups and stews, including the most popular chicken soup recipes on my site for Sopa Ranchera, a Southwest Chicken Soup recipe that is simply amazing with flavor.

    This recipe was adapted from a Whole Foods Sweet Potato and Chicken Soup Recipe.

    More Healthy Chicken Soup Recipes

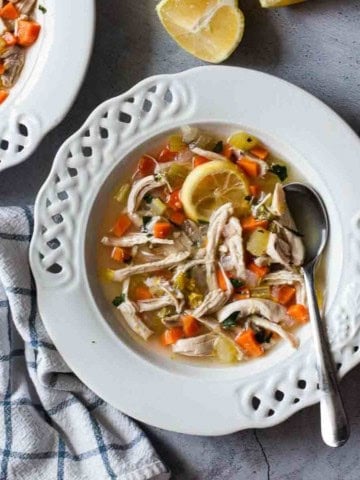
    • A bowl of lemon ginger chicken soup.
      Lemon Ginger Chicken Soup
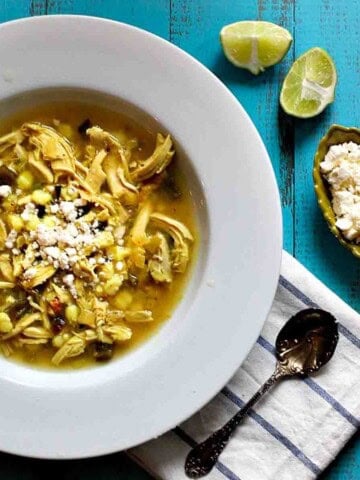
    • Chicken poblano soup with hominy.
      Chicken Poblano Soup With Hominy
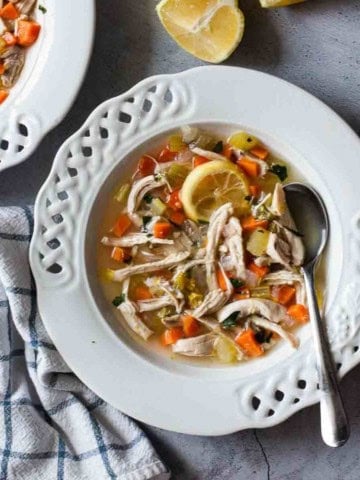
    • A bowl of chicken noodle soup with seasonings.
      Old Fashioned Hearty Chicken Noodle Soup
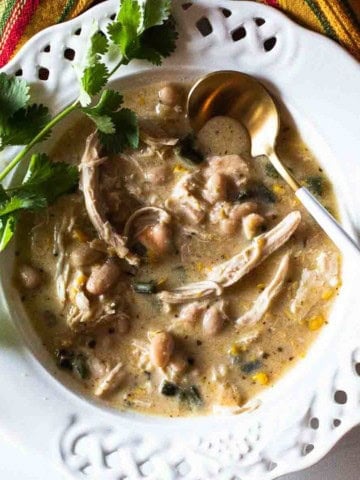
    • Rotisserie chicken soup served in a white bowl garnished with cilantro.
      Southwestern Rotisserie Chicken Soup – 30 Minute Weeknight Meal

    If you liked this recipe, please leave a star ⭐⭐⭐⭐⭐ rating in the recipe card below and leave a comment. I always appreciate your feedback and hearing how everything went.

    And, don’t forget to subscribe to my newsletter for more delicious recipes and cooking tips. Make it a delicious day … every day.

    Chicken sweet potato soup served with bread.
    Print Recipe
    5 from 3 votes

    Chicken and Sweet Potato Soup

    The ultimate comfort food. Adding chunks of sweet potato makes this classic Chicken and Vegetable Soup even more interesting with flavor.
    Prep Time15 minutes mins
    Cook Time35 minutes mins
    Total Time50 minutes mins
    Course: Soup, Stews and Chilis
    Cuisine: American
    Servings: 6
    Calories: 308kcal
    Author: Lea Ann Brown

    Ingredients

    • 2 Tablespoons Olive oil
    • 2 chicken breast cut into bite sized pieces
    • ½ medium onion chopped
    • 2 carrot peeled and chopped
    • 2 stalks celery sliced
    • 1 medium sweet potato peeled and small cubed
    • 1 medium parsnip peeled and chopped
    • 2 quarts chicken stock
    • 5 sprigs fresh parsley minced
    • 1 teaspoon dill seed
    • 1 teaspoon basil
    • ½ teaspoon tarragon
    • ½ teaspoon Kosher salt
    • ¼ teaspoon Fresh ground black pepper

    Instructions

    • In fry pan, saute chicken breasts in one tablespoon olive oil until almost done. Set aside.
    • In a Dutch oven, heat the remaining one tablespoon of olive oil in a large sauce pot over medium heat. Saute onion, carrots, celery, sweet potato and parsnips for 2 minutes to enhance the natural sugar in them. Add the parsley, dill, basil and tarragon and cook, stirring until fragrant. About 1 minute.
    • Add the stock and bring to a boil, lower heat to a simmer and cook for 20 minutes until all the vegetables are tender. Add in cooked chicken and cook until chicken is nice and hot. Season with salt and pepper to taste.
    • Spoon into soup bowls and garnish with chopped fresh parsley.

    Notes

    Tips For Success: 
    • Don’t skip sauteeing the chicken. And don’t over-crowd the pan when doing so. A hot skillet will brown the chicken a bit which will add flavor. We call this Maillard Reaction. It’s basically the chemical reaction that browns foods which adds flavor. Think about toast, your humble toaster may be king of browning.
    • I learned years ago that sweet potatoes continue cooking long after the burner is turned off. I now stop cooking them when they’re just barely tender so they finish naturally in the hot broth instead of falling apart.
    • Celery Leaves: When chopping the celery use some of those tender leaves. They’re nutritious and add a pop of pure celery flavor. Just rough chop them and throw them in the soup when you add the dry seasonings.

    Nutrition

    Calories: 308kcal | Carbohydrates: 27g | Protein: 25g | Fat: 11g | Saturated Fat: 2g | Cholesterol: 58mg | Sodium: 587mg | Potassium: 947mg | Fiber: 3g | Sugar: 9g | Vitamin A: 8833IU | Vitamin C: 9mg | Calcium: 55mg | Iron: 1mg

    Chicken and Sweet Potato Soup …It’s what’s for Dinner.

    Moroccan Apricot Lamb Tagine

    June 25, 2021 By Lea Ann Brown 3 Comments

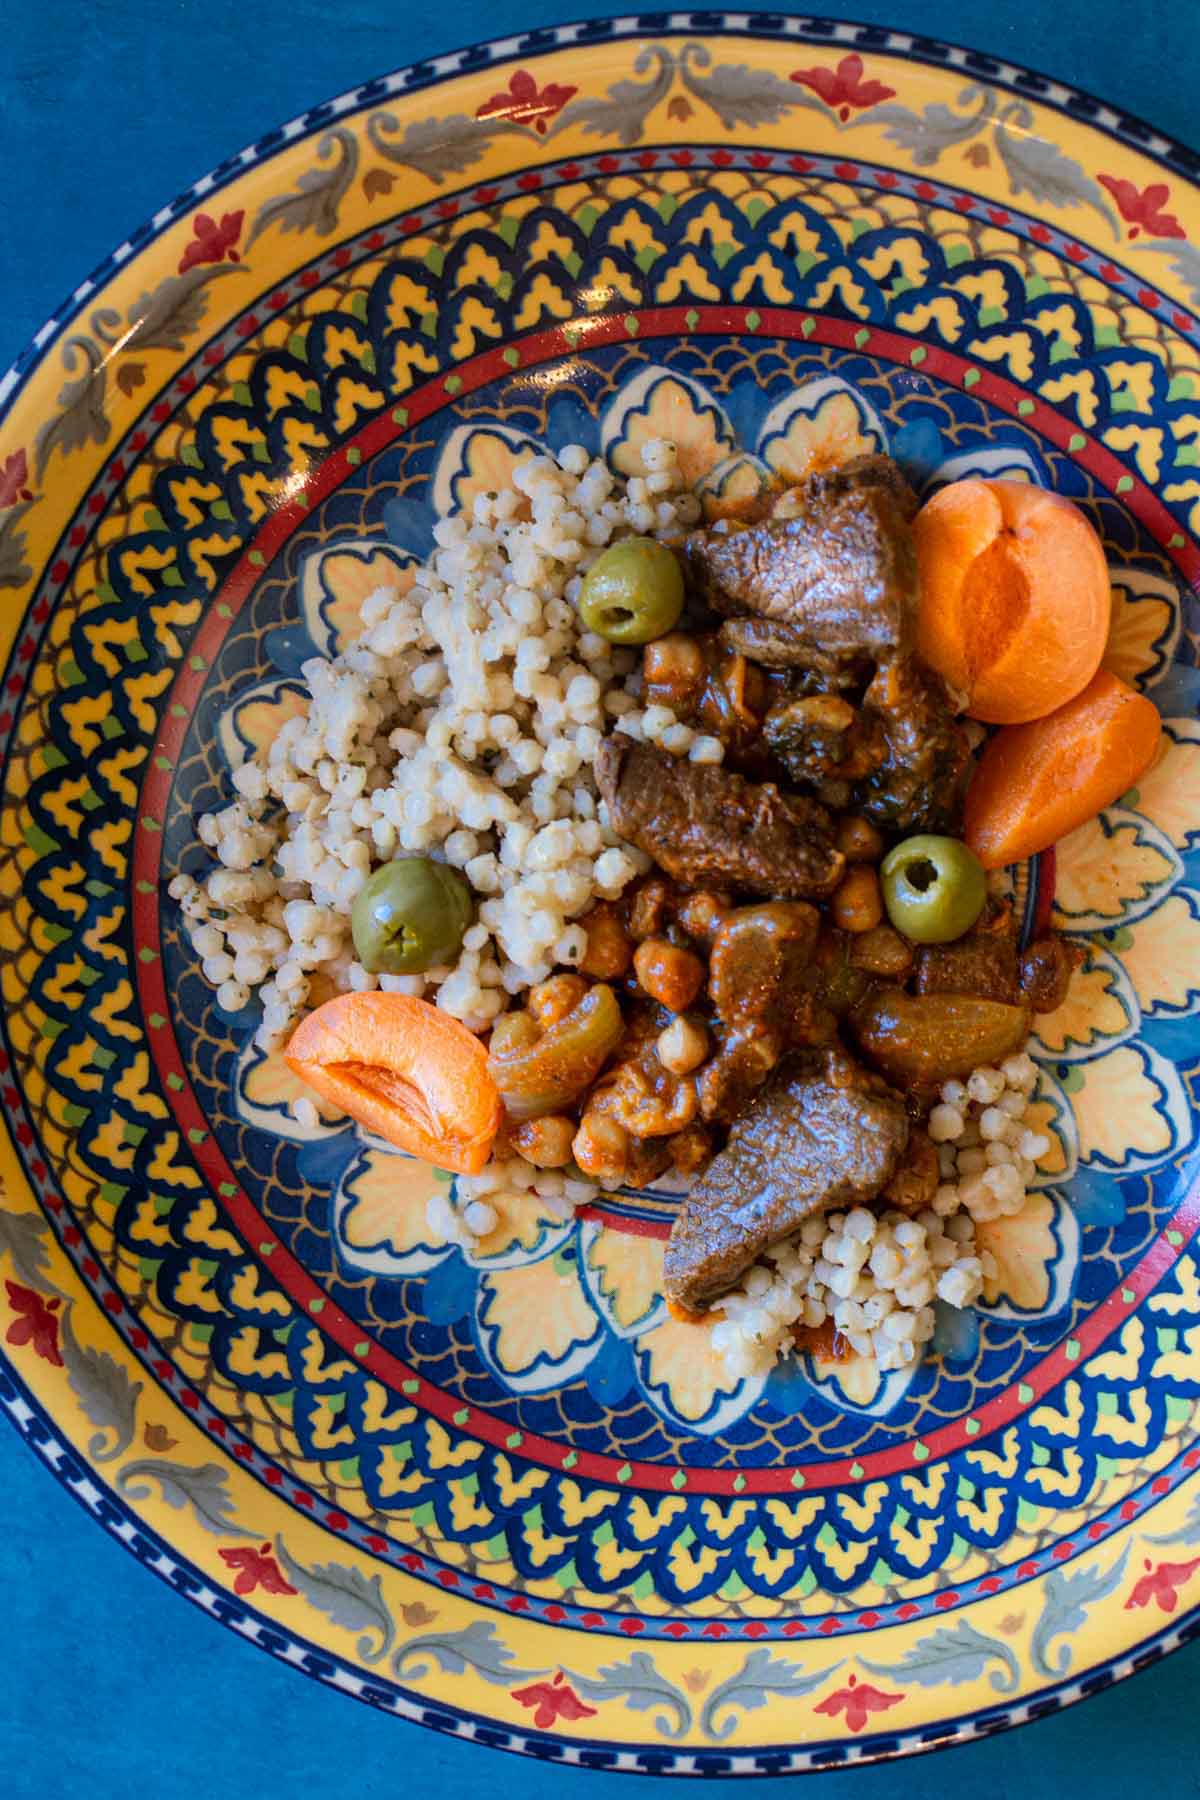
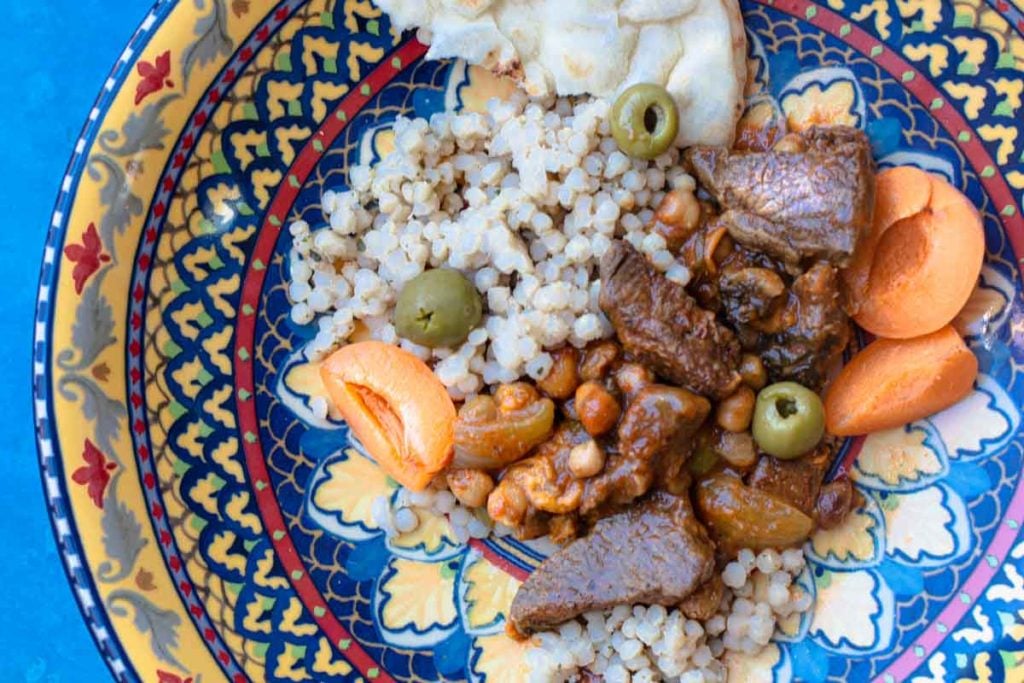
    Apricot lamb tagine served in a Moroccan platter.

    Apricot Lamb Tagine is a traditional Moroccan dish that gets its vibrant flavor from warm spices, sweet apricots and tender fall apart braised lamb.

    Apricot lamb tagine served in a Moroccan platter.

    The word “tagine” refers to both a Moroccan conical cooking vessel and an aromatic stew. A tagine is a circular cooking pot with a dome shaped cover that sits on the base. Tagine recipes are slow cooked stew type meals that are typically made with meat and combine sweet and savory ingredients for flavor.

    The basic recipe for Lamb Tagine with Apricots, that I’ve tweaked here and there from the first time I made it, originally comes from Williams and Sonoma, and is my favorite go-to lamb tagine recipe.

    The recipe consists of lamb pieces braised with spices, olives, apricots, chickpeas and raisins.

    The end result is a tagine recipe that’s incredible with flavor and most certainly entertainment worthy.

    Serve the lamb tagine over a bed of pearl couscous and you’ve got an incredible meal.

    Table of contents

    • What You’ll Need To Make Apricot Lamb Tagine
    • Ingredient Substitutes and Swaps
    • Step by Step Instructions
    • Apricot Lamb Tagine – Tips and FAQ’s
      • Storage and Freezing
      • Serving Suggestion
    • What Tagine Should I Buy?
    • Recipe for Apricot Lamb Tagine
      • Related Recipes

    What You’ll Need To Make Apricot Lamb Tagine

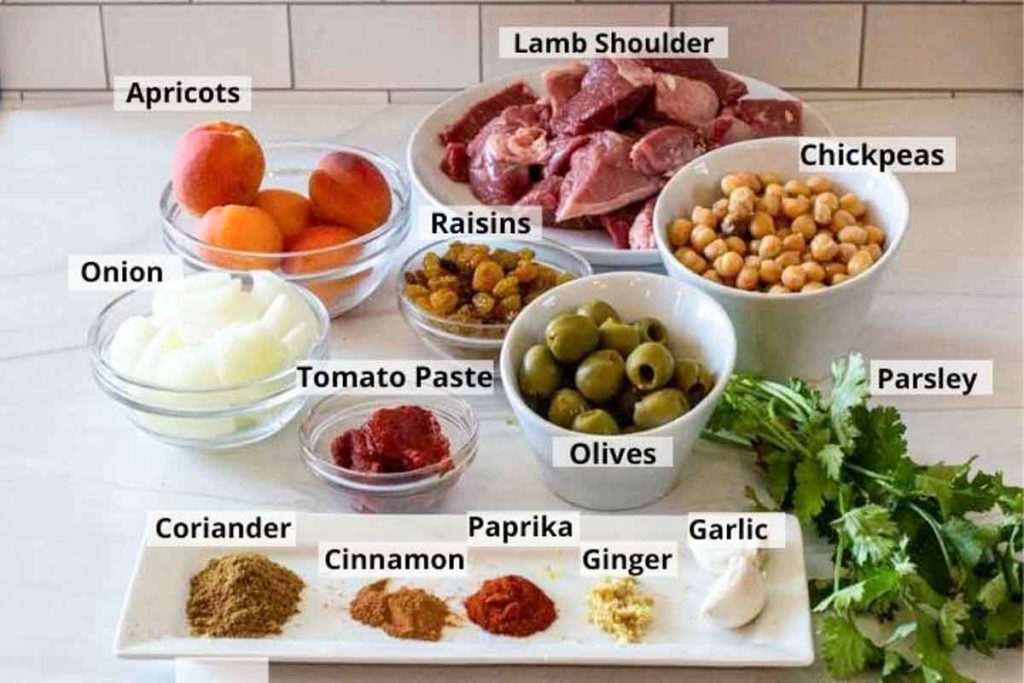
    Ingredients to make apricot lamb tagine
    • Lamb Shoulder: What’s the best cut of lamb for tagine? The shoulder of a lamb gets lots of work, so it tends to be full of flavor but takes a while to become tender. That’s why it’s a great choice for stews or braising, where meat is slow simmered until tender.
    • Chickpeas: Preferably dried chickpeas, which will give you better texture and more flavor.
    • Apricots: Dried or fresh apricots.
    • Raisins: Golden raisins have a sweeter, milder flavor than dark raisins.
    • Onion: Yellow or sweet onion. Sauteed onions bring another level of sweetness to the finished tagine.
    • Green Olives: I like to use Castelvetrano olives. They’re easy to find.
    • Tomato Paste.
    • Parsley.
    • Tagine Spices: Coriander, cinnamon, paprika, ginger and garlic.

    Colorado has a strong ranching heritage and lamb plays a big part in our history. Colorado Lamb is highly sought after due to its quality, and consistency in flavor and tenderness. The majority of lamb are free range, grazing on grass, brush and sage in the foothills of the Rocky Mountains. And even graze in Colorado Vineyards. Colorado lamb is hormone and antibiotic free.

    Lamb raised and imported from New Zealand and Australia are smaller in size that American raised lamb, and bring with it a gamier flavor. Please support local. Ask your butcher for Colorado raised lamb.

    Ingredient Substitutes and Swaps

    • Lamb: Use leg of lamb in place of shoulder. The leg of lamb is a leaner cut, and more expensive which seems a bit like a waste of money when a cheaper cut like shoulder is a better choice for a long simmer. And if you’re simply opposed to cooking with lamb choose a beef chuck roast.

    • Olives: Substitute any kind of green olives in place of the Castelvetrano olives. I’ve used Spanish olives and they work well.
    • Chickpeas: If you don’t want to take the time to soak and cook dried chickpeas substitute one 14.5 ounce can, drained and rinsed.
    • Apricots: If you can’t find dried apricots (which I couldn’t) for the making of this recipe use fresh. The benefit of using fresh is that the fruit will melt down and become a part of the gravy. Dried apricots will hold up to the long simmer and will present themselves as a part of the chunks of lamb and onion .
    • Cinnamon: To get a more pure cinnamon flavor, substitute a cinnamon stock for the ground cinnamon. Just remove it before serving.

    Step by Step Instructions

    Once the gathering and chopping is done, this apricot lamb tagine comes together easily.

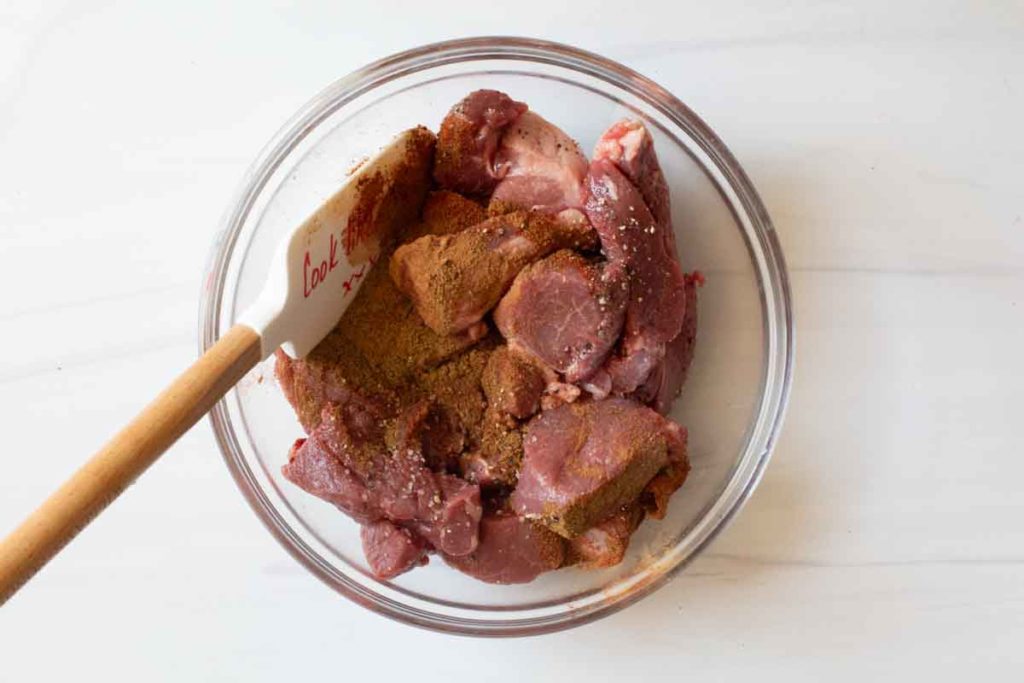
    Spices mixed with lamb shoulder pieces to make lamb tatine

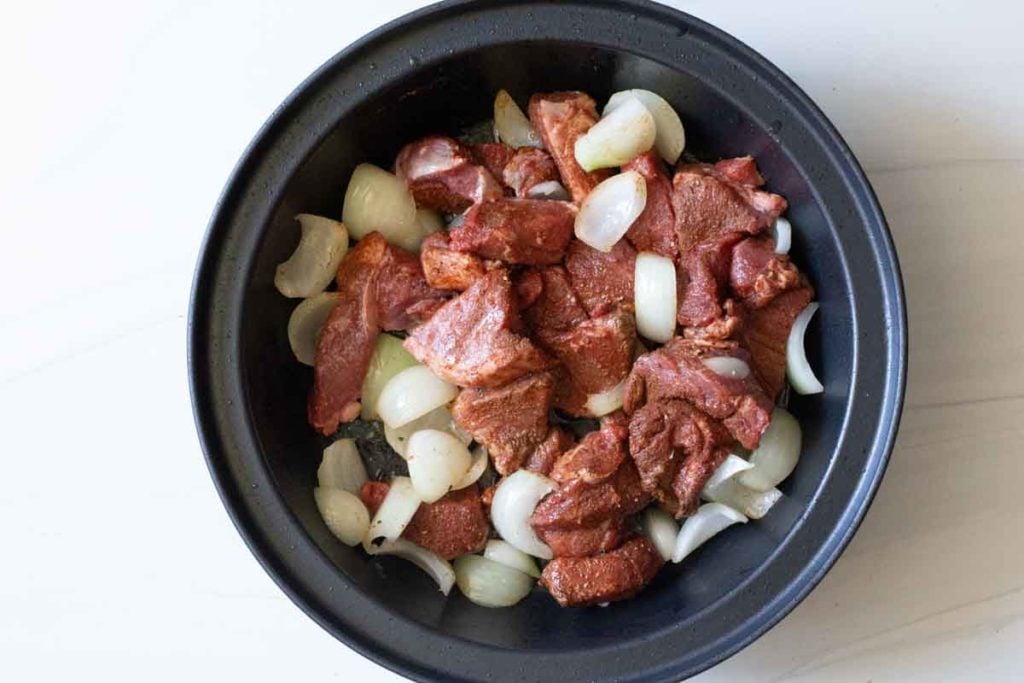
    Step 1: Place cut up lamb shoulder into a large bowl, add olive oil and sprinkle with coriander, cinnamon, ginger, paprika and garlic. Using a spatula mix well to coat the lamb. Refrigerate for three hours, or overnight.

    lamb and onions cooking in a tagine pot

    Step 2: Heat the bottom of the tagine over medium high heat. Once the pot is hot, add olive oil. When the olive oil is hot and shimmering, add the onions and lamb pieces.

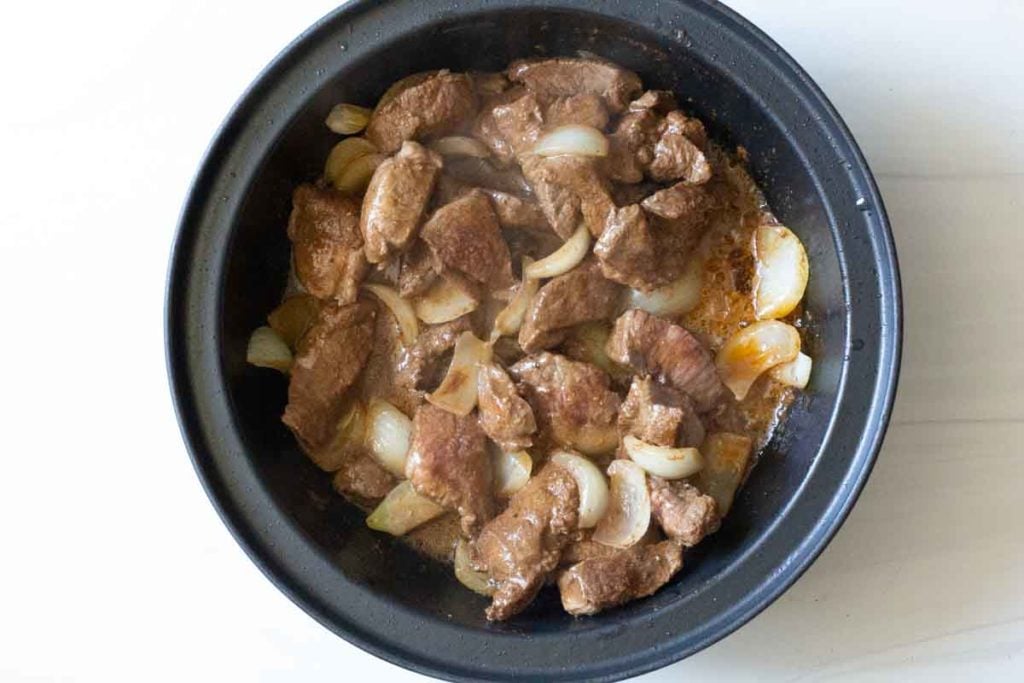
    Cooking lamb and onions in a tagine pot

    Step 3: Cook until lamb is starting to brown and onions are becoming soft.

    Vegetable broth and cornstarch for lamb tagine

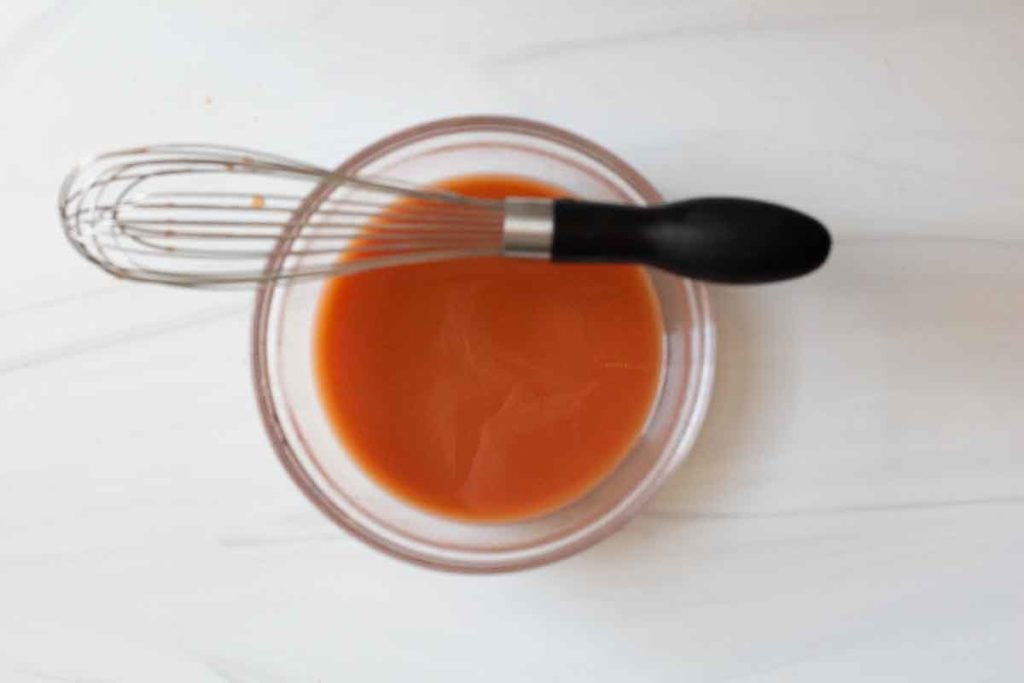
    Step 4: In a small bowl, combine vegetable broth, cornstarch and tomato paste until smooth.

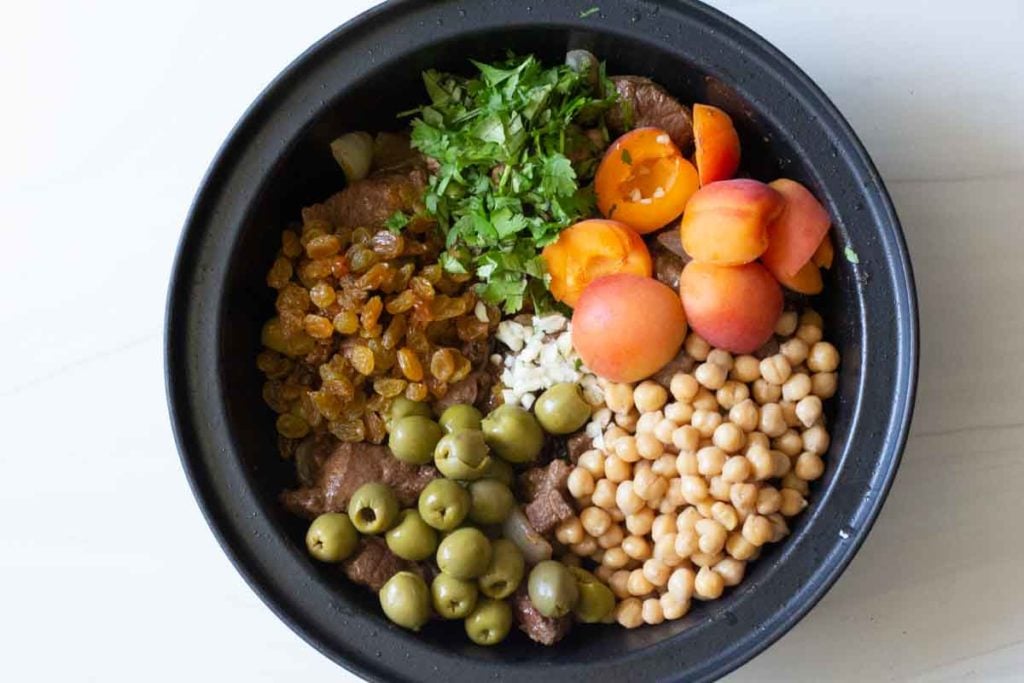
    Adding ingredients to tagine pot to make apricot lamb tagine

    Step 5: Add the raisins, parsley, apricots, chickpeas, chopped parsley and olives on top of the lamb and onions. Gently stir the ingredients to combine. Pour in the vegetable broth mixture. Cover with the top of the tagine and simmer on stovetop on medium low until lamb is tender. About an hour and a half.
    Apricot Lamb Tagine – Tips and FAQ’s

    What If I Don’t Own A Tagine

    Not to worry, a Dutch oven will substitute beautifully for every part of this recipe.

    Can I Serve This Lamb Tagine Recipe Right Out Of The Pot?

    Absolutely yes. That’s the beauty of a tagine. Just place a trivet on the table for heat protection and place the tagine on the trivet in the center of the table. It creates atmosphere and guests can serve themselves right out of the tagine.

    Pro Tip: Cutting Lamb for Tagine Cooking: Be careful not to cut the lamb pieces too small, to avoid it drying out. Cut the lamb into approximately 2″ pieces.

    Storage and Freezing

    This stew will keep in the refrigerator in an airtight container for 4 – 5 days. It will also keep for up to three months in the freezer.
    Serving Suggestion

    Couscous. Whether using traditional couscous or pearl couscous will be a perfect side dish for lamb tagine. A simple tossed salad is also a good addition.
    What Tagine Should I Buy?

    I own two tagine pots. One is a traditional clay pot. The draw back to the clay tagine is that it can only be used in the oven. It’s not suited for stove-top cooking unless you purchase a metal diffuser ring that protects the clay against direct heat.

    I recently was given an enameled cast iron tagine pot from UnoCasa. I love this tagine because it can be used anywhere. Gas, electric, ceramic stove tops, as well as in the oven. It can even be used over open fire.

    It’s heavy duty construction is great for keeping food warm. Which works well if you don’t serve dinner the minute guests arrive. And it’s beautiful enough to use as a centerpiece server on your table.

    The UnoCasa Tagine is larger and holds more, which worked well for the 1 ½ pounds of lamb called for in this apricot lamb tagine recipe. And the lid is a tighter fit, so I don’t need to worry about leaking and spillage while cooking. I do love this tagine pot.

    Click on the links or the photo below to check it out.

    This is a sponsored post. I’ve received the tagine at no charge, and if you purchase from this post, I’ll receive a small commission at no extra charge to you.

    Recipe for Apricot Lamb Tagine

    lamb tagine with apricots, chickpeas, and olives served over pearl couscous

    Tagines are fun to make and full of exotic flavors. I hope you give this much loved Moroccan stew recipe a try, and if you do, please come back and give the recipe a star rating located in the recipe card. And scroll down and leave a comment about your experience with the recipe.

    And if you have a favorite traditional Moroccan lamb tagine recipe, let me know, I’d love to give it a try. And if you’re looking to find out more about tagine’s, I like this article about How to Cook The Perfect Lamb Tagine.

    Apricot lamb tagine served in a Moroccan platter.
    Print Recipe
    5 from 2 votes

    Apricot Lamb Tagine With Olives

    Apricot Lamb Tagine is a traditional Moroccan dish that gets its vibrant flavor from warm spices, sweet apricots and tender fall apart braised lamb. Tagines are fun to make and full of exotic flavors.
    Prep Time30 minutes mins
    Cook Time1 hour hr 30 minutes mins
    Soaking and marinating1 day d
    Course: Main Course Lamb
    Cuisine: Moroccan
    Servings: 6
    Calories: 290kcal
    Author: Lea Ann Brown

    Equipment

    • Tagine

    Ingredients

    • ½ cup dried chickpeas
    • 2 cups water
    • SPICES FOR THE LAMB
    • 1 ½ pounds lamb shoulder cut into 6 – 8 chunks, about 2 inches
    • 2 Tablespoon olive oil divided
    • ½ teaspoon ground cinnamon
    • 1 teaspoon ground coriander
    • ½ teaspoon ground ginger
    • 1 teaspoon paprika
    • 1-2 cloves garlic chopped
    • 1 ½ teaspoon kosher salt
    • ¼ teaspoon ground pepper
    • INGREDIENTS FOR TAGINE
    • 6 dried apricots or fresh apricots
    • 1 medium onion cut into wedges
    • 5 saffron threads
    • 1 Tablespoon tomato paste
    • ½ cup vegetable broth
    • 1 teaspoons corn starch
    • 4 cardamom pods wrapped in cheese cloth
    • 1 Tablespoon fresh parsley chopped
    • ½ cup golden raisins
    • ½ cup green olives

    Instructions

    • Soak the dried chickpeas overnight in just enough water to cover. The next morning, drain the chickpeas, add new water and in a saucepan, simmer them stovetop for 2 hours. Drain the chickpeas and store in refrigerator until ready to use.
    • Mix together all of the Moroccon spices (cinnamon, coriander, ginger, paprika, garlic, salt and pepper) in a small bowl.
    • Cut the lamb shoulder into 6 – 8 chunks about 2 inches.
    • Put the lamb into a large mixing bowl and drizzle with 1 tablespoon olive oil. Using a large spoon, stir the olive oil and lamb together to coat the lamb.
    • Sprinkle the spices over the lamb and stir again to combine well.
    • Marinate the lamb in the refrigerator for at least 3 hours, or overnight.
    • DIRECTIONS FOR THE LAMB TAGINE
    • Heat the tagine pot over medium high heat until hot. Add the remaining 1 tablespoon of oil to the tagine. When the oil starts to shimmer, add the onion wedges and lamb pieces to the hot oil. Salt and pepper the onions and lamb.
    • Cook until lamb is starting to brown and onions are starting to soften. About 10 – 15 minutes. Stirring often so they don't stick to the bottom of the tagine.
    • While onions and meat are cooking, whisk together the vegetable stock, tomato paste and cornstarch in a separate bowl.
    • Pour the broth mixture into the tagine pot, and add in the saffron threads.
    • Wrap cardamon pods in cheesecloth and add them to the pot.
    • Add apricots (pitted and halved if using fresh apricots), olives, parsley, and raisins on top of the lamb and onions. Add the cooked chickpeas.
    • Place the lid on the tagine pot and allow the ingredients to slowly simmer for about an hour and a half. Or until lamb is fall apart tender. Remove cardamon pods and serve.
    • Serve the lamb over pearl couscous.

    Notes

    Use either dried apricots or fresh apricots for this recipe. If using fresh, cut them in half and remove the pit. The fresh apricots will “melt” as they cook and become part of the gravy. Dried apricots will stay solid and become part of the lamb/onion mixture.
    If you don’t own a tagine pot, a Dutch oven will work fine for this recipe.
    This stew will keep in the refrigerator in an airtight container for 4 – 5 days. It will also keep for up to three months in the freezer.

    Nutrition

    Calories: 290kcal | Carbohydrates: 30g | Protein: 19g | Fat: 11g | Saturated Fat: 2g | Polyunsaturated Fat: 2g | Monounsaturated Fat: 6g | Cholesterol: 46mg | Sodium: 918mg | Potassium: 634mg | Fiber: 6g | Sugar: 15g | Vitamin A: 648IU | Vitamin C: 5mg | Calcium: 65mg | Iron: 3mg

    Lamb and Apricot Tagine … It’s Whats For Dinner

    Related Recipes

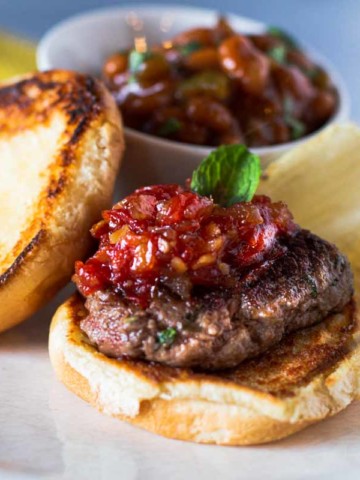
    • Lamb sliders with mint and sweet tomato chutney.
      Lamb Sliders with Mint and Sweet Tomato Chutney
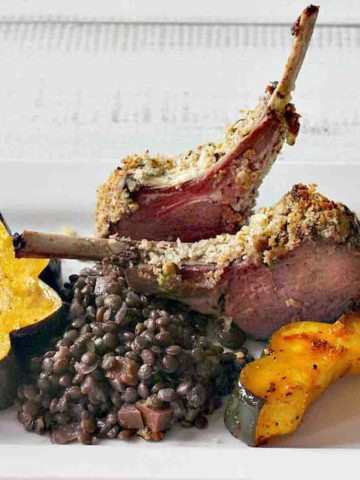
    • Pistachio crusted rack of lamb served with puy lentils.
      Easy Pistachio Crusted Rack of Lamb
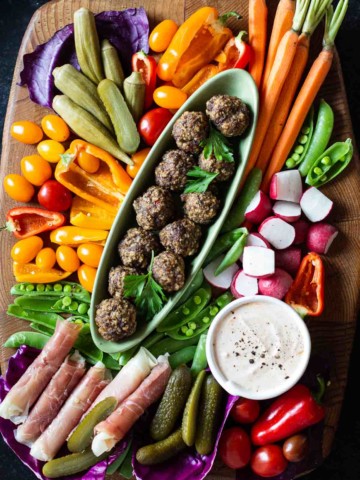
    • Spicy lamb meatballs on a crudite platter.
      Spicy Lamb Meatballs
    • Grilled Lamb Kebab Salad served with arugula.
      Grilled Lamb Salad with Arugula and Creamy Lemon Vinaigrette

    If you liked this recipe, please leave a star ⭐⭐⭐⭐⭐ rating in the recipe card below and leave a comment. I always appreciate your feedback and hearing how everything went.

    And, don’t forget to subscribe to my newsletter for more delicious recipes and cooking tips. Make it a delicious day … every day.

    Ultimate Blue Cheese Potato Salad

    June 22, 2021 By Lea Ann Brown 46 Comments

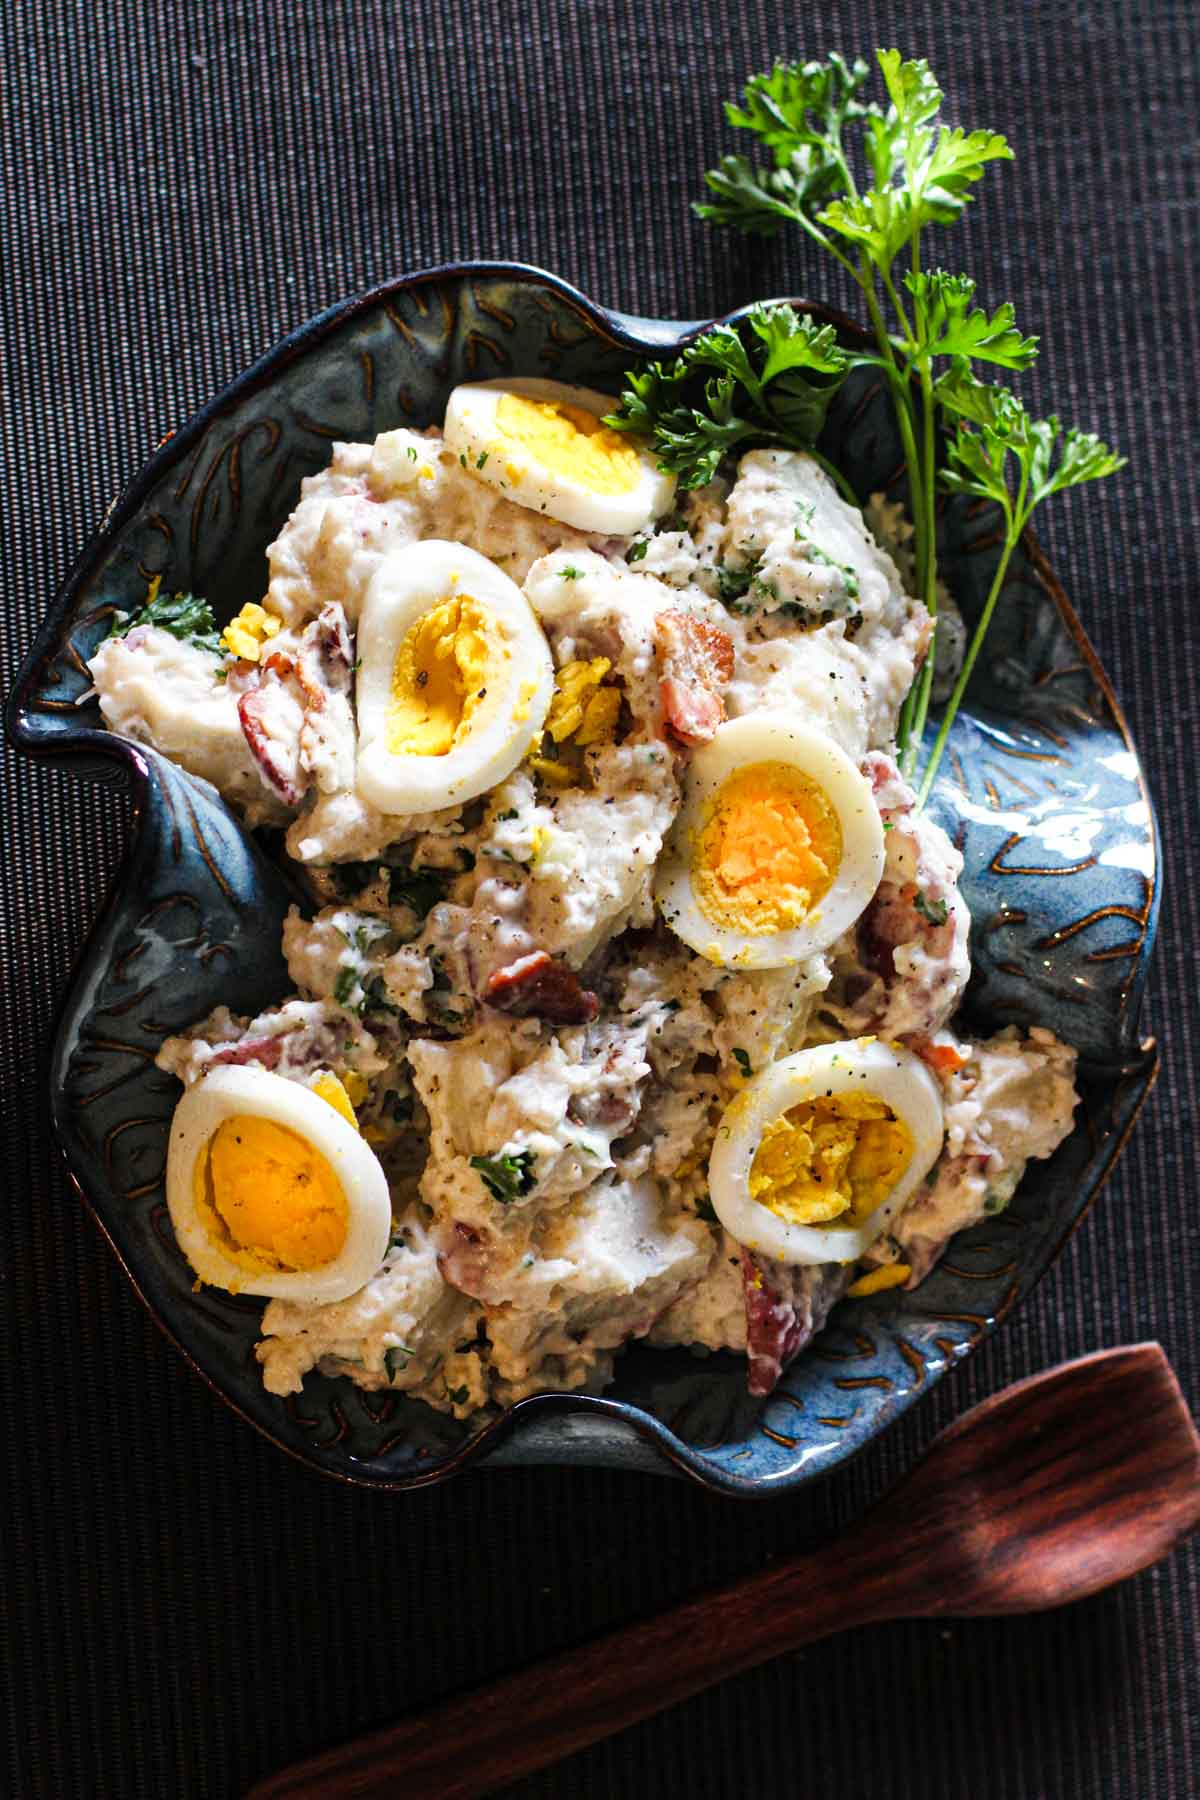
    Blue cheese potato salad with bacon.

    The tart pungent flavor and creamy texture of blue cheese makes a wonderful partner for potatoes, sour cream, green onions and smoky bacon. This blue cheese potato salad is pot luck picnic perfect and a great side for a juicy grilled steak.

    This Summer side dish is delicious with this Buffalo Burgers, or Grilled Flank Steak with Charred Caramelized Sweet Corn, or even our Best Grilled Chicken.

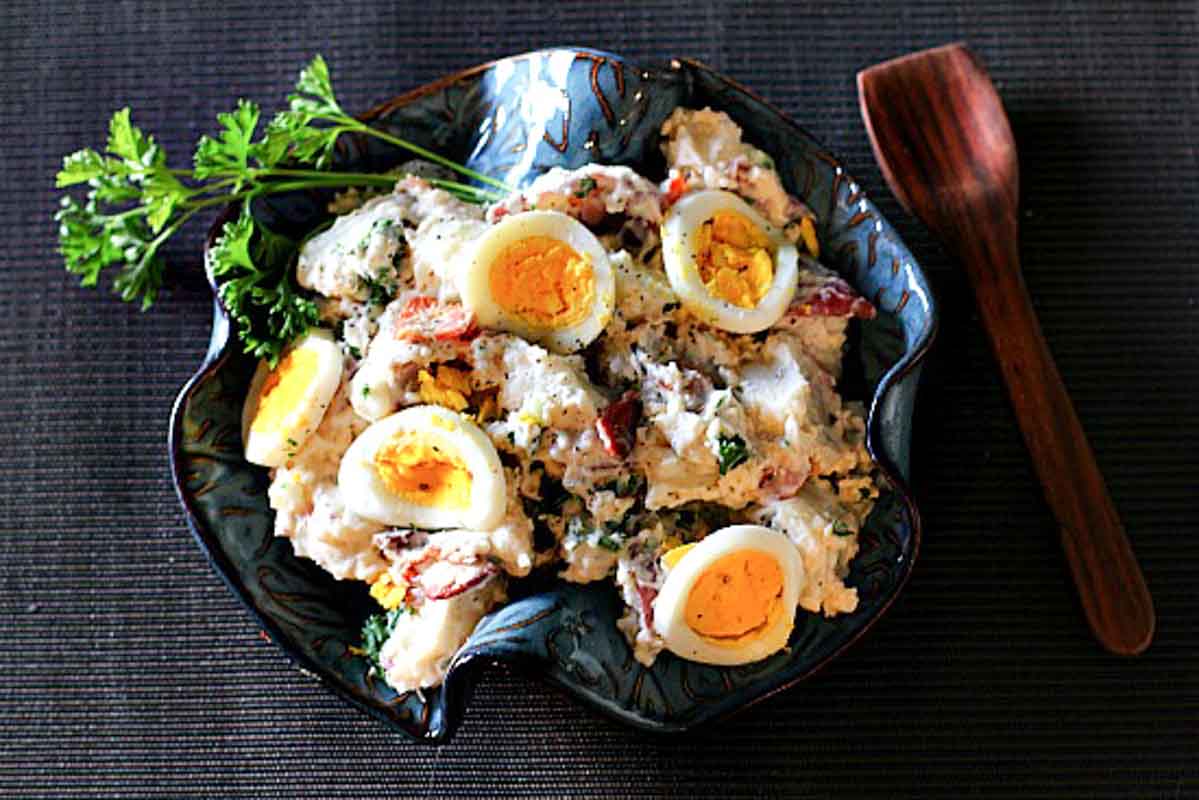
    Blue cheese potato salad in a blue ceramic bowl topped with sliced hard boiled eggs and garnished with parsley

    Why Embrace This Recipe?

    Who can argue with potatoes, bacon, sour cream and blue cheese. 

    • Who Is This Recipe For? This recipe is easy enough for a beginning cook and interesting enough for the seasoned home chef. If you’re someone who attends a lot of back yard bbq’s or office pot lucks, this Blue Cheese Potato salad is a recipe that will capture everyone’s attention.
    • Why This Isn’t Your Grandma’s Potato Salad? It’s a potato salad recipe without mayonnaise. The creamy texture comes from adding sour cream. It’s a far cry from my mom’s Classic Potato Salad Recipe, flavored traditionally with mayo, celery and mustard. This is a unique potato salad dressing that comes with real pizzaz.
    • It’s Easy: Once the prep is complete and potatoes are boiled, potato salads are a quick and very popular option for a side dish.
    • Bacon: Everyone loves bacon, and blue cheese and bacon are a great combo for potatoes. And it’s the reason I call this “the ultimate blue cheese potato salad”.

    Choosing The Right Blue Cheese

    There’s really no right or wrong on which blue cheese you choose to make blue cheese potato salad. Here are some guidelines about flavors and textures.

    • Maytag Blue Cheese: I have received no incentive to mention this name brand, it's simply the brand I prefer. It's an American made blue cheese produced in Iowa. A cow's milk cheese that is creamy and mild in flavor and easy to find.
    • Roquefort Blue Cheese: Roquefort is a sheep milk's cheese. Creamy and aromatic, complex and intense. This cheese will add a stronger funky flavor to blue cheese dressing. This cheese and its strong personality is made for serious blue cheese lovers.
    • Traditional Danish Blue Cheese: A strong blue veined cheese that is rich and creamy, with a slight bitterness and salt. Made with cow's milk, it's milder than Roquefort and an excellent choice for blue cheese dressing.
    • Stilton Cheese: The best known British Blue Cheese that has a strong spicy flavor. I use it whenever I can find it.
    • Gorgonzola: Gorgonzola, from Italy, is soft and spreadable. Depending on age, the flavor ranges from mild to sharp. Due to its softness, your chunky factor will be compromised. I'd save this one to spread on a burger
    • Amish Blue Cheese: Made in Wisconsin, it's a medium strength cow's milk cheese and a good value and I've made this recipe many times using this cheese. The color variation isn't as crisp as other blue cheeses, making it not my first choice.

    In summary, any blue cheese will work for this potato salad. Try them all, find your favorite and make it your own.

    Table of contents

    • Why Embrace This Recipe?
    • Choosing The Right Blue Cheese
    • Ingredients You’ll Need
    • Ingredients Swaps and Substitutions
    • Step by Step, How To
      • Tip: How To Cut Potatoes For The Best Bite Sized Pieces
    • Tips For Success
    • FAQ’s
    • Make Ahead and Storage
    • Recipe For Blue Cheese Potato Salad
    • More Popular Recipes Using Blue Cheese

    Ingredients You’ll Need

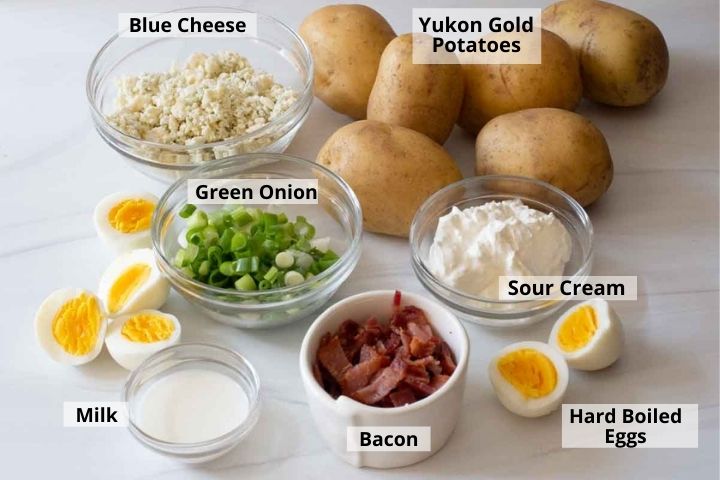
    ingredients to make blue cheese potato salad
    • Blue Cheese, Purchasing a wedge of blue cheese is preferable for quality. Blue cheese is very easy to crumble with your hands.
    • Potatoes, Yukon Gold or Russet Potatoes work well for potato salads and even small red potatoes are a treat for this recipe.
    • Sour Cream, This potato salad with no mayo uses sour cream instead, which really changes up the flavor profile from the classic.
    • Hard Boiled Eggs, Three hard boiled eggs, either chopped or sliced.
    • Milk, Milk is used to thin the consistency.
    • Green Onions, Three green onions, sliced, white and some green parts.
    • Bacon: Cooked and crumbled.

    Ingredients Swaps and Substitutions

    • Onions: If you don’t have green onions, use a mild sweet onion and better yet, a super sweet Vidalia onion. Just chop the onion into small pieces.
    • Milk: Swap that milk with a couple of tablespoons of starchy potato water before you’ve drained it from the cooked potatoes. It’s liquid gold in keeping the potato salad nice and creamy.
    • Sour Cream: I like to use full fat sour cream for optimum flavor. Feel free to use reduced fat sour cream in its place.

    Step by Step, How To

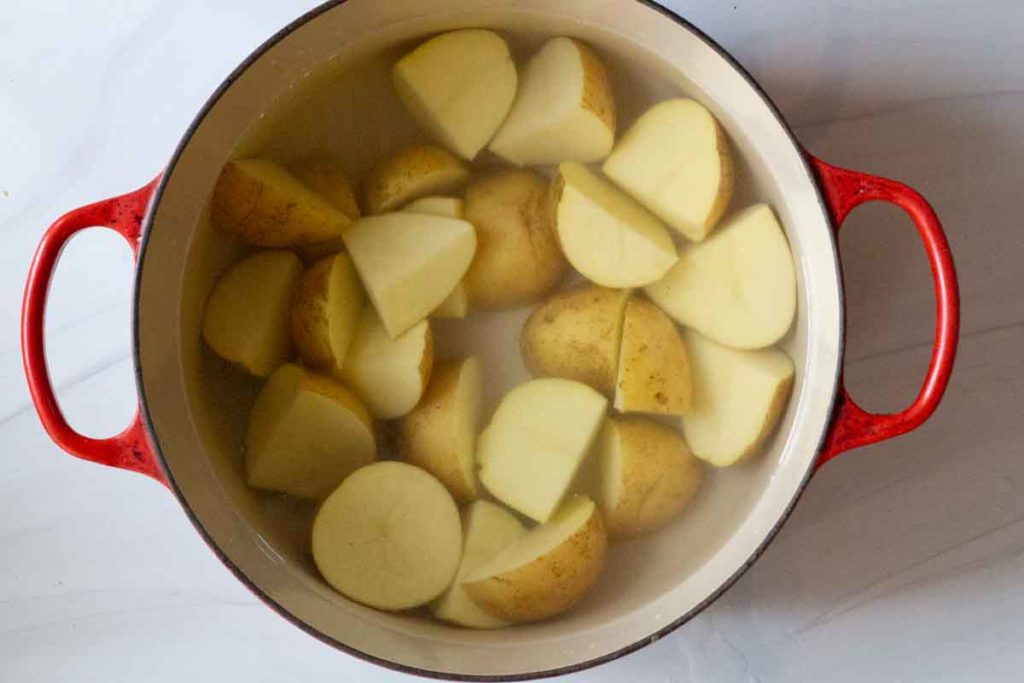
    potatoes cut in cubes in a le creuset dutch oven covered with water
    1. Step 1: Simmer the potatoes. Cut the potatoes into large bite sized pieces. Place the potatoes in a large pot and cover with cold water. Liberally salt and set on a burner over medium heat. Gently bring the potatoes to a simmer and cook until just getting tender. Don’t boil, or over cook or the potatoes will become mushy. Drain the potatoes in a colander in the sink. (Save a bit of that starchy water to add to the potato salad)

    Tip: How To Cut Potatoes For The Best Bite Sized Pieces

    When making potato salad, I like the chunks of potatoes to be a little larger that diced or cubed size. That way they won’t get lost in the other ingredients. Cut them roughly 1 inch in size.

    • First slice the potatoes into planks and then cut the planks into sticks.
    • Then cut those sticks into cubes.
    • If you want them to be perfect, start by squaring off the potatoes by cutting off the ends and sides. That will give you more even potato squares without any mis-shapes from their oblong shape. I don’t do this because once mixed into the salad, an odd shaped from a corner will hardly be noticeable.
    • Note: When using small new Yukon Gold or Red Skinned potatoes, simply quarter them.
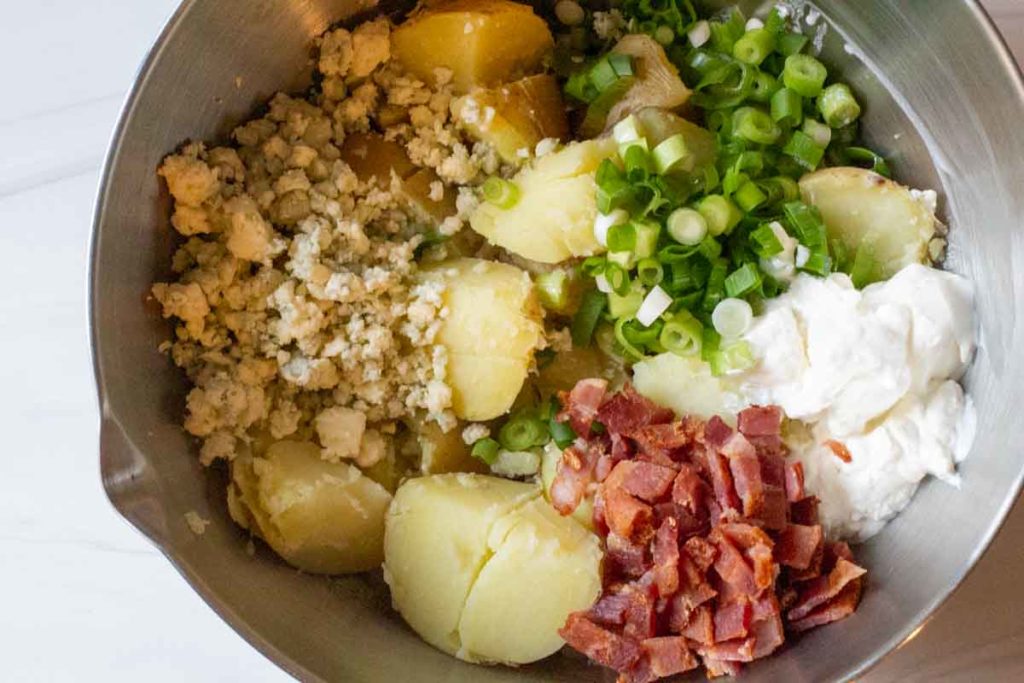
    Cooked potatoes, onions, bacon and blue cheese in a large silver bowl.
    1. Step 2: Place the hot potatoes in a large mixing bowl. Add the blue cheese, sliced onions, sour cream, milk (or starchy potato water, or both) and cooked bacon bits.
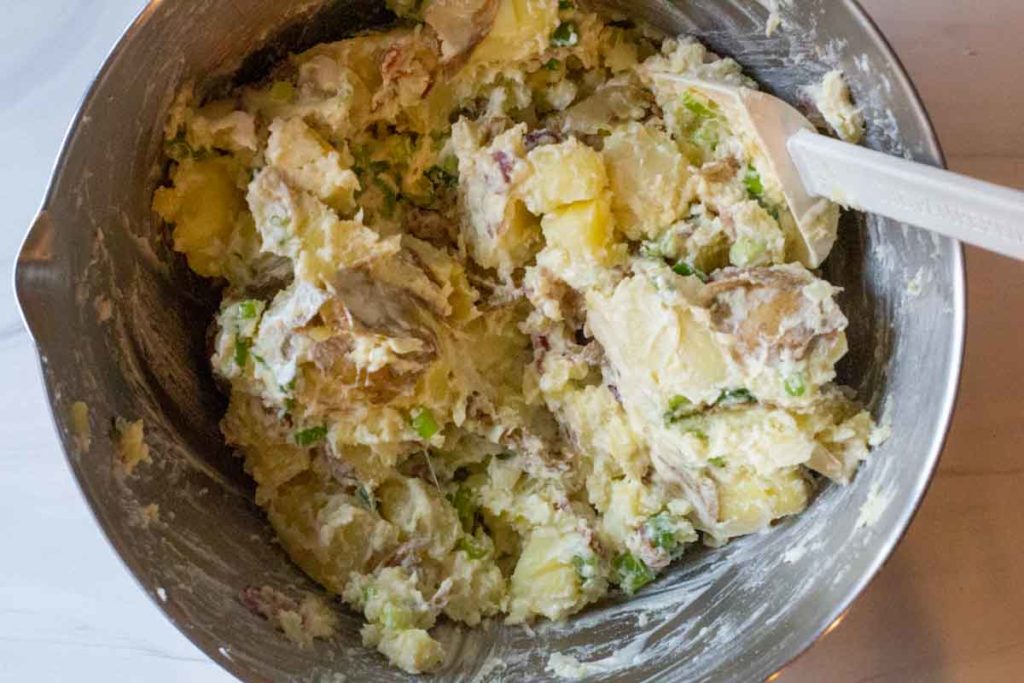
    mixing ingredients together in a mixing bowl for potato salad with bacon
    1. Step 3: Using a large spatula, gently blend the ingredients together. Don’t over mix. It may cause the potatoes to break apart. Adjust seasonings and add a little more milk or starchy water if necessary.

    Tips For Success

    • Potatoes: Choose medium starch potatoes like Yukon Gold or Red Skinned Potatoes. A waxy potato will avoid a mealy texture. They’ll hold their shape and texture better than Russet potatoes, which are a high starch potato. Save those for mashed potatoes or baked potatoes.
    • How To tell when potatoes are “just right done” insert a fork or sharp knife into a potato. If the potato feels tender and the utensil releases easily, they’re done.
    • Grab a wedge or blue cheese rather than pre-crumbled blue cheese in a plastic container. The product will be creamier, fresher and more flavorful.
    • If you don’t want the blue cheese to melt, let the potatoes cool before proceeding with the recipe.

    FAQ’s

    Can I Leave The Potato Skins On?

    No matter what the potato I’m using to make potato salad. I always cook the potatoes with skin on. If using russet potatoes, which have a tough skin, once the potatoes have cooled enough, I remove the skin before proceeding with the recipe. If using Yukon Gold potatoes, I generally will leave the skin on after boiling. The skins are tender enough that they won’t distract from the flavor and texture of the potato salad and they’re very edible.

    Why Are My Potatoes Falling Apart?

    Simple! They were cooked too long. Watch them closely and test the potato periodically with a knife. Once the knife doesn’t have a “pull” when you release it from the potato, it’s done.

    Should I Serve This Potato Salad Warm or Cold?

    A creamy potato salad like this recipe is traditionally served cold. A vinaigrette sauced potato salad, like this Warm German Potato Salad, are recipes that can be served warm.

    Can I Make This Vegetarian?

    Simple, omit the bacon. If you’re looking to keep some crunch, try adding toasted pecans or walnuts.

    Make Ahead and Storage

    • Make Ahead: As with any recipe like this, cold potato salads or pasta salads taste better the next day. Perfect to make ahead to save time. You can make this up to two days in advance. Store in the refrigerator, well sealed.
    • Storage: How long will potato salad last in the refrigerator? Store any leftovers in the refrigerator for up to 4 days.

    Recipe For Blue Cheese Potato Salad

    Bacon Blue Cheese Potato Salad in a blue ceramic bowl topped with sliced hard boiled eggs

    This Blue Cheese Potato Salad with Bacon has quickly become one of our favorite Summer side dishes. Bacon and blue cheese pair wonderfully with potatoes and onions and sour cream, the rest is history.

    More Popular Recipes Using Blue Cheese

    • Silver Spur Ranch Blue Cheese Hamburger
    • Pan Seared Merlot Steak with Blue Cheese Butter – reader favorite
    • Mango and Avocado Salad with Blue Cheese
    • Black and Blue Burgers

    And the most popular on my site for Homemade Blue Cheese Dressing. It’s steakhouse quality.

    Looking for more side dish recipes? Don’t miss my side dish category. You’ll find lots of great recipes including the most popular on my site for Broccoli Cheez Whiz Casserole.

    And if you’re looking for even more side dishes for picnic style gatherings, don’t miss this line-up of Summer cook-out sides. I’m positive you’ll find something you love.

    If you liked this recipe, please leave a star ⭐⭐⭐⭐⭐ rating in the recipe card below and leave a comment. I always appreciate your feedback and hearing how everything went.

    And, don’t forget to subscribe to my newsletter for more delicious recipes and cooking tips. Make it a delicious day … every day.

    Blue cheese potato salad with bacon.
    Print Recipe
    5 from 4 votes

    The Ultimate Blue Cheese Potato Salad

    This potato salad that's great for any pot luck, back yard BBQ or picnic. A creamy and delicious potato side dish that will wow your crowd. Give this one a try, it's creamy, tart and perfect.
    Prep Time20 minutes mins
    Cook Time30 minutes mins
    Total Time35 minutes mins
    Course: Side Dish
    Cuisine: American
    Servings: 8
    Calories: 179kcal
    Author: Lea Ann Brown

    Ingredients

    • 2 ½ pounds Potatoes Yukon gold or russet
    • 1 cup sour cream
    • 2 Tablespoons milk or reserved starchy water that the potatoes were cooked in
    • salt and pepper
    • 3 green onions sliced
    • 3 eggs hard cooked and chopped or sliced
    • 4 ounces blue cheese
    • 4 slices bacon cooked and crumbled

    Instructions

    • Simmer the potatoes. Cut the potatoes into large bite sized pieces. Place the potatoes in a large pot and cover with cold water. Liberally salt the potatoes and set on a burner over medium heat. Gently bring the potatoes to a simmer and cook until just getting tender. Don't boil, or over cook or the potatoes will become mushy. To tell when they're "just right done" insert a fork or sharp knife into a potato. If the potato feels tender and the utensil releases easily, they're done. Drain the potatoes in a colander in the sink. (Save a bit of that starchy water to add to the potato salad)
    • Place the hot potatoes in a large mixing bowl. Add the blue cheese, sliced onions, sour cream, milk (or starchy potato water, or both) and cooked bacon bits.
    • Using a large spatula, gently blend the ingredients together. Don't over mix. It may cause the potatoes to break apart. Adjust seasonings.
    • Serve garnished with sliced or chopped hard boiled eggs. Add some chopped parsley for some color.

    Notes

    If the potato salad seems too thick, add more milk or starchy potato water to thin the consistency. 
    No matter what the potato I’m using to make potato salad. I always cook the potatoes with skin on. If using russet potatoes, which have a tough skin, once the potatoes have cooled enough, I remove the skin before proceeding with the recipe. If using Yukon Gold potatoes, I generally will leave the skin on after boiling. The skins are tender enough that they won’t distract from the flavor and texture of the potato salad.

    Nutrition

    Calories: 179kcal | Carbohydrates: 2g | Protein: 7g | Fat: 16g | Saturated Fat: 8g | Polyunsaturated Fat: 1g | Monounsaturated Fat: 5g | Trans Fat: 1g | Cholesterol: 95mg | Sodium: 319mg | Potassium: 139mg | Fiber: 1g | Sugar: 1g | Vitamin A: 431IU | Vitamin C: 1mg | Calcium: 124mg | Iron: 1mg

    Blue Cheese Potato Salad … It’s What’s For A Summer Side Dish

    « Previous Page
    Next Page »

    I'm Lea Ann

    Welcome to my Colorado kitchen. If you're a fan of rustic homestyle cuisine, you've come to the right place. I'm a Culinary School Grad with a passion to inspire you to cook as often as you can. I offer reliable, approachable and easy to follow recipes. So grab that skillet and let's cook.

    More about me

    Soup and Stew Recipes

    • Southwest chicken soup with hominy and potatoes.
      Sopa Ranchera, Southwest Chicken Soup
    • Creamy chicken tortilla soup with rotel tomatoes.
      Southwestern Creamy Chicken Tortilla Soup
    • Cowboy chili garnished with grated cheese and jalapeno pepers.
      New Mexico Style Cowboy Chili
    • Ground chicken chile with white beans.
      Giada’s Ground Chicken Chili with White Beans
    • Beef stew with mushrooms served in a skillet.
      Beef Stew With Mushrooms – Crock Pot Method
    • 7-can taco soup with ranch dressing.
      Original 7 Can Taco Soup with Ranch Dressing

    Reader Favorites

    • Super Moist Cheesy Cornbread with Creamed Corn
    • Flemings steakhouse macaroni and cheese in a white bowl.
      Flemings Steakhouse Mac and Cheese
    • A slice of Layered Mexican Casserole with ground beef and corn tortillas.
      Mexican Casserole with Ground Beef and Corn Tortillas
    • Beef Tagliata, thin sliced flank steak served over arugula and cherry tomatoes.
      Beef Tagliata (Italian Steak)
    • Ham and cheese quesadilla made with corn tortillas and topped with a fried egg.
      Crispy Ham and Cheese Corn Tortilla Quesadillas
    • Spinach chicken mushroom skillet dinner.
      Chicken Mushroom and Spinach Skillet

    Footer

    • Contact
    • About
    • Privacy Policy
    • Accessibility Statement
    • ↑ back to top

    Copyright © 2024 Cooking on the Ranch • Powered by Feast+

    Rate This Recipe

    Your vote:


    A rating is required
    A name is required
    An email is required