Cooking On The Ranch

  • Home
  • About
  • Recipe Roundup
  • Contact Me
  • Join Community
menu icon
go to homepage
  • Home
  • Soups and Stews
  • About
  • Recipes
  • Contact Me
    • Facebook
    • Instagram
    • Pinterest
  • search icon
    Homepage link
    • Home
    • Soups and Stews
    • About
    • Recipes
    • Contact Me
    • Facebook
    • Instagram
    • Pinterest
  • ×
    Home

    Ultimate Cheesy Chorizo Stuffed Mushrooms

    January 24, 2024 By Lea Ann Brown 12 Comments

    Chorizo mushrooms appetizer.

    Earthy button mushrooms come alive with Western flavors for these Chorizo Stuffed Mushrooms. Try these cheesy, chorizo, jalapeno pepper-stuffed mushrooms for your next appetizer. The filling is so good, you might be tempted to eat it with a spoon.

    Check out my recipe for Mexican Deviled Eggs with Chorizo. Another popular finger food appetizer.
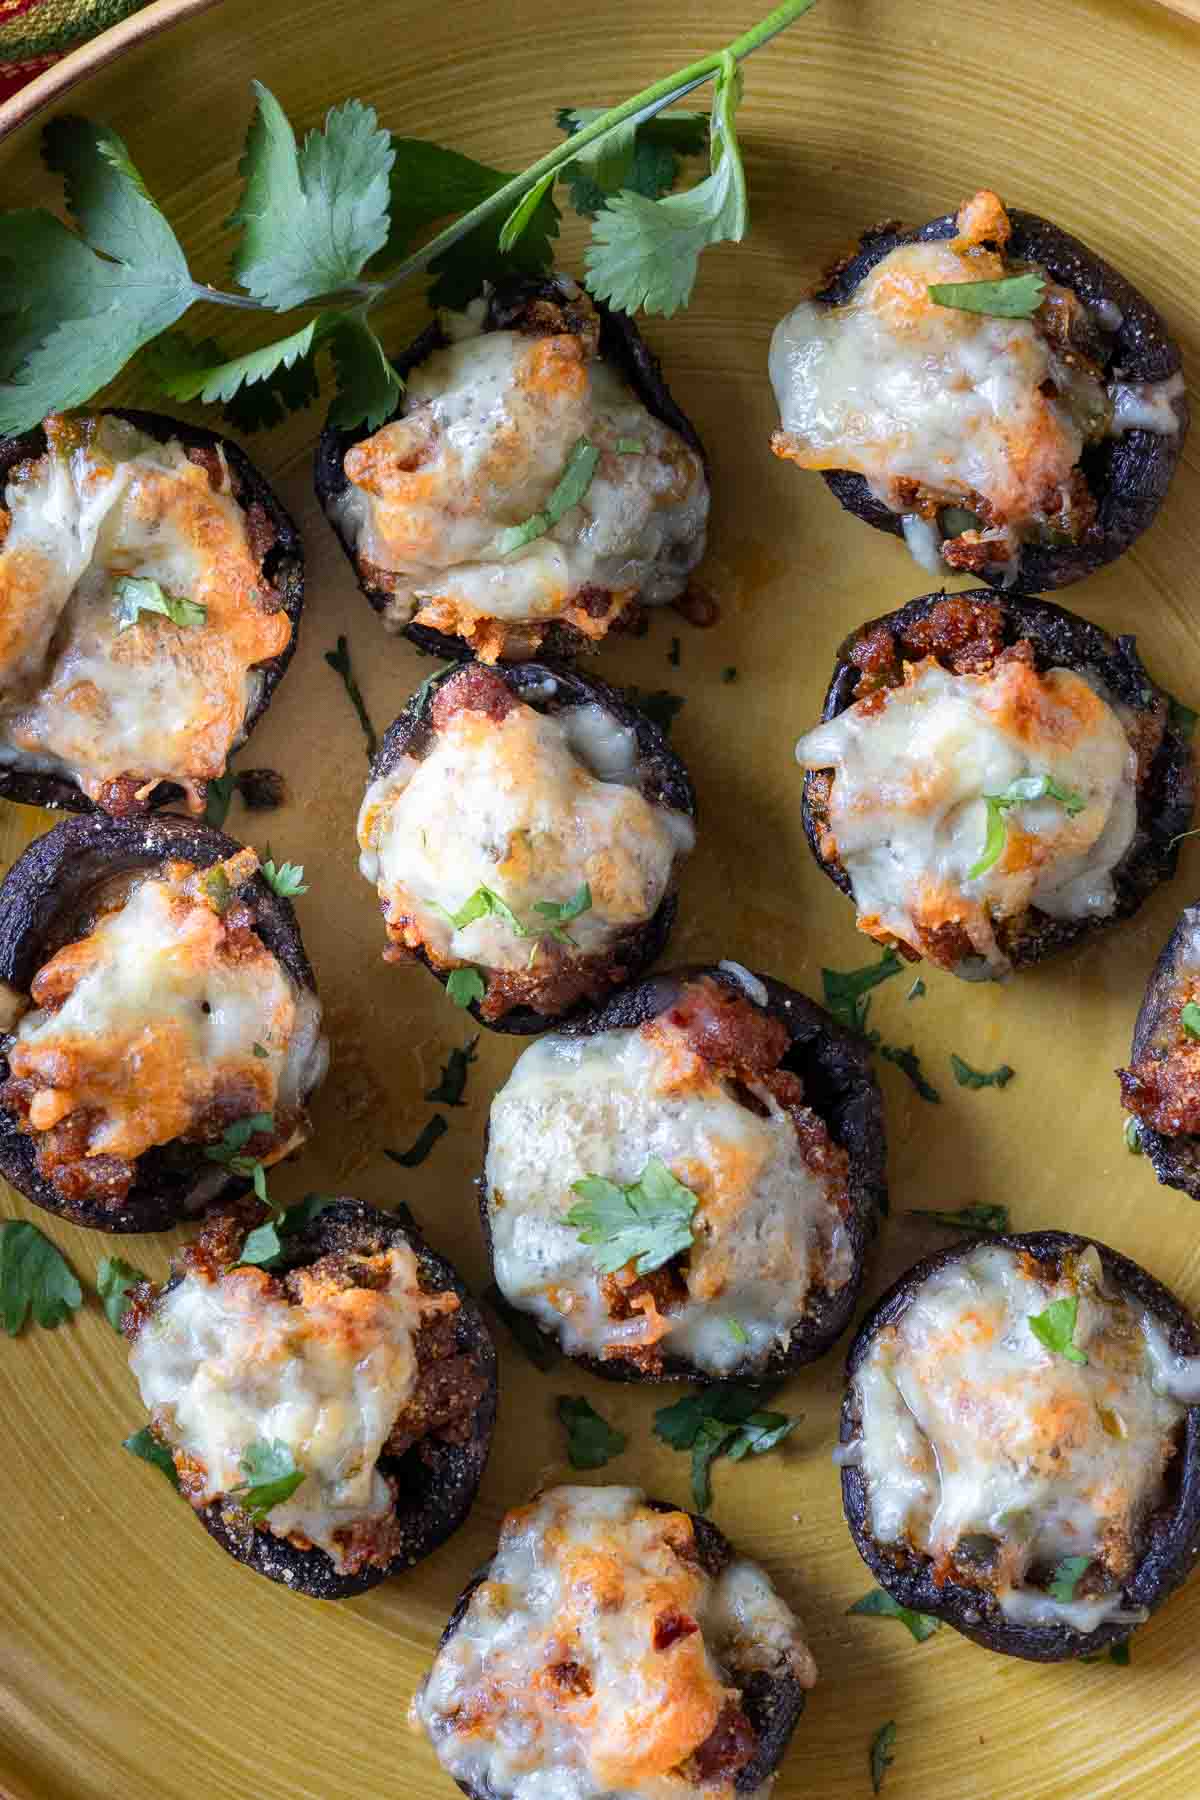
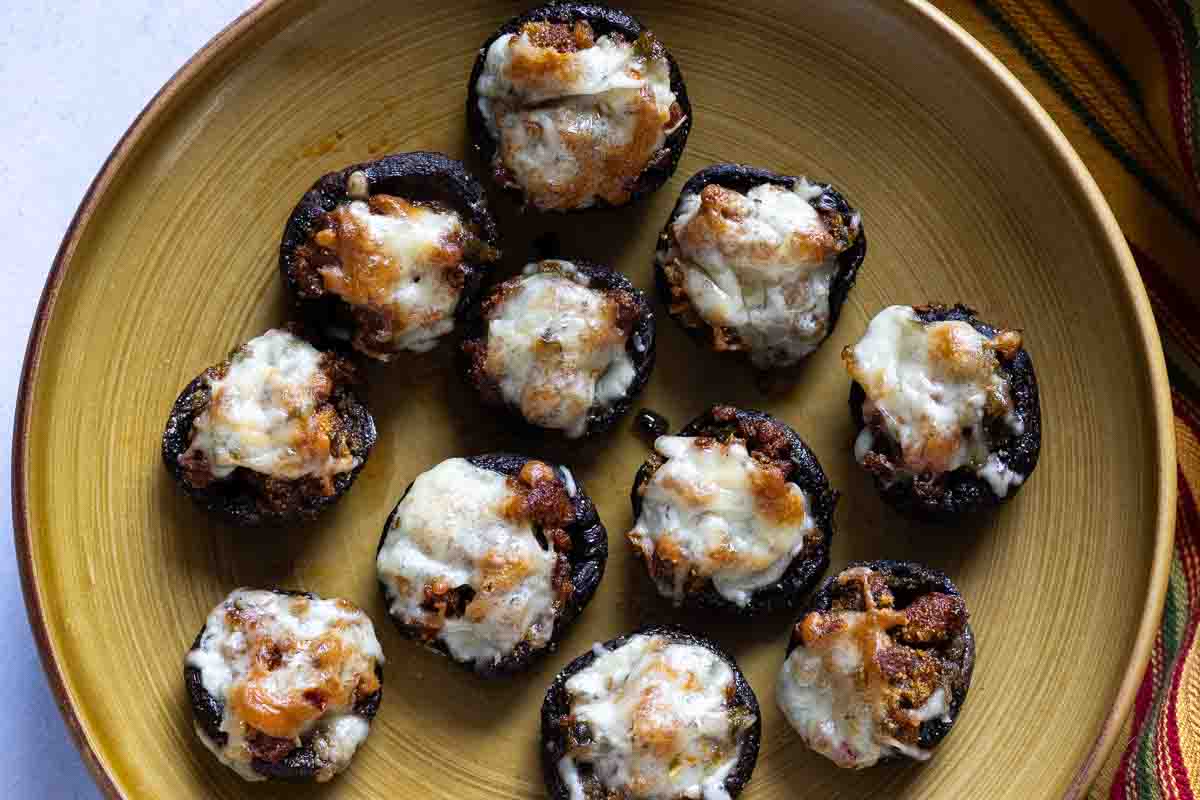
    Chorizo stuffed mushrooms on a gold pottery plate.

    What You Can Expect From This Recipe

    How To Make Chorizo Stuffed Mushrooms
    Bold, Cheesy, and Party-Perfect Bites

    Chorizo Stuffed Mushrooms are the ultimate crowd-pleasing appetizer. Easy to grab, one bite delicious, and full of bold, spicy flavor. These little mushroom caps are loaded with savory chorizo sausage and melty Mexican cheese, making them a no-full finger food your guests will rave about.

    Whether you’re hosting a party or heading to one, this make-ahead recipe has you covered. Assemble them earlier in the day, then bake just before serving. They even travel well when covered with foil.

    Want to elevate your stuffed mushrooms? Learn:

    • How to choose between Spanish and Mexican chorizo
    • The simple stuffing technique
    • A secret ingredient trip to add a little crunch
    • Make-ahead and travel tips for stress-free prep

    Next time you think “stuffed mushrooms,” add a spicy twist with this irresistible chorizo and cheese combo. They're easy to make, hard to resist-and always a hit.

    Chorizo 101 – Which Type Is Right?

    Mexican vs. Spanish Chorizo

    • Please note, we're making these Chorizo Stuffed Mushrooms with bulk Mexican Chorizo, packaged and resembling ground beef. And it resembles ground beef in texture after it’s cooked.
    • You can also use Mexican Chorizo sausage that comes in a tube. It’s a product that contains a lot of oil, so you may have to buy two tubes, as once it’s cooked, there’s not a lot of meat left. It’s a bit mushier in texture and would work fine for this recipe. Once cooked, drain in a colander to remove the excess oil.
    • And please don't confuse Spanish Chorizo with Mexican Chorizo. Spanish chorizo is dry cured and smoked. It's commonly sold in links and simply won't work to make these stuffed mushrooms. Save that product for soups or your next charcuterie board.

    Ingredients You’ll Need
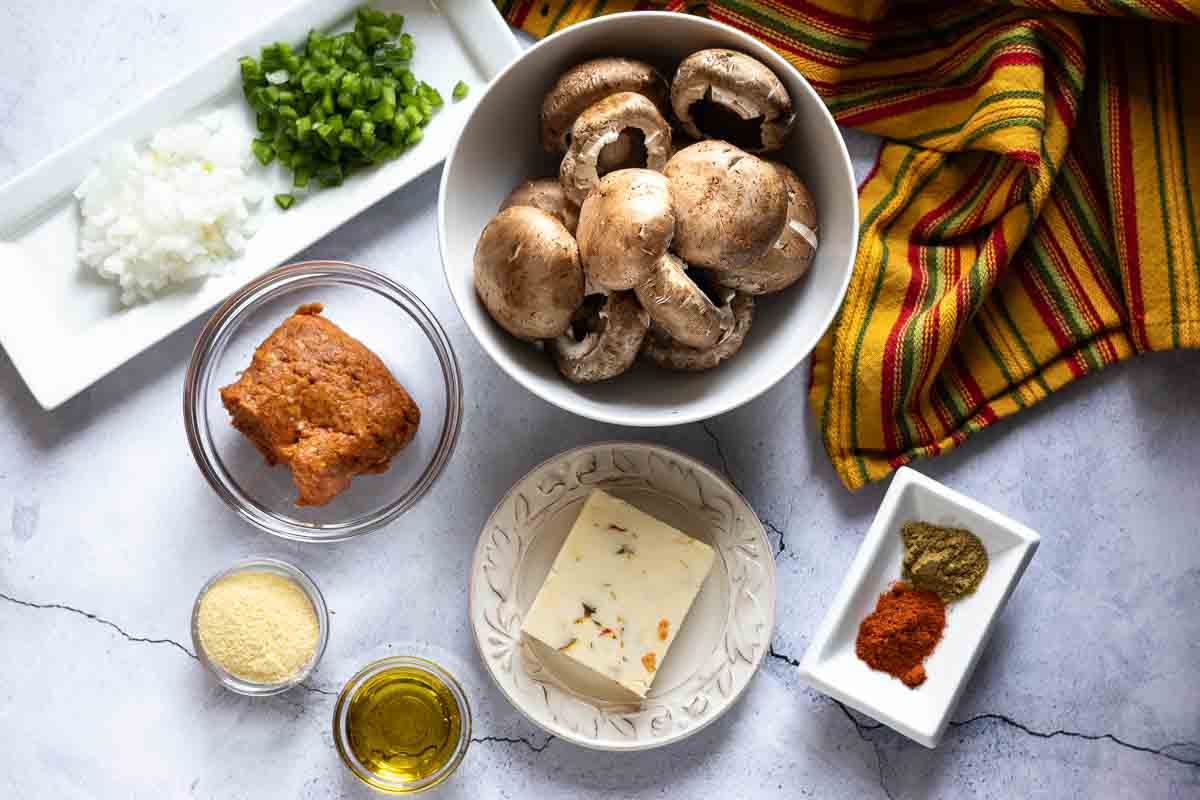
    Ingredients to make chorizo stuffed mushrooms appetizer.
    • Vegetables: Fine chopped jalapeno pepper and sweet onion.
    • Medium sized button mushrooms: I like to use Baby Bella mushrooms because of their rustic appearance. White button mushrooms will work also.
    • Chorizo Sausage: Chorizo is a spicy Mexican sausage. For ease in cooking, select bulk sausage rather than links for this recipe.
    • Melting Cheese: Use a good melting cheese like Monterey Jack, Muenster, Pepper Jack (my choice), or Mexican Queso Asadero.
    • Spices: Ground cumin and New Mexico red chile powder.
    • Olive Oil: We’ll use olive oil to drizzle the mushrooms right before cooking. Doing so will help them brown.
    • Yellow Cornmeal: Yellow cornmeal is used as a binder and adds a slight crunch and rustic flavor. You can also use masa here.

    Step by Step Instructions, How To Make Chorizo Stuffed Mushrooms
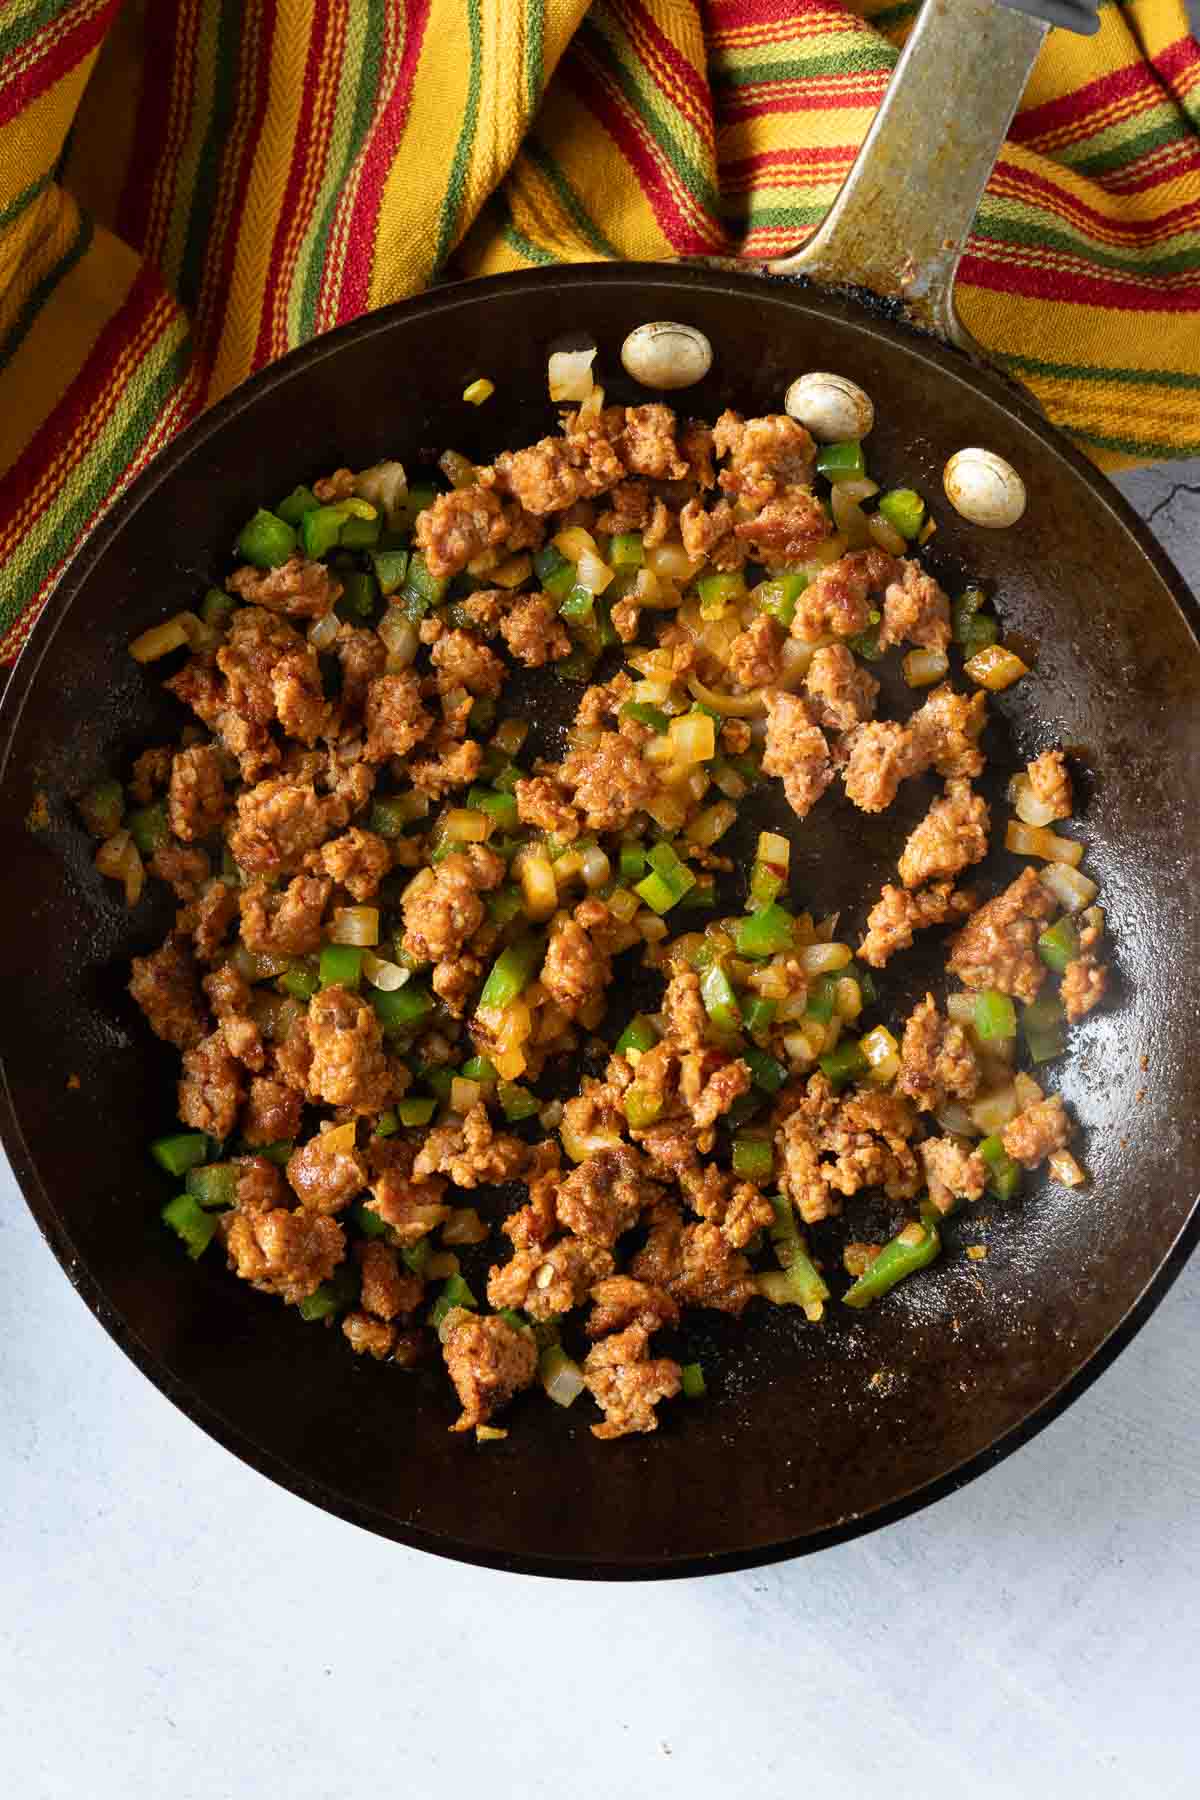
    Cooking chorizo onion and jalapeno peppers to make chorizo stuffed mushrooms.
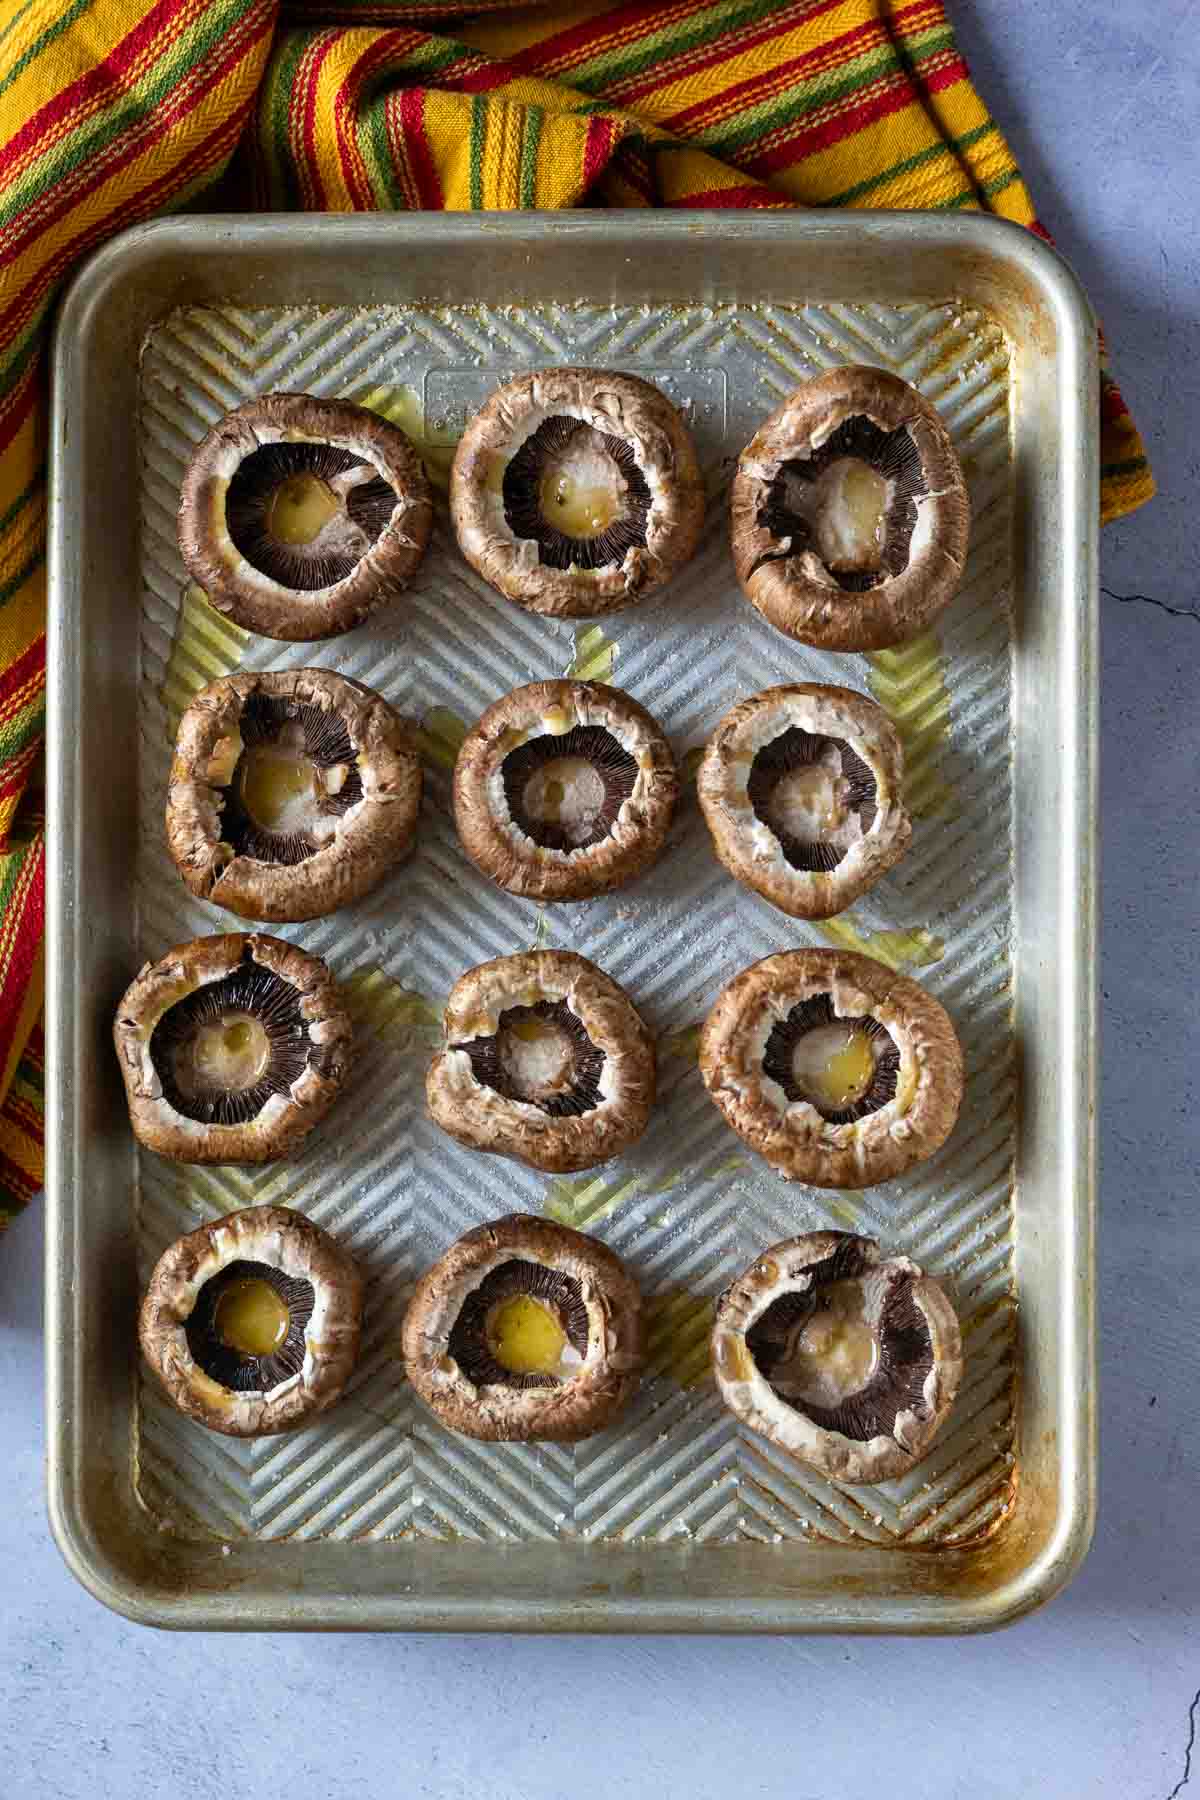
    Baby bella mushroom caps on a sheet pan ready to be stuffed with chorizo sausage.
    1. Step 1: In a medium fry pan, cook the chorizo until almost done. Add the diced onion and diced jalapeno and cook until tender, about 3 minutes. Make sure the chorizo is broken up into as small of pieces as you can get it. That way it will fit nicely into the mushroom caps. Add the chili powder, cumin and a few dashes of salt and pepper. Let cool a bit to make filling mushrooms easier. Taste and adjust seasonings to your liking. Drain the chorizo on paper towels to remove any excess grease.
    2. Step 2: Clean the mushrooms with a damp paper towel, removing the stems. Use a sharp paring knife to remove some of the area where the cap has been removed. This will hollow them about a bit and make more room for the filling. Place them cavity side up on a baking sheet pan.

    Variations For The Filling

    • Mushroom Stems: Fine chop the mushrooms stems and add to the chorizo as you brown.
    • Wine: If you’re sipping some red wine while making these, add a few tablespoons to the chorizo as it cooks. It will add another layer of rich flavor.
    • Bacon Bits: I’ve added some chopped bacon as I cooked the chorizo. Everyone loves bacon and it’s just one more reason to love these mushrooms.
    • Vegetarian: Use a plant based Chorizo sausage.
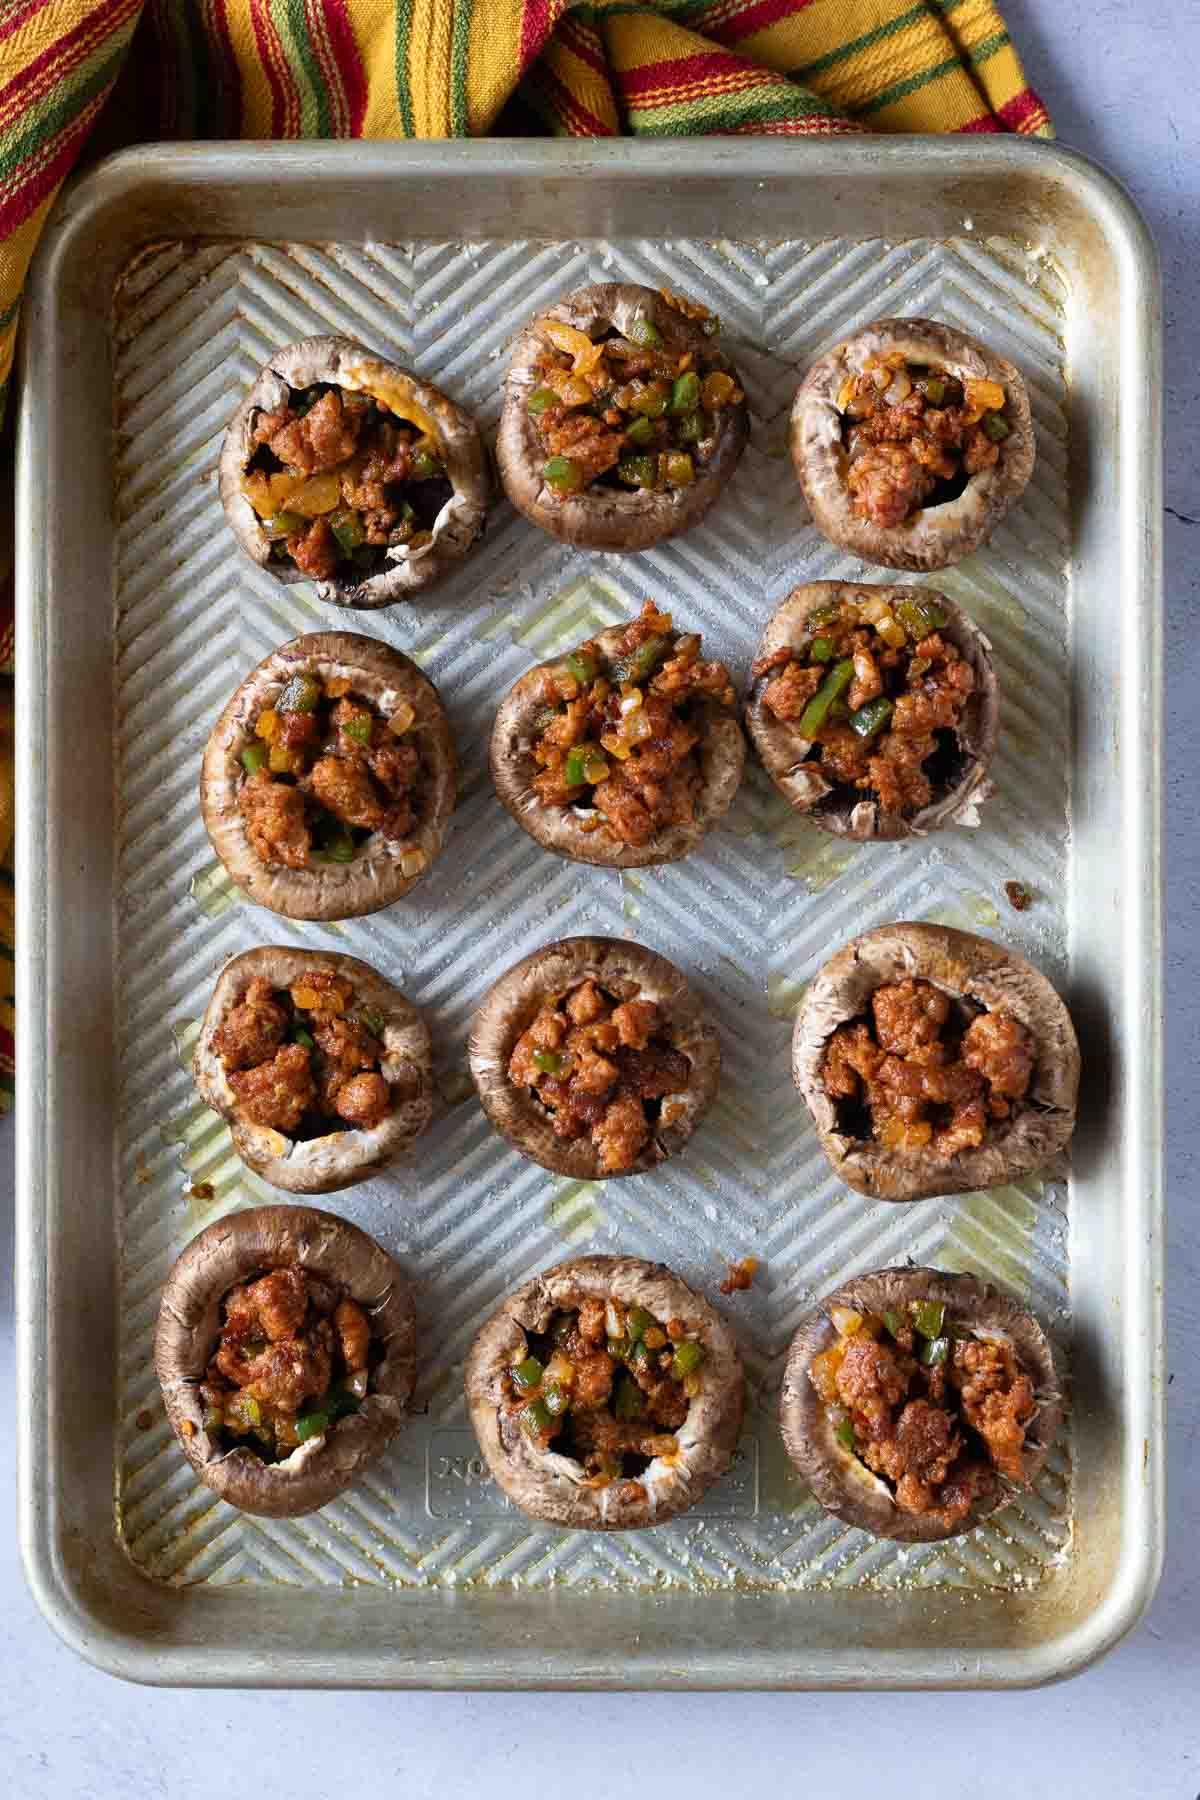
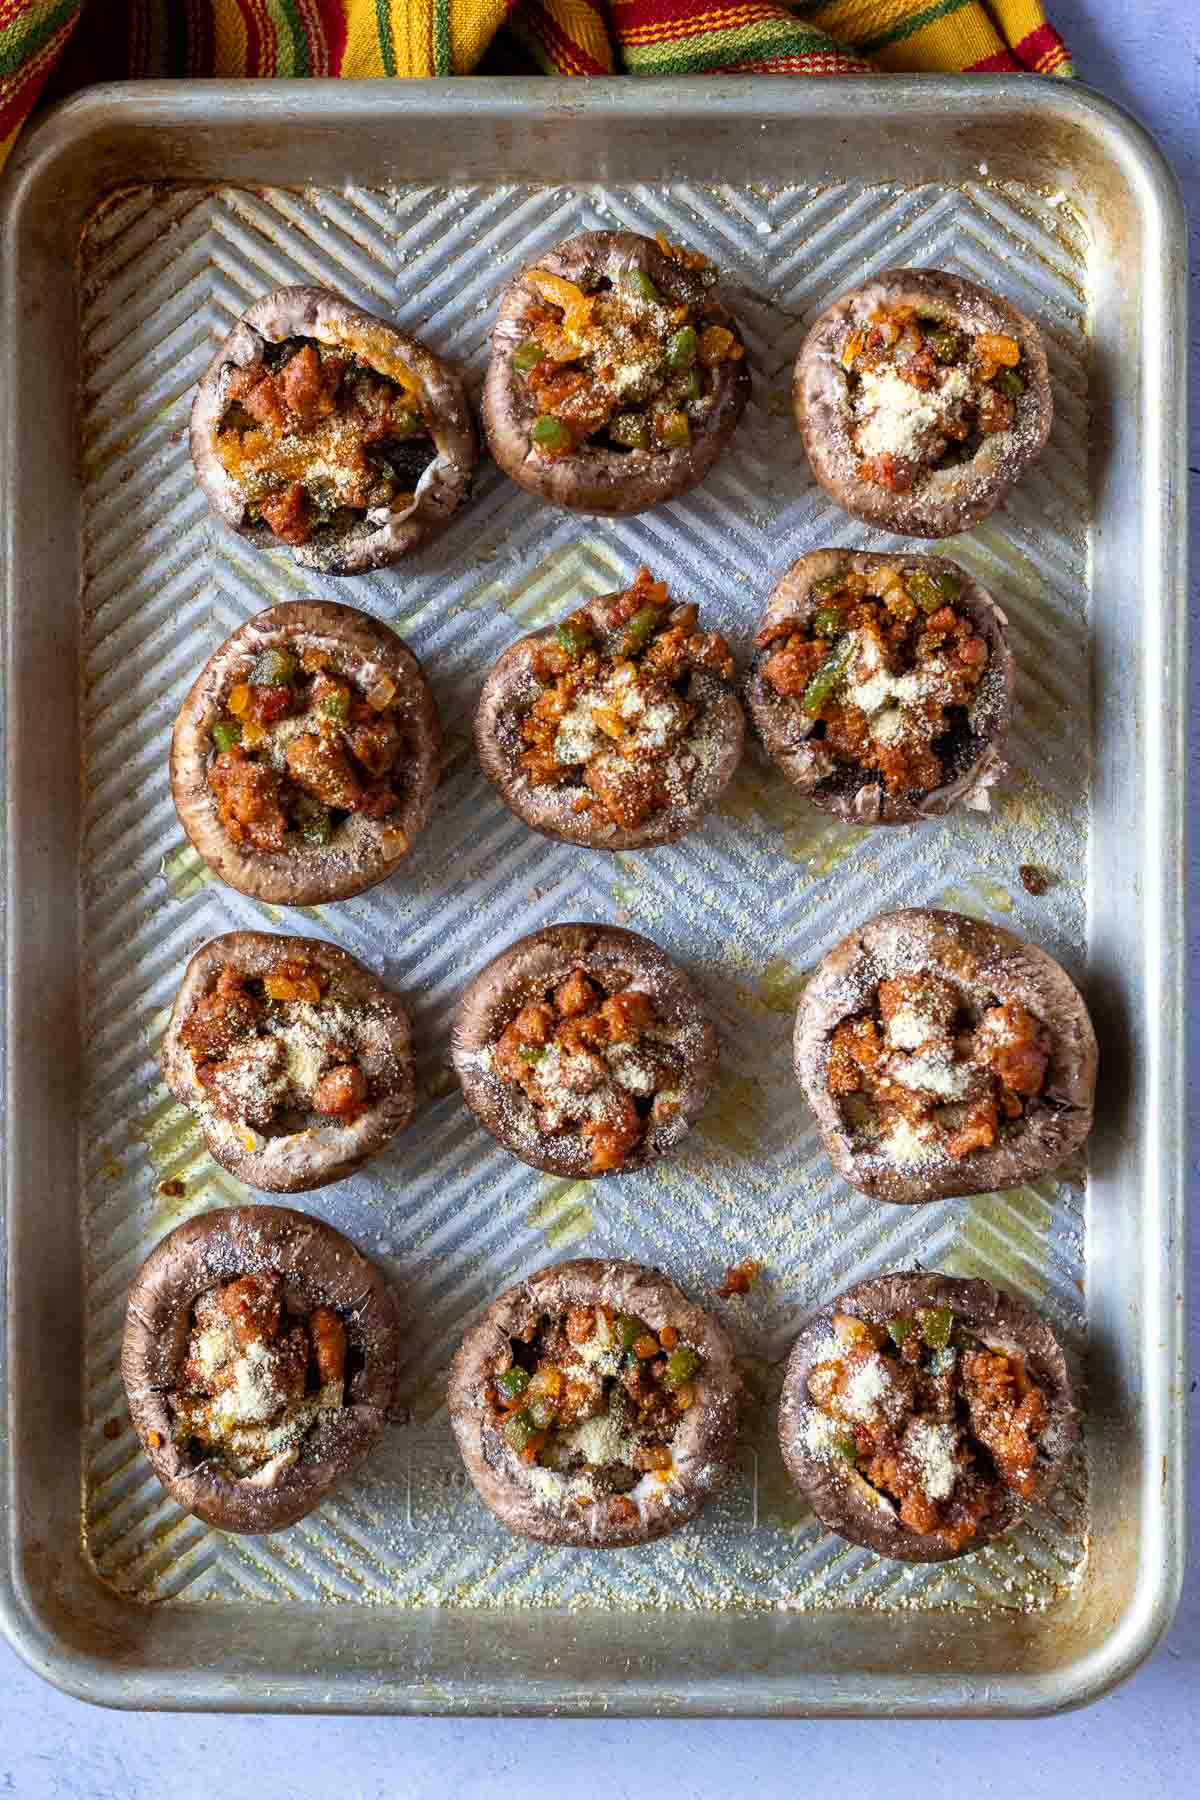
    Baby Bella mushroom caps stuffed with chorizo sausage.
    Chorizo stuffed mushrooms ready to bake.
    1. Step 3: With a small spoon, (I like to use a grapefruit spoon) fill the caps with the chorizo mixture, patting the mixture with your fingers so it forms in the mushroom cap.
    2. Step 4: Sprinkle each mushroom with cornmeal.
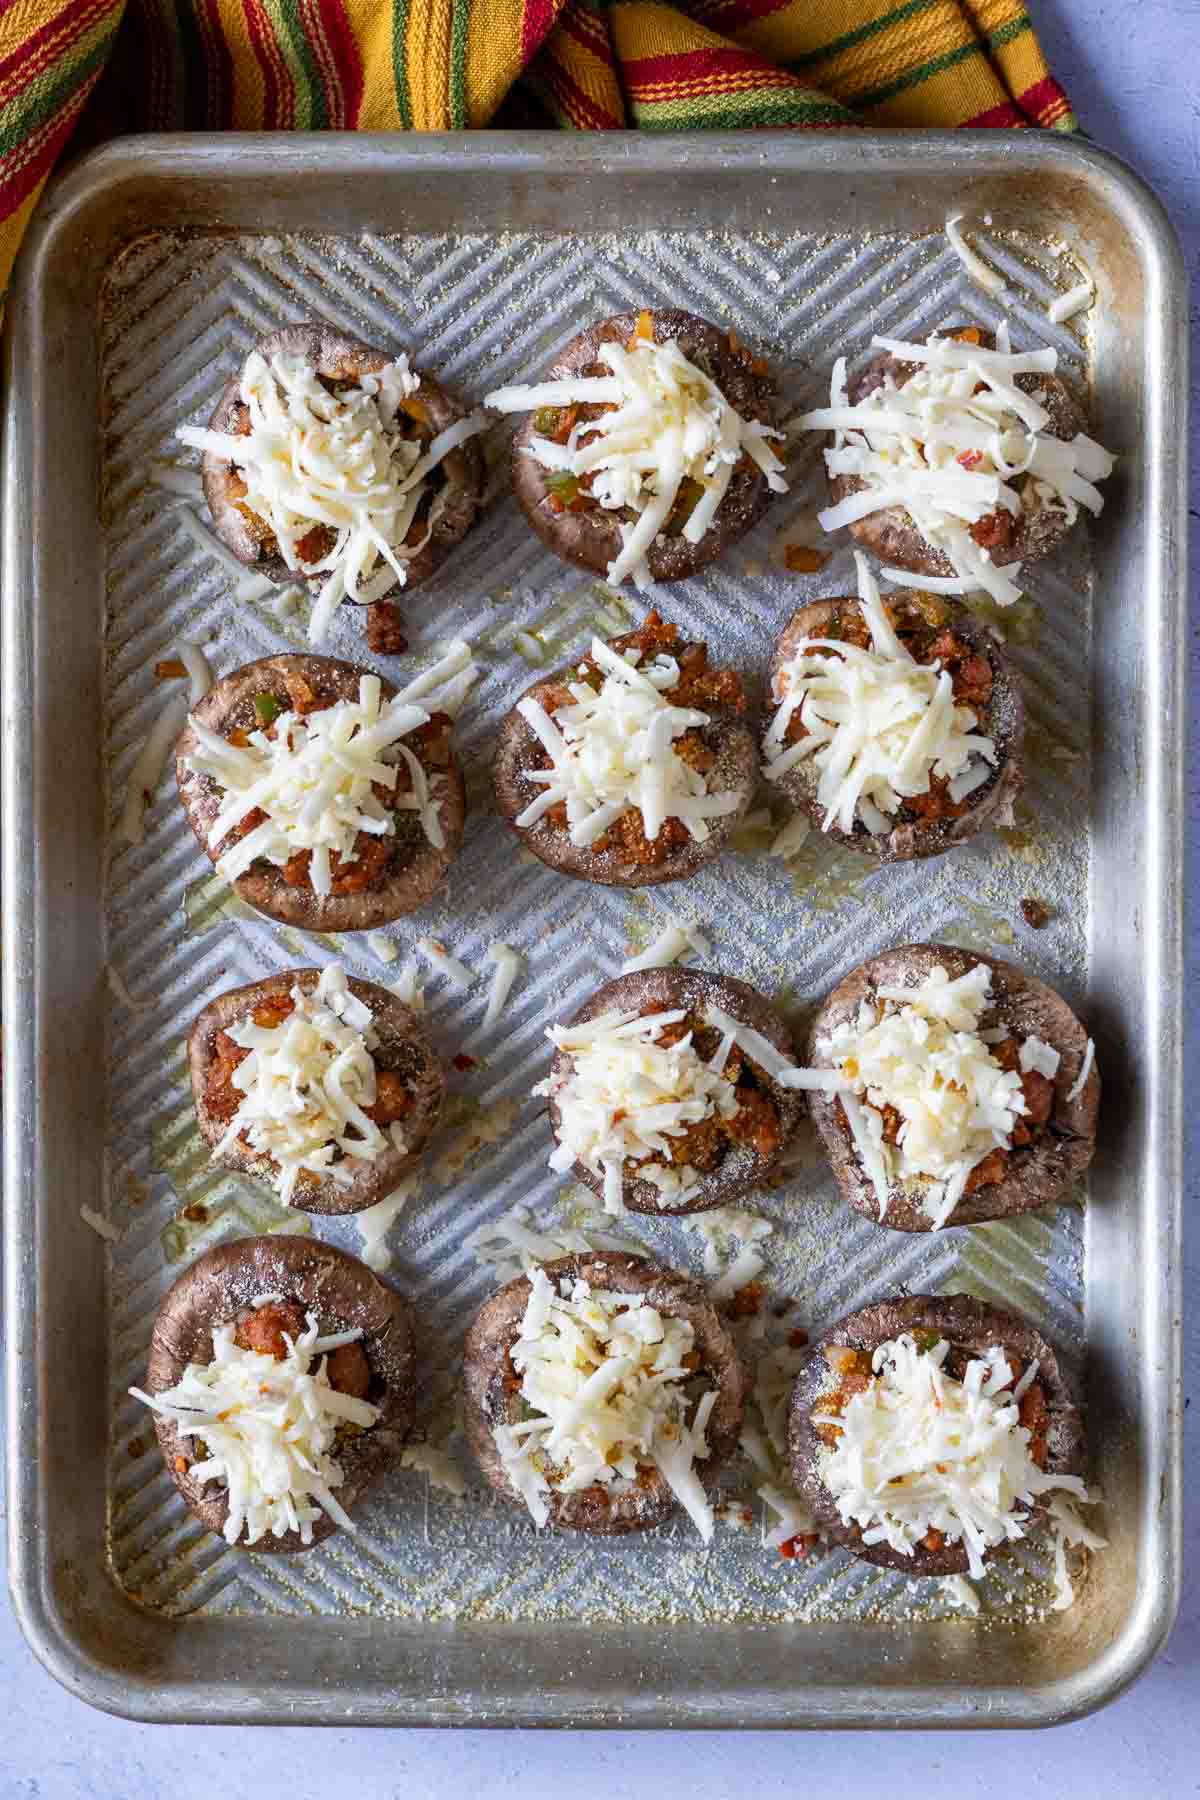
    Chorizo stuffed muchrooms on a baking sheet with shredded cheese topping.
    Baked chorizo stuffed mushrooms on a sheet pan.
    1. Step 5: Top each mushroom with a pinch of shredded cheese.
    2. Step 6: Bake 350 degrees for 15 – 20 minutes. Or until cheese is just starting to brown and mushrooms are tender.
    Baked Chorizo Stuffed Mushrooms.
    1. Step 6: Place the baked chorizo stuffed mushrooms on your favorite serving plate. Garnish with fine chopped cilantro if you wish.

    Tips For Success

    • Put those knife skills to work. Chop the onion and jalapeno pepper into very small diced pieces. The smaller the cut, the easier they will fit into the mushroom caps.
    • When cooking the chorizo, make sure to break it up into the smallest pieces you can. Again, it will stay put in that mushroom cap much better.
    • Troubleshooting, How To Keep Mushrooms From Getting Soggy: Mushrooms can become soggy if you’ve rinsed them with water before prep. Gently clean them with a paper towel. A wet textured filling can also cause the bottom of the mushrooms to become soggy. This chorizo cheese filling does not fall into that category as long as you pat the chorizo dry with paper towels to remove excess grease. A high oven temperature, such as 400 degrees, will also keep stuffed mushrooms from becoming soggy.

    How to Make Ahead

    • Prepare this recipe through step 5, then cover them with plastic wrap and refrigerate until ready to bake.
    • Bring them to room temperature, or add a couple of minutes to the cooking time if they’re still cold.
    • These mushrooms can be prepped and refrigerated for up to one day before baking.

    Serving Ideas

    These chorizo stuffed mushrooms are a very popular choice for any party gathering, such as wine night gatherings, back yard bbq‘s, a tapas themed party or even a game day treat. But they also make a filling side dish for taco night. Try them with Lobster Tacos, Shrimp Tacos or our favorite, Dutch Oven Tri-tip Tacos.

    Mushrooms and steak are a great pairing. Serve these as an appetizer or side for Flank Steak, or even a Grilled T-bone.

    How Do You Prep Mushrooms?

    All mushrooms absorb water like a sponge. Avoid rinsing them under water, as the texture will become compromised and they’ll become harder to brown. If you’re pan frying them or baking them, like for this stuffed mushroom recipe, simply use a damp paper towel to wipe off any visible dirt.

    Are These Chorizo Stuffed Mushrooms Spicy?

    Even though big with flavor, Chorizo sausage is not a particularly spicy sausage. The New Mexico chile powder on the other hand can carry quite a punch of heat. Add the chile powder a little at a time, tasting, until you reach your heat level. Seed and devein the jalapeno peppers for a milder spice level.

    Are These Chorizo Mushrooms Gluten Free?

    Assuming that the chorizo sausage you purchase has no fillers, this should be a gluten free Mexican appetizer.

    Storage and Reheating

    • Store any leftover stuffed mushrooms in an airtight container in the refrigerator. I like to line the bottom of a snap-top storage container with a small sheet of paper towel. This will draw any of the moisture out of the mushroom and keep them from getting soggy. They’ll keep for up to three days.
    • To Reheat: Reheat in the oven using a low temperature like 250 degrees. Place them on a sheet pan with a wire rack. The air beneath the mushrooms will keep them from getting soggy and preserve their texture. An air fryer is also a good way to reheat. Don’t reheat any leftover stuffed mushrooms in the microwave. The microwave will cause them to get soggy.

    Explore More Popular Appetizer Recipes

    If you're looking for bold, savory and spicy, here are some popular ideas.

    • Hatch green chile dip served with blue corn tortilla chips.
      Hatch Green Chile Cheese Dip
    • Empanadas de Chorizo
      Baked Cheese and Chorizo Empanadas
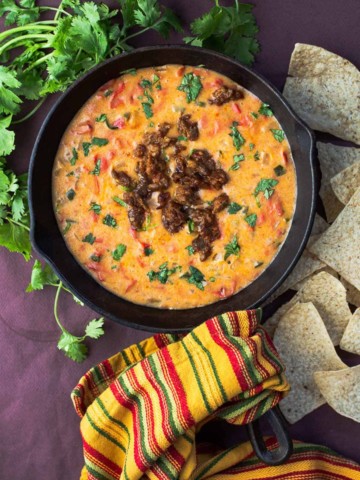
    • Queso fundido with tequila served in a cast iron skillet and topped with cooked chorizo
      Queso Fundido con Chorizo
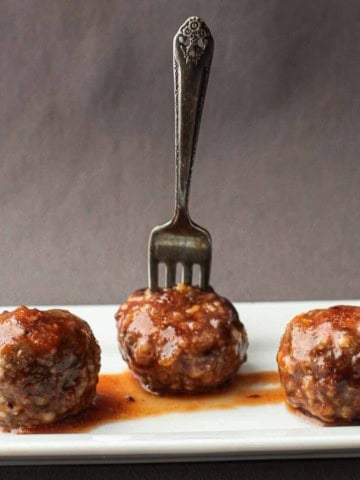
    • Honey sriracha meatballs served on a white platter.
      Sweet-Spicy Honey Sriracha Meatballs With Cranberry Sauce

    And if you’re looking for even more fun finger food appetizer recipes, don’t miss my
    Appetizer Category. You’ll find lots of party recipes including one of the most popular on my site for Andouille Sausage Pigs In A Blanket Using Puff Pastry.

    If you liked this recipe, please leave a star ⭐⭐⭐⭐⭐ rating in the recipe card below and leave a comment. I always appreciate your feedback and hearing how everything went.

    And, don’t forget to subscribe to my newsletter for more delicious recipes and cooking tips. Make it a delicious day … every day.

    Chorizo mushrooms appetizer.
    Print Recipe
    5 from 4 votes

    Cheesy Chorizo Stuffed Mushrooms

    A Mexican version of our all time favorite Appetizer, these Chorizo Stuffed Mushrooms are easy and popular.
    Prep Time20 minutes mins
    Cook Time20 minutes mins
    Total Time40 minutes mins
    Course: Appetizer Recipes
    Cuisine: Mexican
    Servings: 12 mushrooms
    Calories: 59kcal
    Author: Lea Ann Brown

    Ingredients

    • 12 good sized button mushrooms wiped cleaned, stems removed
    • ¼ pound Chorizo sausage bulk rather than links.
    • ½ small sweet onion diced
    • 1 jalapeno pepper seeds and veins removed, diced
    • ¼ teaspoon New Mexico chile powder add ½ teaspoon if you want more heat. Or Cayenne pepper works well here.
    • ½ teaspoon cumin
    • ½ teaspoon Kosher Salt
    • 1 Tablespoon Olive oil for drizzling
    • 2 tablespoons cornmeal
    • ½ cup Pepper Jack Cheese Shredded. Or your favorite melting cheese. Monterey Jack or cheddar works well here.

    Instructions

    • Clean the mushrooms with a damp paper towel, removing the stems.
    • In a fry pan, cook the chorizo until almost done. Add the diced onion and diced jalapeno until tender, about 3 minutes. Make sure the chorizo is broken up into as small of pieces as you can get it. So it will nicely fit into the mushrooms.
    • Add the chile powder, cumin and a few dashes of salt and pepper. Let cool a bit to make filling mushrooms easier. Taste and adjust seasonings to your liking.
    • Place the mushroom caps on a sheet pan or 9 x 11 casserole dish, and drizzle with olive oil.
    • With a small spoon, fill the caps with the chorizo mixture, patting the mixture with your fingers so it forms in the mushroom cap. Sprinkle each mushroom with cornmeal. And then top with a pinch of cheese.
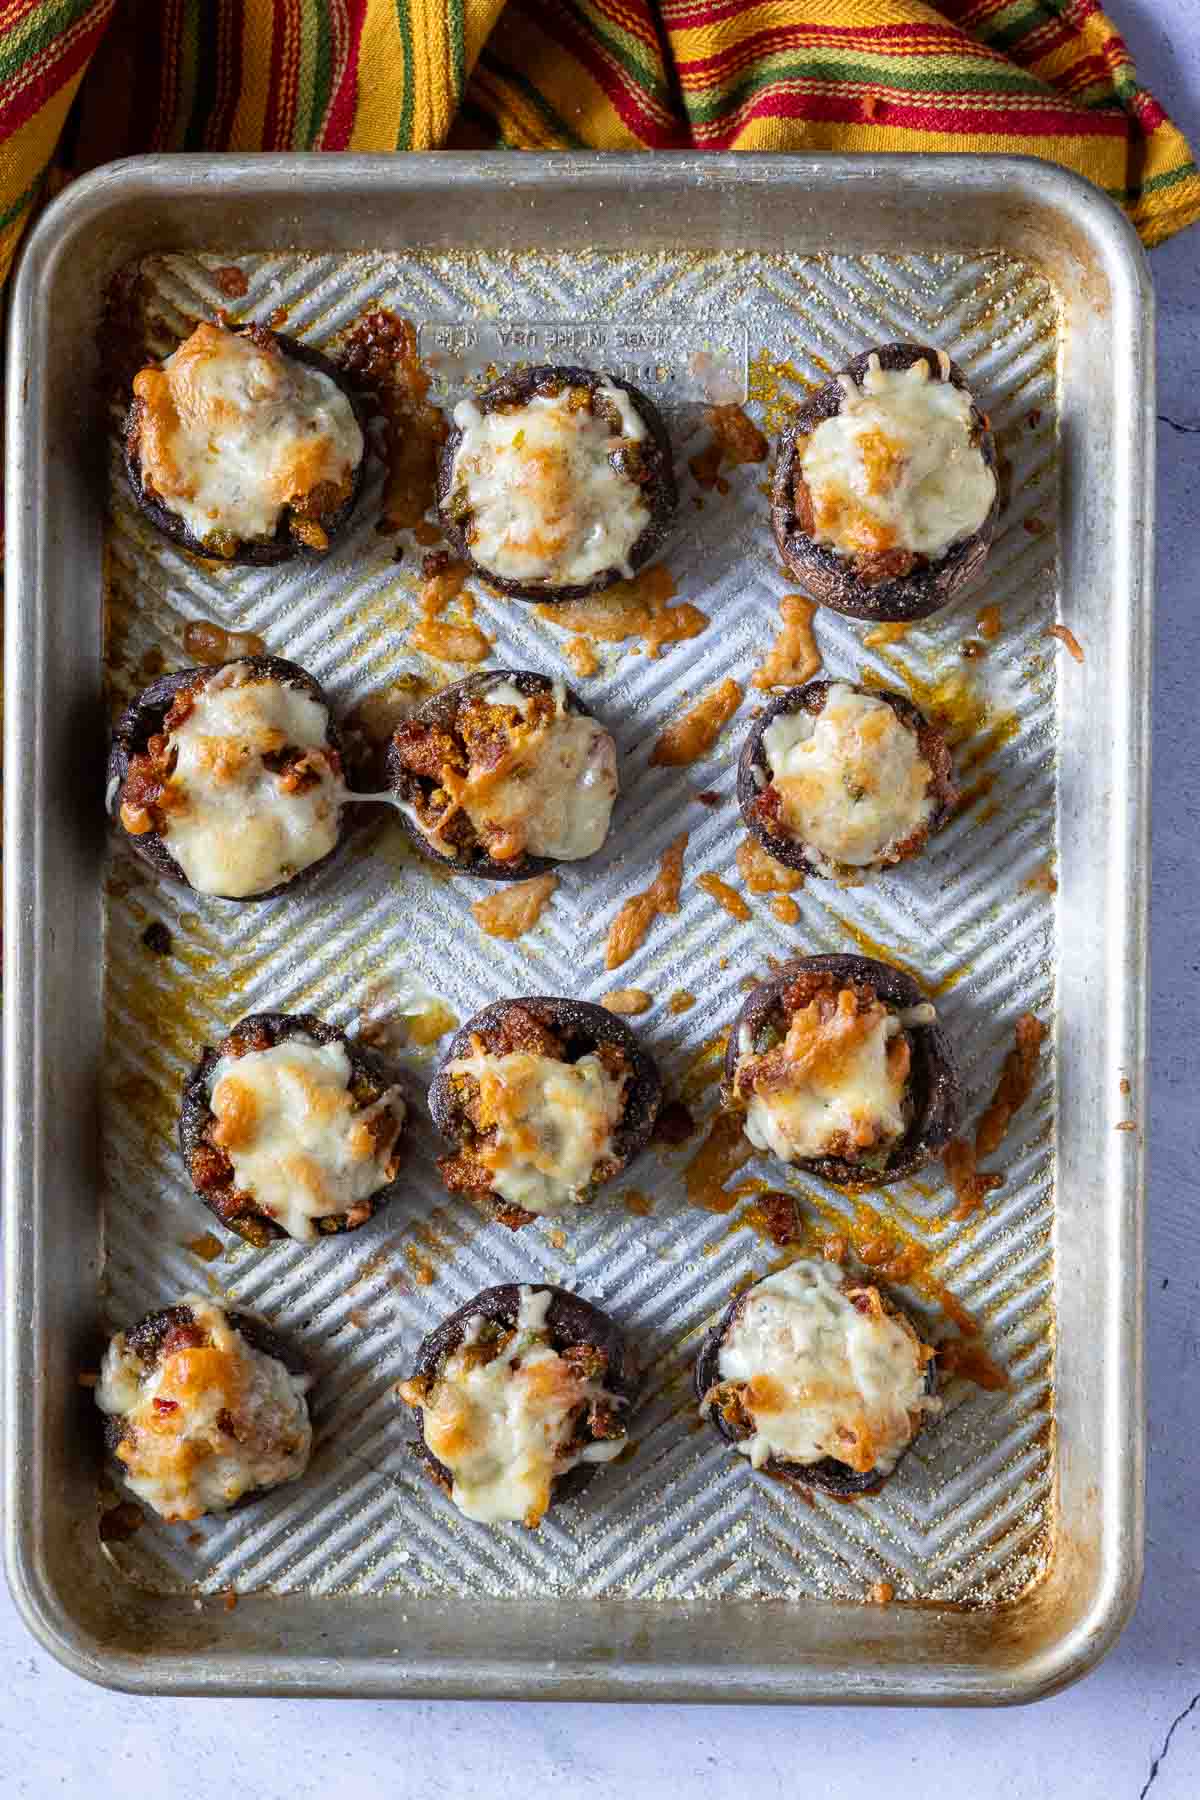
    • Bake 400 degrees for 15 – 20 minutes. Or until cheese is just starting to brown and mushrooms are tender.
    Notes

    Tips for Success:
      • Put those knife skills to work. Chop the onion and jalapeno pepper into very small diced pieces. The smaller the cut, the easier they will fit into the mushroom caps.
      • When cooking the chorizo, make sure to break it up into the smallest pieces you can. Again, it will stay put in that mushroom cap much better.
      • How To Keep Mushrooms From Getting Soggy: Mushrooms can become soggy if you’ve rinsed them with water before prep. Gently clean them with a paper towel. A wet textured filling can also cause the bottom of the mushrooms to become soggy. This chorizo cheese filling does not fall into that category as long as you pat the chorizo dry with paper towels to remove excess grease.

    Nutrition

    Calories: 59kcal | Carbohydrates: 3g | Protein: 3g | Fat: 4g | Saturated Fat: 2g | Polyunsaturated Fat: 0.2g | Monounsaturated Fat: 1g | Cholesterol: 11mg | Sodium: 128mg | Potassium: 94mg | Fiber: 1g | Sugar: 1g | Vitamin A: 110IU | Vitamin C: 4mg | Calcium: 42mg | Iron: 0.4mg

    Cheesy Chorizo Stuffed Mushrooms…They’re what’s for an Appetizer.

    Juicy Gingery Ground Pork Meatballs with Peaches, Basil and Lime

    January 24, 2024 By Lea Ann Brown 3 Comments

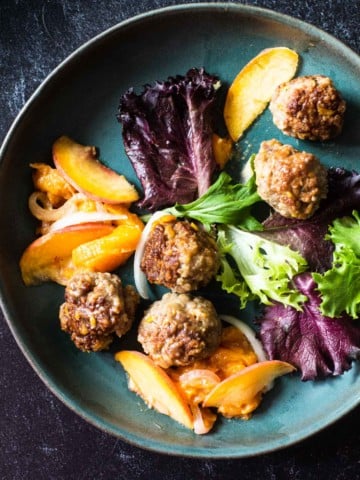
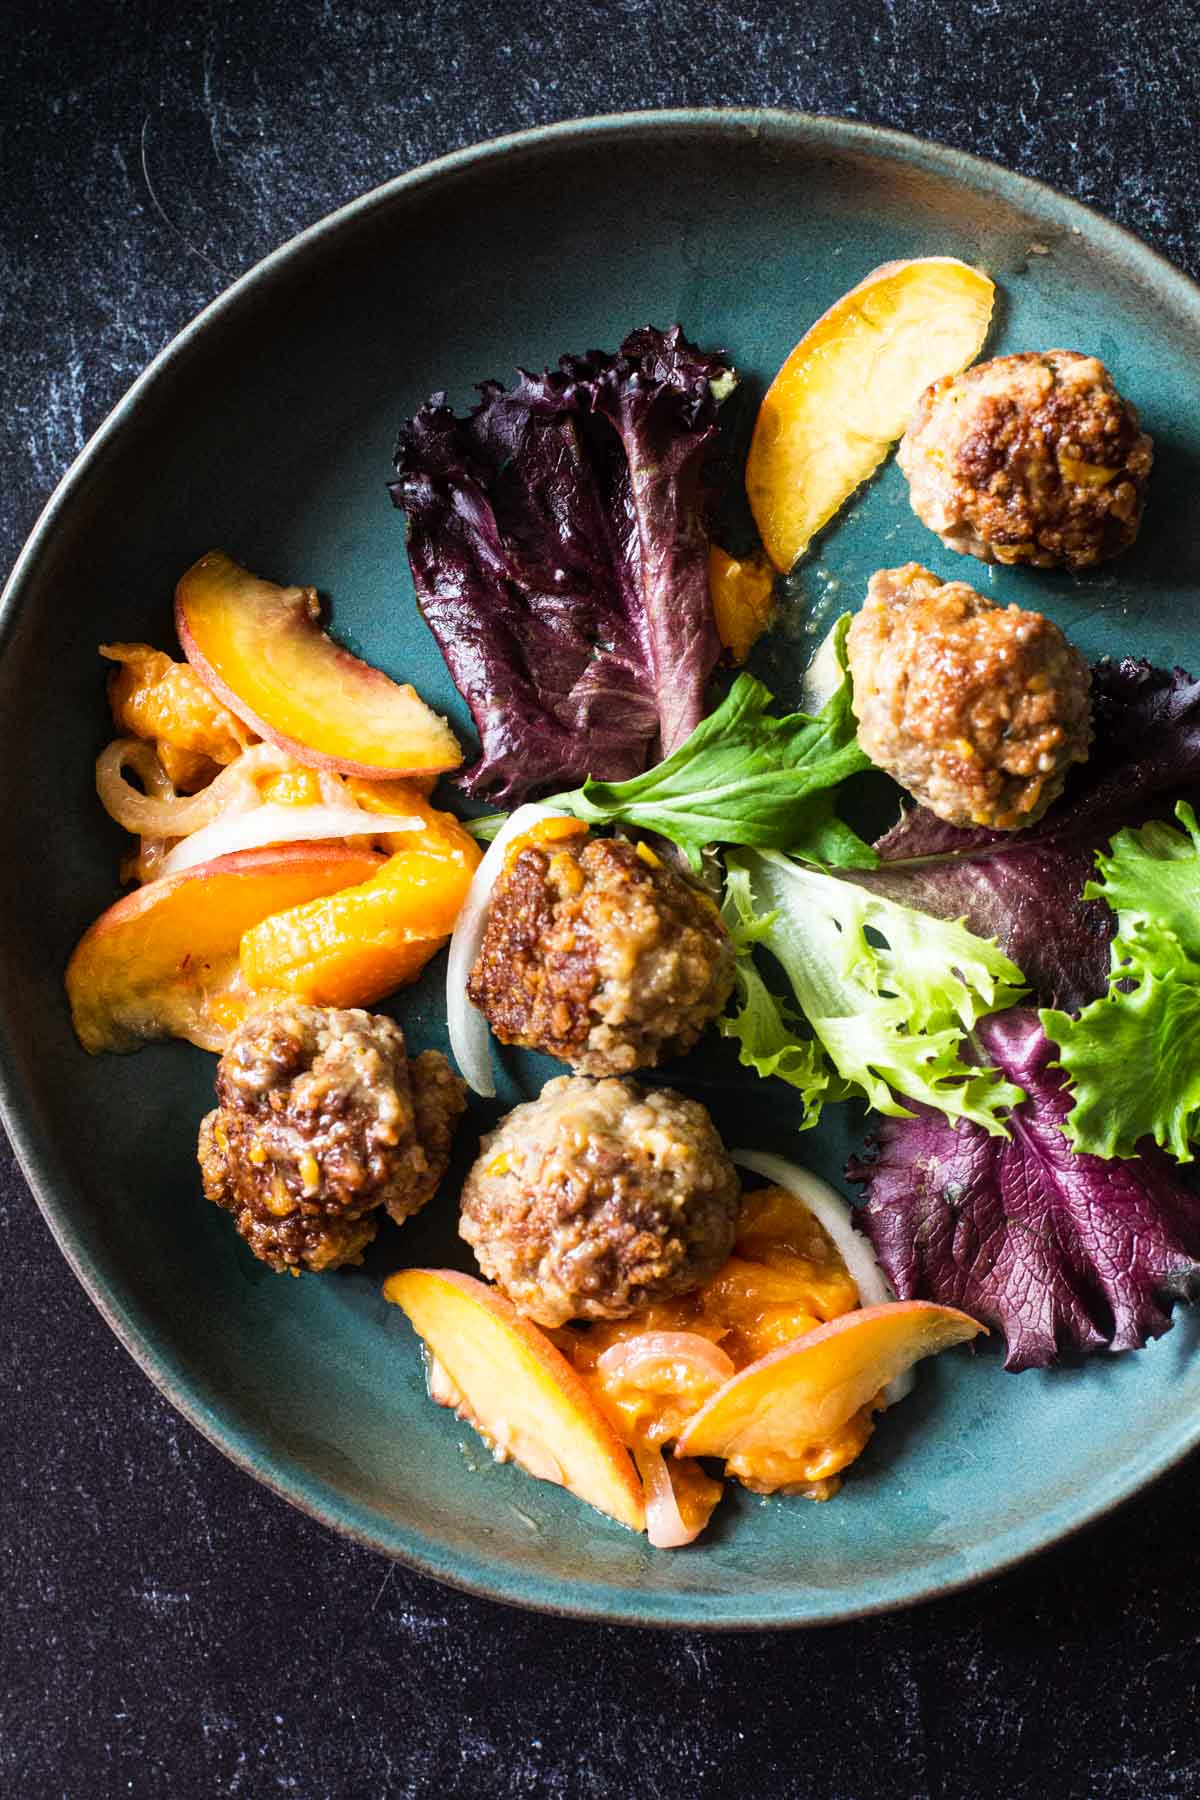
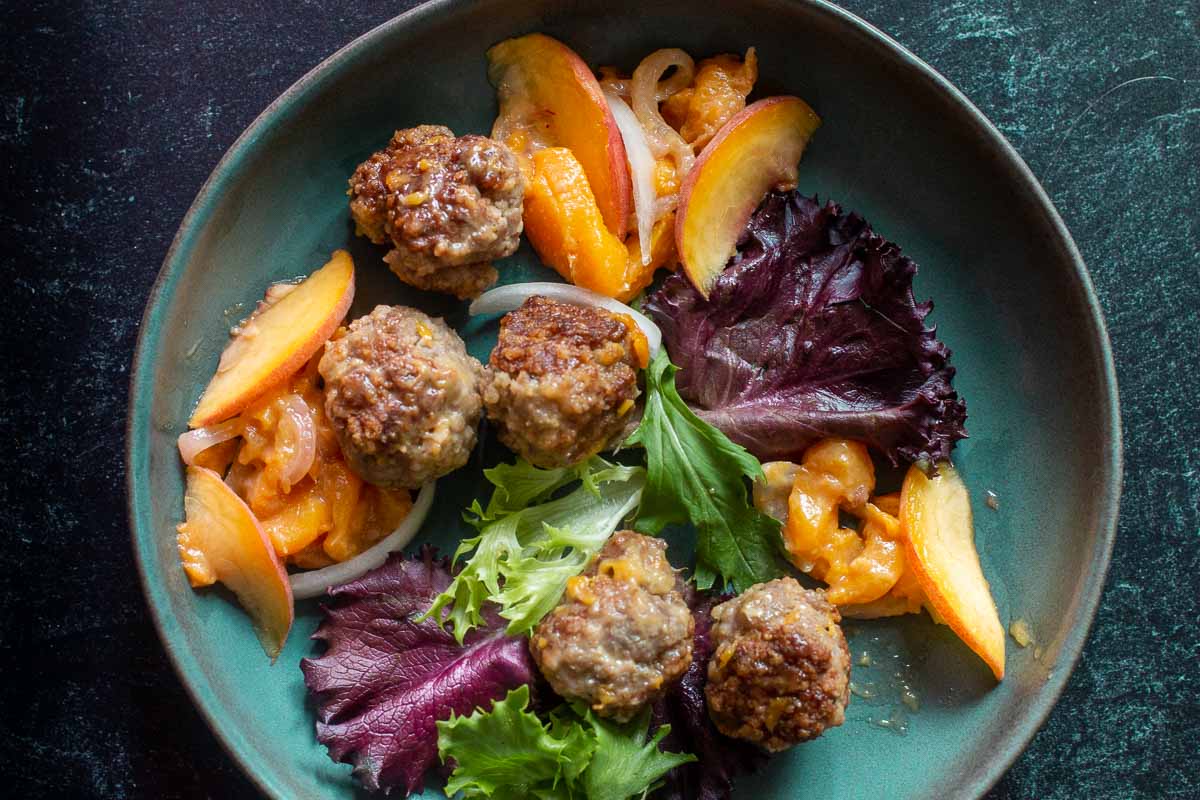
    Pan fried meatballs with peaches served with mixed greens.

    Gingery skillet fried ground pork meatballs are seasoned with basil, lime and served with fresh juicy peaches. A sweet and savory treat with addictive flavors. Serve this over crisp greens for a light summery supper.

    Peaches are wonderful in savory dishes, including these Colorado Peach Pork Tenderloin Medallions.

    Pan fried meatballs with peaches served with mixed greens.

    What You Can Expect From This Recipe

    Why Choose Ground Pork For Meatballs? I’m of the opinion that all meatballs are simply awesome. They’re fun to eat and easy to make. You can make them using about any type of meat, but ground pork can carry a higher fat content than other meats. And fat means flavor and fat means a juicier meatball. And ground pork is a less expensive alternative than beef.

    Speaking of Flavor: These ground pork meatballs are amazing with flavor, seasoned with ginger, basil and tossed with pan-fried sliced peaches. They’ll rock your meatball world and served with mixed greens, you’ve got a light dinner with magical flavor.

    Flavor Profile: You can make these meatballs with any type of meat, but rich ground pork is a perfect flavor compliment to juicy peaches and basil.

    This Recipe Just Works: Pork and peaches are such a natural combination in both texture and flavors. And this ground pork meatballs recipe offers a delightful fusion of savory, tangy and sweet. Whether served as a main course or as a flavorful appetizer, these brawny pork meatballs go especially well with sweet fried peaches.

    This is one of my favorite recipes to celebrate our famous Colorado Palisade Peaches. Peaches and pork are a classic combination.

    Meatballs can be made ahead, they freeze well. They can be served as a main course, or as an appetizer. They’re absolutely lovable and wildly popular. And it seems like every culture on Earth has their own version.

    And if you’re looking for a recipe for meatballs without eggs, this is a great recipe to try.

    [feast_advanced_jump_to]

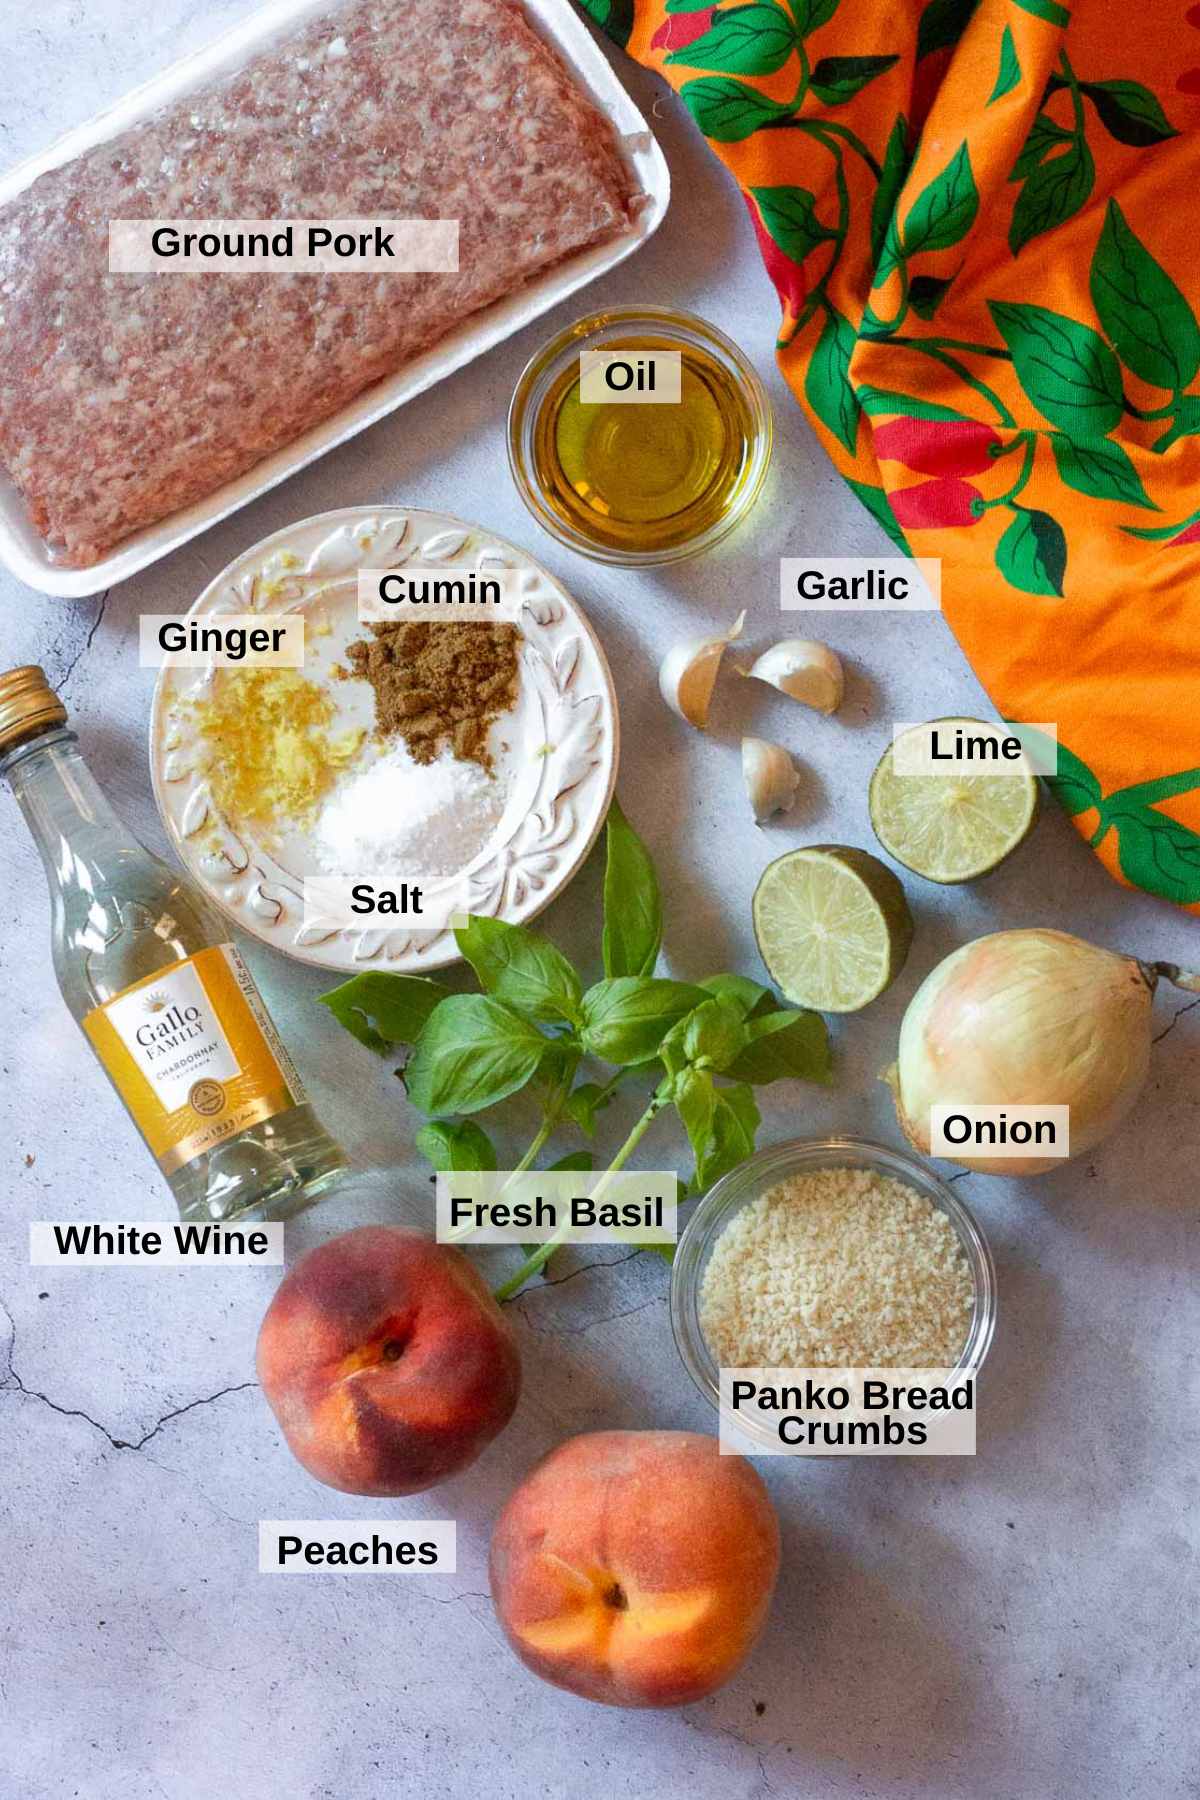
    Ingredients You’ll Need

    Ingredients to make ground pork meatballs.
    • Ground Pork
    • Olive Oil
    • Dry White Wine: Choose a Sauvignon Blanc or Chardonnay
    • Lime
    • Garlic
    • Fresh Basil
    • Onion, white or sweet onion.
    • Panko Bread Crumbs
    • Ripe Fresh Peaches
    • Mixed Greens

    Pro Tip: Freeze Ginger. Keep that knob of ginger in the freezer. Whenever you need a small amount for any recipe, just remove it and use a zester or microplane zester to acquire the amount you need and then return the rest back to the freezer for future use. You don’t even need to peel the ginger. EASY and practical.

    Ingredient Substitutions:

    • Oil: A neutral oil such as vegetable or canola oil works well here
    • White Wine: Use chicken broth or orange juice.
    • Onion: Sliced green onions will work well here.
    • Use plain bread crumbs in place of Panko.
    • Nectarines are a good replacement for peaches.

    Step by Step Instructions, It’s Easy

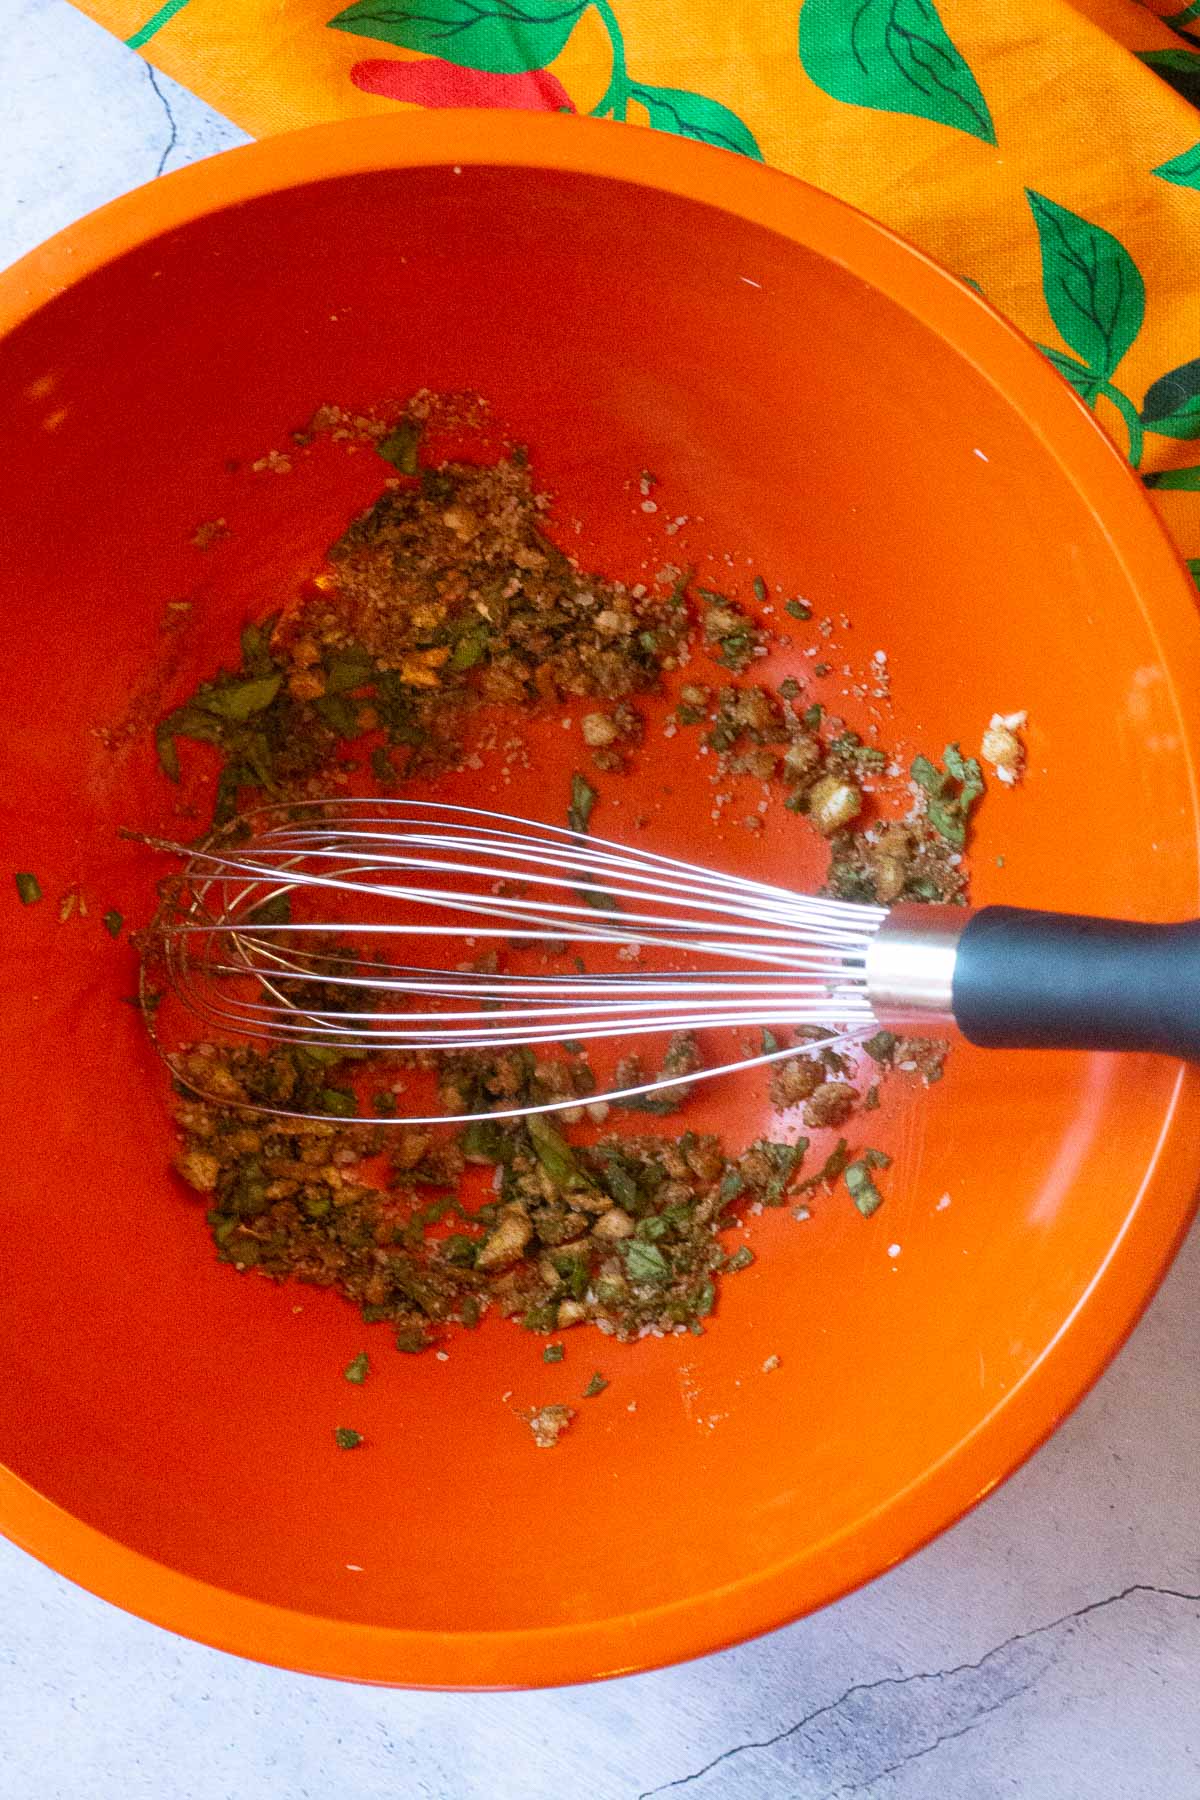
    Mixing seasoning for pork meatballs.
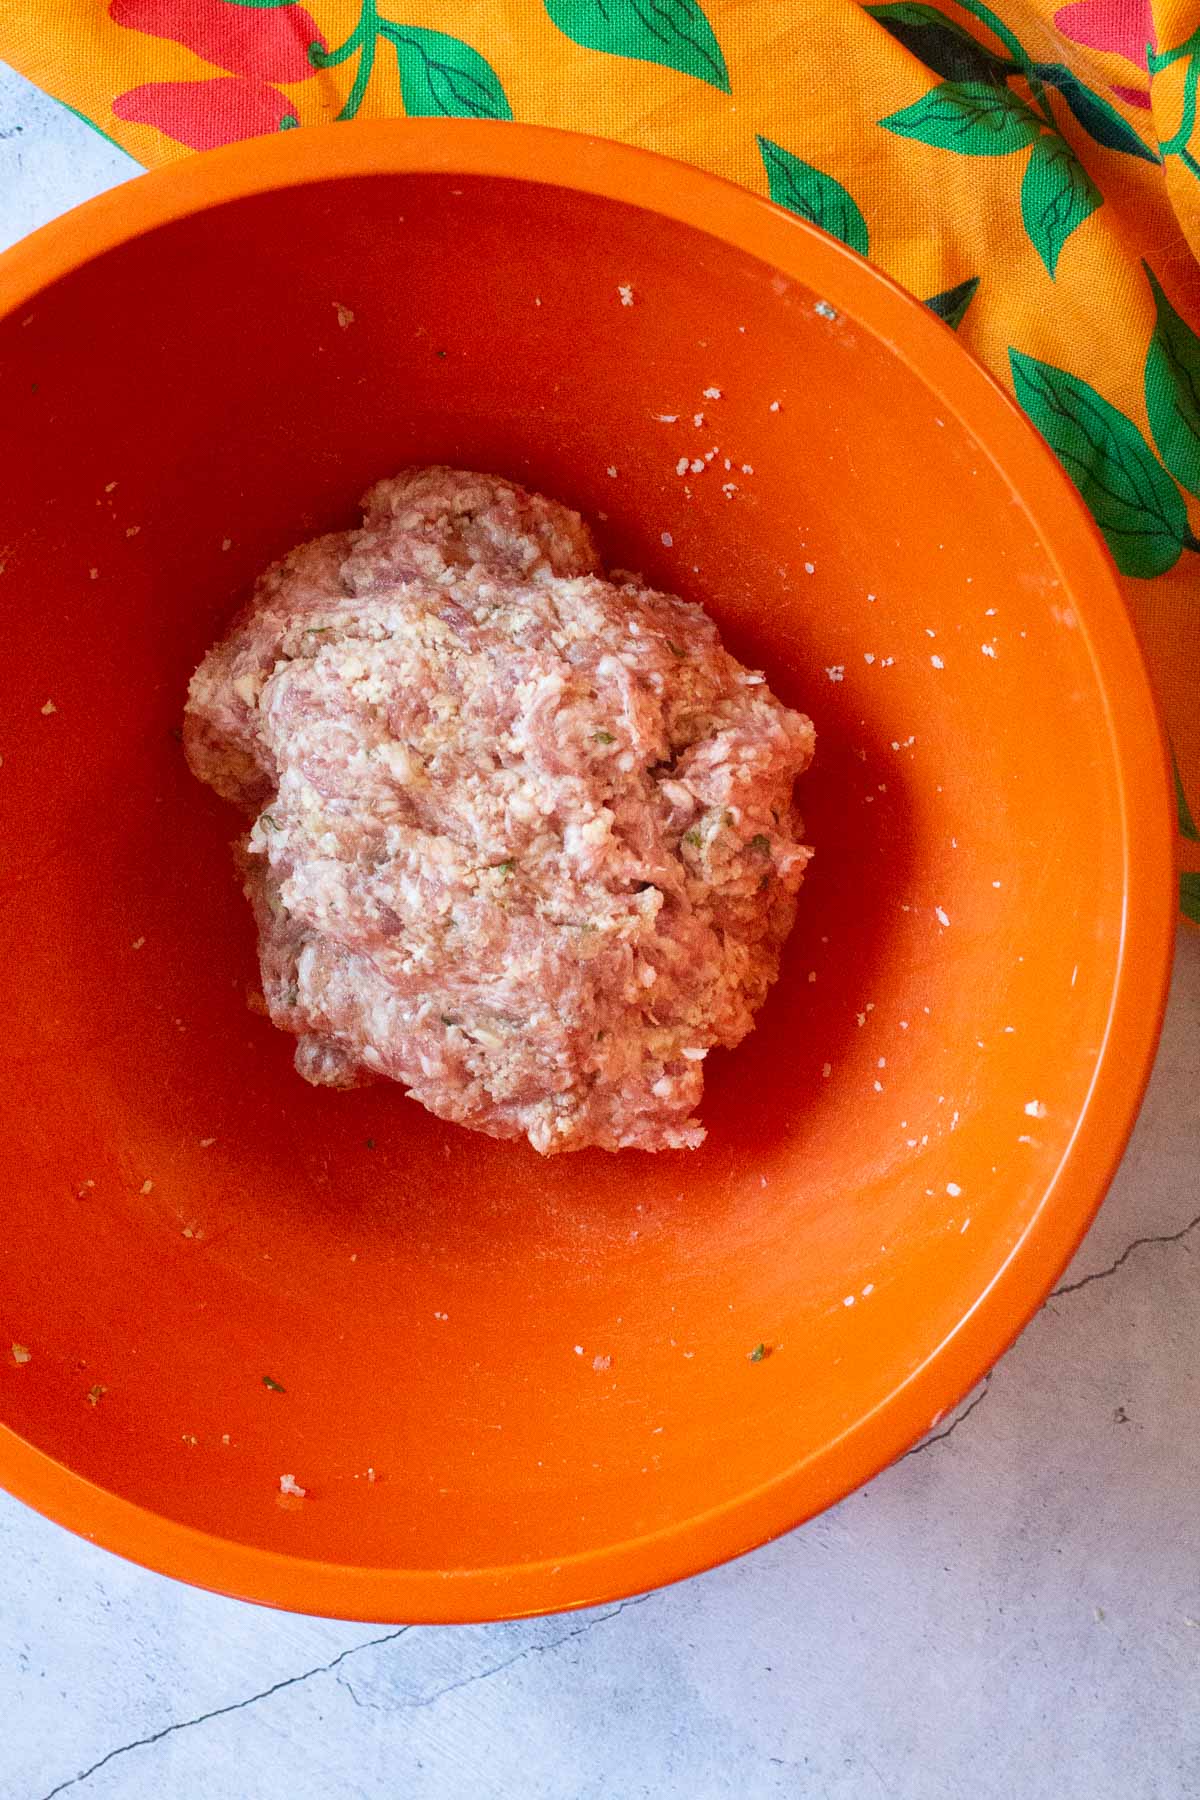
    Mixing ground pork with seasonings to make pork meatballs.
    1. Step 1: In a large bowl, mix together ginger, garlic, cumin and salt.
    2. Step 2: Add pork, panko and basil. Using your hands, gently mix everything together, making sure not to overwork the mixture to avoid dense meatballs. 
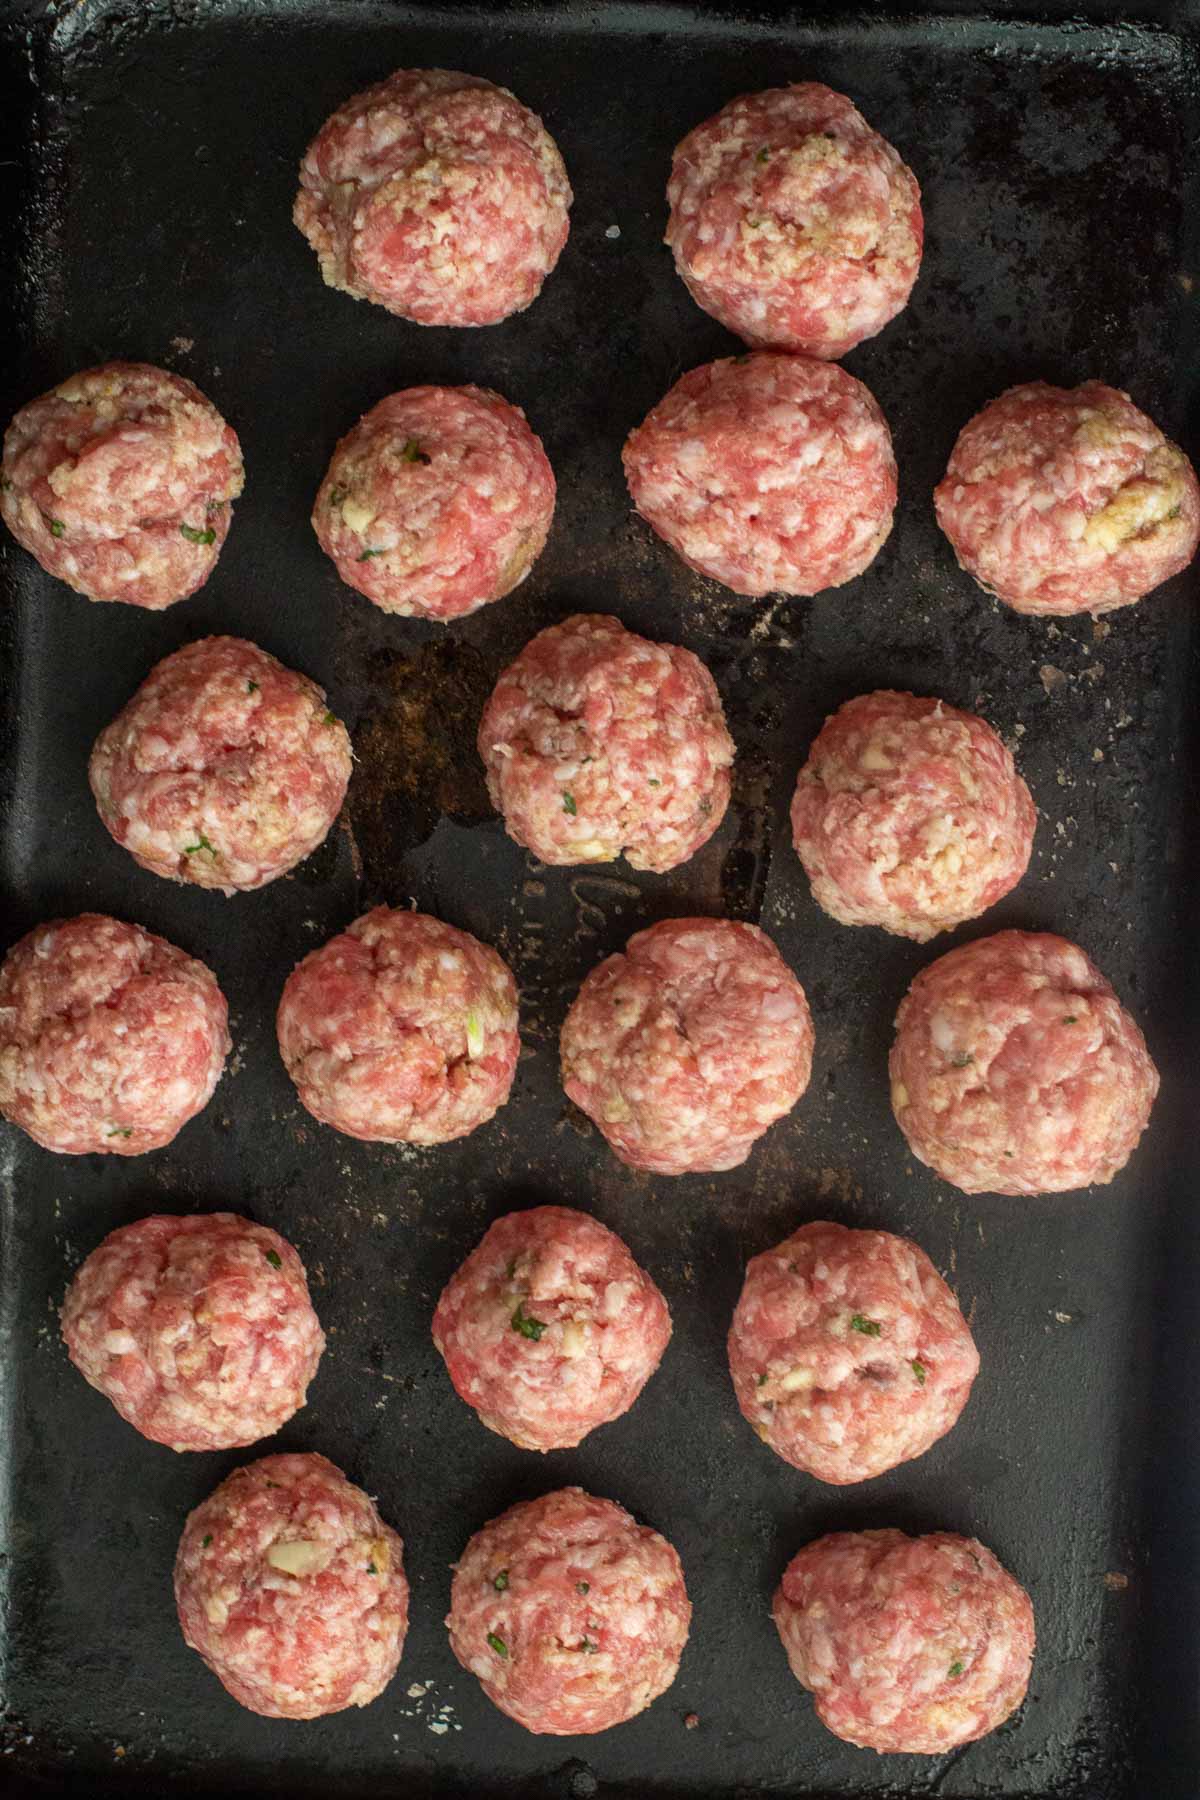
    Pork meatballs ready to cook.
    Frying pork meatballs in a skillet with peaches.
    1. Step 3: Form into 1¼-inch balls.
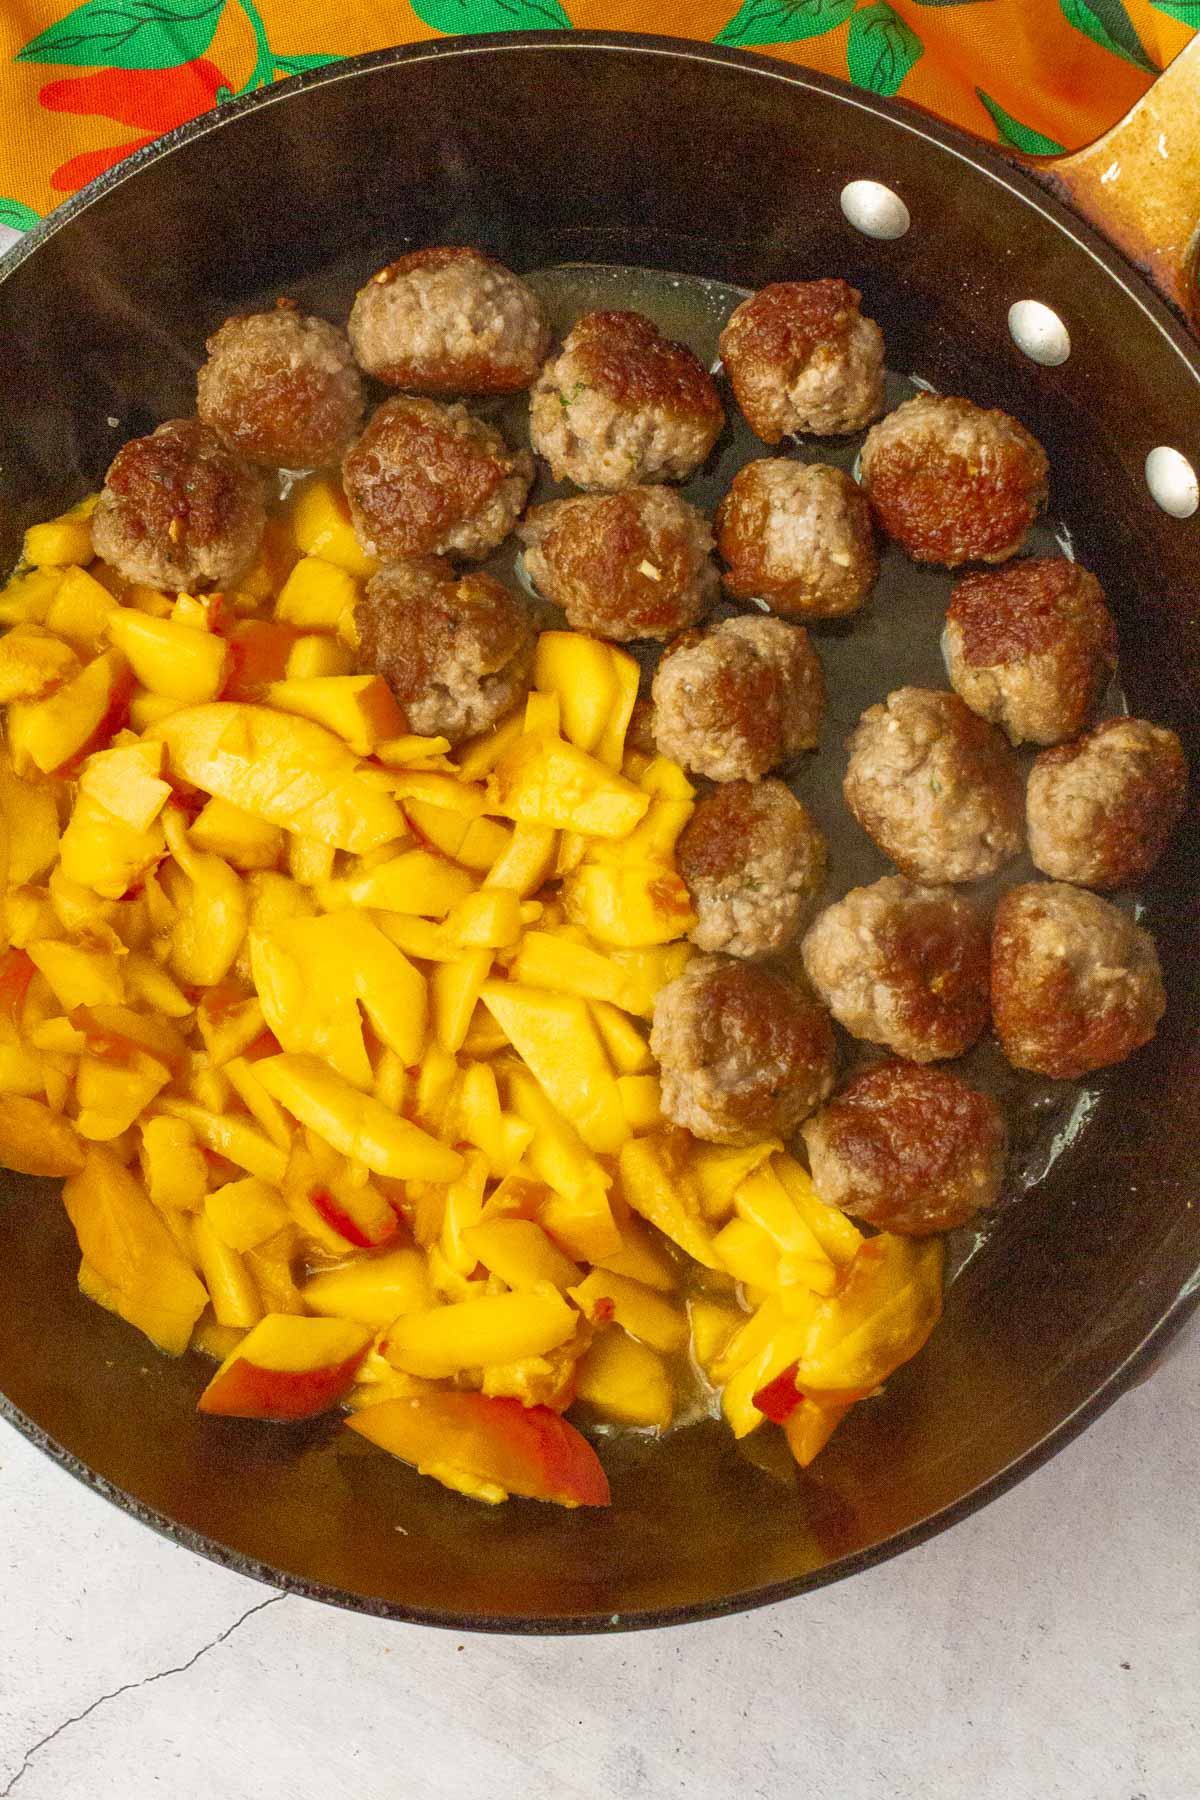
    2. Step 4: Heat a large skillet over medium-high, then add the oil and let it heat up until it thins out. Add meatballs in one layer. Cook, turning and shaking the pan, until meatballs are browned all over, 5 to 7 minutes. Pour the wine into the skillet and move meatballs over to one side of the pan, scraping up the browned bits. Add peaches, a pinch of salt and 2 tablespoons water to the empty side of pan. When peaches are simmering, cover the pan, lower the heat to medium, and let cook until the meatballs are no longer pink at their centers, and the peaches juicy and tender, about 5 to 10 minutes longer.

    Common Questions

    How Do You Prevent Meatballs From Falling Apart During Cooking

    Never omit binders like eggs and breadcrumbs, and avoid over handling when forming the meatballs. For these ground pork meatballs, the binder is simple with breadcrumbs.

    Do You Need To Peel The Peaches?

    I hardly ever peel peaches for recipes, unless I’m making a delicate dessert like Peach Ice Cream or this Peach Bread. But if the texture of peach peel is off-putting to you, then by all means, peel them.

    What Are Some Gluten Free Alternatives to Panko Bread Crumbs?

    Use gluten-free breadcrumbs, crushed rice crackers, or almond flour as substitutes.

    What To Serve With Ground Pork Meatballs

    Tender Spring greens accompaniment salad is my recommendation, however to make this a more substantial light meal, serve pork meatballs over Oven Baked Rice or rice noodles.

    Tips For Success

    • Use ripe soft fresh peaches. They’ll cook quickly and their sweet flavor is a great combination for savory pork and basil. Plus ripe juicy peaches will emit more “syrup” as they cook, which makes a light sauce to add to the flavors.
    • How To Make A Perfect Meatball: And one that doesn’t fall apart. Use the palms of your hands to roll the meatball into a smooth ball. I always count to twenty rolls.

    Storage and Reheating Meatballs

    Got leftovers? Store any leftover meatballs and peaches in an airtight container in the refrigerator for up to four days. Use a microwave, an air fryer or even a low heat oven to reheat. The salad greens simply won’t keep well.

    Ground pork meatballs with peaches and mixed greens.

    I hope you give this recipe for pork skillet meatballs with peaches basil and lime a try. Pan fried meatballs are easy to make.

    More Popular Meatball Recipes

    And here are some more ideas to satisfy your meatball cravings.

    • BBQ meatballs displayed on a decorative plate.
      Oven Meatballs in BBQ Sauce, Pot Luck Perfect
    • Bison meatballs in chipotle salsa served with Mexican yellow rice.
      Smoky Chipotle Bison Meatballs
    • Mexican meatballs on a sheet pan with a bowl of guacamole and queso blanco.
      Mexican Meatballs with Queso Blanco
    • Honey sriracha meatballs served on a white platter.
      Sweet-Spicy Honey Sriracha Meatballs With Cranberry Sauce

    And don’t miss this recipe for Authentic Swedish Meatballs. A fun project, a recipe from a famous chef, and incredible with flavor.

    And ground pork can be an economical option for dinner. Don’t miss this recipe for Pork Pad Thai. Pad thai noodles are drenched in a peanut sauce and mixed with ground pork. An easy dinner option.

    If you liked this recipe, please leave a star ⭐⭐⭐⭐⭐ rating in the recipe card below and leave a comment. I always appreciate your feedback and hearing how everything went.

    And, don’t forget to subscribe to my newsletter for more delicious recipes and cooking tips. Make it a delicious day … every day.
    This recipe is adapted from a recipe from The New York Times.

    Pan fried meatballs with peaches served with mixed greens.
    Print Recipe
    5 from 1 vote

    Gingery Pork Meatballs with Peaches Basil and Lime

    Gingery skillet fried ground pork meatballs are seasoned with basil, lime and served with fresh juicy peaches. A sweet and savory treat with addictive flavors. Serve this over crisp greens for a light Summery supper.
    Prep Time15 minutes mins
    Cook Time15 minutes mins
    Total Time30 minutes mins
    Course: Appetizer Recipes
    Cuisine: American
    Servings: 4 people
    Calories: 436kcal
    Author: Lea Ann Brown

    Ingredients

    • 1 ½ Tablespoons Fresh Ginger finely grated or minced
    • 3 cloves Fresh garlic grated or minced
    • 1 ¼ teaspoon Ground cumin
    • 1 ¼ teaspoons Kosher salt
    • 1 pound Ground pork or turkey, or chicken, or vegan meat
    • ⅓ cup Panko bread crumbs or plain bread crumbs
    • 3 Tablespoons Fresh basil fine chopped, plus more for serving.
    • 2 Tablespoons Extra Virgin Olive Oil
    • 2 Tablespoons Wine dry white, rose or red (or chicken broth, orange juice or water)
    • 2 Cups Fresh ripe peaches diced, peeled or unpeeled. About 3 peaches.
    • ¼ cup onion or shallot thin sliced
    • 1 lime halves

    Instructions

    • In a large bowl, mix together ginger, garlic, cumin and salt.
    • Add ground pork, panko and basil. Using your hands, gently mix everything together, making sure not to overwork the mixture. (Otherwise, the meatballs get tough.) Form into 1¼-inch meatballs.
    • Heat a large skillet over medium-high. Add the oil. Once oil is shimmering, add meatballs. Cook, turning and shaking the pan, until meatballs are browned all over, 5 to 7 minutes.
    • Pour the wine into the skillet and move meatballs over to one side of the pan, scraping up the browned bits. Add peaches, a pinch of salt and 2 tablespoons water to the empty side of pan.
    • Once peaches come to a simmer, cover the pan and lower the heat to medium.Let cook until the meatballs are no longer pink in the center, and the peaches juicy and tender, about 5 to 10 minutes longer.
    • Uncover the pan. If the mixture seems too runny, let it cook down for another minute or so. The peaches should break down into a chunky sauce. Hard or unripe peaches may take a few extra minutes.
    • Add the onions to the pan and mix them in so they wilt slightly. Squeeze lime juice all over everything, then taste and add salt and lime juice, as needed. Sweeter peaches will need more lime juice, tart ones, less.
    • Serve the meatballs garnished with torn basil leaves, over fresh greens.

    Notes

    Tips For Success
    • Use ripe soft fresh peaches. They’ll cook quickly and their sweet flavor is a great combination for savory pork and basil.
    • How To Make A Perfect Meatball: And one that doesn’t fall apart. Use the palms of your hands to roll the meatball into a smooth ball. I always count to twenty rolls.

    Nutrition

    Calories: 436kcal | Carbohydrates: 16g | Protein: 21g | Fat: 32g | Saturated Fat: 10g | Polyunsaturated Fat: 3g | Monounsaturated Fat: 16g | Cholesterol: 82mg | Sodium: 840mg | Potassium: 504mg | Fiber: 2g | Sugar: 8g | Vitamin A: 355IU | Vitamin C: 11mg | Calcium: 50mg | Iron: 2mg

    Ground Pork Meatballs with Peaches … It’s What’s For Dinner

    Shrimp Stew With Rice

    January 15, 2024 By Lea Ann Brown 29 Comments

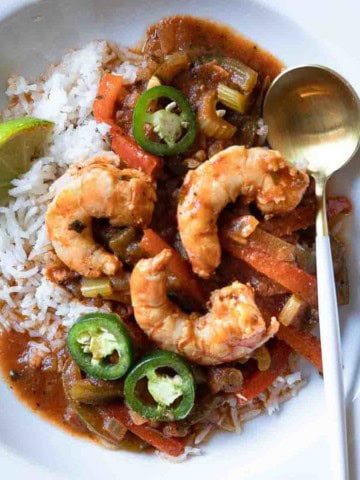
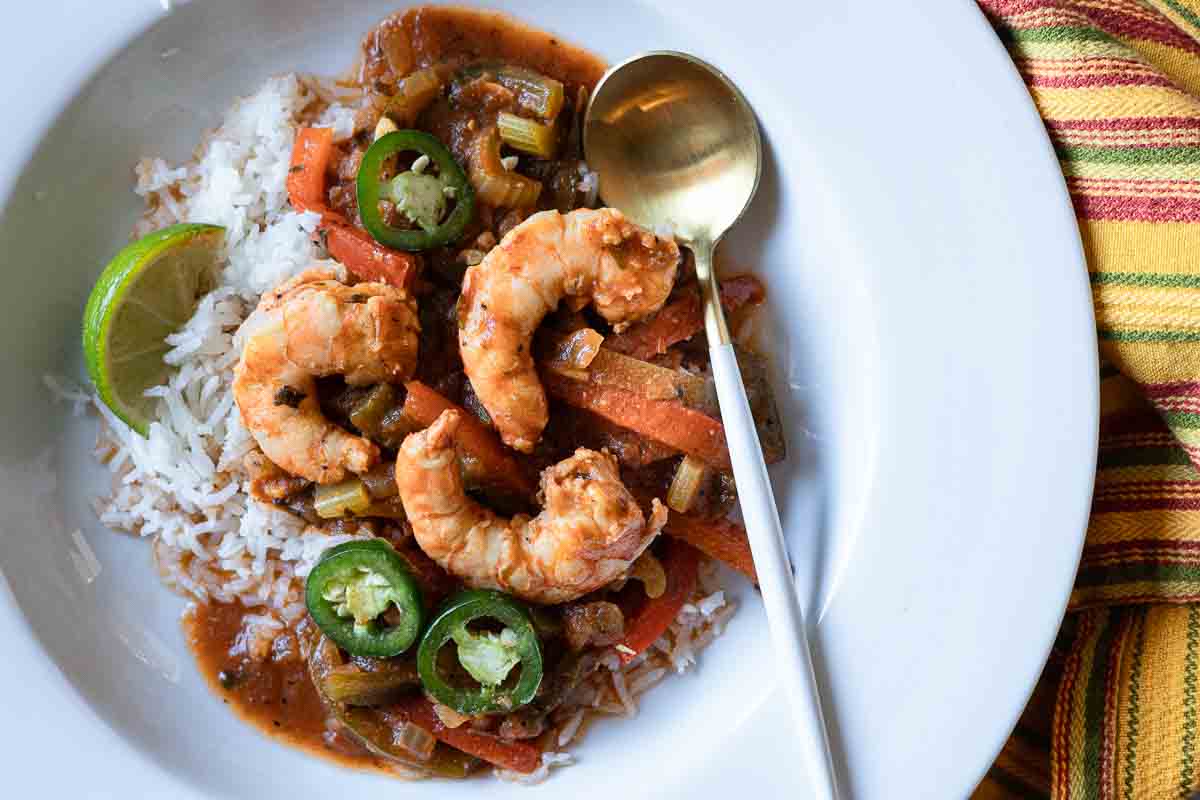
    Shrimp stew served over rice.

    Rich and robust this Shrimp Stew Recipe gets a blast of flavor from it’s brick red broth flavored with bell peppers, tomato paste and white wine. Red chile powder brings a kick of spice, and that’s just the beginning of a very memorable meal.

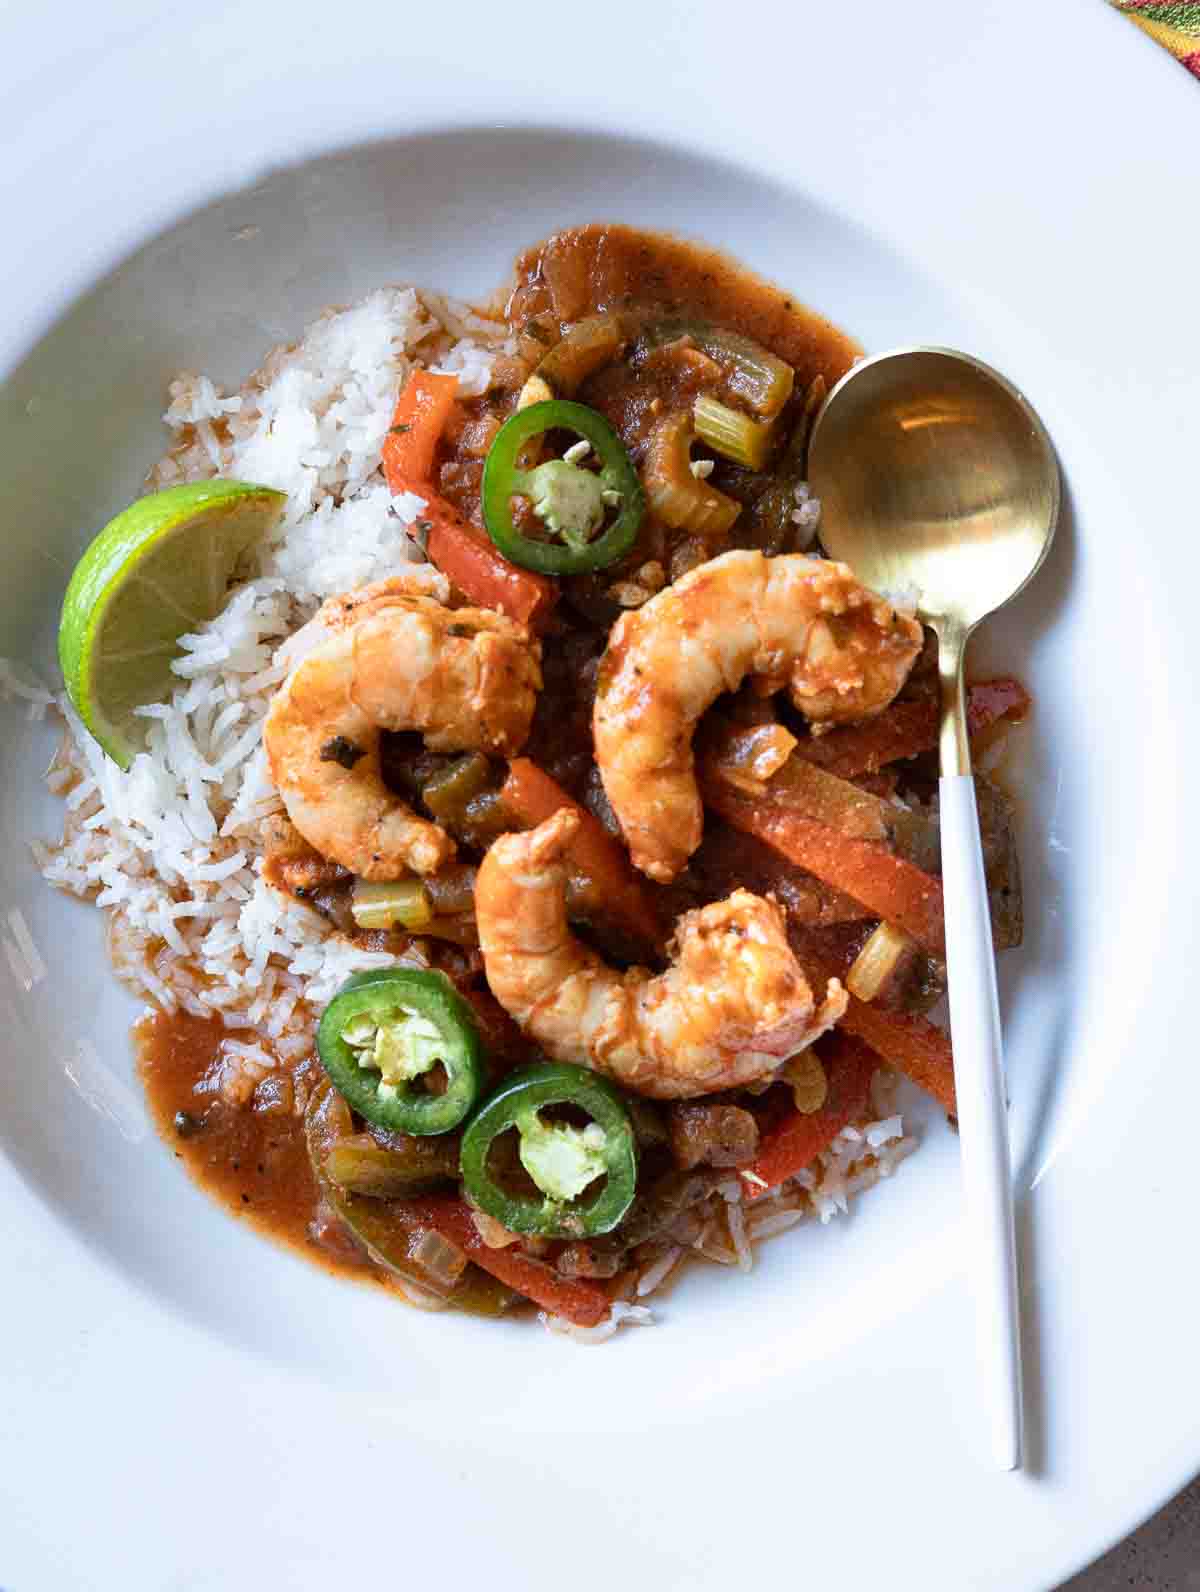
    Shrimp stew served in a large flat white bowl.

    When it comes to shrimp comfort food, I usually go for Easy Gumbo Recipes, but I wanted to find a shrimp stew recipe with a different flavor profile. One that reflected the flavors of the Rocky Mountain West to share with my readers.

    I was browsing my Denver Junior League Colorado Colore Cookbook and ran across this recipe for Cuban Shrimp Stew. At the top of the page I had written “VERY good” with the “very” double underlined. I knew I had to make it again and share the recipe with you.

    I took the original recipe and gave it more of a Southwestern flair by adding New Mexico Red Chile Powder and Mexican Oregano.

    Besides being delicious, look at that vivid brick red color from the tomato paste and the New Mexico Chimayo Chile Powder. Looks beautiful sitting on that bed of fluffy white rice doesn’t it?

    This is one of those dishes that smells so good while it’s cooking, that it drives you wild. 

    And the flavor?  It’s loaded! Sweet onions, bell peppers, celery, garlic and a great lineup of spices.

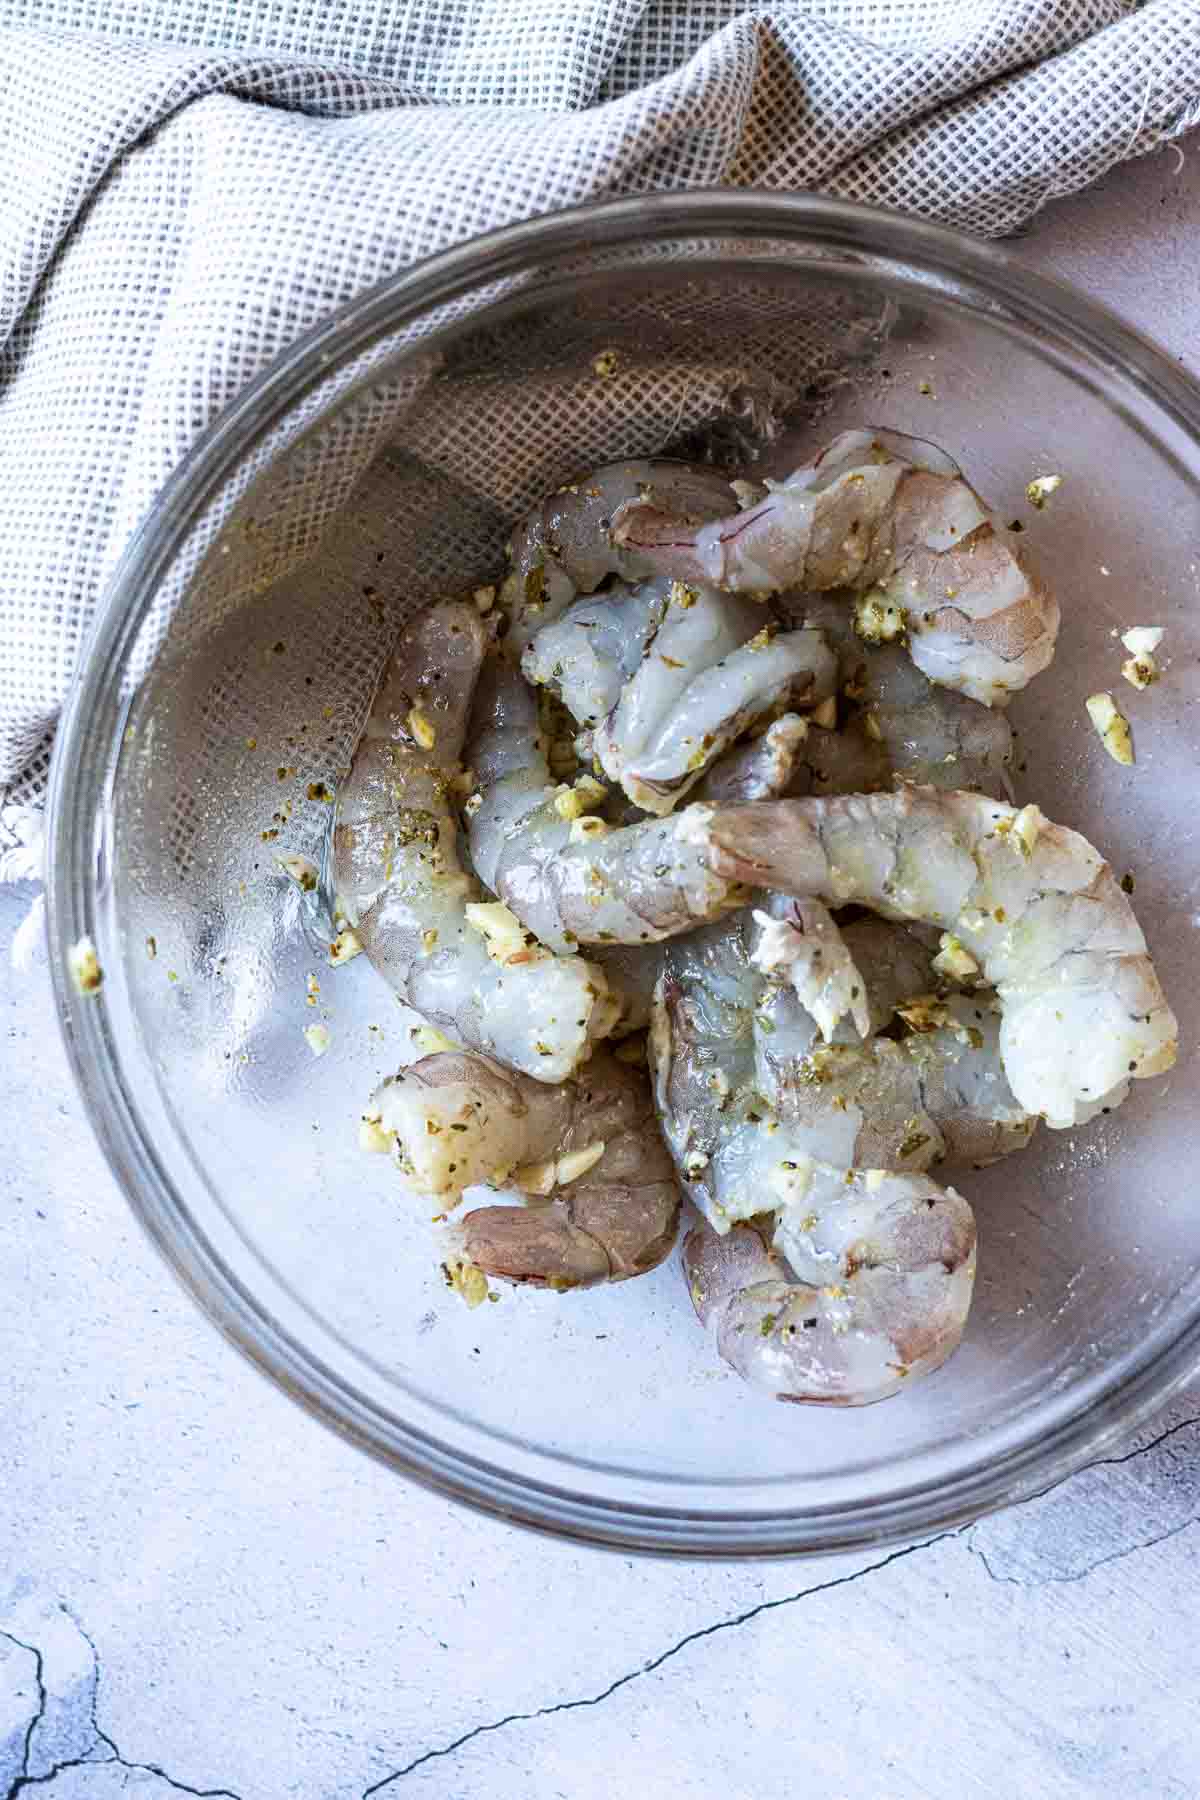
    The shrimp is flavored in a short marinade of lime, garlic, Mexican oregano and cumin. 

    The combination of the marinated shrimp and the lively broth all comes together for one delicious Shrimp Stew dinner.

    Let’s take a look:

    Table of contents

    • Shrimp Stew, The Ingredients
      • For The Shrimp Marinade
      • For The Shrimp Stew
    • Step by Step Instructions, It’s Easy!
    • Tips for Success
    • What To Serve With Shrimp Stew
      • Explore More Hearty Stew Recipes

    Shrimp Stew, The Ingredients

    For The Shrimp Marinade

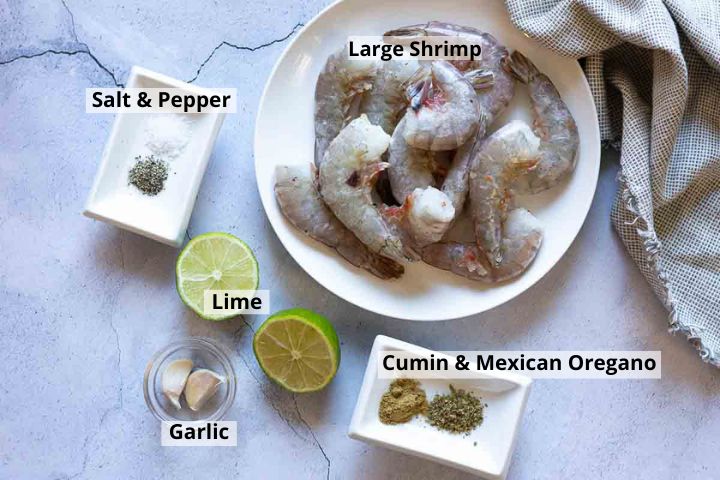
    Ingredients for shrimp marinade to make shrimp stew.
    • ¾ pound large shrimp, peeled, deveined and tails removed. For Shrimp that tastes like shrimp, please seek out Wild American Shrimp.
    • Lime: for juice
    • Garlic
    • Spices: Cumin, Mexican oregano, salt and pepper.

    For The Shrimp Stew

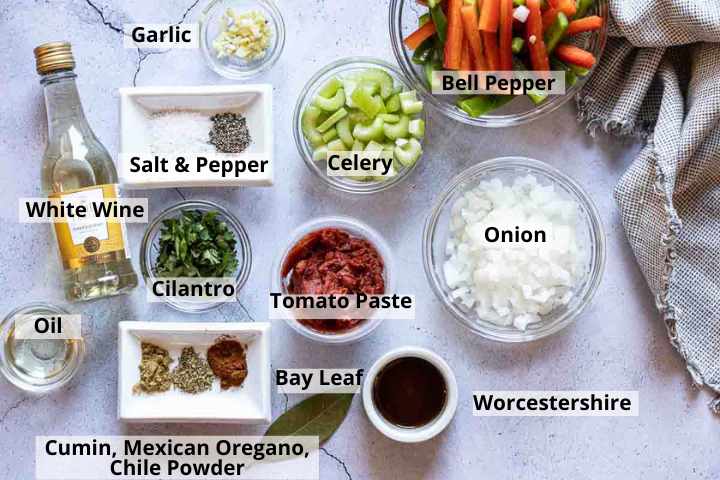
    Ingredients to make shrimp stew.
    • Chopped Garlic
    • Red and Green Bell Pepper
    • Celery
    • White Wine: Choose a dry white wine like Sauvignon Blanc or Chardonnay. I like to keep little bottles on hand for cooking. Your local liquor store will have several brands available. Use chicken broth is you don’t want to use wine.
    • Cilantro
    • Tomato Paste
    • Sweet Onion
    • Neutral Oil: Canola or Vegetable oil work well here.
    • Bay Leaf
    • Worcestershire Sauce: Just as fish sauce is to Asian cuisine, Worcestershire sauce amplifies the flavor and character of any Western style stew recipe.
    • Spices: Cumin powder, Mexican oregano, red chile powder (New Mexico is preferred), salt, pepper. A good pinch of red pepper flakes are a good substitute for the red chile powder.

    Mexican Oregano is preferred for this recipe. It's peppery, grassy, earthy flavor is a good compliment for Mexican Food. If you don't have Mexican Oregano, substitute Marjoram. Known for its aroma and delicate flavor, its related to Mexican oregano and will bring a sweet undertone to any recipe.

    Step by Step Instructions, It’s Easy!

    Don’t let the long list of ingredients scare you away. Once you’re done dicing and slicing, this shrimp stew recipe comes together in flash.

    Marinating shrimp to make shrimp stew.
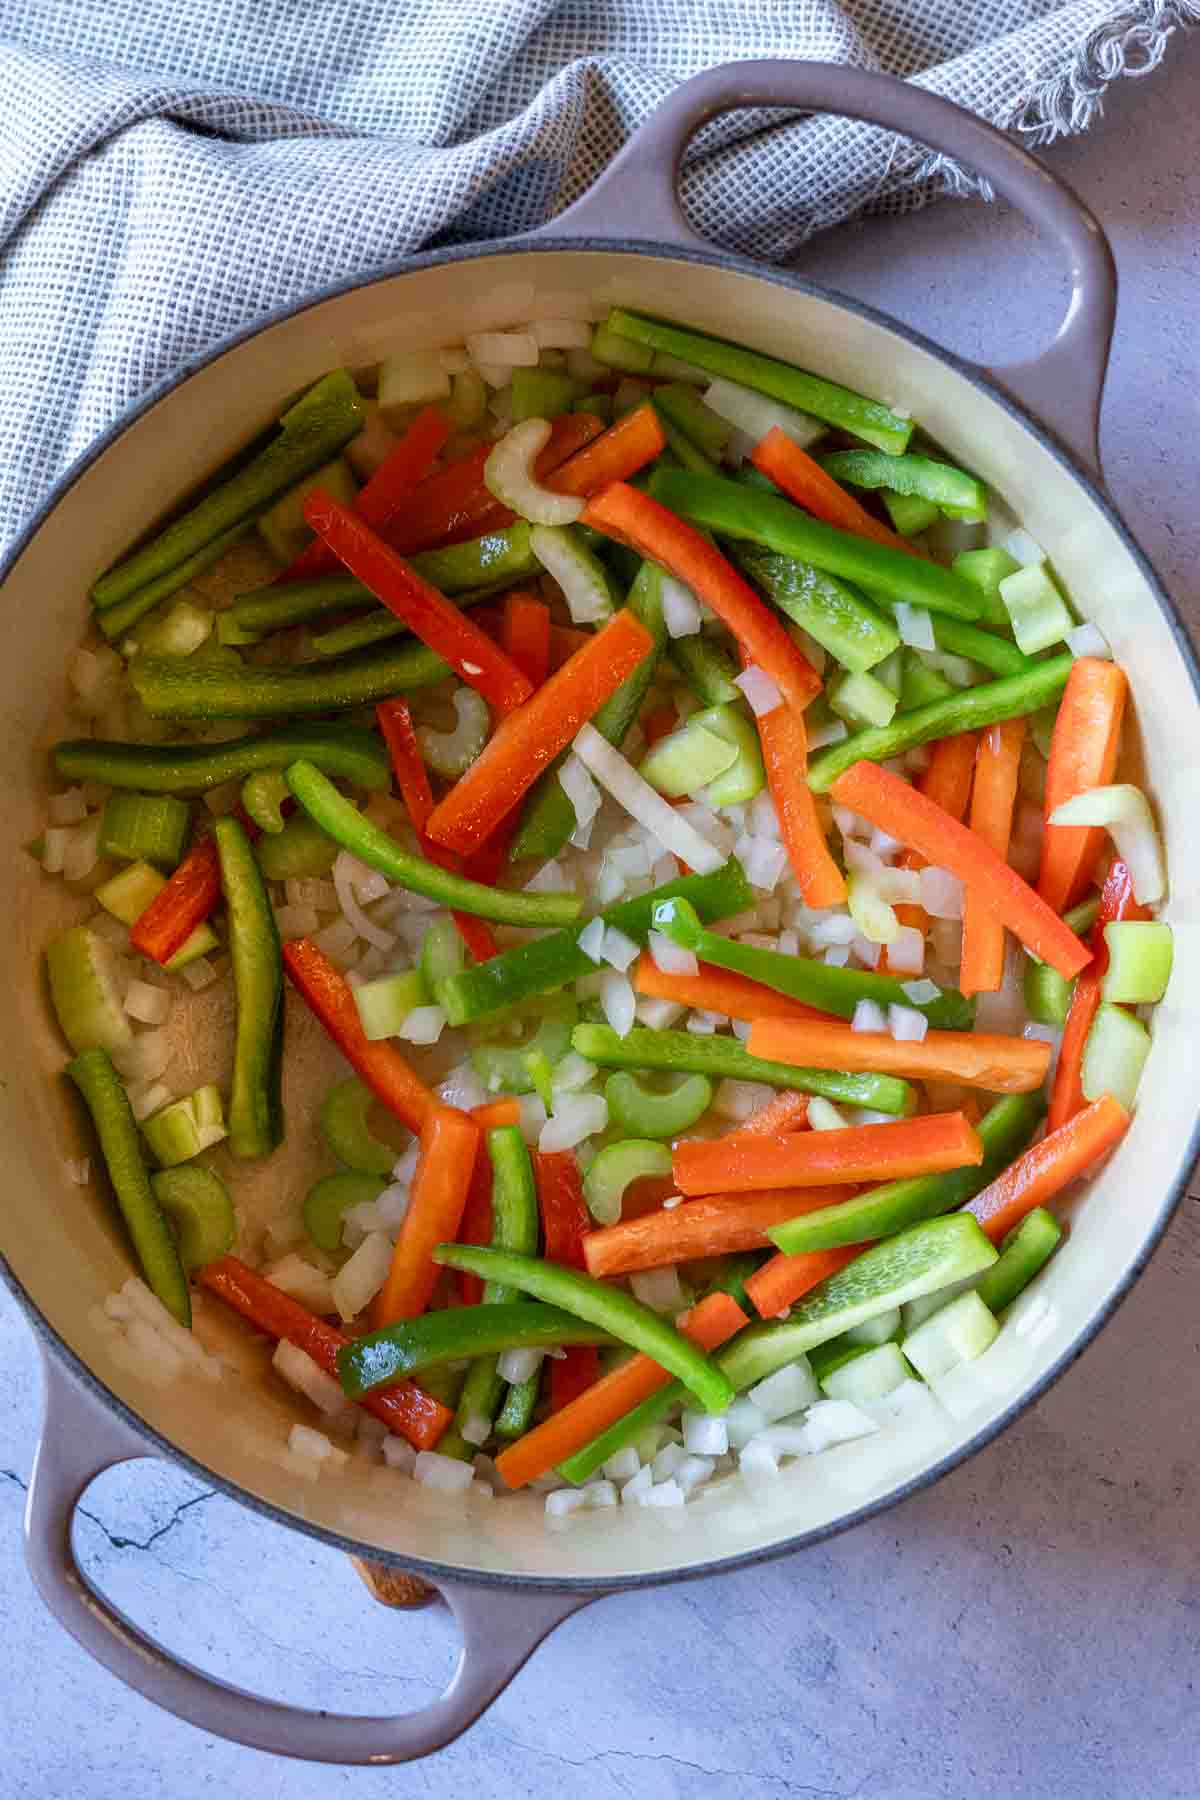
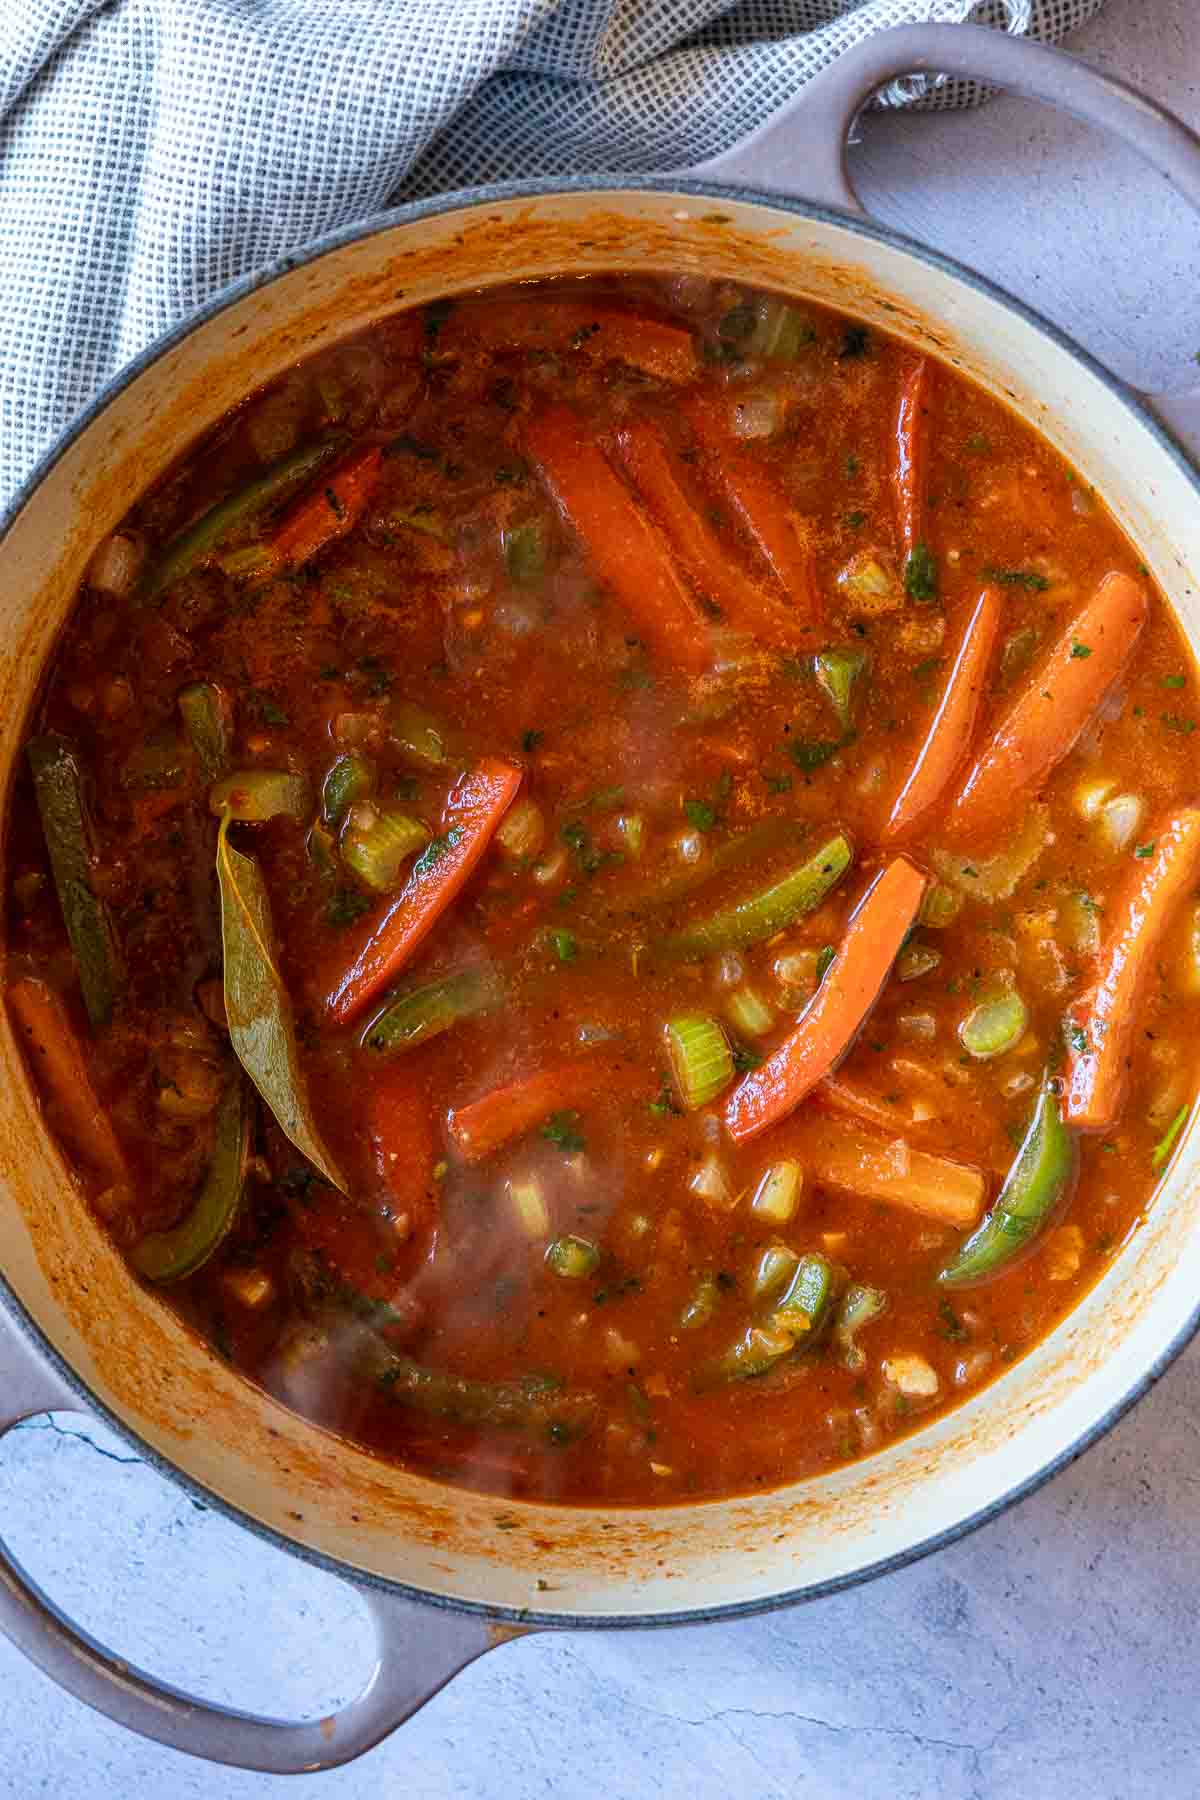
    Cooking bell peppers, celery and onions in a Dutch oven to make shrimp stew.
    1. Step 1: Combine the lime juice, garlic, oregano and cumin in a bowl and mix well. Add the shrimp and toss to coat. Sprinkle with salt and pepper. Marinate, covered, in the refrigerator for 30 minutes. Stir occasionally.
    2. Step 2: Heat the olive oil in a large heavy saucepan or Dutch oven over medium-high heat. Saute the onions, peppers and celery for about 5 minutes, stirring often or until vegetables are starting to soften. Add garlic and cook until fragrant, about 30 seconds.
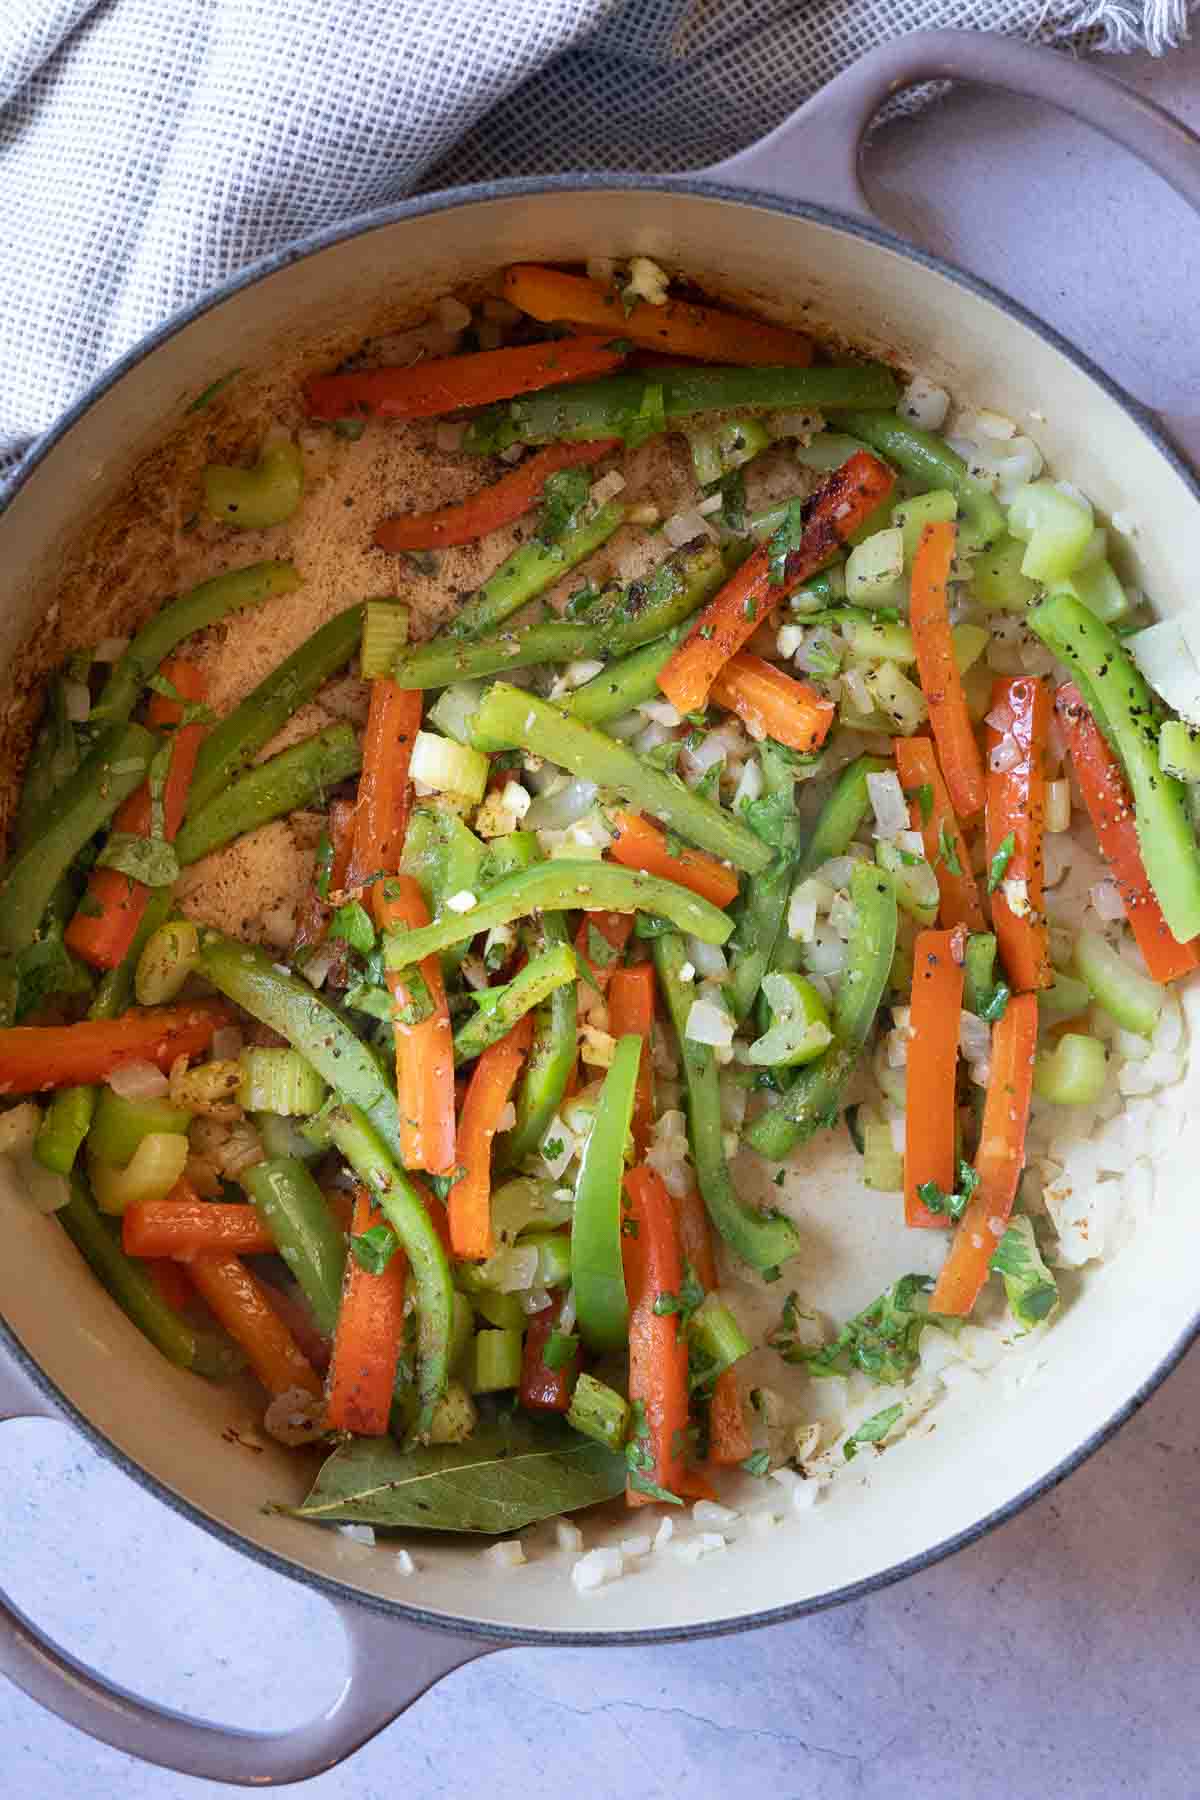
    Adding spices to cooked vegetables to make shrimp stew.
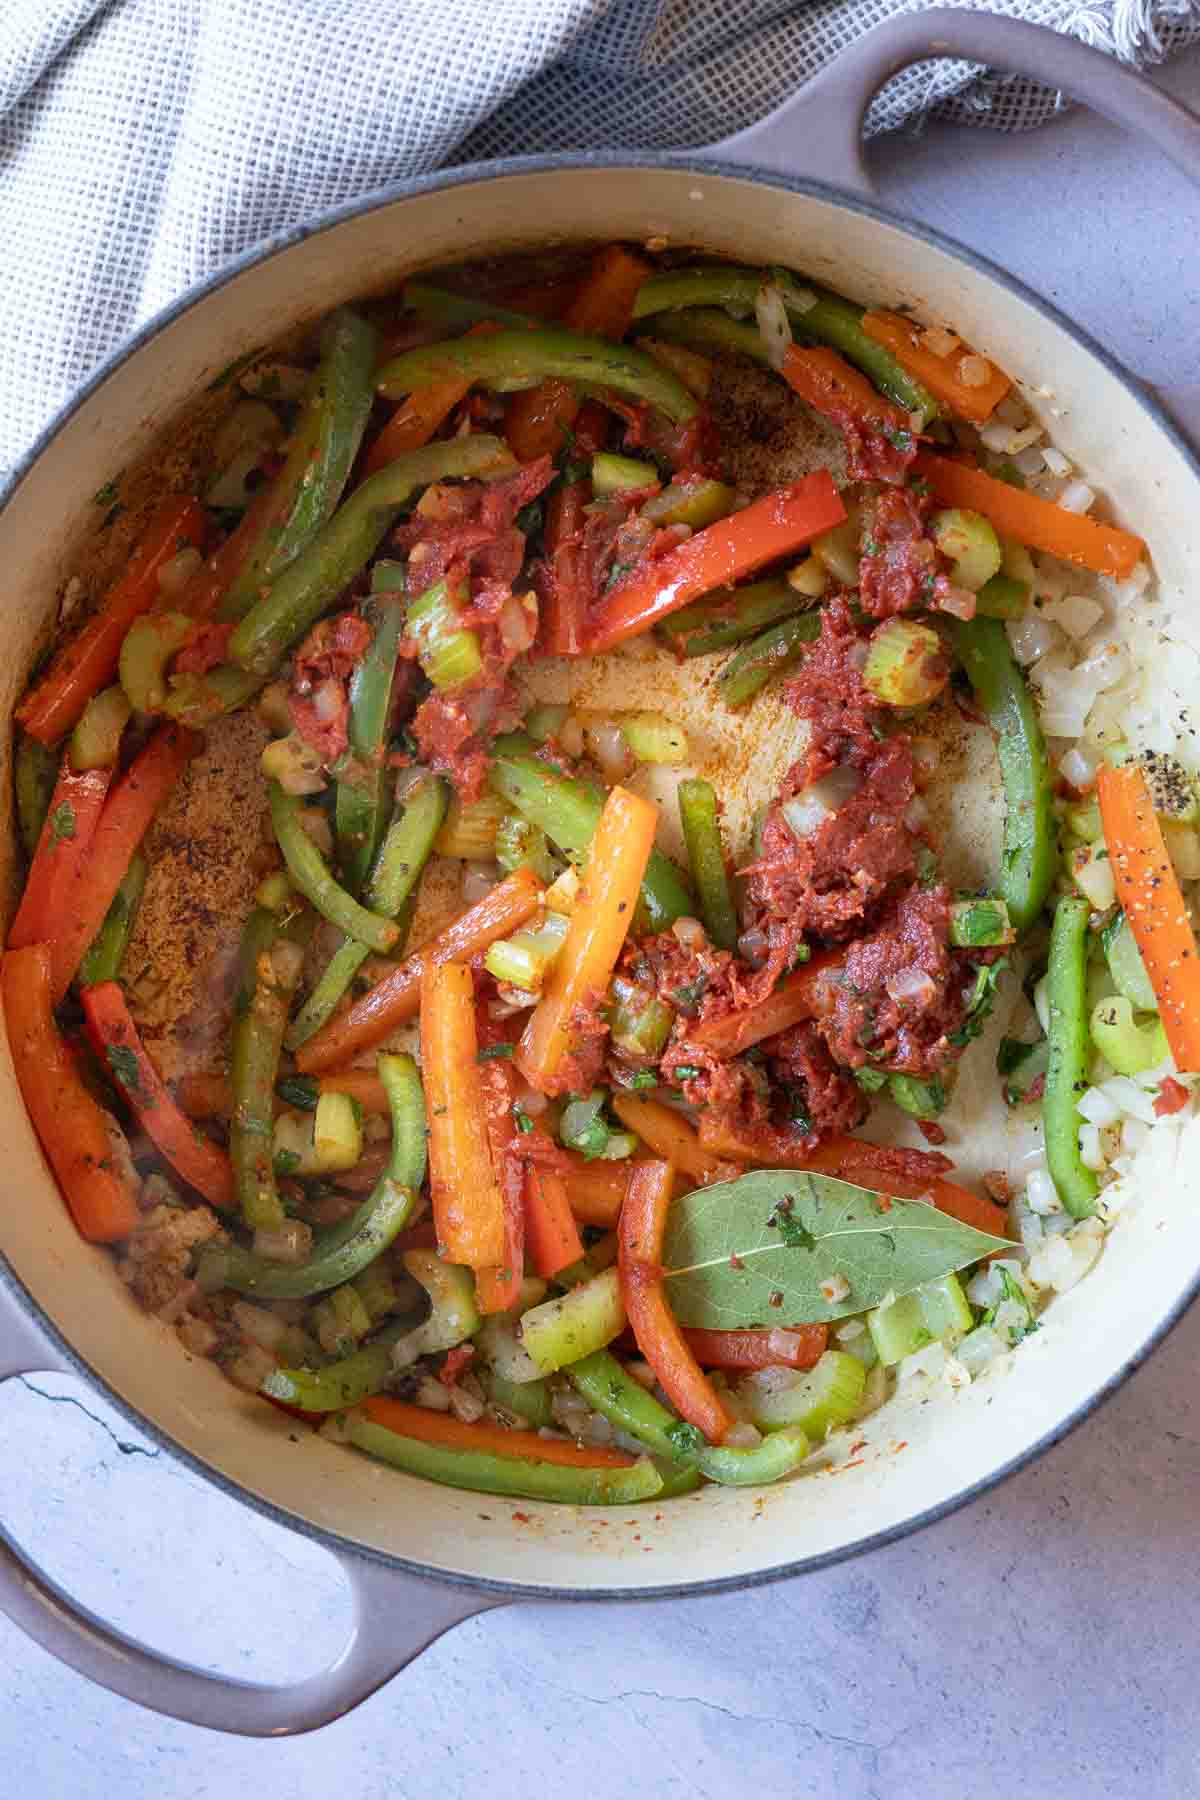
    Adding spices to vegetables to make shrimp stew.
    1. Step 3: Add cilantro, chile powder, oregano, cumin, salt, pepper and bay leaf and stir until well blended. Cook for 1 minute.
    2. Step 4: Add tomato paste and cook for 1 minute.

    Chef’s Secret: Tomato paste is an MVP in the kitchen. The long cooking time used to make tomato paste gives it a concentrated sweet rich flavor. Just a dollop can add a subtle burst of robust flavor and body into just about any soup or tomato based pasta sauce. Add tomato paste at the beginning of the cooking process to add another layer of flavor. It’s a brilliant little trick.

    Add tomato sauce to vegetables to make shrimp stew.
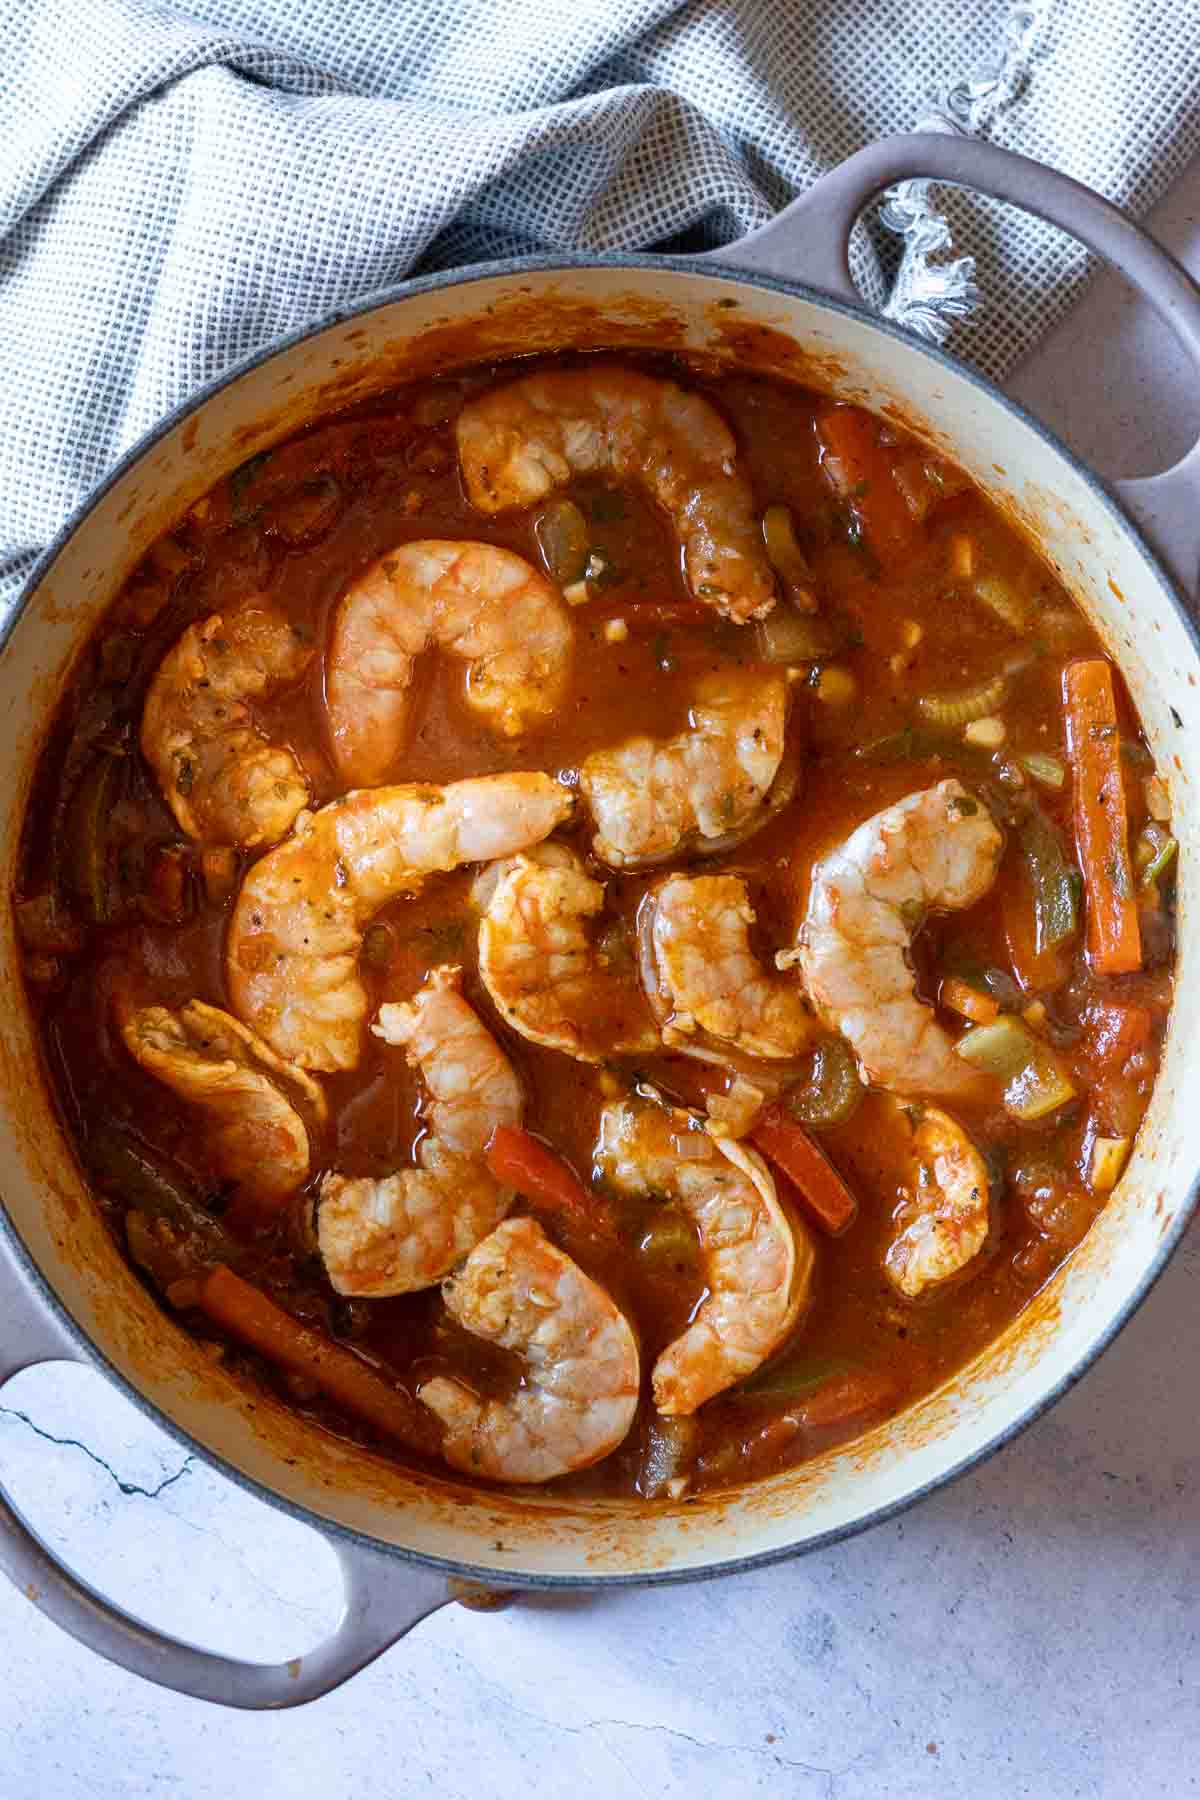
    Adding shrimp to stew broth to make shrimp stew.
    1. Step 5: Add the wine and water to the vegetable mixture and mix well. Simmer for 5 minutes or until slightly thickened, stirring frequently.
    2. Step 6: Stir in the undrained marinated shrimp. Simmer for 5 – 6 minutes or until shrimp turn pink, stirring occasionally.
    Shrimp Stew in a white bowl served over rice.
    1. Step 7: Discard the bay leaves. Stir in Worcestershire sauce. Ladle the stew into a serving bowl over cooked white rice. Garnish with slices of jalapeno pepper or more chopped cilantro.
    Is This Shrimp Stew Gluten Free?

    Yes. Every ingredient in this recipe is clean eating and naturally gluten free.

    Tips for Success

    • Thaw The Shrimp Properly: Here in land-locked Colorado, I exclusively purchase frozen shrimp. If you buy it “fresh” from the seafood counter, odds are it was previously frozen anyway. Thaw shrimp in the refrigerator overnight. If you forgot to do that, place shrimp in a colander and run cold water over them until they’re thawed.
    • How Do You Know When Shrimp Is Cooked? Shrimp cooks quite quickly. The shrimp should turn from a gray color to opaque pink. Eye the thickest part of the shrimp to make your decision.

    What To Serve With Shrimp Stew

    Hearty with vegetables, this is a meal in itself, but a simple tossed salad with Red Wine Vinegar Dressing is a good match. It’s sweet and tart flavor pairs well with robust flavors in this stew. And my Cornbread Recipe With Creamed Corn is always a good choice for any soup or stew.

    Explore More Hearty Stew Recipes

    Here are some stew recipes more stick to your ribs recipes to take a look at:

    • Bison stew served in a green bowl.
      Stove-top Porter Beer Bison Stew
    • Beef stew with mushrooms served in a skillet.
      Beef Stew With Mushrooms – Crock Pot Method
    • Green chile pork stew served in a green Frankhoma bowl.
      Green Chile and Pork Stew
    • Jacques Pipin Red Wine Beef Stew.
      Jacques Pepin’s Beef Stew With Red Wine

    I consider soups and stews to be my specialty, so don’t miss my category for Soup Recipes. You’ll find lots of great recipes including the most popular on my site for Anthony Bourdain’s New Mexico Chili.

    If you liked this recipe, please leave a star ⭐⭐⭐⭐⭐ rating in the recipe card below and leave a comment. I always appreciate your feedback and hearing how everything went.

    And, don’t forget to subscribe to my newsletter for more delicious recipes and cooking tips. Make it a delicious day … every day.

    Shrimp stew served over rice.
    Print Recipe
    4.67 from 3 votes

    Shrimp Stew With Rice

    This is a recipe for Shrimp Stew. A delicious soup of bell peppers, celery and garlic in a brick red broth of sauce that's just right spicy. And that's just the beginning for a very memorable meal.
    Prep Time15 minutes mins
    Cook Time30 minutes mins
    Marinate time30 minutes mins
    Total Time1 hour hr 15 minutes mins
    Course: Main Course Seafood
    Cuisine: Cuban
    Diet: Gluten Free
    Servings: 6
    Calories: 286kcal
    Author: Lea Ann Brown

    Ingredients

    • For The Shrimp:
    • 1 ½ Tablespoons fresh lime juice
    • 2 cloves garlic minced
    • ¼ teaspoon Mexican oregano
    • ¼ teaspoon cumin
    • ¾ pounds shrimp large, peeled, deveined, tails removed
    • ½ teaspoon Kosher salt
    • ¼ teaspoon black pepper
    • For The Shrimp Stew:
    • 1 ½ Tablespoons neutral oil canola or vegetable oil work well here
    • 1 medium sweet onion chopped, about 1 cup
    • 1 green bell pepper thin sliced
    • 1 red bell pepper thin sliced
    • 2 stalks celery thick sliced
    • 2 Tablespoons cilantro minced
    • 2 cloves garlic peeled and minced
    • ¼ teaspoon New Mexico Red Chile Powder or cayenne
    • ¼ teaspoon Mexican Oregano
    • ¼ teaspoon cumin
    • 1 leaves bay
    • ⅓ Cup tomato paste
    • ¾ Cups dry white wine
    • ½ Cup water
    • ½ teaspoon Worcestershire sauce
    • ½ teaspoon kosher salt
    • ¼ teaspoon black pepper
    • 4 Tablespoons cilantro chopped, for topping

    Instructions

    • For the shrimp: Combine the lime juice, garlic, oregano and cumin in a bowl and mix well. Add the shrimp and toss to coat. Sprinkle with salt and pepper. Marinate, covered, in the refrigerator for 30 minutes. Stir occasionally.
    • For the stew: Heat the olive oil in a large heavy saucepan or Dutch oven over medium-high heat. Saute the onions, peppers and celery for about 5 minutes, stirring often or until vegetables are starting to soften. Add garlic and cook until fragrant, about 30 seconds.
    • Add cilantro, chile powder, oregano, cumin, salt, pepper and bay leaf and stir until well blended. Cook for 1 minute.
    • Add tomato paste and cook for 1 minute.
    • Add the wine and water to the vegetable mixture and mix well. Simmer for 5 minutes or until slightly thickened, stirring frequently.
    • Cover and let simmer on low for 15 minutes.
    • Stir in the undrained marinated shrimp. Simmer for 5 – 6 minutes or until shrimp turn pink, stirring occasionally.
    • Discard the bay leaves. Stir in Worcestershire sauce. Ladle the stew into a serving bowl over cooked white rice. Garnish with slices of jalapeno pepper or more chopped cilantro.

    Notes

      • Thaw The Shrimp Properly: Here in land-locked Colorado, I exclusively purchase frozen shrimp. If you buy it “fresh” from the seafood counter, odds are it was previously frozen anyway. Thaw shrimp in the refrigerator overnight. If you forgot to do that, place shrimp in a colander and run cold water over them until they’re thawed. And for shrimp that tastes like shrimp, please seek out Wild American Shrimp.
      • How Do You Know When Shrimp Is Cooked? Shrimp cooks quite quickly. The shrimp should turn from a gray color to opaque pink. Eye the thickest part of the shrimp to make your decision.
      • White Wine: Choose a dry white wine like Sauvignon Blanc or Chardonnay. I like to keep little bottles on hand for cooking. Your local liquor store will have several brands available. Use chicken broth is you don’t want to use wine.

    Nutrition

    Calories: 286kcal | Carbohydrates: 16g | Protein: 26g | Fat: 9g | Saturated Fat: 1g | Cholesterol: 286mg | Sodium: 1129mg | Potassium: 585mg | Fiber: 3g | Sugar: 8g | Vitamin A: 1255IU | Vitamin C: 58mg | Calcium: 204mg | Iron: 4mg

     Shrimp Stew with Rice …It’s What’s for Dinner.

    Homemade Rosemary Olive Bread

    January 13, 2024 By Lea Ann Brown 14 Comments

    Olive Rosemary Bread. A beautiful homemade bread recipe.

    A beautiful outer crust and chewy on the inside, you’re going to love this Rosemary Olive Bread. This is a recipe we made practically daily in Culinary School, this tender fluffy bread made salty with olives is one you’ll want to make over and over again.

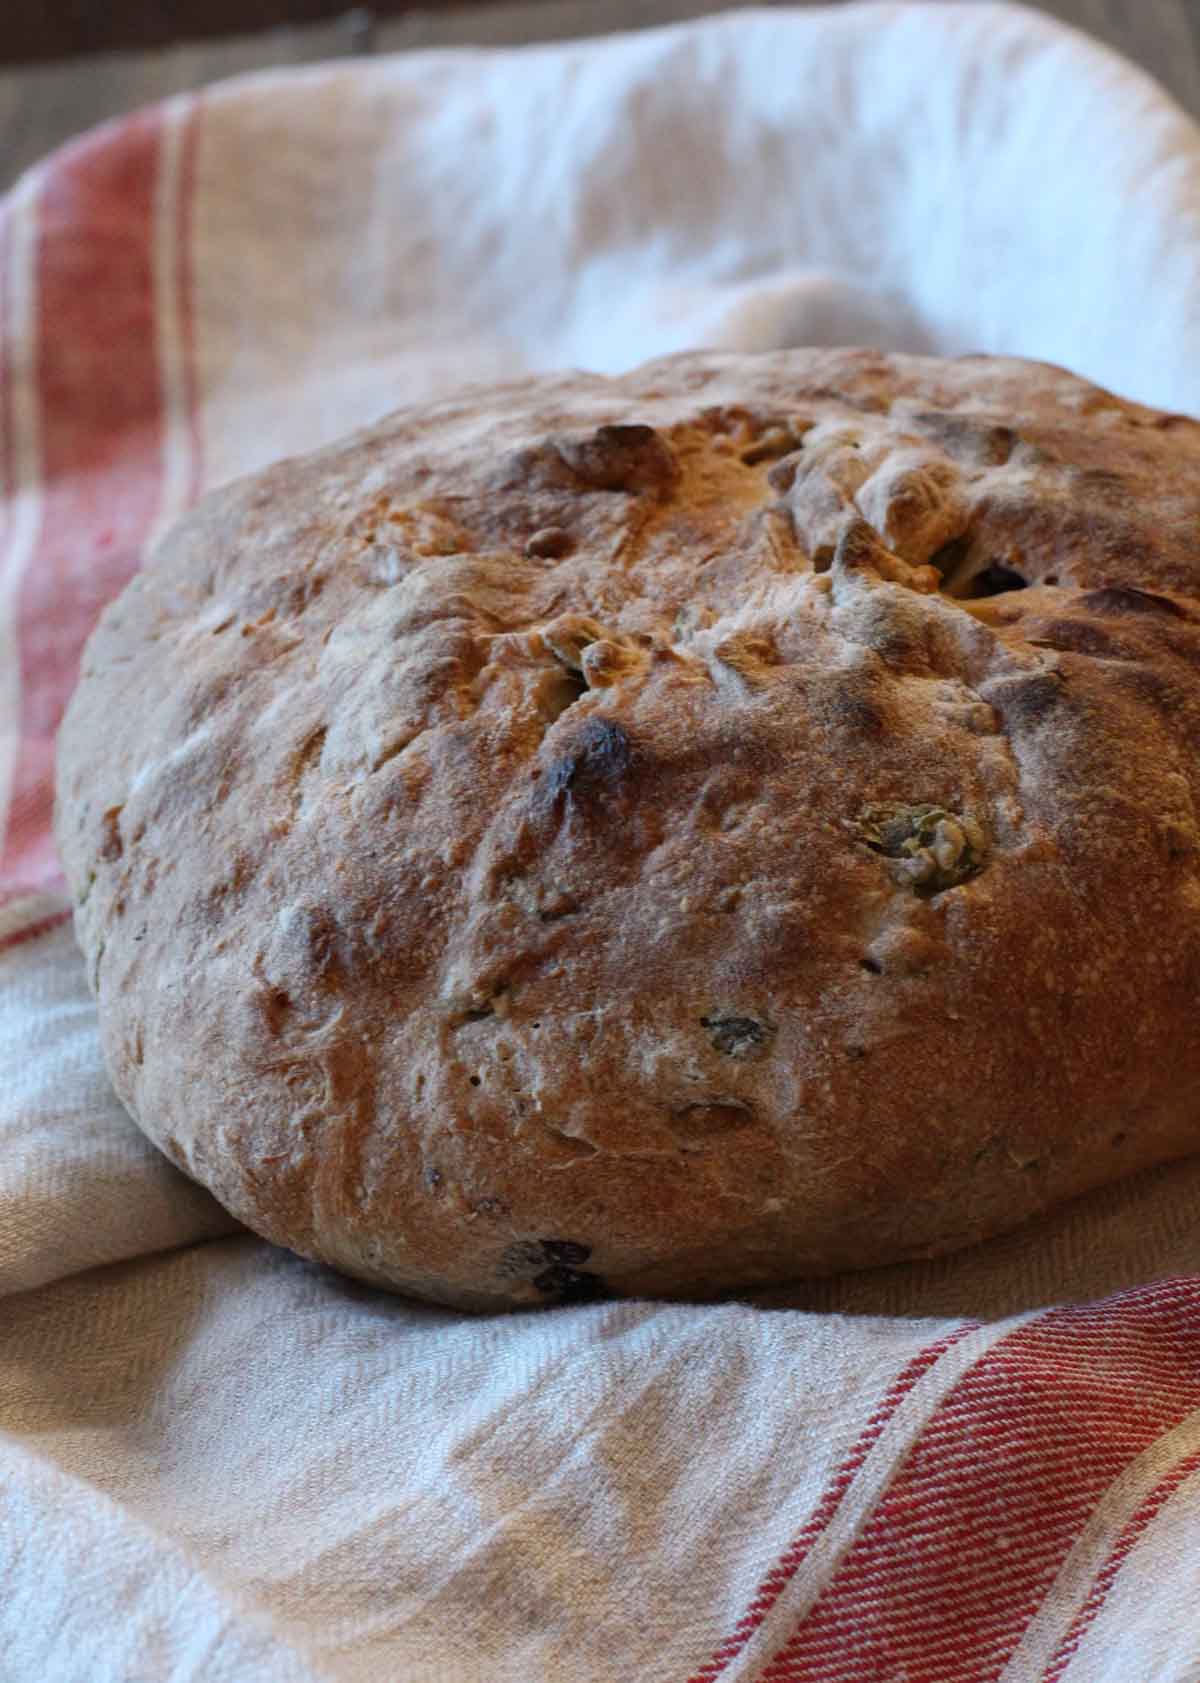
    A loaf of homemade rosemary olive bread on a red striped towel.

    There’s certainly something extremely satisfying about creating a loaf of bread in your own kitchen. So satisfying, it becomes addictive.

    And that’s what’s happened to me. I’ve been on somewhat of a homemade bread making bender. This Rosemary Olive Bread Recipe has me hooked.

    This Bread At A Glance

    • This olive bread recipe is one of my favorites of those we learned to make at school. Moist and savory, I could eat the whole loaf.
    • Beautiful outer crust & chewy inside.
    • Salty with olives & savory with Rosemary.
    • This bread recipe goes through two rises. One for an hour and one for 45 minutes. One of the least complicated recipes I’ve tried so far.
    • I use both Kalamata and Castelvetrano olives for this recipe. Any combination of olives will work.
    • The original recipe calls for Kalamata olives only and the title in my culinary school binder reads Rosemary Kalamata Olive Bread Recipe.

    Ingredients You’ll Need

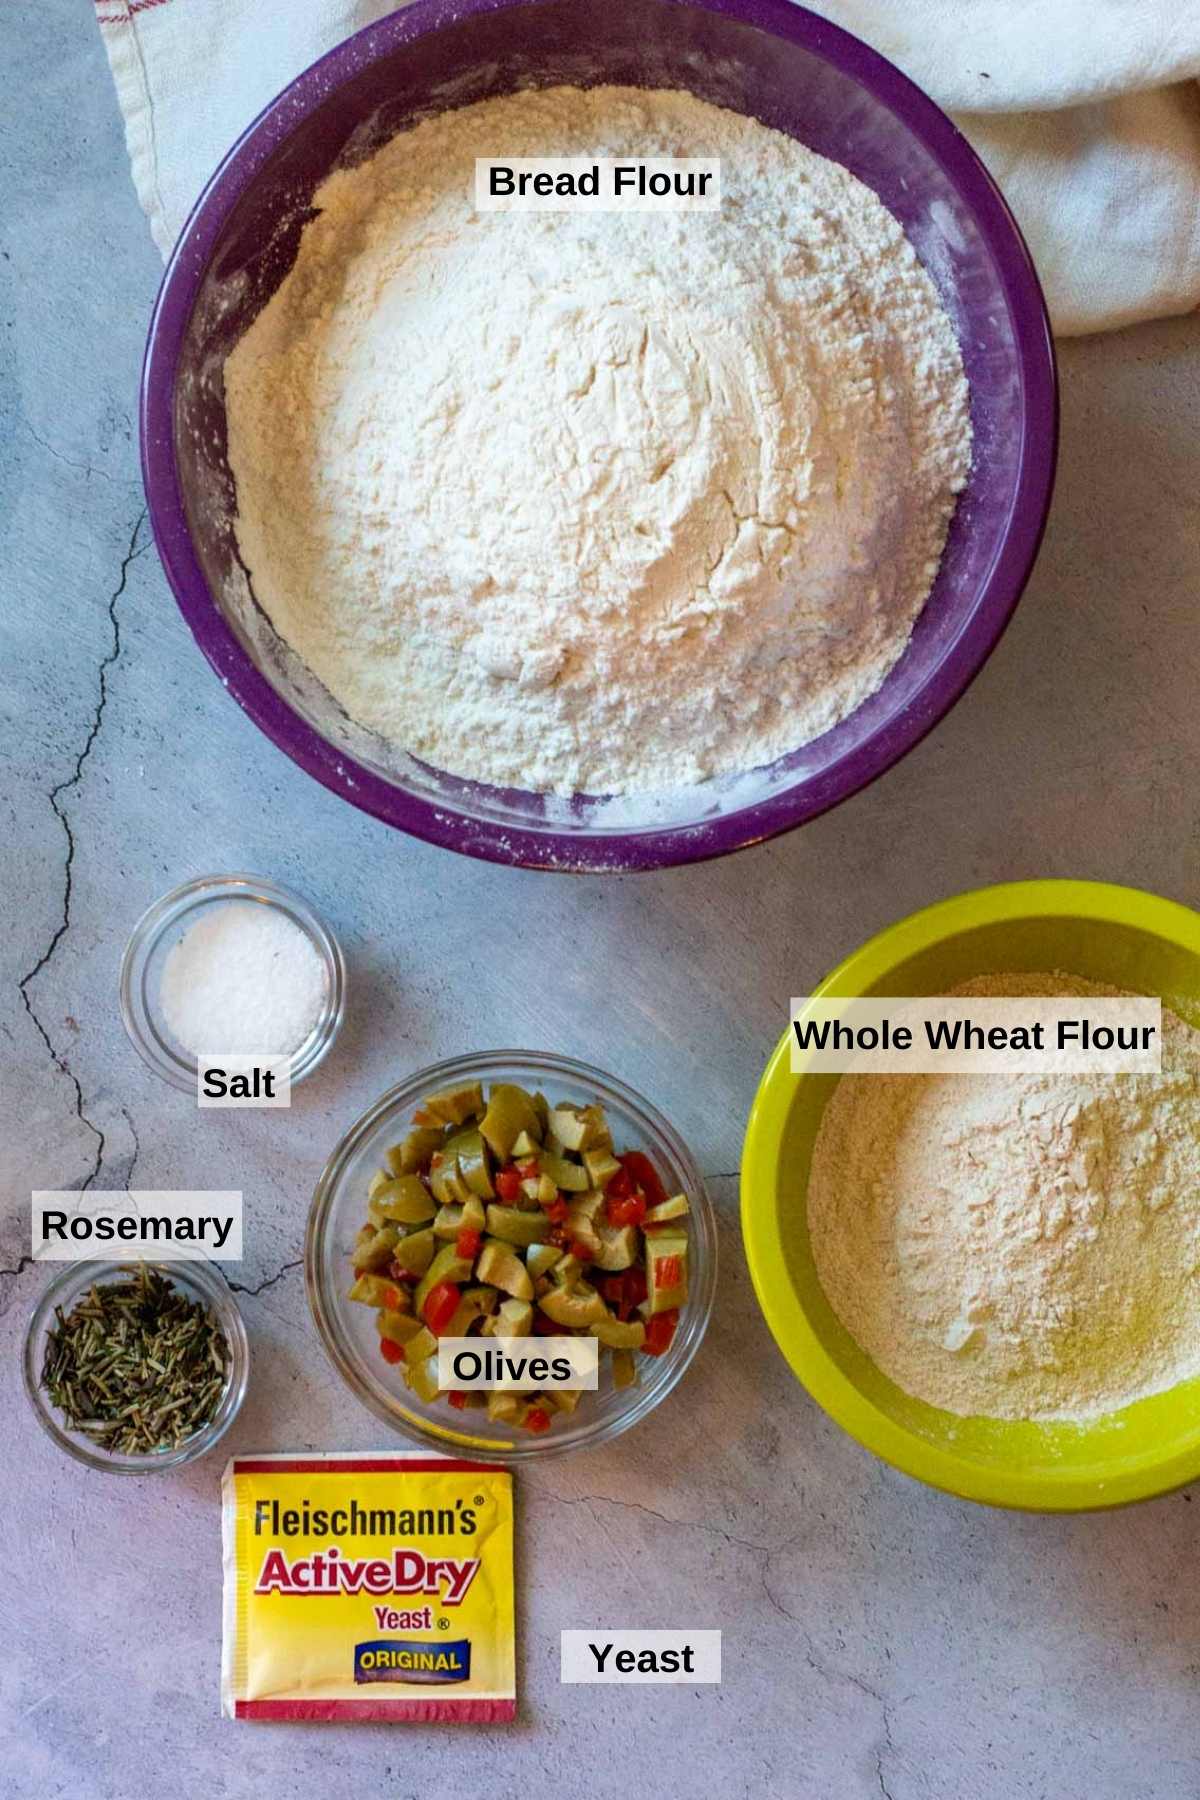
    Ingredient to make olive bread.
    • Bread Flour: Bread flour has higher protein content than All-purpose flour, which gives bread more structure and chew.
    • Kosher Salt: Is favored by chefs for it’s pure salty flavor.
    • Whole Wheat Flour
    • Rosemary: dried or fresh.
    • Olives: Green or Kalamata work well here, or a combo of both.
    • Yeast: Dry active yeast.

    Pro Tip: When substituting dried herbs for fresh, a good rule of thumb is 1 Tablespoon of fresh herbs = 1 teaspoon dried herbs. Some herbs season better when used in dried form. Oregano is a good example.

    Ingredient Substitutions

    • Olives: When making olive bread, use any type of olives you’d like. Experiment and enjoy.

    Step by Step Instructions

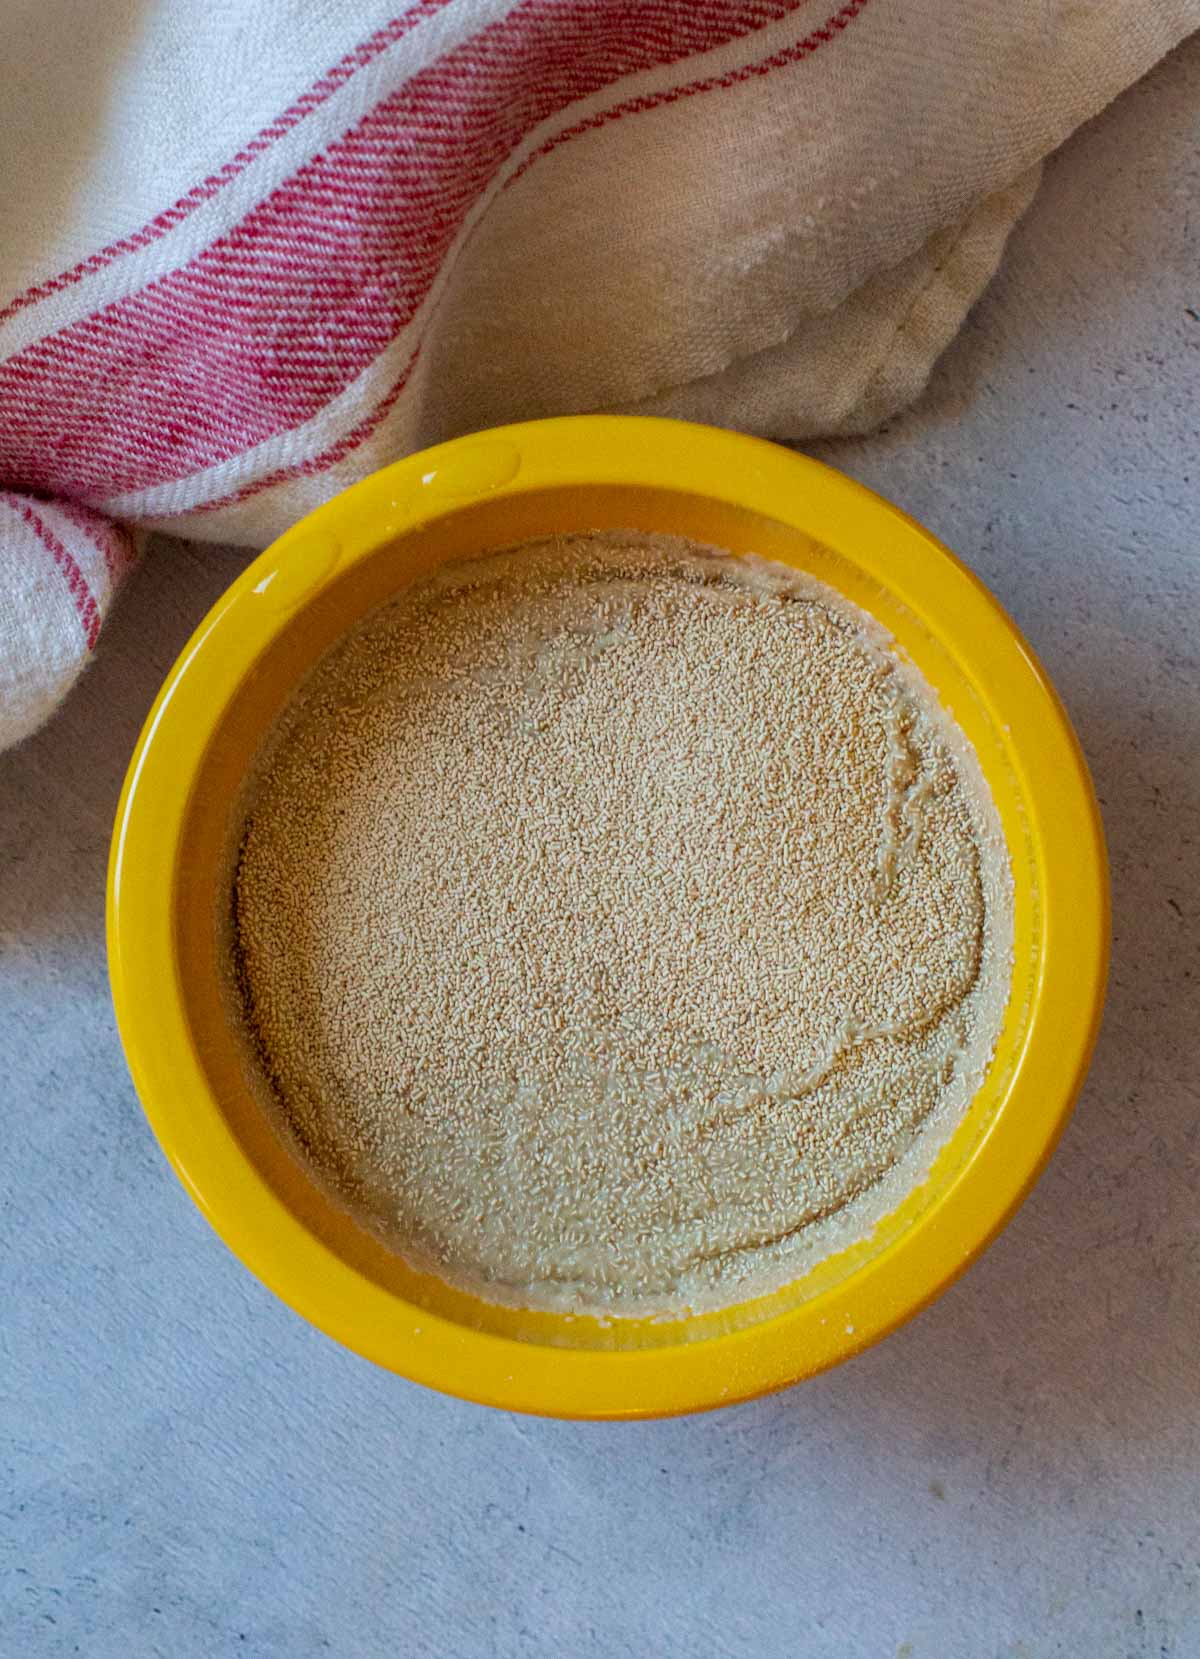
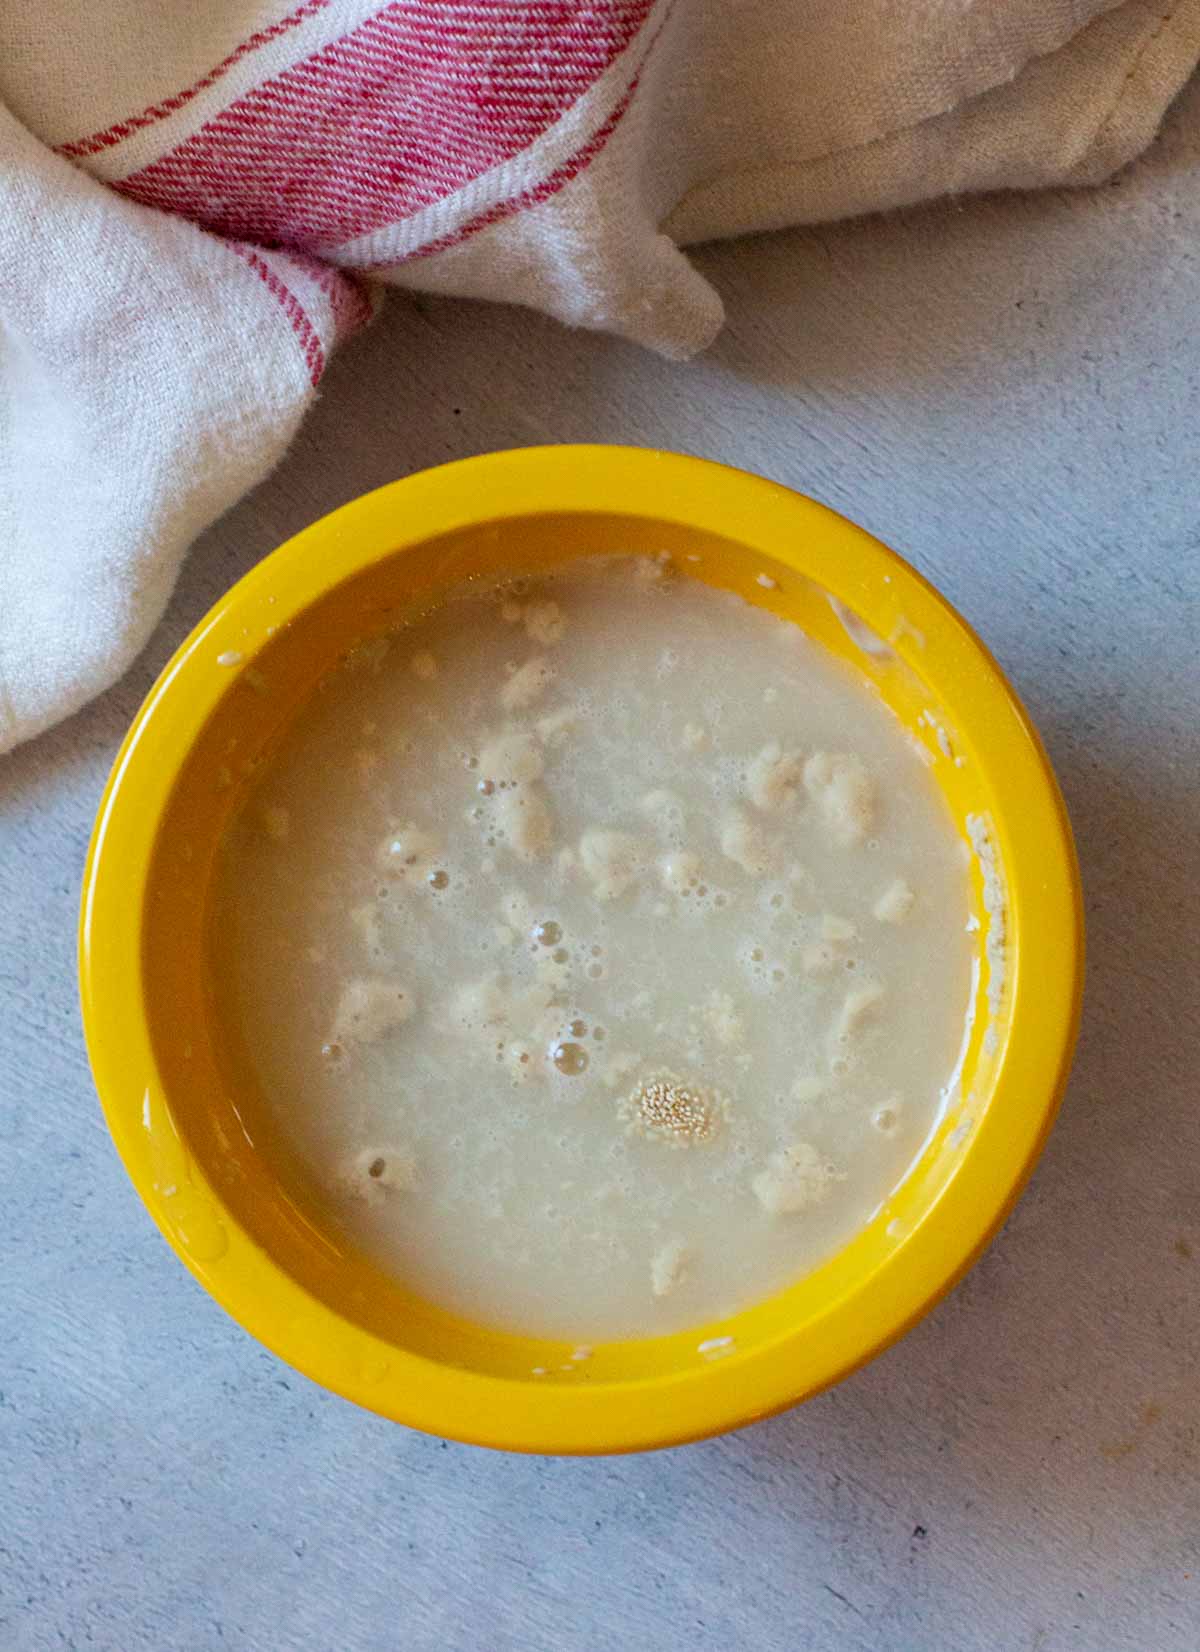
    How to bloom yeast to make bread.
    Bloomed yeast to make olive bread.

    Blooming yeast: Yeast is alive, and blooming the yeast will tell us that it still has active yeast cells to successfully make bread.

    1. Step 1: In a bowl, sprinkle the yeast over the warm water. 100 degrees – 110 degrees. Use a instant read thermometer to test water temperature. Any temperature higher will kill the yeast. Let the yeast start to bubble before proceeding.
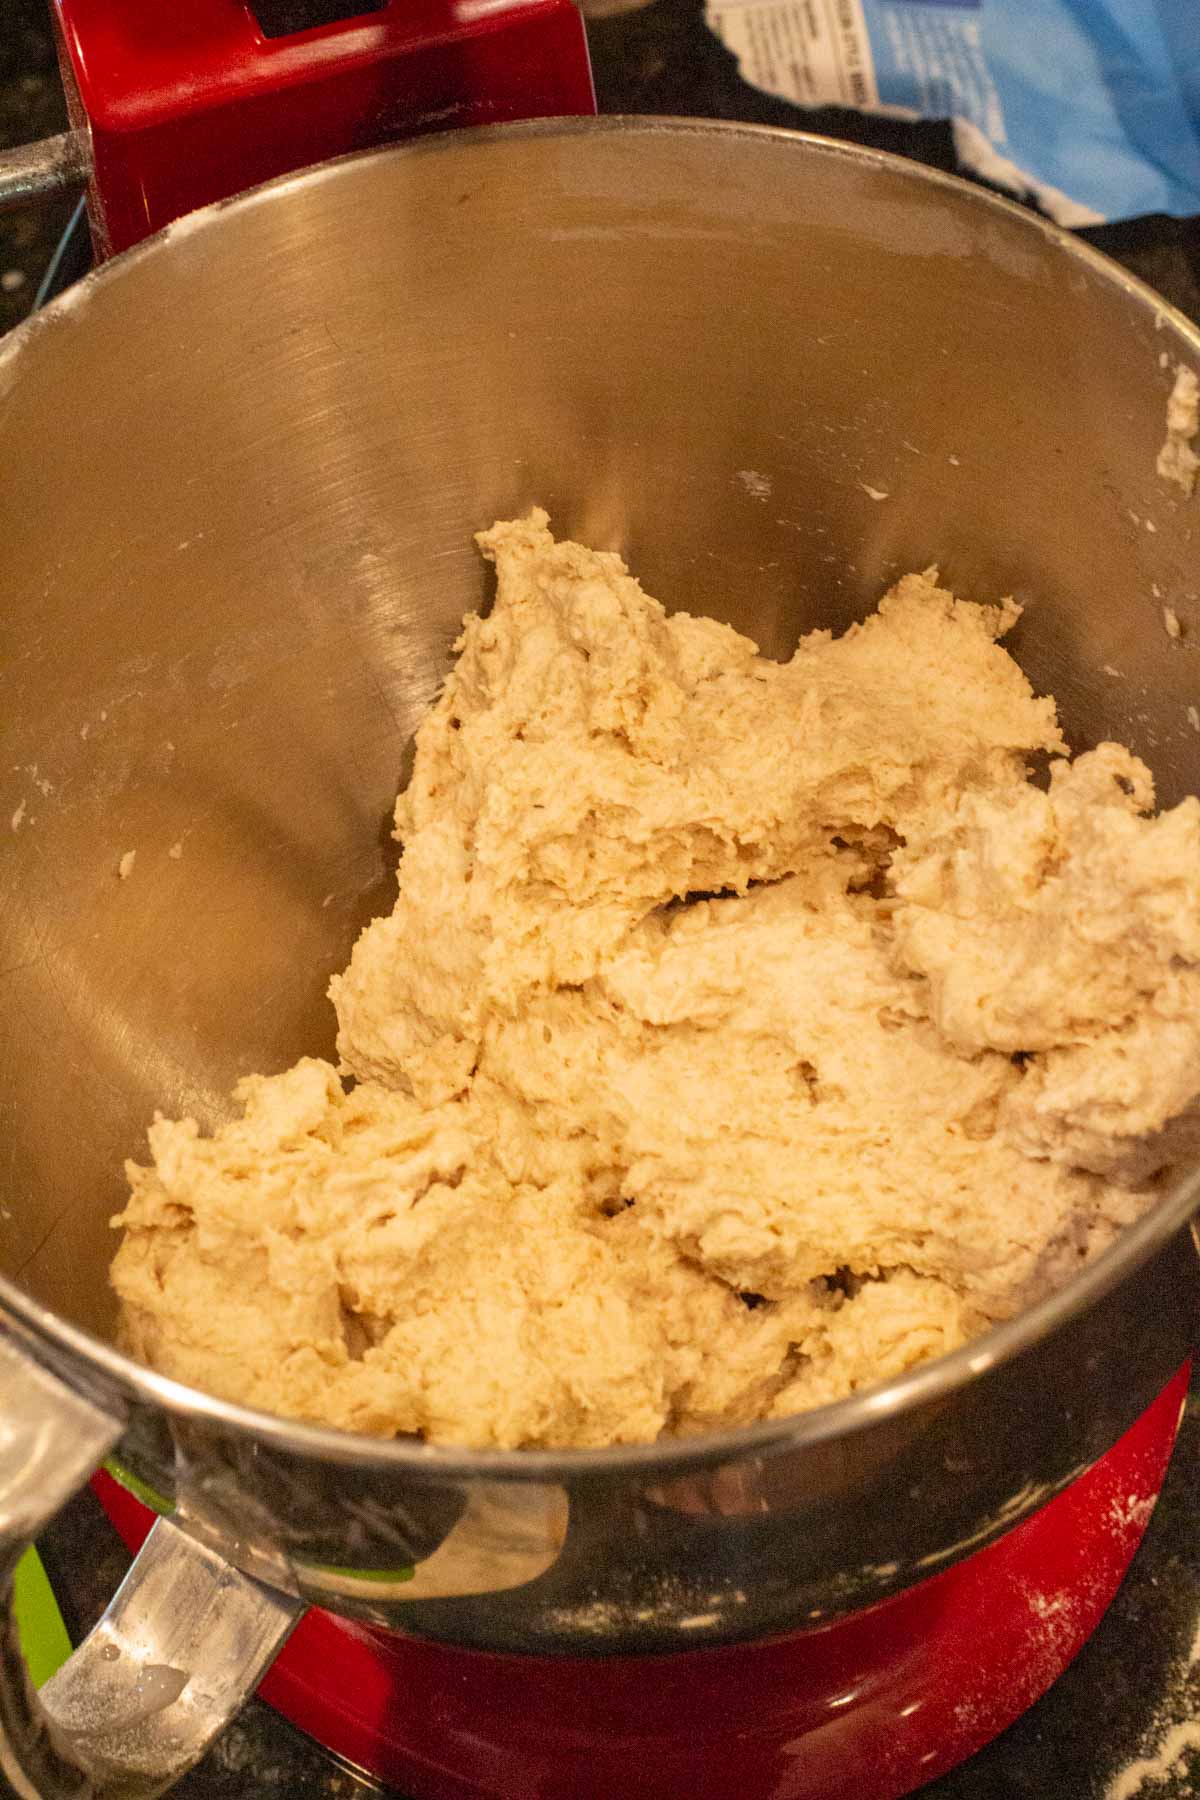
    Olive bread dough that's been mixed to a shaggy mass state.
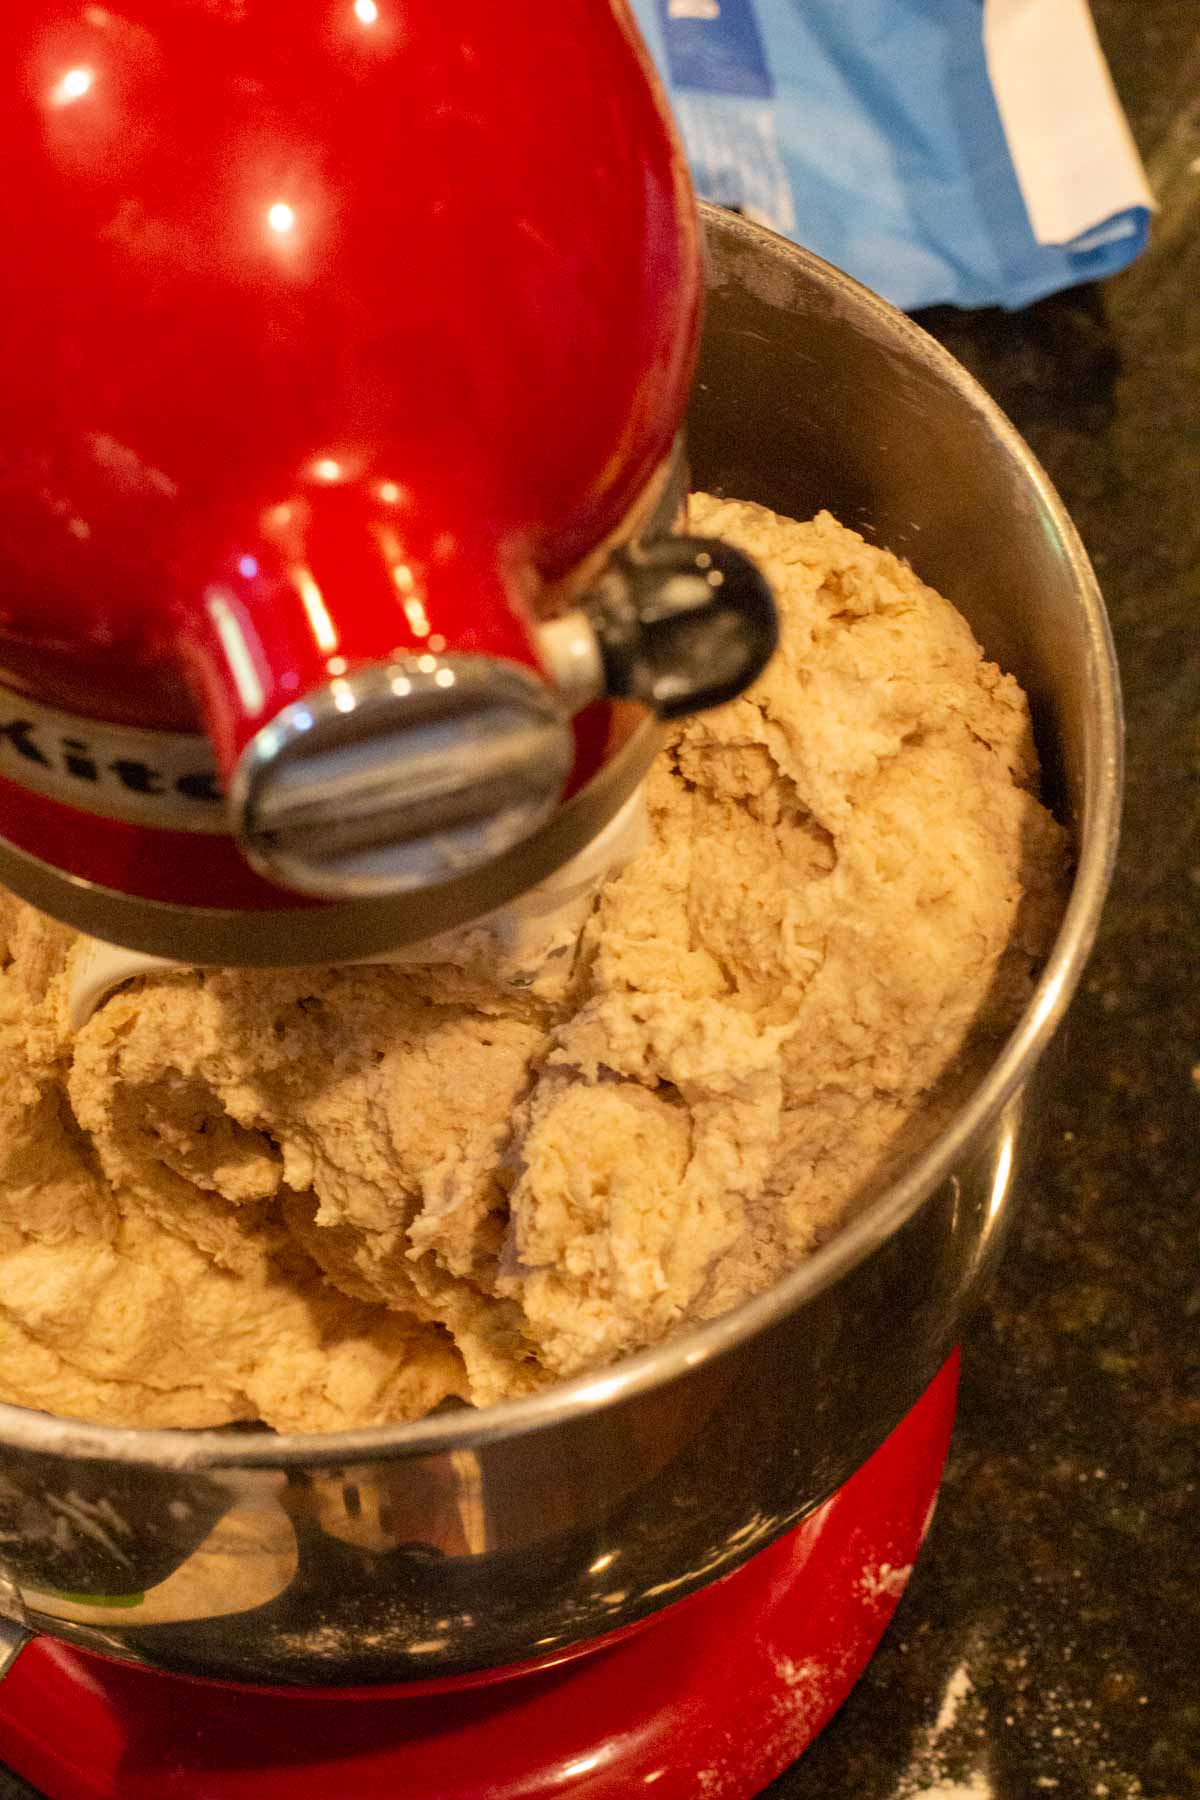
    Mixing dough to make olive bread.
    1. Step 2: In the bowl of an electric mixer fitted with the paddle attachment, combine the cool water, yeast mixture and flours until just incorporated. The dough should resemble a shaggy mass consistency. Cover with plastic wrap and let sit for 15 – 30 minutes. (Autolyse).
    2. Step 3: After resting, switch to a dough hook. Add the salt and knead the dough on low-medium speed until it is soft and smooth. 10 – 12 minutes. Knead in the chopped rosemary and broken olives in the last two minutes of kneading. 
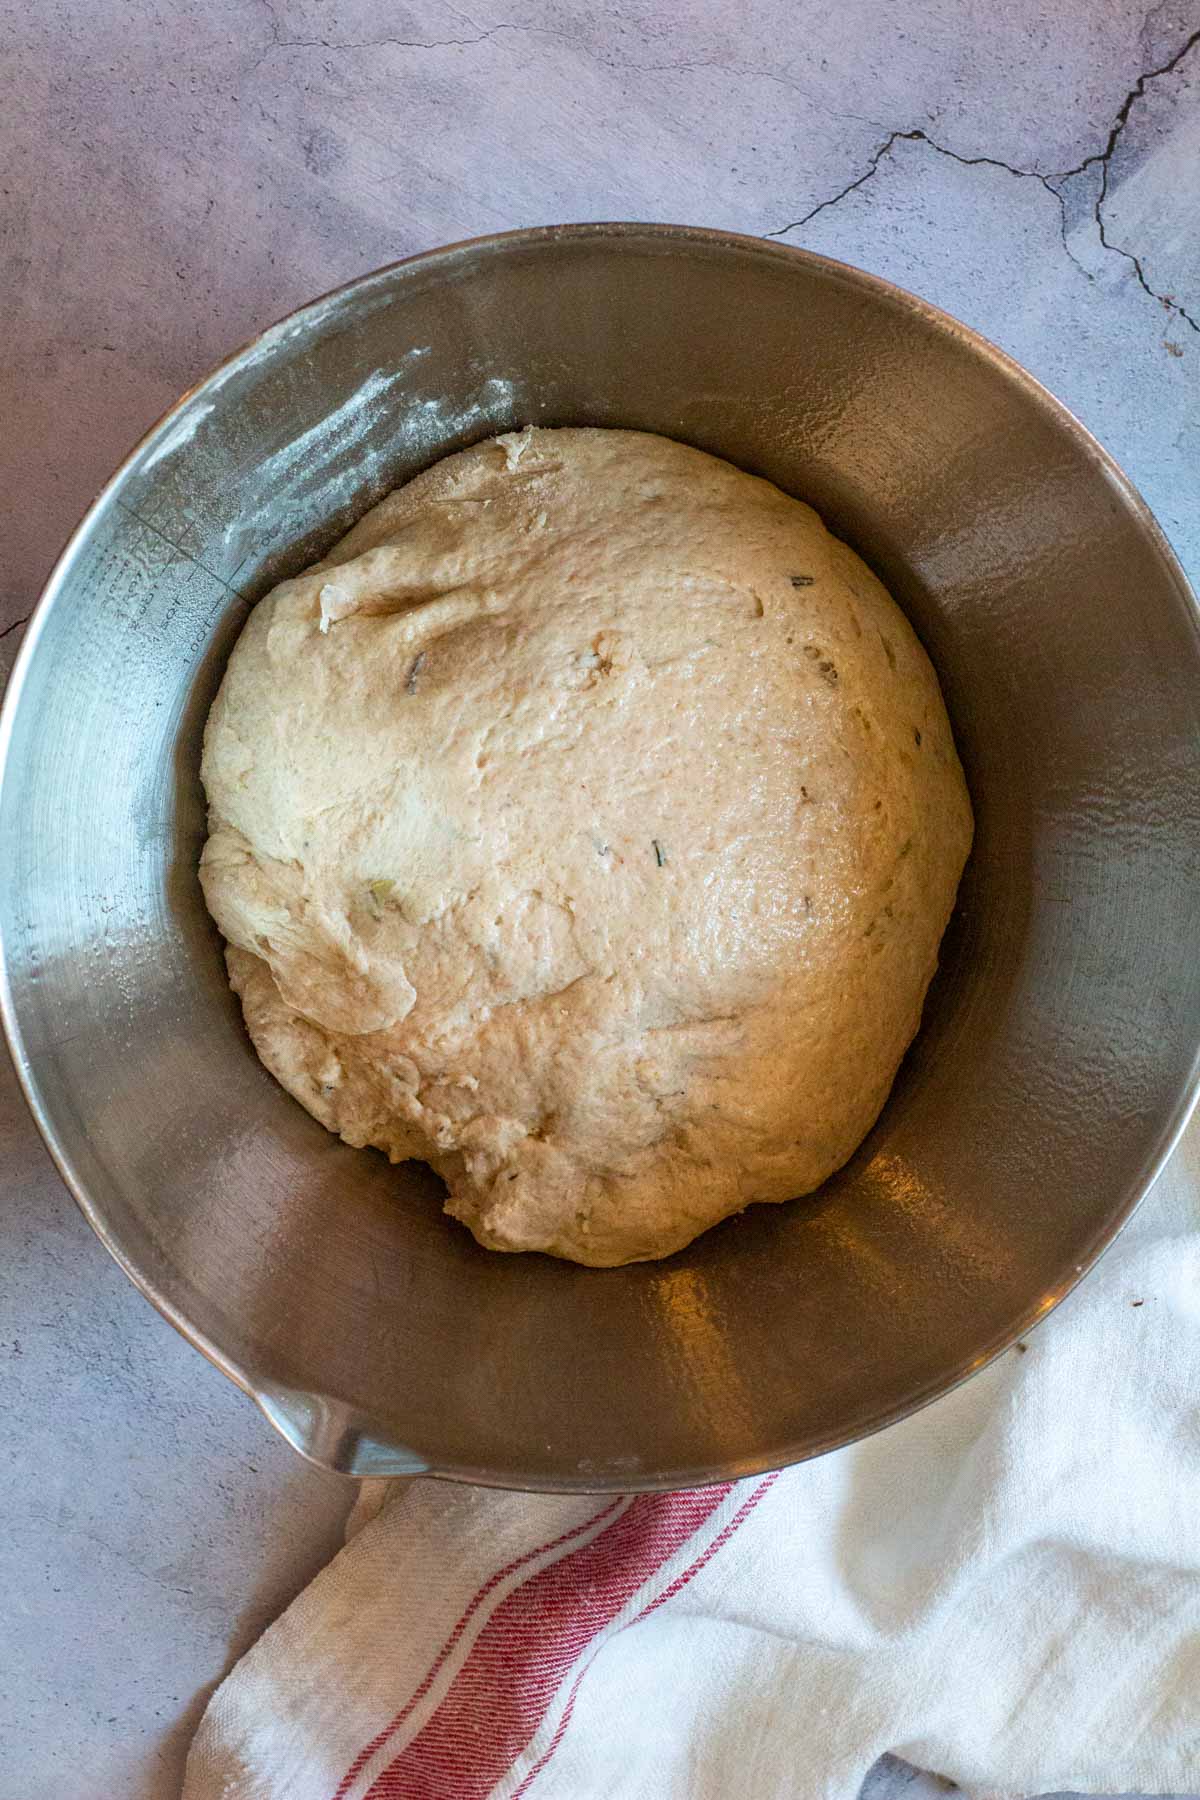
    Olive bread dough ready to rise.
    Olive bread shaped into a loaves and ready to bake.
    1. Step 4: Place the dough into a lightly oiled bowl. Cover and let rise in a warm place until doubled in size. About 1 hour. Punch down and allow to rise again until doubled. (45 – 50 minutes)
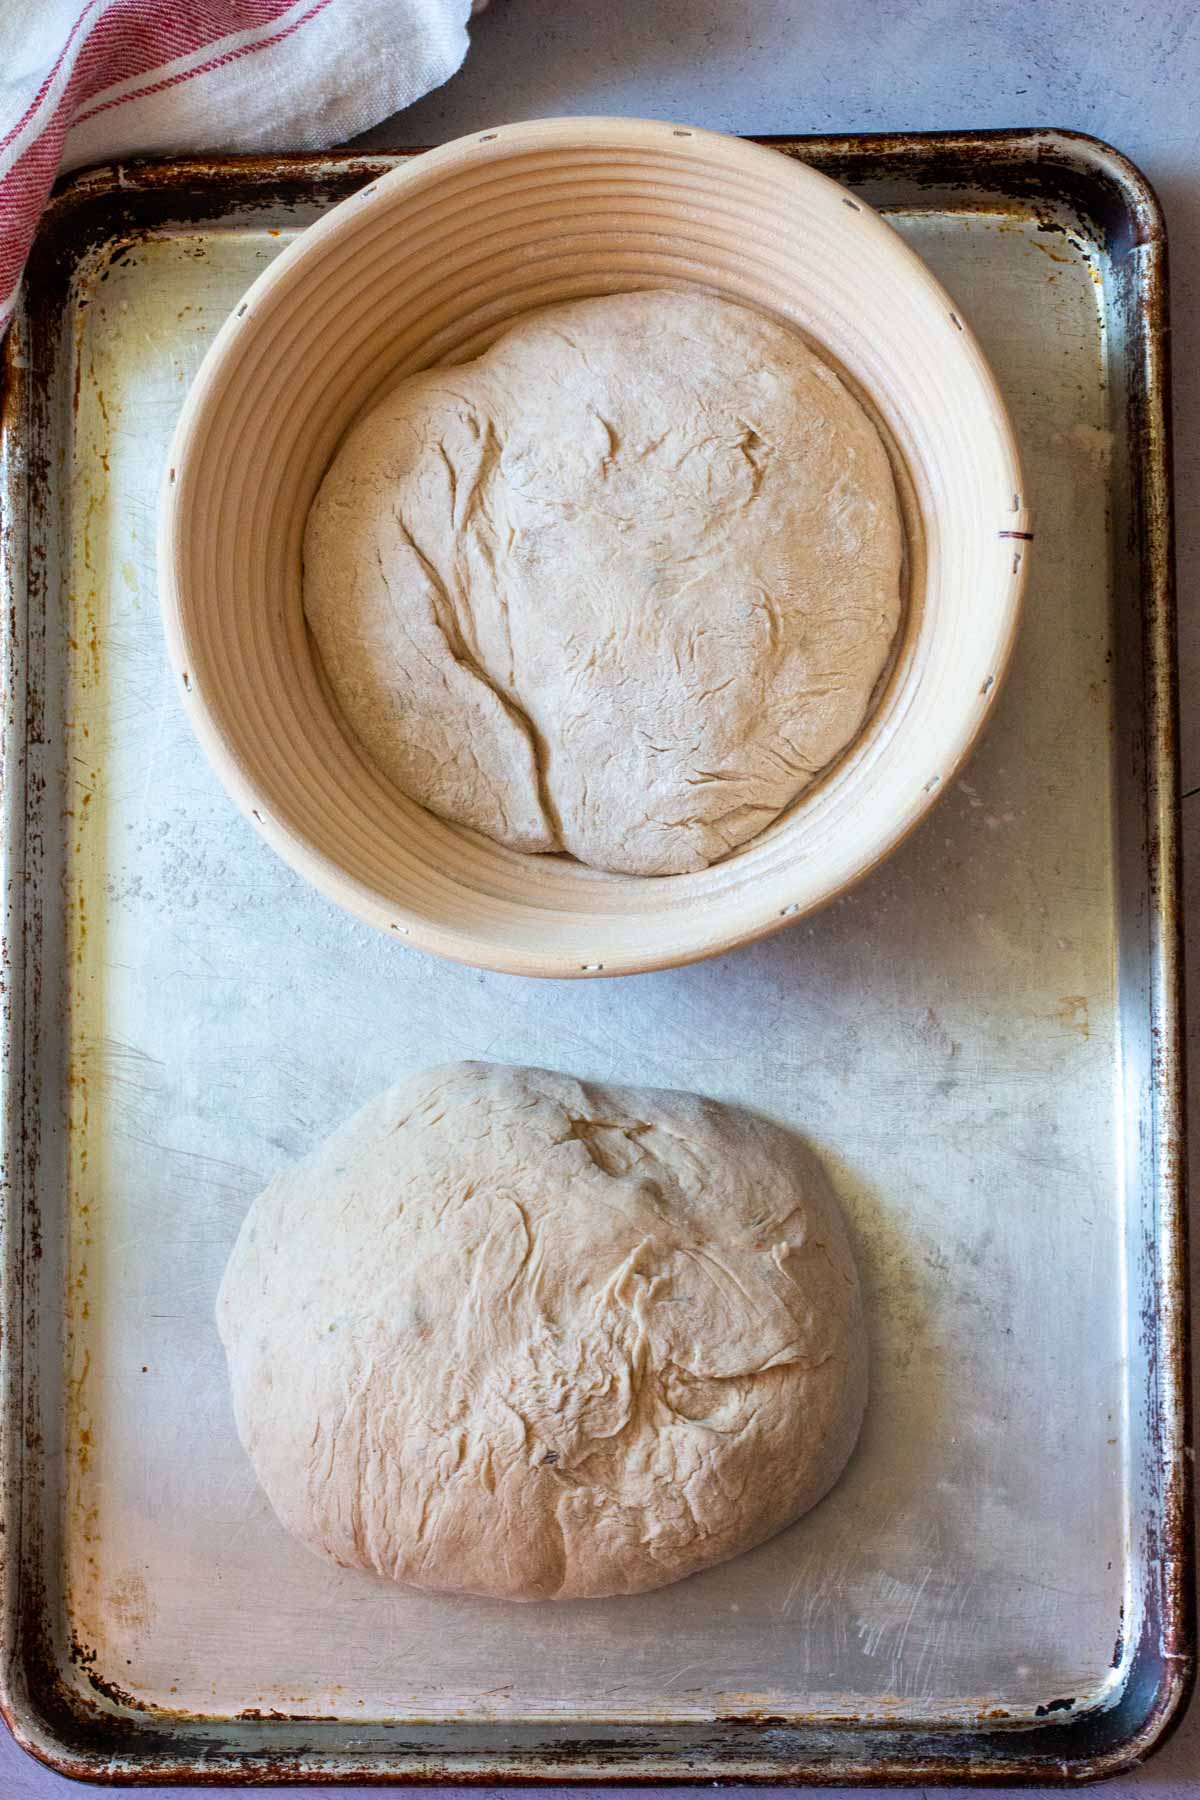
    2. Step 5: On a lightly floured surface, gently deflate the dough and divide in half. Shape each portion into a boule bowl or upside down on a sheet pan. Cover and let rise for 30 – 40 minutes or until about doubled.
    3. Step 6: Preheat oven to 450 degrees. Using a serrated knife or razor, cut an “X” on top of the loaf. If using a boule bowl, remove the dough and place on a baking sheet. Bake until loaf is golden and sounds hollow when tapped on the bottom. About 30 minutes.

    Tips for Success

    • When blooming yeast, use an instant read thermometer to make sure the temperature of the water isn’t hotter than 110 degrees. Water above that level will kill the yeast and ruin the bread.
    • Don’t skip the Autolyse stage. (the resting stage) This allows the gluten to relax and the flour to fully hydrate.

    Tips For Making Bread at Home

    Just like wine making, making bread is watching and nurturing a living thing to grow. Watching the yeast bloom, seeing the bread rise like magic and smelling the bread baking.

    Learning about fermentation and proofing, watching the action happen. Converting starches into sugars… and it’s all actually easier than it seems. There’s nothing like it. It’s messy, it’s rewarding and you feel like an artisan.

    I’ve kept the way I approach bread making in my own kitchen as the way I was taught at Culinary School.

    • Use quality flours.
    • Measure by weight using a digital scale instead of volume (measuring cups).
    • Measure everything exactly to the gram. Owning a good quality digital scale is not optional.

    Making bread is most certainly a labor of love. And if you need inspiration I urge you to watch Michael Pollan’s Netflix Documentary “Cooked”. 

    I liked it so much I’ve watched it twice. A four part series, he explores cooking through four natural elements - fire, water, air and earth. The bread baking part of the series is truly inspiring.

    How To Store Homemade Bread

    Homemade bread doesn't last long. Keep it at room temperature for 1 – 2 days. I place bread, cut side down on a cutting board. Or store in a plastic bag, knowing that the crust will soften. After that, I freeze. Avoid the refrigerator, it simply compromises the texture and flavor.

    Recipe for Homemade Olive and Rosemary Bread

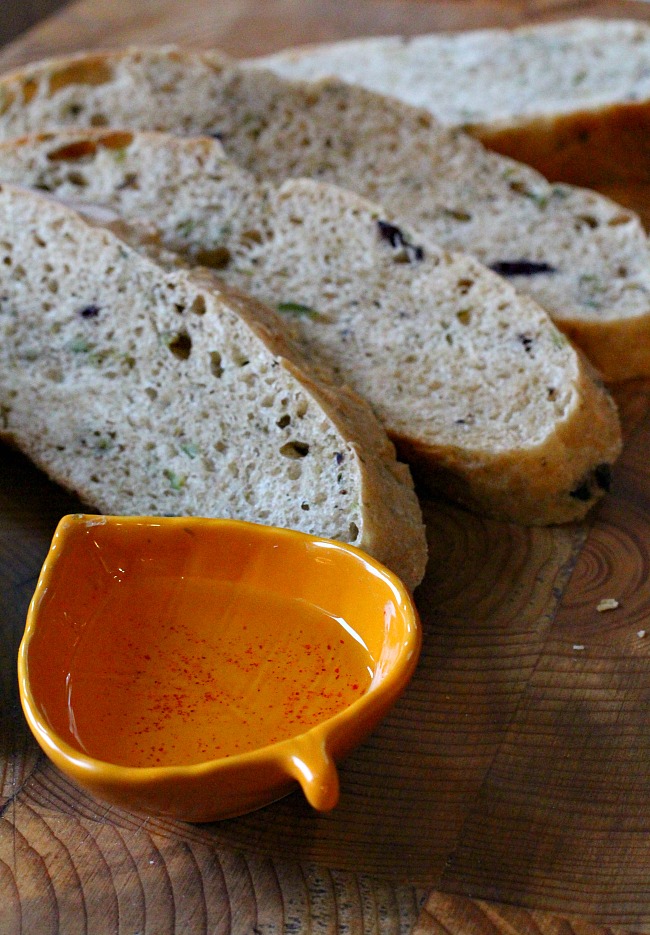
    Homemade Olive Rosemary Bread. A beautiful homemade bread recipe.

    Serving Tip

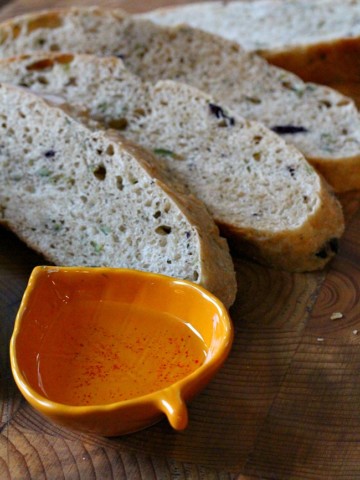
    • Serve this bread with a small shallow bowl of good quality olive oil for dipping. = divine.
    • Or simply slather with butter and enjoy.
    • Soup and bread are a classic combination, I like to serve this bread with my Chicken and Sweet Potato Soup.
    • Soup and salad are also great partners, try my recipe for Warm Butter Bean Salad. There’s bacon involved for a hearty meal.

    More Homemade Bread Recipes

    • Rabbit Hill Inn Oatmeal Molasses Bread
    • Herbed Tomato Bread Recipe
    • Cinnamon Pecan Peach Bread

    And don’t miss this Cornbread Recipe with Creamed Corn. It’s the most popular recipe on my site.

    If you liked this recipe, please leave a star ⭐⭐⭐⭐⭐ rating in the recipe card below and leave a comment. I always appreciate your feedback and hearing how everything went.

    And, don’t forget to subscribe to my newsletter for more delicious recipes and cooking tips. Make it a delicious day … every day.

    A loaf of Olive Rosemary bread. A beautiful homemade bread recipe. Salty olives, savory with rosemary. A nice crust and chewy on the inside.
    Print Recipe
    5 from 8 votes

    Homemade Rosemary Olive Bread

    Rosemary Olive Bread. A beautiful outer crust and chewy on the inside. Salty with olives and beautifully flavored with Rosemary. One of our favorite homemade bread recipes.
    Prep Time30 minutes mins
    Cook Time3 hours hrs
    Total Time3 hours hrs 30 minutes mins
    Course: Bread
    Cuisine: Meditteranean
    Servings: 12
    Calories: 244kcal
    Author: Lea Ann Brown

    Ingredients

    • 1 Tablespoon Dry Active Yeast .3 ounces
    • ½ cup Warm water 4 ounces, 110 degrees
    • 2 cups Cool water 16 ounces
    • 5 cups Bread flour 22 ½ ounces, Plus more for dusting
    • 1 cup Whole wheat flour 4 ½ ounces
    • 1 Tablespoon Salt ½ ounce
    • 2-3 Tablespoons Fresh Rosemary 1 – 1 ½ ounce chopped
    • 1 ¼ Cups Kalamata Olives and Green Olives 6 ½ ounces, pitted, broken, rinsed and squeezed

    Instructions

    • In a bowl, sprinkle the yeast over the warm water. 
    • In the bowl of an electric mixer fitted with the paddle attachment, combine the cool water, yeast mixture and flours until just incorporated. The dough should resemble a shaggy mass consistency. Cover with plastic wrap and let sit for 15 – 30 minutes. (Autolyse)
    • After resting, switch to a dough hook. Add the salt and knead the dough on low-medium speed until it is soft and smooth. 10 – 12 minutes. 
    • Knead in the chopped rosemary and broken olives in the last two minutes of kneading. 
    • Place the dough into a lightly oiled bowl. Cover and let rise in a warm place until doubled in size. About 1 hour. Punch down and allow to rise again until doubled. (45 – 50 minutes)
    • On a lightly floured surface, gently deflate the dough and divide in half. Shape each portion int o a boule. Place upside down on a sheet pan. Cover and let rise for 30 – 40 minutes or until about doubled.
    • Preheat oven to 450 degrees. 
    • With a serrated knife or razor, cut an “X” on top of the loaf. Bake until loaf is golden and sounds hollow when tapped on the bottom. About 30 minutes.

    Notes

    Tips for Success:
      • When blooming yeast, use an instant read thermometer to make sure the temperature of the water isn’t hotter than 110 degrees. Water above that level will kill the yeast and ruin the bread.
      • Don’t skip the Autolyse stage. (the resting stage) This allows the gluten to relax and the flour to fully hydrate.
    Serving Suggestions:
    • Serve this bread with a small shallow bowl of good quality olive oil for dipping. = divine.
    • Or simply slather with butter and enjoy.
     

    Nutrition

    Calories: 244kcal | Carbohydrates: 46g | Protein: 8g | Fat: 3g | Saturated Fat: 1g | Sodium: 804mg | Potassium: 97mg | Fiber: 3g | Sugar: 1g | Vitamin A: 65IU | Vitamin C: 1mg | Calcium: 21mg | Iron: 1mg

    Rosemary Olive Bread … Such A Treat

    Crispy Ham and Cheese Corn Tortilla Quesadillas

    January 9, 2024 By Lea Ann Brown 2 Comments

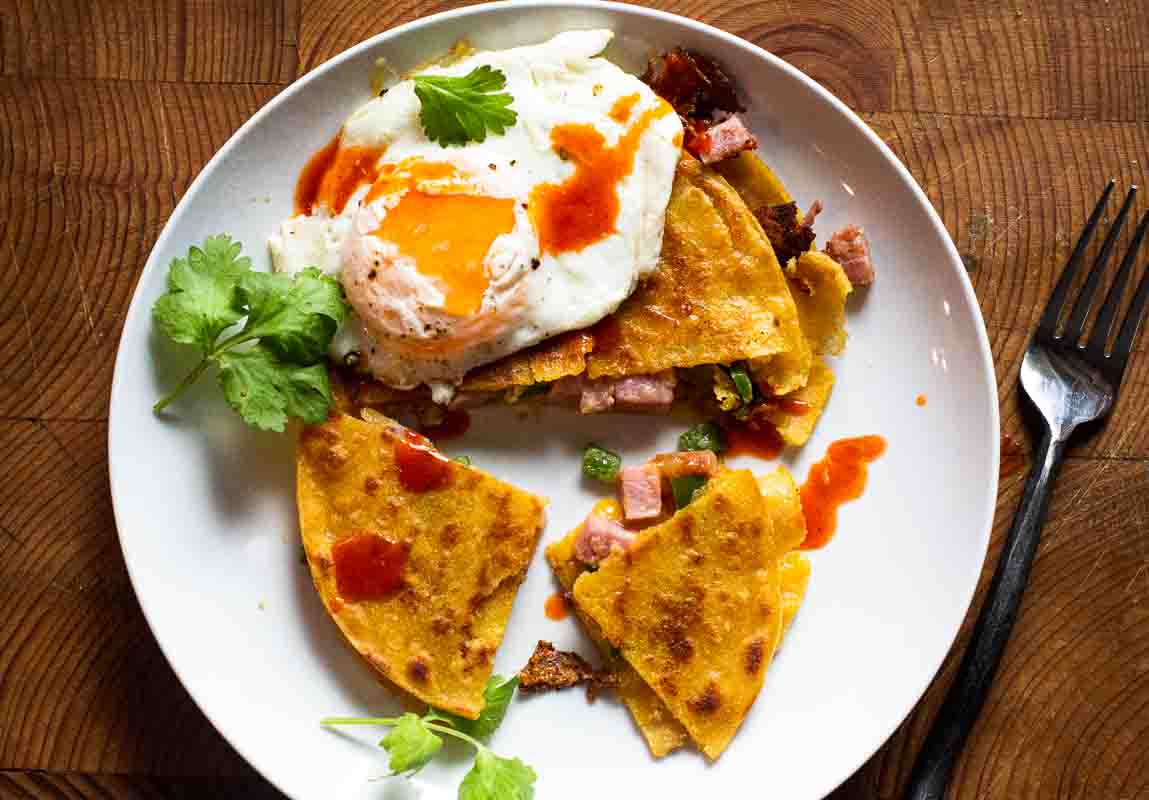
    Ham and cheese quesadilla made with corn tortillas and topped with a fried egg.

    A proper quesadilla doesn't need flour tortillas to be irresistible. In the Southwest, especially New Mexico, corn tortilla quesadillas bring deeper flavor, better texture, and a more authentic bite. These ham and cheese quesadillas, finished with a perfectly runny egg, come together fast but eat like something you'd get at a roadside diner in chile country.

    Fried corn tortilla quesadilla topped with a fried egg.

    What Makes These Quesadillas Different?

    Corn Tortillas! Can you make quesadillas with corn tortillas? Yes! I’m going to show you how. I’m not sure why it never occurred to me to make quesadillas with anything other than flour tortillas. But thanks to a little cafe outside Taos, New Mexico, my quesadilla world just became crispier.

    So if you’ve been curious about honing your Southwestern cooking skills, this easy recipe is a great place to begin.

    Why Use Corn Tortillas Instead Of Flour?

    • Corn tortillas fry easier, brown crispier, are more manageable than flour tortillas. And the end texture and flavor result is pure bliss.
    • A cheese quesadilla on it’s own is a delightful affair, but for my corn tortillas quesadillas, I used a combination of cheese, chopped ham and jalapenos, but the sky is the limit for filling options.
    • These Ham and Cheese Quesadillas are so quick and easy, you’ll be adding them to your meal planning rotation on a weekly basis.
    • You’re immersing yourself in the cultural authenticity in Southwestern & Mexican cooking. I personally feel flour tortillas are more of a Tex-Mex creation.
    • Using Corn Tortillas make this a gluten free option.

    Let’s take a look at this “no recipe” recipe.

    Ingredients You’ll Need

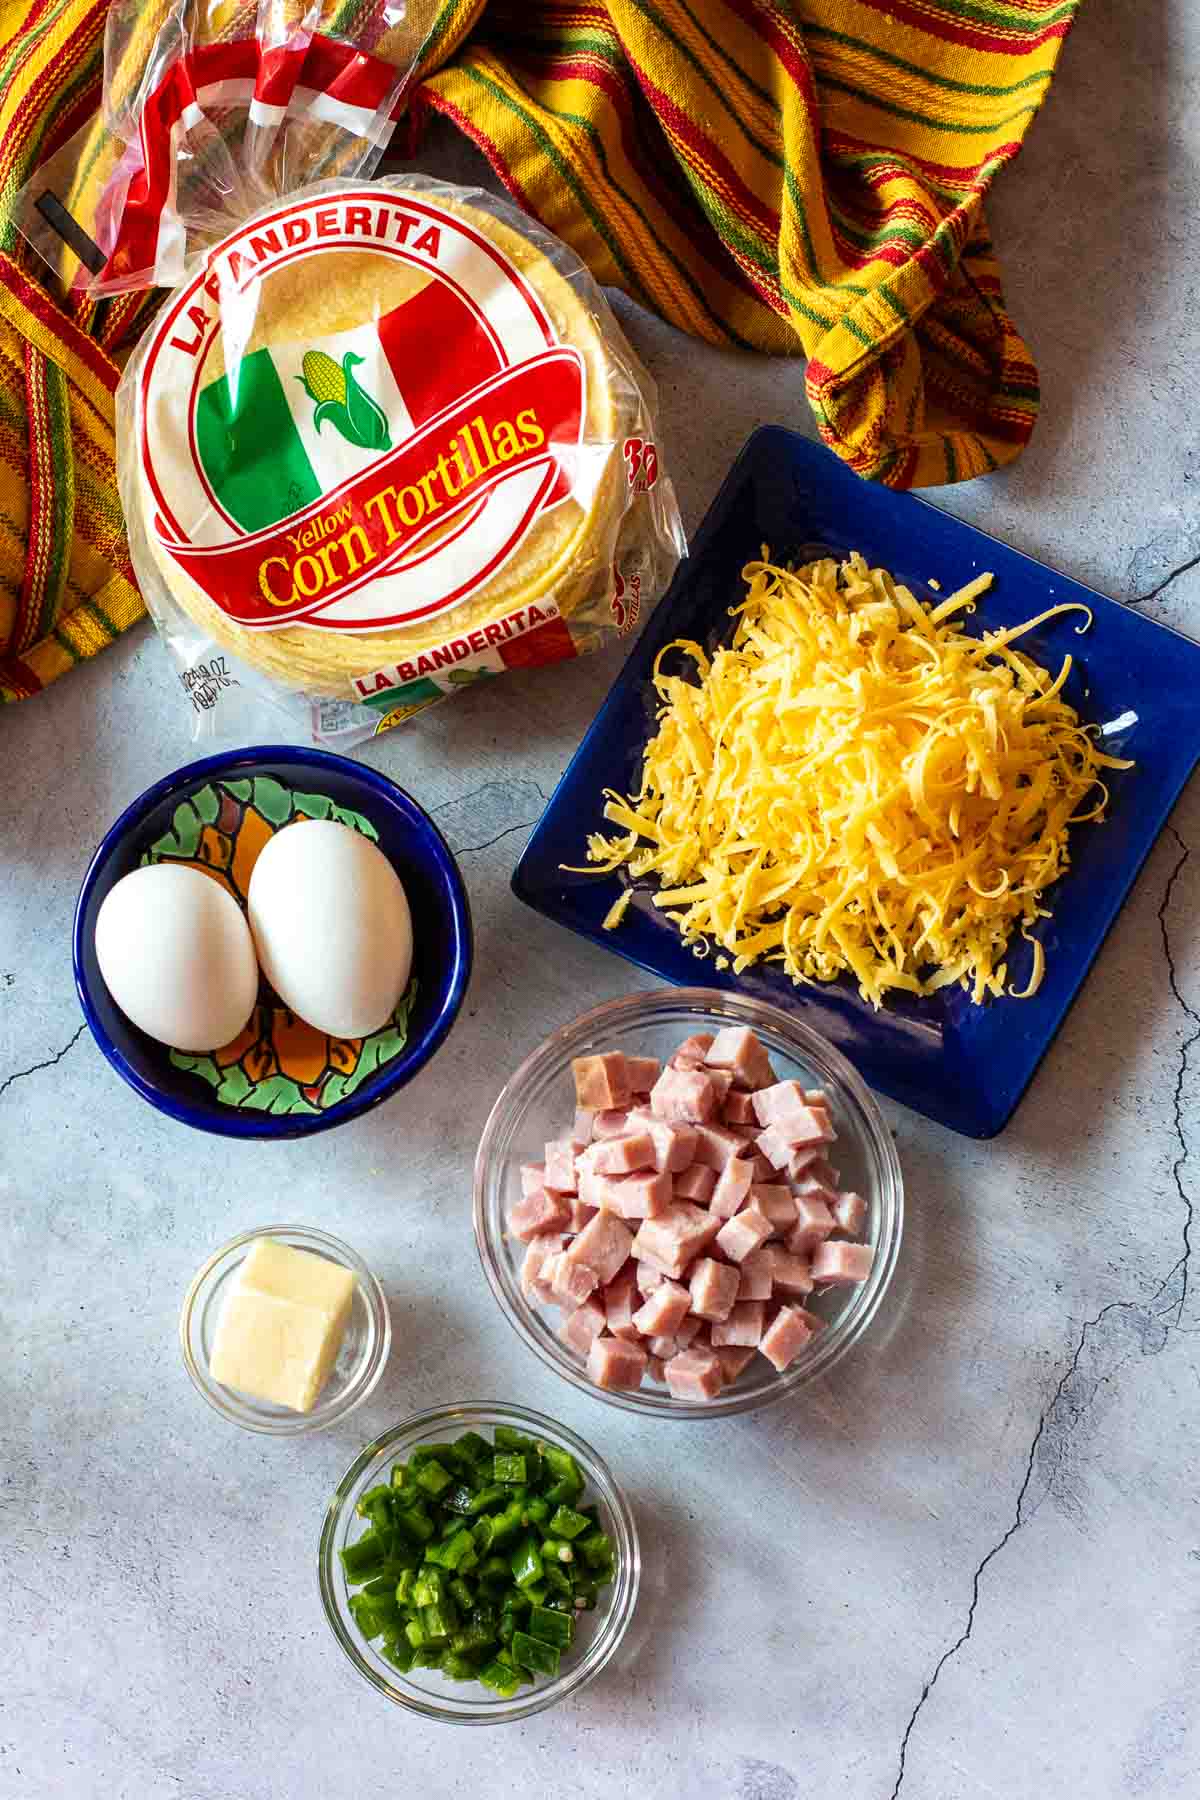
    Ingredients to make fried corn tortilla quesadillas.
    • Yellow Corn Tortillas: I like La Banderita Brand, but use your favorite brand.
    • Shredded Cheese: Medium cheddar works well here.
    • Unsalted Butter
    • Ham: Use a cooked ham steak.
    • Jalapeno Peppers
    • Eggs

    Pro Tip: Purchase good quality cheese and grate it yourself. Pre-grated cheese in bags includes additives to keep it from clumping, which will also compromise the melting factor. Grating cheese from a block of cheese will result in a creamier and more consistent melting experience. Plus, it’s less expensive.

    Ingredient Substitutions

    • Chile Peppers: Are jalapeno peppers simply too spicy for you? Choose mild Hatch Green Chile Peppers as a substitute.
    • Blue Corn Tortillas: If you can find them, use them. Blue Corn Tortillas are totally New Mexico traditional.

    Best Cheese For Corn Tortilla Quesadillas

    There are so many good options here. I’ve chosen a medium cheddar because it seems like a natural partner for ham. But there are so many good options here:

    • Use a good melting cheese to make a cheese quesadilla. A good substitution for cheddar would be Monterey Jack Cheese, or Pepper Jack. Both good choices here and actually better for melting.
    • Ever tried Muenster Cheese? When I took a class on how to make Tamales, it was used to fill Green chile tamales. Great melting cheese.
    • Mexican Cheeses. Have fun and try Oaxaca or Asadero. You can find them in the Mexican produce section at your local grocer.
    • What to avoid: Packages of pre-shredded cheese, or Cotija cheese. Cotija cheese is a dry Mexican crumbling cheese that simply doesn’t melt well. Save it as a finishing cheese to sprinkle on top.

    How to Make Corn Tortilla Quesadillas, It’s So Easy

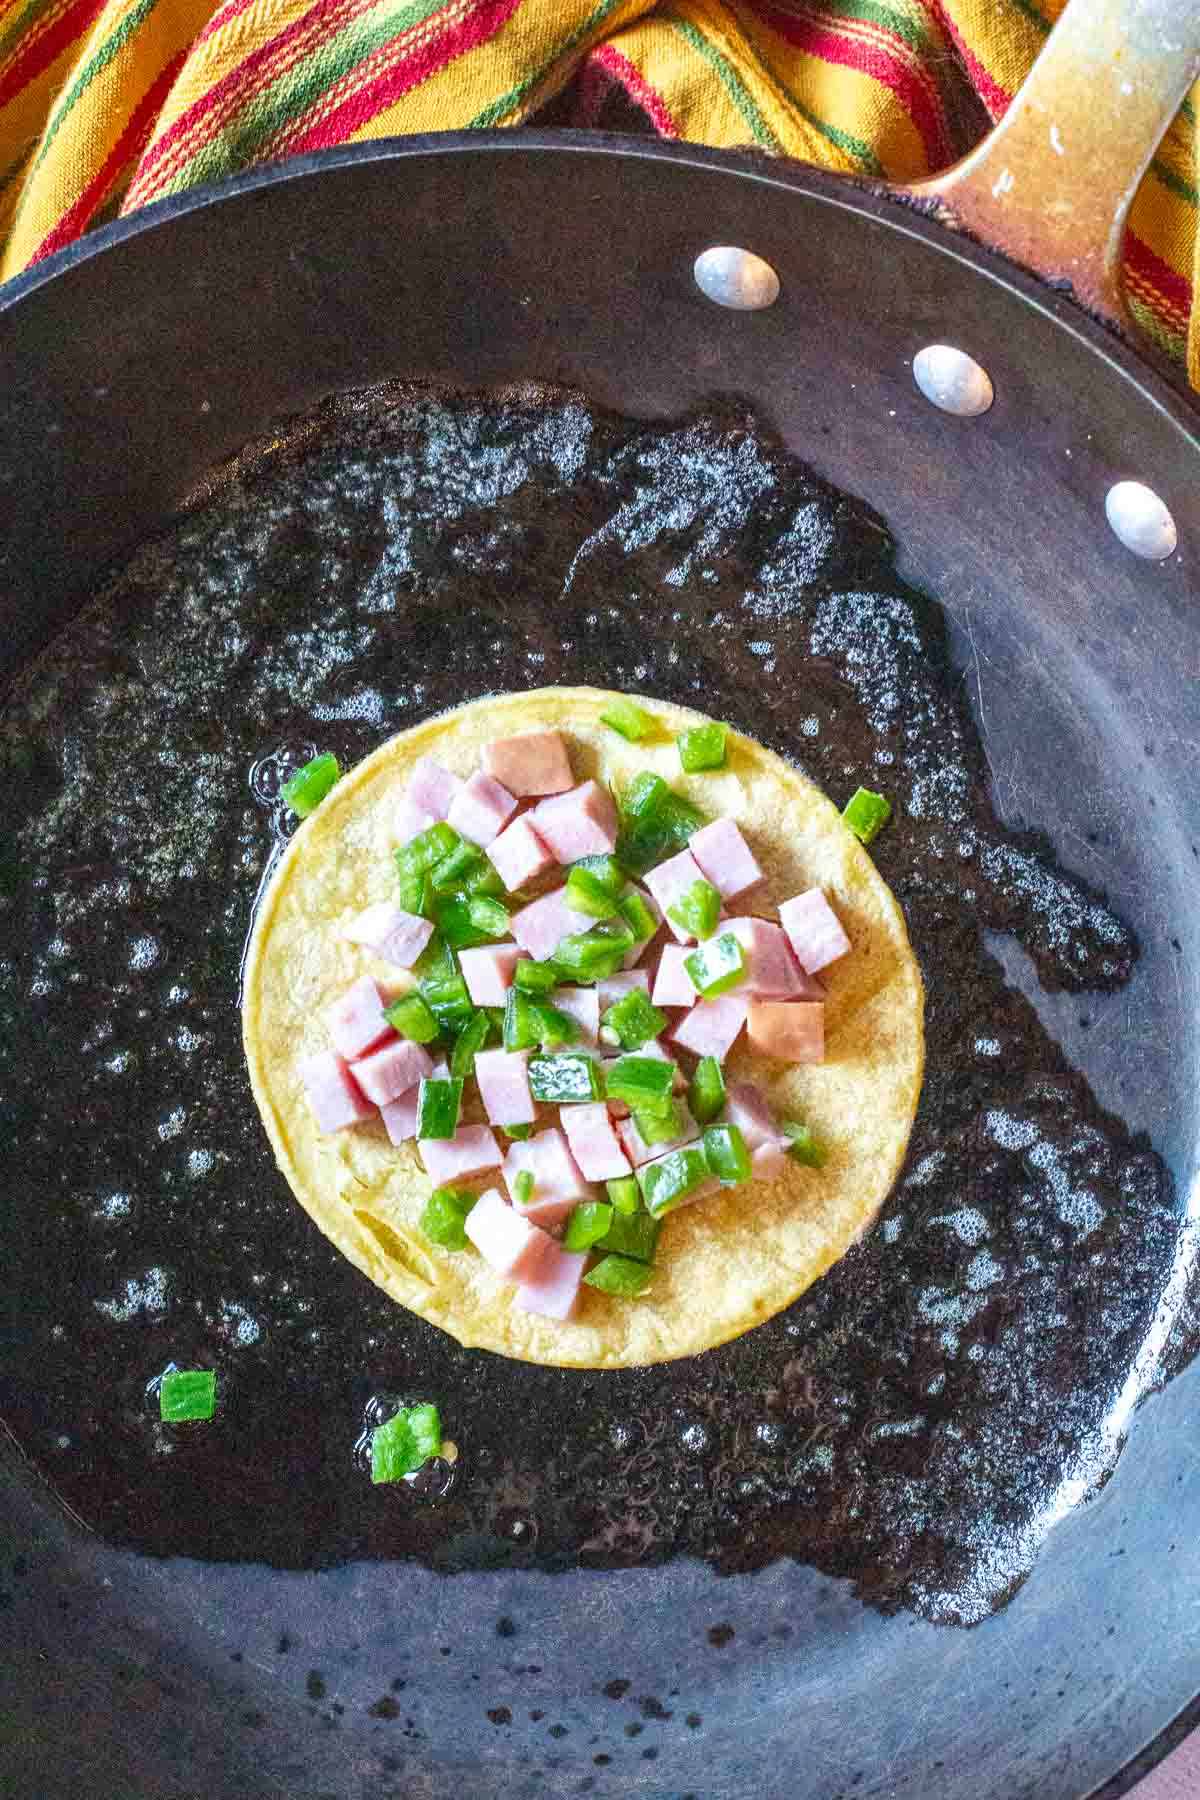
    Frying corn tortillas for corn quesadillas.
    Adding filling ingredients for corn tortilla quesadillas.
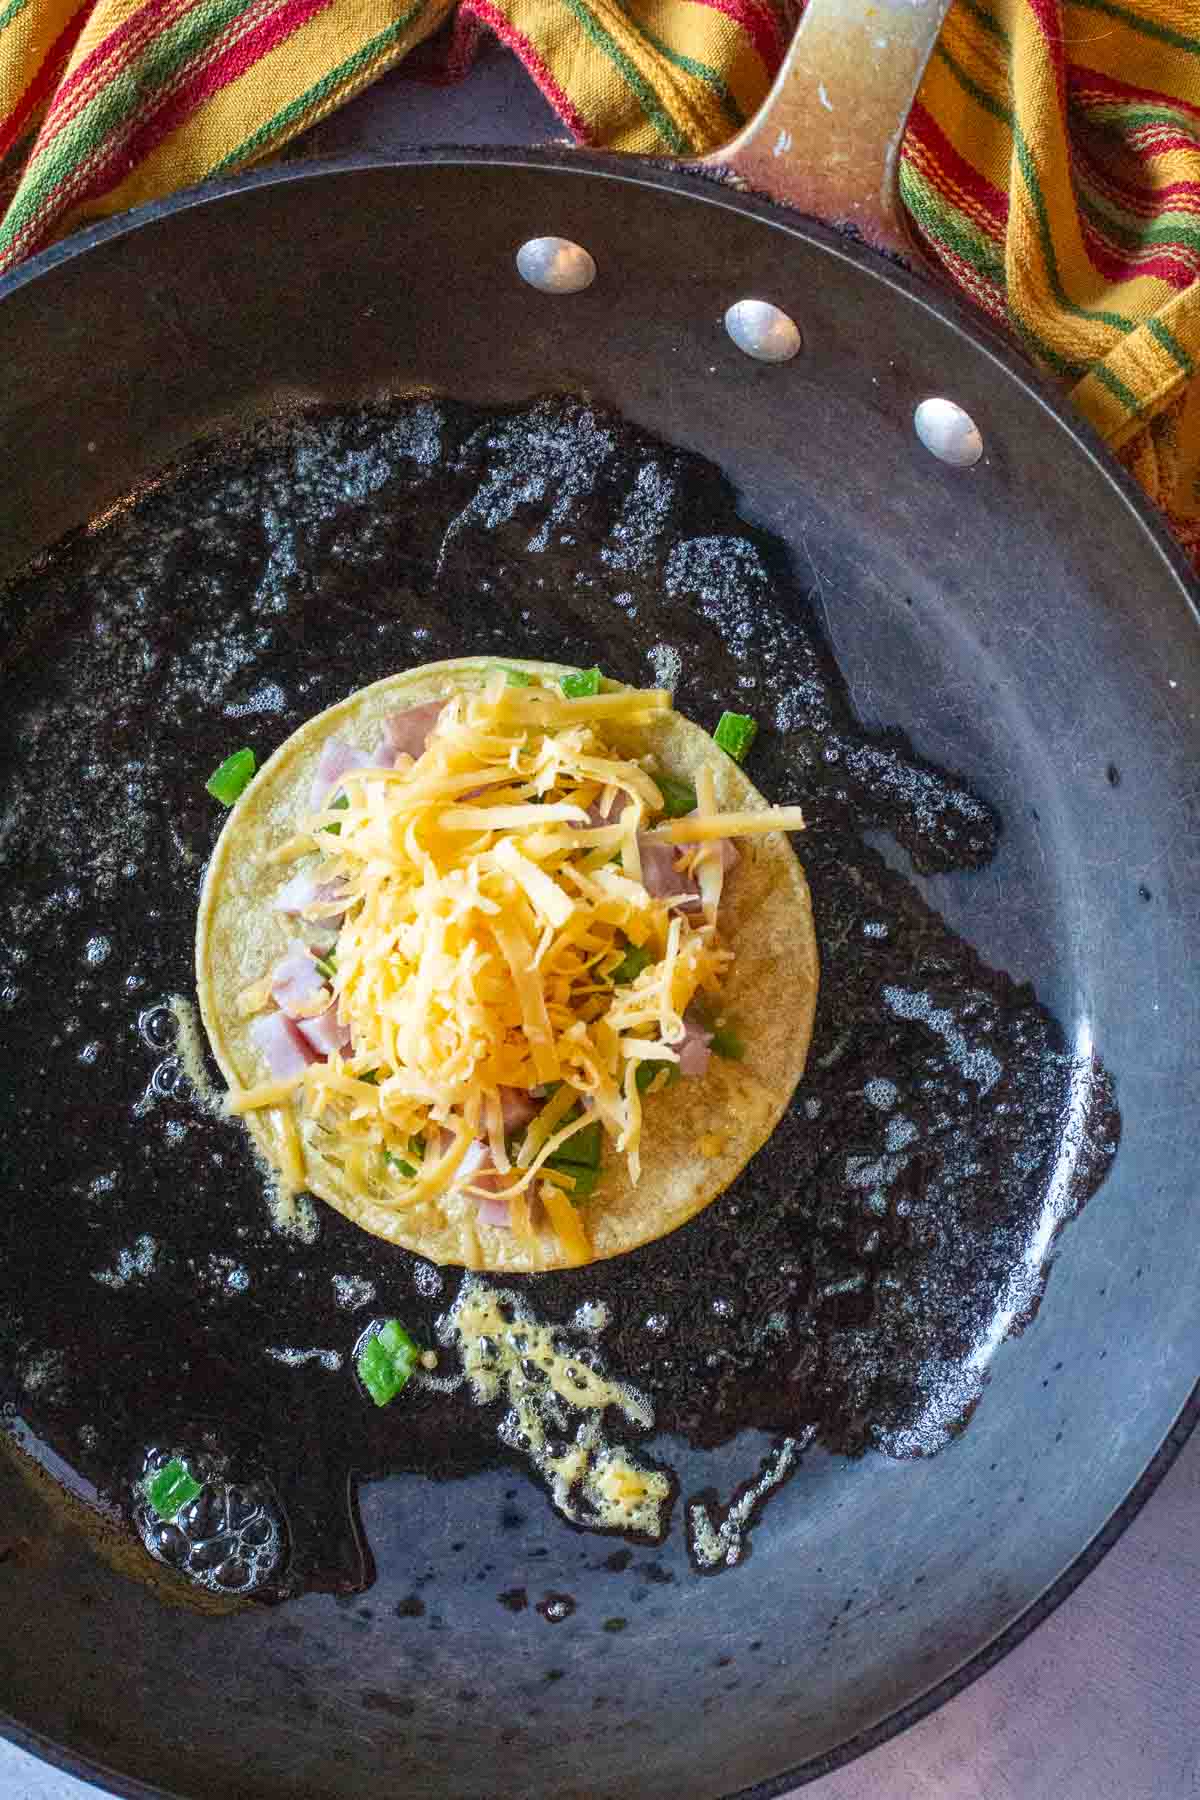
    1. Step 1: Make one quesadilla at a time. Melt butter in a fry pan over medium heat. Once the butter melted and bubbles start to subside, add one corn tortilla and place ham, chopped jalapeno and cheese on top of the tortilla leaving room at the edges.
    2. Step 2: Let the quesadilla cook for about 30 seconds until the bottom of the quesadilla is golden brown.
    Fried ham and cheese quesadillas.
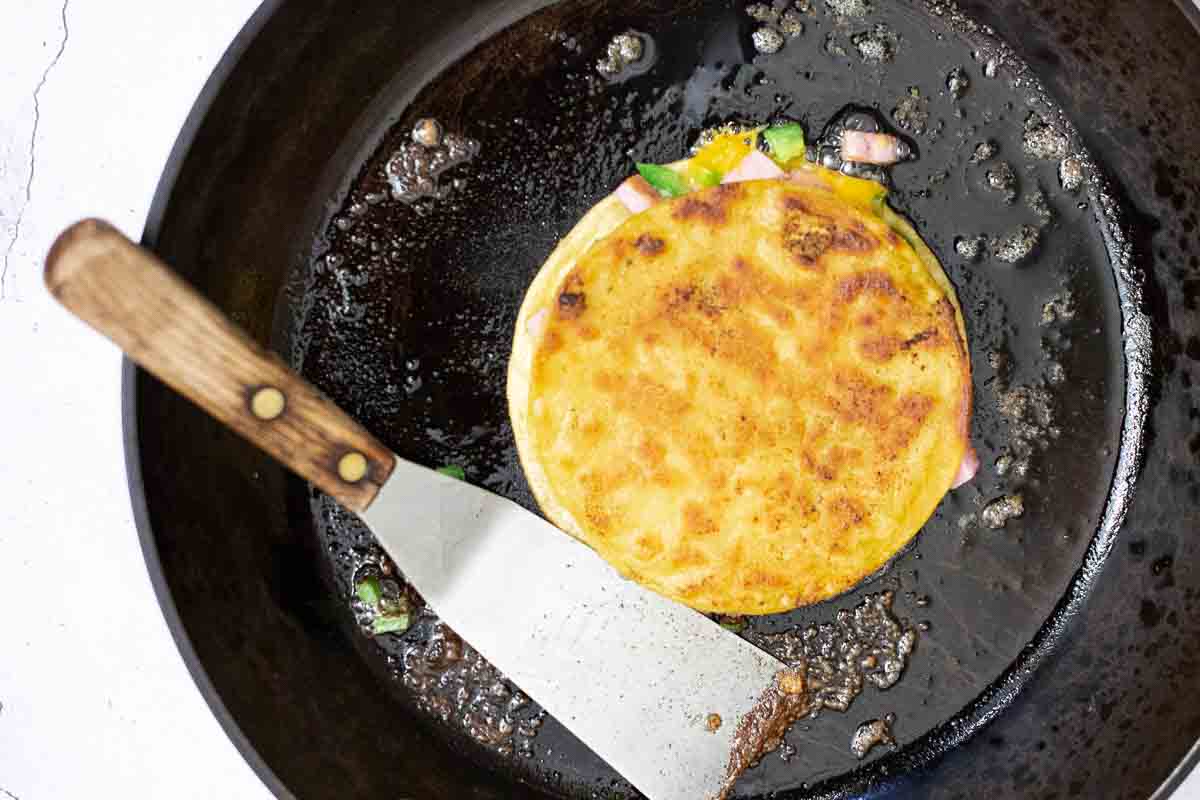
    1. Step 3: Place the 2nd corn tortilla on top and using a sturdy spatula, carefully flip the the quesadilla. Let the bottom corn tortilla toast to golden brown. Move the quesadilla to a plate and tent with foil to keep warm while you fry an egg.
    2. Step 4: To serve: Use a sharp serrated knife to slice into quarters. Top with a fried egg, and may I suggest that egg be over easy? That runny yolk will add a creamy texture and flavor.

    Pro Tip: Once plated add a splash of your favorite hot sauce, or better yet a drizzle of New Mexico Red Chile Sauce. It’s a rich earthy red sauce made from chile pods or chile powder that will turn any Southwestern recipe into a grand affair of flavor.

    Ingredient Combinations

    The sky is the limit when making these fried corn tortilla quesadillas. Here are some easy ideas:

    • Canned black beans, drained and rinsed and sprinkled with chile powder. Some Pepper Jack Cheese would work well here.
    • Smashed avocado, black beans and Muenster cheese.
    • Shredded rotisserie chicken, chopped red bell pepper and Monterey Jack Cheese.
    • Canned pinto beans, drained, roasted bell pepper and pickled jalapeno and cheddar.
    • Cooked Mexican chorizo or leftover taco meat with chopped onions and cheese of your choice.

    Tips For Success

    • Make sure you’re purchasing a cooked ham steak. A ham steak labeled “smoked” is cooked.
    • Practice those knife skills. Chop the ham and jalapeno peppers in uniform and very smallcubes. This will help the ingredients cook evenly and will give you pride in skill set. And cutting them small will keep them from falling out when flipping the quesadilla.
    • If you want to use oil instead of butter, use a neutral oil with a high smoke point like canola or vegetable. A high smoke point will result in a crispier and easier browned quesadilla. I don’t suggest olive oil.
    • A quality cheese quesadilla needs a good melting cheese. Pepper Jack, Monterey Jack, Cheddar, Muenster and Oaxaca are good choices.
    • For this recipe I used very small chunks of ham and jalapeno, so they warmed well and became hot as the quesadilla cooked. As with omelettes, if using bell peppers, onions, or mushrooms, it’s best to sautee the vegetables before adding to the cheese quesadilla.
    • Don’t Overfill: Don’t overfill the quesadillas. They’ll he harder to eat and could fall apart.

    What To Serve Them With

    • Refried beans are a natural side dish.
    • Fresh: I love simple smashed avocado that’s simply been salt and peppered a bit.
    • Salsas: So many options here. A fruity salsa is a great combination for salty ham, like this Jalapeno Pineapple Salsa, or Chipotle Peach Salsa. A scoop of Homemade Mexican Restaurant Salsa is always welcome.
    • Sauces: If you’re looking for a real treat, try drizzling with Authentic New Mexico sauces like this Red Chile Sauce, or Green Chile Sauce.
    • Pico de Gallo: Pico de Gallo: I always have a couple of jars of Homemade Pickled Jalapeno Peppers in the refrigerator and use them to make a quick pico de gallo. Just chop them, add some chopped onion and fresh tomato. Pour in some of the pickling juice and stir. You can also make a more traditional Homemade Pico de Gallo using my recipe. And almost every grocery store will carry a container of pico de gallo in their refrigerator section.

    FAQ’s

    Are These Corn Tortillas Quesadillas Gluten Free?

    Yes, using corn tortillas over flour tortillas makes these naturally gluten free. The ingredients listed to make these are also gluten free.

    Can You Make This Without Ham?

    Don’t want the meat? Make this a cheese quesadilla and use only the cheese and jalapeno peppers.

    Why Are My Corn Tortillas Breaking?

    Overcooking until they’re too crisp is probably the main reason. You just want to crisp them, not turn them into hard taco shells used to make Tostadas. You may also be filling them too full of ingredients.

    Fried Corn Tortilla Ham and Cheese Quesadillas

    These quick ham and cheese quesadillas made with corn tortillas are perfect in every way. Smoky ham, gooey cheese, and the distinct flavor and texture of corn tortillas creates a flavor balance that you’re simply going to love.

    And fried in butter, this is a crispy treat with irresistible appeal.

    A perfect recipe for a quick breakfast or an easy light dinner. A tasty alternative to the traditional quesadillas.

    Explore More Mexican Breakfast Recipes

    • New Mexico Style Huevos Rancheros.
      New Mexico Style Huevos Rancheros in Red Chile Sauce
    • Potato and egg breakfast tacos.
      Potato and Egg Tacos with Hatch Chile Peppers
    • Chorizo omelette topped with salsa and sour cream.
      Easy Cheesy Chorizo Omelette
    • Cottage cheese egg bites with poblano peppers.
      Southwest Egg Bites with Cottage Cheese And Bacon (In Oven)

    And don’t miss this corn tortilla quesadilla recipe for Queso Fresco Quesadillas with Peach Chile Salsa. Another one of our favorites. And check out my Mexican Southwest Recipes category. You’ll find lots of recipe ideas to spice up your meal plans, including one of the most popular on my site for this cheesy layered Mexican Casserole Made with Ground Beef and Corn Tortillas. It’s a family favorite around here.

    If you liked this recipe, please leave a star ⭐⭐⭐⭐⭐ rating in the recipe card below and leave a comment. I always appreciate your feedback and hearing how everything went.

    And, don’t forget to subscribe to my newsletter for more delicious recipes and cooking tips. Make it a delicious day … every day.

    For technique, this recipe is adapted from a recipe from the New York Times Cooking, for Fried Egg Quesadilla and inspired by a recipe from a Taos, New Mexico Restaurant.

    Ham and cheese quesadilla made with corn tortillas and topped with a fried egg.
    Print Recipe
    5 from 3 votes

    Ham and Cheese Corn Tortilla Quesadilla

    These simple fried ham and cheese quesadillas made with corn tortillas are a quick and easy meal. Filled with chopped ham, jalapeno peppers, and topped with a fried egg, you'll want to eat these every night.
    Prep Time15 minutes mins
    Cook Time15 minutes mins
    Total Time30 minutes mins
    Course: Breakfast Recipes
    Cuisine: Mexican
    Servings: 2 Quesadillas
    Calories: 358kcal
    Author: Lea Ann Brown

    Ingredients

    • 2 Tablespoon Butter
    • 4 corn Tortillas
    • ½ cup Cooked Ham Steak chopped
    • ½ cup Jalapeno pepper chopped
    • ¾ cup cheddar cheese grated

    Instructions

    • Melt a tablespoon butter in a fry pan. Once the butter has melted and bubbles are starting to subside, add a corn tortilla.
    • Top the tortilla with half of the grated Cheddar, half of the chopped ham and half of the chopped jalapeno pepper. Leave a little room around the edges so the ingredients don't fall out when you flip it. Let it cook for about 30 seconds or until golden brown.
    • Add the 2nd corn tortilla and flip the quesadilla using a sturdy wide spatula.
    • Cook, flipping the quesadilla a couple of times, until it is crisp and golden and the cheese has melted lacey at the sides.
    • Remove the quesadilla to a cutting board, cover with foil and let it rest.
    • Fry an egg in the now-empty pan with a little more butter, then using a sharp serrated knife, cut the quesadilla into quarters, placing the egg on top. Top with cilantro and a good shake of your favorite hot sauce or salsa. Then make the 2nd quesadilla.

    Notes

    Watch these corn tortilla quesadillas closely while you cook them. They’ll toast up quickly. Cover them with foil to keep warm while you fry the eggs.
    Tips for Success
    • Make sure you’re purchasing a cooked ham steak. A ham steak labeled “smoked” is cooked.
    • Practice those knife skills. Chop the ham and jalapeno peppers in uniform cubes. This will help the ingredients cook evenly and will give you pride in skill set. And cutting them small will keep them from falling out when flipping the quesadilla.
    • If you want to use oil instead of butter, use a neutral oil with a high smoke point like canola or vegetable. A high smoke point will result in a crispier and easier browned quesadilla. I don’t suggest olive oil.
    • A quality cheese quesadilla needs a good melting cheese. Pepper Jack, Monterey Jack, Cheddar, Muenster and Oaxaca are good choices.
    • For this recipe I used very small chunks of ham and jalapeno, so they warmed well and became hot as the quesadilla cooked. As with omelettes, if using bell peppers, onions, or mushrooms, it’s best to sautee the vegetables before adding to the cheese quesadilla.

    Nutrition

    Serving: 1quesadilla | Calories: 358kcal | Carbohydrates: 3g | Protein: 22g | Fat: 29g | Saturated Fat: 16g | Polyunsaturated Fat: 1g | Monounsaturated Fat: 7g | Trans Fat: 0.5g | Cholesterol: 99mg | Sodium: 1133mg | Potassium: 287mg | Fiber: 1g | Sugar: 1g | Vitamin A: 1017IU | Vitamin C: 46mg | Calcium: 311mg | Iron: 1mg

    Corn Tortilla Ham and Cheese Quesadillas … They’re What’s For Dinner or Breakfast.

    « Previous Page
    Next Page »

    I'm Lea Ann

    Welcome to my Colorado kitchen. If you're a fan of rustic homestyle cuisine, you've come to the right place. I'm a Culinary School Grad with a passion to inspire you to cook as often as you can. I offer reliable, approachable and easy to follow recipes. So grab that skillet and let's cook.

    More about me

    Soup and Stew Recipes

    • Southwest chicken soup with hominy and potatoes.
      Sopa Ranchera, Southwest Chicken Soup
    • Creamy chicken tortilla soup with rotel tomatoes.
      Southwestern Creamy Chicken Tortilla Soup
    • Cowboy chili garnished with grated cheese and jalapeno pepers.
      New Mexico Style Cowboy Chili
    • Ground chicken chile with white beans.
      Giada’s Ground Chicken Chili with White Beans
    • Beef stew with mushrooms served in a skillet.
      Beef Stew With Mushrooms – Crock Pot Method
    • 7-can taco soup with ranch dressing.
      Original 7 Can Taco Soup with Ranch Dressing

    Reader Favorites

    • Super Moist Cheesy Cornbread with Creamed Corn
    • Flemings steakhouse macaroni and cheese in a white bowl.
      Flemings Steakhouse Mac and Cheese
    • A slice of Layered Mexican Casserole with ground beef and corn tortillas.
      Mexican Casserole with Ground Beef and Corn Tortillas
    • Beef Tagliata, thin sliced flank steak served over arugula and cherry tomatoes.
      Beef Tagliata (Italian Steak)
    • Ham and cheese quesadilla made with corn tortillas and topped with a fried egg.
      Crispy Ham and Cheese Corn Tortilla Quesadillas
    • Spinach chicken mushroom skillet dinner.
      Chicken Mushroom and Spinach Skillet

    Footer

    • Contact
    • About
    • Privacy Policy
    • Accessibility Statement
    • ↑ back to top

    Copyright © 2024 Cooking on the Ranch • Powered by Feast+

    Rate This Recipe

    Your vote:


    A rating is required
    A name is required
    An email is required