Cooking On The Ranch

  • Home
  • About
  • Recipe Roundup
  • Contact Me
  • Join Community
menu icon
go to homepage
  • Home
  • Soups and Stews
  • About
  • Recipes
  • Contact Me
    • Facebook
    • Instagram
    • Pinterest
  • search icon
    Homepage link
    • Home
    • Soups and Stews
    • About
    • Recipes
    • Contact Me
    • Facebook
    • Instagram
    • Pinterest
  • ×
    Home

    Flemings Steakhouse Mac and Cheese

    December 7, 2020 By Lea Ann Brown 17 Comments

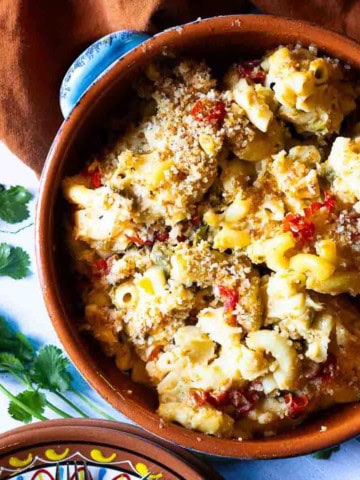
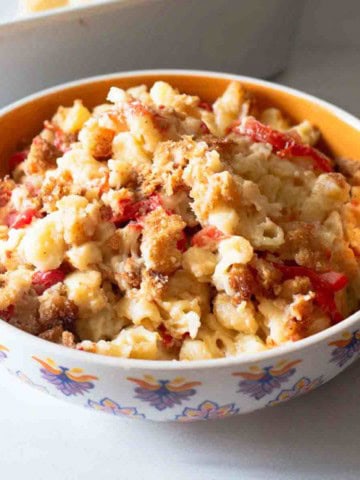
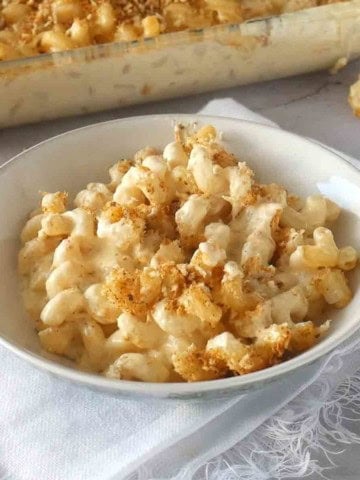
    Flemings steakhouse macaroni and cheese in a white bowl.

    An ultra creamy cheesy chipotle steakhouse mac and cheese recipe from the Executive Chef at Flemings. Incredible Southwestern flavor and the creamiest homemade baked mac and cheese recipe you’ll find.

    And if you’re looking for a super easy stove top macaroni and cheese recipe, don’t miss my recipe for White Cheddar Mac and Cheese. A 30 minute recipe.
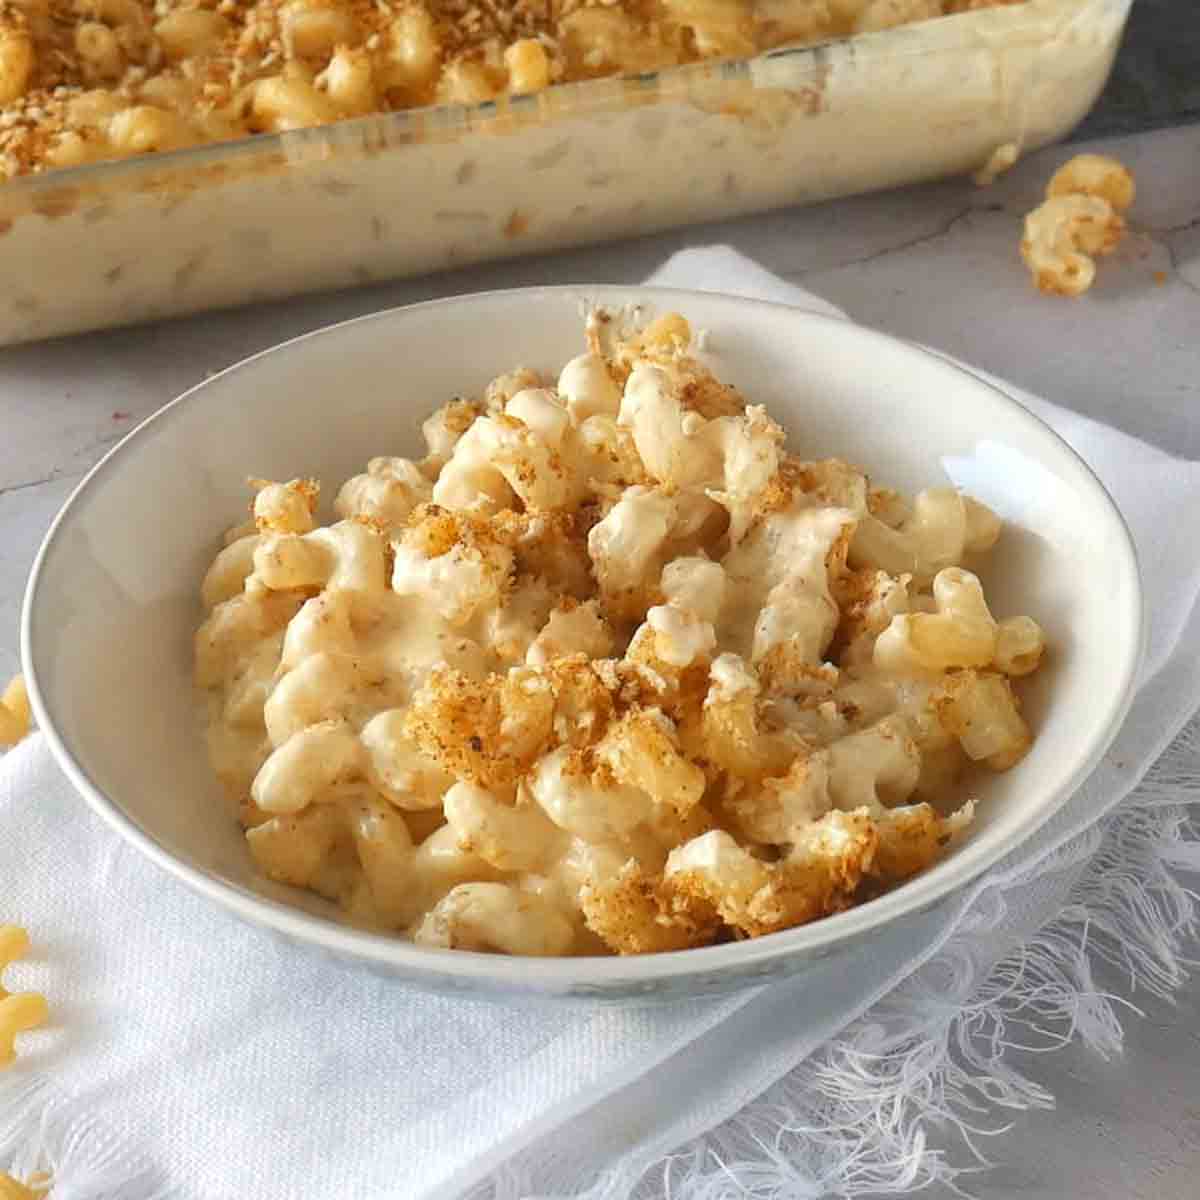
    Flemings steakhouse macaroni and cheese in a white bowl.

    About This Recipe and Why It Works

    Have you ever been to Fleming’s Steakhouse and had their Chipotle Mac and Cheese?  It’s flat out amazing.

    Our last visit to Flemings, I ordered this creamy cheese side dish, and turned it into an entree when the menu indicated you could add lobster for an extra charge. I simply couldn’t resist. Billed on their menu as Atlantic Lobster Chipotle Cheddar Mac and Cheese, it’s truly a must order.

    I couldn’t believe how exquisite this combination of flavors were. The lobster was simply fun and decadent, but really didn’t make or break the flavor of Flemings mac and cheese.  

    This is one of the creamiest macaroni and cheese recipes you’ll ever sink a fork into. What makes this so special?

    • To start with the recipe includes both cheddar and white smoked cheddar cheese.
    • There’s a stick of butter involved, which reminds me of a quote from Julia Child:  “If you’re afraid of butter, use cream”. 
    • With that said, there’s two cups of cream involved and three cups of half and half.
    • And to up the ante, it becomes a spicy mac and cheese with a beautiful combination of toasted panko bread crumbs and chipotle chile powder. Making it a macaroni au gratin style recipe.

    Easy enough to make in your own kitchen, and a recipe directly from Flemings Steakhouse, Let’s take a look:

    Ingredients You’ll Need
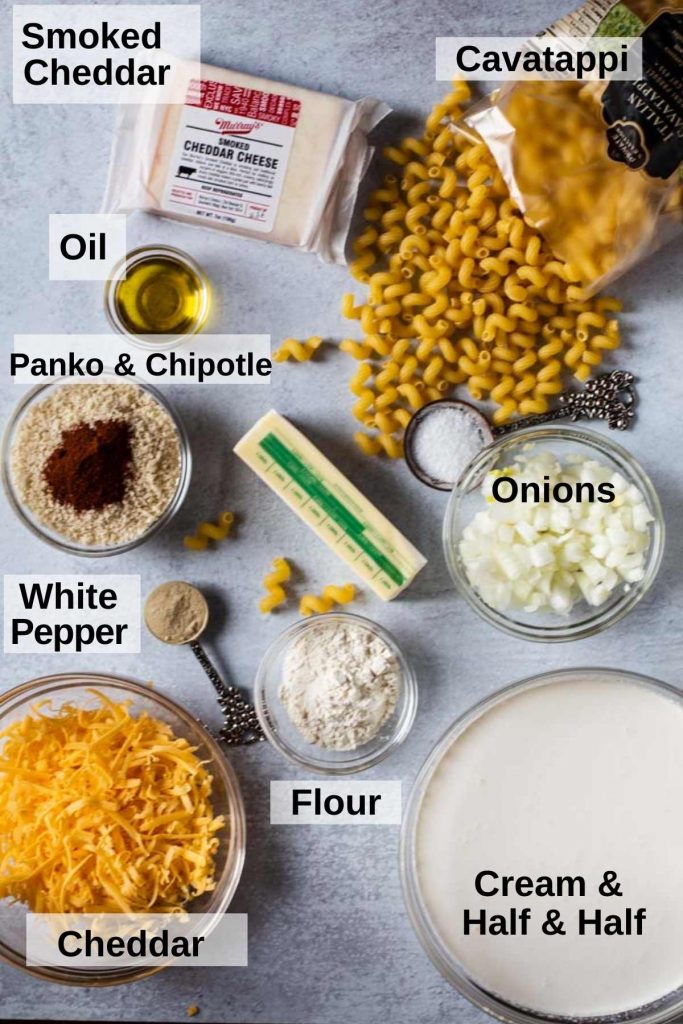
    • The Cheese: A combination of Cheddar and Smoked Cheddar brings a super cheesy experience to this steakhouse mac and cheese. The smoked cheddar is a nice touch for a rustic flavor.
    • Cream and Half & Half: Two cups of heavy cream and three cups of half and half guarantees the creamiest mac and cheese experience possible.
    • The Pasta: This is a cavatappi mac and cheese, a lovely corkscrew spiral shaped pasta. It’s a commonly chosen pasta shape for mac and cheese. It’s twists and turns allow all of that cheesy goodness to cling to every curve of the pasta.
    • White Pepper I personally think white pepper is underrated, and love that it’s used in this recipe. White pepper tastes different than black pepper in that it’s brighter and sharper. It adds a peppery bite without adding black flecks to a white creamy dish. Perfect for this white creamy mac and cheese.
    • Panko & Chipotle Powder: Flemings mac and cheese is finished with a beautiful crunch by toasted panko bread crumbs that have been seasoned with chipotle chile powder. It’s an amazing finish to an already wonderful rustic casserole.

    Ingredient Swaps and Substitutions

    • Cream: I have made this recipe by omitting the heavy cream and using only half and half. It was still creamy and delicious.
    • Yellow Cheddar: I used a yellow cheddar cheese for this recipe. If you want to use an aged white cheddar cheese, alongside the white smoked cheddar, would make this an even whiter macaroni casserole.
    • Cavatappi Pasta: A curly shaped pasta such as Rotini would would well here. As would elbow macaroni or even pasta shells. If choosing shells, choose the larger size shells labeled as medium pasta shells.
    • Black Pepper: Don’t have white pepper, you can use black pepper.

    Let’s get started.

    How To Make Flemings Steakhouse Mac and Cheese
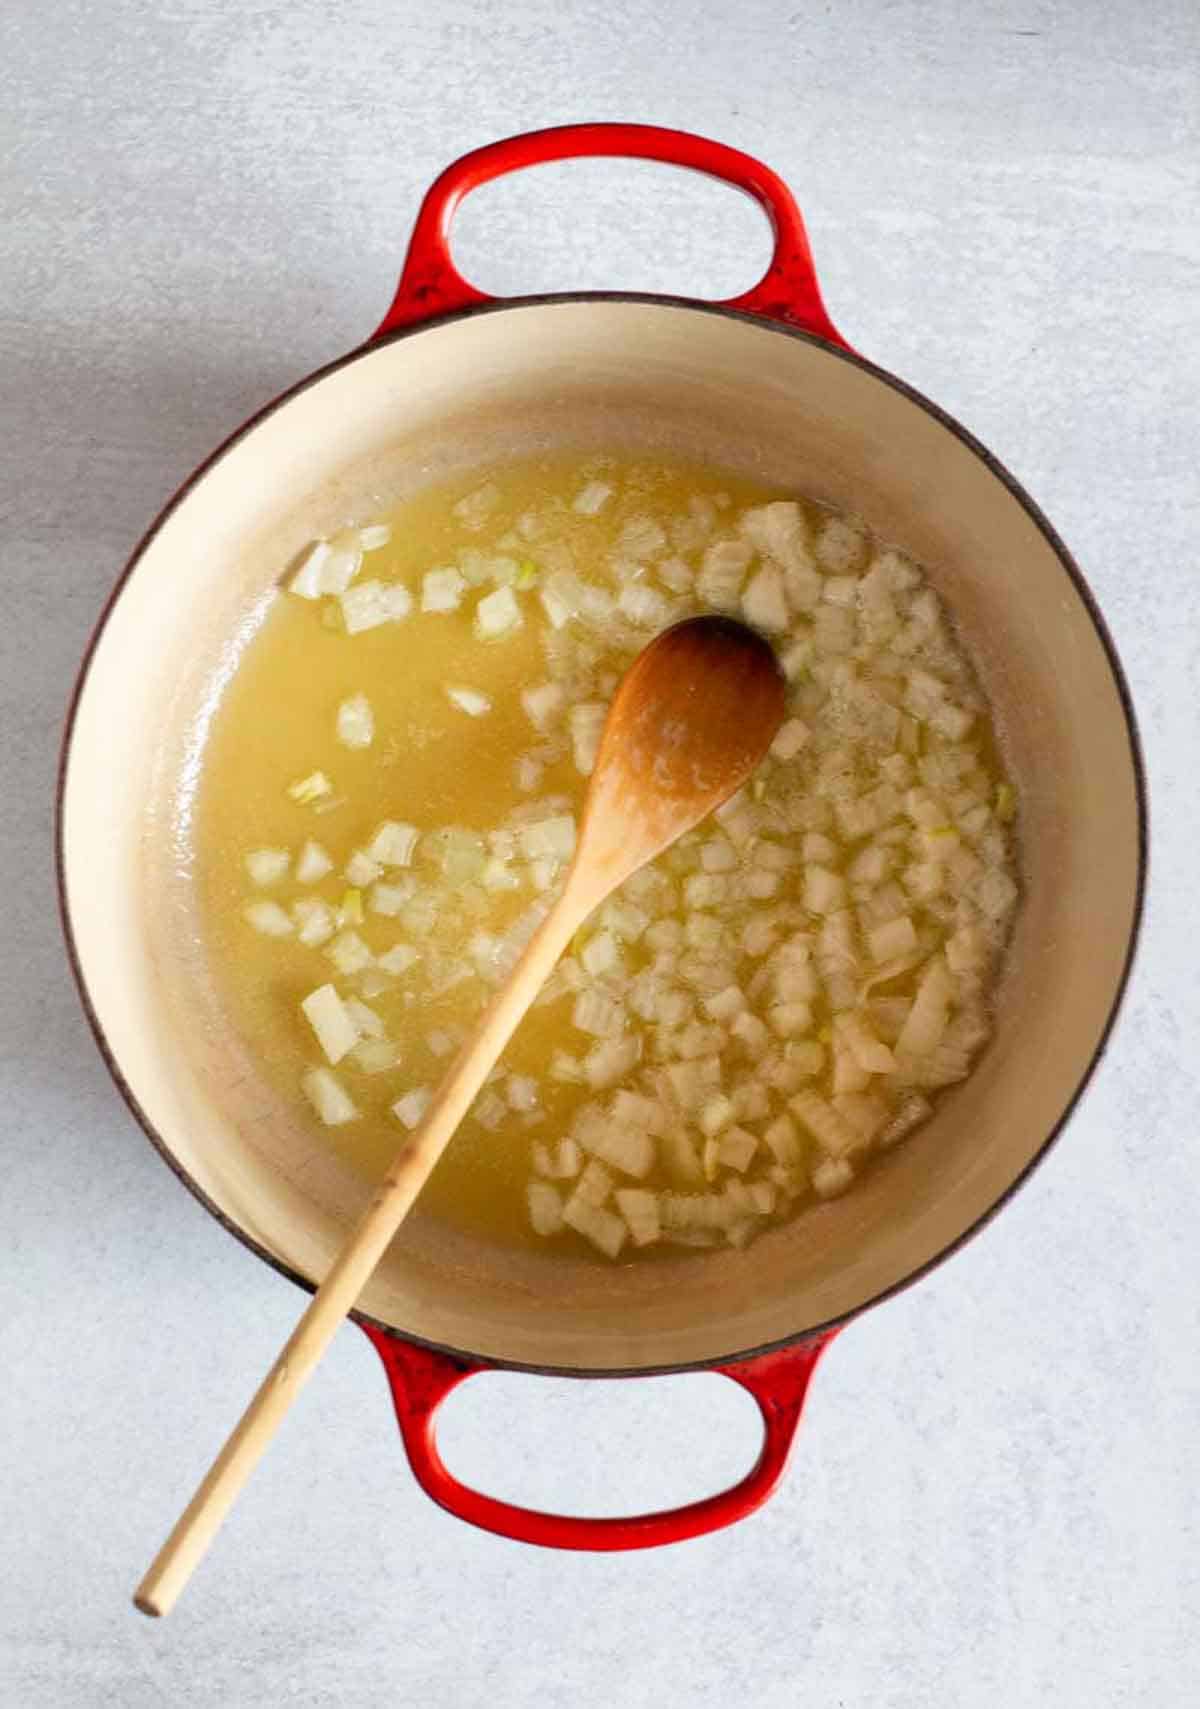
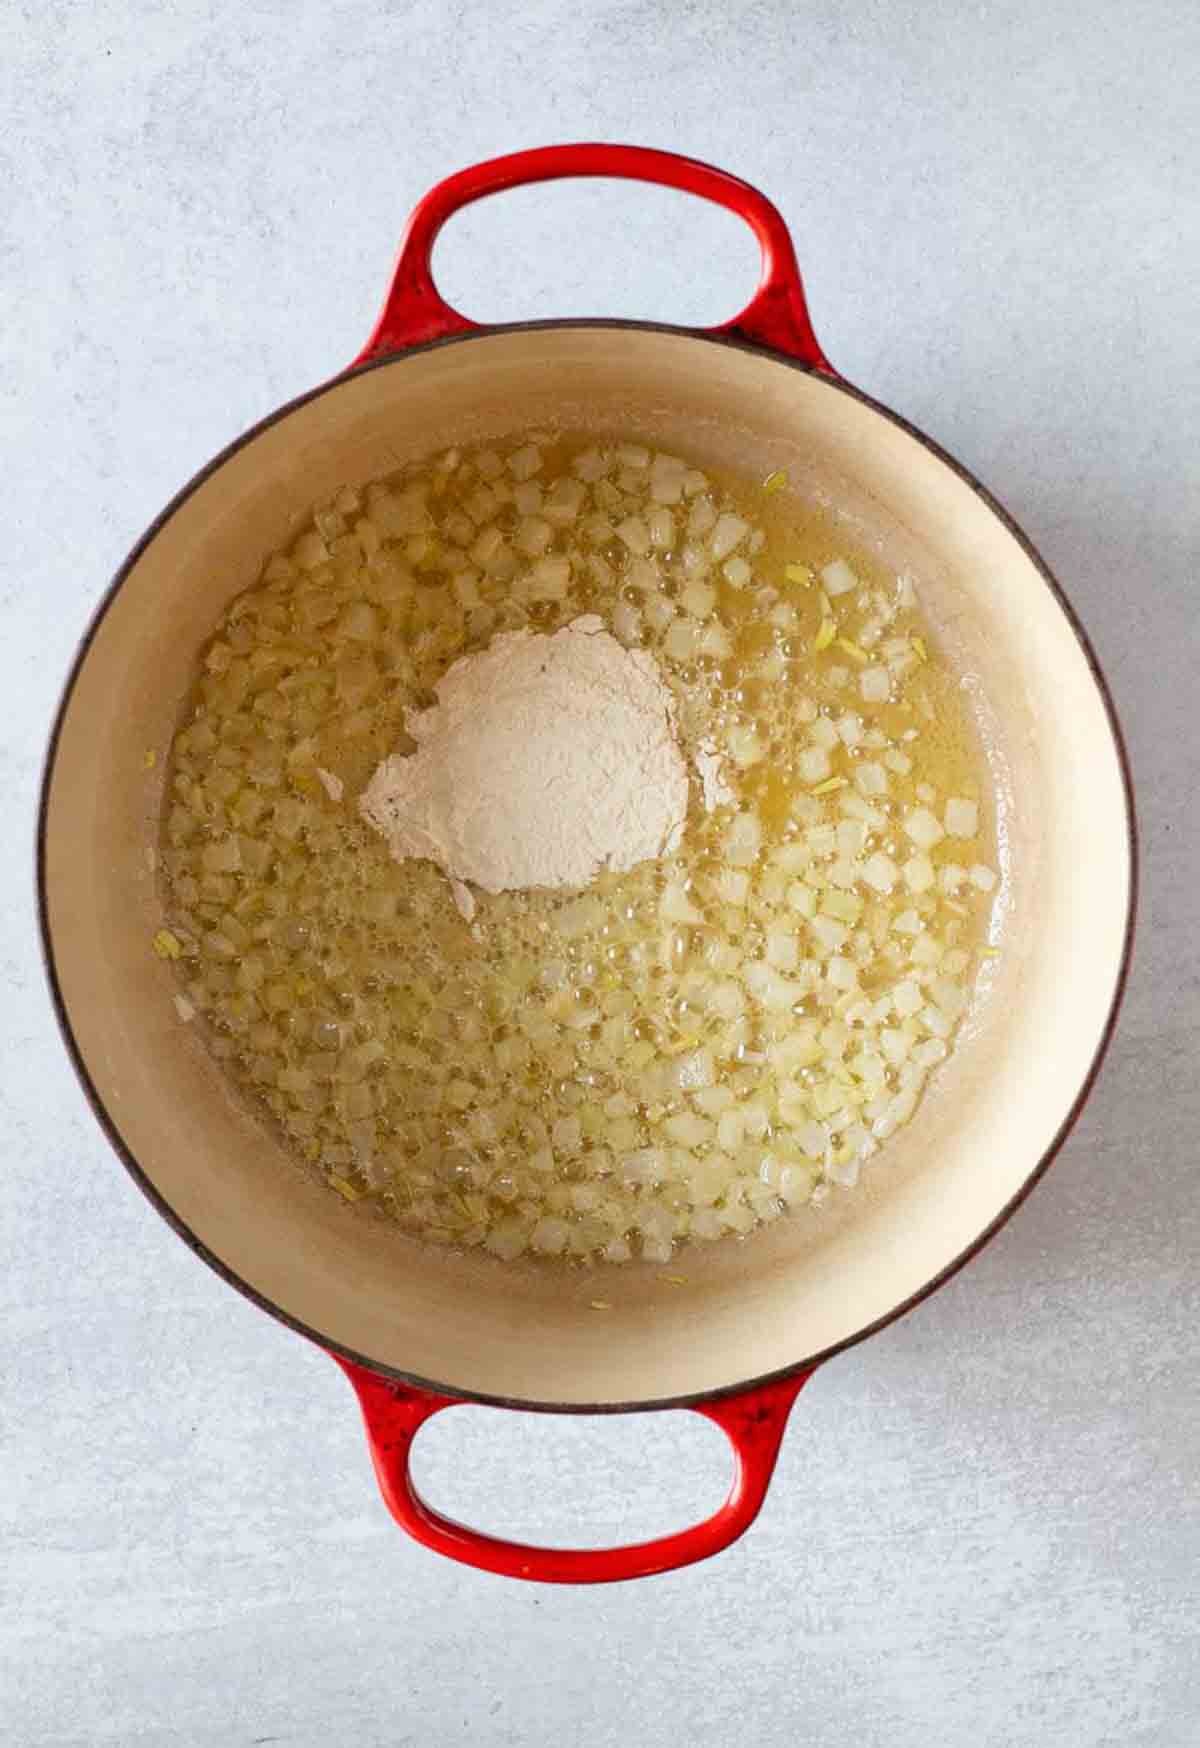
    Cooking onions to make Flemings Steakhouse Chipotle mac and cheese.
    Adding flour to make roux for chipotle mac and cheese.
    1. Step 1: The process starts by melting the butter in a large Dutch oven and then adding onions. The onions are cooked over medium heat until just turning tender.
    2. Step 2: Is where the roux process starts. Add flour to the hot butter and onions and cook for a couple of minutes, stirring frequently.
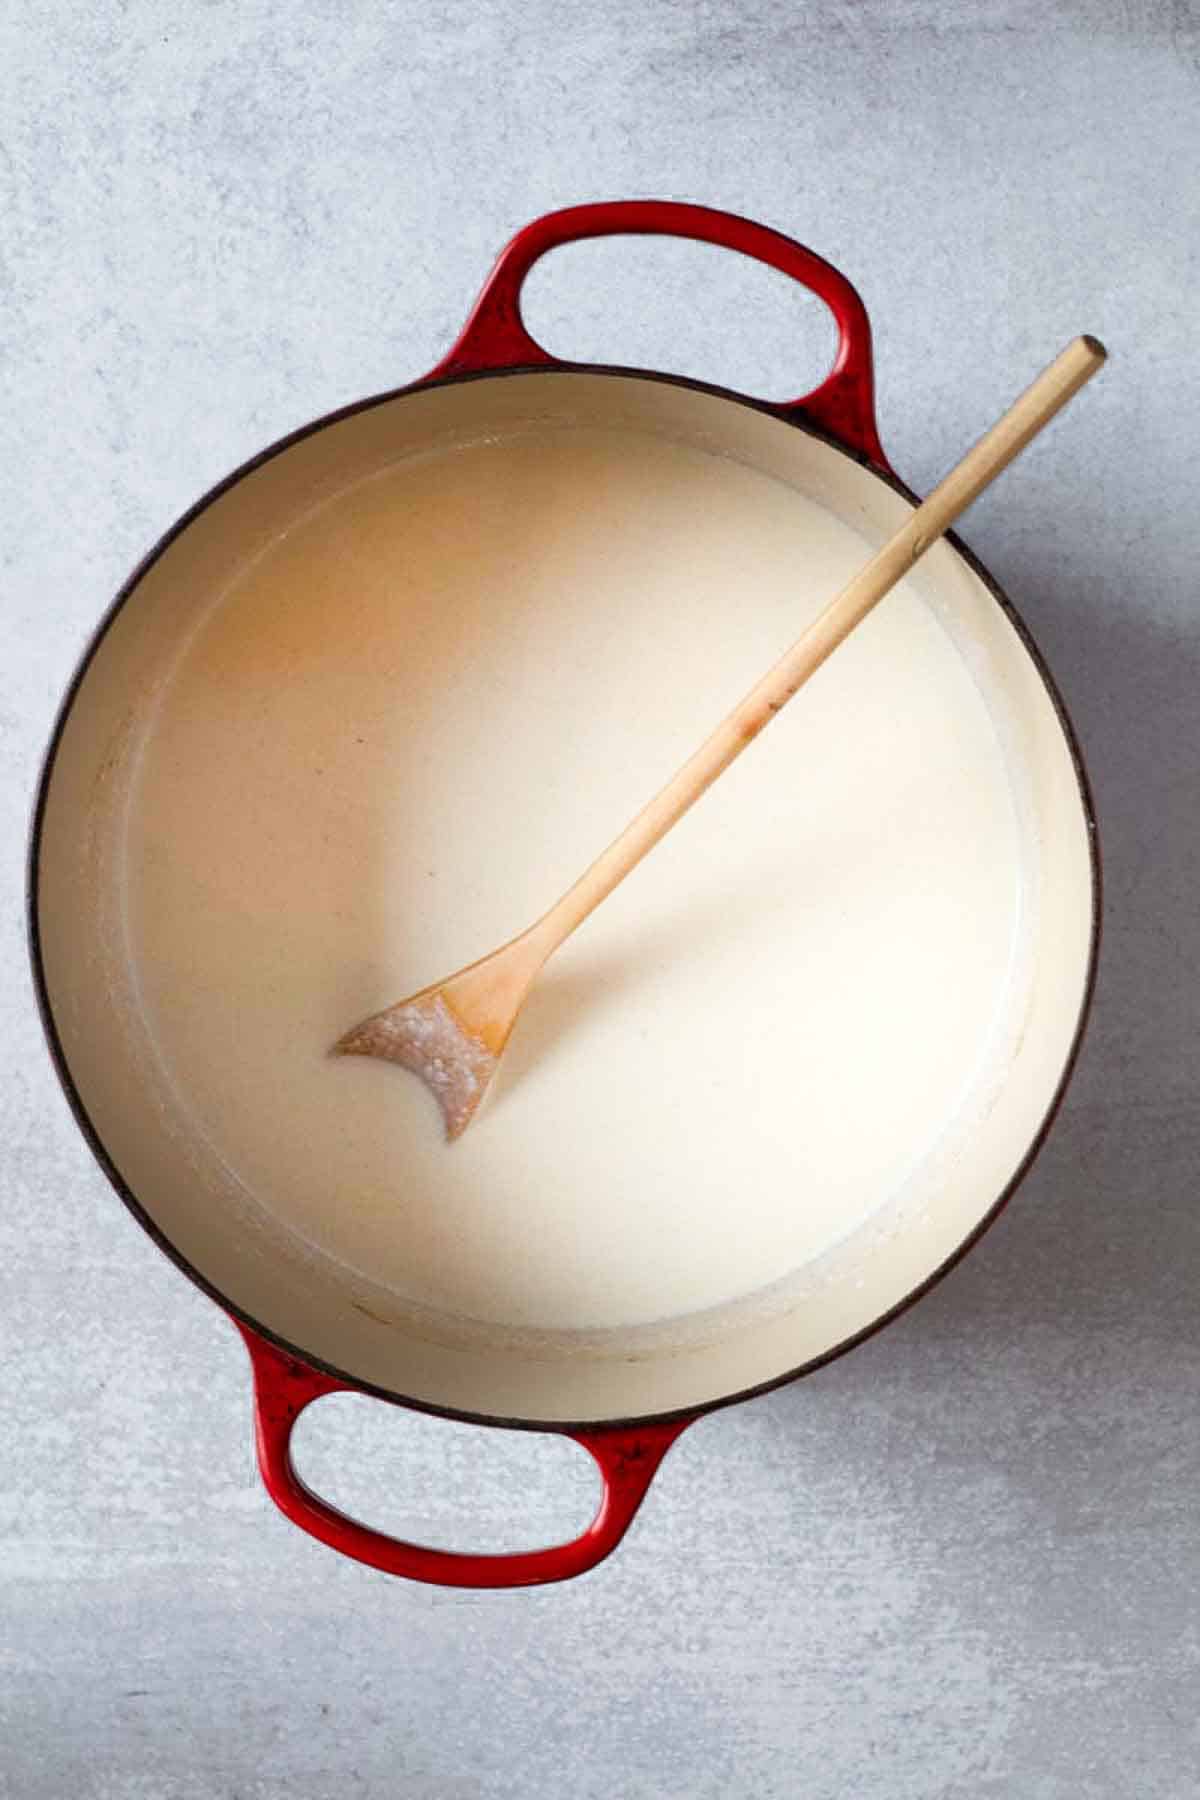
    Adding milk to flour to make a roux for steakhouse mac and cheese.
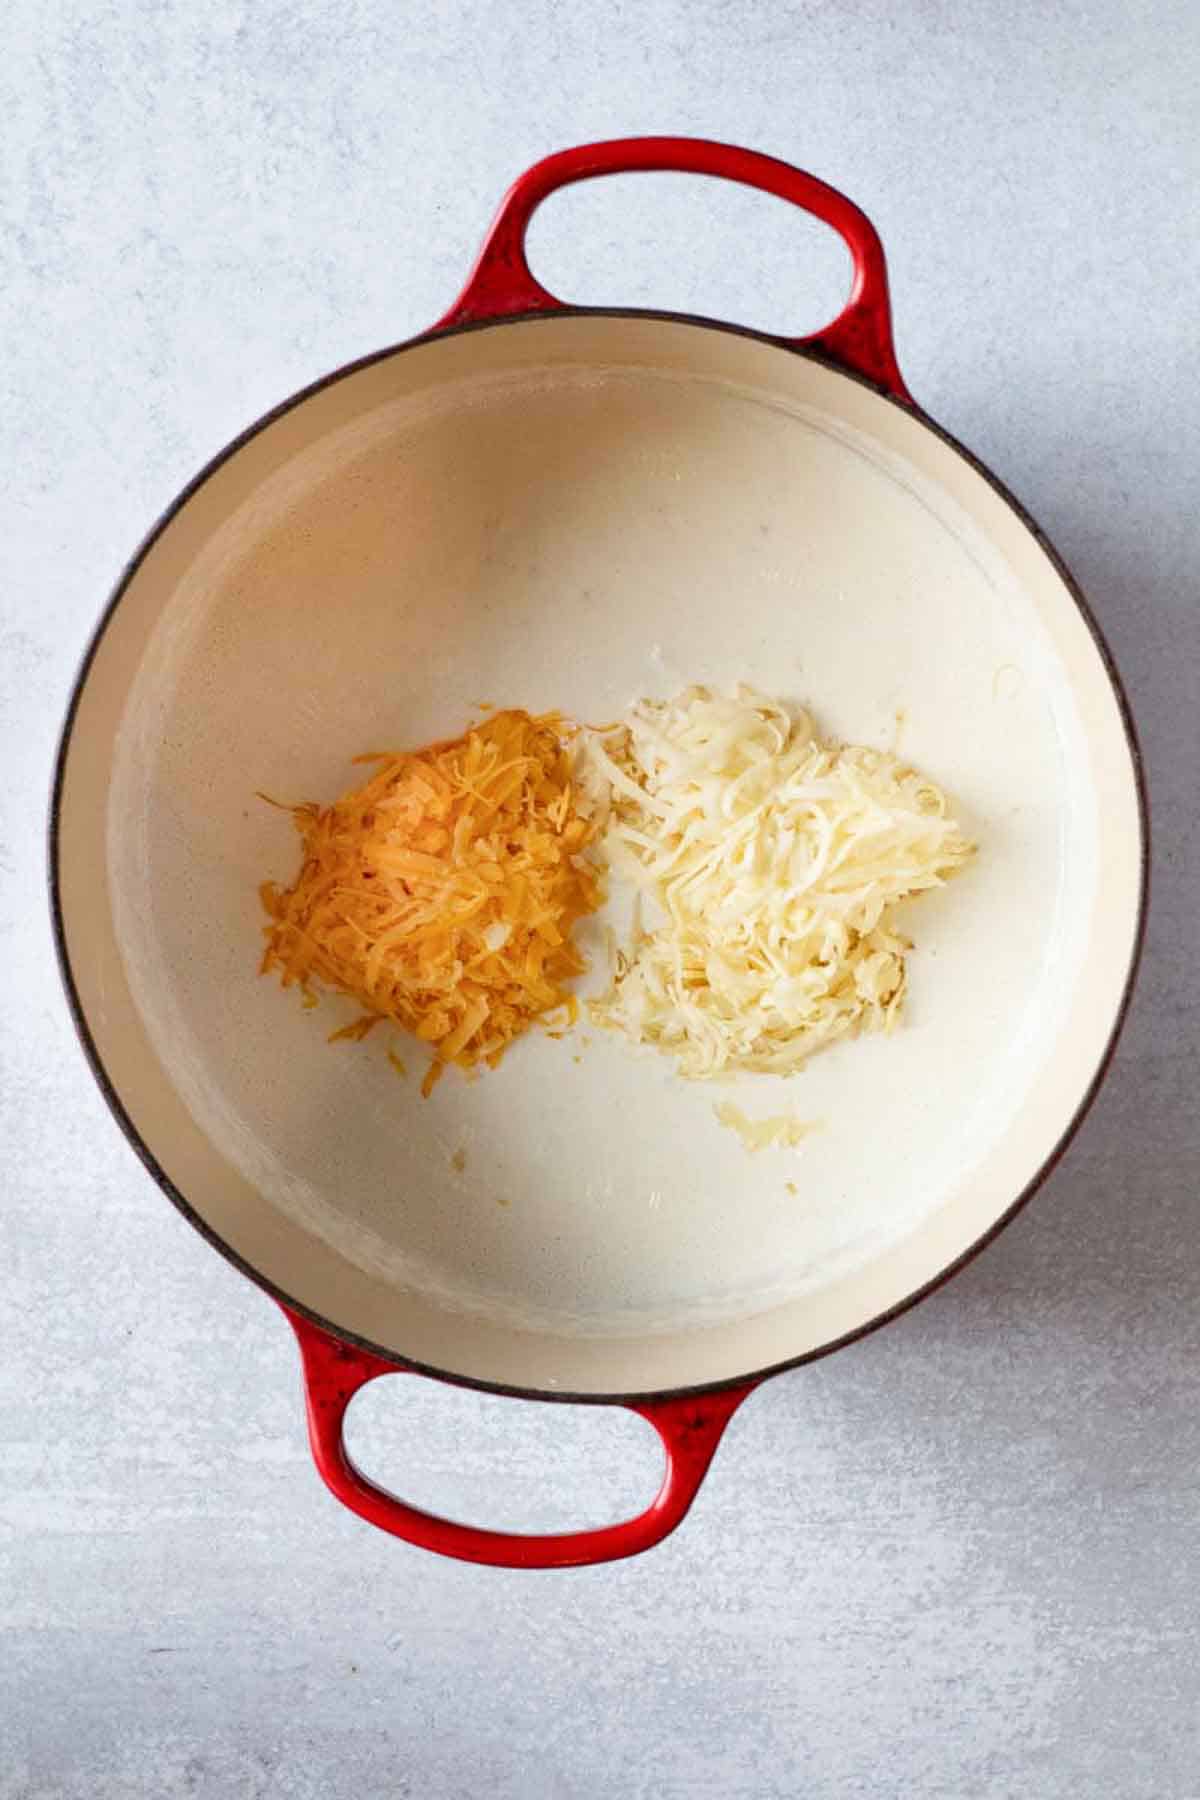
    Adding cheeses to roux to make chipotle mac and cheese.
    1. Step 3: Add the cream and half and half to the flour butter mixture and cook over medium low heat until the roux starts to thicken.
    2. Step 4: Add the yellow cheddar and white smoked cheddar and stir until blended and melted.
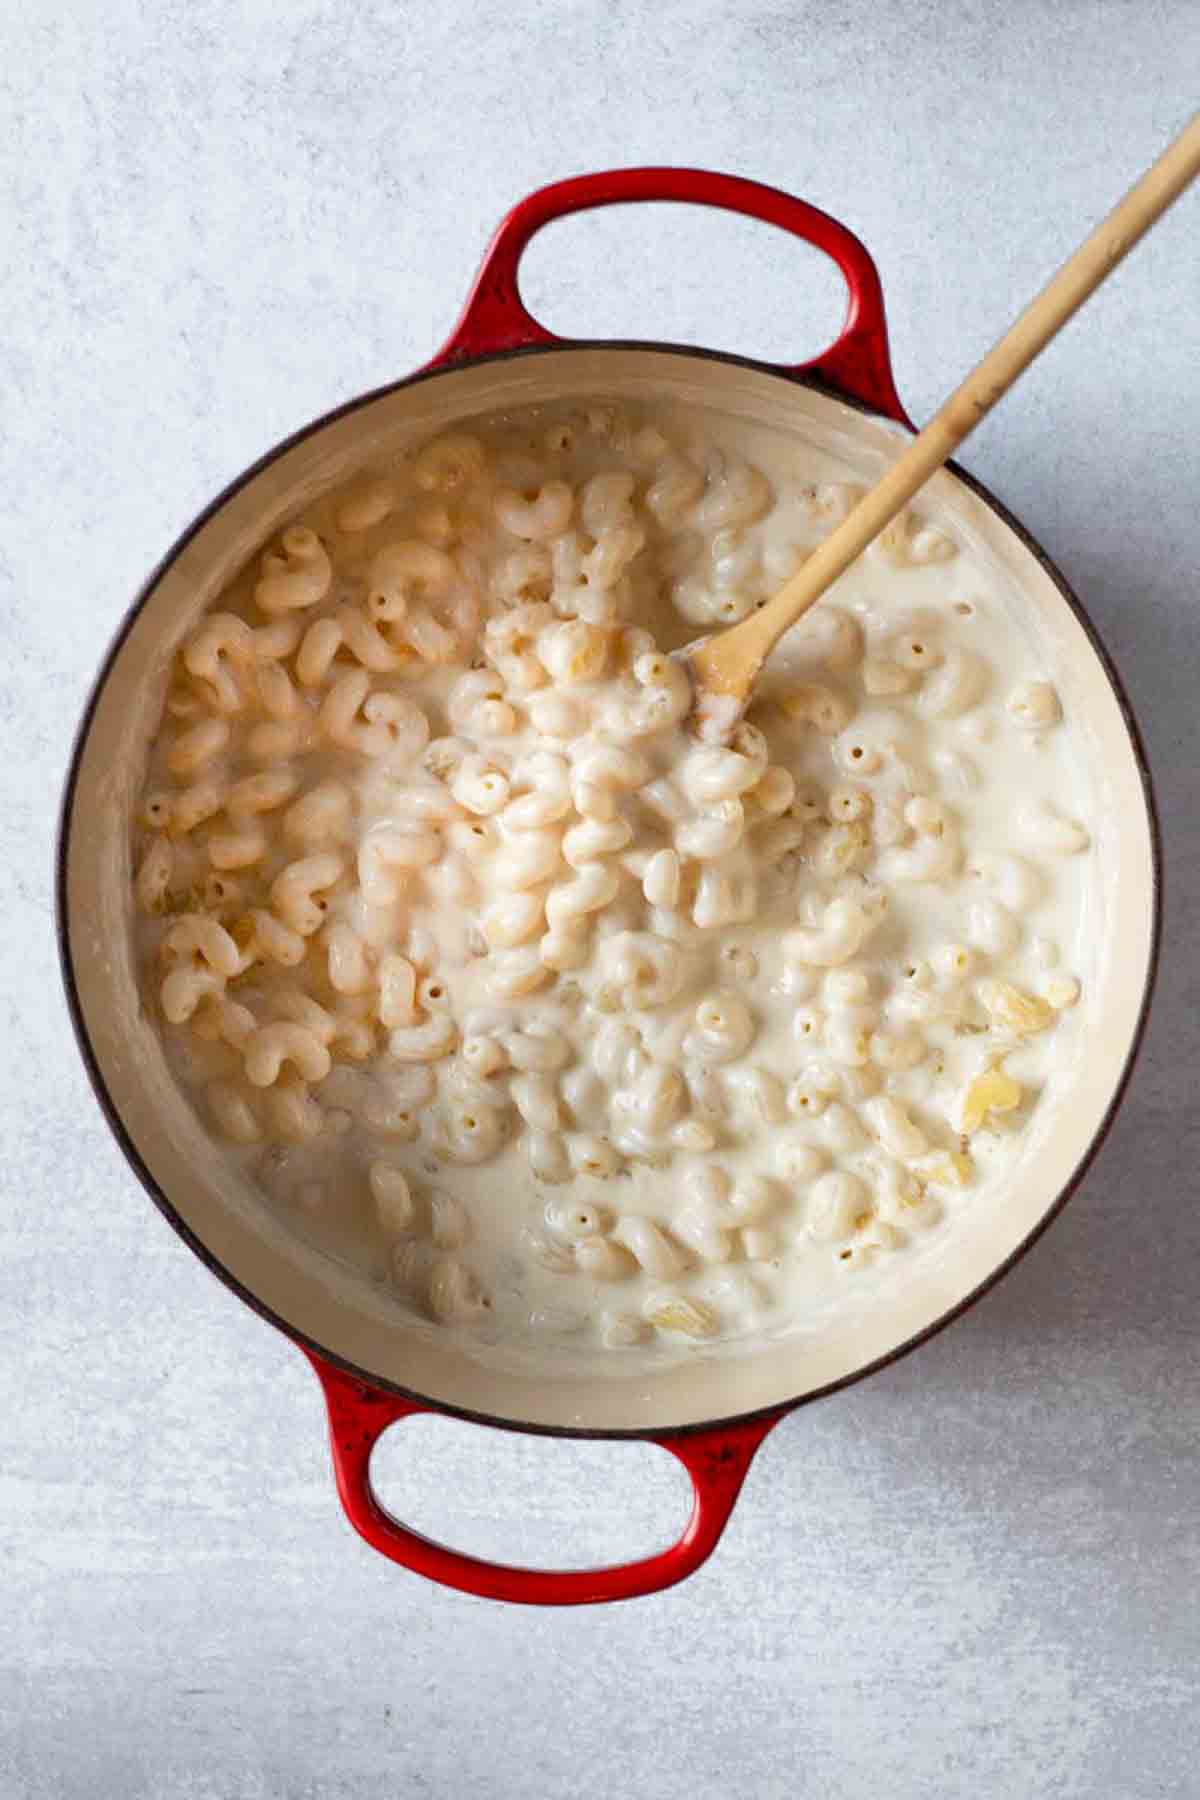
    Adding cooked pasta to roux to make flemings steakhouse mac and cheese.
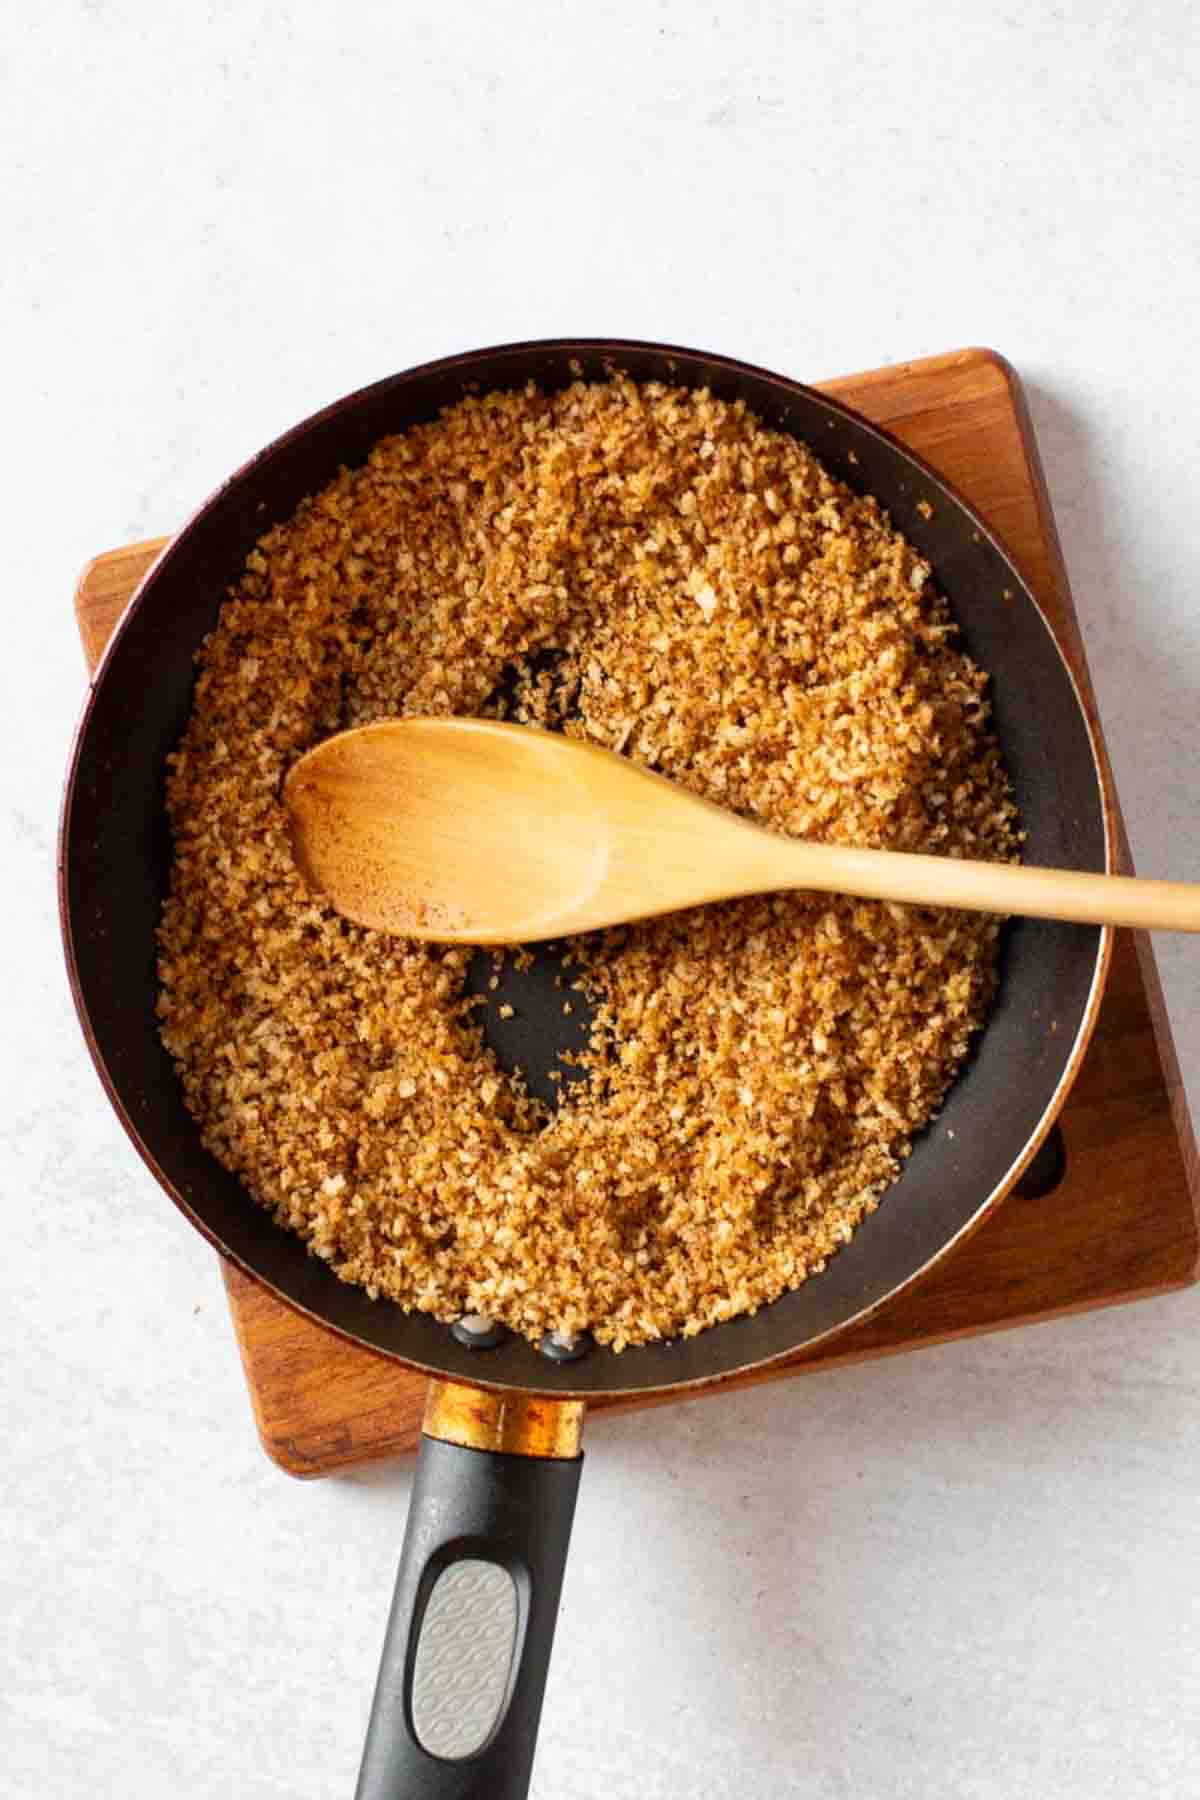
    Making chipotle bread crumb topping for flemings mac and cheese.
    1. Step 5 Add the cooked cavatappi pasta and stir.
    2. Step 7: Make the chipotle panko topping. Heat a small non-stick saucepan over medium high heat. Add the panko and chipotle chile powder and stir until panko is just starting to turn golden.
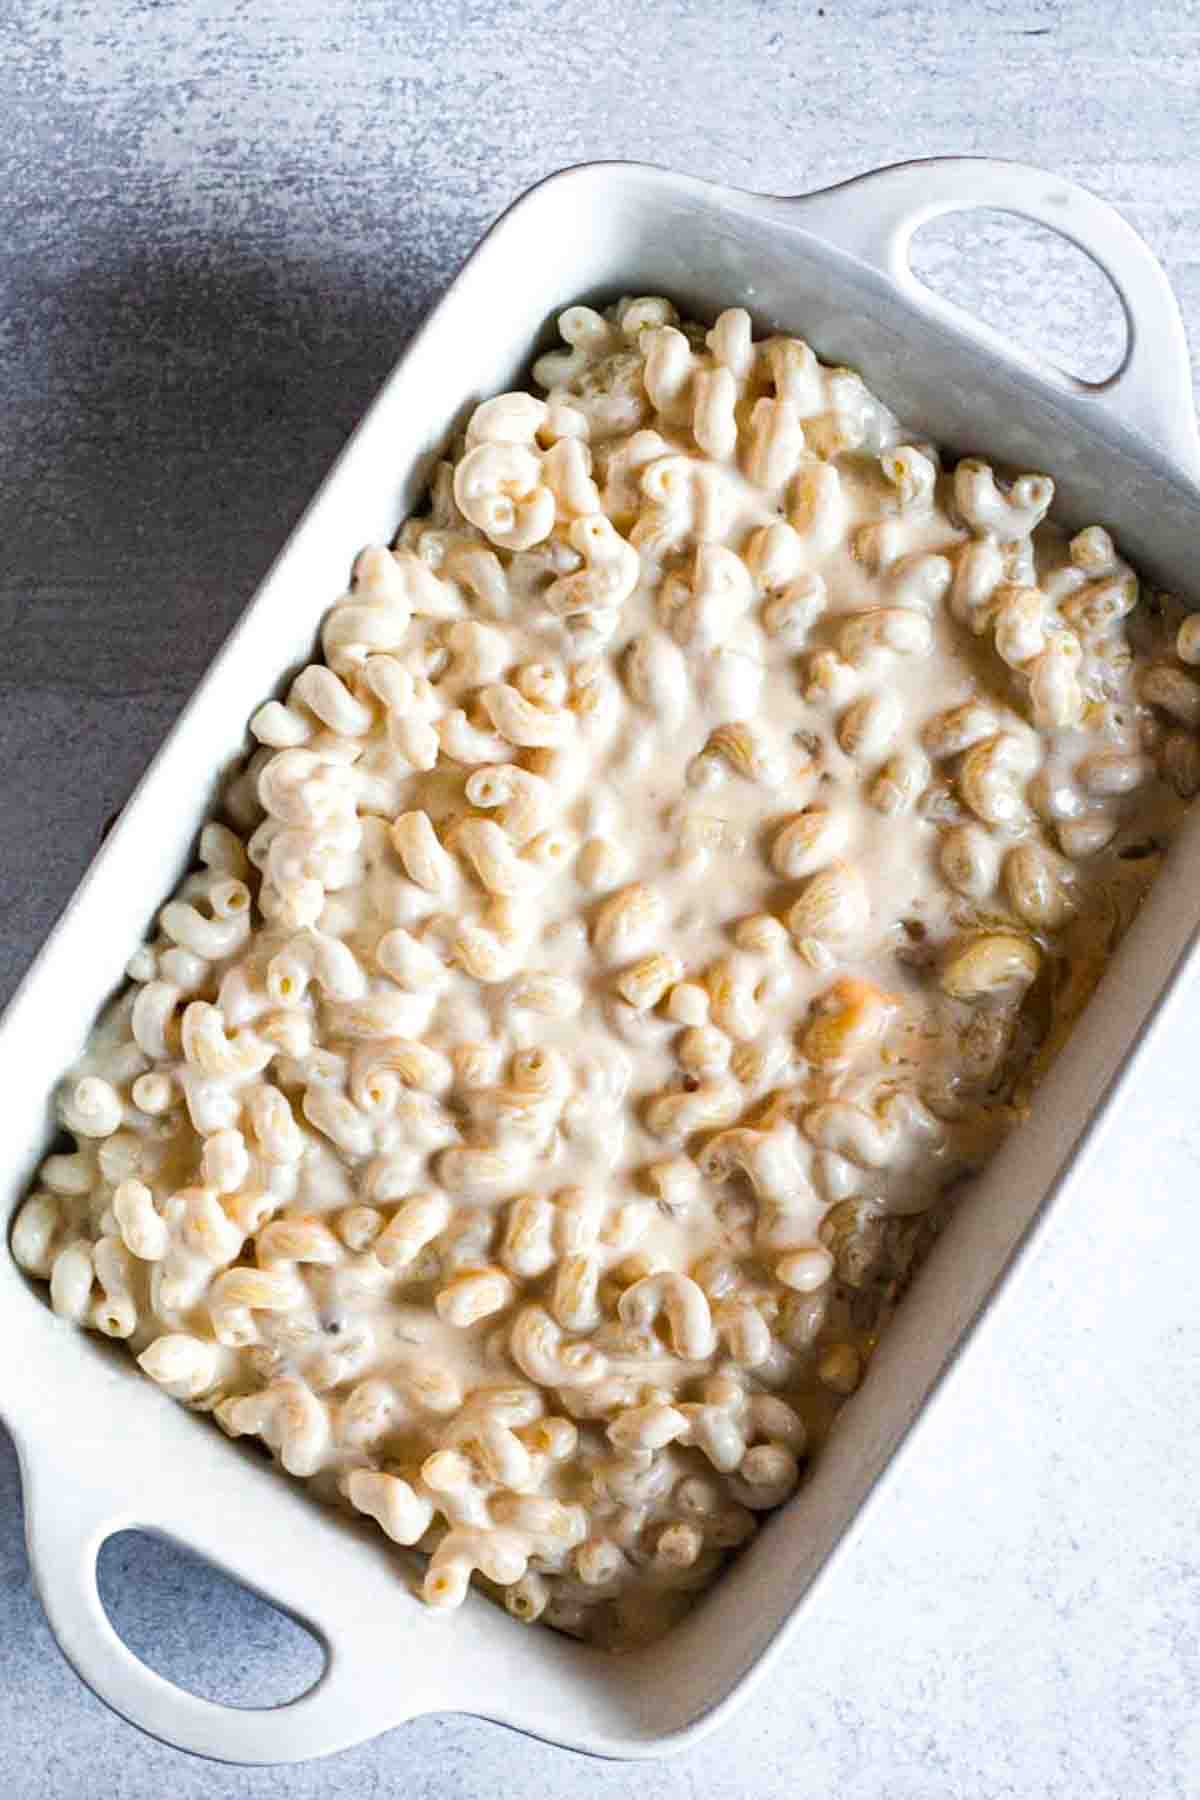
    Adding mac and cheese mixture to casserole dish to bake.
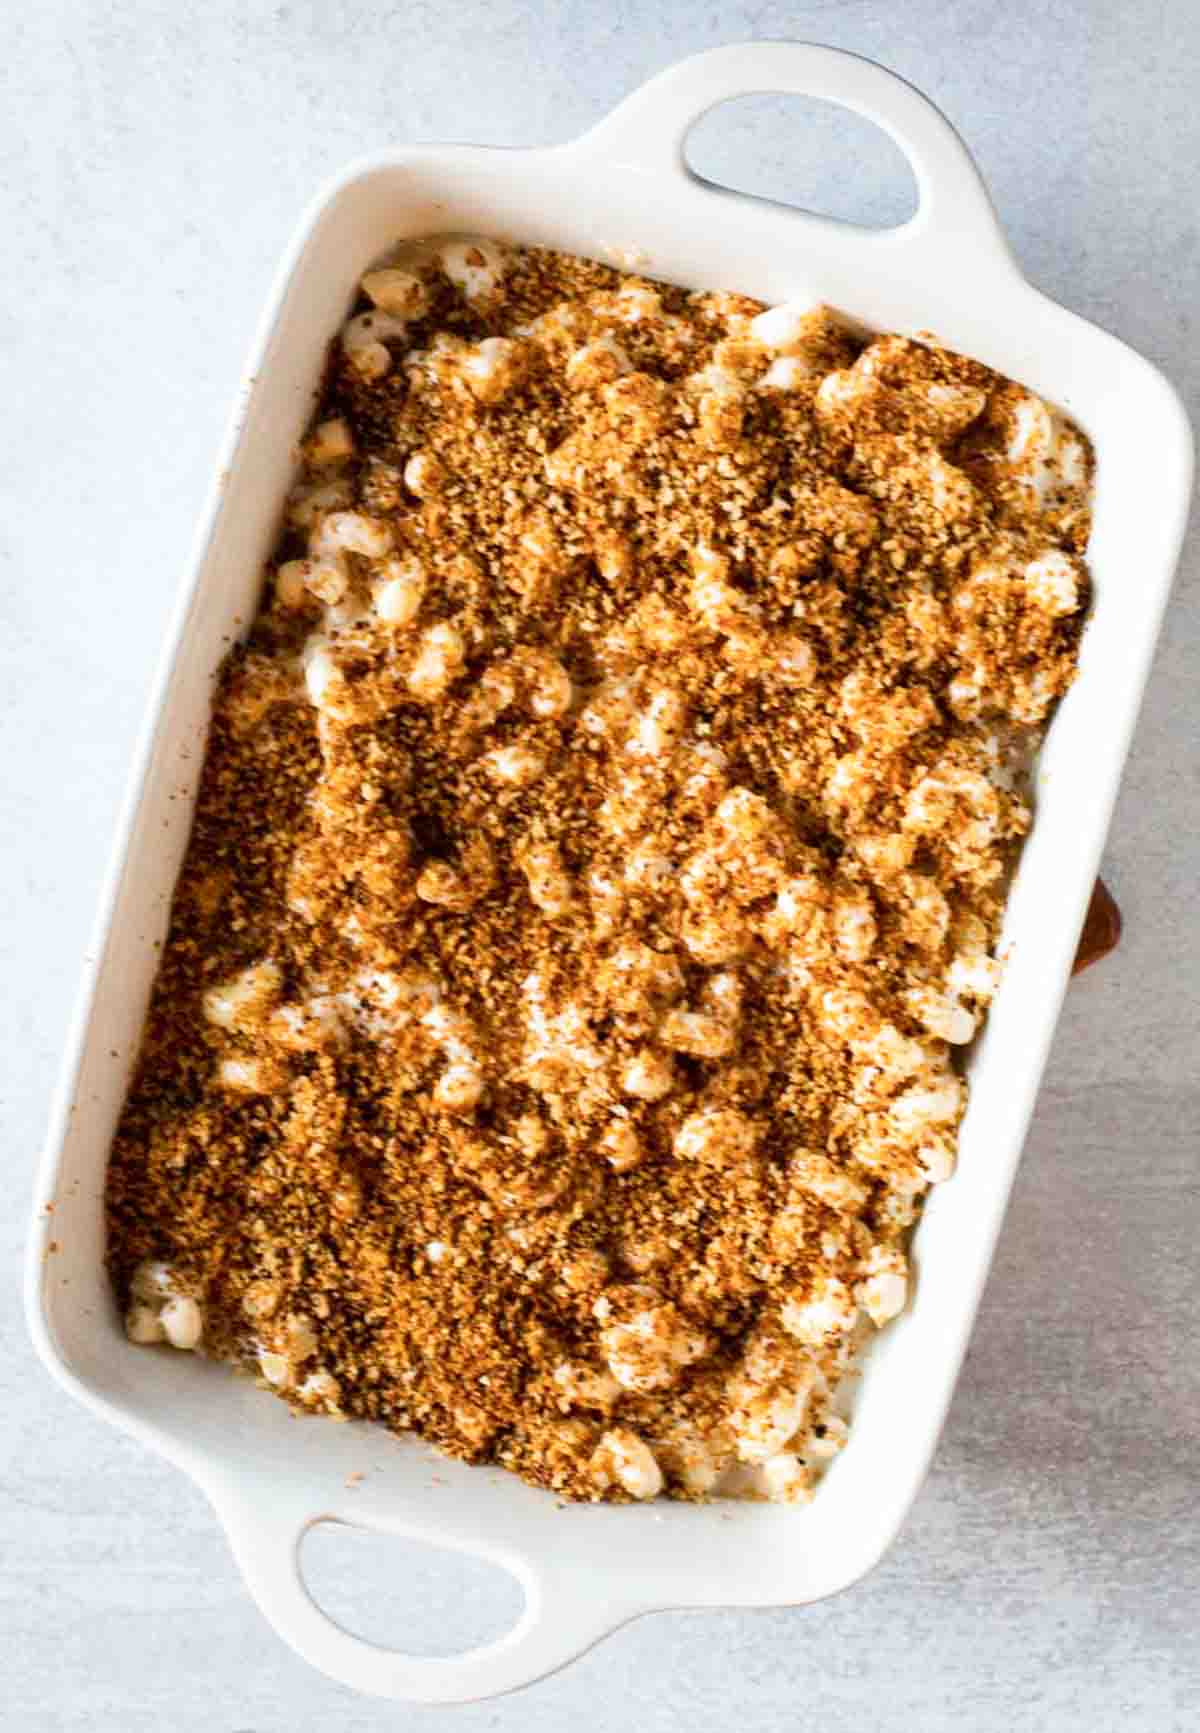
    Adding chipotle bread crumb topping to steakhouse mac and cheese.
    1. Step 7: Transfer the pasta mixture to your favorite casserole dish.
    2. Step 8: Sprinkle on the Panko Chipotle topping and it’s ready for the oven. Bake at 350 degrees for 20 minutes, or until nice and bubbly.
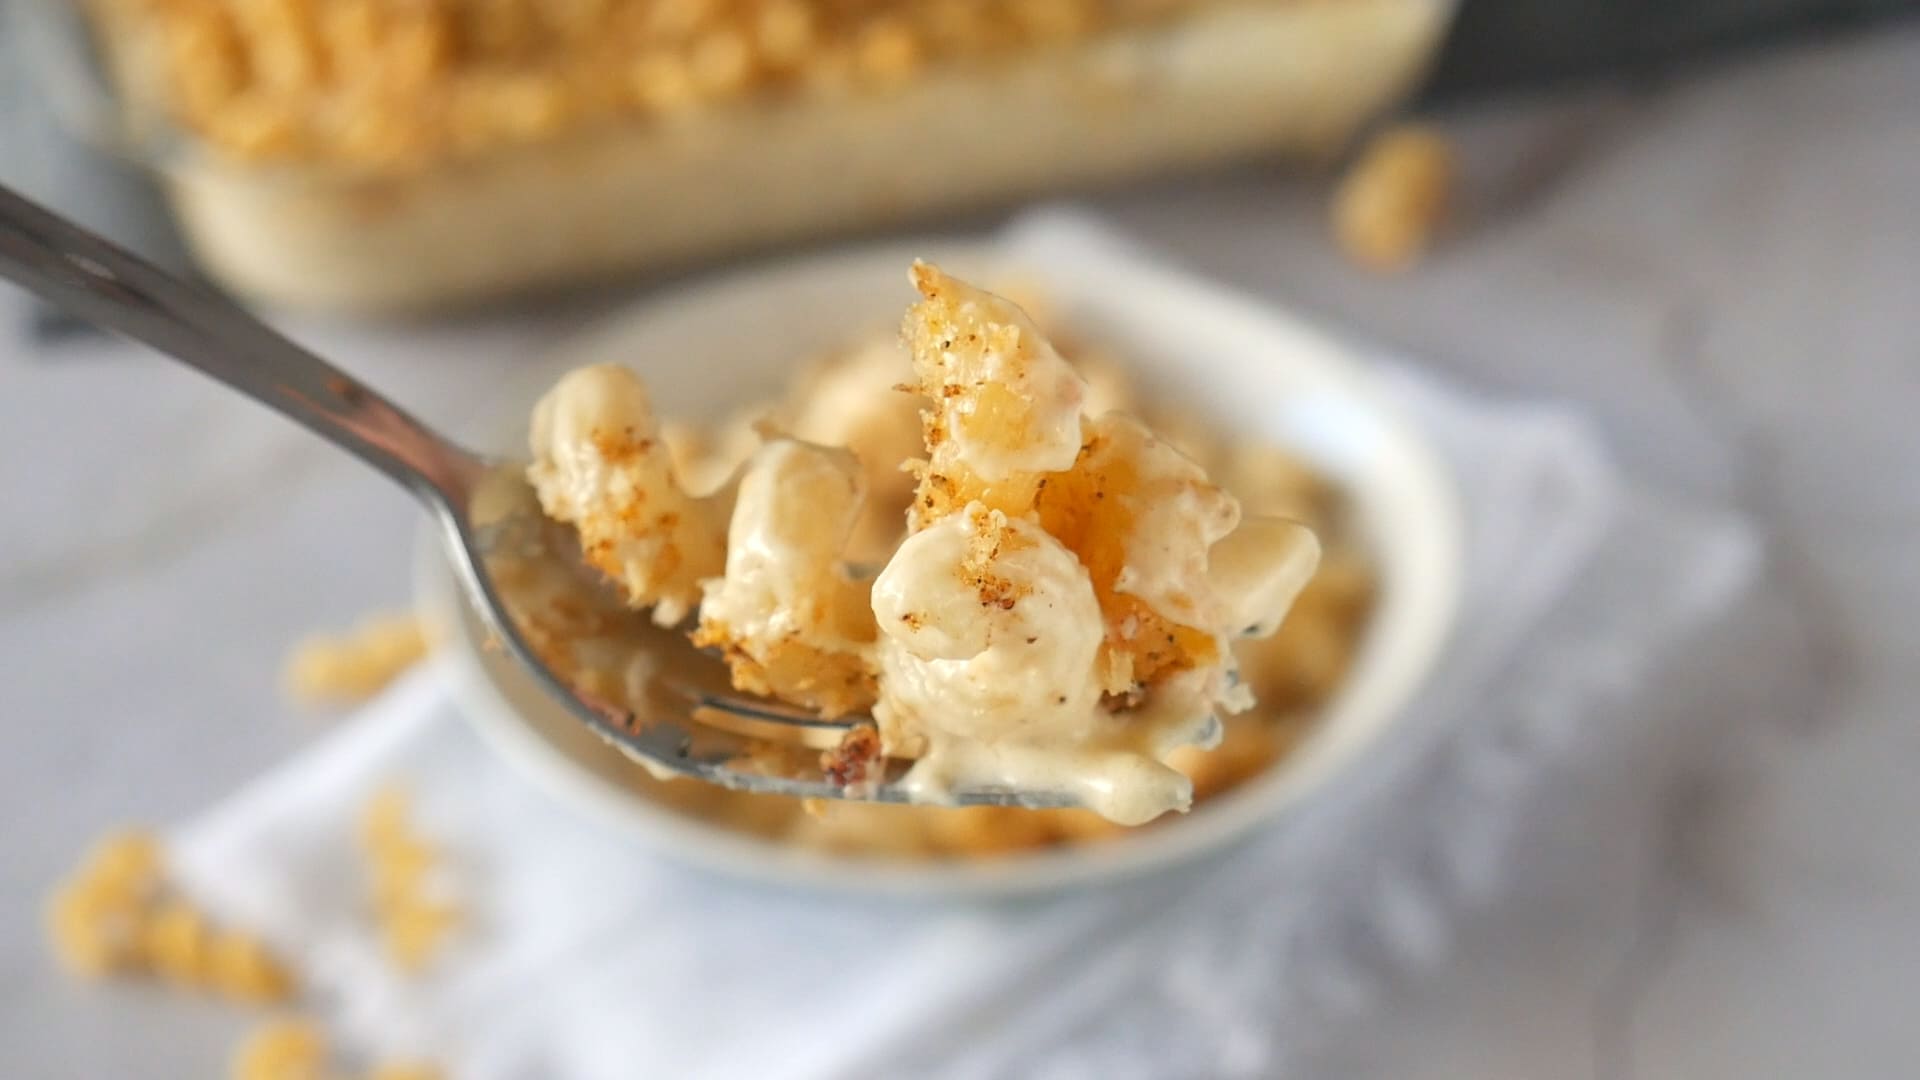
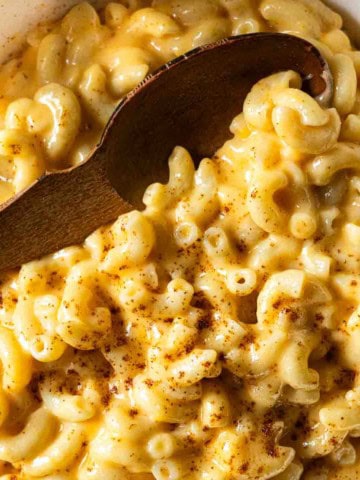
    A spoon full of Flemings steakhouse mac and cheese

    Questions You Might Have

    Can you freeze mac and cheese?

    Yes. Like any cheesy casserole mac and cheese is freezable. This recipe makes a big batch, so when you’ve eaten as much as you can, just freeze in small containers.

    How do reheat this recipe?

    I like to reheat recipes like this in more manageable individual or small portions. Rather than trying to reheat an entire casserole. And use the microwave. Add a drizzle of liquid (milk or water that you’ve cooked the pasta in) to rehydrate the pasta. Pasta seems to soak up liquid as it sits in the fridge. Reheat in 30 second intervals and use that 50% power feature on the microwave. It will help keep it from becoming greasy.

    Can I make this ahead of time?

    Yes. You can cook the casserole ahead of time and either freeze it or keep in in the refrigerator for a day ahead of show-time. If the casserole is frozen, let it come to room temperature before reheating. Reheat in a 200 degree oven, until nice and warm. You don’t want to re-cook the casserole, just heat it up.

    How To Keep Cooked Pasta Dishes From Drying Out

    As it sits, pasta seems to soak up liquid after baking. Don’t throw that pasta cooking water down the drain. It’s liquid gold. Always reserve some of that cooked starchy water. Add about ½ – 1 cup before cooking. It really helps to keep that pasta nice and creamy. I’ve even kept some of that left over water in the fridge. Just add some to the casserole before reheating. Or you can use milk.

    What to Serve It With

    A steak of course, serve this recipe with a Bavette Steak with Cognac Creamed Mushrooms for a true steakhouse feel dinner. Or try it with the butcher’s cut, Denver Steak. This side dish would also pair well with these Honey Garlic Pork Chops. My favorite meal combo is to serve this mac and cheese with a Steakhouse Burger.

    Recipe for Flemings Steakhouse Mac and Cheese
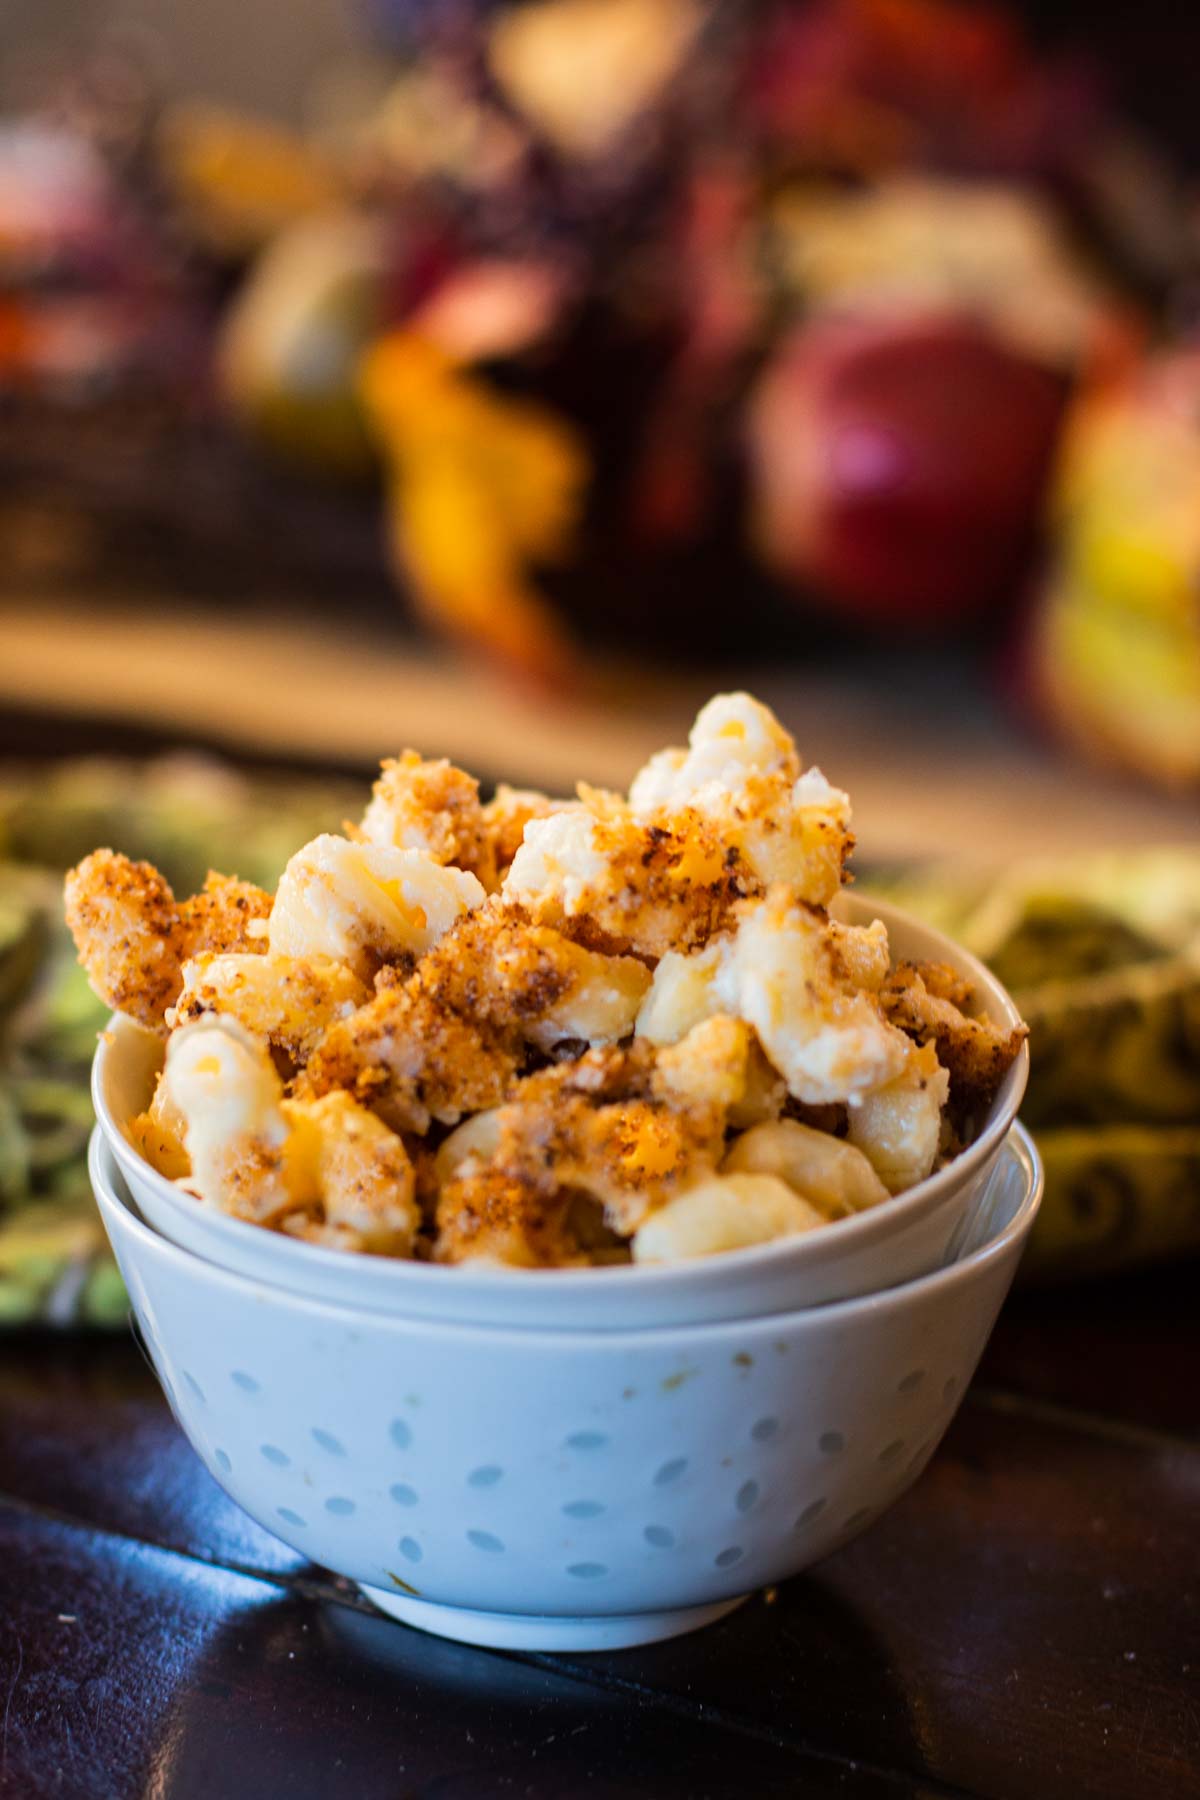
    Flemings Steakhouse Mac and Cheese Recipe with Chipotle

    I hope you give Flemings Mac and Cheese recipe a try, it’s truly a very special macaroni and cheese experience.

    And if you’re pasta lovers like us, don’t miss my Pasta Category, You’ll find lots of comfort food recipes including the most popular on my site for this Southwest version of Chipotle Mac and Cheese with Chicken.

    More Popular Mac and Cheese Recipes:

    • Mexican mac and cheese cooked stovetop in a Dutch oven.
      Mexican Mac and Cheese with Tomato Sauce
    • Green Chile Mac and Cheese in a serving bowl.
      Hatch Green Chile Macaroni and Cheese
    • Macaroni and cheese with tomatoes served in a bowl.
      Gruyere Mac and Cheese with Tomatoes
    • A bowl of beer mac and cheese.
      Easy Stovetop Beer Mac and Cheese

    If you liked this recipe, please leave a star ⭐⭐⭐⭐⭐ rating in the recipe card below and leave a comment. I always appreciate your feedback and hearing how everything went.

    And, don’t forget to subscribe to my newsletter for more delicious recipes and cooking tips. Make it a delicious day … every day.
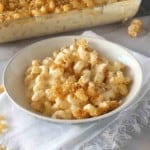
    Flemings steakhouse macaroni and cheese in a white bowl.
    Print Recipe
    4.94 from 31 votes

    Fleming’s Steakhouse Mac and Cheese

    A copy cat recipe for Fleming's Steak House Chipotle Macaroni and Cheese. The creamiest mac and cheese recipe you'll find.
    Prep Time30 minutes mins
    Cook Time45 minutes mins
    Course: Pasta Recipes
    Cuisine: American/Mexican
    Servings: 12
    Calories: 622kcal
    Author: Lea Ann Brown

    Ingredients

    • 1 pound pasta cavatappi or curly
    • 2 teaspoons salt
    • 1 tablespoon vegetable oil
    • ¾ cup onion ½-inch dice
    • ½ cup unsalted butter 1 stick
    • 3 tablespoons all purpose flour
    • 2 cups heavy cream
    • 3 cups half and half
    • 2 teaspoons kosher salt
    • 1 teaspoon white pepper ground
    • ¾ pound smoked cheddar cheese grated
    • ¼ pound cheddar cheese grated
    • 1 tablespoon vegetable oil
    • 1 teaspoon dried chipolte chili chipotle chili powder
    • ¾ cup panko bread crumbs

    Instructions

    • Preheat oven to 350 degrees F. In a large pot, bring 1 gallon of water to boil. Add 2 teaspoons salt and pasta and cook for 8 – 9 minutes
    • Drain pasta and cool under cold running water. Pasta should be slightly firm. Toss drained pasta in oil and reserve
    • Melt butter in a large sauce pot over medium heat. Add onions and saute for 4 – 5 minutes.
    • Add flour and cook 1 – 2 minute but do not brown.
    • Add cream, half and half, kosher salt and white pepper.
    • Bring pot to a simmer. Cook until sauce is thick, about 5 – 6 minutes Blend cheese into sauce and add cooked pasta.
    • Pour pasta and sauce into a large baking dish casserole. Reserve.
    • In a saute pan over medium-high heat, add oil. Once the oil is shimmering, add bread crumbs and chipotle chile powder. Stir over medium heat for about a minute. Sprinkle bread crumbs over macaroni and cheese and bake for 20 minutes.

    Video

    Notes

    Make Ahead: You can cook the casserole ahead of time and either freeze it or keep in in the refrigerator for a day ahead of show-time. If the casserole is frozen, let it come to room temperature before reheating. Reheat in a 200 degree oven, until nice and warm. You don’t want to re-cook the casserole, just heat it up. 
    Can you freeze this casserole? Yes. Like any cheesy casserole, you can cook this mac and cheese and freeze it for a later date, or you can freeze left-over portions.
    Reheat recipes like this in more manageable individual or small portions. Rather than trying to reheat an entire casserole. And use the microwave. Add a drizzle of liquid (milk or water that you’ve cooked the pasta in) to rehydrate the pasta. Pasta seems to soak up liquid as it sits in the fridge. Reheat in 30 second intervals and use that 50% power feature on the microwave. It will help keep it from becoming greasy.
     

    Nutrition

    Calories: 622kcal | Carbohydrates: 38g | Protein: 18g | Fat: 45g | Saturated Fat: 28g | Cholesterol: 137mg | Sodium: 1081mg | Potassium: 252mg | Fiber: 2g | Sugar: 2g | Vitamin A: 1412IU | Vitamin C: 2mg | Calcium: 381mg | Iron: 1mg

    Flemings Steakhouse Mac and Cheese, it’s whats for dinner.
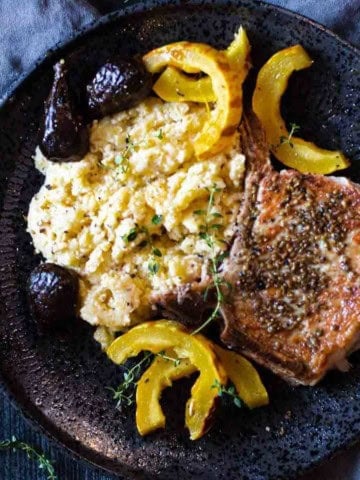
    Slow Cooker Pork Chops with Apples and Onions

    December 2, 2020 By Lea Ann Brown 54 Comments

    Slow Cooker Pork Chops with Apples and Onions.

    Slow Cooker Pork Chops with Apples is an easy dish to make when cooking for two. Thick cut bone-in pork chops are seared, then braised in the slow cooker with sliced onions, apples and figs. Seasoned with anise seed, this is a savory delight. Serve this tasty dish with mashed potatoes or polenta.

    About This Recipe and Why It Works

    When the leaves start turning from green to brilliant Fall colors, I start turning to my slow-cooker for easy flavor-packed savory meals.

    And this Slow Cooker Pork Chops With Apples recipe couldn’t be more timely for convenience and for the season.

    Tender bone-in thick cut pork chops are seared golden and seasoned with anise seed. The pork chops, tart granny smith apples, savory onions, and figs are then braised in a mixture of orange juice and red wine vinegar.

    End result, you’ve got an explosion of complex flavors that will wow the palate. And a thick cut pork chop that is fall off the bone tender.

    So working smarter not harder, grab that slow cooker and let’s get started.

    Ingredients You’ll Need

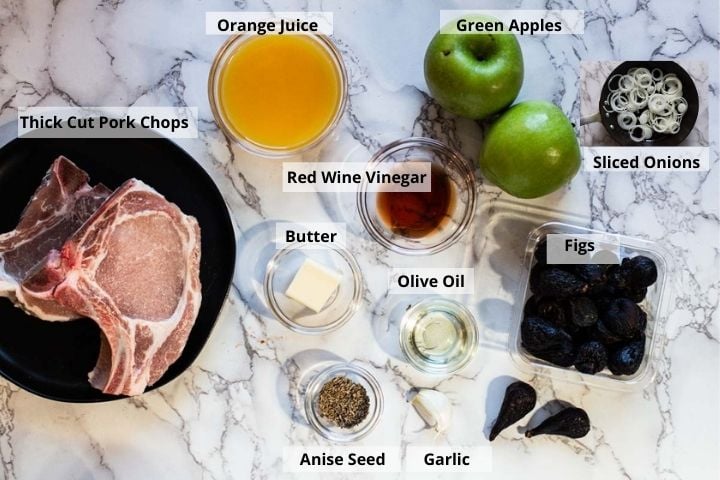
    Ingredients to make slow cooker pork chops with apples
    • Thick Cut Pork Chops, Bone in: Bones make for an extra boost of flavor. Ask your butcher for thick center cut bone-in pork chops. How thick are center cut pork chops? They should be about 1 – 1 ½ inches thick.
    • Granny Smith Apples: Granny Smith’s are famous for their green apple flavor. With their tart flavor and acidic tang, they compliment the ingredients in this recipe. Plus they are firm and crisp and will hold up better for this long slow braise.
    • Orange Juice: Orange juice not only brings an acidic factor to this recipe, but also sweet and bright flavor.
    • Sweet Onions: Use sweet onions or yellow onions.
    • Butter and Olive Oil: Butter and olive oil are great partners for searing meat. The butter brings that buttery flavor and the olive oil keeps the butter from burning.
    • Anise Seeds: Anise seeds are closely related to fennel seeds and have somewhat of a similar flavor. Anise seeds have a more licorice like flavor.
    • Figs: I would recommend using only fresh figs. I couldn’t find them for this photo, so used dried figs. Even though they added a lot of flavor to the dish, they do carry a bitter note.

    Ingredient Swaps

    • Pork Chops: You can substitute thick cut boneless butterfly pork chops for the bone-in chops called for in this recipe. If you must. 🙂
    • Apples: Braeburn Apples bring the same great qualities to this recipe as do Granny Smith. They’re just slightly sweeter. Most other red apple varieties are softer and sweeter. You can use them, but they’ll be more mushy once the recipe is cooked.
    • Citrus Juice: Any sweet citrus juice can be substituted for the orange juice. Apple juice is a good choice and cranberry juice would be a nice substitute.
    • Anise Seeds: Fennel seeds are a great substitute for anise seed.
    • Figs: If you can’t find fresh figs, I would recommend deleting them from the recipe. If you use dried Mission figs, the flavor will be bitter. But, of course you can use them.
    • Dutch Oven: You can make this recipe in a Dutch Oven rather than a slow cooker. Just follow the recipe instructions, and cook in a 325 degree oven for 2 hours, or until pork chops are tender.

    Step by Step Instructions, It’s Easy

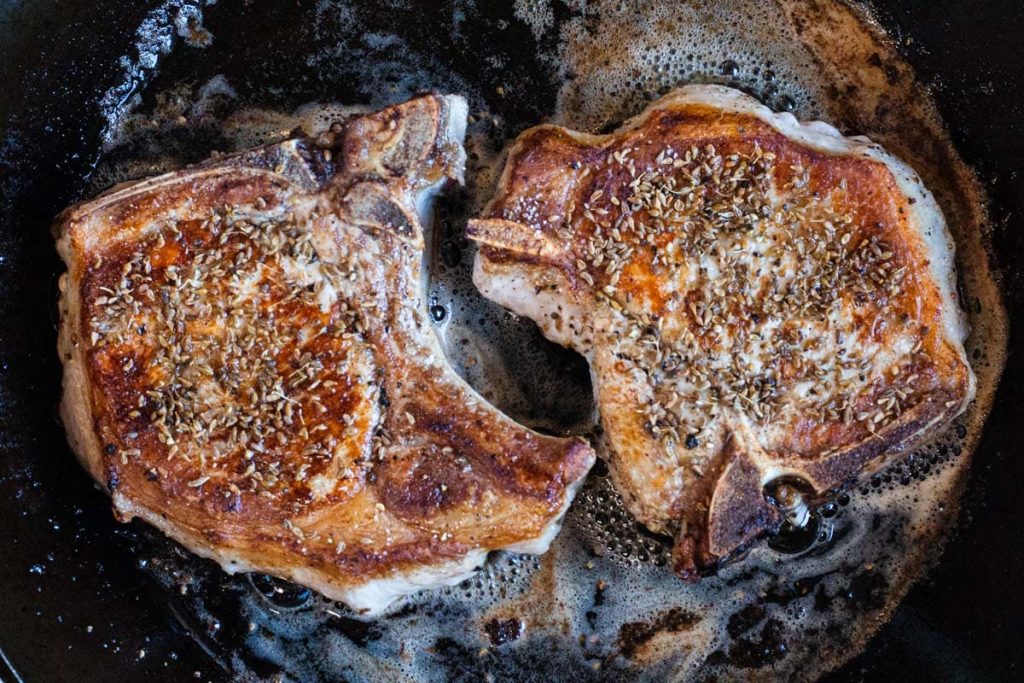
    The most important step in a successful braising recipe is searing and browning the protein.

    pan-seared-thick-cut-pork-chops
    1. Step 1: Sear the Pork Chops: For this recipe, I used both butter and olive oil. Get your pan nice and hot, then add the oils. Once the butter has melted and the bubbles start to subside, add the thick cut pork chops and sear each side for about 4 minutes per side. You want the chops to be crispy browned. Once you’ve turned the chop, sprinkle the cooked side with Anise Seed. Using the back of a fork, press the seeds into the meat while the uncooked side continues to brown.
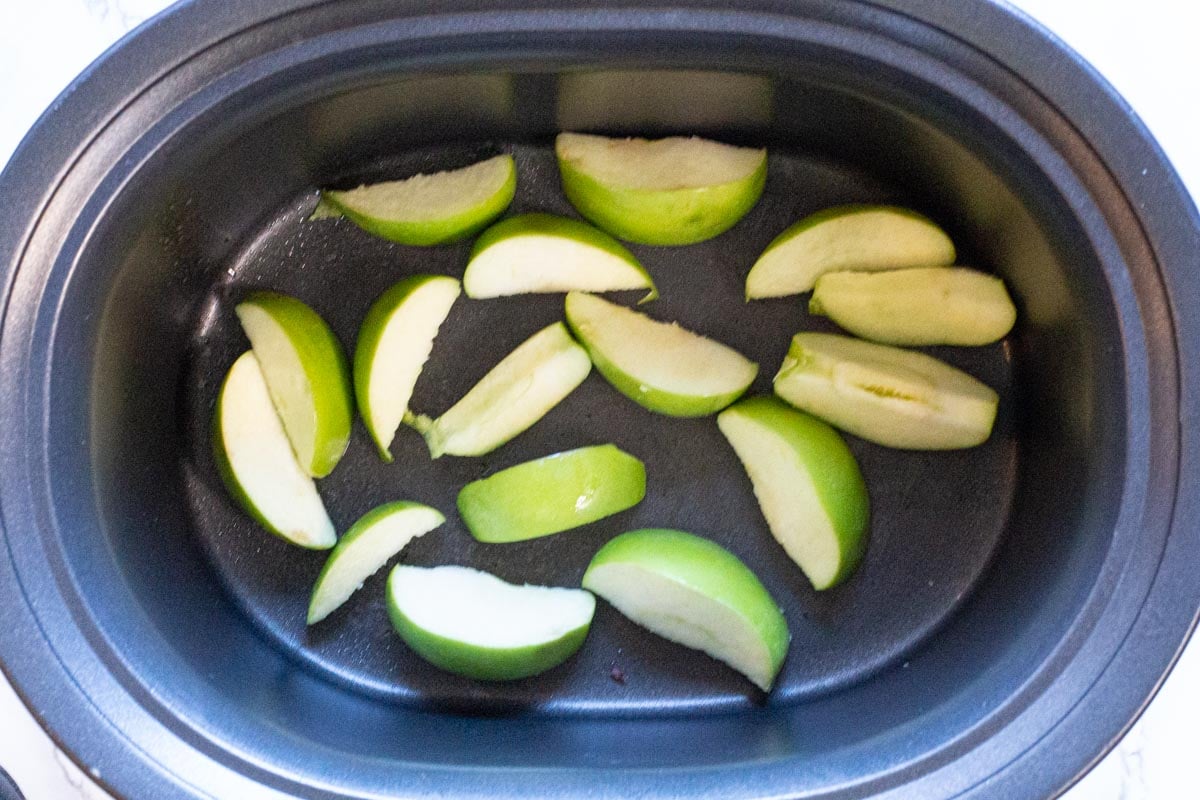
    green apples in slow cooker for Pork Chops with Apples.
    1. Step 2: No need to peel those apples, just cut them into wedges and place them into the bottom of your crock pot.
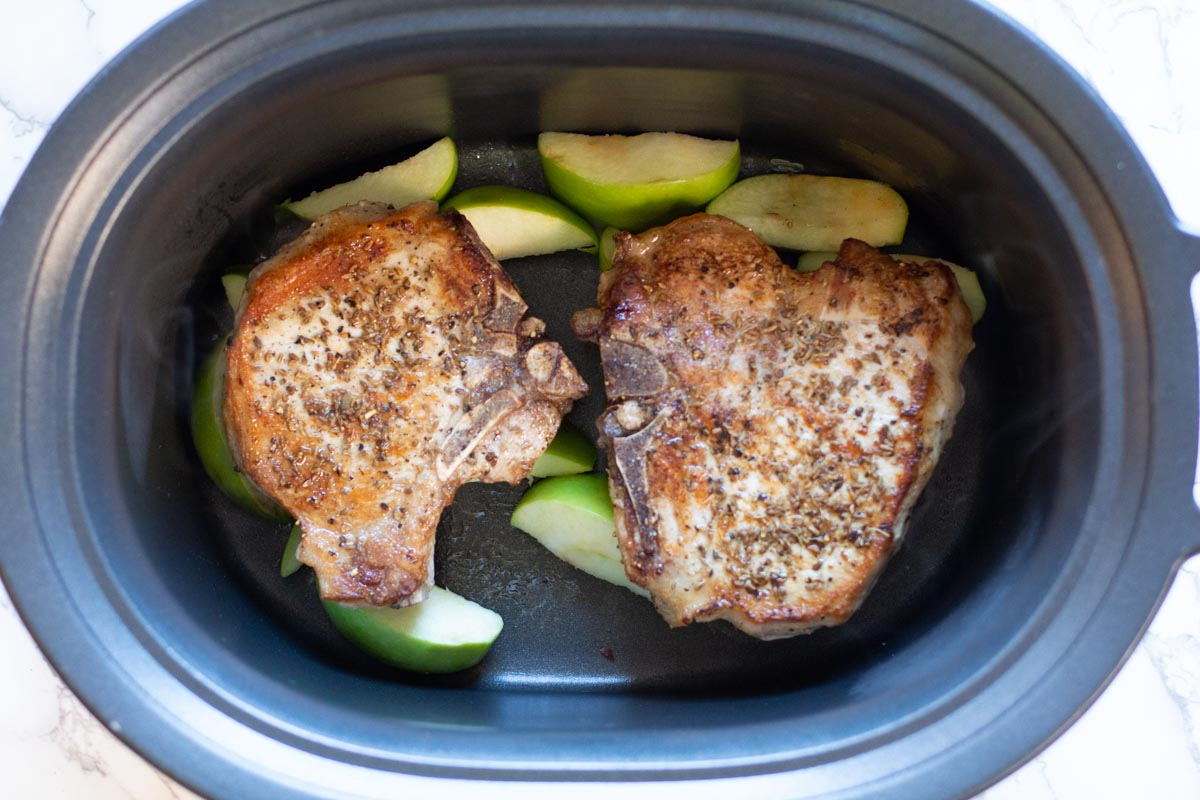
    Adding thick cut bone in pork chops to crockpot over apples
    1. Step 3: Place the browned pork chops on top of the apples.
    adding figs over onions apples and pork chops for braised pork chops
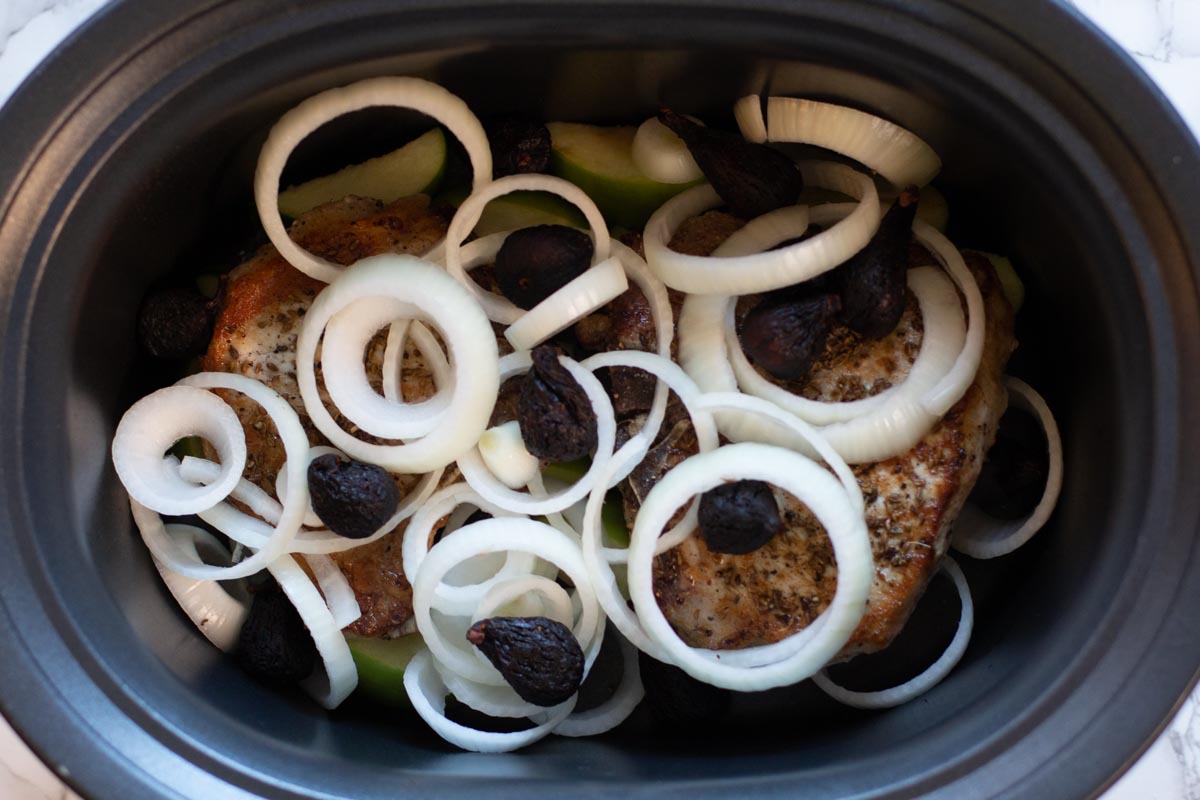
    1. Step 4: Sprinkle those sliced onions on top of the pork chops then place the Mission figs over the onion slices.
    2. Step 5: After a good shake of salt, some fresh ground pepper, orange juice and red wine vinegar for the braising liquid, you’re ready to plug in that slow cooker and enjoy the aromas that fill your home.

    Slow Cooker Pork Chops With Apples, FAQ’s

    Can I Use Any Type Of Apples?

    Yes, you can use any type of apples. Again, no need to peel them unless you want. Keep in mind, different apples bring different levels of sweetness. Which can change the flavor profile. And figs are very sweet, so keep that in mind when choosing apples.

    Do I Have To Sear The Pork Chops Before Slow Cooking?

    You don’t have to. But I do recommend that you do so. Searing brings a crispy texture and an extra layer of flavor. But you can add the pork chops without that pre-sear step.

    What If I Can’t Find Figs?

    Figs are a very seasonal fruit. If you can’t find them, simply omit them from this recipe.

    Can I Freeze This Recipe?

    The pork chops will freeze just fine. Simply store them in an air tight container and freeze for up to 3 months. I’m not a fan of freezing cooked apples. The texture becomes compromised.

    Serving Suggestions

    • Once the pork chops are tender, fish them out of the slow cooker to a platter. Using a large serving spoon, drench the pork chops with the liquid from the slow cooker. Then spoon the onions, apples and figs over the pork chops.
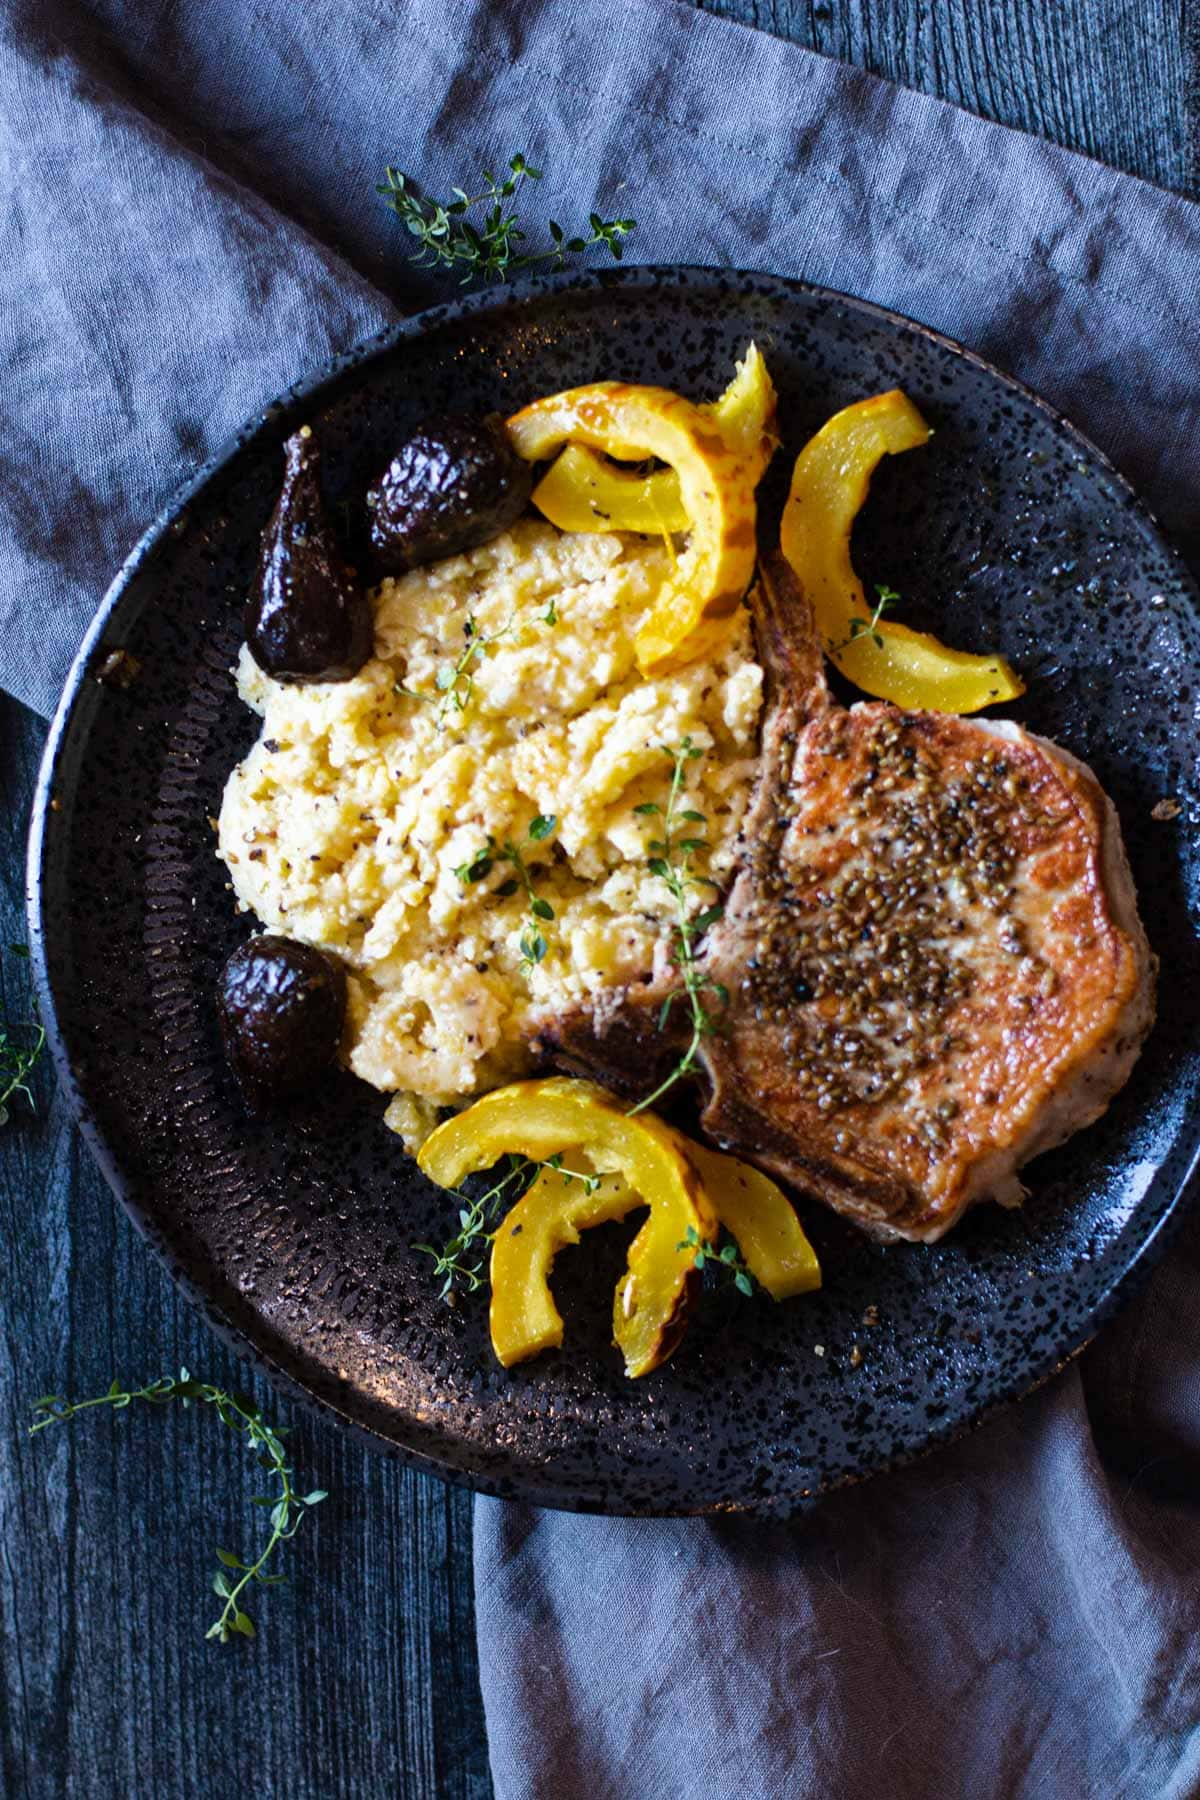
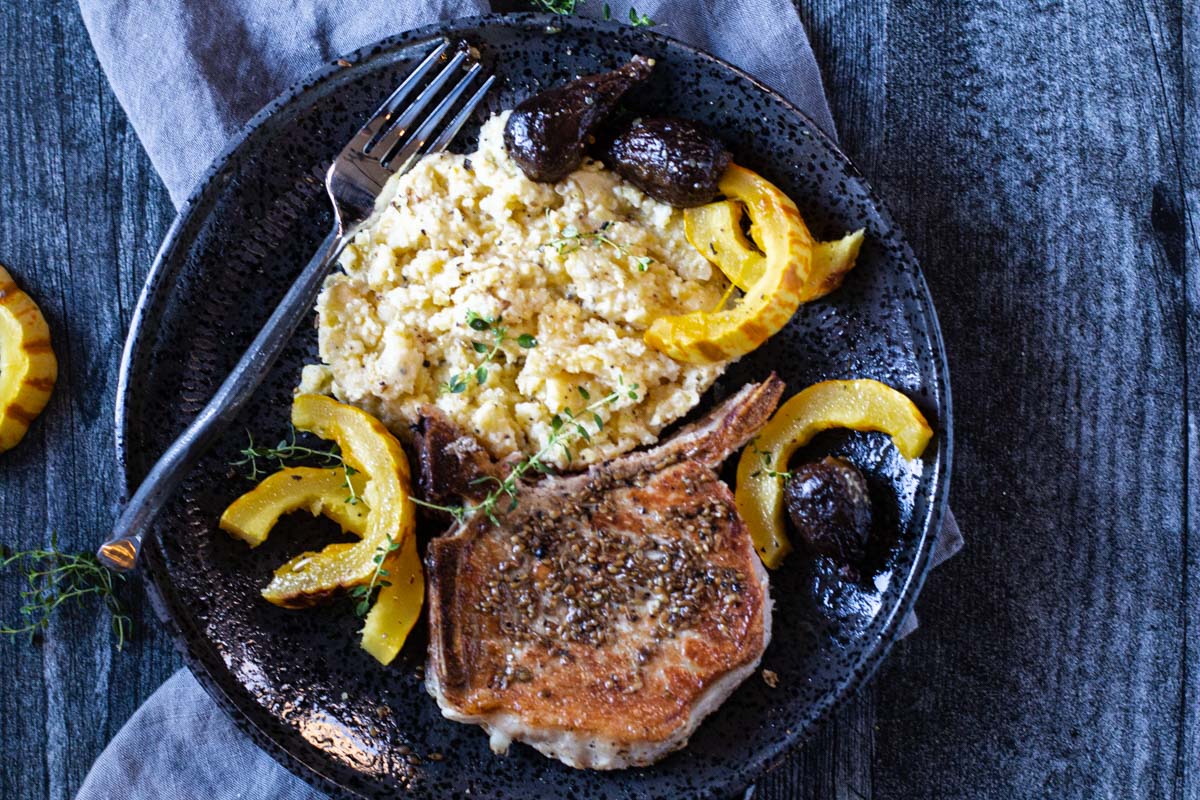
    • Polenta or mashed potatoes make a wonderful side dish for crock pot pork chops and apples, as well as roasted sliced Delicata squash. The photo shows polenta and delicata squash.

    Other side dishes to consider would be Garlic Butter Slow Cooker Baked Potatoes, or even A Perfect Tossed Salad .

    Recipe for Slow Cooker Pork Chops with Apples

    Slow Cooker Pork Chops with Apples served with Delicata Squash and Polenta

    If you’re looking for an easy recipe for thick cut pork chops, I hope you give this slow cooker pork chops and apples a try. And if you do, please come back and give the recipe a star rating, or scroll down and leave a comment about your experience with the recipe.

    Related Articles

    • Cocoa Chile Grilled Butterfly Pork Chops
    • Pork Tenderloin Medallions with Bourbon Peach Sauce
    • One Pan Honey Garlic Pork Chops
    • Roast Rack of Pork with Peach Glaze

    And if you’re looking for more pork recipes, don’t miss my Pork Category. You’ll find lots of great recipe ideas, including my recipe for Crock Pot Country Style Pork Ribs.

    If you liked this recipe, please leave a star ⭐⭐⭐⭐⭐ rating in the recipe card below and leave a comment. I always appreciate your feedback and hearing how everything went.

    And, don’t forget to subscribe to my newsletter for more delicious recipes and cooking tips. Make it a delicious day … every day.

    Slow Cooker Pork Chops with Apples and Onions.
    Print Recipe
    5 from 5 votes

    Slow Cooker Pork Chops with Apples and Onions

    Pork and apples are a classic pairing, and figs and sweet anise seed, orange juice and red wine vinegar, all add an exciting depth of flavor. Give this Slow Cooker Pork Chops with Apples a try next time you're using your slow cooker.
    Prep Time20 minutes mins
    Cook Time7 hours hrs
    Total Time7 hours hrs 20 minutes mins
    Course: Main Course Pork
    Cuisine: American
    Servings: 2
    Calories: 744kcal
    Author: Lea Ann Brown

    Ingredients

    • 2 pork chops bone in, thick cut, about 1 ½ pounds
    • 1 teaspoon aniseed
    • Salt and pepper to taste
    • 2 Granny Smith apples sliced
    • 1 tablespoon olive oil
    • 2 tablespoons unsalted butter
    • 1 yellow onion thick sliced
    • 12 Mission figs cut them in half
    • 1 large clove garlic minced
    • ½ cup orange juice
    • 1 Tablespoon red wine vinegar

    Instructions

    • Heat a large heavy skillet over medium high heat. Add butter and oil. Once butter is bubbly and melted, add the pork chops. Sprinkle with salt and pepper. Cook on one side for 4 minutes. Don't turn, just let the one side of the chop sear nice and brown.
    • Turn the pork chops over, and sprinkle the browned side with salt and pepper and the anise seeds. With the back of a fork, press the anise seeds into the browned side of the pork chops, slightly crushing the anise seed.
    • Cook the pork chop for four minutes. Both sides should be nice and seared.
    • Spray your Crock Pot with non-stick spray and sprinkle in the apples.
    • Place browned pork chops on top of the apples.
    • Next layer in the slices of onions and the figs. Sprinkle the garlic over the mixture and add orange juice and red wine vinegar.
    • Cook on low 6 – 7 hours.

    Notes

    Once the pork chops are tender, fish them out of the slow cooker to a platter. Using a large serving spoon, drench the pork chops with the liquid from the slow cooker. Then spoon the onions, apples and figs over the pork chops.
    Polenta or mashed potatoes make a wonderful side dish, as well as roasted sliced Delicata squash.
    If you can’t find fresh Mission figs, just omit them from the recipe. 
    You can substitute thick cut boneless butterfly pork chops for the bone-in chops called for in this recipe. If you must. 🙂

    Nutrition

    Calories: 744kcal | Carbohydrates: 95g | Protein: 33g | Fat: 29g | Saturated Fat: 12g | Polyunsaturated Fat: 3g | Monounsaturated Fat: 12g | Trans Fat: 1g | Cholesterol: 120mg | Sodium: 75mg | Potassium: 1622mg | Fiber: 14g | Sugar: 75g | Vitamin A: 1008IU | Vitamin C: 50mg | Calcium: 158mg | Iron: 3mg

    Slow Cooker Pork Chops with Apples and Onions…It’s What’s for Dinner

    No-Bake Key Lime Pie

    November 23, 2020 By Lea Ann Brown 37 Comments

    3 ingredient no bake key lime pie.

    This no bake key lime pie recipe is amazingly easy to make. The filling has only three ingredients that when combined bring you a light, fluffy, sweet and tart dessert that everyone will rave over. It simply doesn’t get any easier than this.

    3 ingredient no bake key lime pie.

    The recipe was first published August, 2010 and updated November 2020 with step by step instructions and photos.

    About This Recipe and Why It Works

    My husband’s side of the family recently gathered for their family reunion. 

    Bob’s sister and husband Vern hosted the event at their home with a spread of pot luck food that wow’d our crowd.

    They laid out a feast of Slow Cooker Pulled BBQ Pork and sliced ham for sandwiches, coleslaw, fresh corn on the cob, BBQ Baked Beans, mac and cheese,  fresh slices of watermelon…get the picture? (I hope so since I didn’t take any)  :-/

    And for dessert? This No-Bake Key Lime Pie Recipe with Cool Whip. And you know it must be easy if she had enough of these pies to feed about 30 people.

    This is an excellent recipe to make-ahead, as it freezes well.

    With it’s refreshing flavor and that “no-bake” factor, this is a great Summer dessert recipe. The filling is fluffy using Cool Whip, sweet with condensed milk and tart with lime juice. Amazing flavor with every single bite.

    And once the graham cracker crust is made, this is basically a 3 ingredient no-bake key lime pie.

    A bit if advice? Don’t save this one just for Summer, this is a year round dessert that everyone will enjoy.

    No Bake Key Lime Pie Ingredients:

    Ingredients to make no bake key lime pie with cool whip

    How can something this easy really be this delicious? Let’s take a look.

    • Sweetened Condensed Milk: You’ll find it on the baking aisle at the grocery store.
    • Cool Whip: Talk about a science project. Cool Whip is an imitation whipped cream sold as “whipped topping”. Cool whip has a long list of concerning ingredients and contains very little dairy. With that said, I love the stuff. I could (and have) eaten it by the spoonful from the container. It’s delicious. And this key lime pie with Cool Whip is extremely popular.
    • Key Lime Juice: What are key limes? Key limes are known as Mexican or West Indian Limes. They’re more aromatic and more floral in flavor than regular limes.
    • Graham Crackers.
    • Butter. Salted or unsalted.
    • Granulated Sugar

    Ingredient Notes and Ingredient Swaps

    • Can’t find Key Limes? You can use regular limes. You’ll need to squeeze enough juice to make ½ cup of lime juice. You’ll need 4 – 5 full sized limes. You may also find key lime juice on the juice or baking aisle at your grocery store. I’ve been making this pie long before key limes were available for me to purchase. I’ve made this key lime pie with Nellie and Joe’s Lime Juice, great flavor.
    • Pie Crust: If you want to make this key lime pie easier than easy, purchase a pre-made graham cracker or chocolate pie crust from the baking aisle at the grocery store. You can also make your own graham cracker crust or chocolate crust. I’m thinking an Oreo pie crust might be fab here.

    How To Make This Recipe, It’s Easy

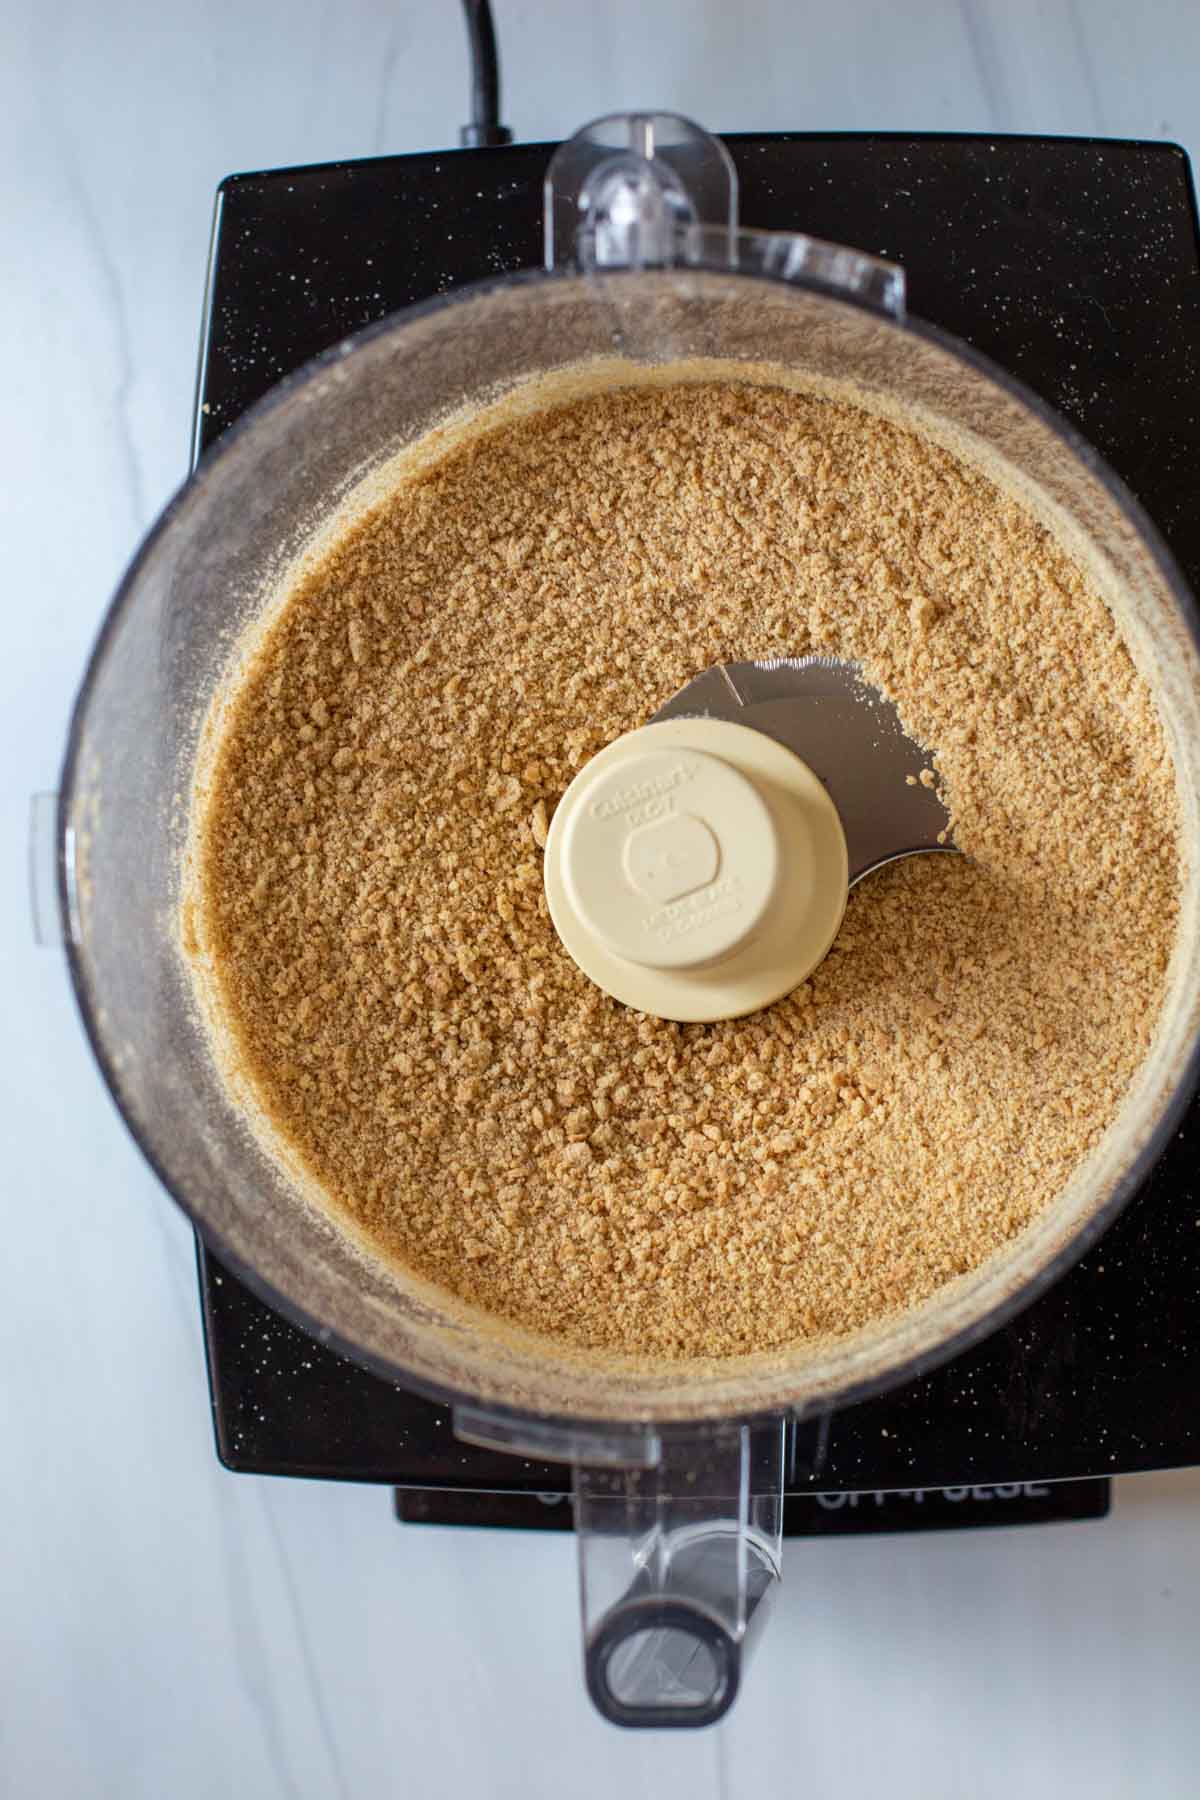
    Graham crackers in a food processor.
    Crushed graham crackers in a food processor.
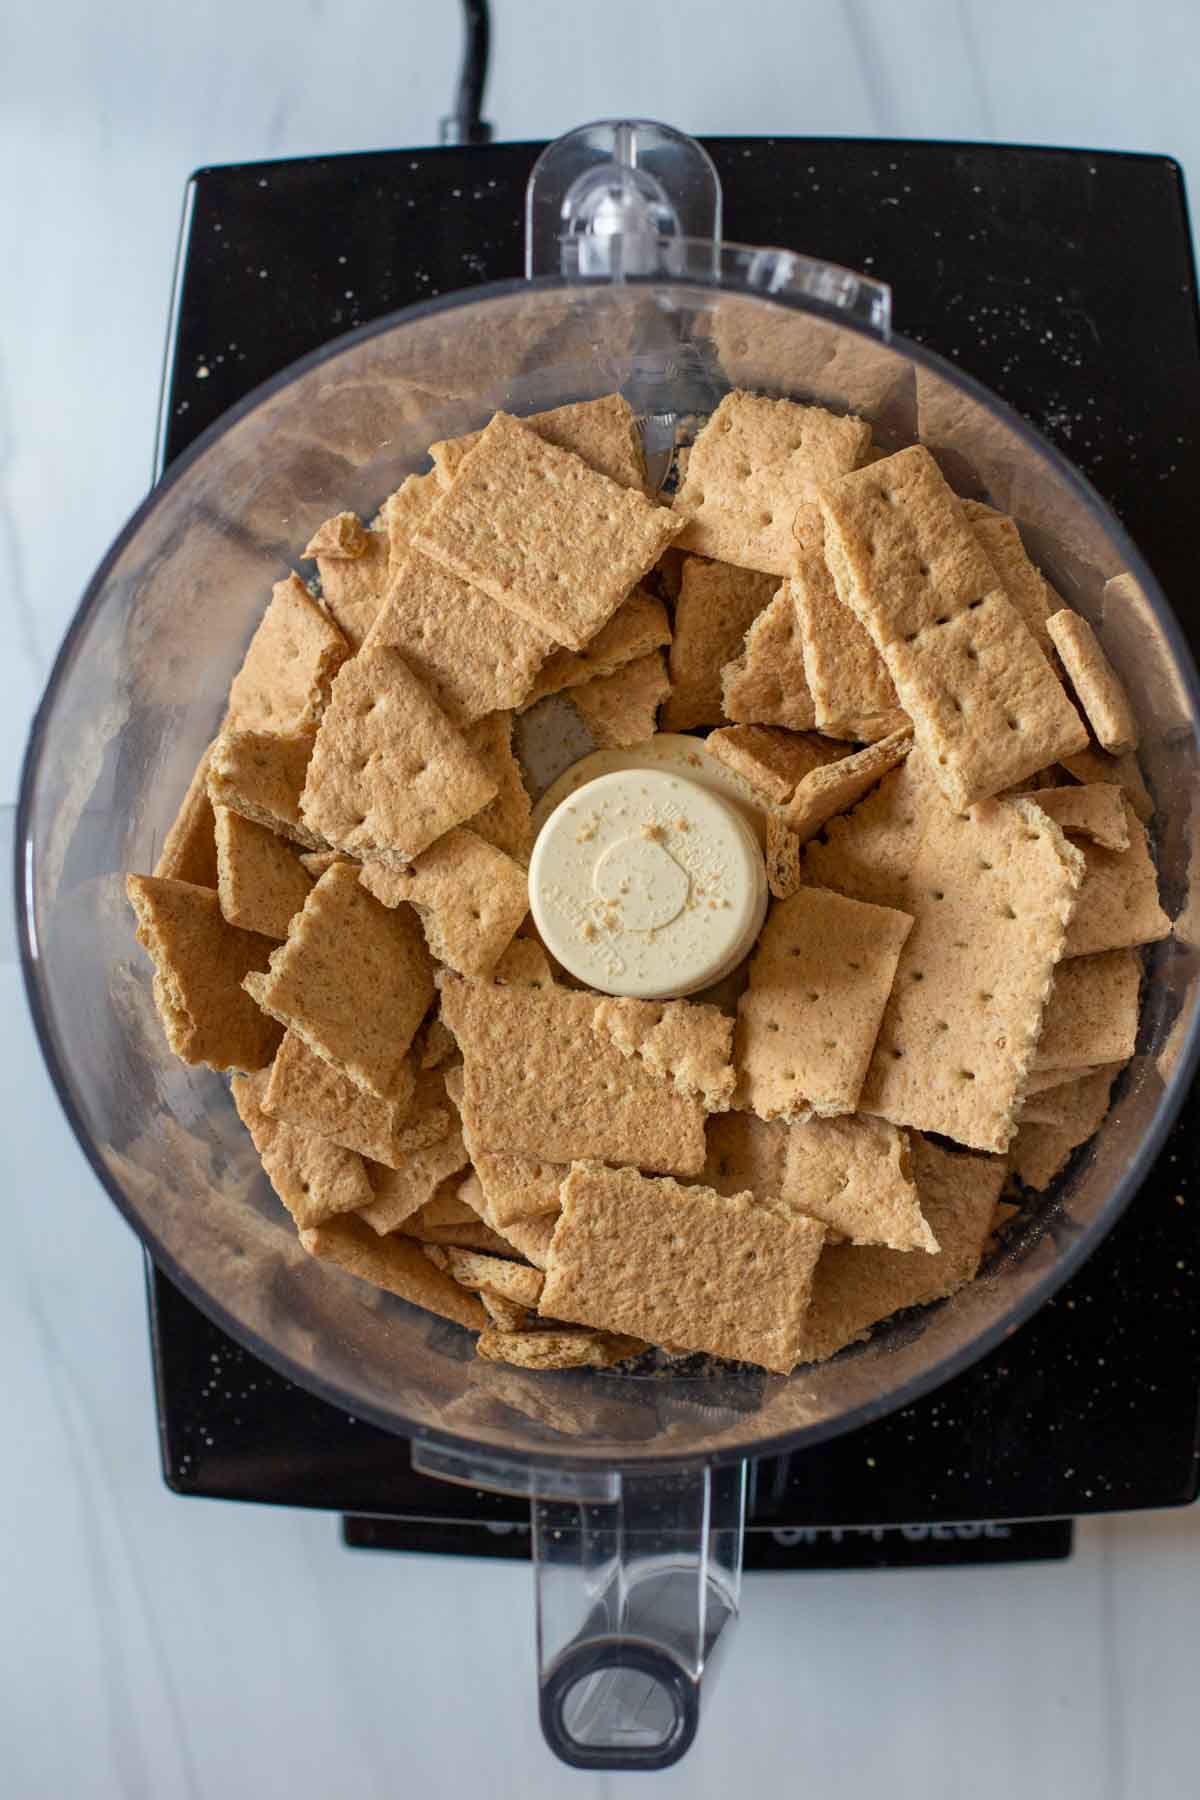
    • Step 1: Place broken up sheets of graham crackers in a food processor.
    • Step 2: Use the pulse feature to crush to a grainy consistency. If you don’t have a food processor, break up the crackers with your hands and place them in a zip lock bag. Seal, pressing the air out and use a use a rolling pin to crush them to a grainy state.
    Mixing together melted butter and sugar for no bake key lime pie crust.
    Mixing melted butter with graham cracker crumbs to make graham cracker crust.
    • Step 3: Using a microwave safe bowl, melt the butter in the microwave for 30 second increments until melted. Add the sugar and stir.
    • Step 4: Step 3: Add in the crushed graham crackers, and use a fork to blend well.
    Pressing Graham Cracker Crust in Pie Shell to make No-Bake Key Lime Pie
    Making filling for no-bake key lime pie.
    • Step 5: Use a small measuring cup to press the graham crackers into your pie pan. Use your fingers to form the crust up the sides of the pan. Refrigerate the crust for 2 hours before proceeding.
    • Step 6: Make the filling for the pie. Use a whisk to simply mix the condensed milk, lime juice and thawed Cool Whip.
    • Step 7: Use a spatula to spread the filling into prepared graham cracker crust. Cover with plastic wrap and refrigerate overnight. When ready to serve, top with an additional layer of Cool Whip and decorate with some lime slices.

    Common Questions

    What Is Sweetened Condensed Milk?

    What is sweetened condensed milk? It’s thick, it’s sticky and not for drinking. Condensed milk is made by removing the water. It’s cooked down to remove moisture. Just like you would a balsamic glaze or red wine reduction. Then sugar is added to prolong shelf life. The sugar prevents microorganisms from growing and sugar thickens this milk even more. Unsweetened condensed milk is sold and labeled as evaporated milk.

    Can You Freeze This Pie (Make Ahead) ?

    Yes you can. If you’re feeding a crowd and want to get a head start, prepare the pies a few days in advance then cover the top with a layer of plastic wrap, then a layer of foil. Simply allow for an overnight thaw in the refrigerate before serving.

    How Many Limes Will I Need?

    You’ll need about 12 key limes, or 4 – 6 regular sized limes to yield the ½ cup lime juice called for in this recipe.

    Can I use Homemade Whipped Cream?

    I’ve not tried it, but I doubt it would hold up to create a dense fluffy texture like Cool Whip. I’d say stick with the Cool Whip not only for ease but guaranteed success.

    A slice of no-bake key lime pie in a graham cracker crust

    Tips For Success:

    • Crust: You can purchase pre-crushed graham crackers on the baking aisle to make a pie crust, but try making your own. Purchase a box of graham crackers, It’s easy to make using a food processor. Plus you’ll have extra crackers left over for snacks.
    • Preparing Crust: When pressing the graham cracker crust into the pan, don’t pack it too tightly. This will cause it to harden and become hard to remove from the pan when ready to serve. Just press it into the pan until it’s well formed to the bottom.
    • Cool Whip: Make sure the Cool Whip has completely thawed. Place it in the refrigerator for a 4-5 hours or leave it at room temperature. You can also remove the lid and place it in the microwave for 30 seconds. Important: Use the setting for defrost.
    • Refrigerate: For best results, once assembled, make sure to refrigerate No-Bake Key Lime Pie overnight. This will allow the dessert to set up and become firm enough for serving.
    • Slicing: As with any cheesecake type dessert, use a sharp knife for slicing and serving. Each time you start a new slice, dip the knife in warm water and wipe clean with a paper towel. This will insure easy neater slices.
    • This pie works well in a purchased chocolate pie crust, such as an Oreo pie crust. Or a regular pie crust. If using a chocolate pie crust garnish with thin slices of shaved chocolate and additional Cool Whip.

    How to decorate a Key Lime Pie

    Presentation Tips:

    • Purchase some extra cool whip and spoon it into a pipping bag. Pipe swirls of whipped topping around the edge, or dollop them spaced on top of the pie.
    • If you use the chocolate crust, dress up the top of each slice of  pie with a bit of  shaved chocolate for chocolate curls. How do you make chocolate curls? Just take a bar of semisweet chocolate. I like to refrigerate the chocolate first. Then I simply use a box grater, the side with the slicer. Or you can use a very sharp paring knife to very thinly slice the chocolate.
    • Decorate with thin sliced limes. Using a knife, make a single cut to the center of the lime. Then twist it.
    • Making this no-bake key lime pie with Cool Whip in a 9″ tart pan will give it an even snazzier look.

    No Bake Key Lime Pie Recipe

    This is such an easy key lime pie recipe, that I’ve made it 2 – 3 pies at a time to serve at pot lucks or back yard bbq parties. Its most certainly a crowd pleaser. No-bake Key Lime Pie is a perfect Summer dessert made with just a few simple ingredients.

    More Classic American Comfort Food Desserts

    • A slice of old fashioned pineapple cake made with crushed pineapple.
      Old-Fashioned Pineapple Cake With Cream Cheese Frosting
    • A slice of peach crumble pie topped with a scoop of vanilla ice cream.
      Classic Peach Pie With Canned Peaches
    • Cherry delight dessert served on a white plate.
      Old Fashioned Cherry Delight Dessert
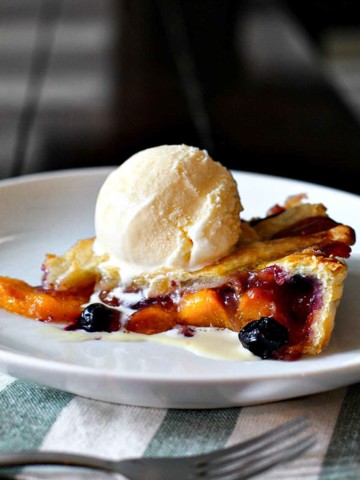
    • Peach and blueberry pie topped with a scoop of vanilla ice cream.
      Fresh Peach Blueberry Pie

    And if you’re looking for more dessert recipes, don’t miss my category for Dessert Recipes. You’ll find my recipe for Old Fashioned Orange Slice Bars. A classic “church supper” dessert that’s not too sweet, and simple with ingredients.

    If you liked this recipe, please leave a star ⭐⭐⭐⭐⭐ rating in the recipe card below and leave a comment. I always appreciate your feedback and hearing how everything went.

    And, don’t forget to subscribe to my newsletter for more delicious recipes and cooking tips. Make it a delicious day … every day.

    3 ingredient no bake key lime pie.
    Print Recipe
    5 from 8 votes

    Easy No-Bake Key Lime Pie

    It takes longer to gather the ingredients than it takes to make this pie. Easy and incredibly tasty.
    Prep Time10 minutes mins
    resting time12 hours hrs
    Total Time10 minutes mins
    Course: Dessert
    Cuisine: American
    Servings: 8
    Calories: 206kcal
    Author: Lea Ann Brown

    Ingredients

    • 1 ½ cups Graham Cracker Crumbs about 10 sheets of graham crackers
    • 5 Tablespoons unsalted butter melted
    • ⅓ cup Sugar
    • 14 ounces Eagle Brand Milk sweetened, condensed milk
    • 8 ounces Cool Whip defrosted, plus extra for topping
    • ½ Cup Key Lime Juice or juice from 12 key limes, or 4 – 6 regular sized limes.

    Instructions

    • For the Graham Cracker Crust: Purchase pre-ground graham crackers. Or if using sheets of graham crackers, break them into a food processor and pulse until a grainy texture. Or crush them with a rolling pin in an enclosed zip-lock bag.
    • In a microwave safe bowl, melt the butter. Add the sugar and stir. Mix in the crushed graham cracker crumbs and still until well coated with the butter mixture.
    • Using a small measuring cup, press the crust into a 9" pie pan. Use your fingers to form the crust up the side of the pan. Refrigerate for two hours.
    • For the Pie: Stir all ingredients together and mix with a whisk. Pour into a prepared pie crust. Refrigerate overnight. The pie also freezes well.
    • Top with additional Cool Whip, lime slices and serve.

    Video

    Notes

    Tips For Success: 
      • Crust: You can purchase pre-crushed graham crackers on the baking aisle to make a pie crust, but try making your own. Purchase a box of graham crackers, It’s easy to make using a food processor. Plus you’ll have extra crackers left over for snacks.
      • Preparing Crust: When pressing the graham cracker crust into the pan, don’t pack it too tightly. This will cause it to harden and become hard to remove from the pan when ready to serve. Just press it into the pan until it’s well formed to the bottom.
      • Cool Whip: Make sure the Cool Whip has completely thawed. Place it in the refrigerator for a 4-5 hours or leave it at room temperature. You can also remove the lid and place it in the microwave for 30 seconds. Important: Use the setting for defrost.
      • Refrigerate: For best results, once assembled, make sure to refrigerate No-Bake Key Lime Pie overnight. This will allow the dessert to set up and become firm enough for serving.
      • Slicing: As with any cheesecake type dessert, use a sharp knife for slicing and serving. Each time you start a new slice, dip the knife in warm water and wipe clean with a paper towel. This will insure easy neater slices.
    • This pie works well in a purchased chocolate pie crust, such as an Oreo pie crust. Or a regular pie crust. If using a chocolate pie crust garnish with thin slices of shaved chocolate and additional Cool Whip.
    • If you can’t find key limes, regular limes will work fine. You’ll need about a dozen key limes and 4 – 6 regular sized limes. You can also purchase Nellie and Joe’s Famous Key Lime Juice. 
    • This pie works well in a purchased chocolate pie crust, such as an oreo pie crust. Or a regular pie crust. If using a chocolate pie crust garnish with thin slices of shaved chocolate and additional whipped cream.

    Nutrition

    Calories: 206kcal | Carbohydrates: 35g | Protein: 5g | Fat: 6g | Saturated Fat: 4g | Cholesterol: 21mg | Sodium: 84mg | Potassium: 232mg | Fiber: 1g | Sugar: 32g | Vitamin A: 190IU | Vitamin C: 6mg | Calcium: 174mg | Iron: 1mg

    Key Lime Pie Recipe No Bake …It’s What’s For Dessert.

    Easy Quick Mexican Pickled Onions

    November 20, 2020 By Lea Ann Brown 42 Comments

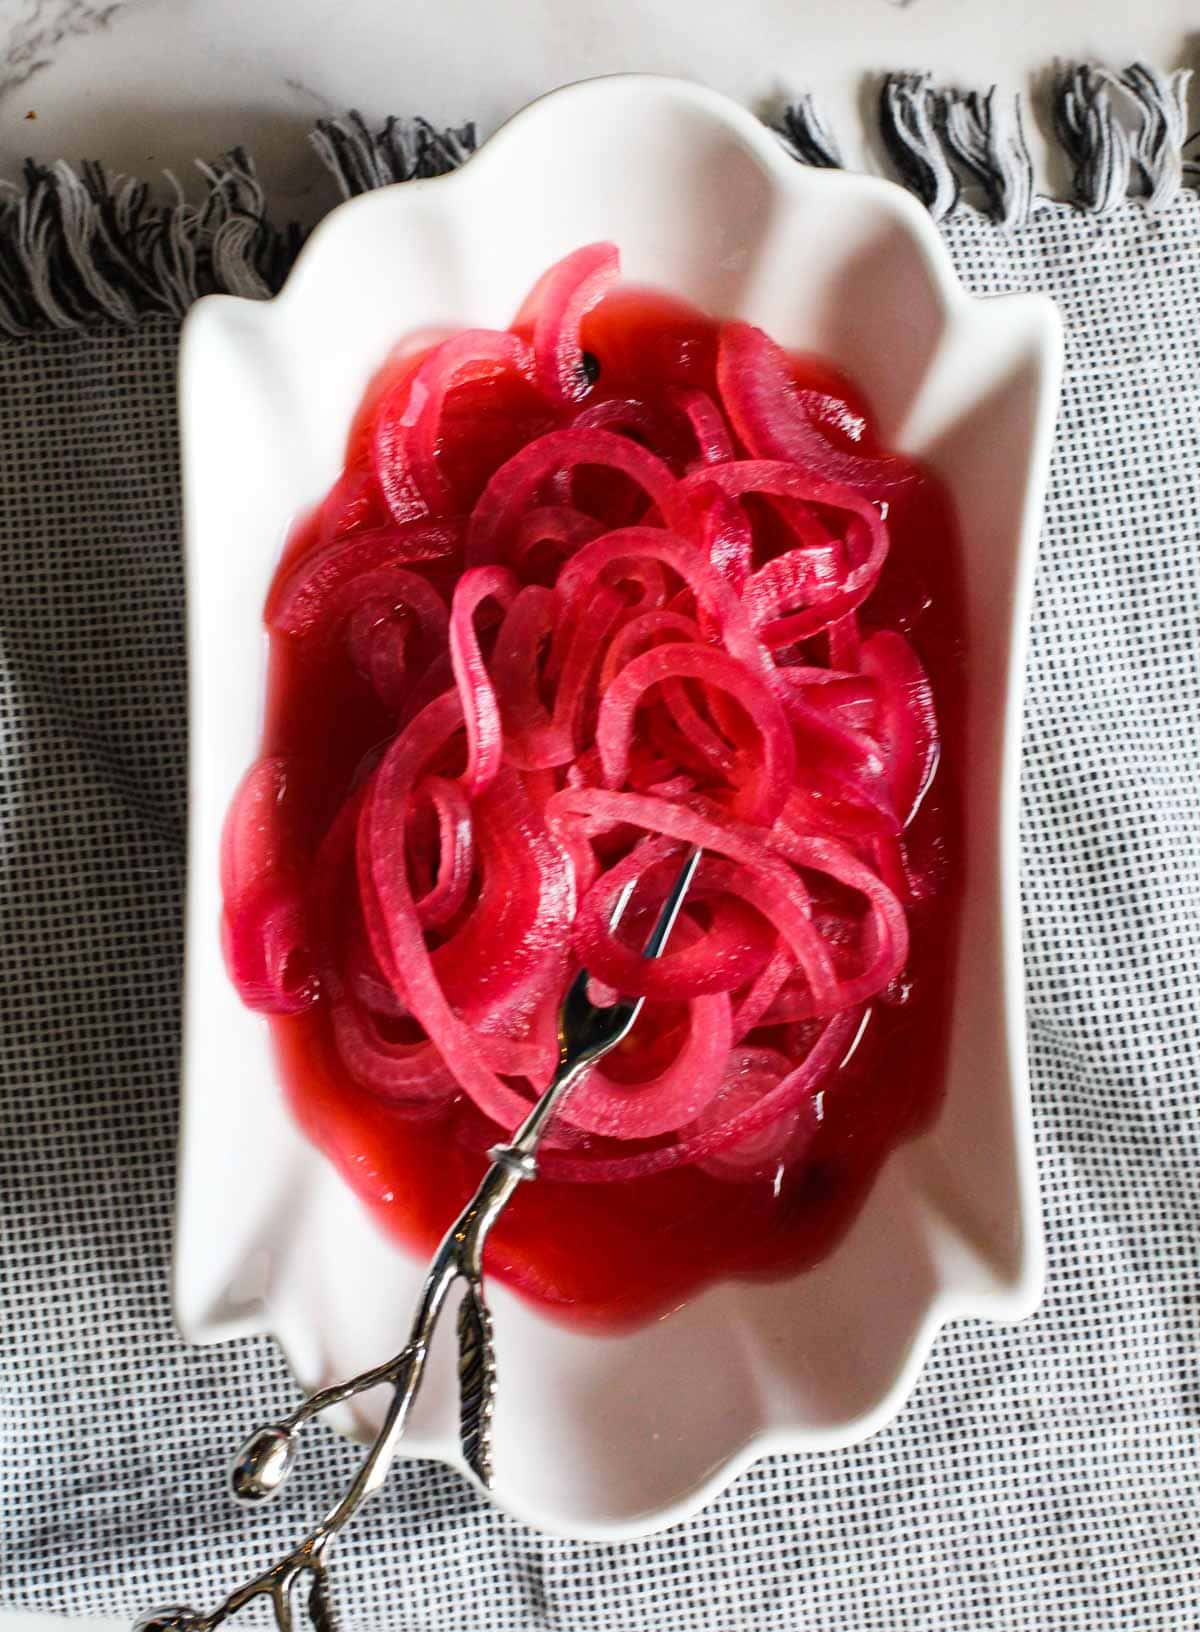
    Friends don’t let friends eat Mexican food without Mexican pickled onions! Quick pickled red onions Mexican style. Tart, sweet, a little heat and a whole lot of personality. Pickled red onions are a great topping for tacos, burritos, enchiladas or even a burger. Ready in just 30 minutes, let’s take a look.

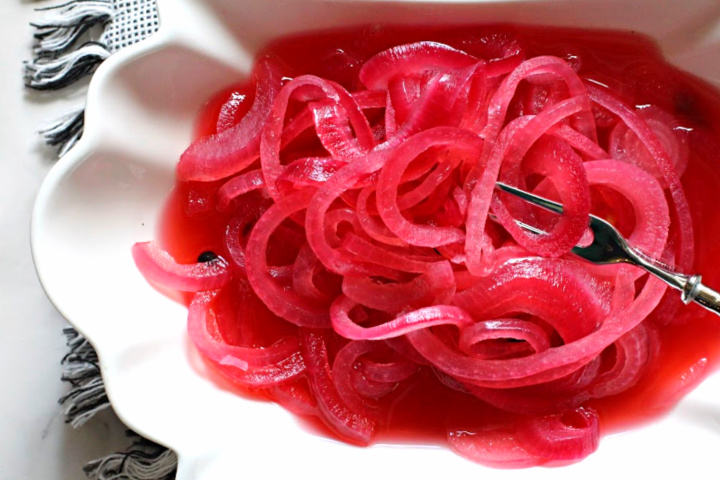
    Mexican Pickled Red Onions in a white serving bowl.

    This recipe was first published December 2010 and updated November 2020.

    Table of contents

    • About This Recipe
    • Ingredients You’ll Need
    • Step by Step Instructions
    • FAQ’s And Tips
    • How To Store
    • What To Do with Mexican Pickled Onions
    • More Pickling Recipes To Try

    About This Recipe

    The first time I had Mexican pickled onions was as a topping for fish tacos at a local, now sadly defunct popular Denver Mexican restaurant, Chama. Created by my favorite local restauranteur and Chef, Sean Yontz.

    I thought they were the best thing since sliced bread.  His fish tacos topped with these beautiful onions were a revelation for my taste buds.

    After receiving instructions from the restaurant, I have duplicated Yontz’s recipe. I simply don’t think I’ve had better pickled red onions.

    The best way to use these is a superb topping for Tacos. Pickled onions for tacos is simply a must.

    But scoop a heaping spoonful onto enchiladas, tostadas or even a hearty serving of pinto beans and you’ve got yourself a new flavor experience.

    Tart and sweet, add a hot bite from the onions, some heat from a dried red pepper and these onions bring the Fiesta to any Mexican meal. 

    So easy and with so much impact. You’ll simply not believe that you’ve never made them before.

    Ingredients You’ll Need

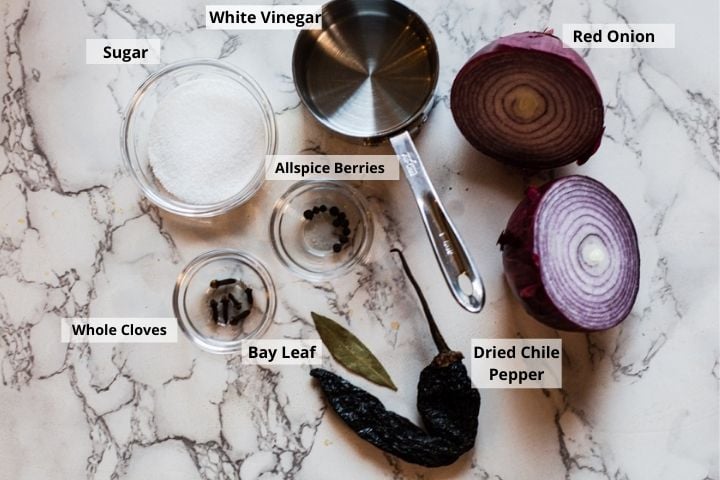
    Mise en place. Always gather ingredients before starting any recipe. It will save you time and organize your mind.

    Ingredients to make homemade pickled red onions
    • Sugar: The sweetness will balance the tart and sour flavor of the vinegar.
    • White Vinegar: White vinegar is the most versatile of vinegars. It brings acidity and a tart flavor to this pickled red onion recipe.
    • Red Onion: (purple onion) Sweetness is the red onion’s claim to fame. It’s sharp in flavor, and has a higher sugar content that other onions. Plus, we want that red color to add to the vibrance of the finished product.
    • Allspice Berries: Allspice is the dried berry of the tropical Pimenta dioica tree native to the West Indies and Central America. Its flavor is a combination of clove, cinnamon, and nutmeg. It brings beautiful aromatics to the finished dish.
    • Whole Cloves: Strong, pungent, sweet and almost hot, cloves bring a penetrating flavor to these Mexican pickled red onions.
    • Bay Leaf: When bay leaves are infused into water, it brings a minty flavor to the party. Some describe the flavor reminiscent of Christmas tree pine.
    • Dried Chile Pepper: Deep red, a dried chile pepper will add color, spice and a pleasant earthy flavor to these onions. And depending on what chile pepper you choose, will dictate the level of heat to the recipe.

    Bring these all together and you’ve got a wonderful flavor combination.

    Step by Step Instructions

    How to make easy pickled red onions

    Could it get any easier?

    • Slice the red onions. You can slice them into full rings or half moon shapes if you want smaller pieces. Use a sharp knife or even a mandolin. ⅛ inch slices are ideal for that perfect slight crunch.
    • Break off the top of the chile pepper pod and empty out the seeds.
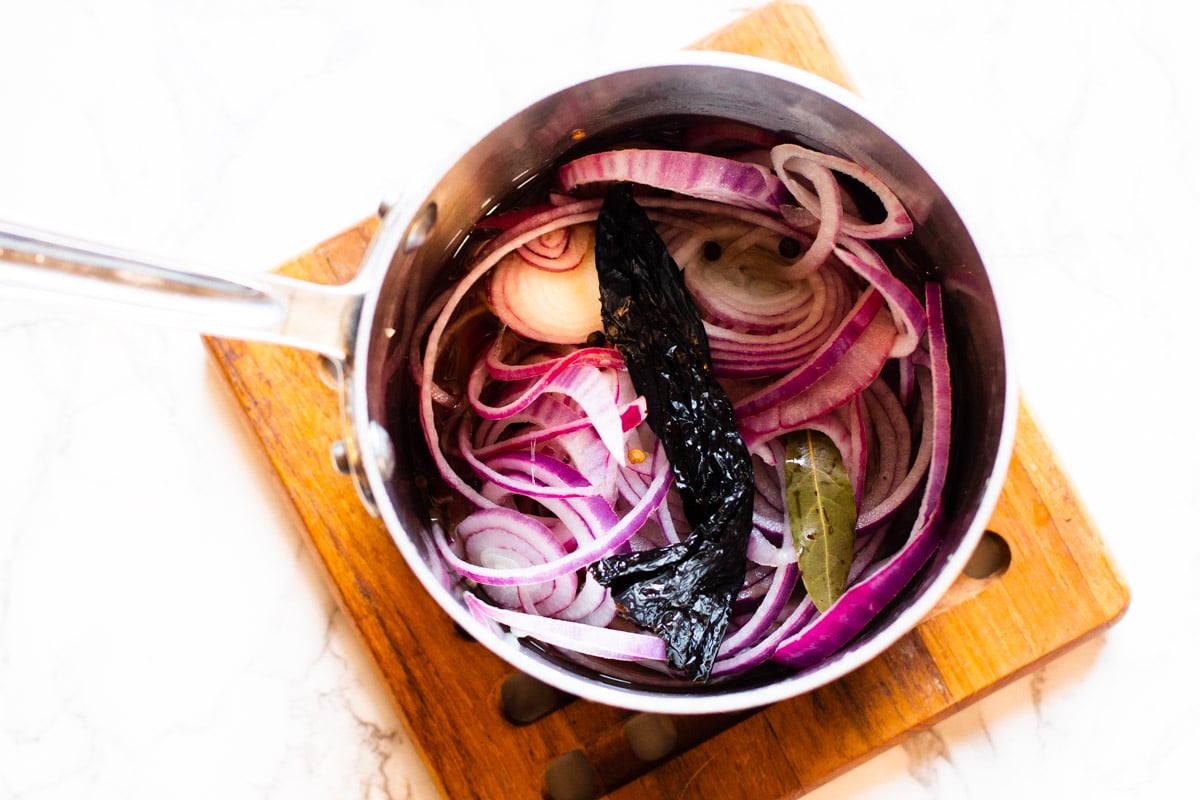
    • Simmer the pickling mixture. In a small non-reactive saucepan, heat the vinegar, sugar, salt, seasonings and chile pepper until boiling.
    • Add the onion slices and lower heat, then simmer for 30 seconds, stirring to make sure all of the onions get coated with flavor.
    • Remove from heat and let the mixture cool completely. I set the timer for 30 minutes to cool and let the flavors marry.
    • Store or Serve: You can either use the quick pickled onions immediately, or store in an airtight container in the refrigerator.
    Quick Mexican pickled red onions with a silver appetizer fork and served in a scalloped white bowl.

    FAQ’s And Tips

    Which Vinegar Is Best For Mexican Pickled Onions?

    I have been trained and by habit have always used white vinegar for any pickling project. You most certainly can substitute cider vinegar or even red wine vinegar for this recipe. It simply will bring a little more sweetness to the overall flavor.

    Do You Have To Boil The Vinegar When Pickling?

    Yes please. Boiling the vinegar along with the spice and seasoning ingredients will insure that all flavors meld together for a superior end product.

    Can I Make Pickled Red Onions Spicier?

    The type of dried chile pepper you choose will dictate how spicy the pickled red onions are. A Guajillo pepper, which are readily available in markets is a very mild pepper. An Ancho Pepper (dried poblano) will bring medium heat. Look for dried Pasilla Peppers for more heat. And sprinkling in a few red pepper flakes will warm things up nicely. Some slices of fresh Jalapeno Pepper works very well here and will add a pop of green color.

    Can I “Can” This PIckled Onions Recipe?

    No, this recipe is for quick pickled refrigerator onions and not designed for a water bath method. Take a look at this recipe for canned pickled red onions.

    Are Red Onions Healthy?

    Yes. Red onions are rich in antioxidants, vitamins and minerals. Full of fiber, they’ve been shown to boost health in many ways. Which may include fighting inflammation, boosting the immune system, as well as promoting healthy digestions. Learn more: (source) Healthier Steps.

    How To Store

    • Refrigerator: Once cooled, transfer onions to a clean airtight glass jar. A Mason jar works very well here. Make sure the onions are fully submerged in the pickling liquid. They’ll last for up to a month.
    • Freezer: Pickled onions simply don’t freeze well.

    What To Do with Mexican Pickled Onions

    Once you get in the habit of keeping a jar of these pickled onions in the refrigerator, you’ve got a fiesta at your fingertips.

    • Enchilada Burritos. Mexican Onions are a perfect topping for these earthy flavored beef and bean burritos.
    • Adobo Grilled Shrimp Tostadas, Seafood tostadas are begging for these onions.
    • Saucy Chicken Soft Tacos. Pickled red onions are a great topping for this tomato sauce version of soft chicken tacos.
    • Next time you make a big pot of beans, like this recipe for Cowboy Beans, don’t forget a topping of these onions. It’s crazy delicious.
    • Pickled red onions for tacos are a “must” for Pork Carnitas Tacos. Sprinkle a couple of pickled red onions over your tender pork tacos for an exciting sweet salty flavor combination.
    • Don’t forget about burgers. Try them on these Jalapeno Steak Sauce Burgers.
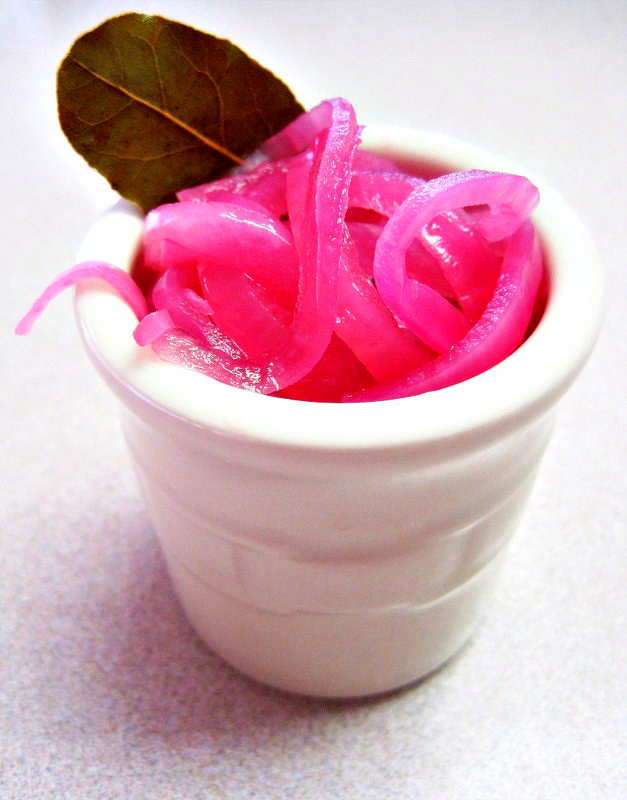
    Pickled Red Onions in a white crock jar with a bay leaf

    The quick pickling process transforms red onions into a culinary delight.

    I hope you give this recipe for Mexican onions a try. They will most certainly elevate your Mexican food recipes.

    More Pickling Recipes To Try

    • Don’t miss my family recipe for Pickled Beets.
    • Quick Spicy Pickles Made From Store Bought Dills. A wildly popular recipe on my site.
    • Ever try Pickled Pineapple? It elevates pork tenderloin from good to great.
    • Pickled Strawberries are another favorite topping for pork.

    And if you are a red onion fans like us, don’t miss this recipe for Red Onion Chutney. Your next burger will thank you.

    And don’t miss my Sauces, Dressing and Vinaigrettes category. You’ll find lots of great recipes to spice up your main courses. Including the most popular on my site for this New Mexico Style Red Chile Sauce. A drizzle will elevate everything from tacos, burritos, eggs and more.

    If you liked this recipe, please leave a star ⭐⭐⭐⭐⭐ rating in the recipe card below and leave a comment. I always appreciate your feedback and hearing how everything went.

    And, don’t forget to subscribe to my newsletter for more delicious recipes and cooking tips. Make it a delicious day … every day.

    Pickled Red Onions in a white crock jar with a bay leaf
    Print Recipe
    5 from 4 votes

    30 Minute Mexican Pickled Onions

    Simple recipe for quick pickled red onions. Tart, sweet, a little heat and a whole lot of personality. Pickled red onions are a great topping for a taco, burrito, enchilada or even a burger.
    Prep Time10 minutes mins
    Cook Time1 minute min
    Pickling time30 minutes mins
    Total Time41 minutes mins
    Course: Condiment
    Cuisine: Mexican
    Servings: 8
    Calories: 224kcal
    Author: Lea Ann Brown

    Ingredients

    • ¾ Cup white vinegar or apple cider or red wine vinegar
    • 3 tablespoons sugar
    • pinch of salt
    • 1 bay leaf
    • 5 allspice berries
    • 5 whole cloves
    • 1 small dried New Mexico Chile pepper Guajillo works good here
    • 1 large red onion peeled, and thinly sliced into rings

    Instructions

    • In a small non-reactive saucepan, heat the vinegar, sugar, salt, seasonings and chile until boiling.
    • Add the onion slices and lower heat, then simmer for 30 seconds. Remove from heat and let sit and cool at room temperature for 30 minutes.
    • Transfer the onions and the liquid into a covered container and refrigerate. These should keep for about a month in the refrigerator.

    Notes

    If you don’t want whole spices floating around in your pickled onions, use cheese cloth to tied with twine to secure the cloves, allspice berries and bay leaf. Don’t remove this spice packet during storage. It will continue to add flavor to the onions.
    I have been trained and by habit have always used white vinegar for any pickling project. You most certainly can substitute cider vinegar or even red wine vinegar for this recipe. It simply will bring a little more sweetness to the overall flavor.
    Choosing a dried chile pepper: The type of dried chile pepper you choose will dictate how spicy the pickled red onions are. A Guajillo pepper, which are readily available in markets is a very mild spiced pepper. An ancho pepper (dried poblano) will bring medium heat. Look for dried pasilla peppers for more heat. And sprinkling in a few red pepper flakes will warm things up nicely.

    Nutrition

    Calories: 224kcal | Carbohydrates: 48g | Protein: 1g | Fat: 1g | Saturated Fat: 1g | Sodium: 12mg | Potassium: 161mg | Fiber: 2g | Sugar: 41g | Vitamin A: 132IU | Vitamin C: 8mg | Calcium: 37mg | Iron: 1mg

    Mexican Pickled Onions ….They’re What’s for a Mexican Dinner.

    Mexican Salmon with Salsa Verde Sauce

    November 13, 2020 By Lea Ann Brown 2 Comments

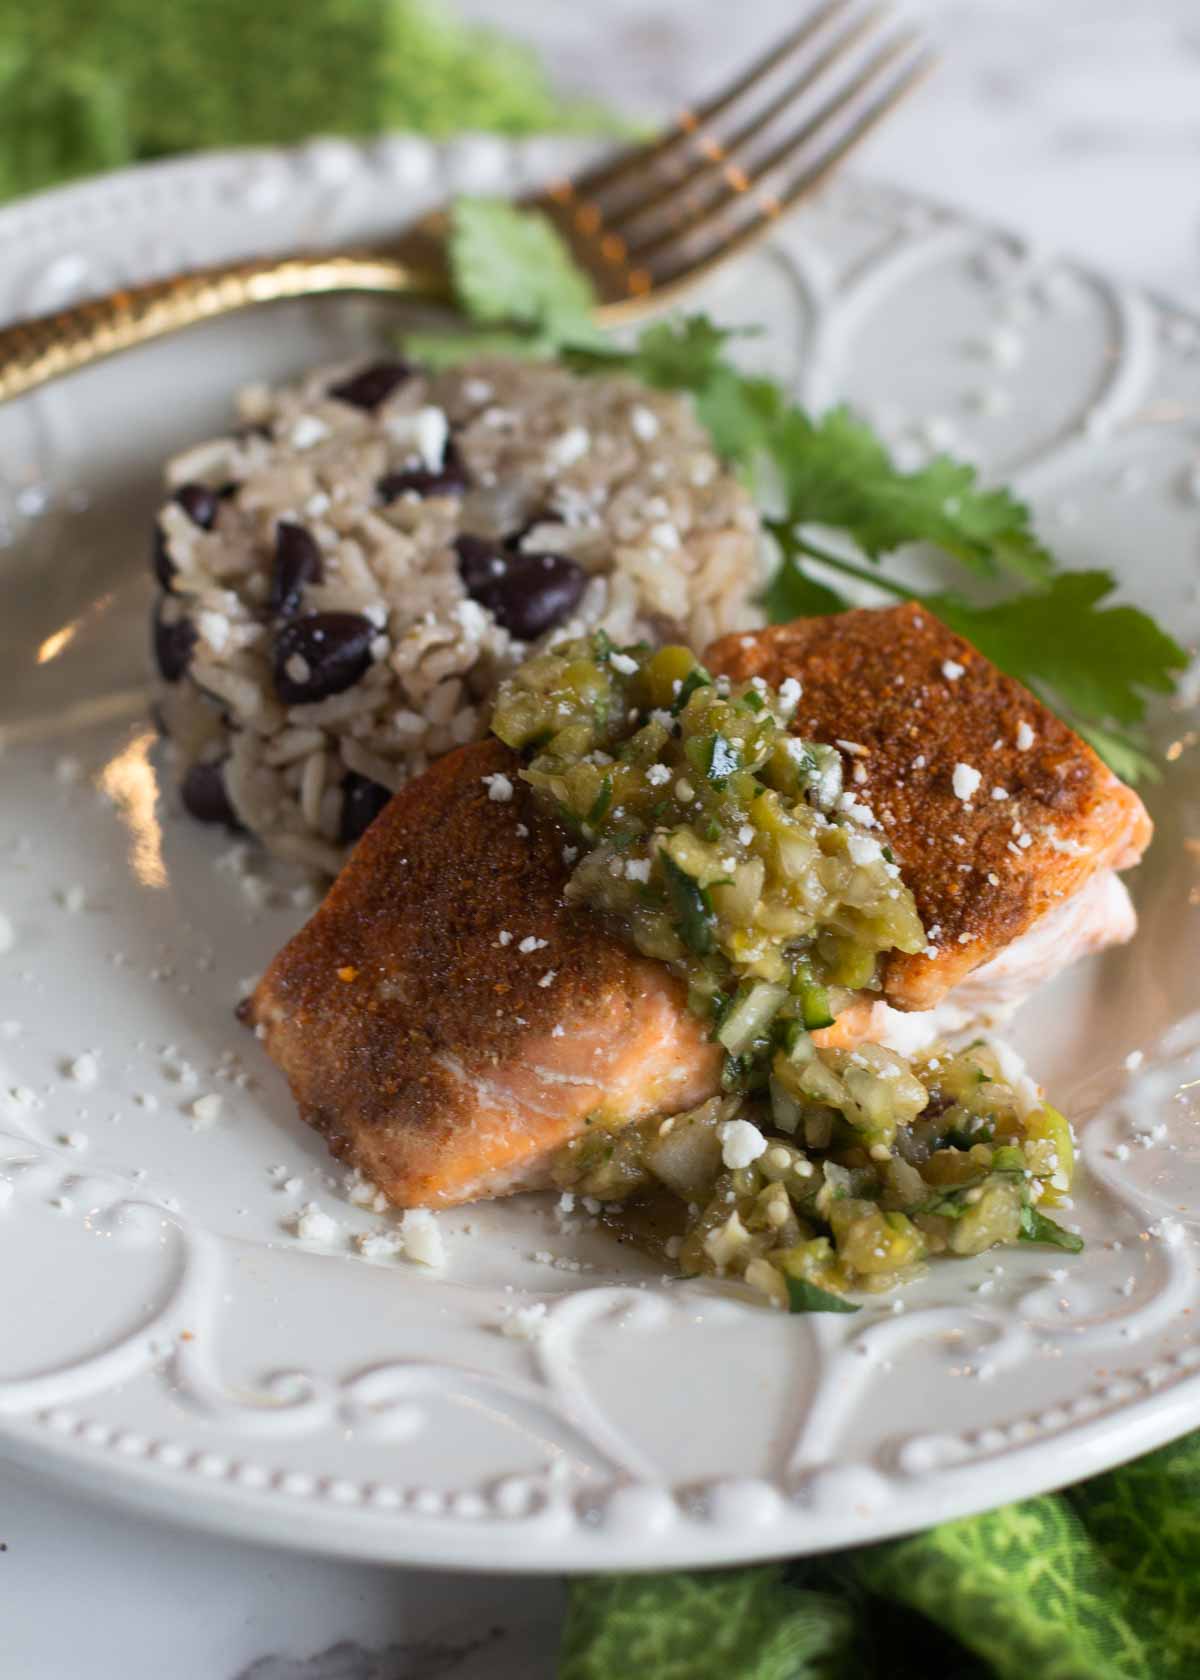
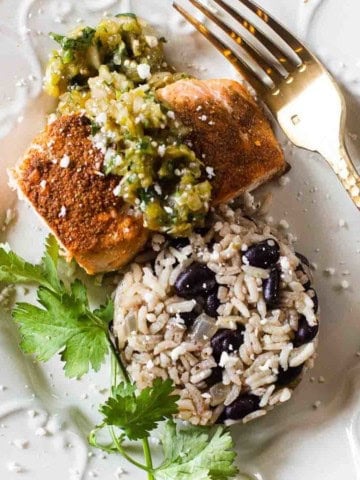
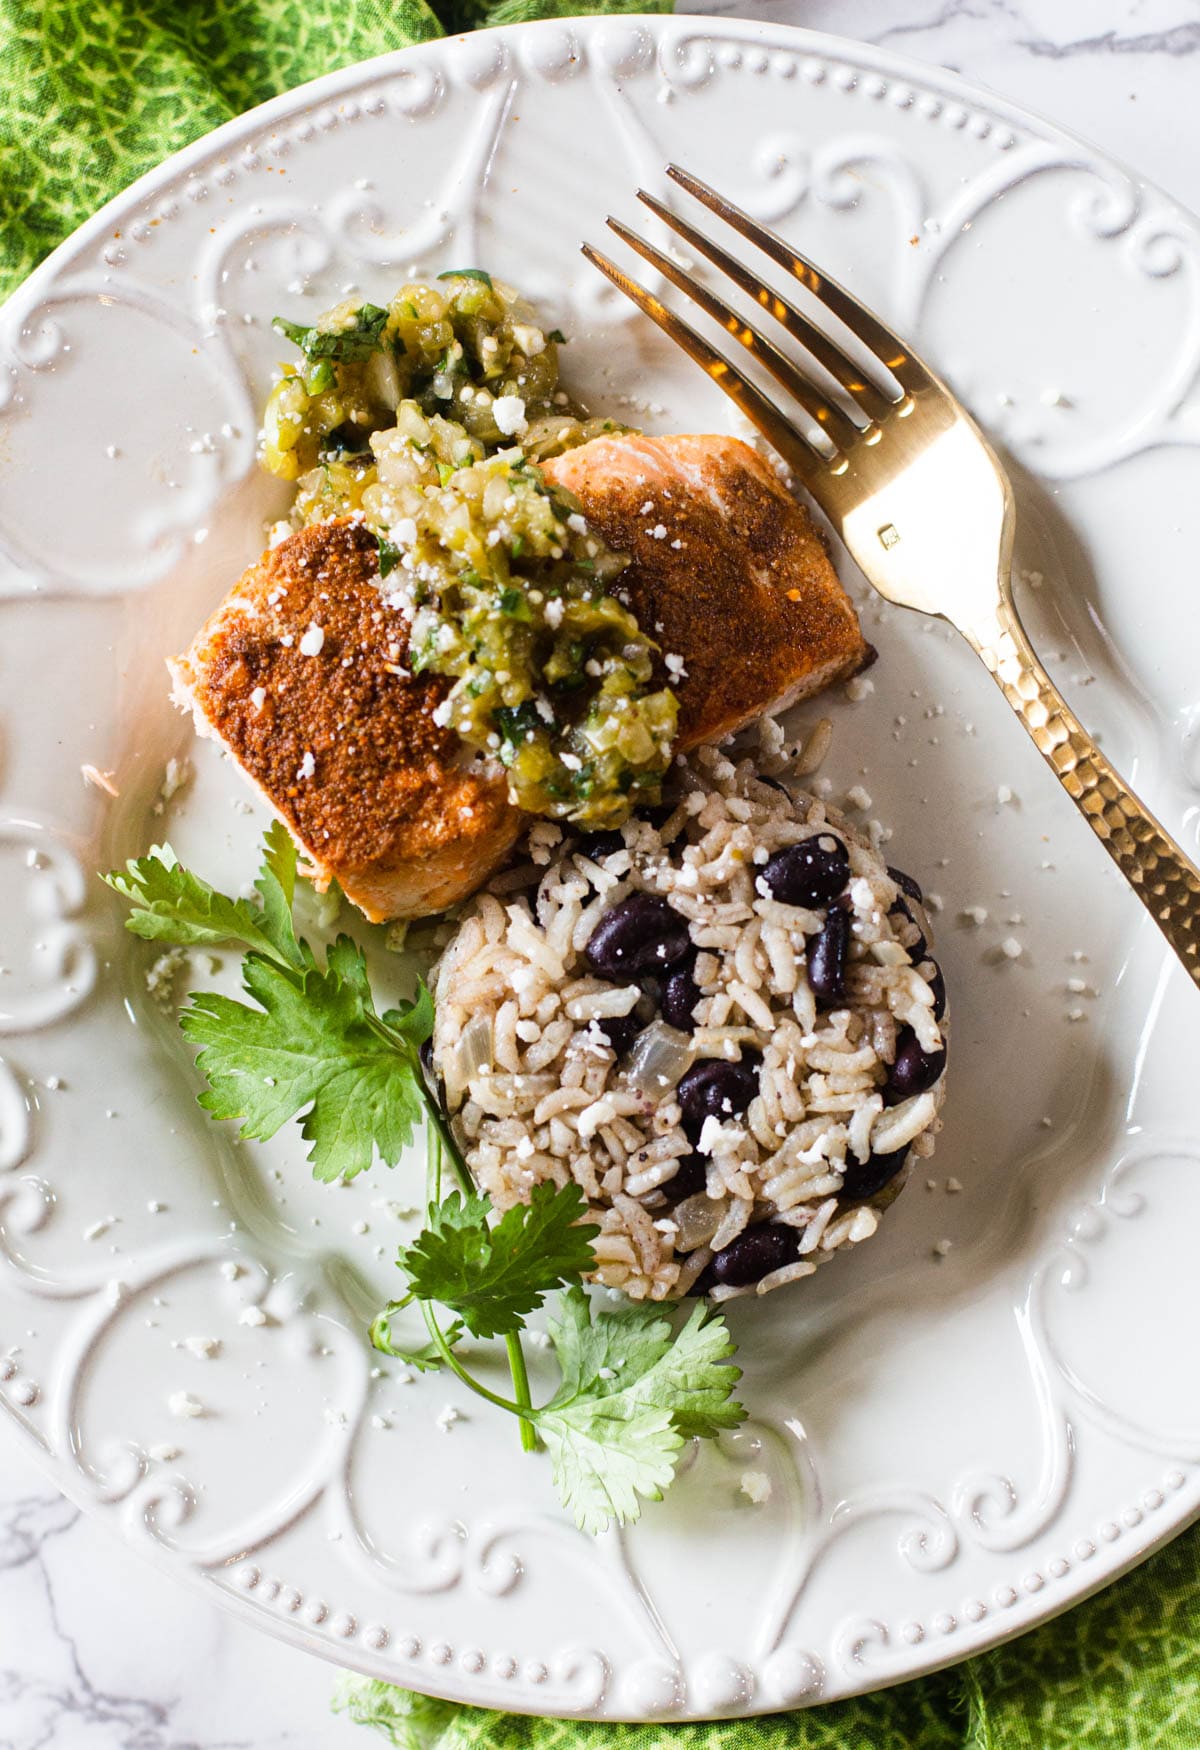
    Mexican salmon with salsa served with rice and beans.

    Tender flaky oven roasted Mexican Salmon dusted with cumin and chile powder and topped with refreshing tomatillo salsa verde. An exciting and nutritious Mexican style salmon entree that’s ready in about 20 minutes = weeknight perfect.

    Salmon dinners can be so easy and perfect for weeknight dinners. Take a look at this recipe for Caper Sauce for Salmon. Fresh, creamy and easy.

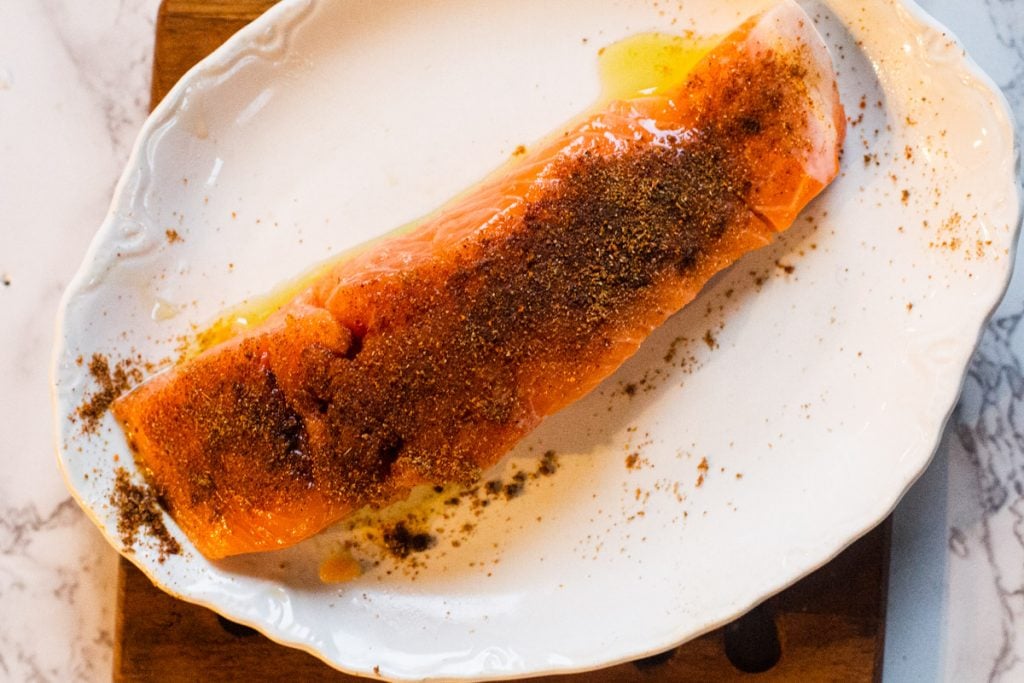
    Cumin chile powder rubbed salmon fillet with black bean and chile rice

    What You Can Expect From This Recipe

    Combining two of your favorite things, salmon and salsa verde proved to be a a winning dinner idea.

    Tender sweet oven-roasted salmon gets a kick of spice with a cumin, coriander, chile powder seasoning combo. And the tangy refreshing topping of Tomatillo Salsa makes this a delight on the palate.

    A little bit spicy, a little bit tangy this Mexican style salmon with salsa will win your heart.

    The end result is robust, exciting and easy salmon dinner recipe.

    If you’re not familiar with tomatillo salsa, it’s simply a fresh salsa with a different flavor profile than a tomato based salsa.

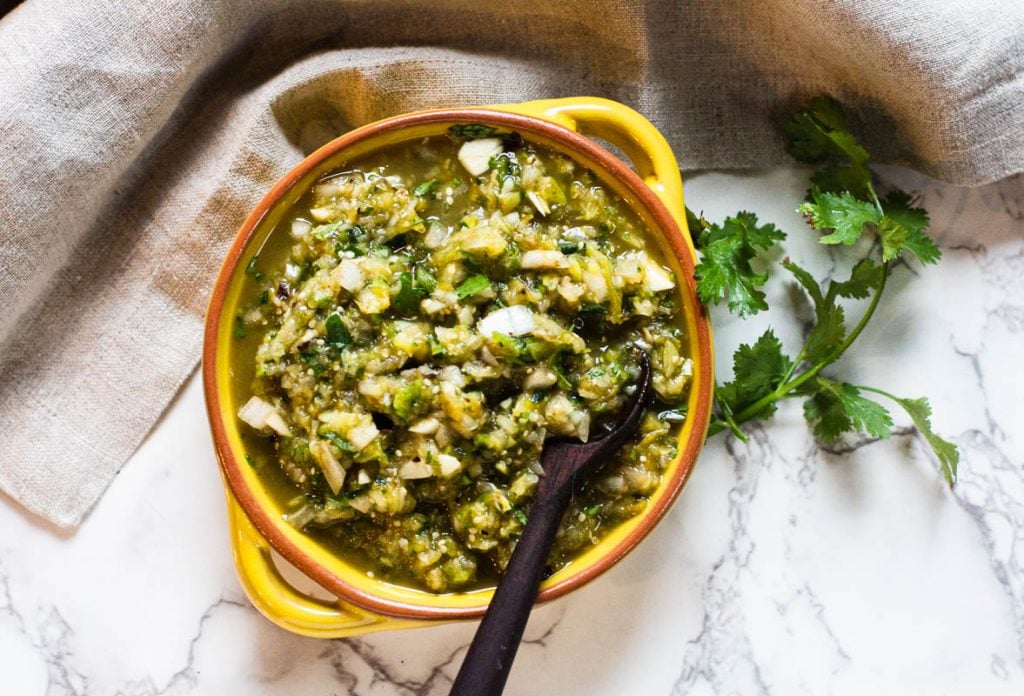
    Salsa verde starts with roasted tomatillos and from there you’ll find the traditional salsa ingredients like onion, jalapeno, etc. You end up with a tangy, sweet, savory salsa that’s truly exciting in flavor.It was delicious on top of this Mexican Salmon entree.

    Not to mention a super healthy Mexican seafood recipe. Salmon is full of Omega 3 fatty acids and the health benefits of incorporating salmon into your diet are important. I like this article from Healthline about the Impressive Healthy Benefits of Salmon.

    The pre-prep for the salmon comes together in literally just a couple of minutes. Then it’s off to the the oven for a 20 minute roast.

    Let’s take a look:

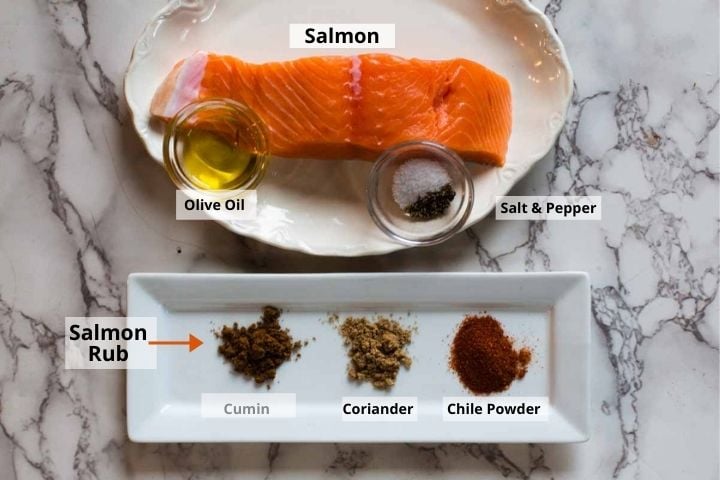
    Ingredients for Salmon with Salsa

    Ingredients for Mexican Salmon
    • Salmon Fillets: Salmon fillets (rather than steaks) are the most commonly used cut of salmon. A fillet can be a small section of a boned side, intended to feed two people, or an entire boned side to feed more.
    • Cumin and Coriander: Seem to go hand in hand in many Mexican recipes. They compliment each other, as cumin is earthy and smoky. And coriander provides earthiness along with brightness and sweet flavors.
    • Chile Powder: Brings the heat to the overall flavor. I always have a stockpile of New Mexico chile powder. Chimayo being my preference. If you don’t have New Mexico chile powder on hand, Ancho is a good substitute. Don’t use chili (with an i) powder, as that’s a blend of many spices and is used to season chili soup. That spice blend would totally overwhelm this recipe.

    How to make Mexican Salmon With Salsa

    This recipe is so very simple to make. Once you oil and season the salmon fillet, you’re just 15 – 20 minutes away from serving.

    • Using a silicone basting brush, spread the olive oil over the flesh part of the salmon fillets.
    • Mix the spices together in a small bowl.
    • Using your hand, press (don’t rub) the spices over the top of the salmon.
    • Roast the salmon in a preheated 400 degree oven for 15 – 20 minutes or until the salmon starts to flake. Tip: Use the back of a fork to press on the salmon, if the meat spreads apart easily, it’s done.
    • Serve immediately with your favorite Mexican side dish. I like rice with black beans or Mexican Toasted Green Rice.
    • Sprinkle with Mexican Cotija Cheese for garnish.
    • A wedge of Avocado is always a good garnish for anything Mexican food.

    PRO TIP if you start to see albumin seeping out of the flakes of fish, that means the salmon is done. Albumin is the white protein that exists in the raw salmon fillet. When the salmon starts to cook, the albumin becomes semi-solid and turns white. Once you start to see albumen it’s time to remove it from the heat. Too much albumin will indicate that the fish will be dry.

    Mexican Salmon FAQ’s

    Can I Grill This Salmon?

    Mexican salmon can also be grilled as opposed to oven roasted. Just coat the grates with oil and cook with the grill temperature between 350 – 400 degrees. You don’t need to turn the salmon just close the lid and let it cook, checking for flareups every once in a while. The salmon will slide off the skin and you’ve got a delightful Mexican Grilled Salmon dinner. Add a few green onions or knob onions to the grill. They’re a great side kick for grilled salmon.
    Can I Make This Ahead?

    Any salmon entree is best enjoyed as soon as it’s cooked. It’s somewhat finicky to re-heat without over cooking or without compromising the moist texture of salmon.

    Can I Use A Tomato Based Salsa?

    Absolutely yes. Use your favorite bottled salsa or homemade like this Essential Restaurant Style Salsa. Any salsa will make a tasty salmon with salsa dinner.
    Variations:

    For a Southwestern flavor profile, switch out the Salsa Verde with my recipe for Black Bean Corn Salsa Dip.

    Storage

    If you have any leftovers, place salmon is an air tight container in the refrigerator. It will keep for 2 – 3 days. Tip: Use any leftover cooked salmon on a tossed salad.

    Recipe For Mexican Salmon With Salsa Verde

    Salmon fillet roasted with Mexican spices and served with black beans and rice.

    Explore More Easy Oven Salmon Recipes

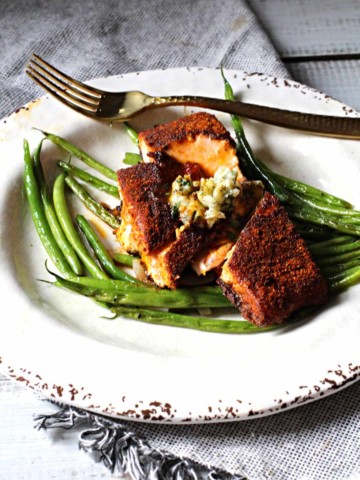
    • salmon rubbed with spices served over green beans
      Southwestern Dry Salmon Rub for Grilled Salmon
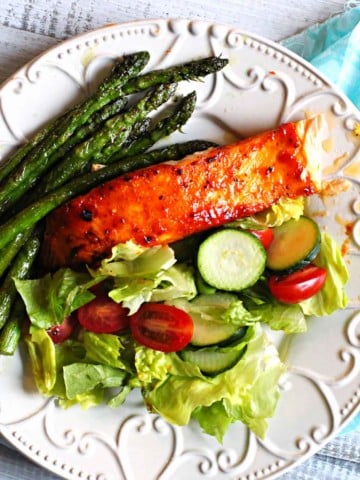
    • Palisade Peach Salmon Baked and Glazed
    • Glazed Maple Syrup Salmon served over yellow rice.
      Oven Glazed Mustard Maple Syrup Salmon
    • A salmon fillet cooked in parchment paper with Southwestern spices.
      Southwestern Salmon en Papillote

    And if you’re looking for more seafood recipes, don’t miss my Seafood Category. You’l find lots of great recipe ideas, including the most popular on my site for Heavenly Halibut, broiled halibut fillets.

    If you liked this recipe, please leave a star ⭐⭐⭐⭐⭐ rating in the recipe card below and leave a comment. I always appreciate your feedback and hearing how everything went.

    And, don’t forget to subscribe to my newsletter for more delicious recipes and cooking tips. Make it a delicious day … every day.

    Mexican salmon with salsa served with rice and beans.
    Print Recipe
    5 from 1 vote

    Mexican Salmon with Salsa Verde Sauce

    Tender flaky oven roasted Salmon dusted with cumin and chile powder and topped with refreshing tomatillo salsa. An exciting and nutritious Mexican Salmon entree that's ready in about 20 minutes = weeknight perfect.
    Prep Time2 minutes mins
    Cook Time20 minutes mins
    Total Time22 minutes mins
    Course: Main Course Seafood
    Cuisine: Mexican
    Diet: Gluten Free
    Servings: 8
    Calories: 152kcal
    Author: Lea Ann Brown

    Ingredients

    • 4 Salmon Fillets rinsed, patted dry
    • 1 Tablespoons olive oil
    • Salt and pepper to taste
    • 1 teaspoon ground cumin
    • 1 teaspoon ground coriander
    • 1 teaspoon New Mexico Chile Powder or ancho chile powder
    • 1 Cup Tomatillo Salsa

    Instructions

    • Preheat oven to 400 degrees
    • Place the salmon fillets, skin side down on a baking sheet that's been sprayed with PAM. Using a silicone pastry brush, brush salmon fillet flesh with olive oil.
    • In a small bowl, combine the cumin, coriander, chile powder and salt and pepper.
    • Pat (don't rub)the spice mix on top of the flesh of the salmon.
    • Bake the salmon until the flesh starts to flake. To check doneness, use the back of a fork to press on the salmon. If the salmon starts to flake its done. If you start to see albumen (the white liquid in the salmon) the salmon is cooked,
    • Divide the salmon among 4 dinner plates and top each with a spoonful of Tomatillo Salsa.

    Notes

    Depending on how heavy the side dishes are, this recipe will feed 8 people. Just divide each fillet into two portions.
    PRO TIP if you start to see albumin seeping out of the flakes of fish, that means the salmon is done. Albumin is the white protein that exists in the raw salmon fillet. When the salmon starts to cook, the albumin becomes semi-solid and turns white. Once you start to see albumen it’s time to remove it from the heat. Too much albumin will indicate that the fish will be dry.

    Nutrition

    Calories: 152kcal | Carbohydrates: 2g | Protein: 17g | Fat: 8g | Saturated Fat: 1g | Cholesterol: 47mg | Sodium: 245mg | Potassium: 483mg | Fiber: 1g | Sugar: 2g | Vitamin A: 285IU | Vitamin C: 1mg | Calcium: 14mg | Iron: 1mg

    Mexican Salmon …. It’s What’s For Dinner

    « Previous Page
    Next Page »

    I'm Lea Ann

    Welcome to my Colorado kitchen. If you're a fan of rustic homestyle cuisine, you've come to the right place. I'm a Culinary School Grad with a passion to inspire you to cook as often as you can. I offer reliable, approachable and easy to follow recipes. So grab that skillet and let's cook.

    More about me

    Soup and Stew Recipes

    • Southwest chicken soup with hominy and potatoes.
      Sopa Ranchera, Southwest Chicken Soup
    • Creamy chicken tortilla soup with rotel tomatoes.
      Southwestern Creamy Chicken Tortilla Soup
    • Cowboy chili garnished with grated cheese and jalapeno pepers.
      New Mexico Style Cowboy Chili
    • Ground chicken chile with white beans.
      Giada’s Ground Chicken Chili with White Beans
    • Beef stew with mushrooms served in a skillet.
      Beef Stew With Mushrooms – Crock Pot Method
    • 7-can taco soup with ranch dressing.
      Original 7 Can Taco Soup with Ranch Dressing

    Reader Favorites

    • Super Moist Cheesy Cornbread with Creamed Corn
    • Flemings steakhouse macaroni and cheese in a white bowl.
      Flemings Steakhouse Mac and Cheese
    • A slice of Layered Mexican Casserole with ground beef and corn tortillas.
      Mexican Casserole with Ground Beef and Corn Tortillas
    • Beef Tagliata, thin sliced flank steak served over arugula and cherry tomatoes.
      Beef Tagliata (Italian Steak)
    • Ham and cheese quesadilla made with corn tortillas and topped with a fried egg.
      Crispy Ham and Cheese Corn Tortilla Quesadillas
    • Spinach chicken mushroom skillet dinner.
      Chicken Mushroom and Spinach Skillet

    Footer

    • Contact
    • About
    • Privacy Policy
    • Accessibility Statement
    • ↑ back to top

    Copyright © 2024 Cooking on the Ranch • Powered by Feast+

    Rate This Recipe

    Your vote:


    A rating is required
    A name is required
    An email is required