Cooking On The Ranch

  • Home
  • About
  • Recipe Roundup
  • Contact Me
  • Join Community
menu icon
go to homepage
  • Home
  • Soups and Stews
  • About
  • Recipes
  • Contact Me
    • Facebook
    • Instagram
    • Pinterest
  • search icon
    Homepage link
    • Home
    • Soups and Stews
    • About
    • Recipes
    • Contact Me
    • Facebook
    • Instagram
    • Pinterest
  • ×
    Home

    Smoky Dutch Oven Tri-Tip Tacos

    April 16, 2022 By Lea Ann Brown 3 Comments

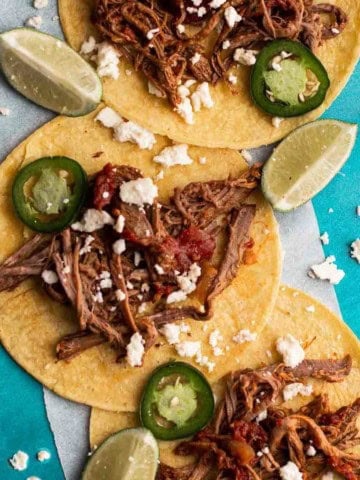
    Tri-tip tacos served on corn tortillas.

    If there's one thing I've learned from cooking Mexican and Southwest food for years, it's that bold flavor doesn't come from piling things on. It comes from doing a few things really well. These Dutch Oven Tri-Tip Tacos are exactly that. This classic Mexican and Southwestern recipe features beef, slow-cooked with smoky chipotle peppers in adobo, tucked into warm tortillas and finished with fresh, bright toppings.
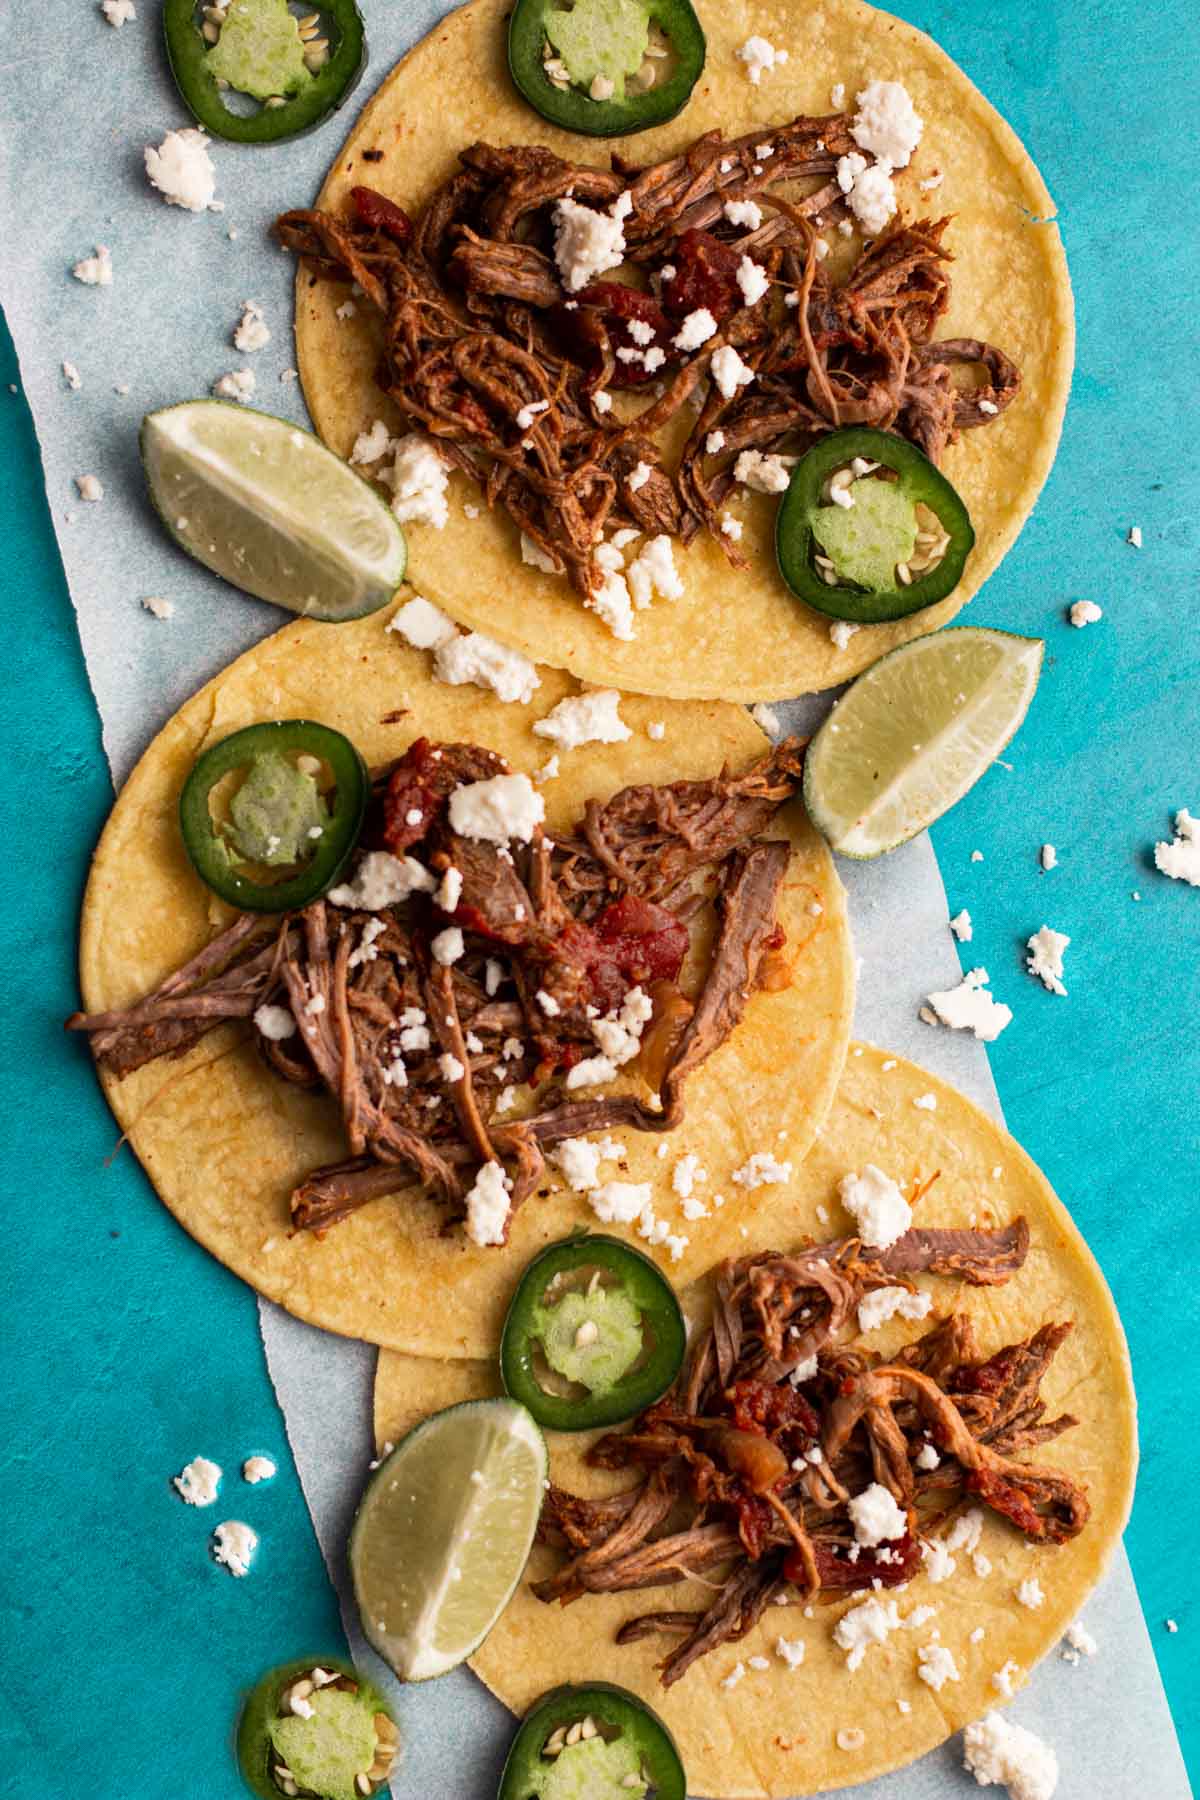
    3 tri-tip tacos garnished with jalapeno peppers, lime wedges and cotija cheese.

    What Are Dutch Oven Tri-Tip Tacos?

    These are beef tacos with big personality. Big flavor. Real flavor. Tri-tip gets seared, then slow-cooked in a Dutch oven with chipotle peppers in adobo until the meat relaxes and soaks up all that smoky heat. You end up with tacos with big beefy Southwestern flavor. Cozy and a little wild.

    Why Tri-Tip Works for Tacos

    A tri-tip roast stays beefy with flavor and meaty in texture. It's a great cut for tender texture and it shreds well without turning mushy. Perfect for piling on top of a warm taco shell.

    What Makes These Tacos Smoky?

    Chipotle peppers in adobo. That's the whole trick. Dried, smoked jalapeños packed in a tangy, brick-red sauce. One whiff and you know what you're in for. Smoky, warm, a little sweet with true warm smoky flavor. That’s why we love chile forward Mexican Recipes like this one.

    Why Cook Tri-Tip in a Dutch Oven?

    A Dutch oven lets you sear, braise, and it holds heat like a champ to infuse flavor. One pot and no drama. I've cooked tri-tip every which way, and this method keeps the meat juicy without babysitting it. And I like a Dutch oven much better than a slow cooker for this recipe. A slow cooker can cook the meat “too wet” to where it turns gray and mushy. Using a Dutch Oven provides just enough moisture to infuse the rich flavors with the meat.

    This is the kind of taco that lives comfortably in the Southwest kitchen. Rustic. Beef-forward. A little smoky, a little spicy, and completely unfussy. These tacos are about understanding how heat, smoke, and time work together, the same way they've always worked in Mexican and Southwestern cooking. Honestly, once you taste tri-tip cooked this way, it's hard to go back.

    Table of contents

    • What Are Dutch Oven Tri-Tip Tacos?
    • Key Ingredients For Smoky Tri-Tip Tacos
    • How To Make Dutch Oven Tri-Tip Tacos
    • Toppings For Tri-tip Tacos
      • Sauces That Work Well With Chipotle Adobo
    • What To Serve Them With
    • Sides for Tri-Tip Tacos:
      • How Spicy Are Chipotle Adobo Tacos?
    • Make-Ahead, Storage, and Reheating Tips
    • FAQ’s
    • Recipe for Dutch Oven Tri-Tip Tacos
    • Explore More Red Chile Forward Southwestern Mexican Recipes

    Key Ingredients For Smoky Tri-Tip Tacos
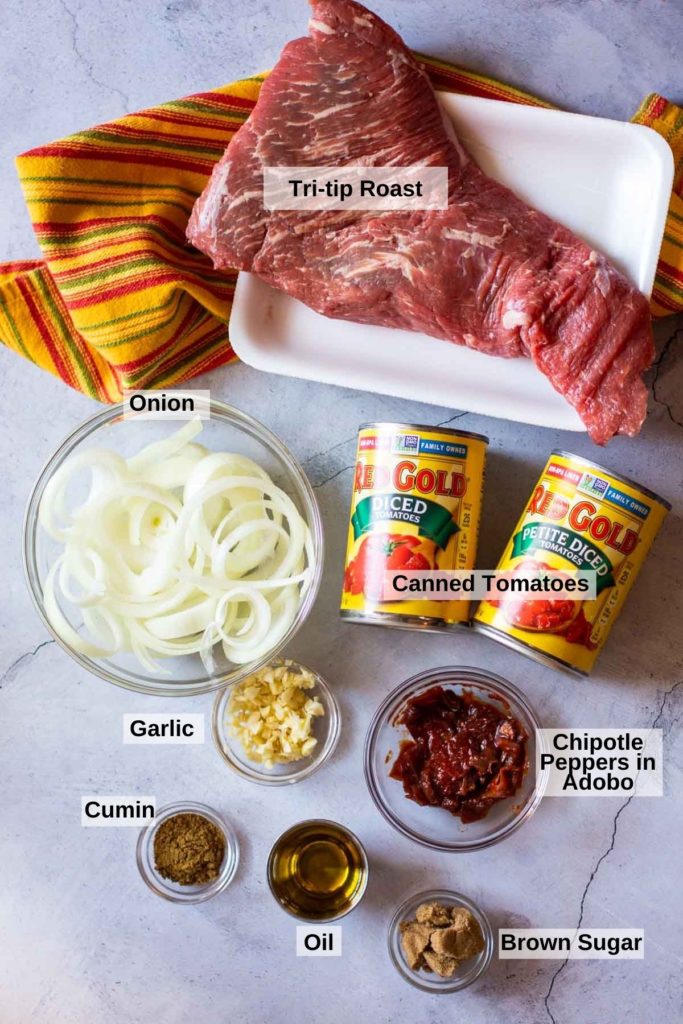
    Ingredients to make tri-tip tacos.
    • A tri-tip roast. Most tri-tips weigh between 1 ½ pounds and 2 ½ pounds. Any weight between this range will work fine for this recipe, but I’d choose a roast on the heavier side. Look for good marbling and even thickness.
    • Canned Tomatoes: Chopped. I like Red Gold petite chopped. They’re a smaller dice and will break down easier during the cooking process.
    • Chipotle Peppers in Adobo: They're smoky first, spicy second. That's important. You can dial the heat up or down just by using more sauce or fewer peppers. Honestly, the sauce alone already brings plenty of flavor.
    • Spices That Compliment Chipotle Smoke: Cumin, garlic and brown sugar.

    How To Make Dutch Oven Tri-Tip Tacos

    It truly doesn’t get any easier and more straight forward than this. Let’s get started.
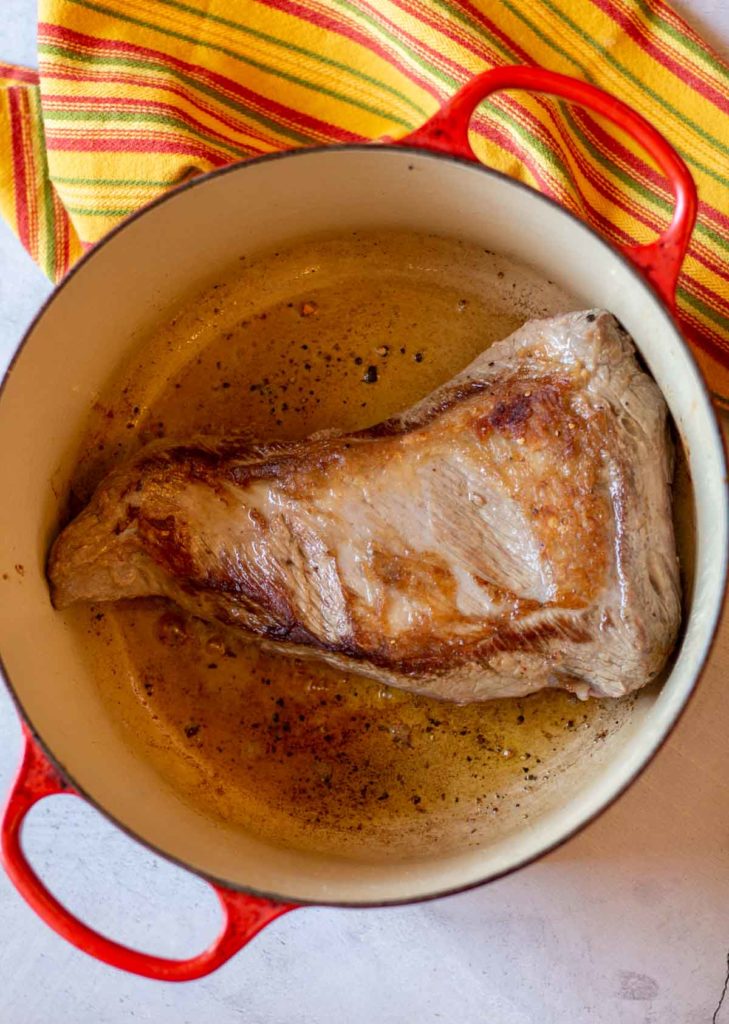
    Browning a tri-tip roast in a dutch oven.
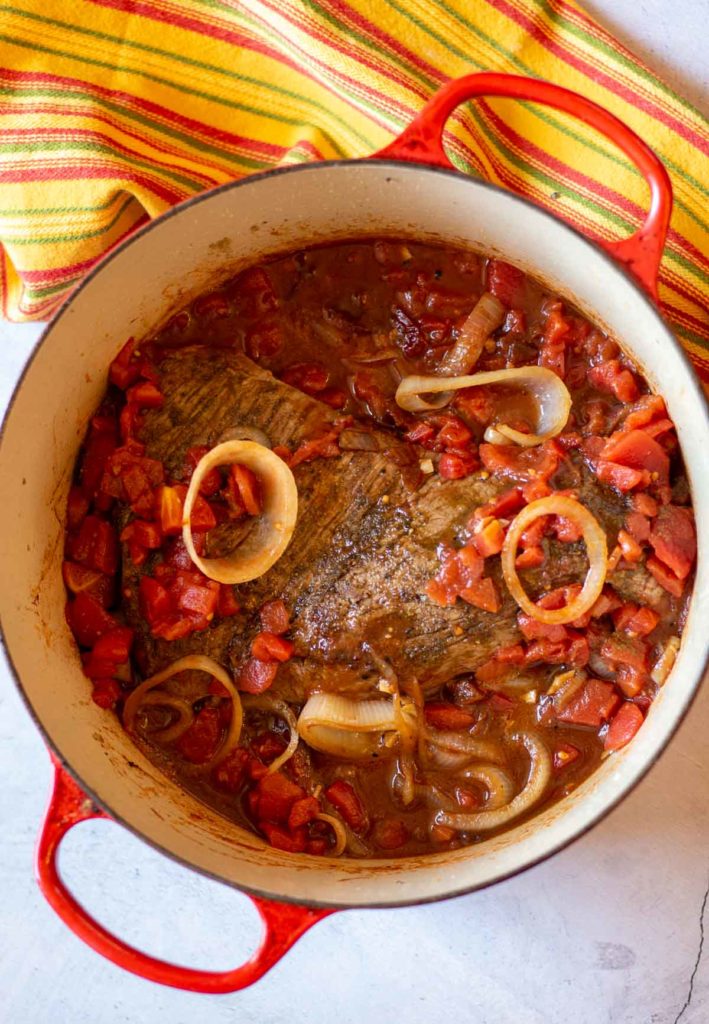
    A 6-quart dutch oven with a tri-tip roast and ingredients to bake for tri-tip tacos.
    1. Step 1: Heat a large Dutch oven over medium high heat. Once the pan is hot, add oil. Season the tri tip roast on both sides with Kosher salt (salt that tastes like salt), and ground black pepper. You can even add some meat seasoning like Montreal Steak Seasoning. Once the oil is hot, add the roast and sear on both sides. About 5 minutes per side. Remove roast to a plate.
    2. Step 2: Add the sliced onion to the pan and cook stirring for about 2 minutes. Remove the pan from the heat and add chopped tomatoes, sliced onions and seasonings. Nestle and place tri-tip roast into the ingredients.
    3. Step 3: Cover and cook in a 325 degree oven for 3 hours.
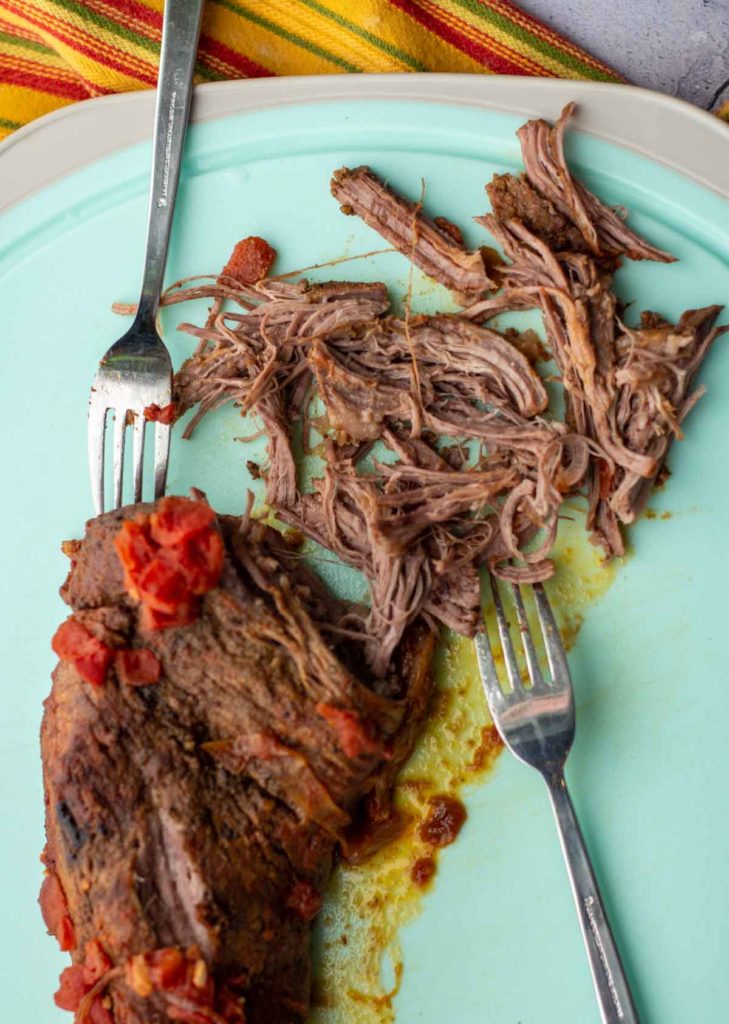
    Shredding a tri-tip roast on a cutting board using two forks.
    Crockpot Shredded Beef for tacos
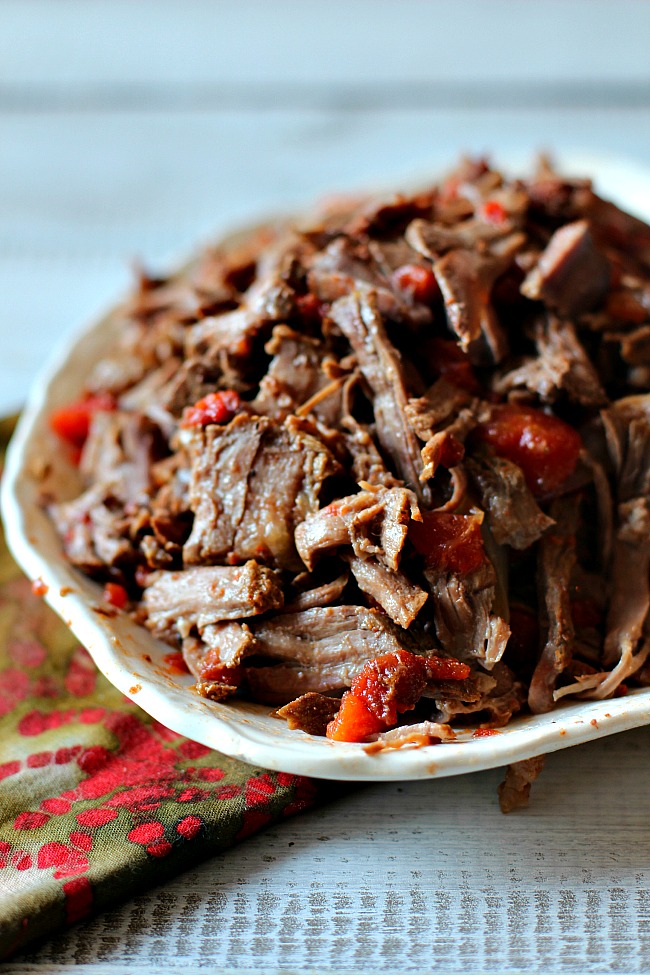
    1. Once cooked, remove the tri-tip to a cutting board. Once cool enough to handle, use two forks to shred the meat.
    2. Return the shredded meat back to the cooking liquid in the Dutch oven and stir to coat. You’re ready to build those tacos.

    Toppings For Tri-tip Tacos
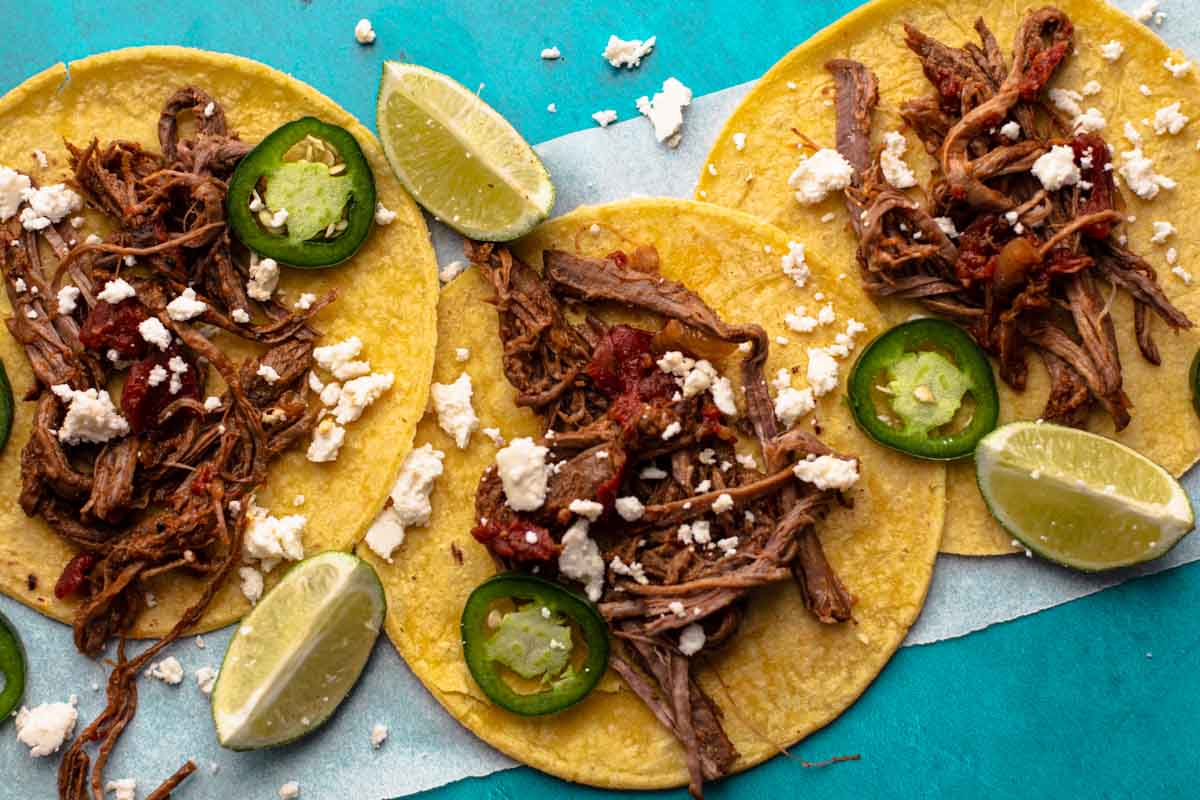
    Tri-tip tacos on corn tortillas topped with cotija cheese, sliced jalapeno pepper and lime wedges.

    Once this meat is cooled and the beef shredded, the meat is so flavorful that I like to keep the toppings simple with sliced fresh jalapeno pepper, lime wedges to squeeze to brighten flavors. Cotija cheese, a dry Mexican crumbling cheese with a wonderfully tangy salty flavor works very well for these tri-tip tacos.

    But if you want more on those tacos, here are some more taco topping ideas that pair well.

    • A crunch of thin shredded cabbage.
    • A slice of avocado.
    • Guacamole. I like to spread a thin layer of guacamole on the tortilla before adding the beef.

    Sauces That Work Well With Chipotle Adobo

    Anything that’s cool and bright. Let the beef stay the star. Try a drizzle of Mexican Crema along with a spoonful of Salsa Verde. or try a dollop of Cilantro Lime Jalapeno Aioli.

    • Red Salsa. Be careful with adding a spoonful of salsa to these tacos. They are already tomato based, so don’t need much more.
    • A fresh Mango pico-de Gallo will bring a tropical flair.

    What To Serve Them With

    • Corn vs. Flour Tortillas: My preference is to use yellow corn tortillas, or New Mexico Blue Corn Tortillas. These two options bring true corn flavor to enhance the smoky beef. White corn tortillas are less sturdy, a little chalkier in flavor and may not hold up well with the heavy meat. You can also substitute small flour tortillas.

    Tip: You can’t just take soft corn tortillas out of the package and make a taco. You must warm the shells to be pliable. My preferred method is to dampen a clean dish towel by quickly running the towel under water from the faucet. Wrap a stack of corn tortillas into the damp towel. Place the package in a gallon zip lock bag. Don’t seal the bag. Place the tortillas in the microwave and heat for 3 minutes at 50% power. Remove from the microwave and let them steam in the bag for 2-3 more minutes. They’re ready.

    Sides for Tri-Tip Tacos:

    Refried Beans, a nice helping of Mexican Rice , or take a look at this Mexican Corn Salad or my Southwestern Salad tossed salad recipe..

    How Spicy Are Chipotle Adobo Tacos?

    Keeping with the amount suggested in this recipe, they're warm, not wild. Think cozy heat. Add more if you’re looking for spicier experience add more chipotle peppers. The actual peppers are where the heat lies, and the sauce brings the smoky flavor.

    Make-Ahead, Storage, and Reheating Tips

    • Make Ahead: The shredded beef for the tacos can be made ahead of time and actually get better with flavor. And I do this on purpose and for that reason. Store in the Dutch oven in the refrigerator for up to 3 days.
    • Reheating: Once ready to serve, warm the beef stove-top on medium low. You don’t want to re-cook it, just get it hot. When ready to serve, gather taco toppings, warm the corn tortillas and serve. I don’t like using a microwave here, it can make the beef leathery.
    • Freezer: Store any leftover shredded beef in freezer safe bags for up to three months. Be sure to label and date the bags. Let me meat thaw in the refrigerator overnight and then reheat.

    FAQ’s

    Can I Make Slow Cooker Tri-tip Tacos?

    You can, but I prefer the Dutch oven. Make sure you brown the tri-tip roast and then follow the instructions in the recipe card. Cook on low for 7 hours or until meat is tender enough to shred.

    Can This Be Made Stove-top Only?

    Yes, but watch the heat. Make sure you get a low heat that will simmer the meat low and slow without scorching.

    Can I Use A Different Cut Of Beef?

    Beef Roast: Substitute a 2 – 3 pound Beef Chuck Roast for the Tri-tip. A chuck roast will shred very well, but will contain more fat. You may want to trim some of the larger pieces of fat before cooking to avoid the tacos from being greasy.

    Are Chipotle Peppers in Adobo the Same As Chipotle Powder.

    Chipotle peppers are dried and smoked jalapeno peppers. Chipotle peppers in Adobo are dried and smoked jalapenos that are then packed in a tangy sauce which rehydrates them. It’s a wonderful product. Chipotle powder is a single ground chile powder product made from smoked and dried jalapeno peppers.

    Recipe for Dutch Oven Tri-Tip Tacos

    Roasted tri-tip is an unexpected choice for street-style tacos. And using your Dutch oven creates a hands off no-fuss meal. And surprisingly, a tri-tip makes really good pulled beef tacos.

    I hope you give this recipe a try with your favorite taco toppings. Such an easy recipe with big reward. A street taco to remember.

    And if you’re looking for more ways to use a tri-tip-roast, check out my recipe for Oven Roasted Tri-Tip. Slathered with Dijon Mustard, rosemary and thyme, it’s an easy recipe for Sunday dinner.

    Explore More Red Chile Forward Southwestern Mexican Recipes

    Rich with flavor and tradition, These classic Mexican and Southwestern recipes are a must try for any serious cook.
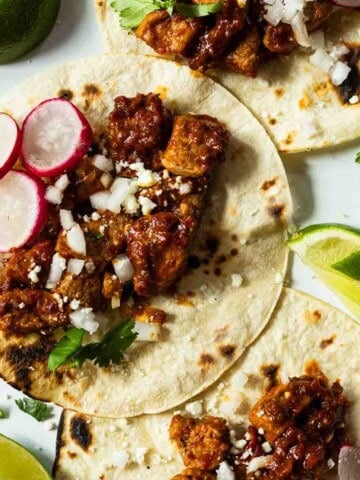
    • Pork tenderloin tacos with guajillo chile sauce.
      Pork Tenderloin Tacos In Chile Guajillo Red Sauce
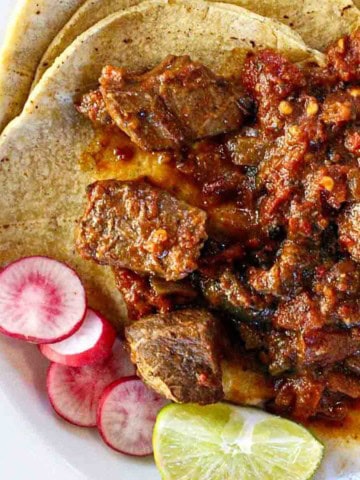
    • Mexican pot roast served over corn tortillas and garnished with sliced radishes and a wedge of lime.
      Mexican Pot Roast with Guajillo Chile Sauce (Carne Guisada)
    • Chile Rubbed Braised Beef Tacos with Red Cabbage Slaw
    • New Mexico Style Huevos Rancheros.
      New Mexico Style Huevos Rancheros in Red Chile Sauce

    Love homemade Mexican Flavors? Don’t miss this favorite for Authentic Carne Adovada, and my category for Mexican Southwest Recipes.

    If you liked this recipe, please leave a star ⭐⭐⭐⭐⭐ rating in the recipe card below and leave a comment. I always appreciate your feedback and hearing how everything went.

    And, don’t forget to subscribe to my newsletter for more delicious recipes and cooking tips. Make it a delicious day … every day.

    Tri-tip tacos served on corn tortillas.
    Print Recipe
    5 from 2 votes

    Dutch Oven Tri-Tip Tacos

    How about grabbing that Dutch oven for some easy, hassle free, feed a crowd, tri-tip tacos? We'll take that typical taco dinner up a notch by using smoky chipotle peppers in adobo sauce. The preparation is easy and produces incredibly delicious results.
    Prep Time20 minutes mins
    Cook Time3 hours hrs
    Total Time3 hours hrs 20 minutes mins
    Course: Mexican
    Cuisine: Mexican
    Servings: 10
    Calories: 181kcal
    Author: Lea Ann Brown

    Ingredients

    • 2-3 pound tri-tip roast
    • 3 chipotle peppers in adobo sauce seeded, veins removed and chopped
    • 1 Tablespoon adobo sauce from the can of peppers
    • 1 sweet onion thinly sliced
    • 6 garlic cloves chopped
    • 28 ounce can chopped tomatoes undrained
    • 1 Tablespoon cumin
    • 1 Tablespoon brown sugar
    • salt and pepper
    • 3 tablespoons vegetable oil

    Instructions

    • Preheat the oven to 325 degrees.
    • Season the roast with salt and pepper. You can even add your favorite steak seasoning, like Montreal Steak Seasoning.
    • Heat a large Dutch oven over medium high heat. Once the pan is hot, add the oil. Once the oil is hot, add the tri-tip roast and brown on both sides. About 5 minutes per side.
    • Transfer the roast to a plate and set aside. Add the onion to the pan and saute until tender. Add garlic and cook until fragrant. Season the onion and garlic with salt and pepper. Add tomatoes. Nestle the tri-tip down into the tomatoes, onions and garlic mixture, then top with remaining ingredients.
    • Spoon a little of the tomato mixture on top of roast.
    • Cover the pan and cook 2.5 or 3 hours. Until meat is tender.
    • Remove the meat from the pan and shred with a fork when cool enough to handle.
    • Return the shredded meat back to the cooking liquid and stir to coat.
    • Serve the meat into heated corn tortillas or purchased taco shell with all your favorite taco toppings.

    Notes

    How to Remove Seeds and Veins From Chipotle Peppers: Chipotle Peppers in Adobo are indeed very hot. With a sharp knife, slice open the peppers and then using the back of the knife, scrape out the seeds and veins. That’s where the heat lies. What you have left is a rich smoky flavor without as much heat.
    You can’t just take soft corn tortillas out of the package and make a taco. You must warm the shells to be pliable. My preferred method is to dampen clean dish towel by quickly running the towel under water from the faucet. Wrap a stack of corn tortillas into the damp towel. Place the package in a gallon zip lock bag. Don’t seal the bag. Place the tortillas in the microwave and heat for 3 minutes at 50% power. Remove from the microwave and let them steam in the bag for 2-3 more minutes. They’re ready.
    Suggested Toppings: Keep it simple. Crumbled Cotija cheese, sliced jalapenos, lime wedges. 
     

    Nutrition

    Calories: 181kcal | Carbohydrates: 8g | Protein: 20g | Fat: 8g | Saturated Fat: 3g | Polyunsaturated Fat: 1g | Monounsaturated Fat: 4g | Cholesterol: 59mg | Sodium: 475mg | Potassium: 503mg | Fiber: 1g | Sugar: 5g | Vitamin A: 105IU | Vitamin C: 10mg | Calcium: 65mg | Iron: 3mg

    Dutch Oven Tri-Tip Tacos … They’re What’s for Dinner. 

     This post was first published January of 2013 and updated February 2026.
    Instant Pot Pork Carnitas Tacos (Or Pressure Cooker)

    April 14, 2022 By Lea Ann Brown 16 Comments

    Instant Pot Pork Carnitas Tacos

    This classic Southwestern Style Mexican dish is inspired by authentic Pork Carnitas where an exciting mix of citrus and Mexican spices compliment fall apart shredded pork for an easy taco dinner that will WOW your crowd. Instant Pot Carnitas mean minimal prep with juicy fall apart shredded pork. I’ll even show you how to create those famous Carnita crispy edges.

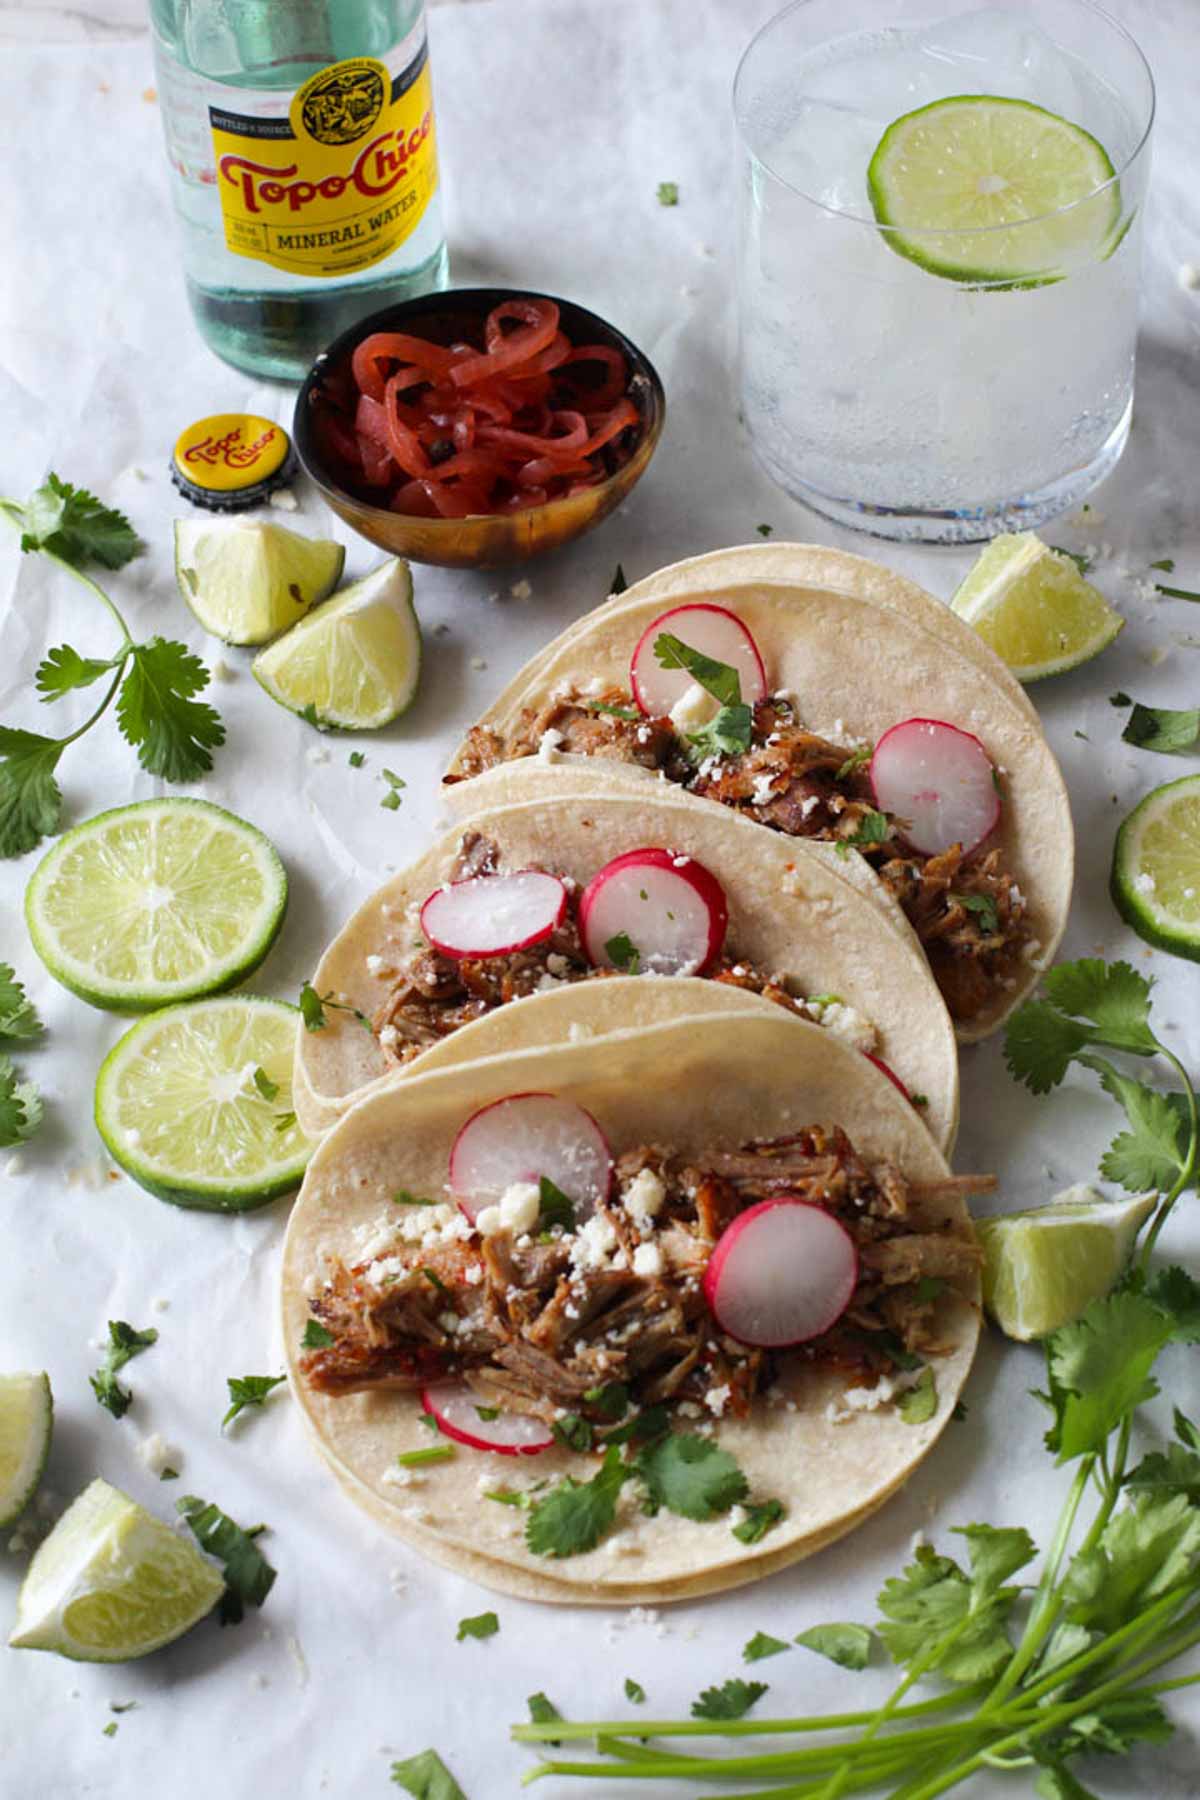
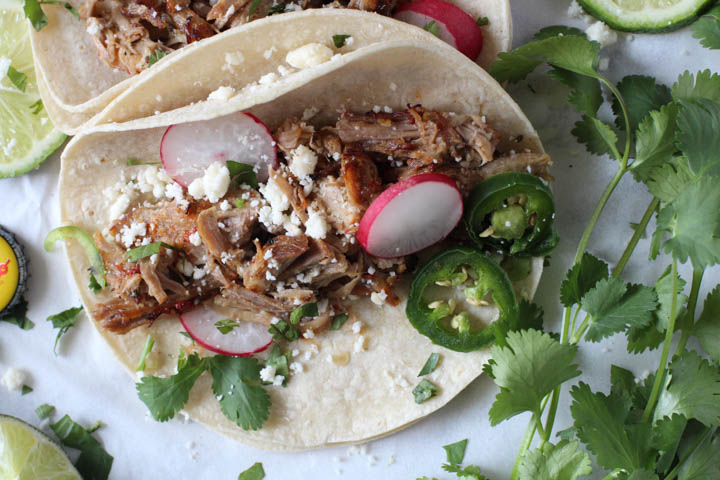
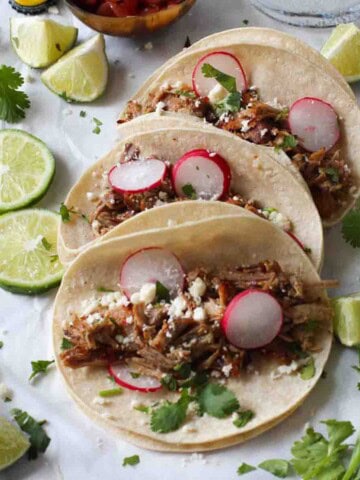
    3 pork carnitas tacos garnished with slices of radish, lime served in corn tortillas

    What Are Pork Carnitas?

    Traditional Mexican carnitas are slow-cooked, tender pieces of pork that are simmered in their own fat until meltingly soft, then crisped until the edges turn golden and slightly crackly. The word carnitas literally means "little meats" in Spanish.

    Carnitas originated in Michoacán Mexico, where they're considered a point of regional pride and often cooked for celebrations, markets, and family gatherings.

    How Traditional Carnitas Are Made

    Authentic carnitas are:

    • Made with pork shoulder (Boston butt)
    • Slow-cooked in lard in a wide copper pot called a cazo.
    • Seasoned simply - typically with salt, sometimes garlic, bay leaves, orange.
    • Cooked low and slow until tender
    • Finished at higher heat so the exterior crisps while the inside stays juicy

    Unlike shredded pork that's braised in broth, traditional carnitas are gently cooked in fat and as the liquid evaporates, the pork fries in the remaining lard, creating that signature mix of silky interior and crispy edges.

    We made traditional pork carnitas in Culinary School and they were OUTstandingly wow.

    Making Pressure Cooker Carnitas

    The method mentioned above literally takes hours and is well worth the time, but I wanted to make a quicker version and knowing that my Instant Pot would render that pork roast fall apart and luscious, I created this recipe.

    Pressure cooking gives you that fall-apart texture in a fraction of the time. Same deep flavor. Same shreddable pork. Less hovering over the stove wondering if you burned the bottom. I love tradition but I also love dinner in under a few hours and the convenience. Here’s what you can expect:

    Flavor Profile And Benefits

    • Rich and savory, slightly salty, pork-forward and not heavily spiced, but warm and cozy with heat.
    • An easy recipe for street-style tacos.
    • Using a pressure cooker to make Carnitas Tacos guarantees a cook time of less than one hour, compared to 3 – 4 hours in the oven.
    • A another star for the Southwestern flavor combination of citrus and New Mexico Red Chile Powder.
    • What pushes this recipe over into the five-star category is it’s make-ahead qualities.

    Ingredients You’ll Need

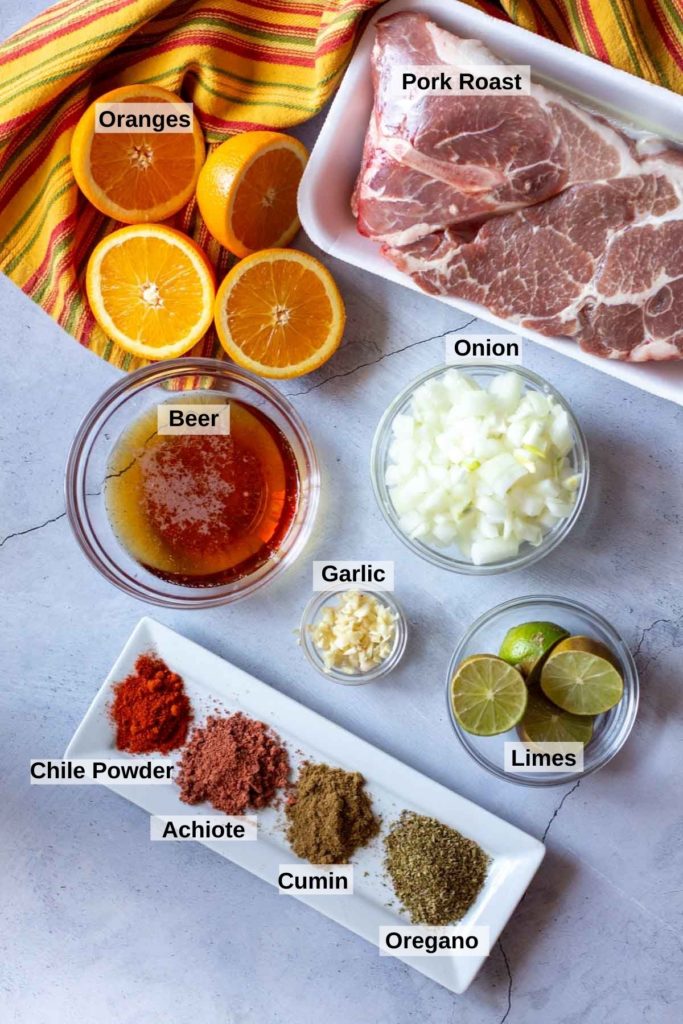
    Mise en place. Always gather ingredients before starting any recipe. It will save you time and organize your mind.

    Ingredients to make Pressure Cooker Pork Carnitas Tacos
    • Pork: Choose a 3-5 pound pork shoulder (butt) roast. Preferably bone in.
    • Oranges
    • Onion: Sweet or Yellow Onion recommended.
    • Beer: A Mexican beer works well here.
    • Limes
    • Spices: New Mexico Red Chile Powder and Achiote Paste make this chile forward with flavor. Traditional with garlic, cumin, Mexican oregano for traditional Mexican seasonings.

    Ingredient Swaps

    • Pork: You can also use a boneless pork shoulder roast. Avoid a pork loin, or pork tenderloin. They are leaner cuts of meat and will tend to dry out, which won’t make good shredded pork tacos. Pork shoulder roast has enough fat to keep the meat tender and juicy.
    • Oregano: Mexican oregano is preferred for this recipe, it’s peppery, grassy, earthy flavor is a good compliment for Mexican Food. If you don’t have Mexican Oregano, substitute Marjoram. Known for its aroma and delicate flavor, its related to oregano and will bring a sweet undertone to any recipe.

    Step by Step Instructions – It’s Easy

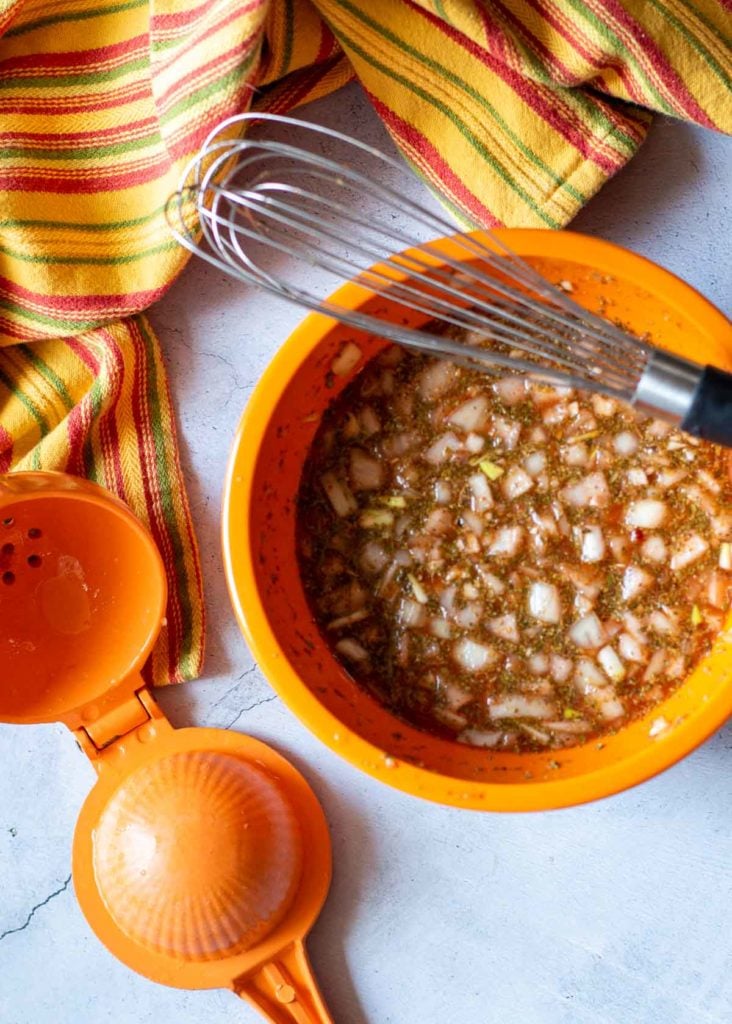
    Step 1: Sauce to make Instant Pot Pork Carnitas tacos.
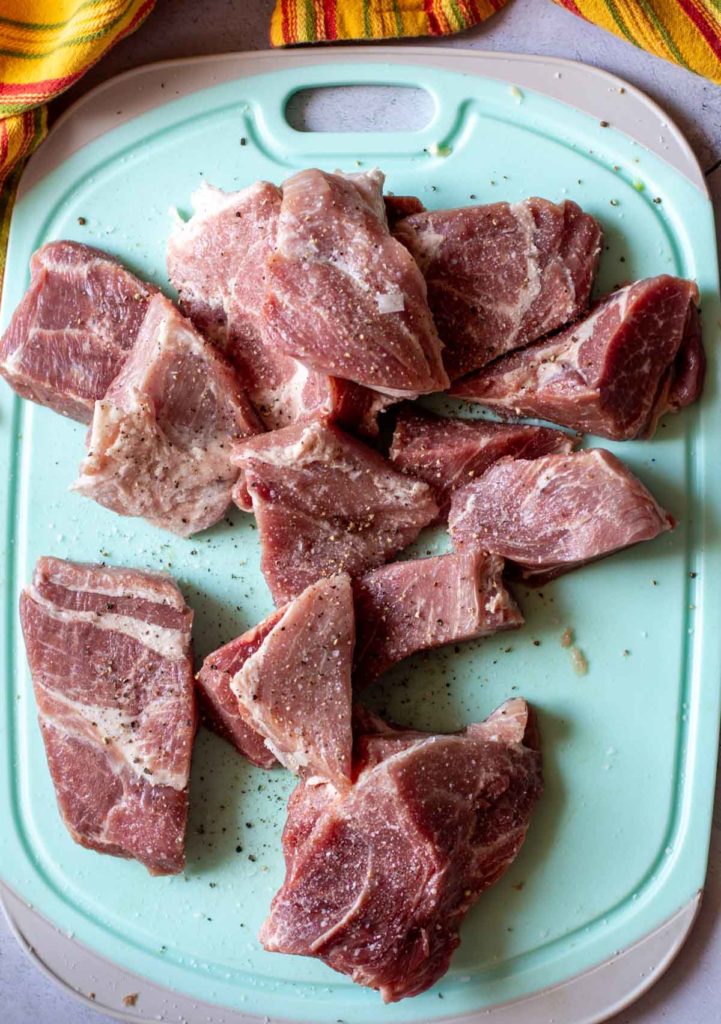
    Step 2: Large chunks of cut pork roast to make Insta pot pork carnitas tacos.
    1. Step 1: Make the Carnitas sauce. In a small bowl, whisk together oregano, cumin, achiote paste, New Mexico red chile powder, onion, garlic, lime juice, orange juice, and beer until combined.
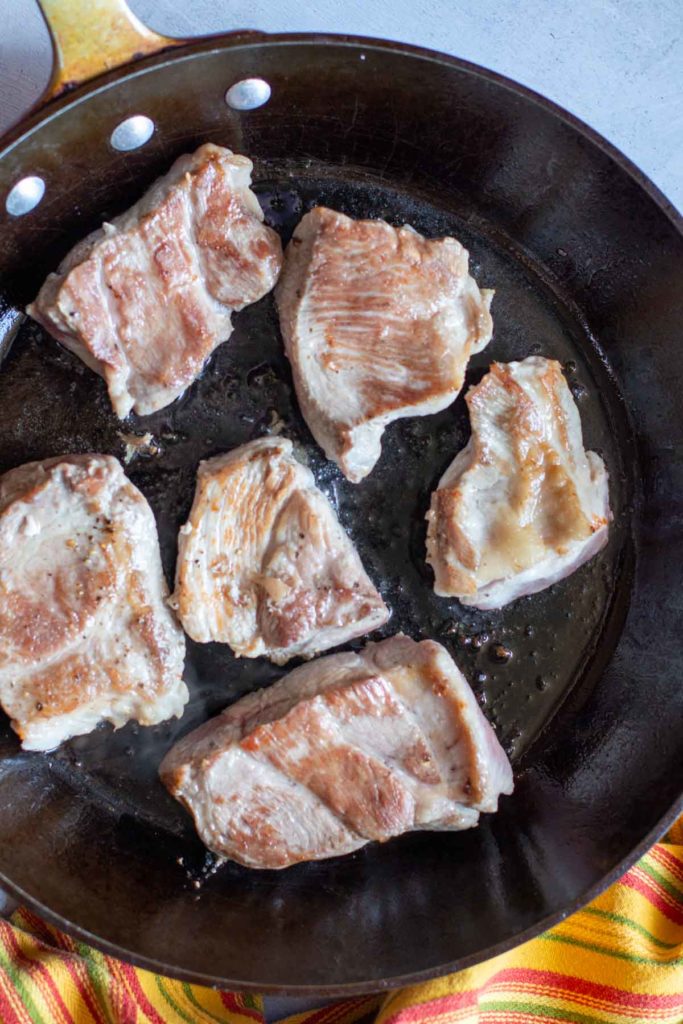
    2. Step 2: Cut the pork roast into large chunks to fit well in your pressure cooker. Discard any large chunks of fat.

    Tip: If using a bone-in pork roast (preferred) cut around the bone, leaving a chuck of meat attached. Add that piece to the browning/cooking process and then to the Instant Pot. That bone will bring even more savory flavor to the end result. You’ll remove that bone once you start shredding the meat.

    Step 3: Browning pieces of pork roast to make  Instant Pot Pork Carnitas tacos.
    Step 4: Cooking pork in pressure cooker for  Instant Pot Pork Carnitas tacos.
    1. Step 3: Heat a large skillet over medium-high heat. Once the skillet is hot, add oil. Salt and pepper the pork pieces and brown them on each side. You may need to do this in batches. Don’t crowd the meat.
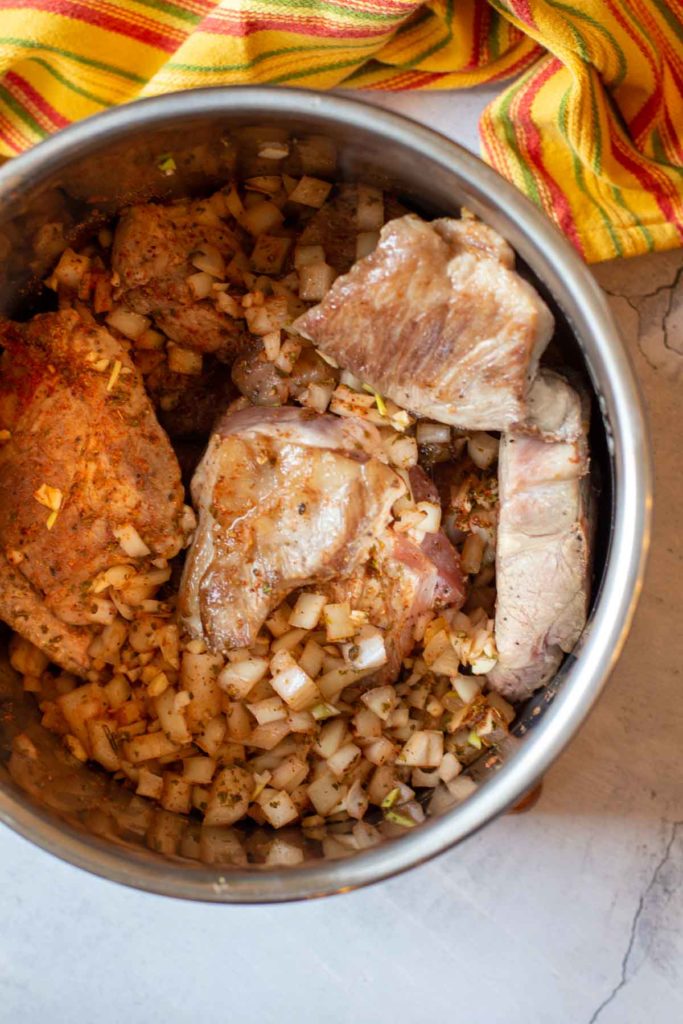
    2. Step 4: Add the pork pieces to the pressure cooker insert. Pour the carnitas sauce over the pork. Cook 25 minutes on high.

    Pro Tip: Don't skip searing the meat. This is a crucial step in getting the most flavor out of this meal. Searing creates what is technically called Maillard reaction. Maillard reaction is the process where a crust is created. Simply stated, it's responsible for the complex flavors and aroma that makes bread taste toasty, and a grilled or pan seared seared steak, like my recipe for Denver Steak, taste charred. It's a technique that brings science to your cooking skills.

    Step 5: Shredded pork on a sheet pan ready to broil in the oven to make crispy Instant Pot Pork Carnitas tacos.
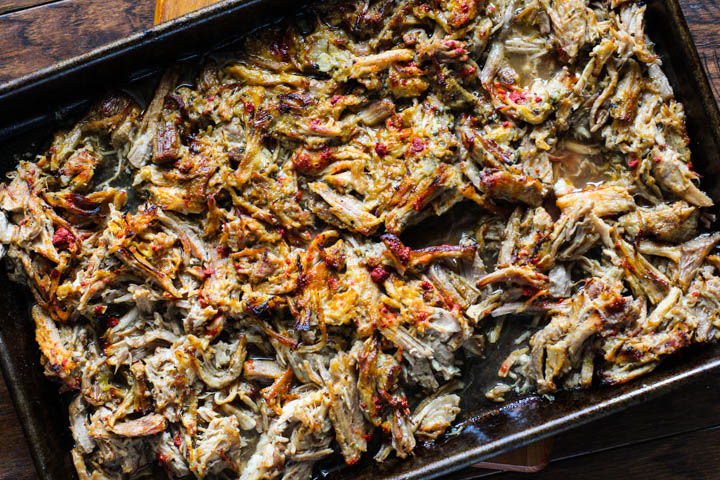
    1. Step 6: Once cool enough to handle, using two forks, or your hands, shred the meat. Discard the bone from the piece of meat that it was attached to. Spread the shredded pork on a sheet pan and then set it on a rack 5 inches below the broiling unit to create that famous carnitas crisp. Watch it close during the broiling process, it won’t take long.
    2. Tip: I like to sprinkle on a bit more red chile powder, for color, heat and that famous New Mexico warm flavor.

    How They’re Traditionally Served

    Pork Carnitas are typically chopped and served as Carnitas Tacos:

    • Warm corn tortillas
    • Fresh Cilantro
    • Diced White or Sweet Onion (raw)
    • Salsa: Use either red salsa or salsa verde.
    • Always lime wedges.
    • Sliced radishes are also common toppings for tacos in Mexico, as well as chopped avocado and Mexican Pickled Onions. A dollop of Guacamole would work well here.
    • Toppings For Carnitas Tacos: Sliced Radishes, chopped cilantro, lime wedges, crumbled cotija cheese, sliced or chopped avocados andMexican Pickled Onions.
    • To make it a meal, serve with Gulf Coast Rice, Refried Beans or this tossed salad recipe for Southwestern Salad.

    Make Ahead

    This pulled pork taco recipe is also a great make-ahead taco recipe to feed a crowd. Here’s why.

    • The pork roast can be cooked, shredded and stored until ready to re-heat and broil. (you will need to broil to get that crispy element for carnitas).
    • You can prep, chop and store all the toppings in air tight containers in the refrigerator in advance.

    All that’s left is to do is warm the corn tortillas and line up those toppings. Guests can build their own personal carnitas as you sit back and take in the compliments.

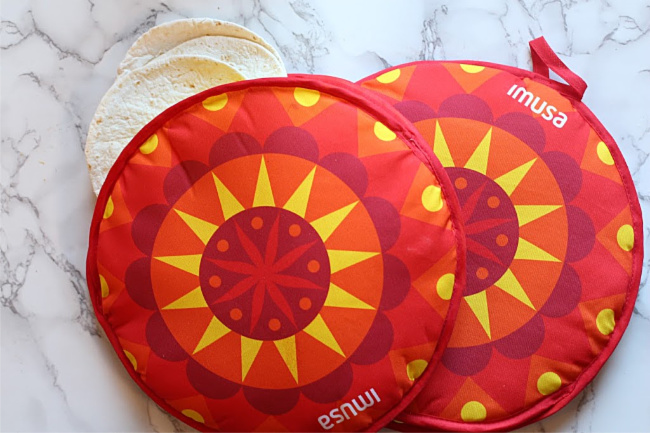
    TIP: How to keep those corn and flour tortillas warm. I was recently introduced to these Imusa Tortilla Warmers. They work like magic. Just place the tortillas in the warmers and then use the microwave to heat them. They’ll stay warm for about an hour tucked inside. Check it out, they’re amazing. You can also toast corn tortillas over open flame stove top. Just a few seconds per side for a more rustic Mexican feel. Disclaimer: I am an Amazon Affiliate, if you purchase the tortilla warmers using the link above, I receive a small commission at no extra charge to you.

    Imusa Tortilla Warmers

    FAQ’s

    Can I Over-Cook Pork Carnitas In The Instant Pot?

    A pork roast is very forgiving, and hard to over cook. If the meat turns out mushy, you’ve over cooked. Stick to the cooking times in the recipe and you’re safe.

    Why Are My Carnitas Dry?

    Probably not enough fat. Or you didn't cook it long enough to fully break down. Dry pork usually means undercooked, weirdly enough.

    How Many Carnitas Tacos Per Person?

    Just how many tacos should you plan for each person. Err on the safe side and plan for three tacos per person, especially if you’re using smaller street-style corn tortillas.

    Are Carnitas The Same As Barbacoa or Cochinita Pibil?

    Barbacoa is slow cooked shredded meat, usually beef. It’s a more chile-forward dish that used dried red chile peppers and stronger spices. Cochinita Pibil is a Yucatan inspired dish, where pork is achiote marinated.

    Storing, Reheating and Freezing

    • Refrigerator: Store any leftovers in an airtight container in the refrigerator for up to four days.
    • Reheating: Gently reheat stovetop in a saucepan until warm. Or use your microwave oven. The 50% power feature is your best friend. Place individual servings in a microwave safe bowl and reheat in 30 second increments until warm enough to eat. This lower setting helps avoid those splattering microwave food explosions.
    • Freezer: Place any leftovers in a freezer safe zip-lock style bag. Fill the bag while it’s standing up, then press air out and seal well. You can store the bag laying down to optimize freezer space. Label with date and contents and freeze for up to 3 months. Thaw in the refrigerator overnight before reheating.
    Instant Pot carnitas recipe. Pork tacos on a soft white corn taco shell garnished with sliced radishes, cotija cheese, and cilantro

    And that's it. Close to the real-deal authentic carnitas. Faster. Crispy where it counts. Tender where it matters. And honestly? Pretty hard to mess up.

    I routinely make this pressure cooker Pork Carnitas recipe for Super Bowl. This is truly perfect football party food. Actually it’s perfect party food – period, any time of year and especially a Cinco de Mayo.

    Explore More Southwestern Mexican Taco Recipes

    Love tacos as much as we do? Here are some recipe you might want to take a look at:

    • Tinga chicken tacos with toppings, served on a white platter.
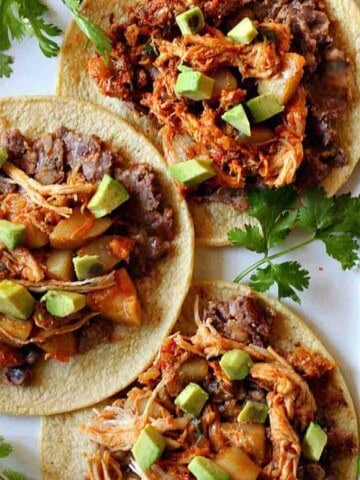
      Mexican Chicken Tinga With Chorizo
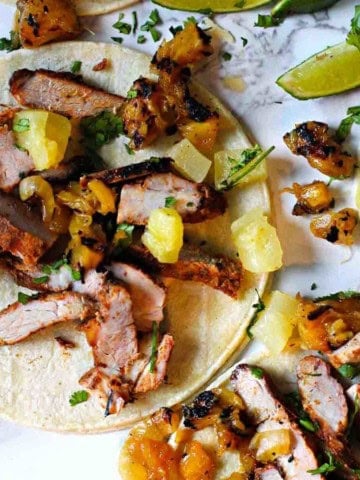
    • Tacos al Pastor Made with Grilled Pork Steaks
    • Chile Rubbed Braised Beef Tacos with Red Cabbage Slaw
    • Rick Bayless rotisserie chicken tacos on homemade tortillas.
      Weeknight Rotisserie Chicken Tacos

    And don’t miss my Taco Category, you’ll find even more ideas, including Fried Tacos, the most popular on my site.

    And don’t miss my recipe for Pork Tenderloin Tacos in Chile Guajillo Sauce. Pure rustic rich red-chile forward flavor in every bite.

    If you liked this recipe, please leave a star ⭐⭐⭐⭐⭐ rating in the recipe card below and leave a comment. I always appreciate your feedback and hearing how everything went.

    And, don’t forget to subscribe to my newsletter for more delicious recipes and cooking tips. Make it a delicious day … every day.

    Instant Pot Pork Carnitas Tacos
    Print Recipe
    5 from 3 votes

    Instant Pot Carnitas Tacos

    These carnitas tacos are quick and easy to make in the pressure cooker, perfectly flavored and juicy. So delicious!
    Prep Time30 minutes mins
    Cook Time30 minutes mins
    Total Time1 hour hr
    Course: Main Course Pork
    Cuisine: Southwestern Mexican
    Servings: 12 people
    Calories: 183kcal
    Author: Lea Ann Brown

    Equipment

    • Instant Pot Electric Pressure Cooker

    Ingredients

    • 1 tablespoon Dried Oregano preferably Mexican Oregano
    • 1 tablespoon Ground Cumin
    • 1 tablespoon Achiote paste
    • 1 teaspoon New Mexico red chile powder or ancho
    • 1 large Sweet Onion chopped
    • 3 cloves Garlic chopped
    • 2 Limes juiced
    • 2 large Oranges juiced
    • ½ cup Beer
    • 4-5 pounds Pork Shoulder Butt Cut into large pieces
    • 3 teaspoons Salt
    • 1 teaspoon Black Pepper
    • 1 Tablespoon Neutral Oil Canola or vegetable oil works well here.
    • Soft Corn or Flour Tortillas Look for 5 – 5 ½" tortillas to make Street Style Tacos.

    Instructions

    • In a small bowl, whisk together oregano, cumin, achiote paste, chile powder, onion, garlic, lime juice, orange juice, and beer until combined.
    • Cut the pork into large pieces, removing any large chunks of fat. Season pork chunks with salt and pepper.
    • Heat a large fry pan over medium high heat. Add oil. When oil is shimmering, add half of the pieces of pork. Sear on both sides and remove to a plate. Repeat with the rest of the pork.
    • Place brown pieces of pork into the instant pot. Pour sauce on top of the pork. Close lid and set to pressure on high. Cook for 25 minutes. Let naturally release for about 15 minutes. Release the remaining steam before removing lid.
    • Remove pork to a large cutting board and when cool enough to handle, shred with two forks or your hands. Spread pork onto a large baking sheet. Spoon one third of the sauce from the Pressure Cooker on top of the pork, tossing to combine.
    • Set broiler temperature to 550 and set the sheet pan full of pork 5 inches below the broiler unit. Broil for 4 to 5 minutes, just until the pork edges begin to crisp.
    • Remove the baking sheet from the oven and top with half of the remaining sauce from the pressure cooker. Toss again to combine. Broil for an additional 5 minutes.
    • Remove the baking sheet from the oven and toss more sauce. Don't use too much sauce. You don't want that pork to be swimming.
    • To assemble the tacos, top warmed flour or corn tortillas with pork. Top with sliced red onion, diced avocado, jalapeno, cilantro, pickled onions, or diced sweet onions and cotija cheese. Serve with lime wedges.

    Notes

    This pulled pork taco recipe is easily adaptable for crockpot or oven roasting. For Oven: Place seared pork chunks into a Dutch Oven and pour the sauce over the pork. Roast at 350 degrees until meat is fall apart tender. This should take about 2 – 3 hours. 
    For the crockpot: Place seared chunks of pork into the crockpot and pour in the sauce. Cook on low for 4-5 hours or until tender enough to shred. 
    Friends don’t let friends eat Mexican Food without Pickled Onions. Check out this recipe for Quick Pickled Red Onions.
    Can I sear the pork pieces in the Instant Pot? Set Instant Pot to Sauté. Add oil. Once hot, add half the pork and sear directly in the Instant Pot, turning every 45 to 60 seconds. Transfer pork to a separate plate and repeat with remaining pork pieces until browned. Press cancel to turn off the heat. (I find it easier to sear stove-top)
    This recipe serves 8 – 12 people depending on the number of tacos per person.

    Nutrition

    Calories: 183kcal | Carbohydrates: 8g | Protein: 19g | Fat: 8g | Saturated Fat: 2g | Polyunsaturated Fat: 1g | Monounsaturated Fat: 4g | Trans Fat: 0.01g | Cholesterol: 62mg | Sodium: 658mg | Potassium: 440mg | Fiber: 2g | Sugar: 4g | Vitamin A: 144IU | Vitamin C: 22mg | Calcium: 49mg | Iron: 2mg

    Pressure Cooker Pork Carnitas Tacos … It’s Whats for Dinner

    Homemade Banana Ice Cream

    April 13, 2022 By Lea Ann Brown 24 Comments

    Homemade banana ice cream in waffle cones.

    This recipe for homemade banana ice cream becomes even more decadent by caramelizing bananas in the oven before adding to the ice cream mixture. The delicious banana flavor shines and is complimented with the sweetness from brown sugar and cinnamon.

    Homemade banana ice cream in waffle cones.

    What You Can Expect From This Recipe

    This banana ice cream becomes very special by making it a caramelized banana ice cream recipe.

    Bananas are caramelized in the oven with a mixture of brown sugar, butter and cinnamon. The end flavor is remarkable.

    The custard ice cream recipe is the real deal. Using pure ingredients, eggs, cream, milk and vanilla, you’ve go a classic custard style ice cream from scratch that will simply delight your family.

    Custard style ice cream is made where milk is heated stove top and then slowly added to an egg sugar combination to temper. To temper means to slowly combine as to not scramble or cook the eggs. 

    Cream is then added to the tempered mix.

    The mixture is then refrigerated overnight to allow it to expand.

    In all reality, you’re making frozen custard dessert.

    I’ve been wanting to make homemade banana ice cream as I used to love getting banana milkshakes from the Dolly Madison Store.  Man they’re the best.  Anyone had ’em?

    Everyone loves a good custard ice cream recipe.  Let’s get started.

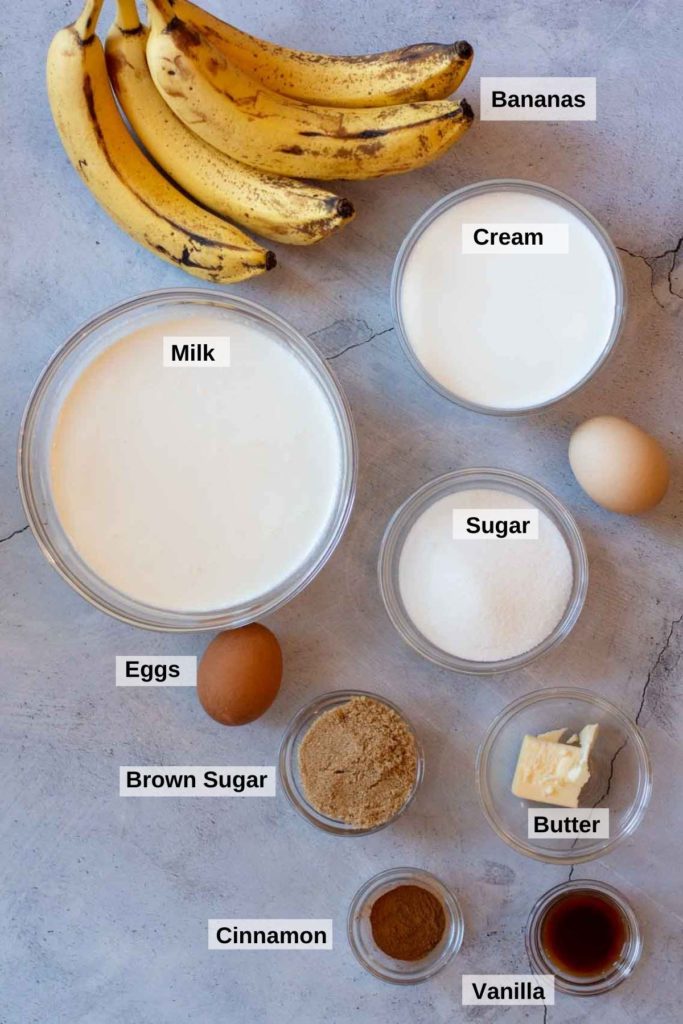
    Ingredients You’ll Need

    Ingredients to make homemade banana ice cream.
    • Ripe Bananas.
    • Dairy: Cream, milk, eggs and butter.
    • Brown Sugar
    • Cinnamon
    • Vanilla

    Tip: For this homemade banana ice cream recipe you’ll need ripe bananas. Don’t use bananas that have blackened, like you would for Banana bread. You’ll need them soft to the touch but still firm enough to be able to slice.

    Step by Step Instructions

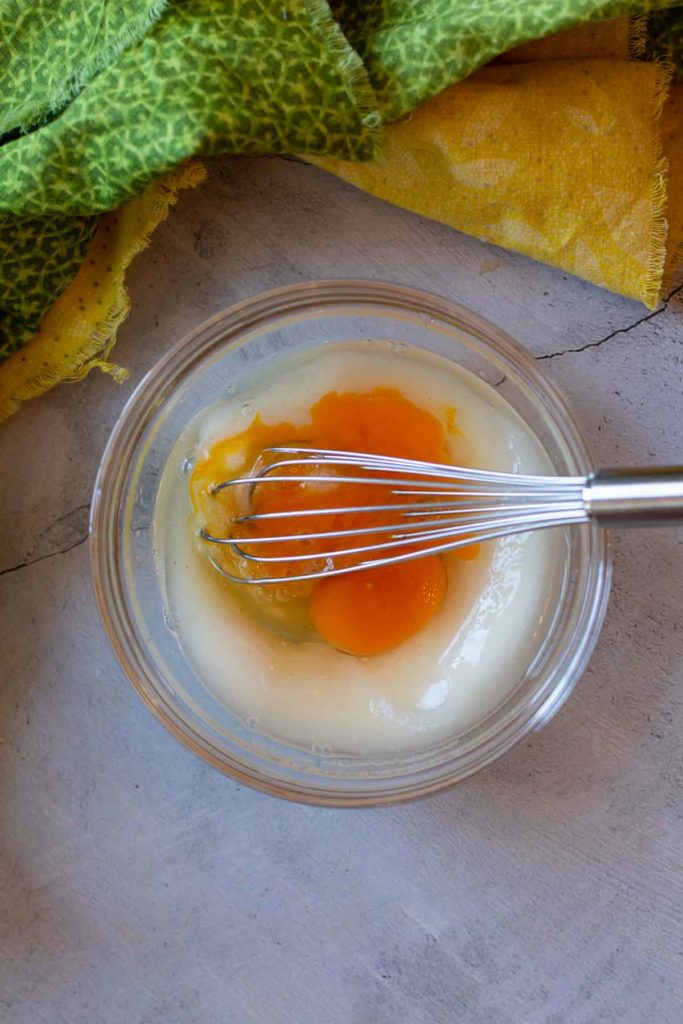
    Whisking eggs with sugar to make homemade banana ice cream.
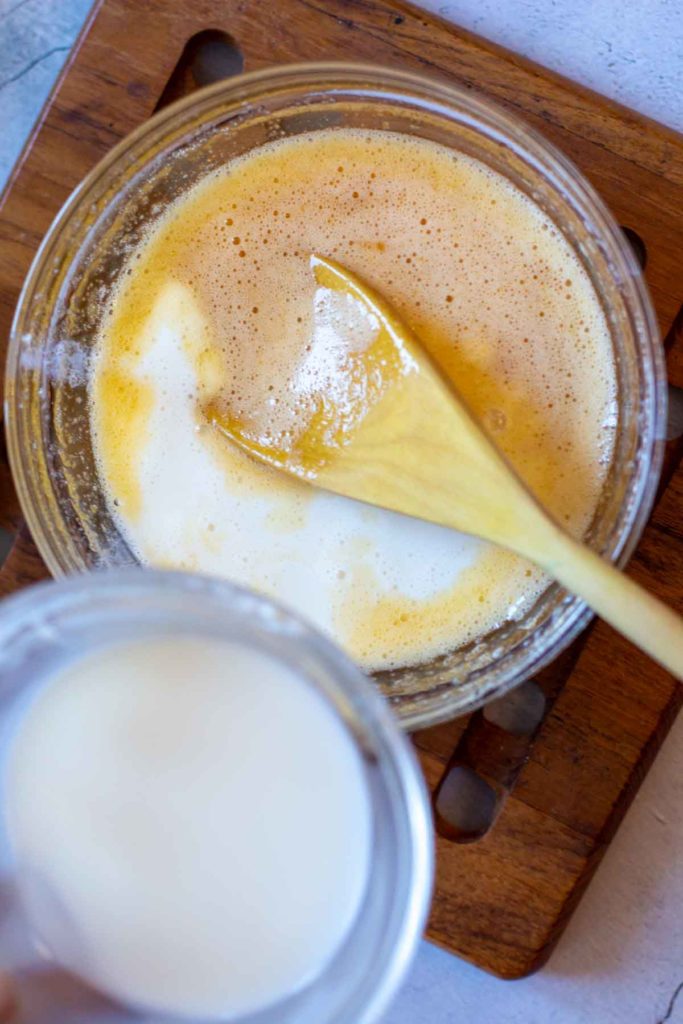
    Pouring hot milk mixture into eggs to temper.
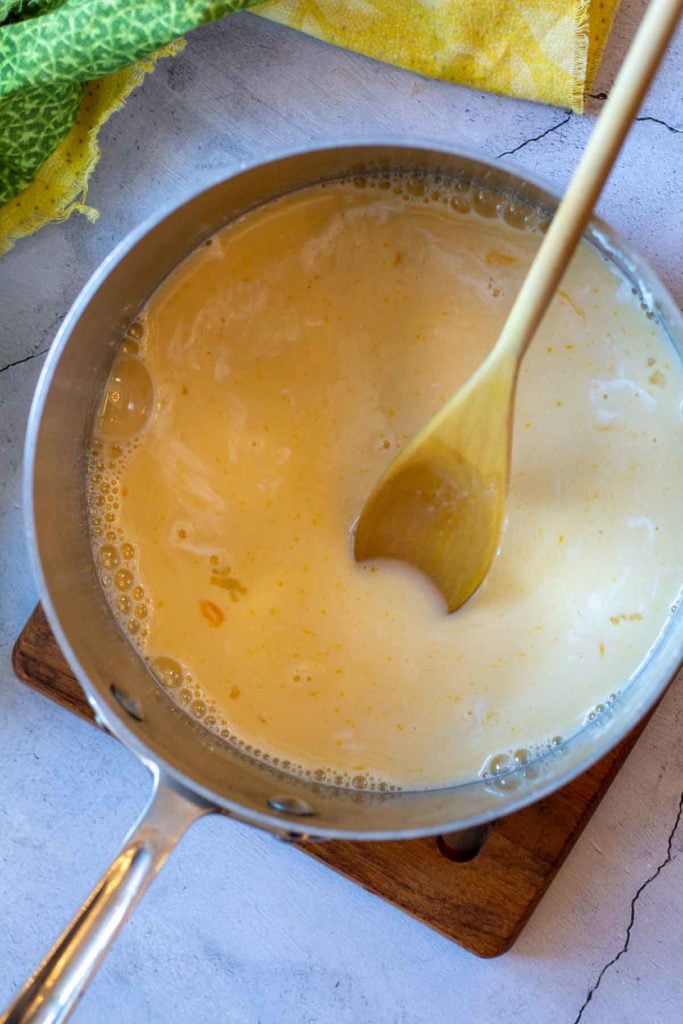
    • Slowly heat milk in a sauce pan on medium low heat. Do not let it boil, just get it nice and steamy.
    • Meanwhile, whisk sugar and eggs together in a bowl.
    • When milk is hot, slowly…and I mean slow as you can…drizzle some of the milk into the sugar/egg mixture.
    Stirring to mix eggs and milk.
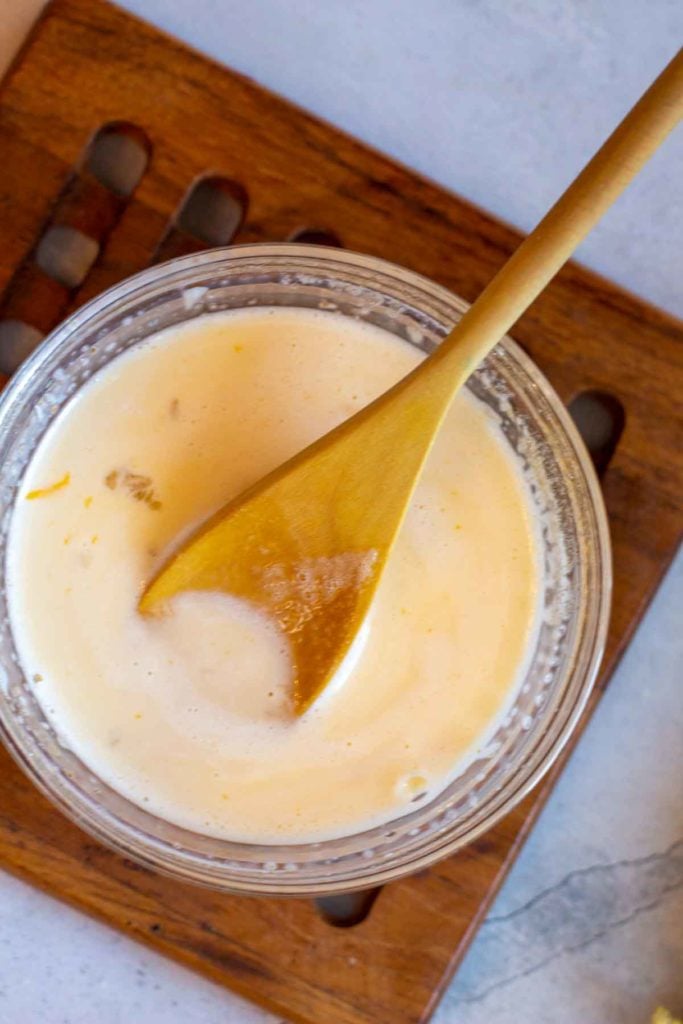
    Stirring to thicken eggs and milk mixture.
    • Stir to combine the tempered egg and milk together.
    • Pour the tempered eggs and milk mixture into the pan of hot milk, stir until well blended.
    • Heat until thickened, stirring constantly until it thickens enough to coat the back of a spatula or wooden spoon.
    • Remove from heat and when it reaches room temperature add the cream and vanilla. Refrigerate overnight so that the mixture volumizes. Do not short cut this step.

    Caramelized Bananas

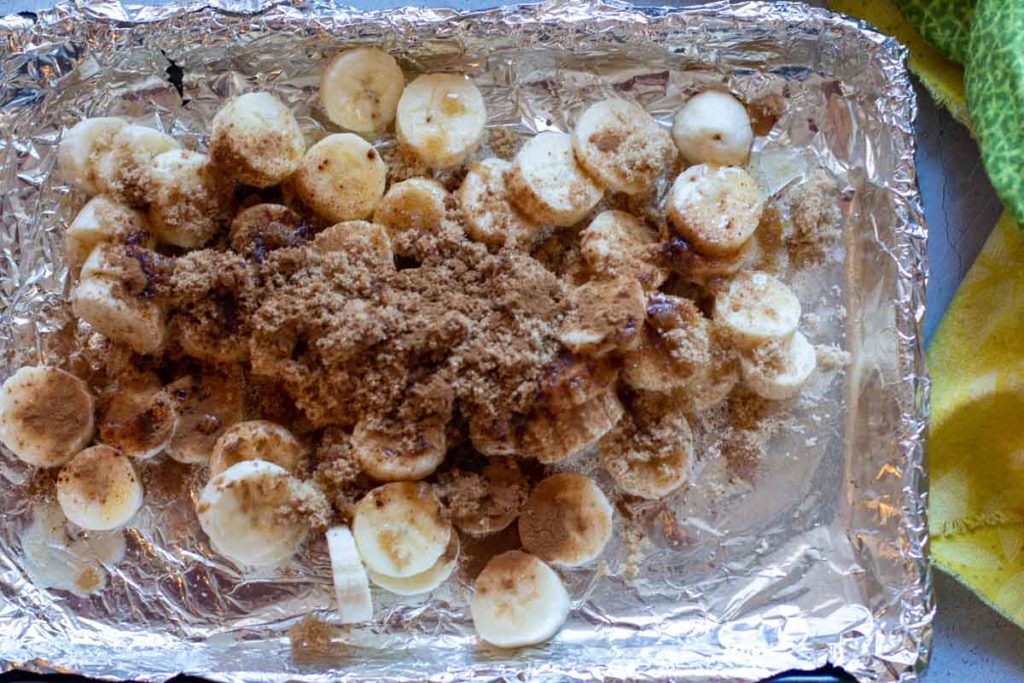
    Sliced bananas on a foil lined sheet pan sprinkled with brown sugar and cinnamon.
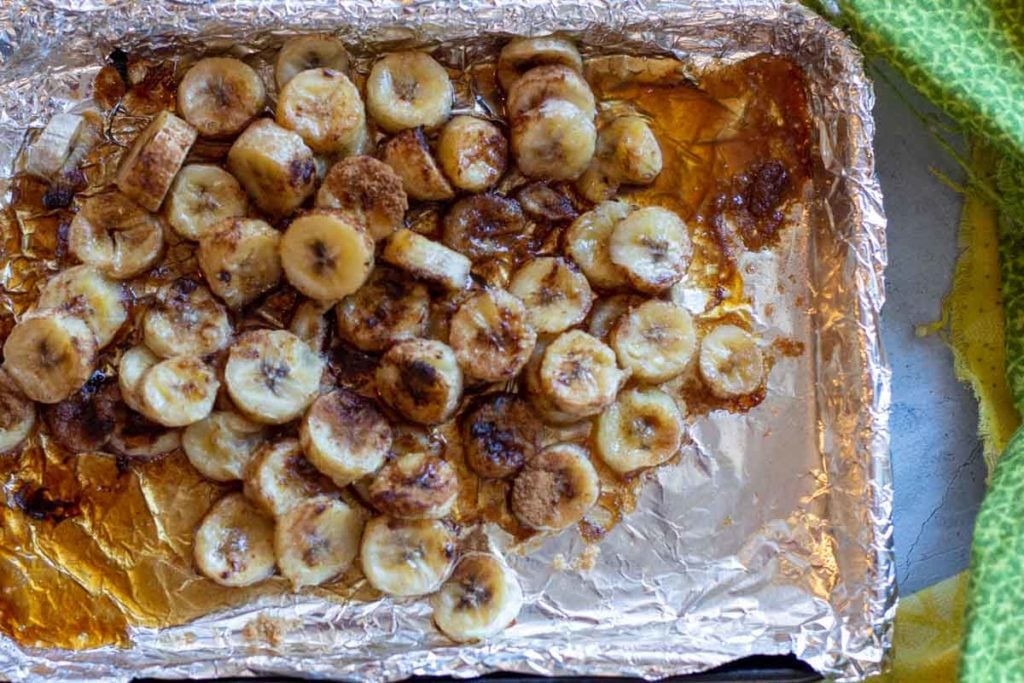
    Caramelized bananas on a sheet pan lined with foil.
    • Step 1: How to caramelize bananas. It’s super easy. Preheat oven to 400 degrees.
    • On a foil lined pan place the sliced bananas and sprinkle with brown sugar, cinnamon and drizzle with the butter.
    • Step 2: Bake for 20 minutes. 
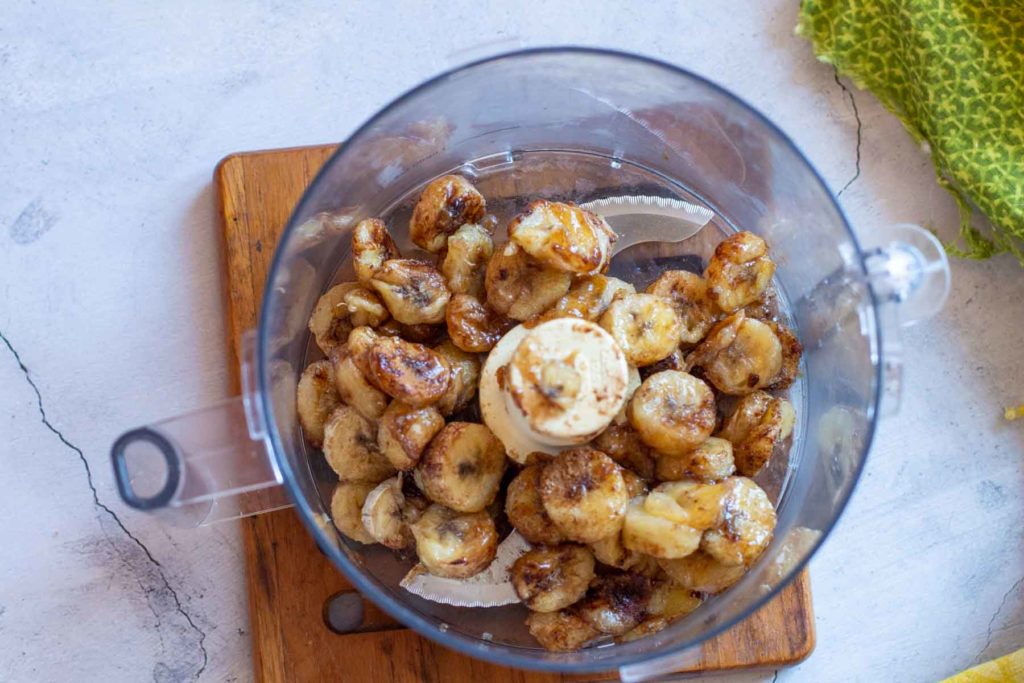
    • Step 3: Let mixture cool then puree in a food processor.

    Tip: Don’t wait too long to transfer the caramelized bananas to the food processor. If allowed to cool too much, the brown sugar will start to harden.

    Adding pureed bananas to milk and egg mixture to make homemade banana ice cream.

    When completely cooled, add the pureed caramelized bananas to the volumed ice cream mixture and churn according to your ice cream maker’s instructions.

    Tip: As with most home ice cream makers, the final consistency of the ice cream will resemble soft serve. Place in the freezer for a couple of hours to achieve a texture to scoop.

    FAQ’s, Banana Ice Cream

    Can I Use Frozen Bananas?

    My experience with frozen bananas is that once thawed, they are mushy. Since we’re slicing the bananas for this recipe, I would not recommend using frozen. Fresh is best here.

    Variations

    • Add some chocolate chips. Purchase some good quality semi-sweet chocolate and chop it into small pieces. About half way through the churning process, drop in the chocolate pieces.
    • To make peanut butter banana ice cream, add 3 tablespoons chunky or creamy peanut butter during the churning process.

    Equipment Needed

    • Ice Cream Maker
    • Good quality Sheet Pan.

    Storage

    Store in an air tight, freezer friendly container. This banana ice cream will last a month in the freezer.

    Homemade Banana Ice Cream

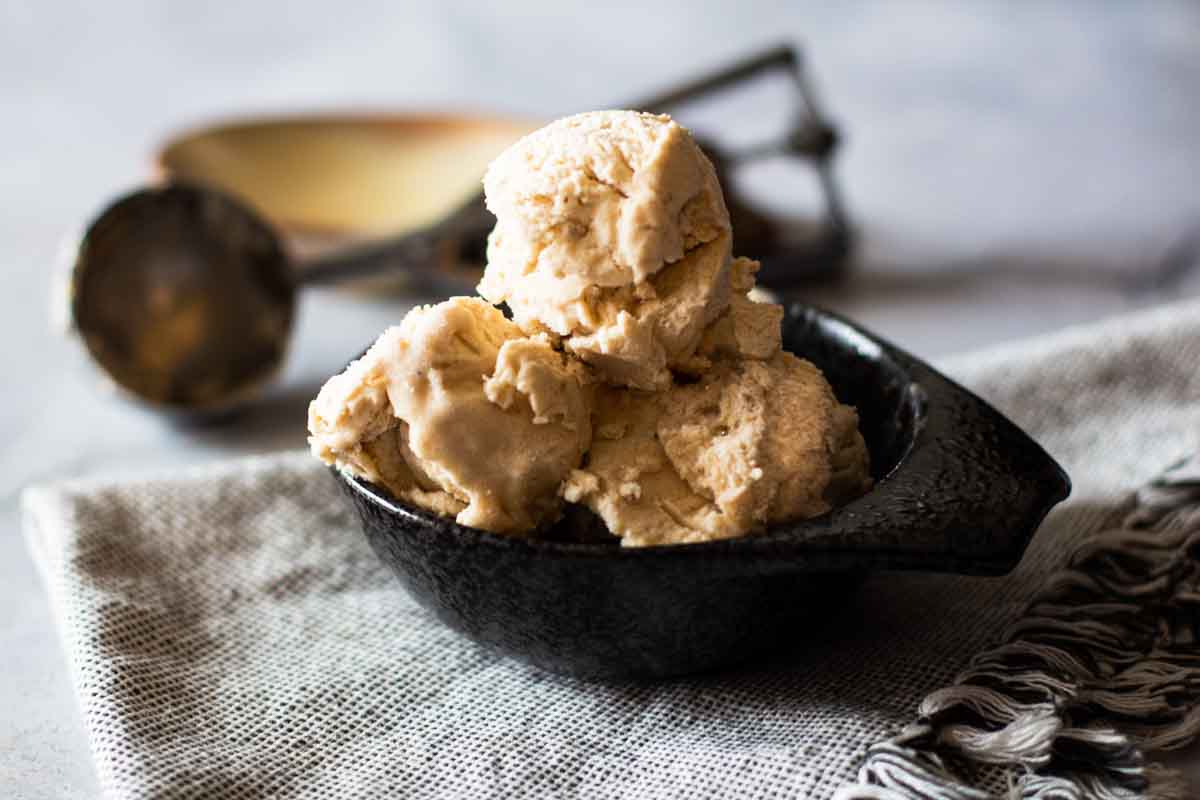
    Scoops of homemade banana ice cream in a black bowl.

    I hope you give this frozen custard style homemade banana ice cream recipe a try. It’s crazy delicious and one of the best homemade ice cream recipes I’ve ever made.

    More Homemade Ice Cream Recipes

    • Homemade peach ice cream in a waffle cone.
      Homemade Peach Ice Cream Custard Style
    • Homemade Strawberry Ice Cream
      Balsamic Roasted Strawberry Ice Cream

    If you liked this recipe, please leave a star ⭐⭐⭐⭐⭐ rating in the recipe card below and leave a comment. I always appreciate your feedback and hearing how everything went.

    And, don’t forget to subscribe to my newsletter for more delicious recipes and cooking tips. Make it a delicious day … every day.

    Homemade banana ice cream in waffle cones.
    Print Recipe
    5 from 3 votes

    Homemade Banana Ice Cream with Caramelized Bananas

    This recipe for homemade banana ice cream becomes even more decadent by caramelizing bananas in the oven before adding to the ice cream mixture.
    Prep Time20 minutes mins
    Cook Time30 minutes mins
    resting time8 minutes mins
    Course: Dessert
    Cuisine: American
    Servings: 8
    Calories: 383kcal
    Author: Lea Ann Brown

    Ingredients

    • 1 Cup whole milk
    • ½ Cup sugar
    • 2 eggs
    • 2 teaspoons vanilla
    • 2 cup heavy cream
    • For the Bananas:
    • 4 ripe bananas sliced into ½ – 1 inch segments
    • ¼ Cup brown sugar
    • ½ teaspoon cinnamon
    • 1 Tablespoon butter melted

    Instructions

    • Slowly heat milk in a sauce pan on medium low heat. Do not let it boil, just get it nice and steamy. Meanwhile, whisk sugar and eggs together in a bowl. When milk is hot, slowly…and I mean slow as you can…drizzle some of the milk into the sugar/egg mixture, stirring constantly.
    • Pour the milk, eggs and sugar mixture back into the sauce pan and heat on low until thickened, again stirring constantly. It should reach the consistency of liquid pudding.
    • Remove from heat and when it reaches room temperature add the cream and vanilla and stir. Refrigerate covered overnight so that the mixture volumizes. Do not short cut this step.
    • For the bananas:
    • Preheat oven to 400 degrees. On a foil lined pan place the sliced bananas and sprinkle with brown sugar, cinnamon and drizzle with the butter. Bake for 20 minutes. Let mixture cool then puree in a food processor.
    • When completely cooled, add the caramelized bananas to the ice cream mixture and stir to combine. Churn according to your ice cream maker's instructions.

    Notes

    Tip: Don’t wait too long to transfer the caramelized bananas to the food processor. If allowed to cool too much, the brown sugar will start to harden
    As with most home ice cream makers, the final consistency of the ice cream will resemble soft serve. Place in the freezer for a couple of hours to achieve a texture to scoop.

    Nutrition

    Calories: 383kcal | Carbohydrates: 36g | Protein: 4g | Fat: 26g | Saturated Fat: 16g | Cholesterol: 129mg | Sodium: 67mg | Potassium: 320mg | Fiber: 2g | Sugar: 28g | Vitamin A: 1065IU | Vitamin C: 5mg | Calcium: 90mg | Iron: 1mg

    Homemade Banana Ice Cream with Caramelized Bananas …It’s What’s For Dessert

    Southwest Rotini Pasta Salad With Black Beans

    April 5, 2022 By Lea Ann Brown 4 Comments

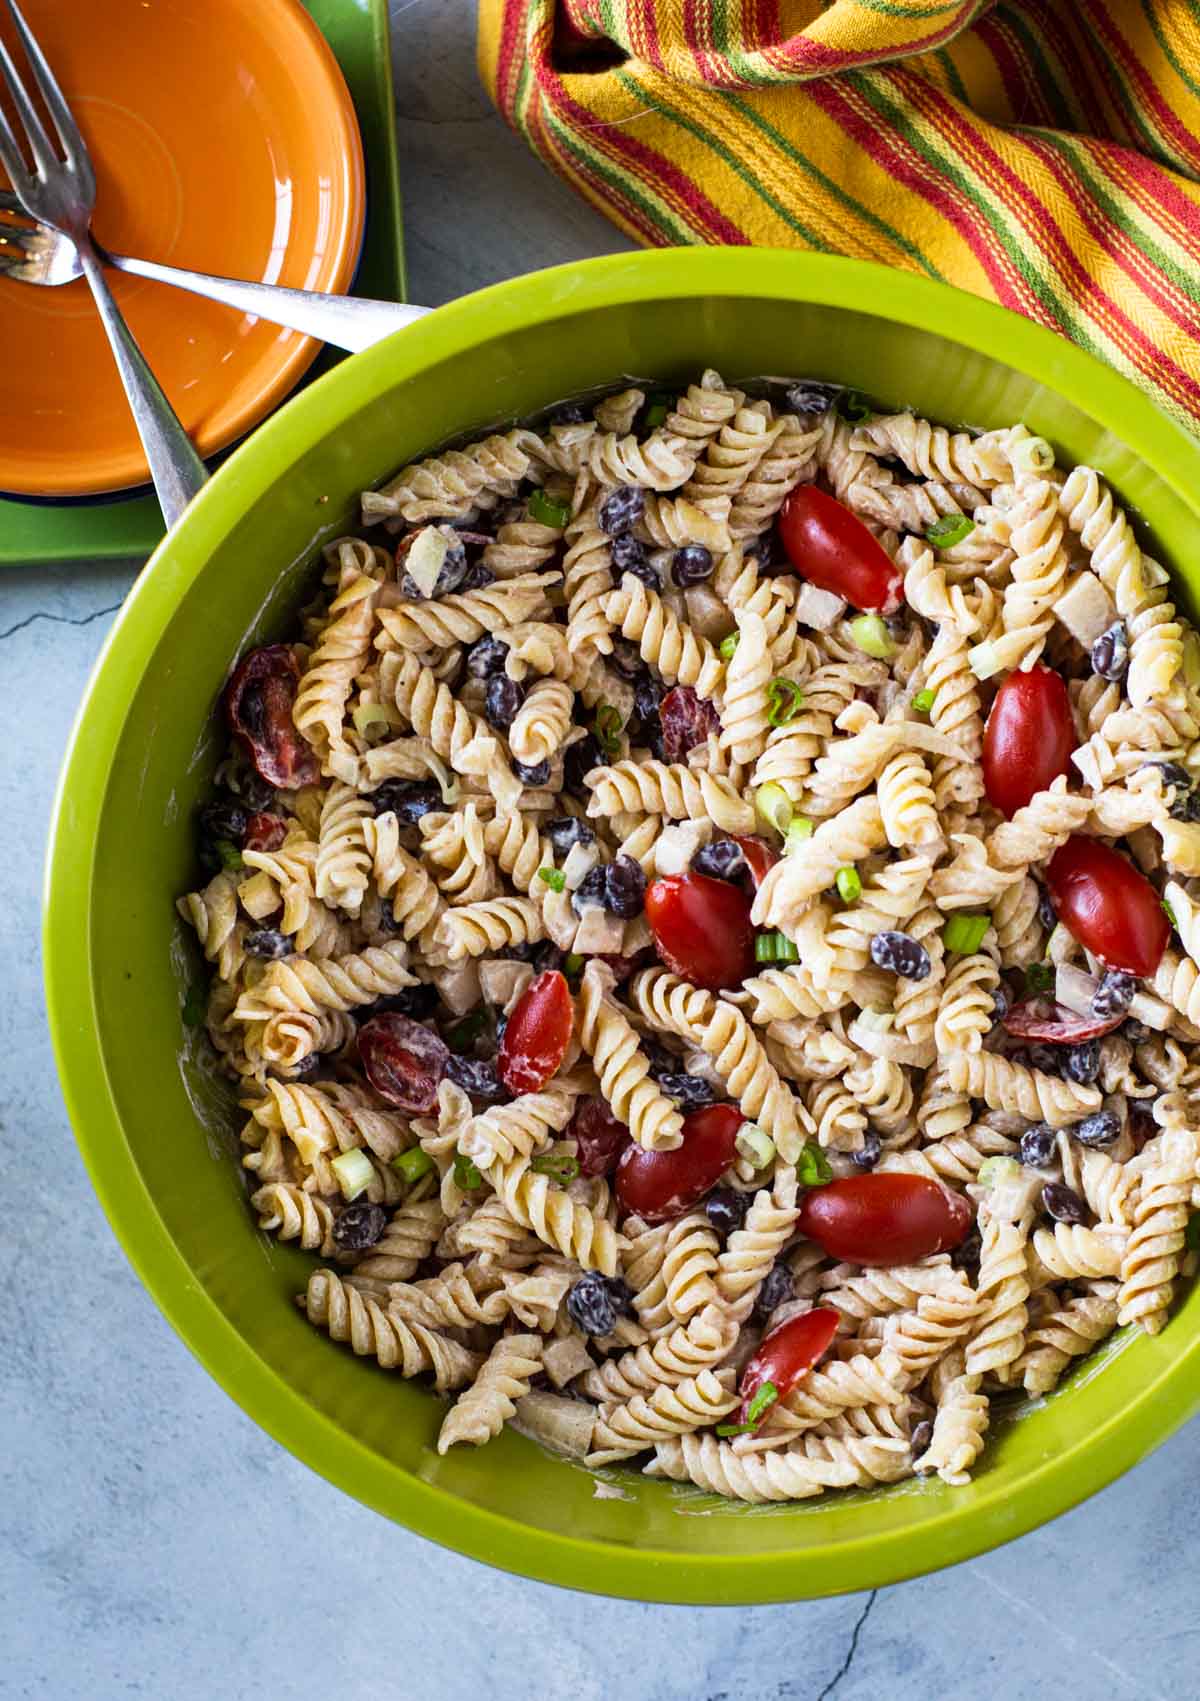
    Pasta salad with black beans and cherry tomatoes.

    This Rotini Pasta Salad is made with a creamy ranch dressing, sour cream, bbq sauce dressing for an irresistibly Southwestern flavor. With Black beans and tomatoes this is potluck picnic perfect.

    BBQ Pasta salad with black beans and cherry tomatoes.

    Pasta salad … ’tis the season. And it’s hard to beat a good pasta salad. A staple at back yard Summer cookouts, it’s nice to have a variety of recipes to see you through the season.

    For this creation, I wanted something that would stand up to and compliment the wonderful flavor and texture of a beef brisket. And it was perfect.

    With a championship lineup of Southwest ingredients, this rotini pasta salad is one you’ll devour all Summer long.

    Let’s take a look:

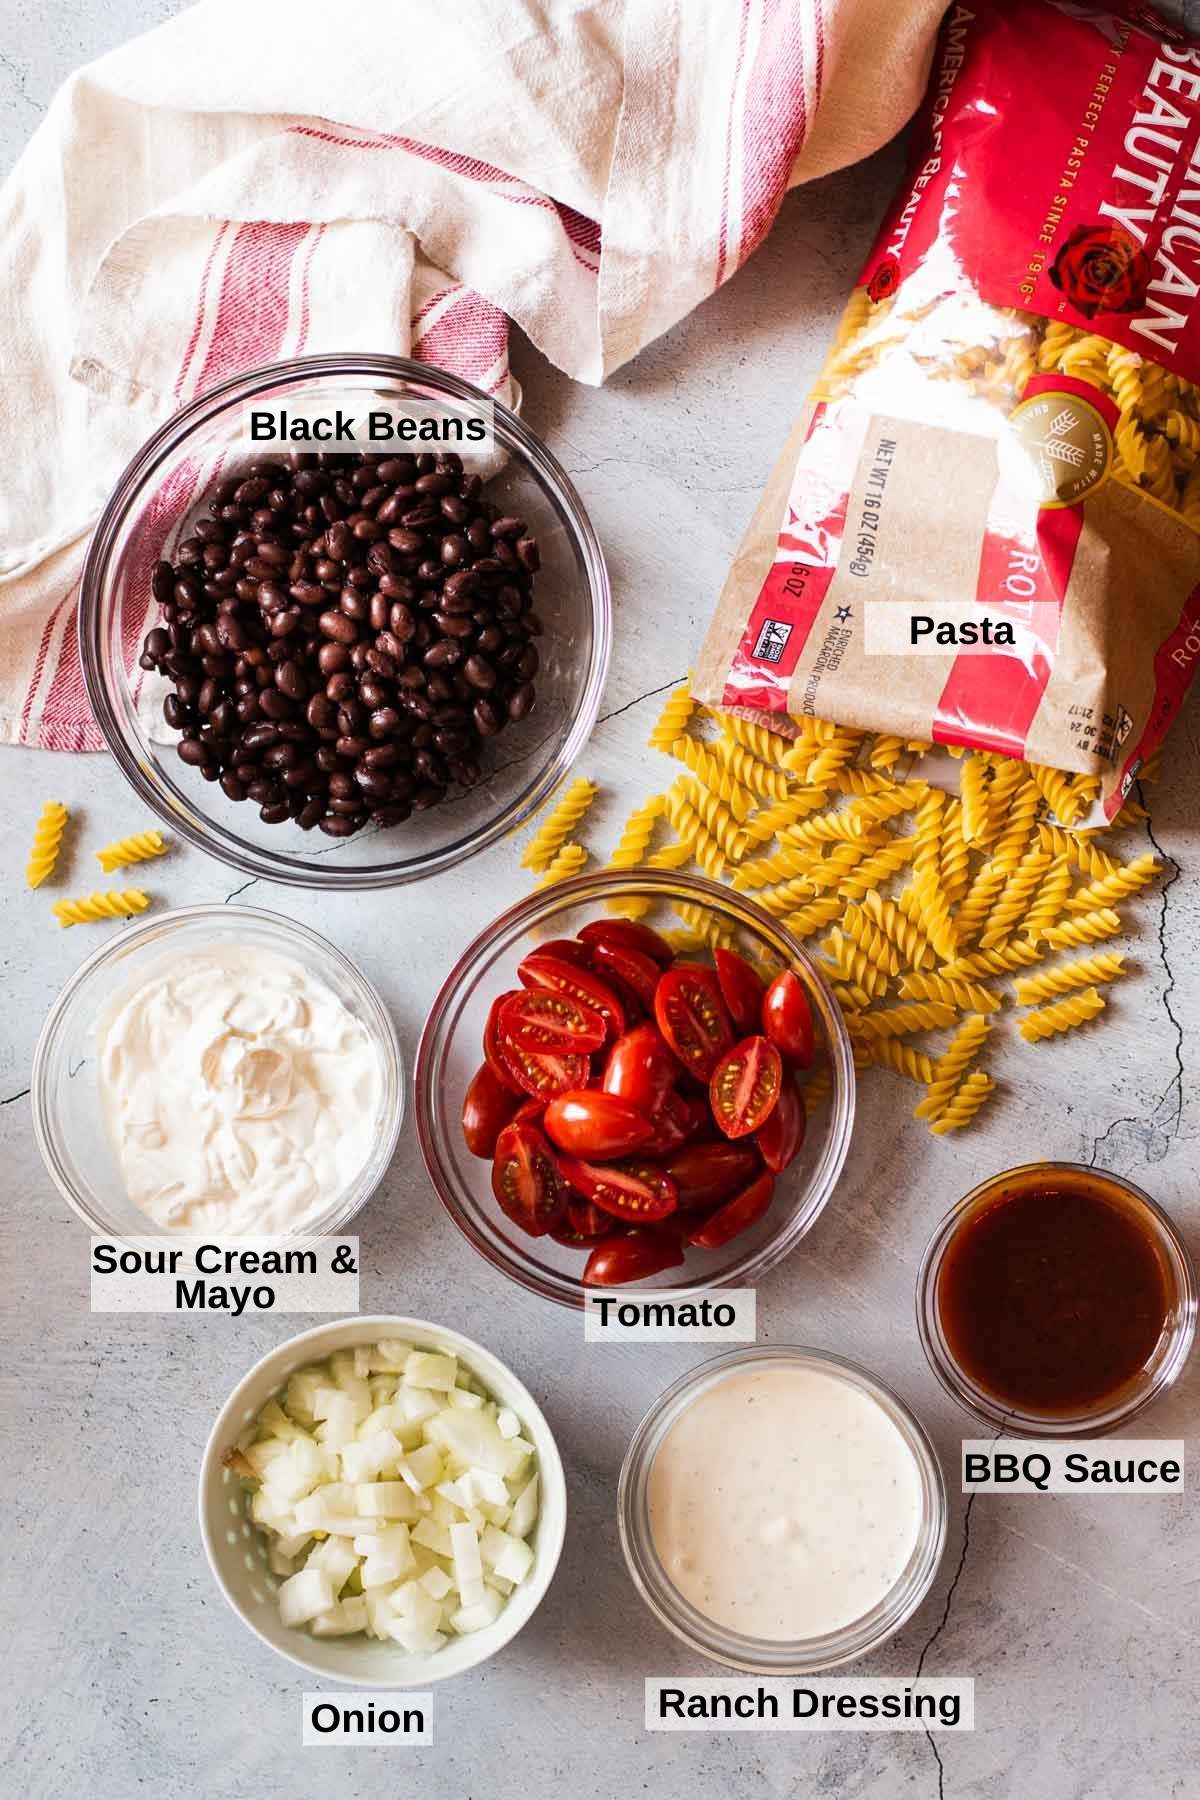
    Ingredients You’ll Need

    Ingredients to make bbq pasta salad with black beans.
    • Black Beans, canned.
    • Pasta: For this recipe, we’re using curly fun Rotini pasta. It’s curves, nooks and crannies are great for holding on to the creamy sauce.
    • Sour Cream: Full fat please. A big bowl of pasta salad is no time to count fat calories. For a creamier experience, use regular sour cream.
    • Tomatoes, Fresh tomatoes when in season, or Grape tomatoes. Tomatoes add a pop of Summer color to this pasta salad.
    • BBQ Sauce, your favorite brand.
    • Sweet Onion
    • Ranch Dressing, use your favorite brand, or better yet, make my recipe for Spicy Ranch Dressing.
    • Mayonnaise

    Chef Tip: I like to purchase Cherub brand tomatoes. Cherubs are a variety of grape tomatoes which have a stronger outer skin and meatier, less watery flesh. They are easier to slice for salads, hold up better during cooking or roasting and are reliable year round with their mild, sweet flavor.

    Ingredient Subs and Swaps

    • Pasta: I like to use a flexible softer pasta such as Rotini pasta. Elbow macaroni would be a good substitute, or shells. Avoid thicker sturdy pastas such as rigitoni or penne.
    • Onion: Substitute red onion for white or sweet onion.

    Instructions

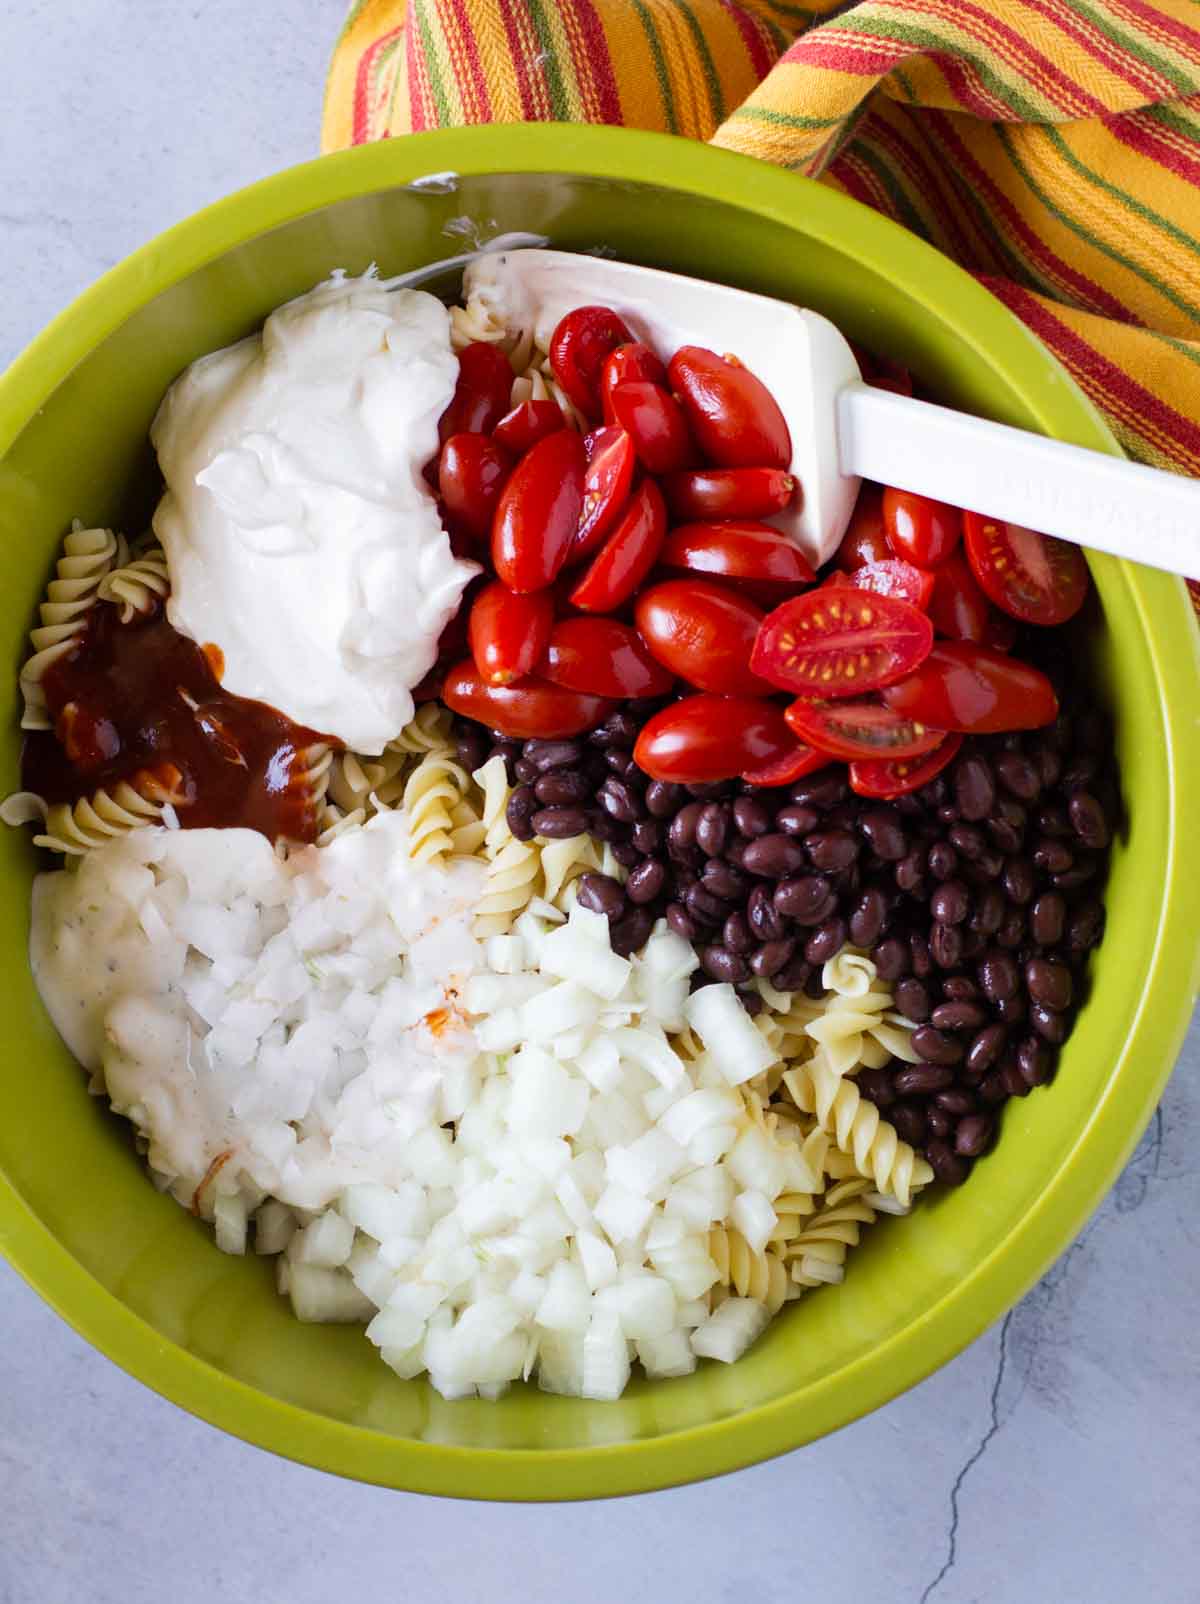
    • Step 1: Cook the rotini pasta according to package instructions. Fish out about ½ cup of the pasta water before draining. In a large bowl combine all ingredients. Using a large spoon gently stir until well combined. Add a little pasta water at a time to make it creamier.

    Pro Tip: Why is pasta water good for pasta sauce? Don’t throw all of that pasta cooking liquid down the drain, It's liquid gold. It's a must to add to any sauce for any pasta dish. It's high in starch and this salty starchy water helps the sauce cling to the pasta while helping to thicken the sauce. It turns any pasta dish into a luxurious pasta dish.

    Variations

    Make this rotini pasta salad your own, here are some suggestions for add-in ingredients.

    • Add 1 cup of sweet corn. Use frozen (that’s been thawed) or canned.
    • To heat things up, add a 4 ounce can of chopped green chile peppers.
    • Add chopped yellow bell pepper or red bell pepper.
    • Add 1 avocado that’s been chopped.
    • One pasta has cooled, add 2 cups Mexican blend shredded cheese.
    Can You Freeze Pasta Salad?

    Technically you can, however, I feel the texture is compromised when doing so. Its best to enjoy this pasta salad fresh, or as refrigerated leftovers.

    Storage

    • This Rotini Pasta Salad is a perfect make-ahead pasta salad. It’s one of those dishes that tastes better the next day. It will keep in the refrigerator, well sealed, for three to 4 days. If it becomes dried out during that time, just give it a good stir and add a drizzle of ranch dressing to bring it back to life.
    • This is a mayonnaise based pasta salad. Don’t let it set at room temperature for more than 2 hours.

    Tips For Success

    • To save time, prep all of the ingredients while the pasta is cooking.
    • Cook the pasta according to package directions for al dente. Once cooked, the pasta will continue to soften as it absorbs the dressing.
    • When draining pasta, rinse with cold water. This will stop the cooking process and also keep the pasta from becoming gummy.

    What To Serve It With?

    Any Summer grilled entree, but our favorite back yard cookout party meal starts with this pasta salad as a side for our favorite Silver Spur Ranch Blue Cheese Burgers.

    It will also compliment any burger,

    • Grilled Steak: Like my recipe for Grilled T-bone Steak With Cowboy Butter.
    • Chicken: Take a look at my recipe for Grilled Chicken Halves
    • Southwestern Entrees: A perfect side for Southwest Grilled Ground Chicken Burgers, or Hatch Green Chile Cheeseburgers.

    Rotini Pasta Salad with Black Beans

    This rotini pasta salad becomes irresistibly creamy by using the combo of sour cream and mayo for the sauce. Adding bbq sauce and ranch dressing makes this a Southwest pasta salad that will compliment any Summer entree. Pot luck picnic perfect!

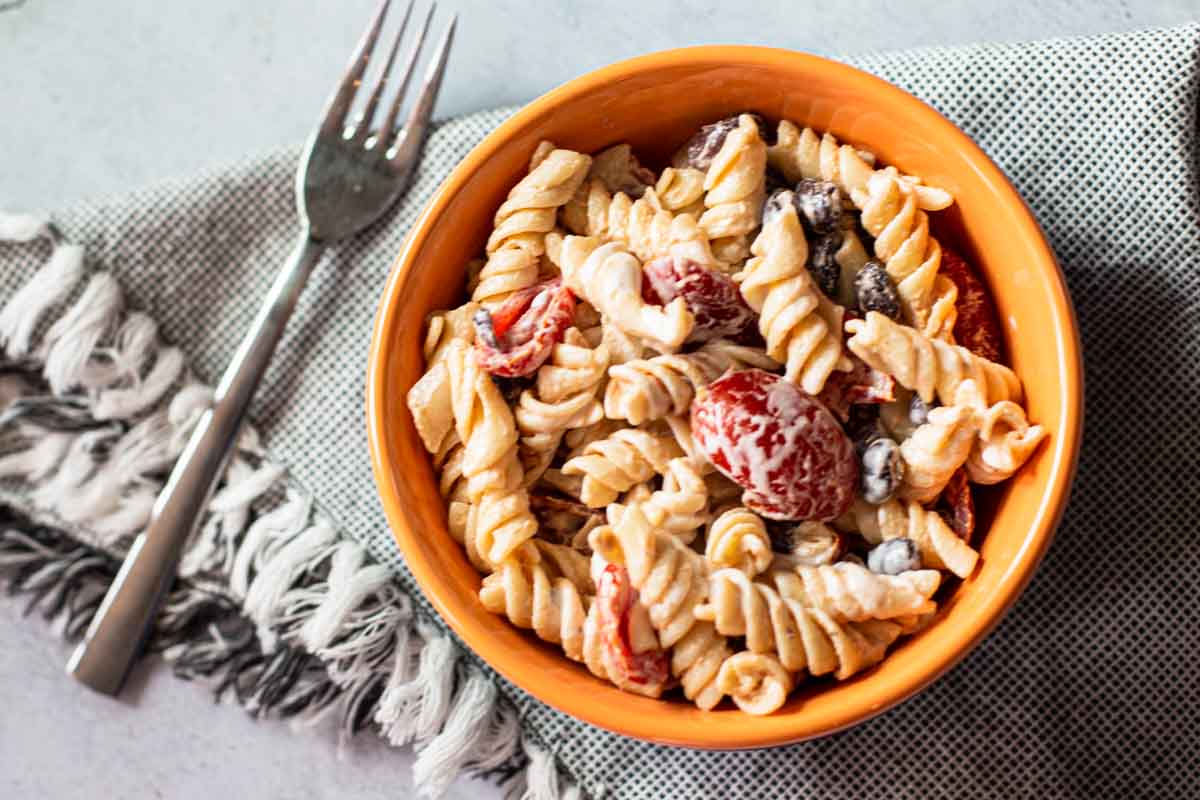
    Rotini pasta salad with black beans and cherry tomatoes.

    More Pasta Salad Recipes You Might Like

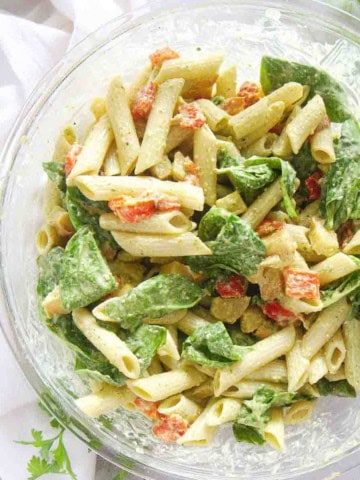
    • A bowl of Whole Foods Smoked Mozzarella Pasta Salad.
      Whole Foods Smoked Mozzarella Pasta Salad with Creamy Parmesan Sauce
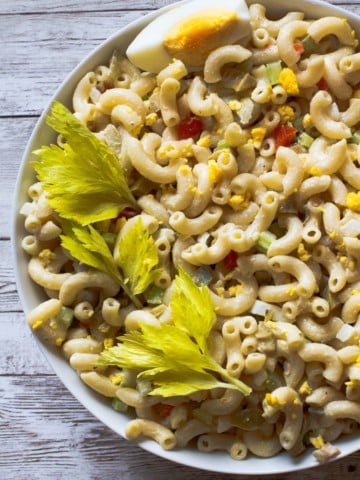
    • Elbow Macaroni Summer Pasta Salad recipe with celery and hard boiled eggs
      Old Fashioned Classic Macaroni Salad, Perfectly Sweet, Creamy and Tangy
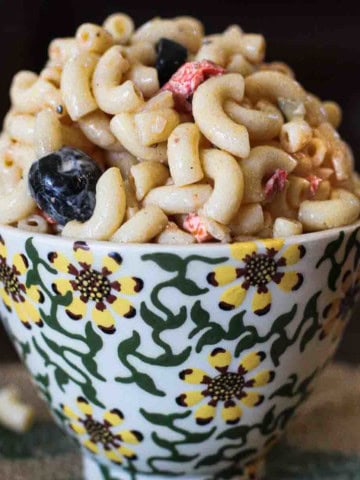
    • Pioneer Woman Macaroni Salad in a sunflower design bowl.
      Pioneer Woman’s Macaroni Salad
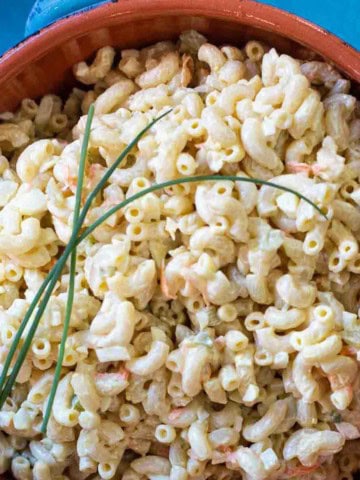
    • Amish Macaroni Salad garnished with chives.
      Lancaster County Amish Macaroni Salad

    And check out my Chicken Macaroni Salad if you're looking for a main course pasta dish.

    And if you’re looking for even more side dish recipes, don’t miss my Side Dish Category. You’ll find lots of great recipes including the most popular on my site for Broccoli Cheez Whiz Casserole, everyone’s favorite holiday casserole.

    If you liked this recipe, please leave a star ⭐⭐⭐⭐⭐ rating in the recipe card below and leave a comment. I always appreciate your feedback and hearing how everything went.

    And, don’t forget to subscribe to my newsletter for more delicious recipes and cooking tips. Make it a delicious day … every day.

    Pasta salad with black beans and cherry tomatoes.
    Print Recipe
    5 from 2 votes

    Rotini Pasta Salad With Black Beans

    A Southwestern pasta salad that you'll devour all Summer. Goes great with any grill or bbq entree.
    Prep Time15 minutes mins
    Cook Time12 minutes mins
    Total Time27 minutes mins
    Course: Pasta Recipes
    Cuisine: American
    Servings: 16
    Calories: 501kcal
    Author: Lea Ann Brown

    Ingredients

    • 1 pound Rotini Pasta
    • ½ Cup Sour Cream
    • ½ Cup BBQ Sauce
    • ½ Cup Ranch Dressing
    • ¼ Cup Mayonnaise
    • 14.5 ounce Can Black Beans Drained and rinsed
    • 1 sweet onion chopped
    • 2 Cups Cherry Tomatoes halved
    • 1 tablespoon cider vinegar
    • 1 teaspoon sugar
    • salt and pepper to taste

    Instructions

    • Cook Pasta according to directions on package. Before draining, reserve about a cup of the starchy pasta liquid.
    • In the meantime combine Sour Cream, BBQ Sauce, Homemade Ranch Dressing, Mayonnaise, Black Beans, onion, tomatoes, sugar and vinegar. Drain pasta and allow to cool for about 5 minutes. Add to the salad ingredients and stir to combine. Pour in the pasta water until the pasta seems creamy. I usually use about ½ cup or a little more.

    Notes

    This Southwest Pasta Salad is a perfect make-ahead pasta salad. It’s one of those dishes that tastes better the next day. It will keep in the refrigerator, well sealed, for three to 4 days.
    Pro Tip: Why is pasta water good for pasta sauce? Don’t throw all of that pasta cooking liquid down the drain, It’s liquid gold. It’s a must to add to any sauce for any pasta dish. It’s high in starch and this salty starchy water helps the sauce cling to the pasta while helping to thicken the sauce. It turns any pasta dish into a luxurious pasta dish.
    Variations:
    • Add 1 cup of sweet corn. Use frozen (that’s been thawed) or canned.
    • To heat things up, add a 4 ounce can of chopped green chile peppers.
    • Add 1 avocado that’s been chopped.
    • Add 2 cups Mexican blend shredded cheese.

    Nutrition

    Calories: 501kcal | Carbohydrates: 82g | Protein: 24g | Fat: 9g | Saturated Fat: 2g | Polyunsaturated Fat: 4g | Monounsaturated Fat: 2g | Trans Fat: 1g | Cholesterol: 8mg | Sodium: 192mg | Potassium: 969mg | Fiber: 21g | Sugar: 6g | Vitamin A: 175IU | Vitamin C: 5mg | Calcium: 86mg | Iron: 5mg

    Creamy BBQ Rotini Pasta Salad … It’s what’s for a Summer Side Dish

    This recipe for Rotini pasta salad was first published June 2017 and republished April 2022 with step by step photos.

    Mango Pico de Gallo Recipe

    March 31, 2022 By Lea Ann Brown 39 Comments

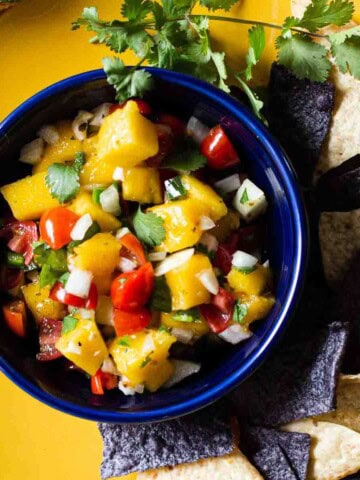
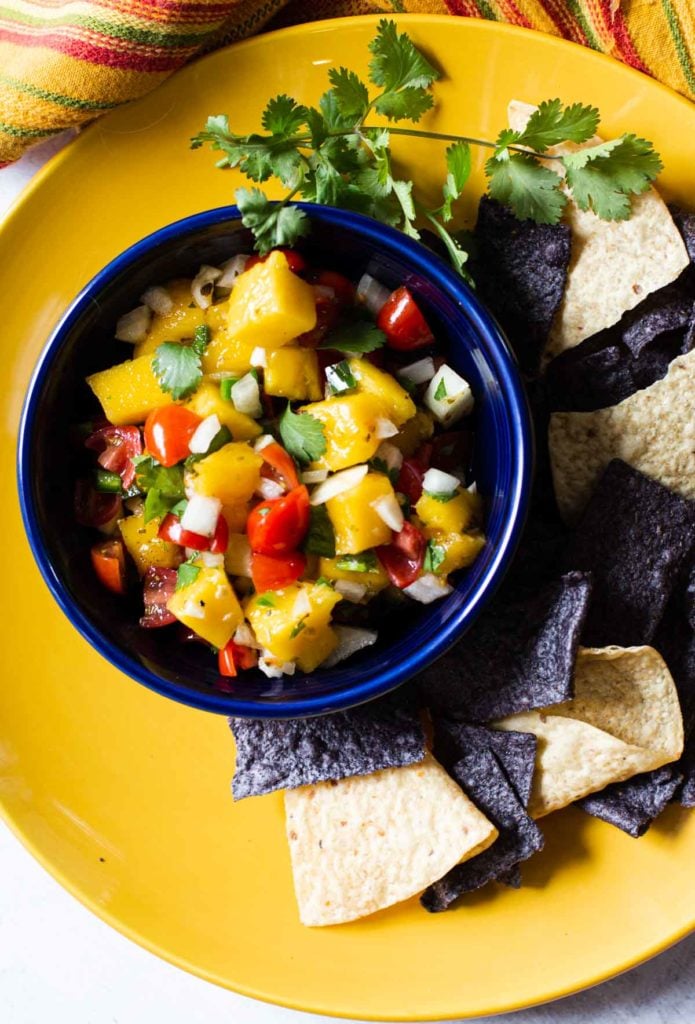
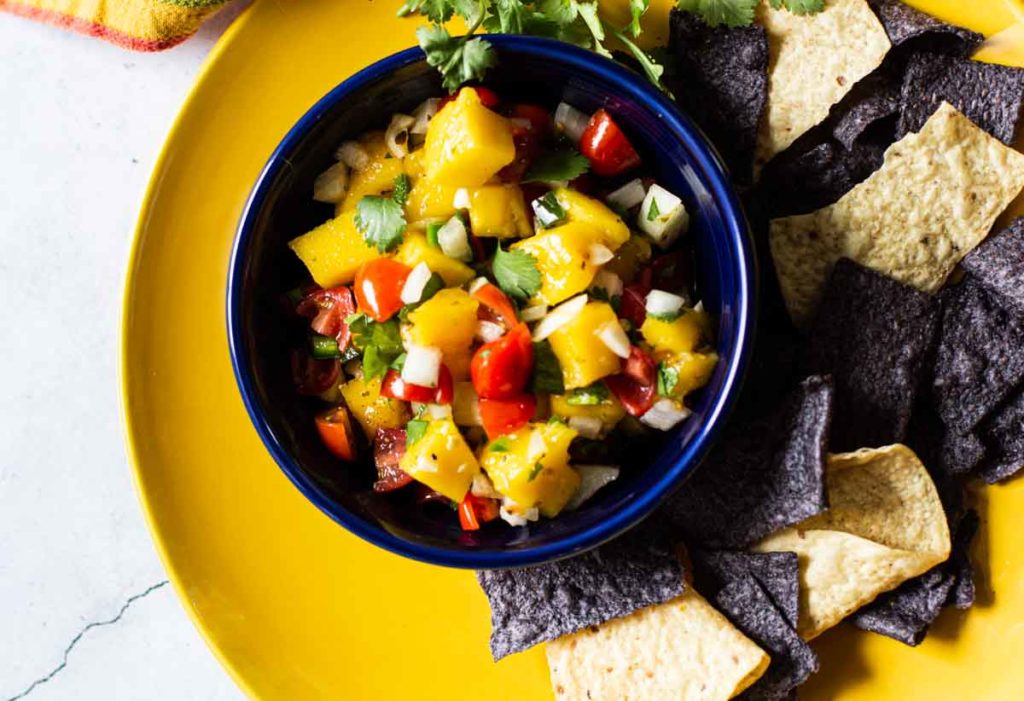
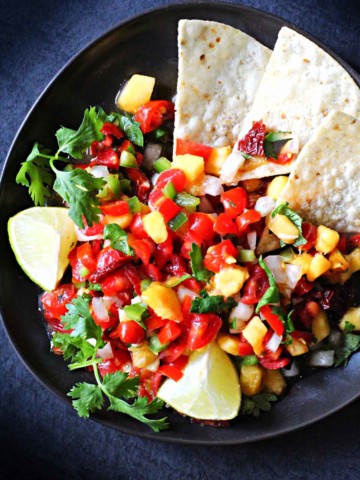
    Mango Pico de gallo in a blue Fiesta bowl served with corn chips.

    Mango Pico de Gallo is a more tropical version of everyone’s favorite fresh salsa. Sweet, spicy and packed full of fresh flavor, this traditional Mexican Southwestern salsa is great with chips or served over grilled fish, grilled chicken or steak.

    Pico de gallo with mango served blue and white corn chips.

    What Is Pico de Gallo?

    Pico de Gallo literally translates to “beak of the rooster”. It can also be labeled as salsa fresca and salsa cruda. Pico de gallo is a fresh, uncooked salsa, traditionally made from chopped tomatoes, chopped onions, chile peppers and cilantro and lime juice for seasoning. It’s vibrant color and refreshing flavor make this a very popular Mexican condiment.

    Salsa vs. Pico de Gallo

    What’s the difference between pico de gallo and salsa? Texture. Even though both can be made with fresh ingredients, salsa is usually processed to a fine “pureed” texture and contains liquid. Such as this Essential Restaurant Style Salsa made with canned tomatoes.

    Pico de gallo ingredients are simply tossed together without liquid. Pico de gallo can be used in much the same way as Mexican “liquid” salsas and served with chips, but can also compliment steak, chicken or even salmon.

    A Great Recipe For Fresh Produce Season

    Once our Colorado produce starts coming in, it seems like my mind-set automatically shifts towards Mexican food. Fresh and simple with lively colors and exciting flavors. I just don’t think there’s anything that showcases our state produce better.

    Certainly, mangos are not grown in Colorado, but added to fresh garden tomatoes, jalapeno peppers, onion and cilantro you’ve got a combination that will brighten those tortilla chips.

    And once our famous Colorado Palisade Peaches arrive, I like to switch out the mango for chopped peaches.

    Easy – peasy, let’s take a look.

    Ingredients

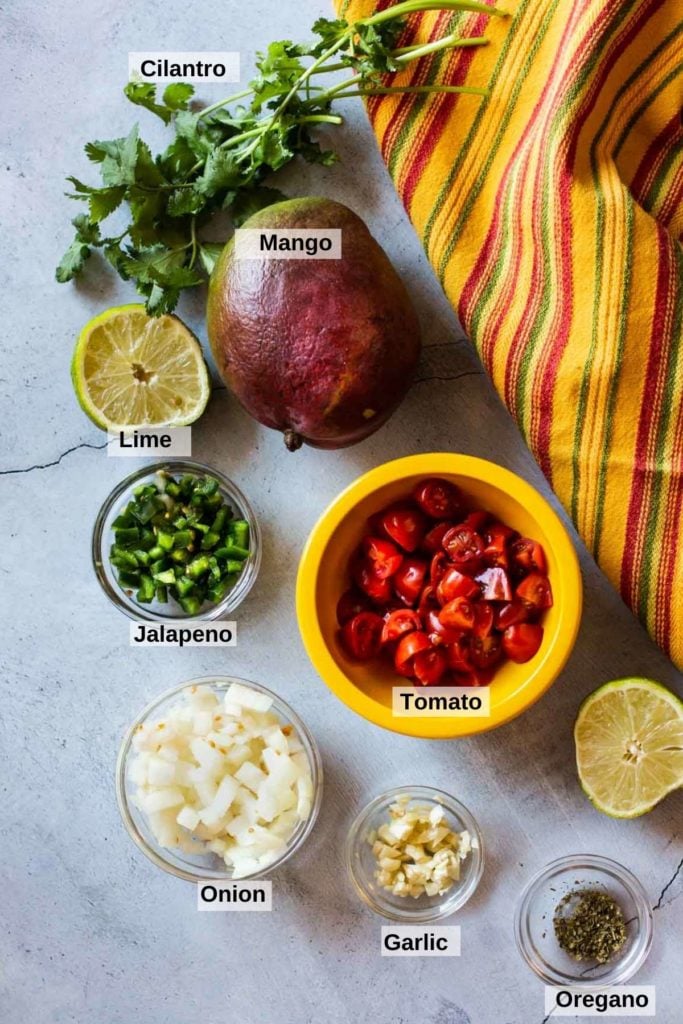
    Ingredients to make mango pico de gallo.
    • Cilantro
    • Mango
    • Lime, for juice
    • Jalapeno Pepper
    • Tomatoes
    • Sweet Onion
    • Garlic
    • Mexican Oregano

    Ingredient Swaps and Substitutions

    • Mango: Mangos may be hard to find at certain times of the year. Substitute with chopped fresh pineapple.
    • When tomatoes are not in season, don’t reach for those sad hot house tomatoes. Rather purchase cherry tomatoes and quarter them. Those little bite sized tomatoes consistently deliver good flavor and a firm texture. Roma tomatoes left to ripen on your countertop for a few days are also a good purchase due to their density.
    • Mexican Oregano: Mexican oregano is preferred for this recipe. It's peppery, grassy, earthy flavor is a good compliment for Mexican Food. If you don't have Mexican Oregano, substitute Marjoram. Known for its aroma and delicate flavor, its related to oregano and will bring a sweet undertone to any recipe.
    • Onion: Red onion is traditionally used for pico de gallo. I find the flavor too strong so like to use sweet onion. Substitute red onion for the sweet onion.

    How to make Mango Pico De Gallo.

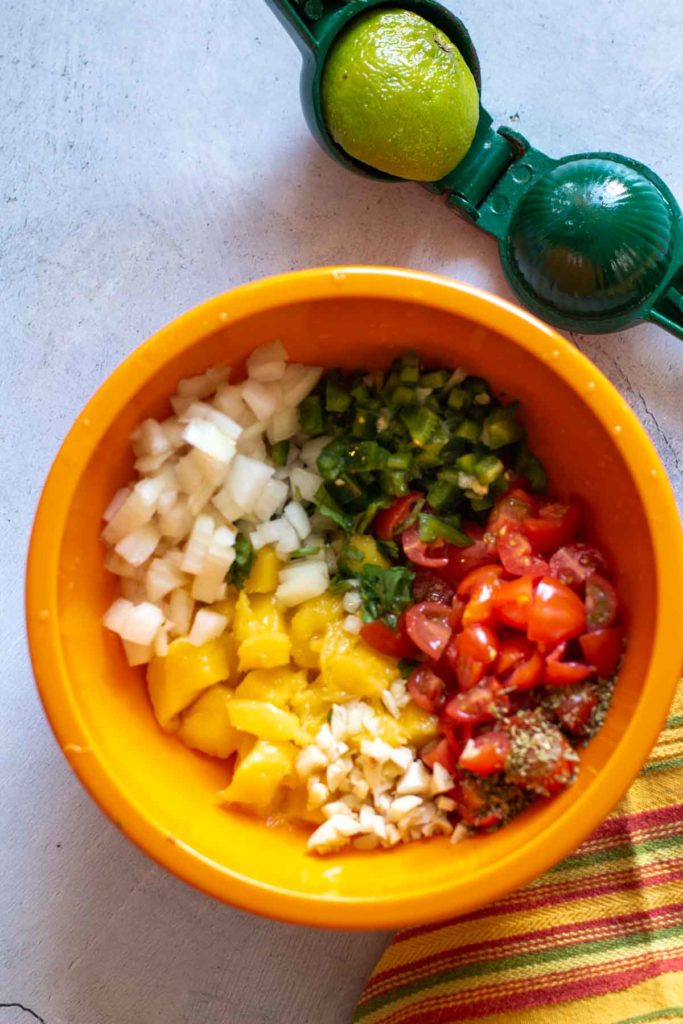
    Chopped ingredients in a bowl to make pico de gallo.
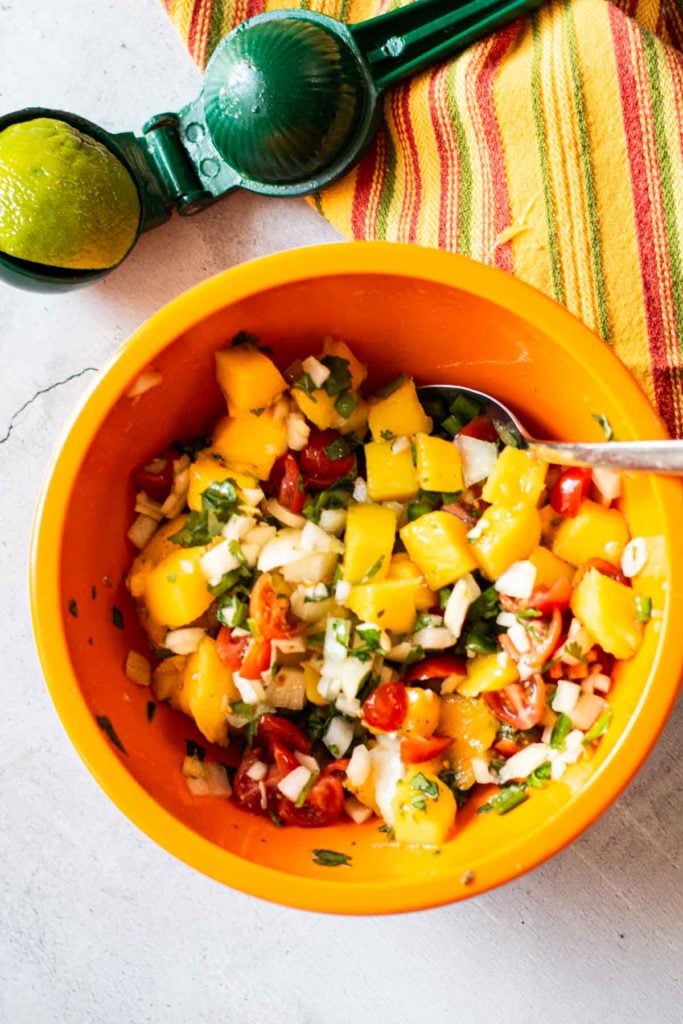
    Mango pico de gallo in a bright orange bowl.
    1. Step 1: Chop all ingredients and place them in a bowl. This is a good opportunity to practice your knife skills. Evenly cut ingredients leads to pride in craft and presentation.
    2. Step 2: Simply stir to combine and this mango pico de gallo is ready to serve.
    OXO Tool to slice mangoes for mango cream cheese stuffed french toast

    Tip: Cutting a mango can be a tedious project. Once peeled, they’re slimy and it an be difficult to cut around that seed without mangling the delicate flesh. I purchased a mango slicer a few years ago and it’s been a life-saver for preparing mango for any recipe. No need to peel the fruit, just position the slicer in the direction of the seed and press down. Once the mango is sliced, using a knife, score the flesh in two directions and using a spoon, scoop out and remove the cubes of mango from the skin.

    Variations

    • Less Spicy: If you’re sensitive to the heat from jalapeno peppers, simply remove the seeds and veins from the pepper. That’s where the heat lies. Cut off the top of the jalapeno and then using the handle of a spoon, scrape out the seeds and veins. Or slice the jalapeno open, cut it lengthwise. Use the back of a knife to scrape out the seeds and veins.
    • Pico de Gallo with Avocado: Right before serving, add some chopped avocado. It will add a creamy texture to mango pico de gallo.

    Tip: Use a serrated knife to dice tomatoes. And selecting a firm tomato variety such as roma or cherry tomatoes will make chopping easier and with less juice.

    How To Use It

    Mango pico de gallo traditionally makes a great dip for a bowl of sturdy tortilla chips. But use it as a topping for a Grilled Flank Steak, Grilled Chicken, a topping for Tacos, or even Quesadillas.

    Make Ahead and Storage

    • This recipe is a perfect salsa to make ahead. Once mixed together, refrigerate covered with plastic wrap to let the flavors blend. It becomes more flavorful as it sits.
    • Store covered in the refrigerator for 3 – 4 days. Mango pico de gallo does not freeze well. Doing so will compromise the texture.

    Expert Tip

    • Purchase a ripe mango with good color. When the mango is squeezed, there should be a little give, without it feeling mushy. A ripe mango will deliver a more sweet flavor for this salsa.
    • Add a little sugar. Tomatoes and limes are acidic, adding a teaspoon of sugar will balance out those acidic flavors.
    Mango salsa in a blue Fiesta Bowl on a yellow plate with tortilla chips.
    Is Mango Pico de Gallo Gluten Free?

    Yes. All of the ingredients in this recipe are fresh and naturally gluten free.

    I hope you give this fresh healthy mango pico de gallo recipe a try, I think you’ll find that mango adds a perfect sweet touch. Flavored with traditional salsa seasonings.

    Mango Pico de Gallo is a recipe you’ll want to add to your salsa repertoire. A tropical version to celebrate Summer.

    Explore More Southwestern Mexican Salsa Recipes

    • Mexican restaurant salsa in a bowl served with tortilla chips.
      Homemade Mexican Restaurant Style Salsa
    • Black bean corn salsa dip in a yellow bowl.
      Black Bean And Corn Salsa
    • spicy peach salsa recipe served with tortilla chips
      Chipotle Peach Salsa Recipe
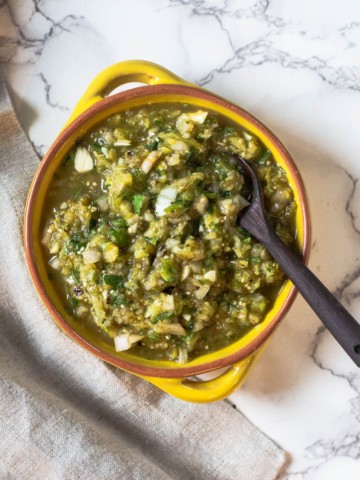
    • Homemade Roasted Tomatillo Salsa Verde

    And if you’re looking for more Mexican salsa recipes, don’t miss this one Salsa Macha. A unique topping that you can serve on just about anything. Check out my Mexican food category, you’ll find lots of Mexican food recipes to bring a fiesta to your dinner table.

    If you liked this recipe, please leave a star ⭐⭐⭐⭐⭐ rating in the recipe card below and leave a comment. I always appreciate your feedback and hearing how everything went.

    And, don’t forget to subscribe to my newsletter for more delicious recipes and cooking tips. Make it a delicious day … every day.

    Mango Pico de gallo in a blue Fiesta bowl served with corn chips.
    Print Recipe
    5 from 1 vote

    Mango Pico de Gallo

    Mango Pico de Gallo is a more tropical version of everyone's favorite salsa. Sweet, spicy and packed full of fresh flavor, this is great with chips or served over salmon or steak.
    Prep Time15 minutes mins
    Cook Time0 minutes mins
    Total Time15 minutes mins
    Course: Appetizer Recipes
    Cuisine: Mexican
    Diet: Gluten Free
    Servings: 4
    Calories: 54kcal
    Author: Lea Ann Brown

    Equipment

    • Mango Slicer

    Ingredients

    • 2 medium tomatoes diced. About 1 cup
    • ½ Cup sweet onion diced
    • 2 medium jalapeno diced
    • 1 tablespoon minced garlic
    • 1 medium mango peeled and chopped
    • Juice of 1 lime
    • 2 tablespoons chopped cilantro
    • ¼ teaspoon Mexican oregano or dried marjoram
    • Salt, pepper, sugar to taste

    Instructions

    • Prepare all of the ingredients by chopping.
    • In a large bowl mix all ingredients together. Taste and adjust any ingredients and flavors.

    Notes

    This recipe is gluten free, dairy free, keto and low carb.
    Make Ahead/Storage
    • This recipe is a perfect salsa to make ahead. Once mixed together, refrigerate covered with plastic wrap to let the flavors blend. It becomes more flavorful as it sits.
    • Store covered in the refrigerator for 3 – 4 days. Mango pico de gallo does not freeze well. Doing so will compromise the texture.
    Variations
    • Less Spicy: If you’re sensitive to the heat from jalapeno peppers, simply remove the seeds and veins from the pepper. That’s where the heat lies. Cut off the top of the jalapeno and then using the handle of a spoon, scrape out the seeds and veins. Or slice the jalapeno open, cut it lengthwise. Use the back of a knife to scrape out the seeds and veins.
    • Pico de Gallo with Avocado: Right before serving, add some chopped avocado. It will add a creamy texture to mango pico de gallo.
    Tip
    Cutting a mango can be a tedious project. Once peeled, they’re slimy and it an be difficult to cut around that seed without mangling the delicate flesh. I purchased a mango slicer a few years ago and it’s been a life-saver for preparing mango for any recipe. No need to peel the fruit, just position the slicer in the direction of the seed and press down. Once the mango is sliced, using a knife, score the flesh in two directions and using a spoon, scoop out and remove the cubes of mango from the skin.
    As an Amazon Associate I earn from qualifying purchases.

    Nutrition

    Calories: 54kcal | Carbohydrates: 13g | Protein: 1g | Fat: 1g | Saturated Fat: 1g | Polyunsaturated Fat: 1g | Monounsaturated Fat: 1g | Sodium: 6mg | Potassium: 284mg | Fiber: 2g | Sugar: 10g | Vitamin A: 1164IU | Vitamin C: 37mg | Calcium: 22mg | Iron: 1mg

    Mango Pico De Gallo … It’s what’s for an appetizer.

    This pico de gallo recipe was first published August of 2011 and updated March 2022 with new photos and step by step instructions.

    « Previous Page
    Next Page »

    I'm Lea Ann

    Welcome to my Colorado kitchen. If you're a fan of rustic homestyle cuisine, you've come to the right place. I'm a Culinary School Grad with a passion to inspire you to cook as often as you can. I offer reliable, approachable and easy to follow recipes. So grab that skillet and let's cook.

    More about me

    Soup and Stew Recipes

    • Southwest chicken soup with hominy and potatoes.
      Sopa Ranchera, Southwest Chicken Soup
    • Creamy chicken tortilla soup with rotel tomatoes.
      Southwestern Creamy Chicken Tortilla Soup
    • Cowboy chili garnished with grated cheese and jalapeno pepers.
      New Mexico Style Cowboy Chili
    • Ground chicken chile with white beans.
      Giada’s Ground Chicken Chili with White Beans
    • Beef stew with mushrooms served in a skillet.
      Beef Stew With Mushrooms – Crock Pot Method
    • 7-can taco soup with ranch dressing.
      Original 7 Can Taco Soup with Ranch Dressing

    Reader Favorites

    • Super Moist Cheesy Cornbread with Creamed Corn
    • Flemings steakhouse macaroni and cheese in a white bowl.
      Flemings Steakhouse Mac and Cheese
    • A slice of Layered Mexican Casserole with ground beef and corn tortillas.
      Mexican Casserole with Ground Beef and Corn Tortillas
    • Beef Tagliata, thin sliced flank steak served over arugula and cherry tomatoes.
      Beef Tagliata (Italian Steak)
    • Ham and cheese quesadilla made with corn tortillas and topped with a fried egg.
      Crispy Ham and Cheese Corn Tortilla Quesadillas
    • Spinach chicken mushroom skillet dinner.
      Chicken Mushroom and Spinach Skillet

    Footer

    • Contact
    • About
    • Privacy Policy
    • Accessibility Statement
    • ↑ back to top

    Copyright © 2024 Cooking on the Ranch • Powered by Feast+

    Rate This Recipe

    Your vote:


    A rating is required
    A name is required
    An email is required