Cooking On The Ranch

  • Home
  • About
  • Recipe Roundup
  • Contact Me
  • Join Community
menu icon
go to homepage
  • Home
  • Our Favorite Grilling Recipes
  • About
  • Recipe Roundup
  • Contact Me
    • Facebook
    • Instagram
    • Pinterest
  • search icon
    Homepage link
    • Home
    • Our Favorite Grilling Recipes
    • About
    • Recipe Roundup
    • Contact Me
    • Facebook
    • Instagram
    • Pinterest
  • ×
    Home

    Easy Mixed Vegetable Side Dish

    January 24, 2016 By Lea Ann Brown 17 Comments

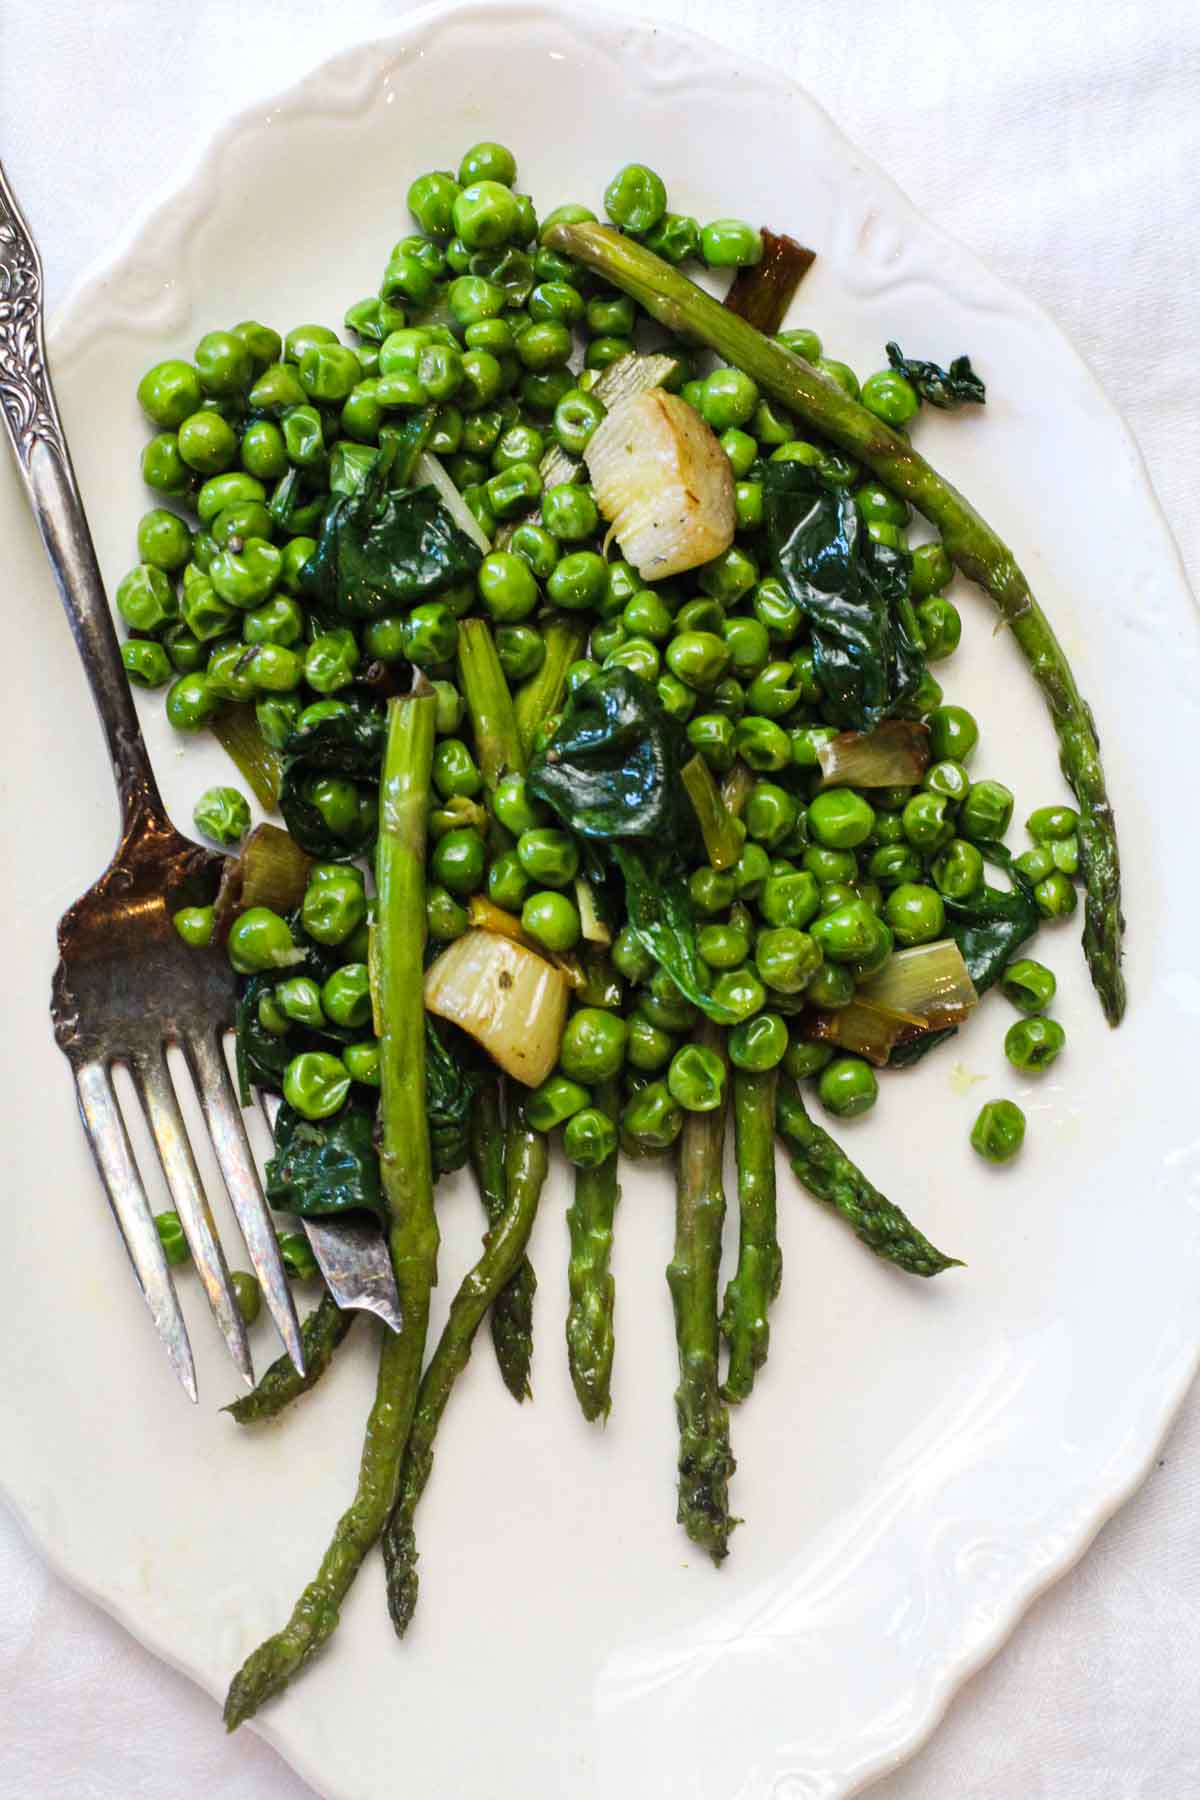
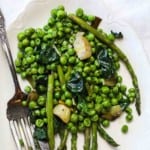
    Mixed green vegetable side dish.

    This is an easy, simple, feel-special mixed vegetable side dish recipe. Green, fresh and delicate, this Spring vegetable medley is ready to serve in about 15 minutes.

    Mixed green vegetable side dish.

    What You Can Expect From This Recipe

    Hands down, this is my favorite mixed green vegetable side dish. Why? Because it’s so easy and amazing with simple fresh flavors.

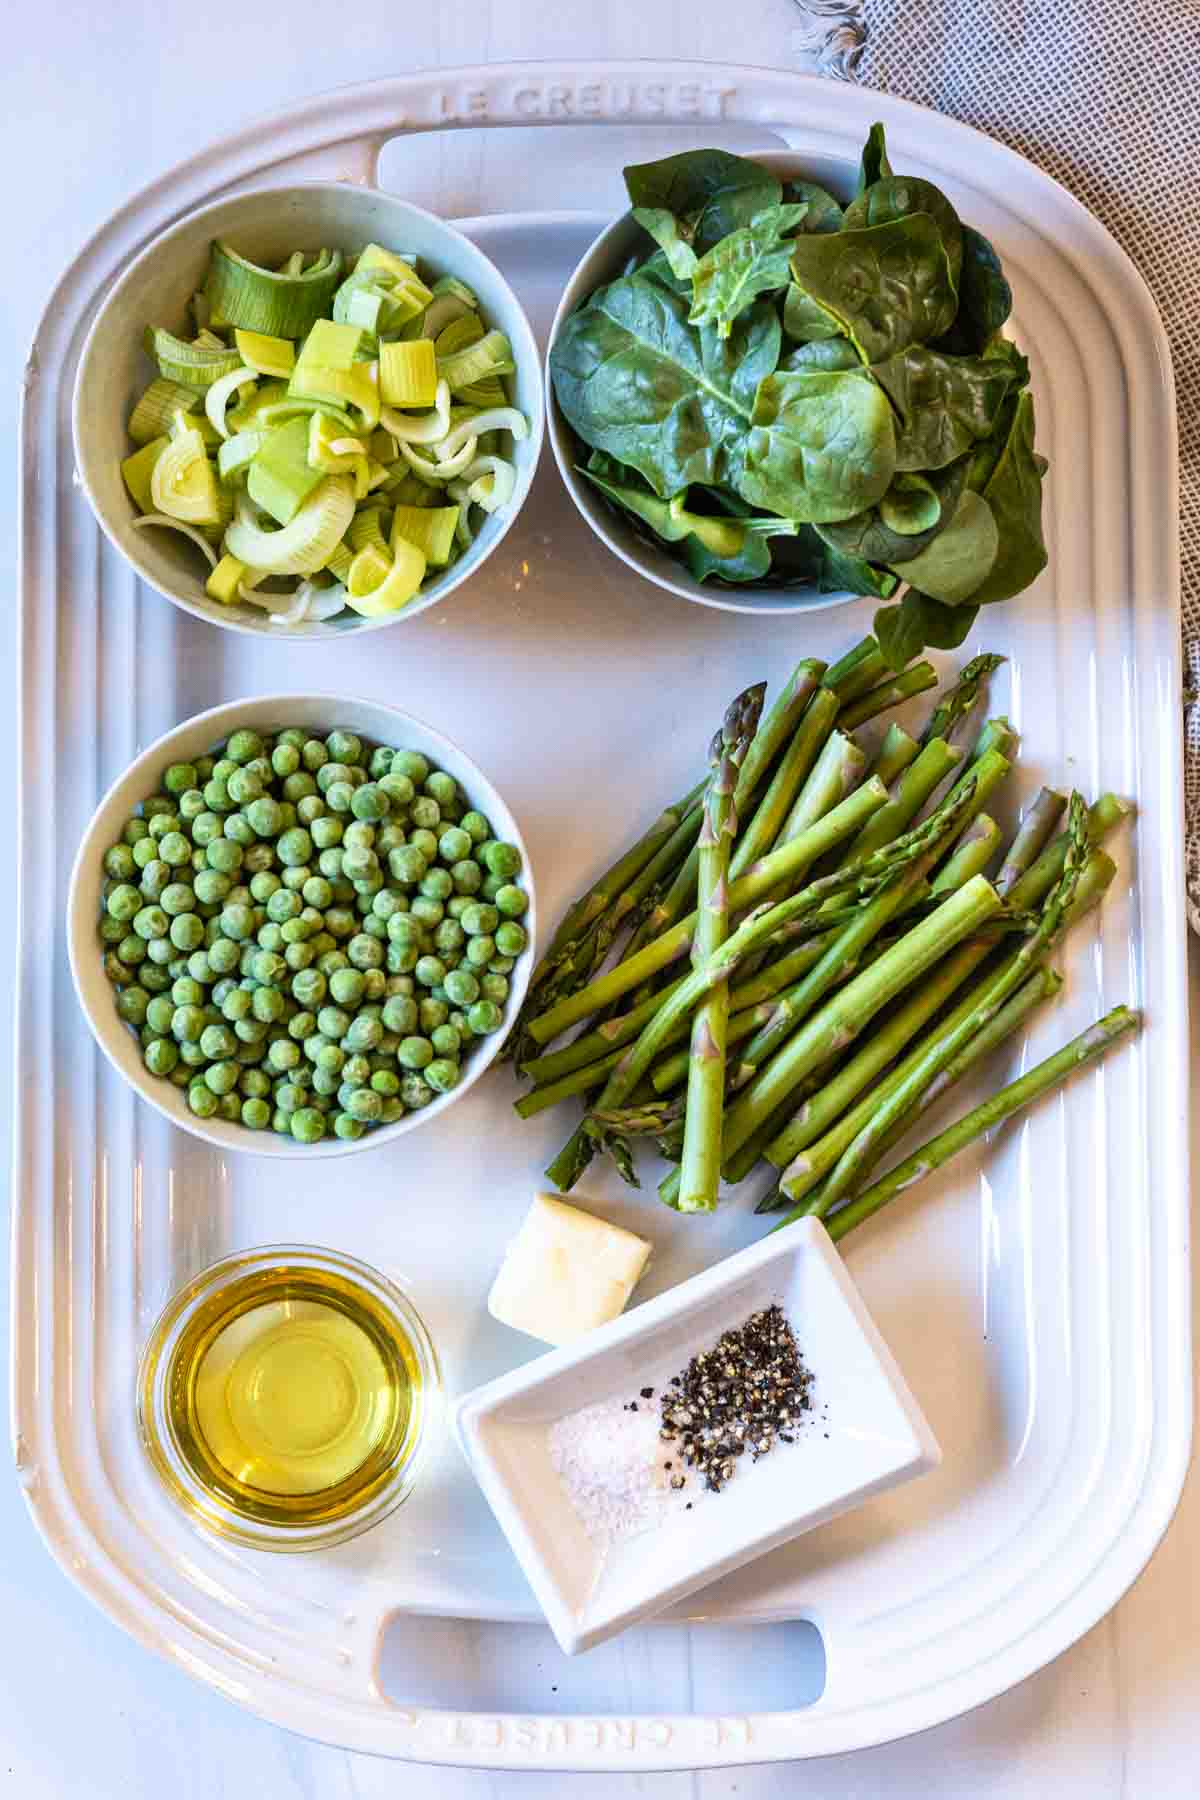
    This is a side dish combining asparagus, frozen peas, fresh spinach and leeks.

    It’s a beautiful way to take advantage of Spring vegetables, but please feel free to serve it year round.

    Simply seasoned with a little salt, pepper and butter, the flavor of the fresh vegetables shine when gently cooked.

    If you’ve made your decision for the main course, and you’re wondering what to serve as a clean vegetable side dish, this is a recipe I recommend you try. You don’t need a special occasion to serve this easy and elegant green vegetable medley.

    This recipe comes from the ever reliable Martha Stewart with her advice: “Add any spring vegetables to this dish, but make sure to choose fresh and tender ones that will cook in a flash”.

    Asparagus side dishes are so popular, this recipe showcases those fresh spears. Let’s take a look.

    Ingredients You’ll Need

    Ingredients to make mixed green vegetable side dish.
    • Neutral Oil: Use Avocado oil, vegetable oil or canola oil. We’ll also use butter to sautee the delicate peas and spinach.
    • Leek: If you’ve never cooked with leek, you’re in for a treat. A mild sweet vegetable with a hint of onion flavor.
    • Asparagus
    • Baby Spinach: Fresh please, frozen spinach simply won’t work here.
    • Frozen peas. Make it easy, frozen peas work beautifully in this dish.

    Step by Step Instructions, It’s Easy!

    Green vegetable medley step 1.
    How to make skillet green vegetable medley step 2.
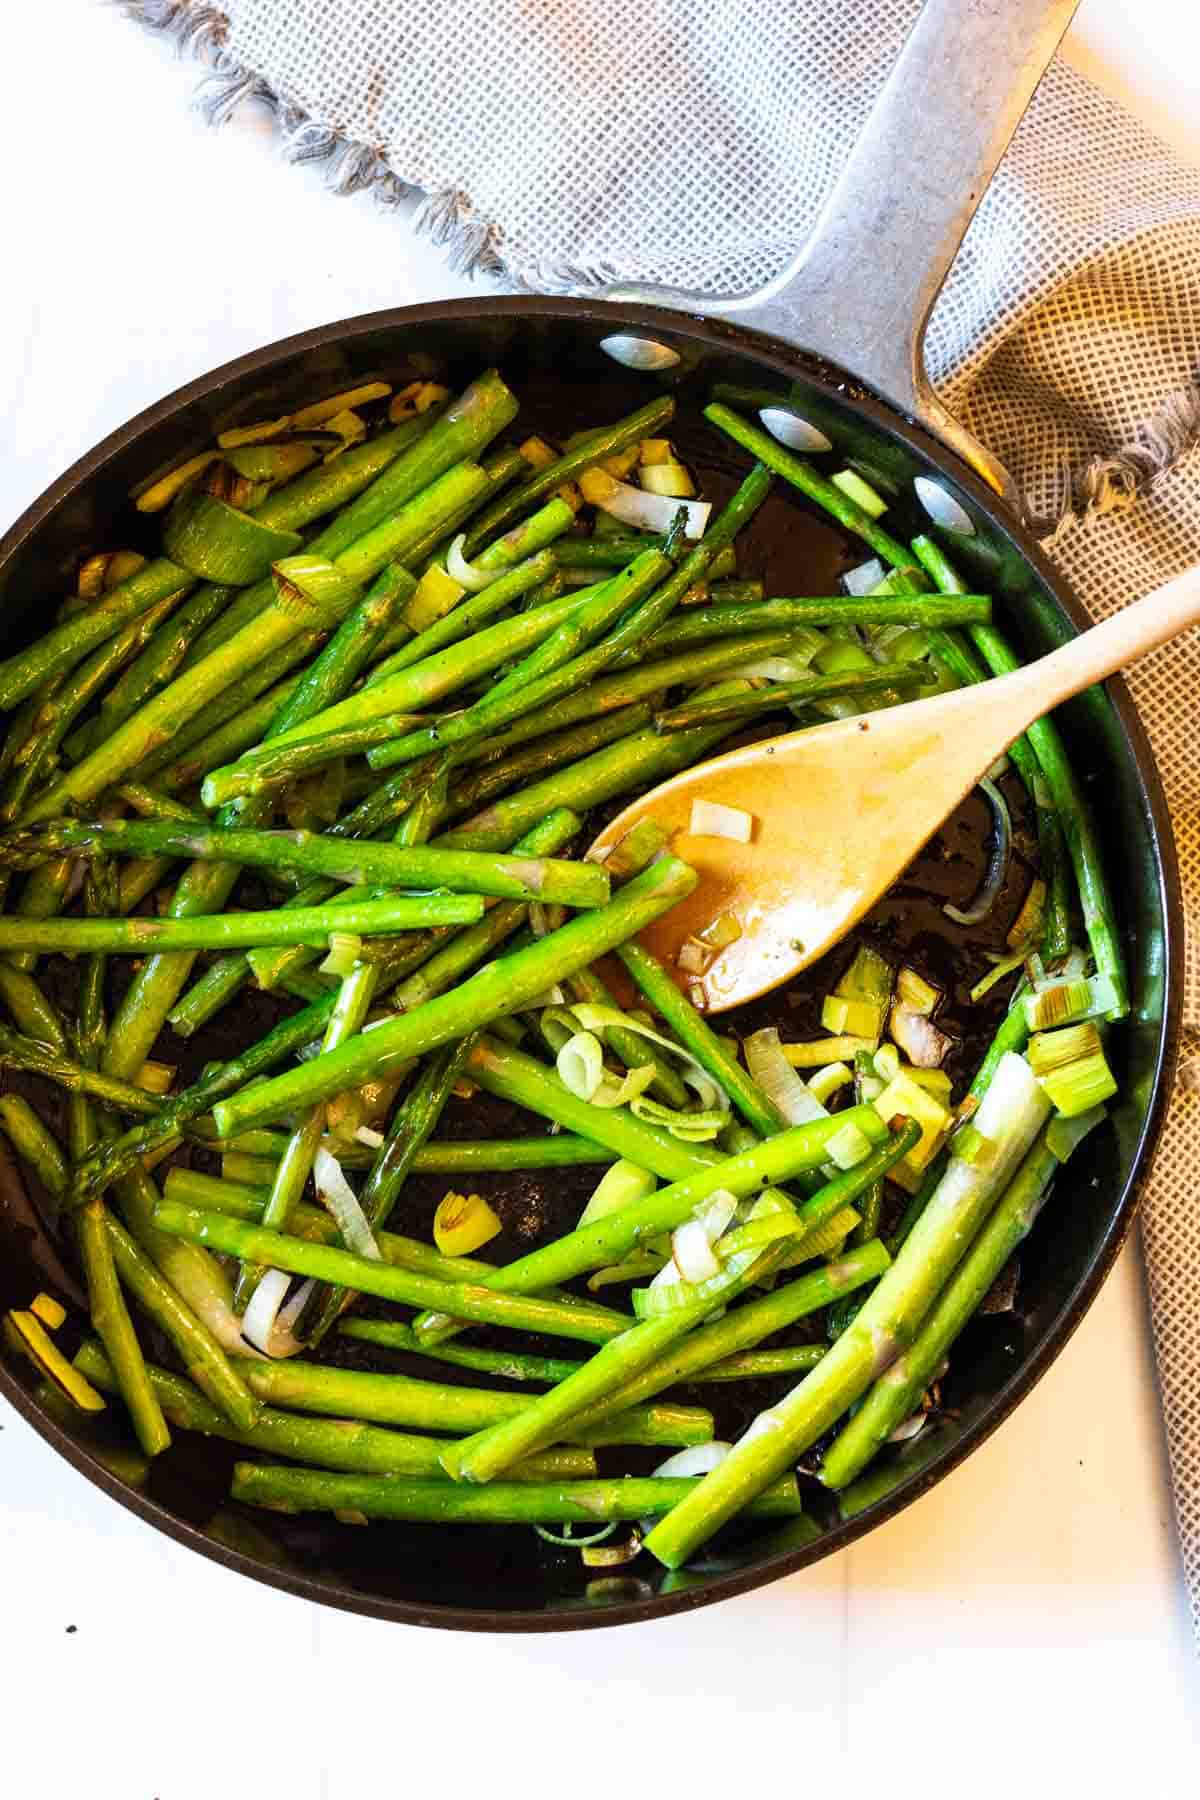
    1. Step 1: Cook the tougher vegetables first. Add oil to and heat a 12-inch skillet over medium high heat until oil is hot. Add asparagus, leeks and salt and saute turning frequently until just getting tender, about 5 minutes. Remove asparagus and leeks to a plate
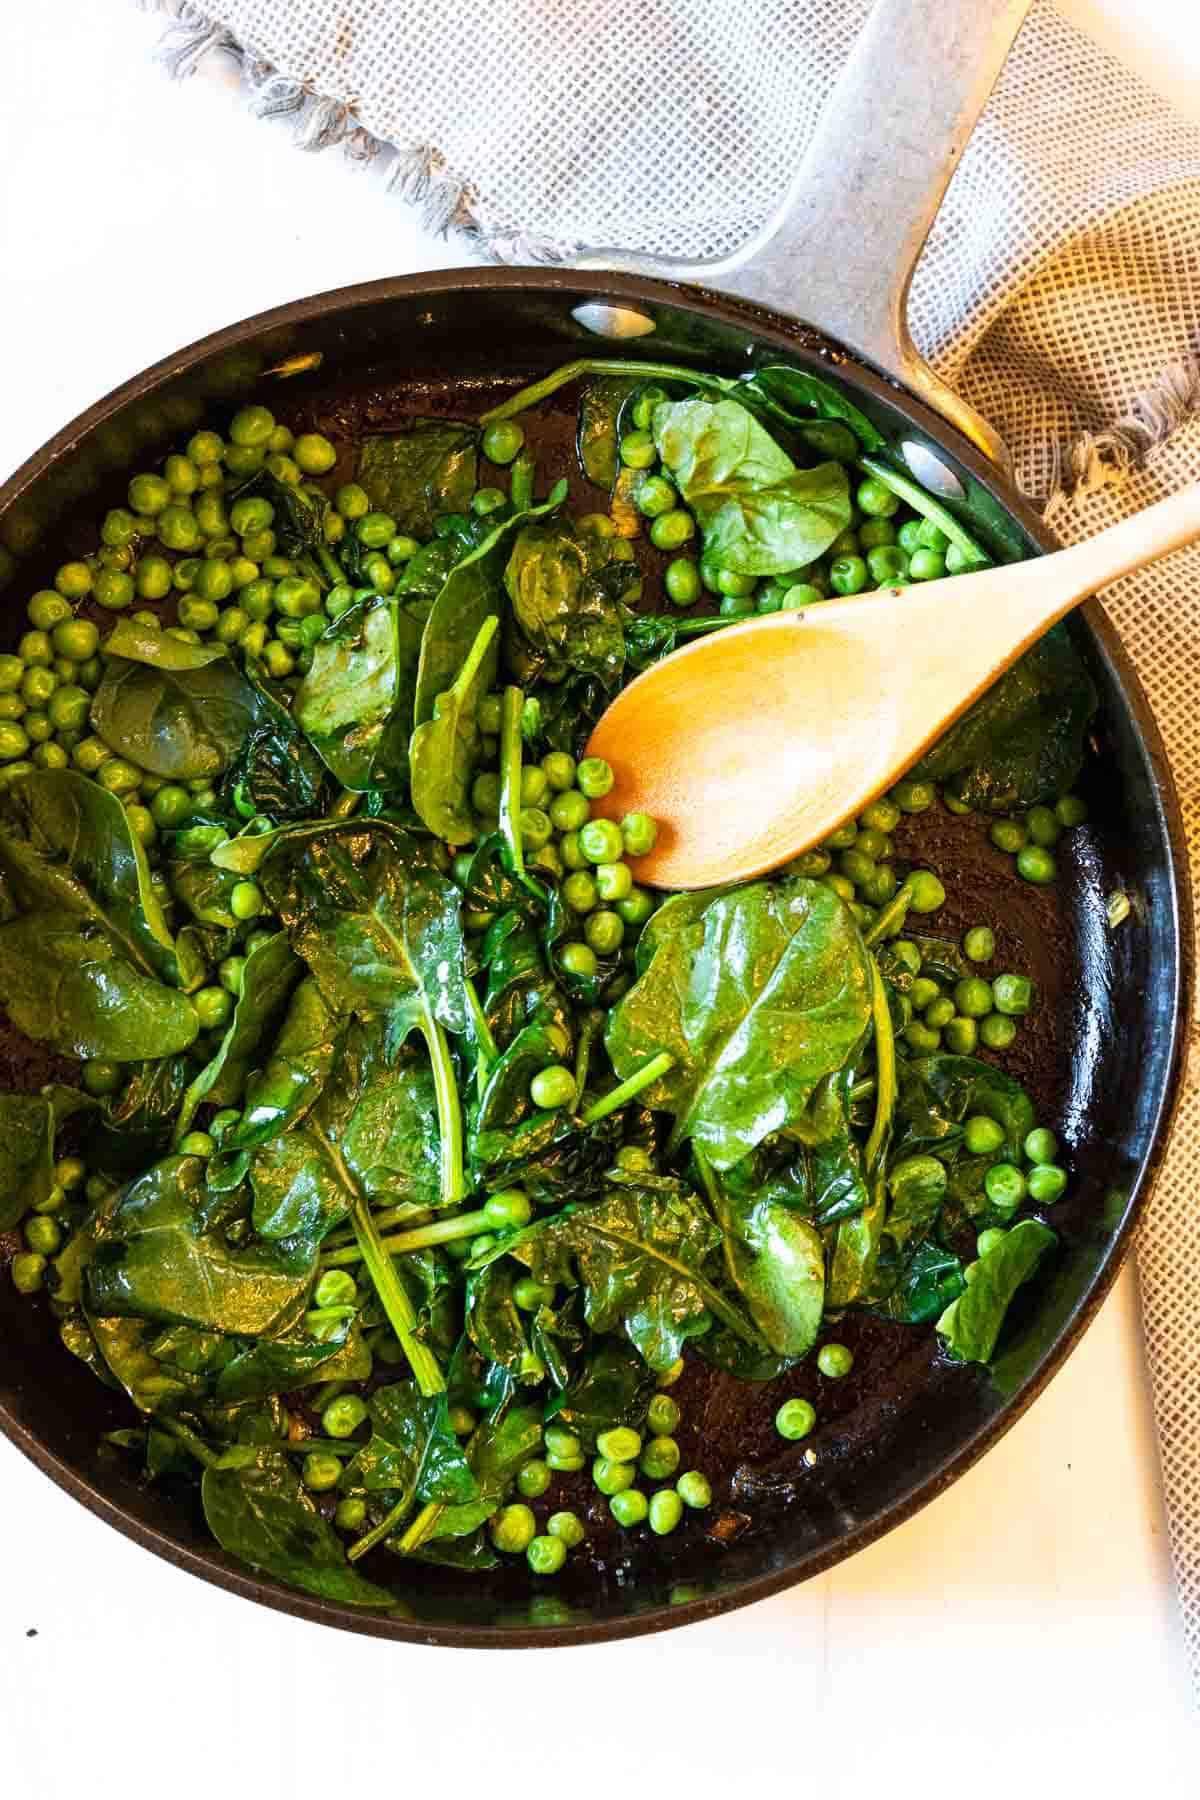
    2. Step 2: Add the more delicate vegetables: Return skillet to heat, and melt butter. Add spinach and peas, season with remaining ½ teaspoon salt and the pepper; cover, and cook until spinach is wilted and peas are tender, about 3 minutes.

    Return the asparagus and leeks to the pan and it’s ready to serve.

    What To Serve It With

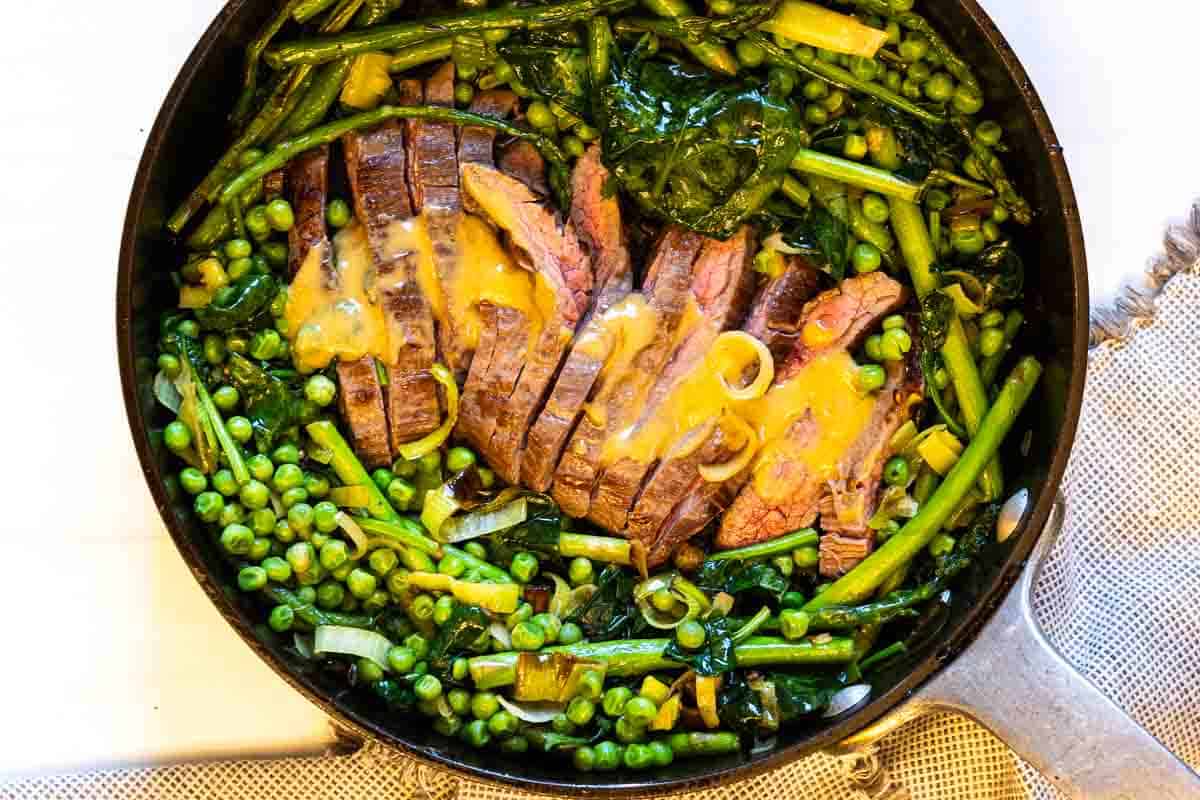
    One skillet steak and mixed vegetables.

    Steak and mixed green vegetables, my favorite way to serve this recipe. You can remove the vegetables to a plate, cover and keep warm. In the same pan, quick sear a simply seasoned small Flank Steak, or even a New York Strip. The steak cooks in a matter of minutes, you can then return the vegetables to the pan for a quick warm up. Drizzle the Steak with Mustard Sauce for an outstanding meal.

    • When I need to skip the Fries, I’ve served this mixed vegetable side dish with my favorite burger.
    • it’s my go-to side dish for Oven Glazed Salmon, but my favorite way to serve it is with Grilled T-bone Steaks. It’s a match made in heaven.
    • A perfect accompaniment for this White Wine Sauced Chicken Breast.

    Storage

    Leftovers: These cooked vegetables store very well in the refrigerator. Just place in an air-tight contained and refrigerate for up to 4 days. Reheat in the microwave. The 50% power feature is your best friend. Use it to gently reheat the vegetables in 30 second increments.

    Cleaning Leeks: Prized by chefs, leeks carry a milder flavor than their cousins onions and garlic. They also carry grit because their tightly packed leaves easily collect soil. To clean leeks, remove any outer leaqves that have wilted. Slice the leek lengthwise in half, all the way through the root end. Hold the leek under a faucet with the root end up. Rinse the leek under cold running water, lifting and separating the leaves with your fingers to allow the grit to flow down though the top of the leek. Continue rinsing until all the grit is removed. Remove the root end before using.

    Explore More Vegetable Side Dish Recipes

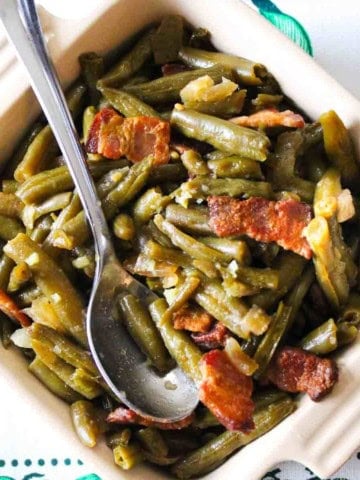
    • Brown sugar green beans with bacon in a casserole dish.
      Green Beans With Bacon and Brown Sugar
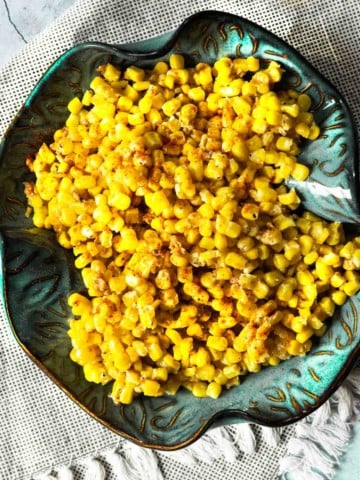
    • Honey Butter Skillet Corn in a blue serving bowl.
      Honey Butter Skillet Corn
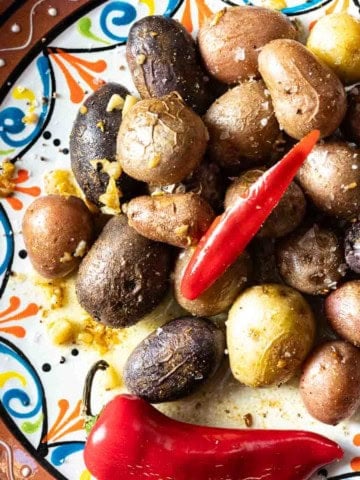
    • Cumin Garlic Marbled Potatoes
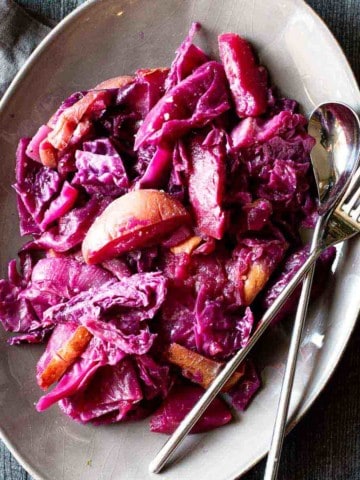
    • A plate of roasted braised red cabbage, Rode Kool.
      Rode Kool, Dutch Red Cabbage Recipe

    And don’t miss my side dish category. You’ll find lots of great side dish recipes including one of the the most popular side dishes on my site for easy, cheesy Microwave Cauliflower.

    If you liked this recipe, please leave a star ⭐⭐⭐⭐⭐ rating in the recipe card below and leave a comment. I always appreciate your feedback and hearing how everything went.

    And, don’t forget to subscribe to my newsletter for more delicious recipes and cooking tips. Make it a delicious day … every day.
    Mixed green vegetable side dish.
    Print Recipe
    5 from 1 vote

    Green Mixed Vegetable Side Dish

    A simple, fresh and healthy side dish with mixed vegetables.
    Prep Time10 minutes mins
    Cook Time15 minutes mins
    Total Time25 minutes mins
    Course: Side Dish
    Cuisine: American
    Servings: 2
    Calories: 328kcal
    Author: Lea Ann Brown

    Ingredients

    • 2 tablespoons vegetable oil
    • 1 teaspoon salt
    • 1 bunch thin asparagus ends trimmed if tough
    • 1 tablespoon unsalted butter
    • 1 small leek dark-green leaves trimmed, sliced into ¼-inch-thick rounds (about 1 cup)
    • 1 bunch spinach stems trimmed
    • 4 ounces sweet baby peas
    • Pinch freshly ground pepper

    Instructions

    • Add oil to and heat a 12-inch skillet over medium high heat until oil is hot. Add asparagus, leeks and salt and saute turning frequently until just getting tender, about 5 minutes. Remove asparagus and leeks to a plate.
    • Return skillet to heat, and melt butter. Add spinach and peas, season with remaining ½ teaspoon salt and the pepper; cover, and cook until spinach is wilted and peas are tender, about 3 minutes.
    • Return the asparagus and leeks to the pan. Nestle a seared steak in the center and serve immediately.

    Notes

    This recipe comes from the ever reliable Martha Stewart.

    Nutrition

    Calories: 328kcal | Carbohydrates: 29g | Protein: 14g | Fat: 21g | Saturated Fat: 15g | Cholesterol: 15mg | Sodium: 1314mg | Potassium: 1622mg | Fiber: 12g | Sugar: 10g | Vitamin A: 18992IU | Vitamin C: 88mg | Calcium: 263mg | Iron: 11mg

    Green Vegetable Side Dish …It’s what’s for any entree.

    Beans and Chicos, Traditional New Mexico Recipe

    January 9, 2016 By Lea Ann Brown 18 Comments

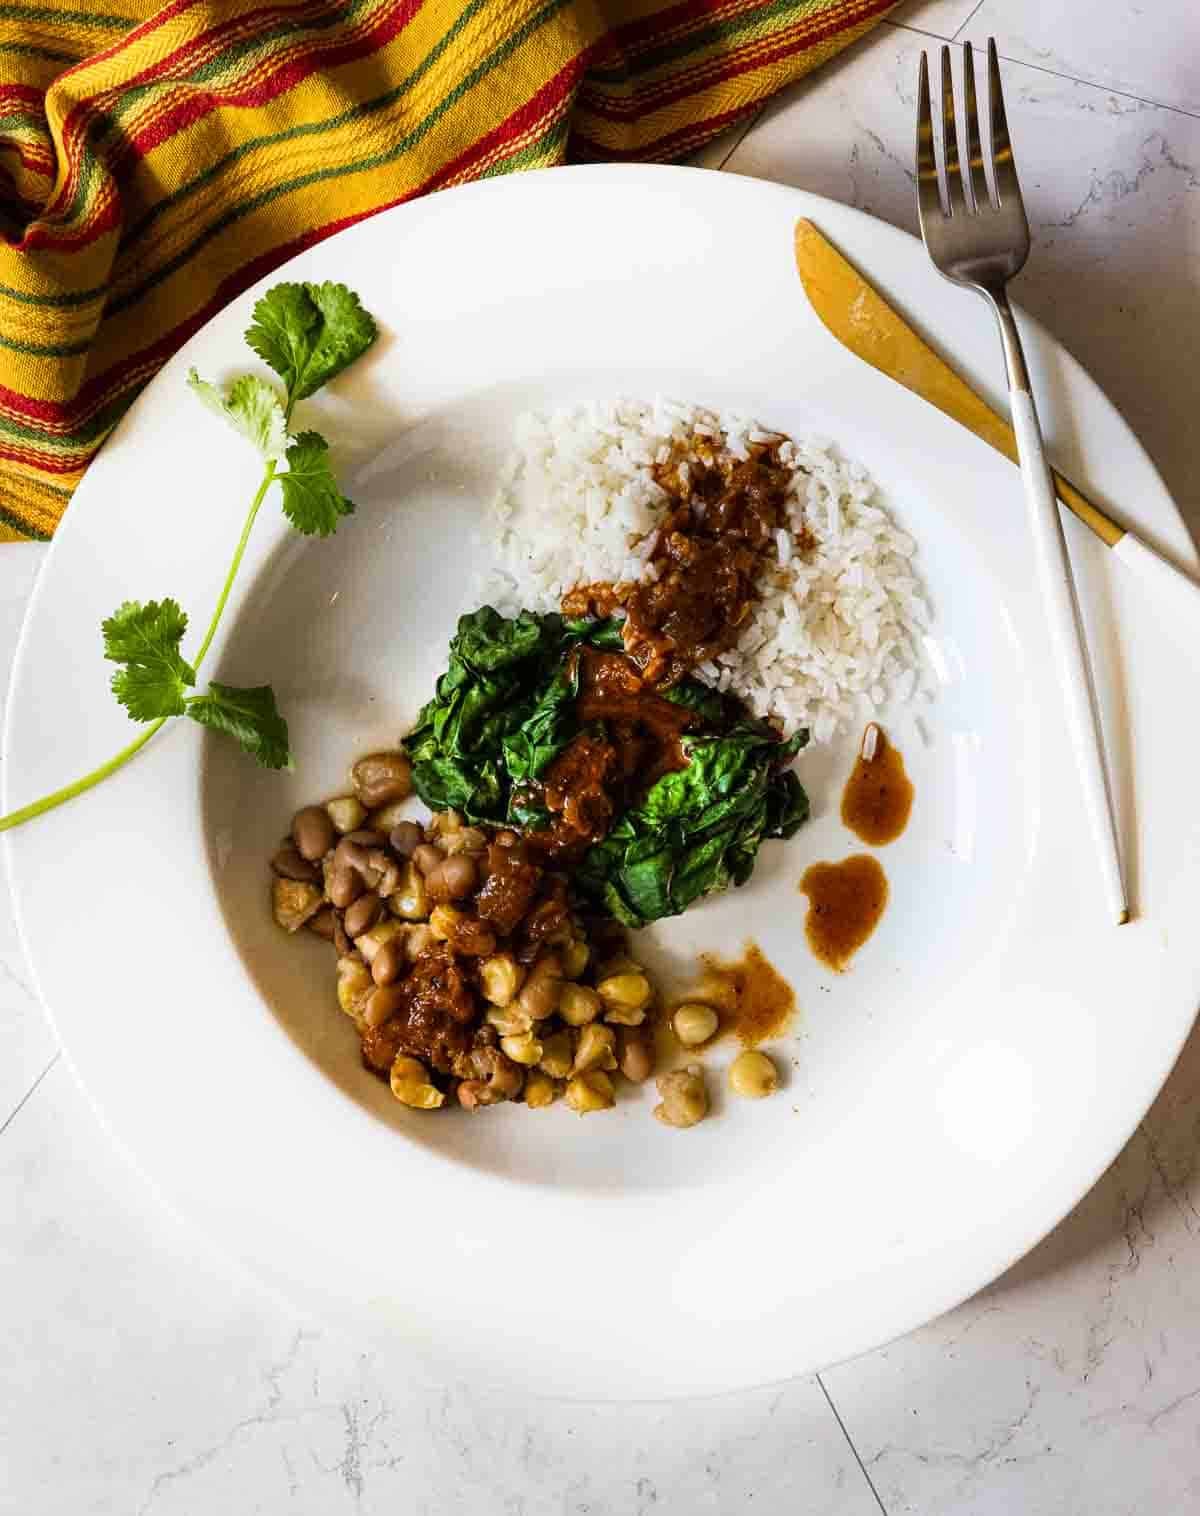
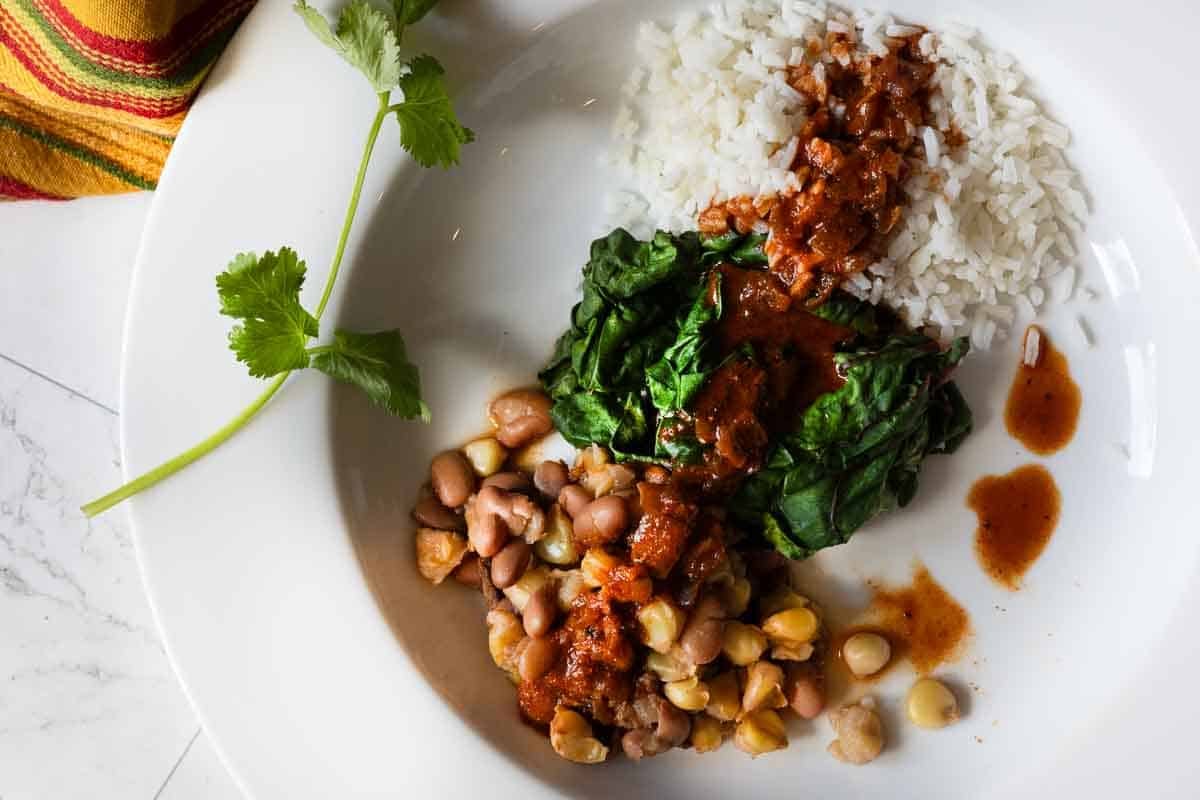
    New Mexico Beans and chicos served with rice and chard.

    Beans and Chicos. New Mexico chicos are made from local sweet corn. Once sun-dried, they’re a staple in Southwestern kitchens. Beans and chicos are a popular, simple and hearty dish made from this specialty food.

    Beans and chicos served over rice and swiss chard and drizzle with New Mexico red chile sauce.

    Last Fall, on one of our trips to Northern New Mexico, I ran across a peculiar bag of dried corn that didn’t quite look exactly like hominy.

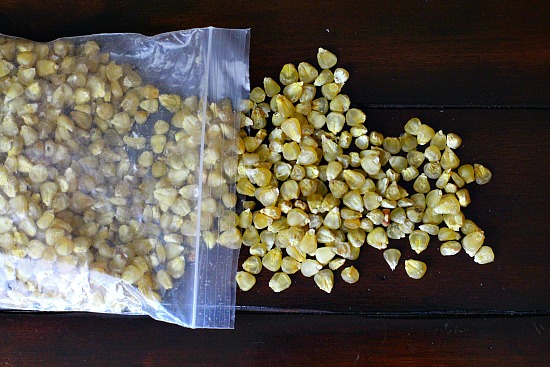
    What Are Chicos?

    A bad of Dried corn chicos.

    A trip to the counter to ask about my find, revealed that I had a bag of Chicos in my hand. And they suggested I make a traditional Northern New Mexico dish of Beans and Chicos. When I arrived home, and thanks to New Mexico Magazine, here’s what I learned about Chicos:

    What Are Chicos Made From?

    “We take ears of white, sweet corn that is still in the husks, and lay them in a big horno, or outdoor adobe oven, and cover them with wet potato sacks," says Shirley Martinez of Martinez Farms, which produces more than 100 pounds of chicos a year. "We make a hot wood fire, cover the horno completely with adobe and mud, and leave the corn to steam overnight, which gives chicos their smoky flavor. We take the corn out the next day, pull the husks all the way back, and hang them to sun-dry for at least a week." The fruits of this fall's labors, she says, will be sold next year. “

    How To Make Chicos And Beans

    A horno is an adobe built outdoor oven used by Native Americans. I don’t have one, nor have the inclination to cover anything with mud ….. so I chose my crockpot to make Beans and Chicos. Following a method from New Mexico Magazine, here’s what I did.

    Ingredients You’ll Need

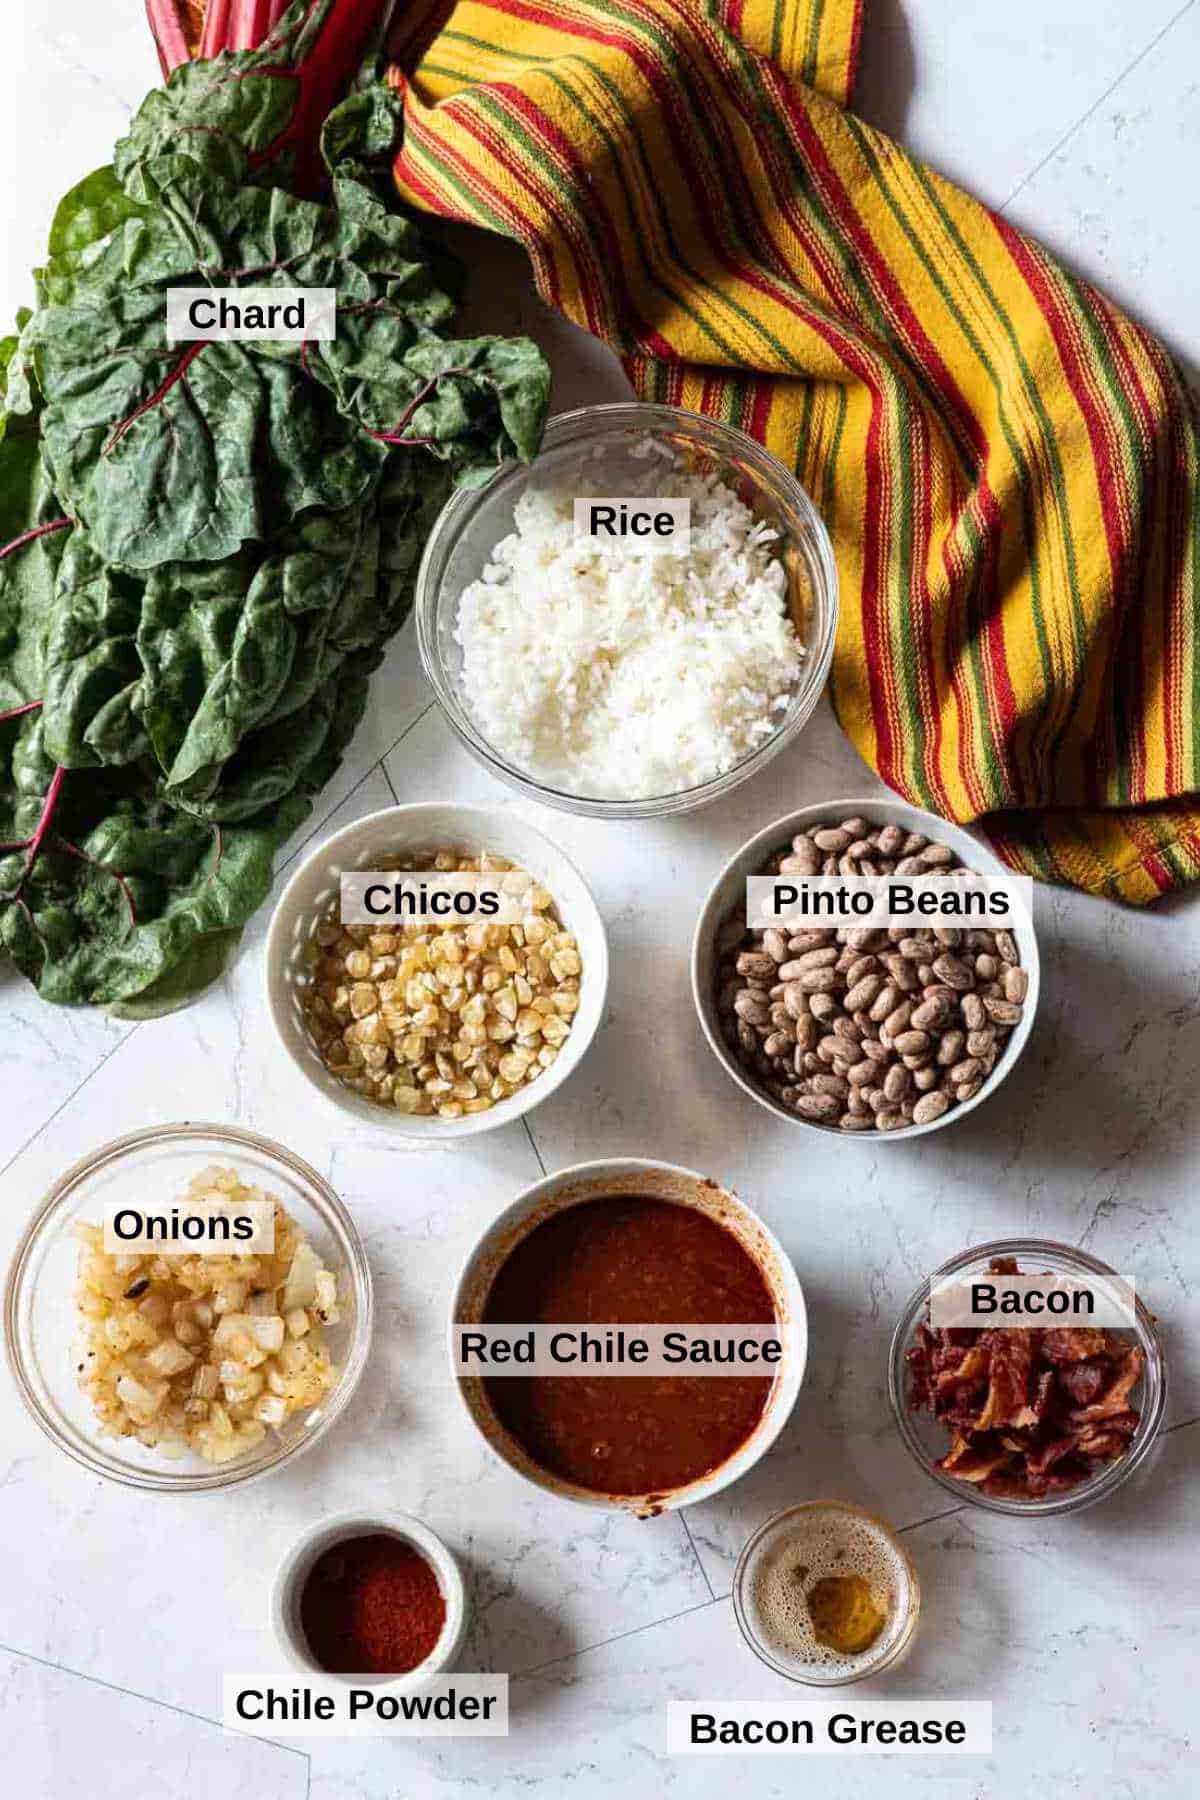
    Ingredients to make New Mexico beans and chicos.
    • Chard: Even though chard is not a traditional ingredient used in ancient Puebloan cooking, Modern Southwestern cooks often stir in or serve bean dishes over hearty greens, like Swiss Chard to add color, nutrition and texture.
    • Rice: Cooked
    • Dried Chicos
    • Dried Pinto Beans
    • Onions: Sweet or white.
    • New Mexico Red Chile Sauce
    • New Mexico Red Chile Powder, Preferably Chimayo
    • Cooked thick sliced bacon and reserved bacon grease

    Step by Step Instructions

    Step 1, how to make beans and chicos.
    1. Step 1: Pre-prep: Place the dried beans and chicos in a colander and rinse well. remove any misfits. Place in a crock pot and cover with 1″ of water. Let the beans and chicos soak overnight.
    2. Fry the bacon until crispy, remove with a slotted spoon and cut into good sized bacon bits. Reserve 1 Tablespoon of the bacon grease and remove all but one tablespoon of bacon grease to fry the onions.
    3. Fry onion in the bacon grease until tender, about 3 minutes.
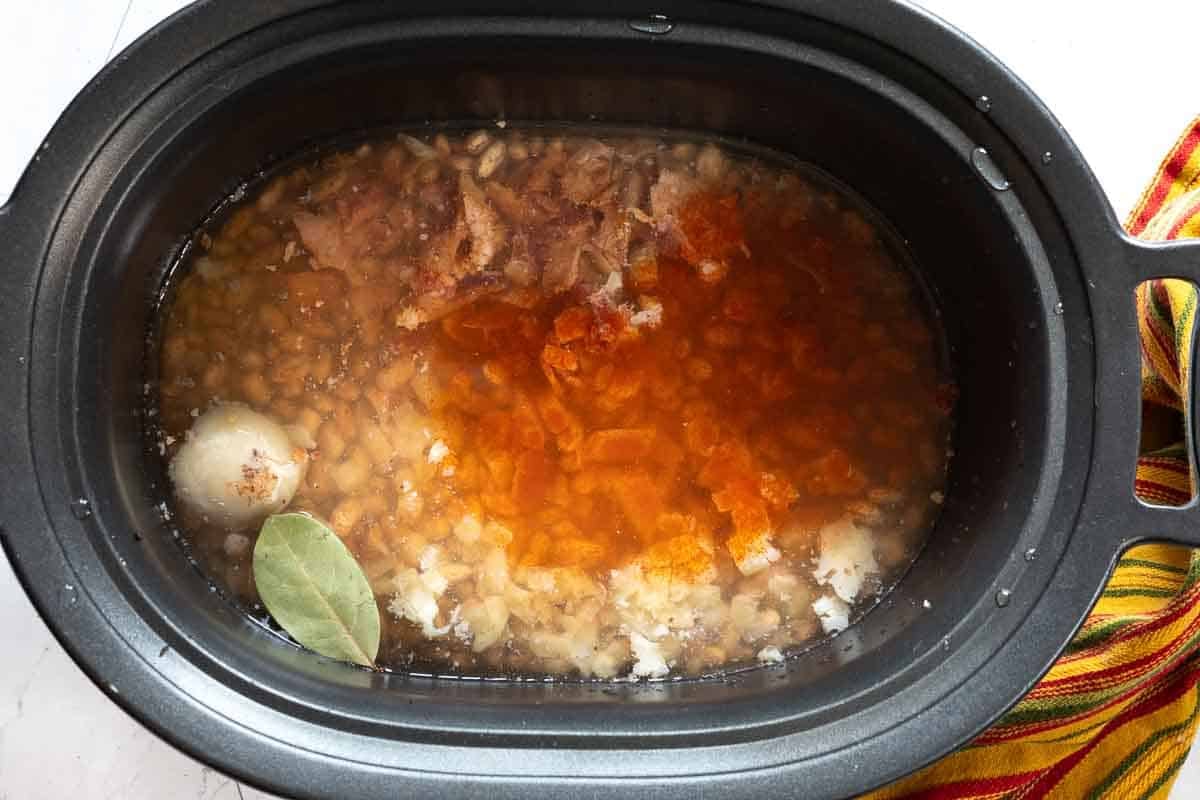
    4. Cooking Process: The next morning, add reserved bacon grease, cooked onions, cooked bacon to beans and chicos. Sprinkle in Chile powder. Cook on low all day or until beans and chicos are tender. Salt to taste.
    How to prep chard to make beans and chicos.
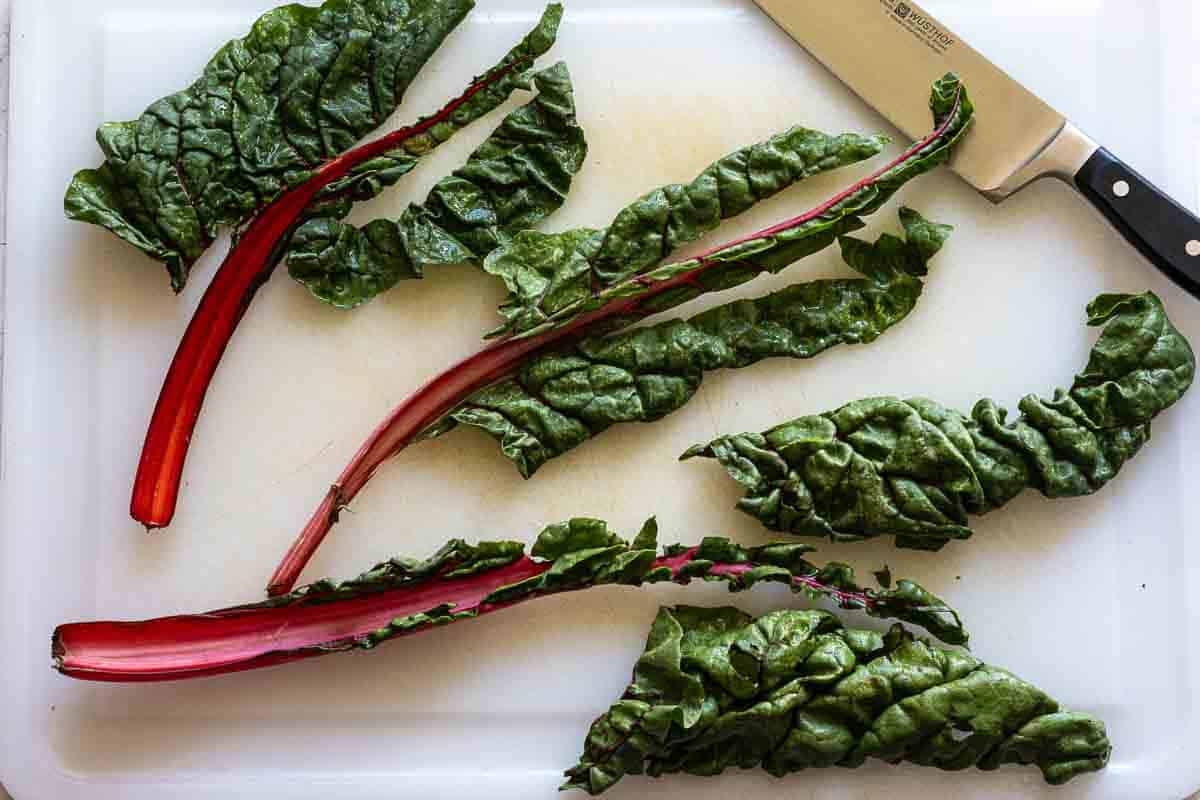
    1. Step 5: Prep The Chard: Rinse, then dry chard with a paper towel. Use a knife to remove the green leaves from the tough stems. To wilt the chard, place it on a place and cook in the microwave for 2 minutes.
    How to serve beans and chicos.
    1. Step 6 – How To Serve: Place the wilted chard on a plate. If there is a lot of liquid left in the crock pot, use a slotted spoon to scoop a serving of beans and chicos on the plate. Add a spoonful of cooked rice and drizzle everything with New Mexico Red Chile Sauce.

    Variations

    • Topping: Drizzle the plate of Beans and Chicos with New Mexico Green Chile Sauce instead of the red. You can also use a spoon full of Red Salsa, Homemade Roasted Tomatillo Salsa Verde or take a walk on the wild side and serve with Salsa Macha Chile Oil.
    • Garlic: Add two cloves of sliced garlic to the crock pot at the beginning of the cooking process.
    • New Mexico Red Chile Powder: I prefer and have access to Chimayo Chile Powder, which can be hard to find. Use any New Mexico Chile Powder or a red chile powder like Ancho. For a smokier flavor, use Chipotle Chile Powder. To learn more about chile powders, take a look at my resource article What Is Chile Powder.

    Tips For Success:

    • Don’t skip the overnight soaking process. Not so much for the pinto beans, but the chicos texture will benefit from the soak.
    • Once cooked, this dish will benefit from a healthy dose of salt. Start with one tablespoon of Kosher salt and then test.

    Storage

    • Refrigerator: Store beans and chicos in an airtight container in the refrigerator for up to 4 days.
    • Freezer: You can also freeze them. Once cooled, transfer the cooked beans and chicos to airtight containers or freezer bags. Freeze for up to 3 months. Thaw overnight in the refrigerator and reheat gently on the stovetop, adding a splash of broth or water if needed.

    FAQ’s

    Where Can I Buy Chicos?

    Chicos can be difficult to find outside the Southwest, but they’re commonly sold at specialty markets throughout Northern New Mexico. You can also order them from New Mexico food companies that specialize in regional ingredients. Look for packages labeled “dried chicos” or “New Mexico chicos”. Try New Mexico Connection for on-line puchase.

    What Do Beans and Chicos Taste Like?

    Beans and chicos have an earthy flavor with subtle sweetness from the dried corn. The chicos develop a pleasantly chewy texture while the pinto beans become creamy, creating a hearty combination that’s often enhanced with pork, onions, garlic, and New Mexico chile powder.

    New Mexico Pinto Beans Recipe with Chicos

    Explore More Southwestern Recipes Using Dried Beans

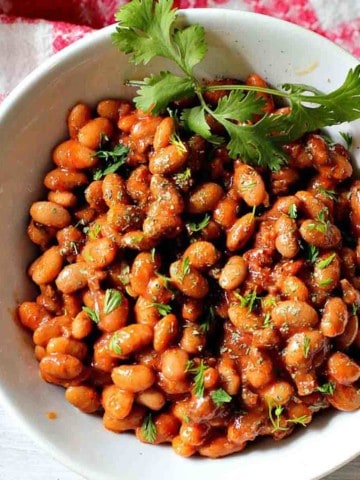
    • Instant pot pinto beans with chorizo served in a white bowl garnished with cilantro.
      Southwestern Pinto Beans with Chorizo (Instant Pot Recipe)
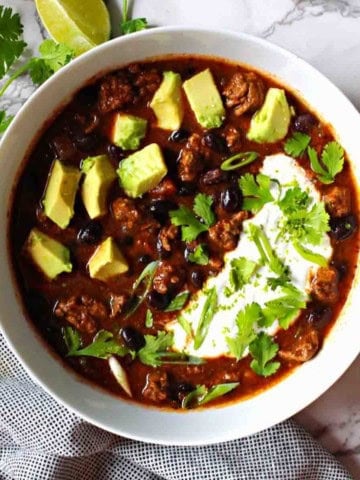
    • Bison chili with black beans.
      Award Winning Bison Chili Recipe with Black Beans and Lime Crema
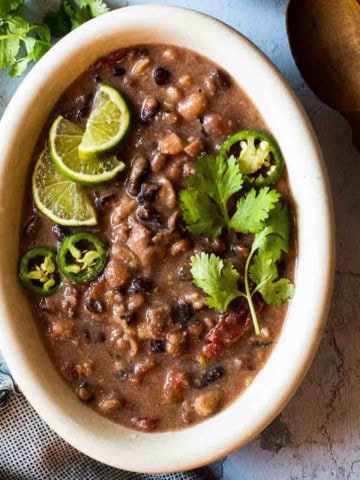
    • A bowl of slow cooker cowboy beans garnished with cilantro and limes.
      Slow Cooker Cowboy Baked Beans
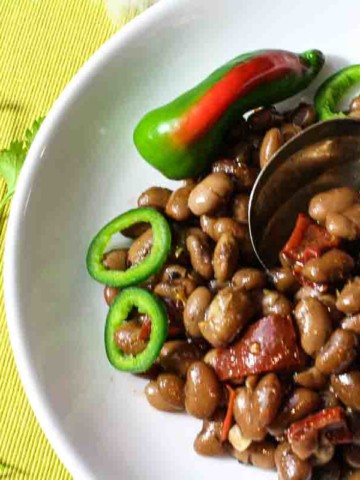
    • Bolita Beans recipe with smoked paprika and jalapeno.
      Bolita Beans with Red Wine, Smoked Paprika and Jalapeño

    And if you’re looking for more Southwestern inspired recipes, don’t miss my Mexican Southwestern Recipe Category. You’ll find lots of New Mexico inspired recipes including the most popular on my site for traditional New Mexico Carne Adovada. One taste and you’ll understand why it’s one of New Mexico’s most celebrated dishes.

    If you liked this recipe, please leave a star ⭐⭐⭐⭐⭐ rating in the recipe card below and leave a comment. I always appreciate your feedback and hearing how everything went.

    And, don’t forget to subscribe to my newsletter for more delicious recipes and cooking tips. Make it a delicious day … every day.

    New Mexico Beans and chicos served with rice and chard.
    Print Recipe
    5 from 7 votes

    Chicos and Beans

    Beans and Chicos. New Mexico chicos are made from local sweet corn. Once sun-dried, they're a staple in Southwestern kitchens. Beans and chicos are a popular, simple and hearty dish made from this specialty food.
    Prep Time15 minutes mins
    Cook Time8 hours hrs
    Total Time8 hours hrs 15 minutes mins
    Course: Mexican
    Cuisine: Southwestern
    Servings: 8
    Calories: 327kcal
    Author: Lea Ann Brown

    Ingredients

    • 1 Cup Dried pinto beans rinsed and misfits removed
    • ½ Cup chicos rinsed
    • 1 small sweet onion diced
    • 6 slices Thick cut bacon chopped and cooked until just crisp
    • 1 Tablespoon red chili powder New Mexico Chimayo, Or Ancho Chile Powder, or Chipotle Chile Powder
    • 3 Tablespoons bacon grease 1 to fry onions, two to add to the crockpot
    • 1 bunch Swiss chard wilted
    • 2 cups Cooked White rice
    • 1 Tablespoon Kosher Salt

    Instructions

    • Place beans and chicos in a colander and rinse well. Place the beans and chicos in your crock pot, and cover with water by one inch. Soak over night.
    • In a fry pan, cook bacon until just crisp. With a slotted spoon remove bacon to a paper towel. Remove most of the bacon grease, reserving two tablespoons. And leave about a tablespoon in the pan to cook the onnion. Add onion and cook until translucent, about 3 minutes.
    • In a crock pot, add bacon grease, onions, bacon to the chicos and beans. Add a bay leaf if you'd like Stir in chile powder. Cook on low all day or until beans and chicos are tender. Add salt and test. Add more salt if needed.
    • Serve over wilted chard and cooked white rice.

    Notes

    Tips For Success
    • Don’t skip the overnight soaking process. Not so much for the pinto beans, but the chicos texture will benefit from the soak.
    • Once cooked, this dish will benefit from a healthy dose of salt. Start with one tablespoon of Kosher salt and then test.

    Nutrition

    Calories: 327kcal | Carbohydrates: 34g | Protein: 11g | Fat: 17g | Saturated Fat: 6g | Polyunsaturated Fat: 3g | Monounsaturated Fat: 7g | Trans Fat: 0.04g | Cholesterol: 23mg | Sodium: 1162mg | Potassium: 635mg | Fiber: 5g | Sugar: 4g | Vitamin A: 2626IU | Vitamin C: 15mg | Calcium: 64mg | Iron: 2mg

    New Mexico Pinto Beans and Chicos …They’re what’s for Dinner.
    Slow Cooker Dr. Pepper Barbecue Pulled Pork Sliders

    November 1, 2015 By Lea Ann Brown 14 Comments

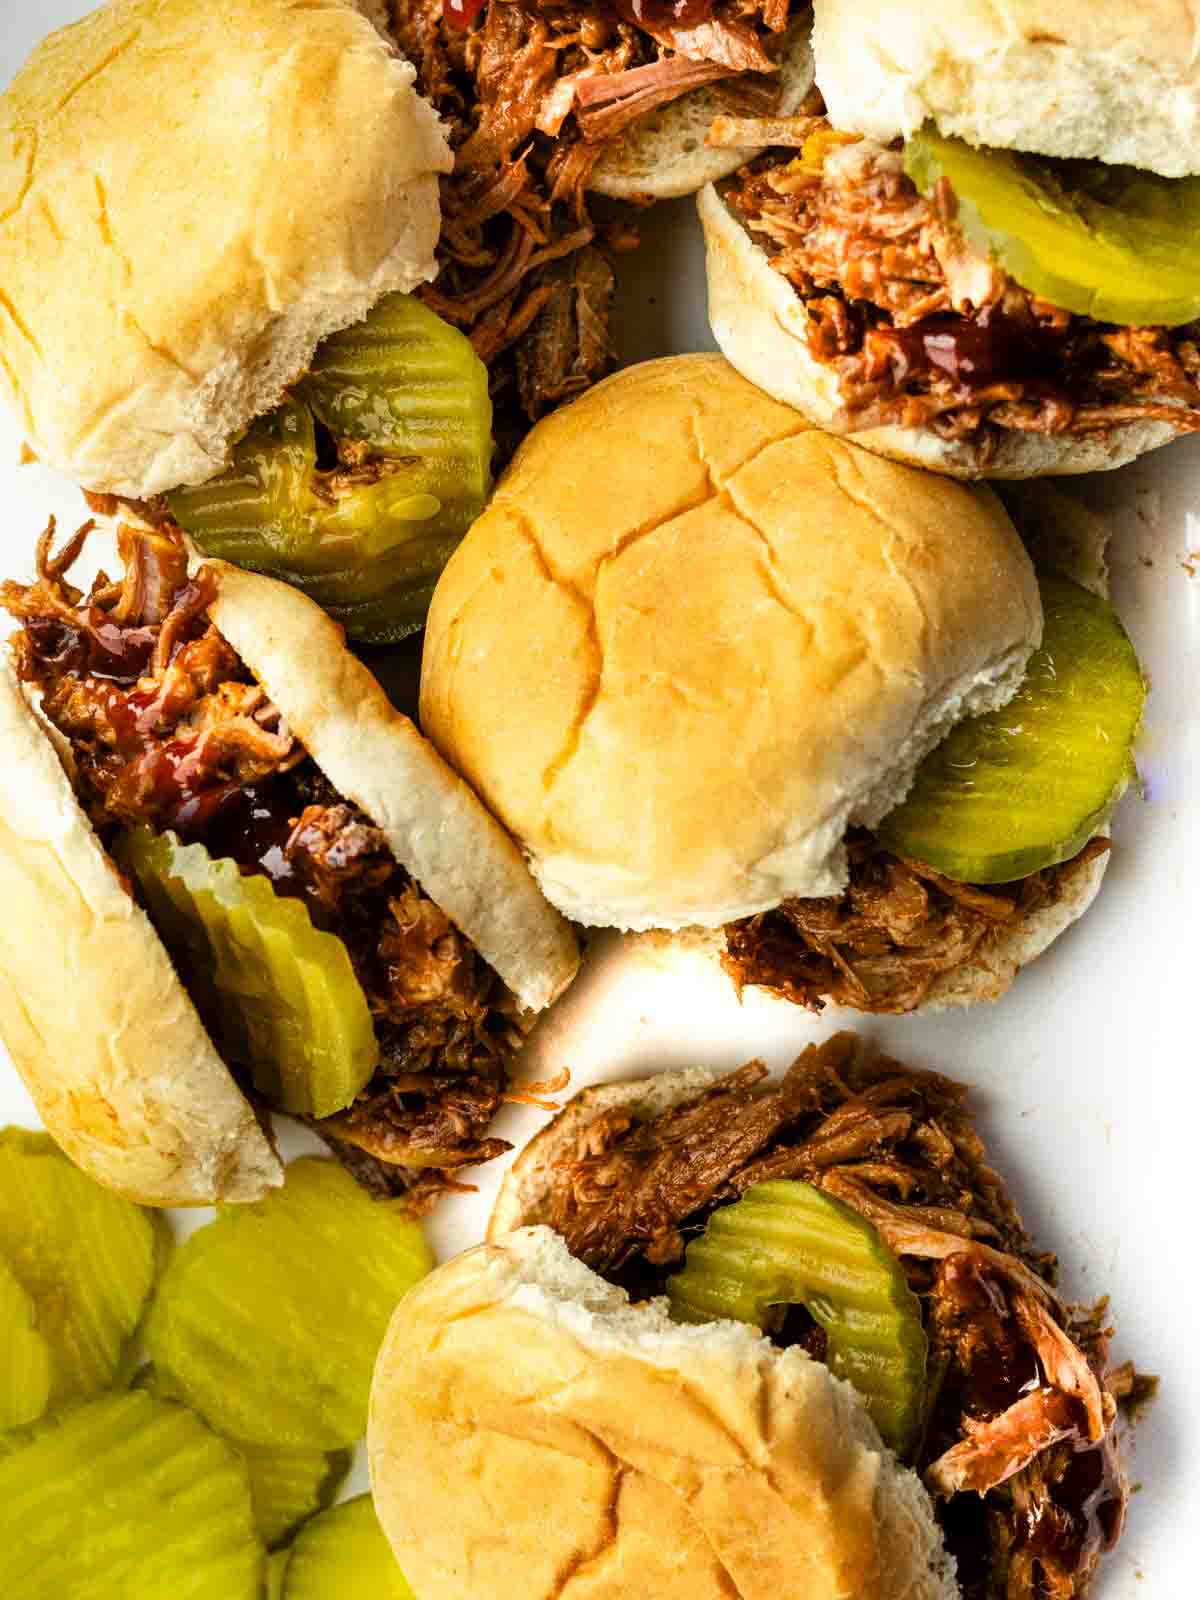
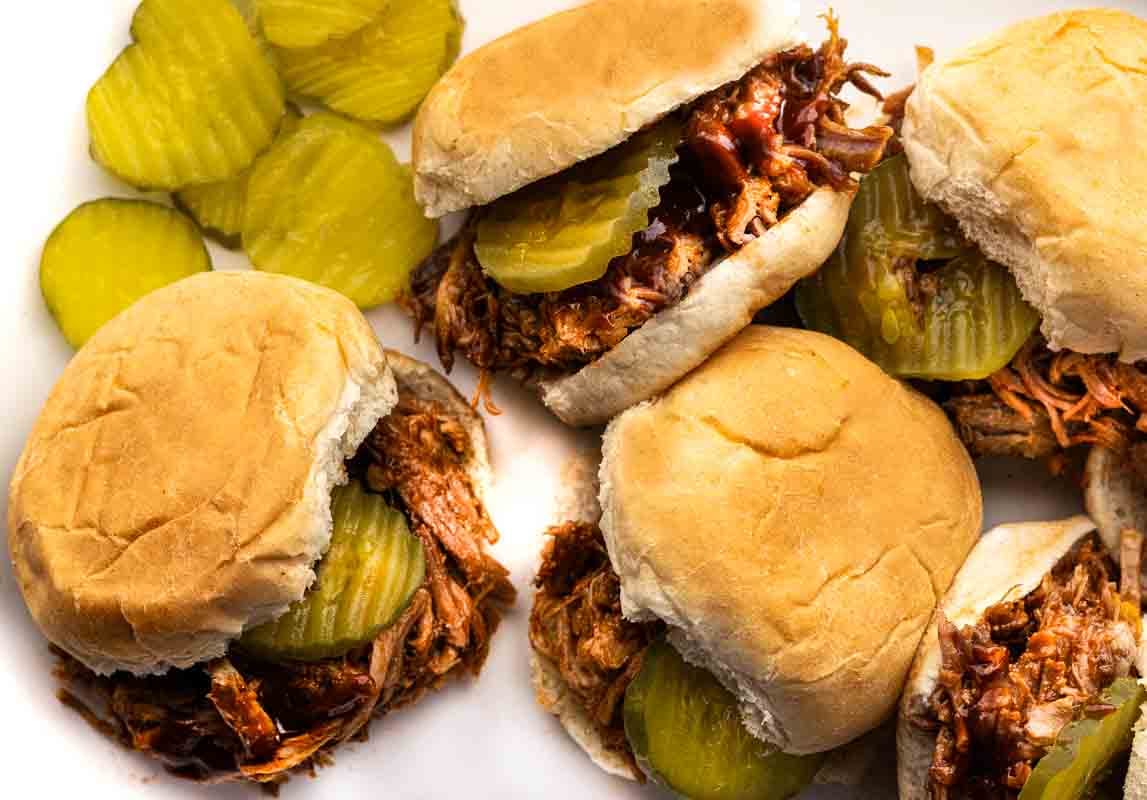
    Dr. Pepper bbq pulled pork sliders on a white platter.

    Looking for an easy and tasty way to feed your next party crowd? Consider these Slow Cooker Dr. Pepper BBQ Pulled Pork Sliders. Fuss free and insanely popular, a pork roast is doused with Dr. Pepper & Barbecue Sauce. You’ll love how easy this shredded pulled pork slider recipe is and your family and friends will go crazy over them.

    Dr. Pepper bbq pulled pork sliders on a white platter.

    What You Can Expect From This Recipe

    Something magical happens when you pour Dr. Pepper on a pork roast. Why? I’ve read that many mainstream sodas contain a type of acid that will tenderize meat. And that’s not to mention the caramelized and unique sweet flavor that comes along with it.

    Dr. Pepper Barbecue Pulled Pork Sliders are a great main course option next time you need to feed a crowd. It’s a dream recipe for a family gathering or that next game day gathering.

    A combination of spices that you probably already have in your pantry are rubbed into the pork shoulder, which is then placed in your slow cooker. Dr. Pepper is added and cooked until the meat is fall apart tender. The meat is so tender is practically shreds itself.

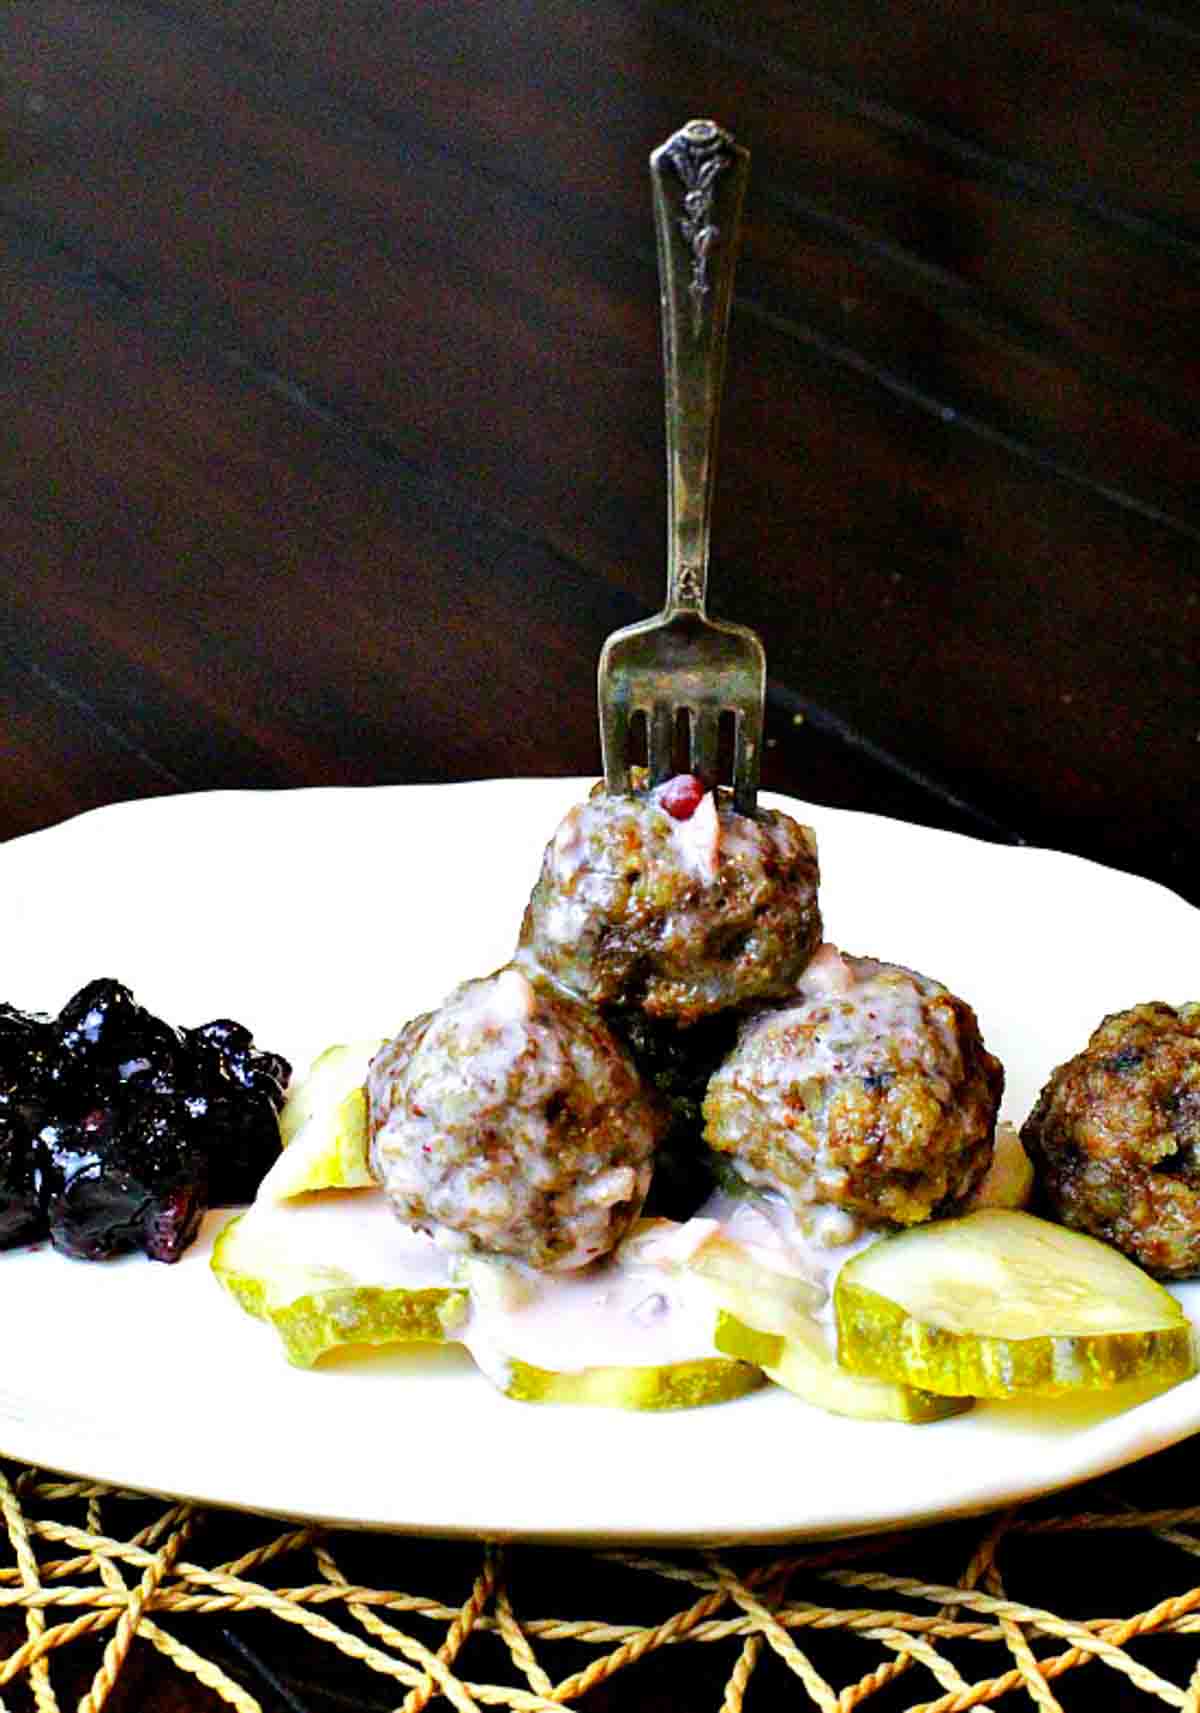
    Barbecue sauce is added to finish. And you’re ready for tasty little shredded pork sliders. Don’t forget those pickle slices!

    With just a few minutes of prep work and simple with ingredients, this is a ridiculously easy recipe to make, that comes with big flavor. Let’s take a look.

    Ingredients You’ll Need

    Minimal ingredients make this an easy pulled pork slider recipe.

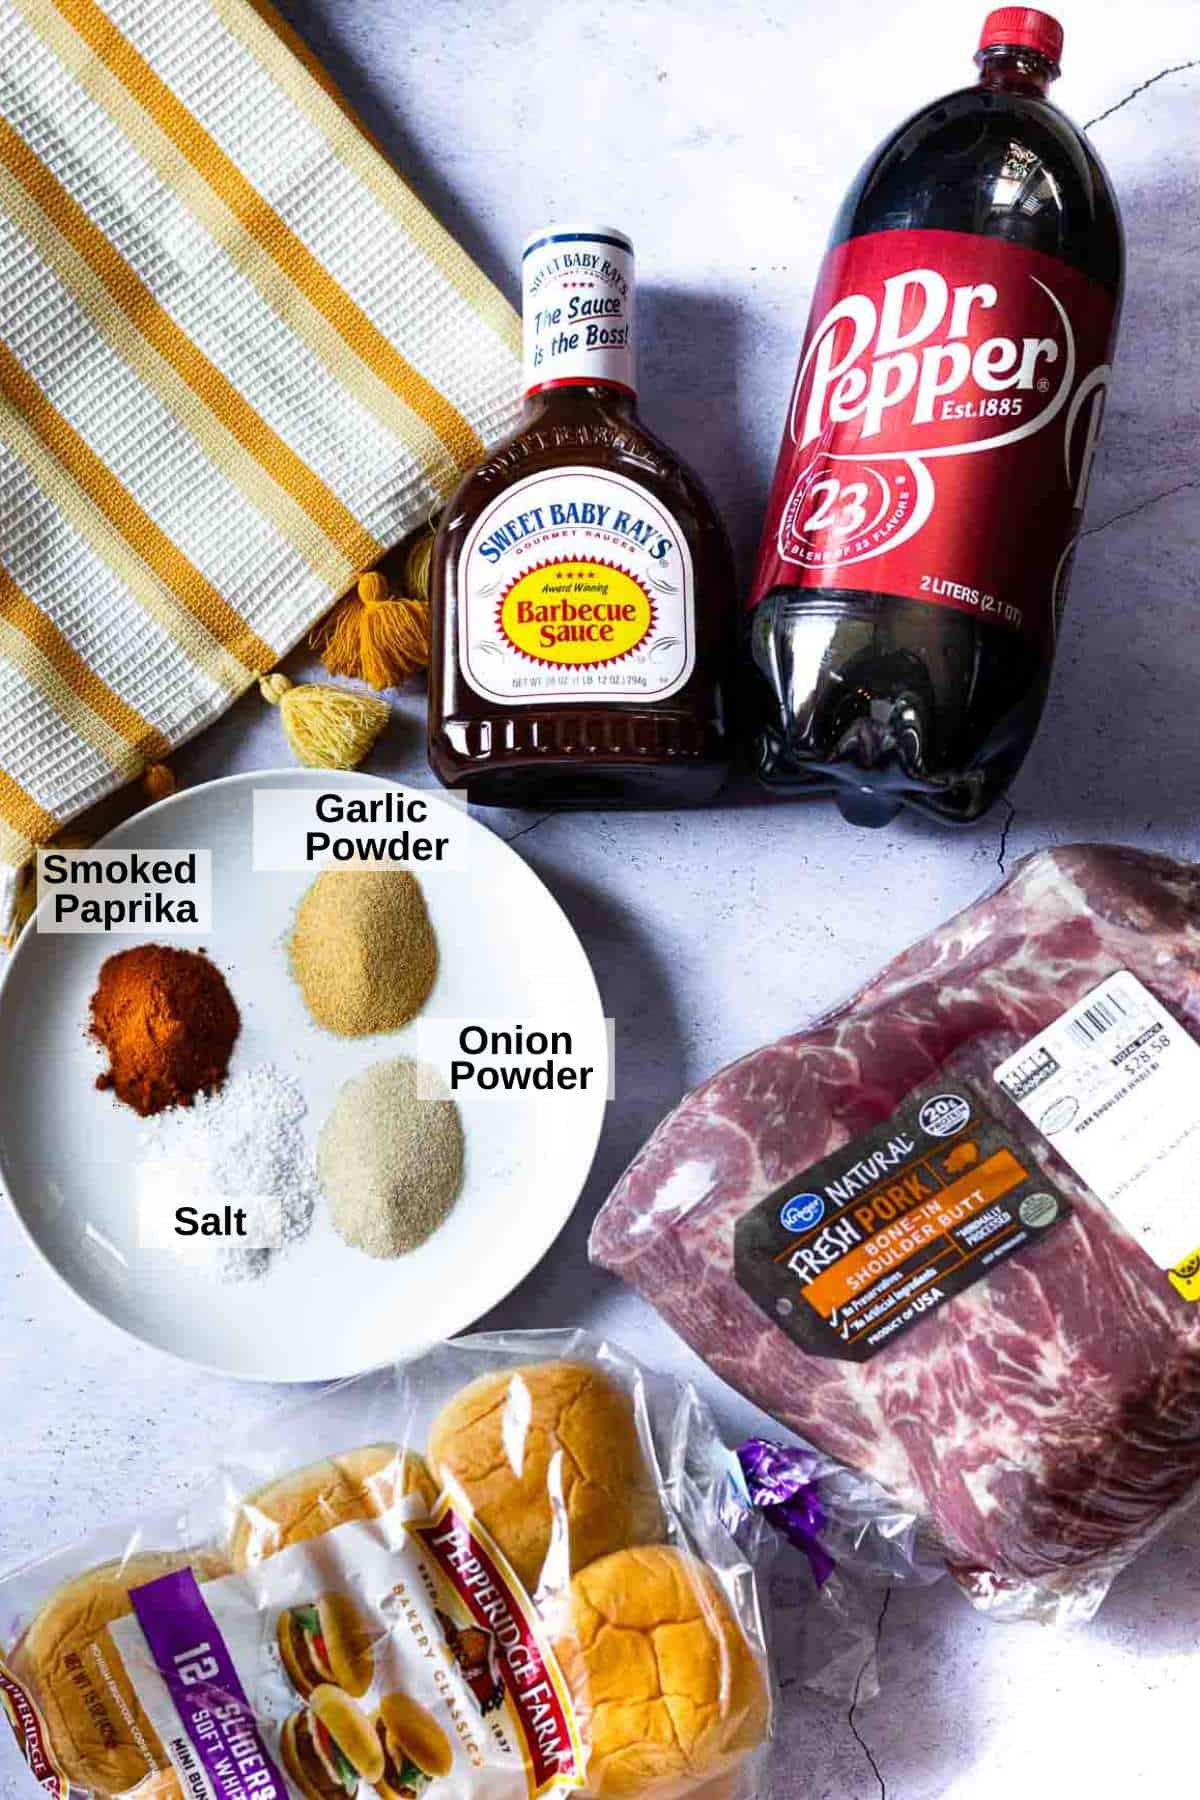
    Ingredients to make Dr. Pepper barbecue pulled pork sliders.

    Aside from a bone-in Boston Butt Pork Shoulder, Dr. Pepper and and your favorite bottle of barbecue sauce, here are the spices you’ll need.

    • Smoked Paprika: If you’ve never cooked with smoked paprika, you’re in for a treat. Rich in deep red color, smoky and earthy with flavor.
    • Garlic Powder
    • Onion Powder
    • And Kosher Salt: Chefs prefer Kosher salt for it’s pure salty flavor.

    Top Tip: Once the meat is cooked and the bone and fat discarded, an 8-pound bone-in Boston Shoulder Butt will yield about 4 pounds of shredded pork.

    Step by Step Instructions, It’s So Easy

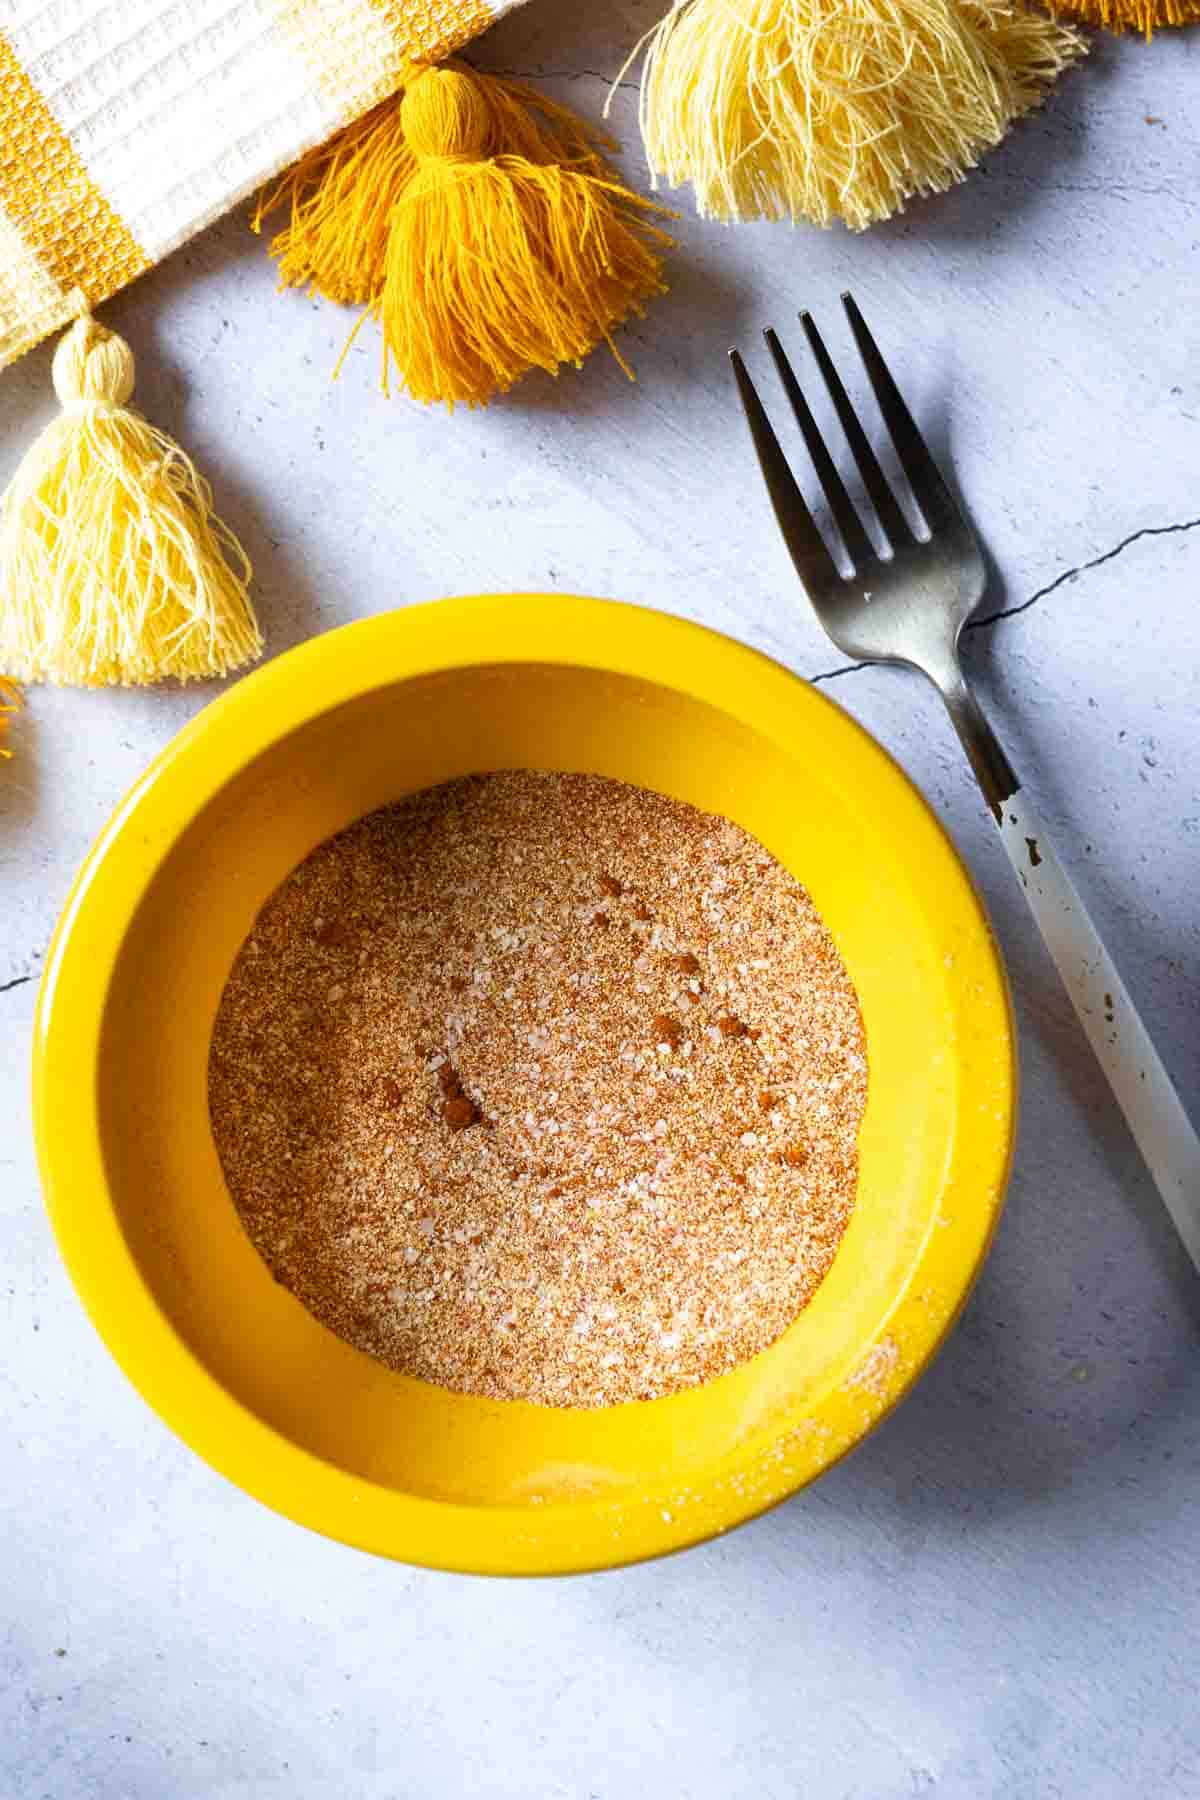
    Pulled pork seasoning rub in a small yellow bowl.
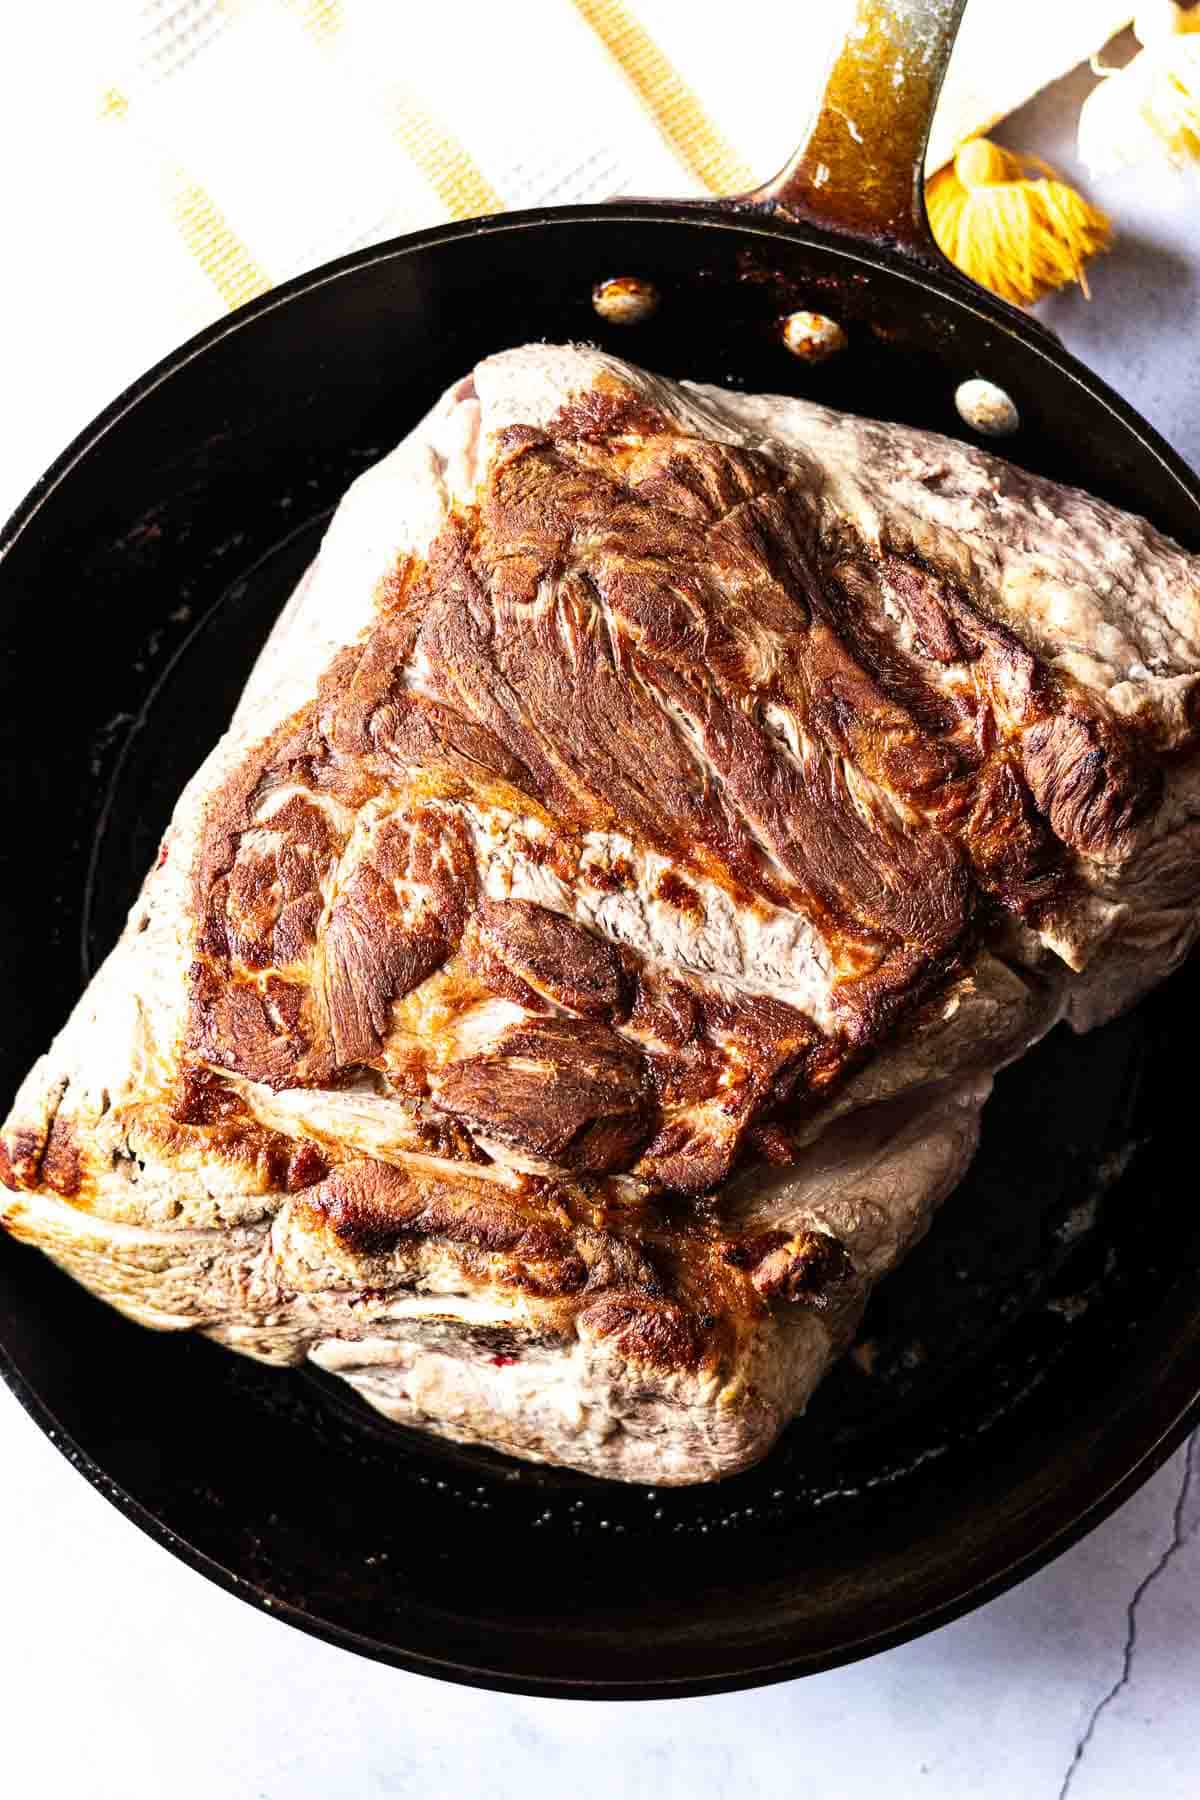
    Searing a boston butt pork shoulder roast to make pulled pork sliders.
    1. Step 1: Make the pork shoulder spice rub. Combine spices in a small bowl, mix well.
    2. Step 2: Sear the pork roast. Place the pork roast on a cutting board and pat dry with paper towels. Add neutral oil to a large skillet. Once hot, brown the pork roast on two sides. Start with the fat cap side so the meaty side can brown in this flavorful fat.

    Pro Tip: Don't skip searing the meat. This is a crucial step in getting the most flavor out of this meal. Searing creates what is technically called Maillard reaction. Maillard reaction is the process where a crust is created. Simply stated, it's responsible for the complex flavors and aroma that makes bread taste toasty, and a grilled or seared burger taste charred. It's a technique that brings science to your cooking skills.

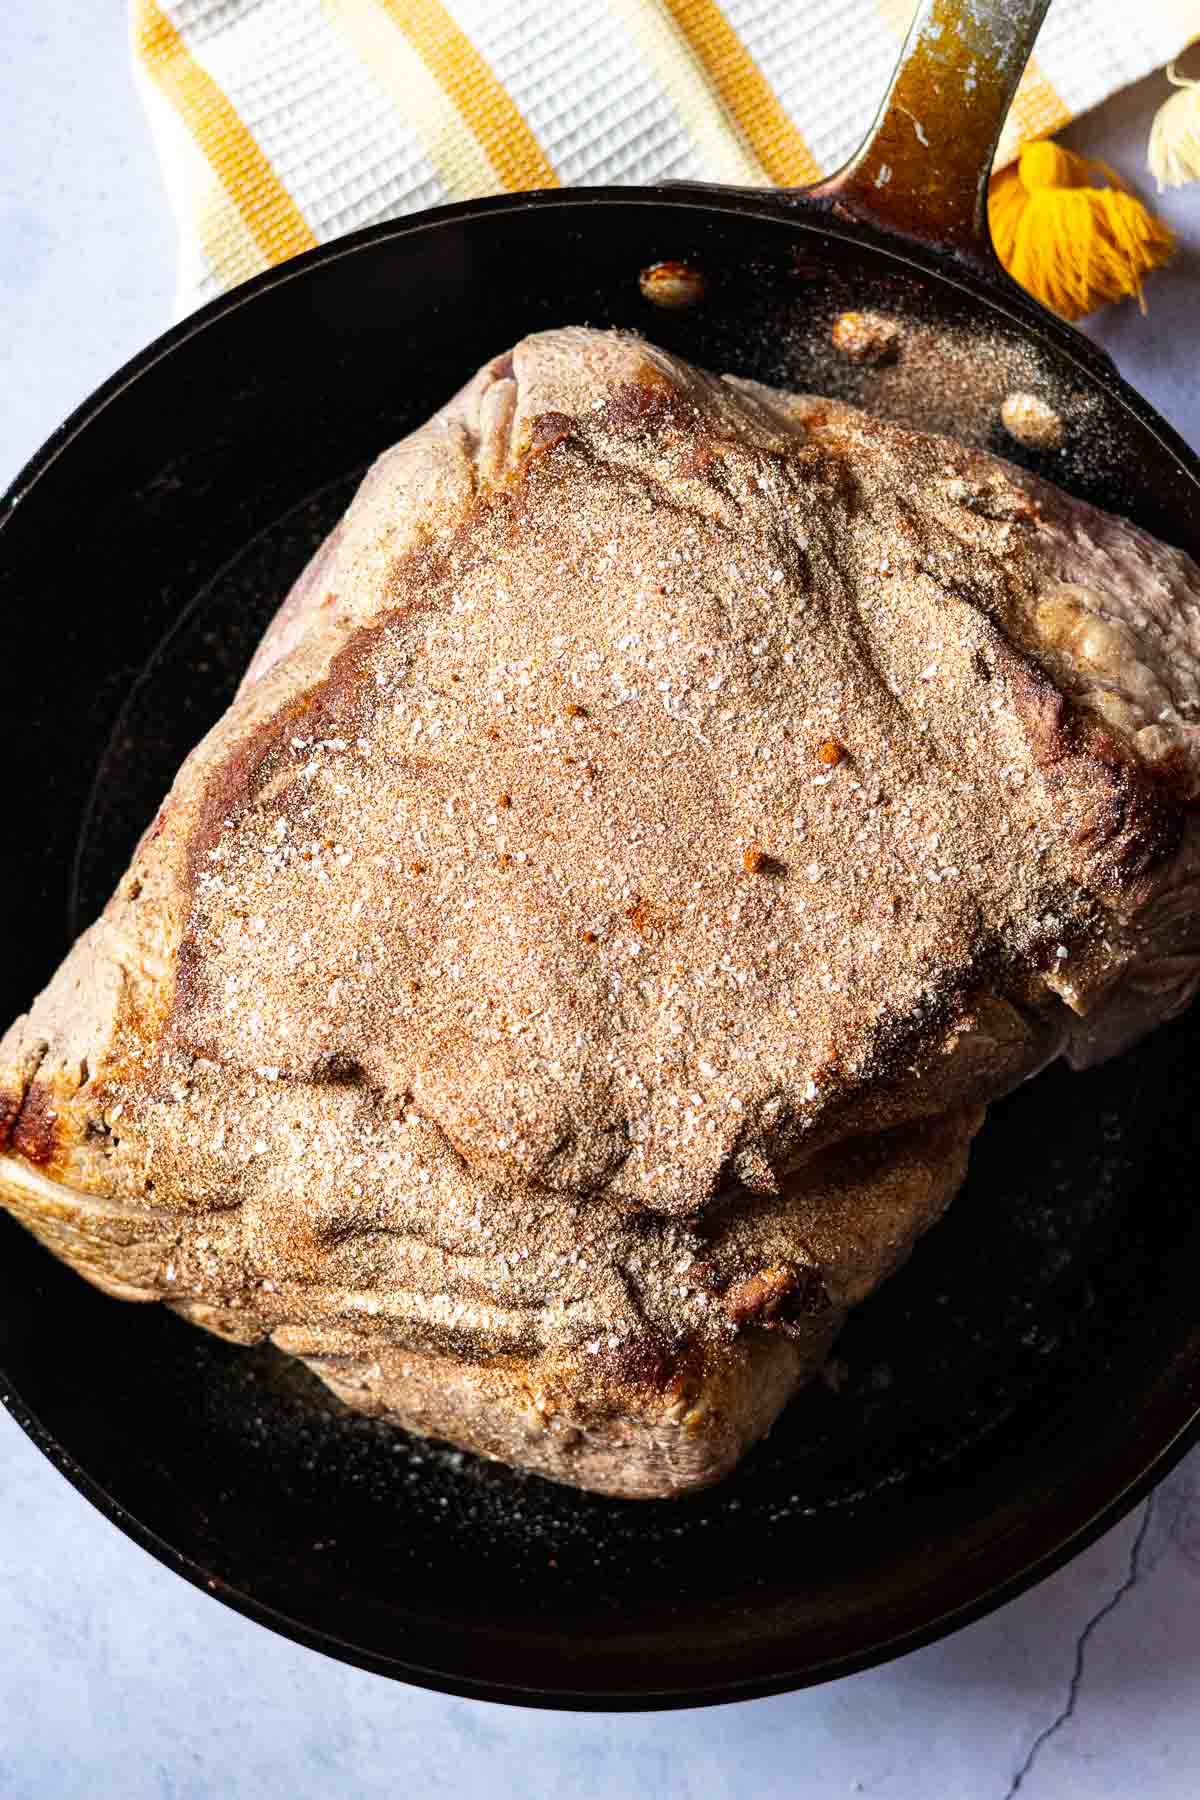
    Step 3: Sprinkling the pork shoulder roast with seasoning mix.
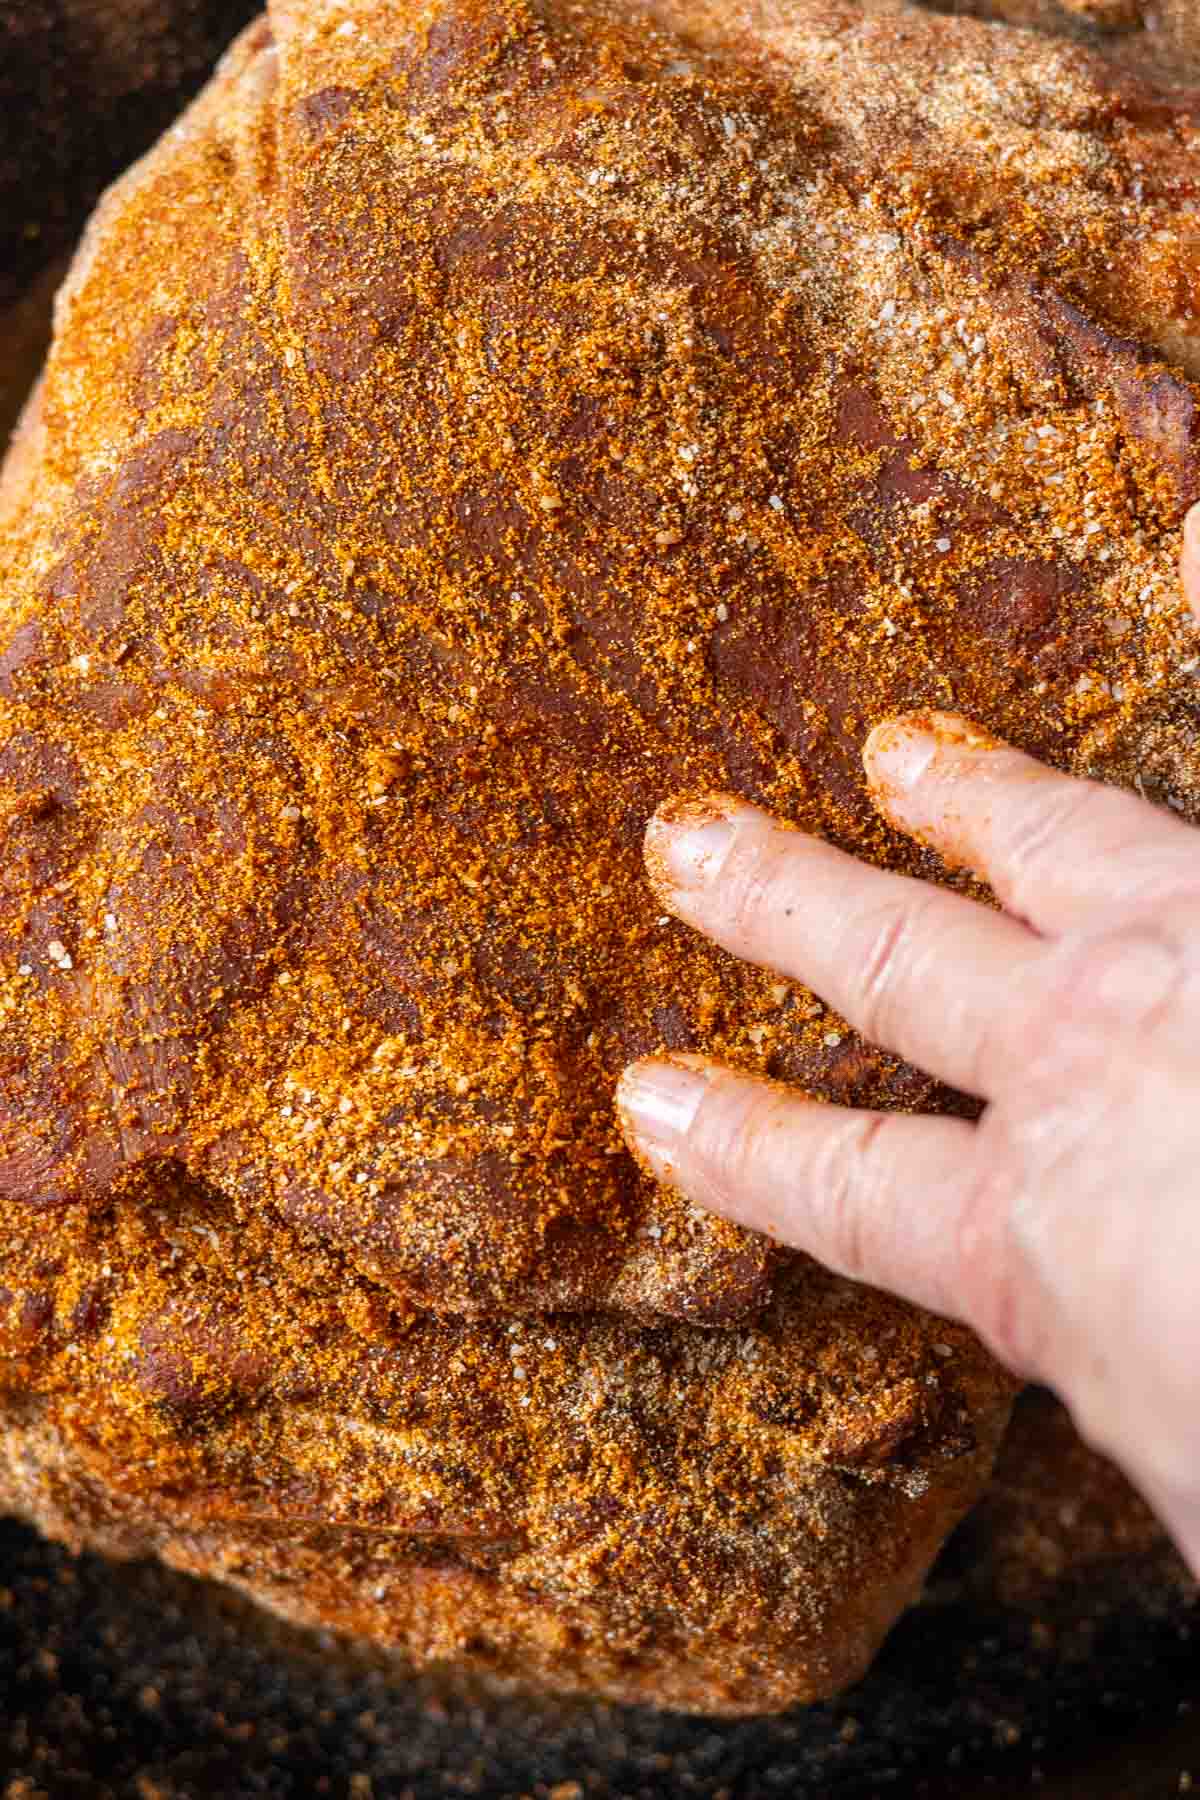
    Step 4: Rub the seasoning mix into the pork roast.
    1. Step 3 Season the pork roast: Sprinkle the spice mix on the meaty side of the roast, not the fat side.
    2. Step 4: Rub in the seasoning: Using your hands, rub spice mix into pork and place in crockpot.
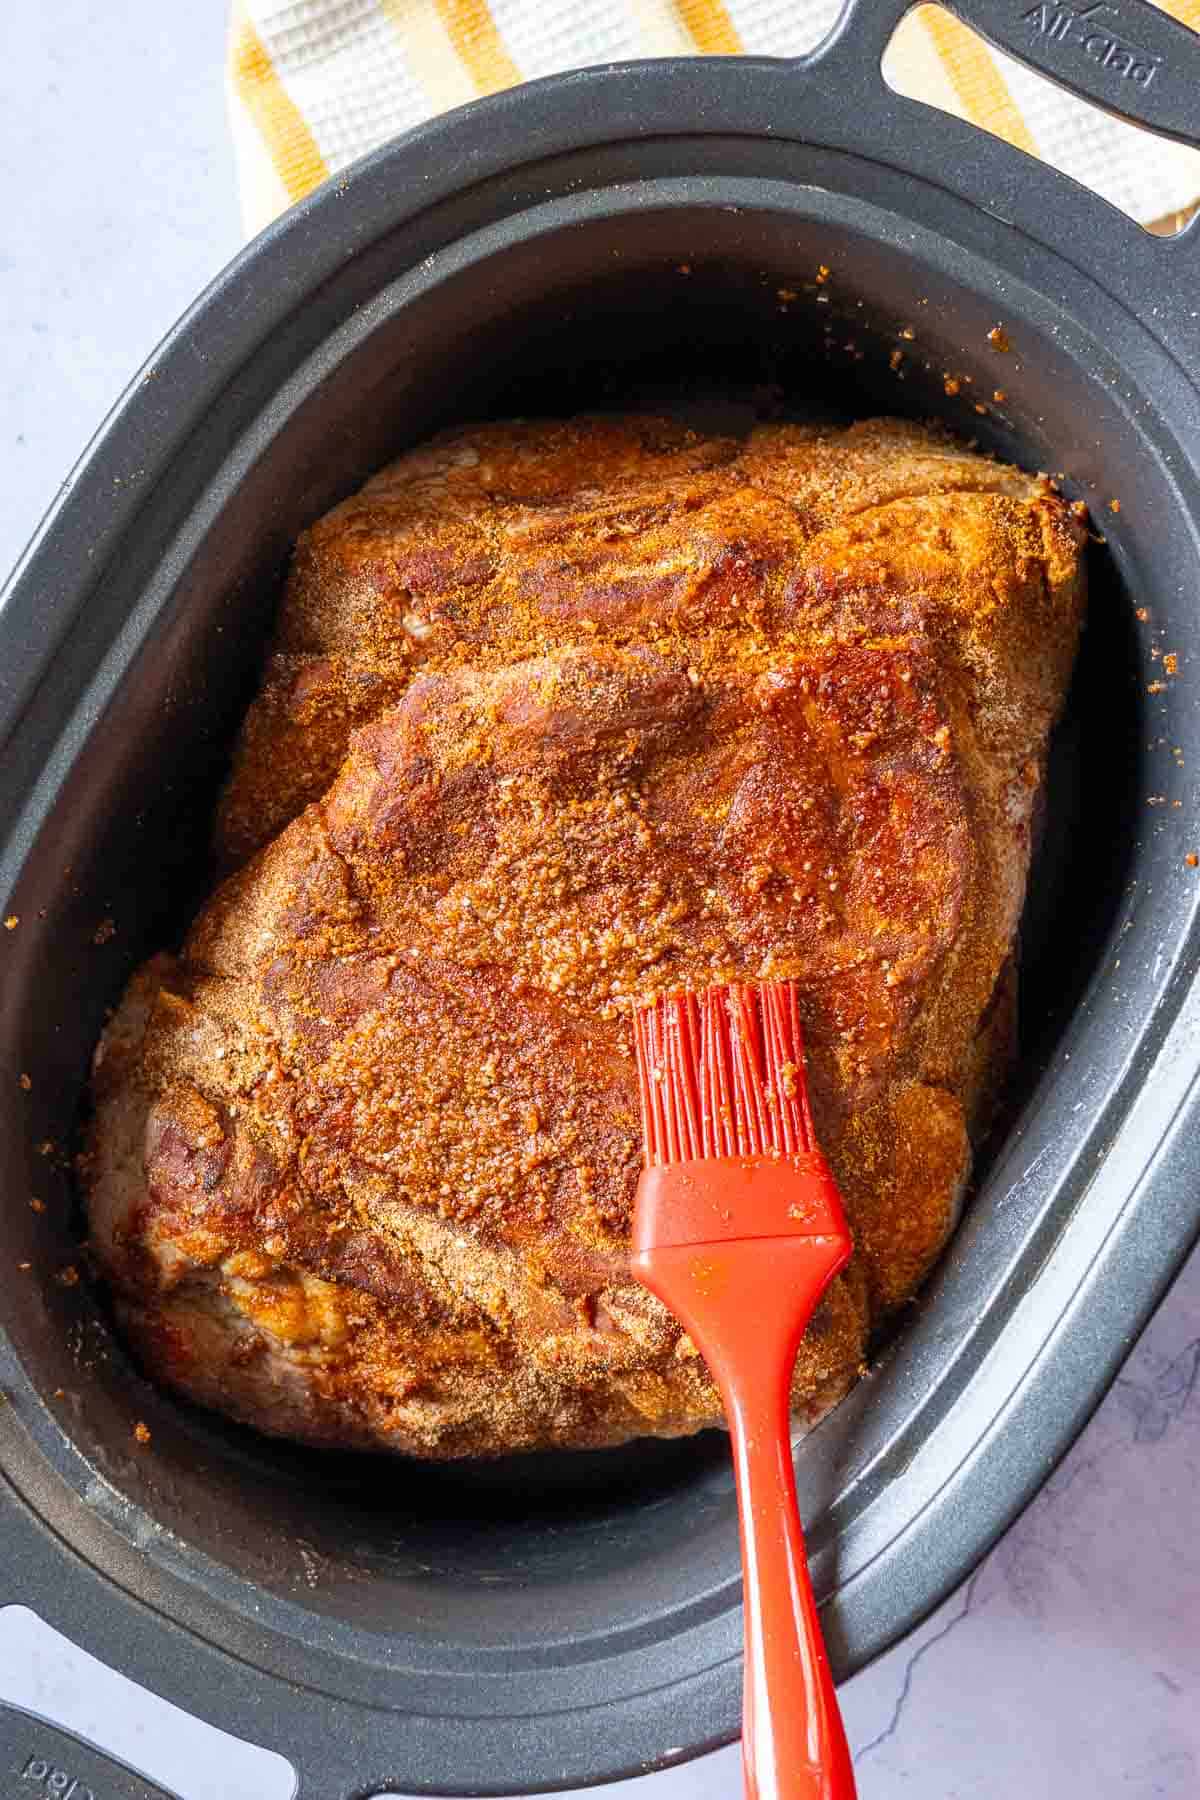
    Step 5: placing pork roast in crockpot to make pulled pork sliders.
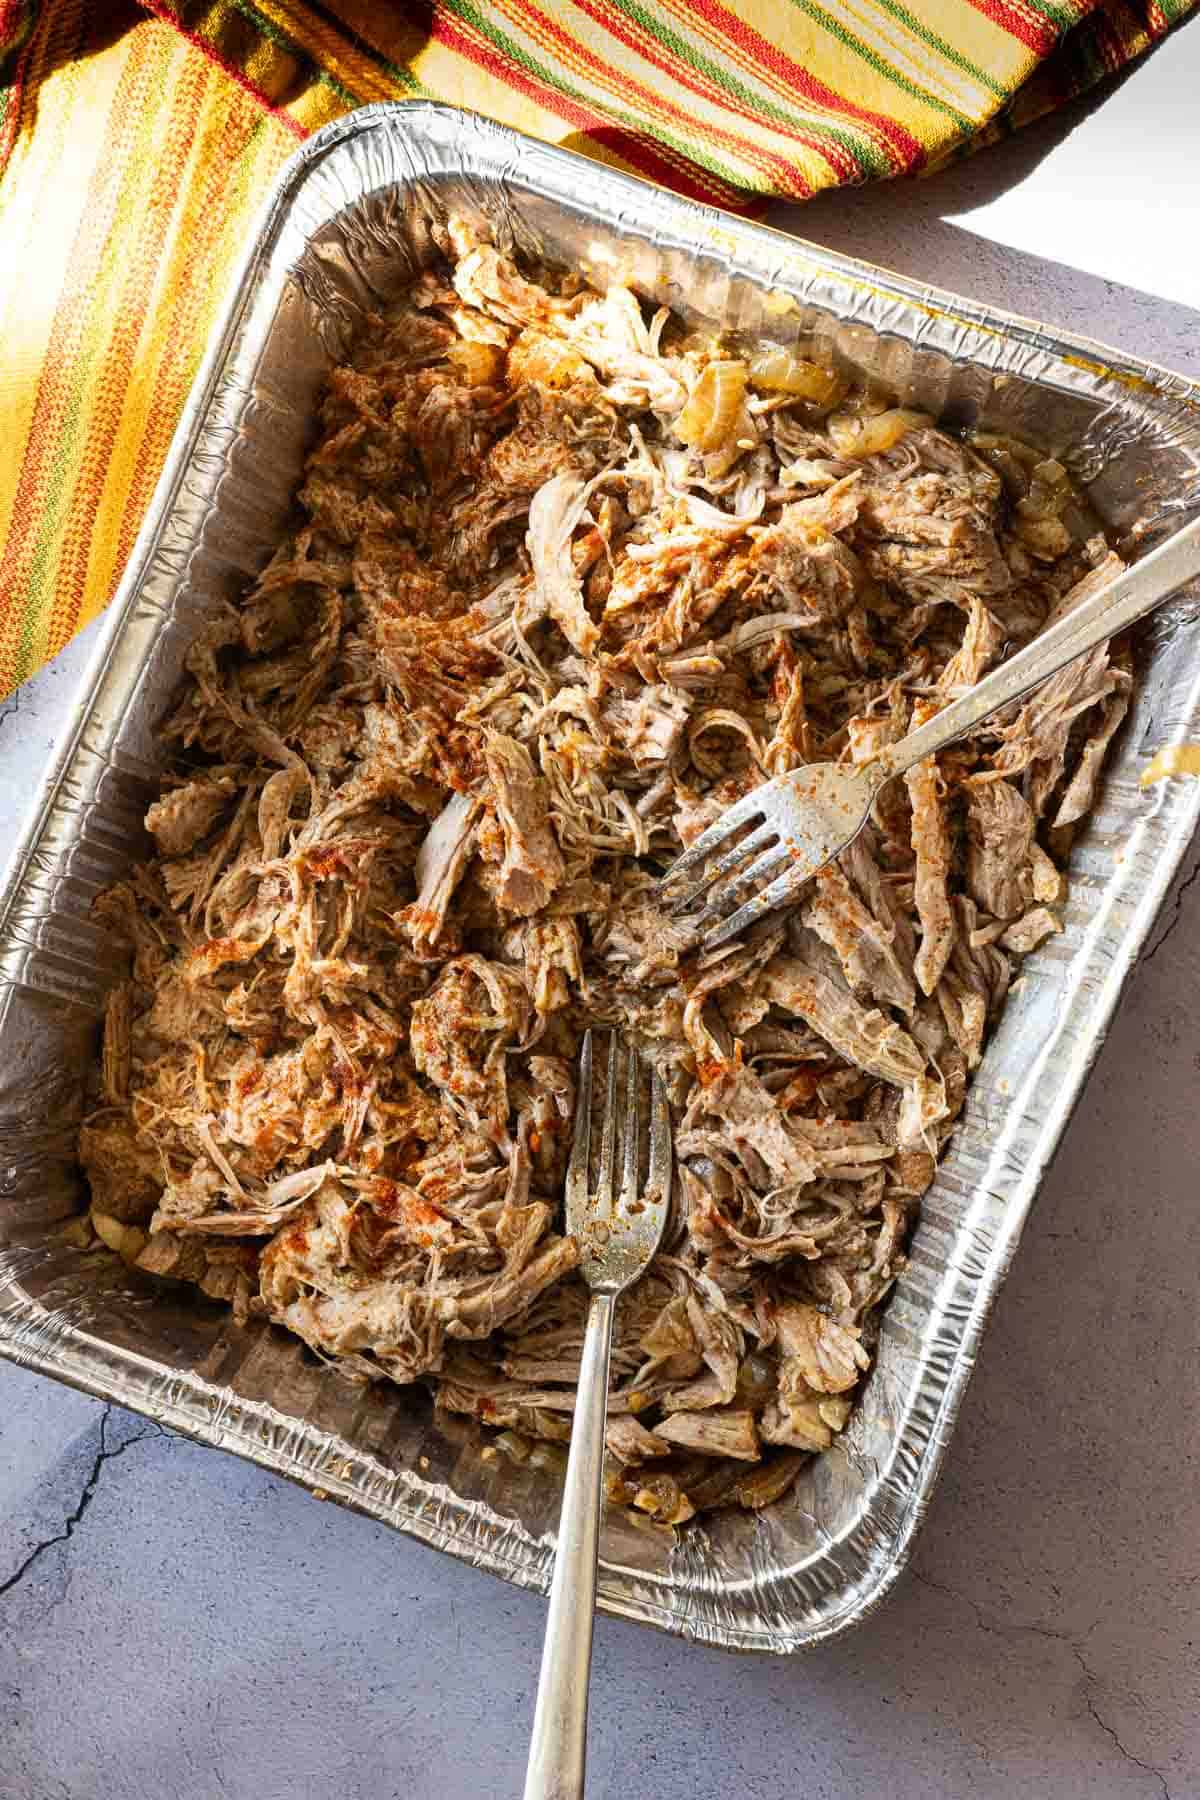
    Shredding pork roast to make pulled pork sliders.
    1. Step 5: Mop up the seasoning mix that landed in the skillet using a silicone basting brush. Brush it over the pork roast, you don’t want to lose any of that seasoning flavor. Pour the Dr. Pepper around the roast. Cook on low for 8 hours.
    2. Step 6: Shred the pork roast. Remove pork to a large cutting board or a disposable aluminum roasting pan. Discard the liquid in the slow cooker. Once pork is cool enough to handle use two forks to shred meat, discarding the bone and large chunks of fat.

    Keep A Lid On It: When cooking foods in your slow cooker, resist the urge to lift that lid. Unless of course it’s absolutely necessary. Crockpots cook at such low temps that lost heat is not quickly recovered. An uncovered slow cooker can lose up to 20 degrees of heat in as little as two minutes. If you need to lift the lid to add ingredients, replace that lid as quickly as possible. This is especially important when using the low heat setting.

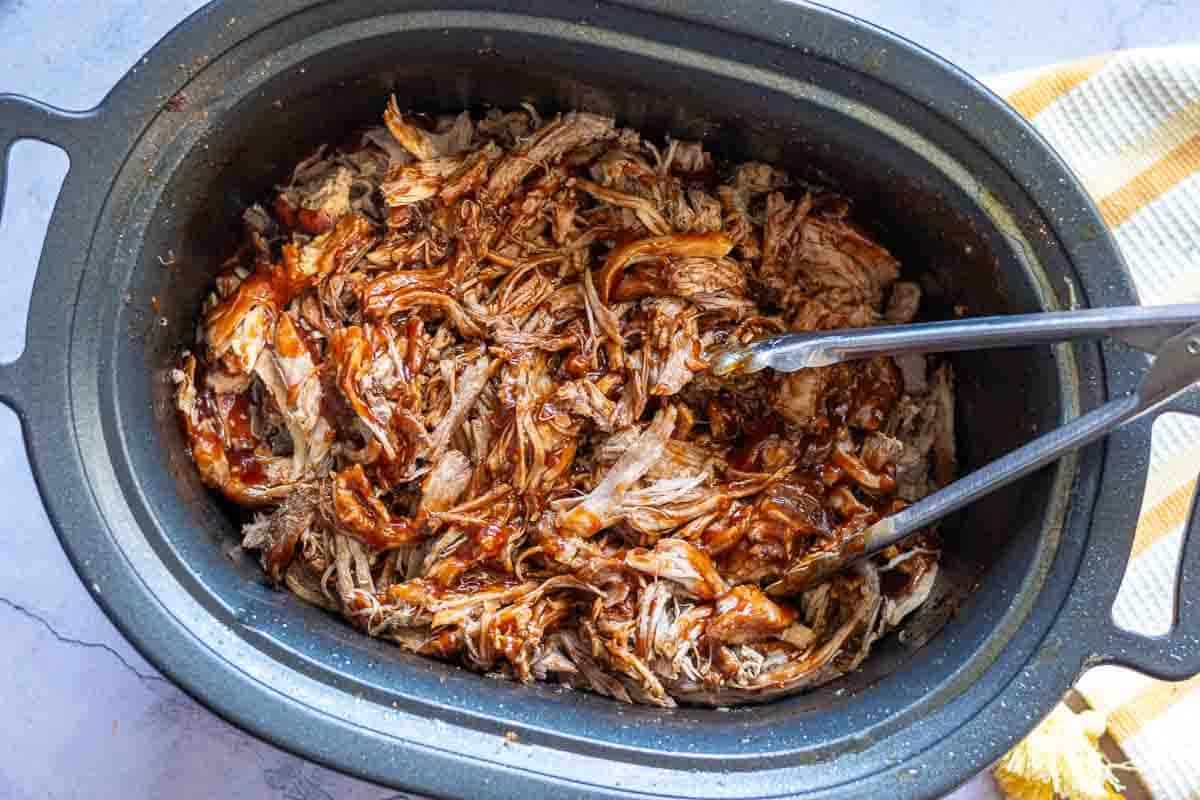
    BBQ pulled pork sliders in the slow cooker.
    1. Step 7: Return shredded pork to slow cooker, add the barbecue sauce and cook on high for one hour. Serve on slider buns with pickle slices.
    What’s The Difference Between Pulled Pork and Shredded Pork

    Pulled pork and shredded pork are often used interchangeably. Pulled pork is an American barbecue dish based on shredded barbecued pork shoulder. Pulled pork is cooked until fall-apart tender to allow the meat to be shredded or pulled apart.

    Can I Use A Pork Loin Roast?

    I highly recommend you use a bone-in pork shoulder roast to make pulled pork sliders. Avoid a pork loin, or pork tenderloin. These are leaner cuts of meat and will tend to dry out. A bone in pork shoulder roast has enough fat to keep the meat tender and juicy and very shreddable. Also, that bone adds over-all flavor.

    Tips For Success

    • Pat the pork roast dry before searing. A dry piece of meat will sear quicker and with a crispier exterior.
    • Choose a soft squishy slider bun to serve these bbq pulled pork sliders. I like Pepperidge Farm and even Hawaiian rolls would work well here. I’m not a fan of Brioche buns for any burger type sandwich. Most of the time they simply fall apart when eating. I’ve also seen some really good looking slider buns that are very stiff. You’ll be happier with a soft roll here.
    • Choose your favorite bbq sauce for this recipe. I would caution using a strong flavored sauce. Some simply come with too much “smokiness” or too much bourbon. Strong flavors will overwhelm this sandwich experience. Stick with the basics here. I’ve also made this recipe using my homemade bbq sauce.

    Sides to Serve with BBQ Pulled Pork Sliders

    These types of barbecue pulled pork sliders will accommodate so many popular picnic and pot luck style side dishes.

    We like a good macaroni salad like this Amish Macaroni Salad. Or try a cold potato salad like this unique Blue Cheese Potato Salad.

    A hot dish like my recipe for Beer Mac and Cheese is always a popular choice. Or this recipe for Spicy Baked Beans.

    For dessert I like this Cherry Delight Recipe.

    Storage and Reheating

    This recipe makes enough to feed an army. So if your army didn’t quite eat as much as you thought, simply store any leftover bbq pork in an airtight container in the refrigerator for up to 5 days. You can also wrap well, and freeze for up to 3 months.

    Your microwave is your best weapon for reheating pulled pork meat. Just place a portion of the meat in a microwave safe bowl and heat in 30 second increments until warm. This will take less time than you think because of the sugar in the bbq sauce.

    Recipe for Slow Cooker Dr. Pepper BBQ Pulled Pork Sliders

    Dr. Pepper bbq pulled pork sliders on a white platter.

    More Recipes Using Pork Shoulder

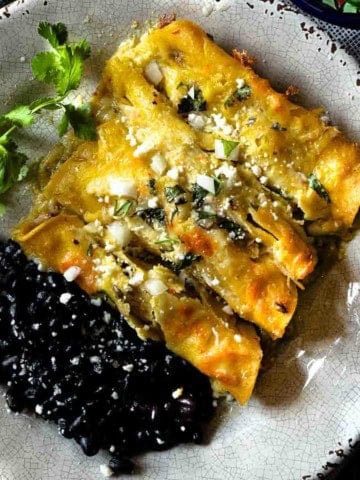
    • Pork enchiladas verde served with a side of black beans.
      Beer Braised Pulled Pork Enchiladas Verde
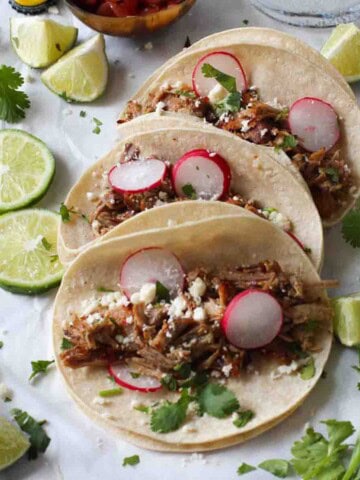
    • Instant Pot Pork Carnitas Tacos
      Instant Pot Pork Carnitas Tacos (Or Pressure Cooker)
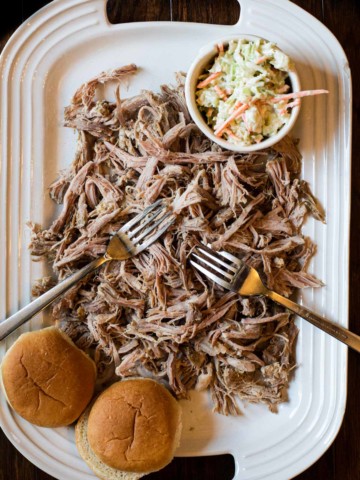
    • A platter of pulled pork with cole slaw and buns
      Pork Butt Brine, Recipe From Manor Vail Lodge
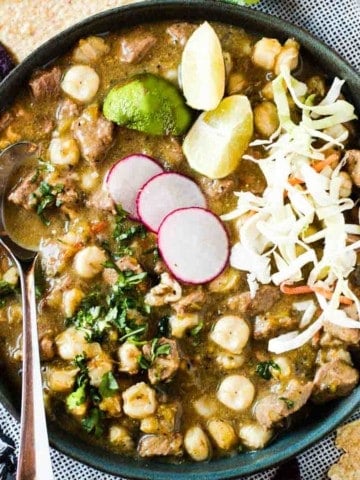
    • New Mexico Pork Posole topped with sliced radishes and grated cheese.
      New Mexico Pork Posole (Pozole)

    And don’t miss my category for Pork Recipes. You’ll find lots of great recipes including one of our favorite BBQ pork recipe for “Campfire Ribs” Grilled Country Style Pork Ribs.

    Dr. Pepper bbq pulled pork sliders on a white platter.
    Print Recipe
    5 from 4 votes

    Slow Cooker Dr. Pepper Barbecue Pulled Pork Sliders

    Looking for an easy and tasty way to feed your next party crowd? Consider these Slow Cooker Dr. Pepper BBQ Pulled Pork Sliders. Fuss free and popular doused with Dr. Pepper & Barbecue Sauce. A great shredded pulled pork slider recipe using pork roast.
    Prep Time15 minutes mins
    Cook Time8 hours hrs
    Total Time9 hours hrs 15 minutes mins
    Course: Main Course Sandwiches
    Cuisine: American
    Servings: 24 sliders
    Calories: 469kcal
    Author: Lea Ann Brown

    Equipment

    • Large Slow Cooker
    • Large Heavy Skillet

    Ingredients

    • 8 pound Bone in pork shoulder Boston Butt roast
    • 1 Tablespoon Neutral Oil Canola, peanut or avocado oil work well here
    • 1 Tablespoon Garlic powder
    • 1 Tablespoon Onion powder
    • 1 Tablespoon Smoked paprika
    • 1 teaspoon kosher salt
    • 3 cups Dr Pepper
    • 3 cups BBQ Sauce Your favorite brand
    • 24 slider buns
    • Sliced pickles for serving

    Instructions

    • Place the pork roast on a cutting board and pat dry with paper towels. Add neutral oil to a large skillet. Once hot, brown the pork roast on two sides. This will take about 5 minutes per side.
    • Combine spices in a small bowl, mix well with a fork. Sprinkle the spice mix on top of the roast. You want to sprinkle the sauce on the meaty side, not the fat side.
    • Using your hands, rub spice mix into pork. Place the pork roast in the slow cooker. Mop up the seasoning mix that landed in the skillet using a silicone basting brush. Brush it over the pork roast, you don't want to lose any of that seasoning flavor.
    • Pour Dr. Pepper around pork. Cover and cook on low 6-8 hours, until pork is tender and pulls apart easily.
    • Remove pork to a large cutting board or an aluminum disposable pan. Discard the liquid in the slow cooker. Once pork is cool enough to handle use two forks to shred meat, discarding the bone and large chunks of fat.
    • Return shredded pork to slow cooker and add the barbecue sauce. Stir well and cook on high for one hour. Serve on slider buns with pickles.

    Notes

    Top Tip: Once the meat is cooked and the bone and fat discarded, an 8-pound bone-in Boston Shoulder Butt will yield about 4 pounds of shredded pork.
    Tips For Success: 
    • Pat the pork roast dry before searing. A dry piece of meat will sear quicker and with a crispier exterior.
    • Choose a soft squishy slider bun to serve these bbq pulled pork sliders. I like Pepperidge Farm and even Hawaiian rolls would work well here. I’m not a fan of Brioche buns for any burger type sandwich. Most of the time they simply fall apart when eating. I’ve also seen some really good looking slider buns that are very stiff. You’ll be happier with a soft roll here.
    • Choose your favorite bbq sauce for this recipe. I would caution using a strong flavored sauce. Some simply come with too much “smokiness” or too much bourbon. Strong flavors will overwhelm this sandwich experience. Stick with the basics here. I’ve also made this recipe using my homemade bbq sauce.

    Nutrition

    Calories: 469kcal | Carbohydrates: 35g | Protein: 33g | Fat: 21g | Saturated Fat: 7g | Polyunsaturated Fat: 2g | Monounsaturated Fat: 9g | Trans Fat: 0.003g | Cholesterol: 95mg | Sodium: 547mg | Potassium: 635mg | Fiber: 2g | Sugar: 18g | Vitamin A: 234IU | Vitamin C: 1mg | Calcium: 66mg | Iron: 2mg

    Dr. Pepper BBQ Pulled Pork Sliders … They’re What’s for Your Next Party

    If you liked this recipe, please leave a star ⭐⭐⭐⭐⭐ rating in the recipe card below and leave a comment. I always appreciate your feedback and hearing how everything went.

    And, don’t forget to subscribe to my newsletter for more delicious recipes and cooking tips. Make it a delicious day … every day.

    Mexican Casserole with Ground Beef and Corn Tortillas

    October 4, 2015 By Lea Ann Brown 43 Comments

    Layered Mexican Casserole in a 9 x 13 pyrex dish with ground beef and corn tortillas, garnished with tomatoes and cilantro

    This Mexican Casserole with Tortillas and Ground Beef is an easy and satisfying way to spice up your dinner plans. Layered with corn tortillas, and a ground beef mixture complete with black beans and sweet corn puts this in the category of irresistible and easy casserole dishes. Did I mention there’s sour cream involved?

    Layered Mexican Casserole in a 9 x 13 pyrex dish with ground beef and corn tortillas, garnished with tomatoes and cilantro

    Mexican casseroles are always popular for pot lucks. Aside from this Mexican casserole with tortillas and ground beef, another popular recipe is this one for Mexican Casserole with Chicken.

    I always welcome the arrival of Autumn and all that comes with it. Crisp air, cool temperatures and of course the food. Which around here includes Roasted Chile Peppers in about e-v-e-r-y-thing.

    Chile Roasters at Whole Foods

    And the air is filled with the aroma of chile when the multitude of roasters fire up their cages to char Pueblo, Hatch, Poblano, Jalapeno chile just so folks like me can make fresh Mexican and Southwestern meals.

    Fall is a wonderful time to be in Colorado. And a wonderful time for this Mexican Casserole with Tortillas and Ground Beef.

    Mexican casserole made with ground beef, corn tortillas, sour cream, pepper jack cheese, sweet corn, black beans and canned tomatoes. Topped with fresh tomatoes, cilantro and jalapeno.

    Thanks to my cousin Pam for introducing this Easy Mexican casserole with ground beef to my Fall collection of goodness. This is one of those things that I simply could not stop eating.

    Ingredients You’ll Need

    • 1 pound lean ground beef
    • 1 sweet onion
    • 1 cup frozen corn thawed.
    • Canned black beans
    • Taco seasoning
    • Yellow corn tortillas
    • Canned chopped tomatoes
    • Chile peppers Hatch, Poblano, or Pueblo, roasted, chopped. Or 8 ounces canned, chopped chiles from the Mexican aisle.
    • Sour cream
    • Pepper Jack Cheese
    • Garnish: Jalapeno peppers, chopped tomatoes and chopped cilantro

    Ingredient Substitutions

    • Corn: Substitute 1 can of corn for frozen corn. Drain before using.
    • Onion: I prefer sweet or yellow onion, but if you want a bolder flavor, use a red onion.
    • Tortillas: Yellow corn tortillas are preferred for this recipe, as they’re stronger than white corn tortillas. If you want to use white corn tortillas, make sure the ground beef mixture is a little dryer.
    • Sour Cream: Ever tried Mexican Crema? You can find it in the produce section at the grocery store. It’s a little thinner than full fat sour cream and a little tangier in flavor.
    • Cheese: Any good melting cheese will work well here. Cheddar, Muenster, Monterey Jack are all good choices.
    • Beans: If you don’t have canned black beans, canned chile beans in chile sauce would be a great replacement.

    How To Make Mexican Casserole with Ground Beef

    frying ground beef, tomatoes, beans and corn for a mexican casserole

    How To Cook Ground Beef Mixture

    Just grab your favorite frying skillet and heat it over medium high heat.

    • Once the skillet is hot, add the ground beef.
    • With your favorite spatula, break the ground beef apart.
    • Once the pink starts to fade from the meat, add the chopped onions.
    • Cook until the onions are starting to soften.
    • Add canned black beans (drained)
    • Frozen or canned yellow corn (drained if using canned) I prefer frozen corn, 1 cup.
    • 2 cans of chopped tomatoes (drained)
    • And 8 chile peppers, roasted, peeled, seeded and chopped. Hatch work great here, Pueblo (Mirisol) Peppers are lovely or 2-4 ounce can of chopped chiles (undrained) make this even easier.
    • Add taco seasoning and ½ to 1 cup of water and let simmer for about 10 – 15 minutes or until mixture starts to thicken. Start with ½ cup of water and add more if mixture becomes dry.

    How to Build This Mexican Casserole with Corn Tortillas

    Laying ingredients for Mexican casserole. Corn tortillas in a clear pyrex baking dish.
    • Spray a 9 x 11 baking dish with PAM
    • Add about 1 cup of the beef mixture as evenly as you can on the bottom of your baking dish. It won’t cover the pan, but will add a barrier for the tortillas so they will stay moist during baking.
    • Place 6 corn tortillas over the ground beef mixture, overlapping them and placing them so they curl up the side of the dish by about a half inch.
    • Cover the corn tortillas with half the remaining beef mixture
    Layered Mexican Casserole with Ground Beef and Corn tortillas topped with sour cream.
    • Spread the sour cream over the beef mixture.
    Mexican casserole layered with ground beef and corn tortillas topped with cheese, ready for oven
    • Place the remaining 6 corn tortillas on top of the sour cream in the same manner you did with the first layer.
    • Add the remaining ground beef mixture.
    • Sprinkle with the cheese.
    Mexican casserole made with ground beef, corn tortillas, sour cream, pepper jack cheese, sweet corn, black beans and canned tomatoes. Topped with fresh tomatoes, cilantro and jalapeno.
    • Bake the casserole in a 350 degree oven for 25 – 30 minutes.
    • Let the casserole sit for about 5 – 10 minutes. Garnish with sliced jalapenos, chopped fresh tomatoes and chopped cilantro. Cut into squares and serve. YUM!
    Mexican casserole made with ground beef, corn tortillas, sour cream, pepper jack cheese, sweet corn, black beans and canned tomatoes. Topped with fresh tomatoes, cilantro and jalapeno. Served on Mexican colored appetizer plates

    Tips for Success

    • Important Tip: If the mixture is too watery, this will cause the corn tortillas to become soggy during baking. Different taco seasoning mixes may contain different amounts of corn starch (for the thickening agent) This is why I say start with ½ cup and add a little more at a time. You want the mixture a little soupy but not watery.
    • I urge you to use Homemade Taco Seasoning for this. It’s superior in flavor and void of preservatives. Ever since I discovered smoked paprika a few years ago, I’ve gone crazy using it. And sprinkling some in taco seasoning is no exception and adds a wonderful smoky flavor. I hope you take a look at my recipe.
    • If you use this homemade mixture, just use about 3 tablespoons instead of a packet of taco seasoning. It brings a whole new level of earthy depth to this casserole. And you’ll love that bold color and bold flavor.

    What To Serve It With

    All this hearty casserole needs for a side dish is a tossed green salad like my recipe for Southwestern Salad. And for a more Summery side, try my Mexican Corn Salad.

    Flavor Tip

    For an amazing layer of deep Southwestern flavor, once cooked, drizzle this casserole with New Mexico Red Chile Sauce. It’s amazing.

    Recipe for Mexican Casserole with Ground Beef

    Zesty and loaded with all of your favorite Mexican flavors, what’s not to love. This is a great weeknight meal that will reward you with some tasty leftovers, which means you don’t need to worry about cooking for the next evening…or two.

    As much as I love to spend time in the kitchen fussing over dinner, I’m also always looking for quick and easy dinner ideas. This Mexican Casserole With Ground Beef and Corn Tortillas is one that fits that bill.

    It’s a favorite here On The Ranch and it’s a classic layered Mexican Casserole recipe that’s filled with flavor. Quick and easy, family friendly, I hope you give this a try.

    And if you have a favorite Mexican Casserole with ground beef and corn tortillas, let me know, I’d love to give it a try.

    More Recipes Using Corn Tortillas

    • A slice of chorizo Mexican breakfast casserole.
      Eggs Ole’ Mexican Breakfast Casserole
    • Ground Beef Red Chile Sauce Enchiladas.
      Blue Corn, Red Chile Ground Beef Enchiladas (New Mexico Style)
    • Mexican pot roast served over corn tortillas and garnished with sliced radishes and a wedge of lime.
      Mexican Pot Roast with Guajillo Chile Sauce (Carne Guisada)
    • New Mexico Stacked Enchiladas topped with a fried egg.
      New Mexico Stacked Enchiladas

    And if you’re in the eternal mood for Mexican Recipes, don’t miss my Mexican Southwest Category. And the most popular recipe in that category, Fried Tacos.

    If you liked this recipe, please leave a star ⭐⭐⭐⭐⭐ rating in the recipe card below and leave a comment. I always appreciate your feedback and hearing how everything went.

    And, don’t forget to subscribe to my newsletter for more delicious recipes and cooking tips. Make it a delicious day … every day.

    Layered Mexican Casserole in a 9 x 13 pyrex dish with ground beef and corn tortillas, garnished with tomatoes and cilantro
    Print Recipe
    4.92 from 57 votes

    Mexican Casserole with Ground Beef and Corn Tortillas

    Easy and satisfying this Mexican Casserole with Ground Beef is a popular recipe around our house.
    Prep Time20 minutes mins
    Cook Time30 minutes mins
    Total Time50 minutes mins
    Course: Mexican
    Cuisine: Mexican
    Servings: 16
    Calories: 158kcal
    Author: Lea Ann Brown

    Ingredients

    • 1 pound lean ground beef
    • 1 medium onion chopped
    • 1 cup frozen corn thawed. You can use 1 can, drained. I prefer 1 cup frozen corn.
    • 1-15 ounce black beans canned, drained and rinsed
    • 2-3 tablespoons taco seasoning
    • ½ – 1 cup water start with ½ cup. See note below.
    • 12 yellow corn tortillas
    • 2-15 ounce chopped tomatoes canned, drained
    • 8 green chile peppers Hatch, Poblano, or Pueblo, roasted, chopped. Or 8 ounced canned, chopped chiles from the Mexican aisle.
    • 1 cup sour cream
    • 1 cup Pepper Jack Cheese
    • Sliced jalapeno peppers, chopped tomatoes and chopped cilantro for garnish

    Instructions

    • In a large fry pan, brown ground beef. When the pink is starting to fade, add onions and cook for about 5 minutes, stirring frequently.
    • Add corn, beans, tomatoes, chiles and taco seasoning and water. Mix well and simmer for 10 minutes. Taste and add more taco seasoning if needed.
    • Spray 9 x 13 baking dish with cooking spray.
    • Place 1 cup of ground beef mixture on the bottom of the pan. Place half of the tortillas on top of the ground beef, overlapping and placing them so they come about ½ inch up the side of the casserole dish.
    • Spoon half of the remaining beef mixture on top of the tortillas and spread the sour cream over the beef. Layer the rest of the corn tortillas and then the rest of the beef mixture. Top with the grated cheese.
    • Place in heated 350 degree F. oven and bake for 25 minutes. Garnish with sliced jalapenos, chopped fresh tomatoes and chopped cilantro. Let stand for 5 minutes and serve.

    Video

    Notes

    • Important Tip: If the mixture is too watery, this will cause the corn tortillas to become soggy during baking. Different taco seasoning mixes may contain different amounts of corn starch (for the thickening agent) This is why I say start with ½ cup water  and add a little more at a time. You want the mixture a little soupy but not watery.
    • I urge you to use Homemade Taco Seasoning for this. It’s superior in flavor and void of preservatives. Ever since I discovered smoked paprika a few years ago, I’ve gone crazy using it. And sprinkling some in taco seasoning is no exception and adds a wonderful smoky flavor. I hope you take a look at my recipe.
    • If you use this homemade mixture, just use about 3 tablespoons instead of a packet of taco seasoning. It brings a whole new level of earthy depth to this casserole. And you’ll love that bold color and bold flavor.

    Nutrition

    Calories: 158kcal | Carbohydrates: 14g | Protein: 10g | Fat: 7g | Saturated Fat: 4g | Cholesterol: 31mg | Sodium: 184mg | Potassium: 214mg | Fiber: 3g | Sugar: 2g | Vitamin A: 177IU | Vitamin C: 5mg | Calcium: 90mg | Iron: 1mg

    Mexican Casserole with Ground Beef  …It’s what’s for Dinner.
    Smoky Oven Brisket Recipe with BBQ Sauce

    September 24, 2015 By Lea Ann Brown 22 Comments

    Oven brisket served with baked potato and fried cabbage.

    Learn How To Cook A Brisket In The Oven. It’s Easy. This is an oven brisket recipe that’s simple with seasoning yet flavored with perfection. Using Liquid Smoke and cooked low and slow in the oven you won’t miss the barbecue grill or smoker. Finished with BBQ Sauce this is a super easy recipe that’s big on flavor.

    And if you’re looking to cook a brisket in the crock pot, take a look at my Coca Cola Brisket recipe. Put your slow cooker to work for this fun, easy and unique with flavor brisket recipe.

    sliced Oven brisket served with baked potato and fried cabbage.

    How To Cook A Brisket In The Oven

    You don't need a smoker, or a secret rub to make a great brisket. With simple pantry spices, a touch of Liquid Smoke to mimic smoke flavor, and a low-and-slow bake, you can get tender, smoky, flavorful brisket right from your oven.

    This easy oven brisket starts with a dry rub of celery salt, garlic powder, onion powder, and Liquid Smoke.

    Note: Be prepared to start the brisket the day before cooking. After an overnight rest in the fridge will allow the dry rub and liquid smoke flavors to penetrate the meat. It's then brushed with Worcestershire and baked low and slow until it's fall-apart tender.

    Inspired by a beloved family recipe from Helen VenJohn and the Bergkamp family cookbook, this method proves you can make incredible brisket, tender every time, no smoker required.

    Table of contents

    • How To Cook A Brisket In The Oven
    • Step by Step Instructions … It’s So Easy
      • Before Cooking
      • Cooking Brisket
    • Tips For Success
    • Brisket Serving Size – How Much Brisket Per Person
    • Questions You May Have
    • Resting, Slicing and Serving
    • What To Serve With It
    • Make Ahead, Storing Brisket And How To Reheat Brisket
    • Oven Brisket Recipe with BBQ Sauce
    • More Main Course Beef Recipes You Might Like
    Ingredients to make oven brisket.
    • Brisket. Choose a 5 – 7 pound brisket.
    • Worcestershire Sauce: Tangy, savory, sweet and salty, Worcestershire adds a beautiful layer of flavor to this oven brisket.
    • Liquid Smoke: Liquid smoke is a flavoring agent made by burning wood chips then capturing that flavor in a liquid substance. Liquid smoke has a strong smoky flavor and is used to bring enhance that outdoor smoky to food.
    • Seasonings: Kosher Salt, freshly ground pepper, celery salt, onion powder and garlic powder.
    • Optional: This oven brisket is beautiful in flavor without it, but you can add BBQ Sauce at the end of the cooking time. I always do. Use your favorite brand or make homemade bbq sauce, like this recipe from my Mom’s BBQ Meatballs.

    Step by Step Instructions … It’s So Easy

    Before Cooking

    Seasoning a brisket to bake in the oven.
    Adding liquid smoke to a brisket for oven baked brisket.
    1. Step 1: Place the brisket in a roasting pan, fat side down. Sprinkle on the celery salt, onion powder and garlic powder and rub it in a bit.
    2. Step 2: Drizzle on the liquid smoke.
    Oven brisket in a roasting pan covered with aluminum foil.
    1. Step 2: Cover the pan tightly with aluminum foil. Refrigerate it for 24 hours before baking.

    Cooking Brisket

    Bake at 275 degrees for 5 hours. This will allow the internal temperature to reach 190 degrees.

    Slicing oven brisket across the grain.
    Drizzling bbq sauce on top of oven brisket.
    1. Step 4: Remove the brisket from the roasting pan. Tent the meat and let it rest for 10 – 20 minutes, then slice against the grain.
    2. Step 5: Return the sliced brisket to the roasting pan, and drizzle on the BBQ sauce. I used about one cup of sauce as to not overwhelm the flavor the brisket. Cover again with the aluminum foil and cook for 30 more minutes.

    Expert Tip: Larry, over at Big Dude’s, a brisket expert, adds this about oven baked brisket. “Every piece of brisket is different and cooks differently so it’s hard to use a single cooking time and temperature for all of them.  It is also a piece of meat with a very small window of just right and it goes from tough (under cooked) to dry (over cooked) very quickly.  Nearly all pro-brisket cooks monitor the internal temp until it gets to about 195* then use the prob test – when a probe slides in and meets little resistance (like room temperature butter) its done.”  

    Tips For Success

    • Don’t be tempted to raise the temperature to rush the cooking time. Your oven brisket will turn out tough. Roasting at a low oven temperature allows the fats to break down slowly, tenderizing the meat during this process.
    • Before seasoning and cooking, find the grain and slice a small corner off the brisket. This will help you find the direction of the grain after it’s cooked = easier slicing decisions.

    Brisket Serving Size – How Much Brisket Per Person

    Briskets shrink as they cook. Take for instance, a five pound brisket will shrink to about 3 ½ pounds. Plan for ½ pound of uncooked brisket per person. So a five pound brisket will serve 10 people. I like a lot of leftovers, so I usually seek out a 7 pound brisket.

    Questions You May Have

    How Long Does It Take To Cook Brisket In The Oven?

    A 5 – 7 pound brisket, cooked at 270 degrees will take about 5 hours. After the 5 hour cook time, the BBQ sauce is added and it’s back to the oven just long enough to heat the sauce. A probe thermometer should indicate the internal temperature to be 190 degrees.

    How Long To Cook A Small Beef Brisket?

    If you purchase a 2 – 3 pound brisket, use a digital probe thermometer to monitor the internal temperature. Once you add the sauce, continue to bake until the temperature probe alerts you of the proper temperature.

    Resting, Slicing and Serving

    Do You Need To Let A Brisket Rest? All meat benefits from a rest after cooking. Once out of the oven, remove it to a cutting board and let it rest, tented with the foil for about 10 – 20 minutes. Then slice, add the bbq sauce and return to oven. Resting allows the meat juices to redistribute. The result is a more tender piece of brisket.

    Slice Against The Grain: Very important! Meat cuts like brisket, flank steak, skirt steak or even flap steak have muscle fibers that run in one direction. It’s crucial to cut this type of meat against the grain, meaning across the grain. This will shorten the fibers making it tender to chew. If you don’t follow this rule, you’ll have pieces of meat that are simply impossible to break down with your teeth.

    What To Serve With It

    I can’t think of a better meal than beef, potatoes and a vegetable. Serve oven brisket with these Garlic Butter Slow Cooker Baked Potatoes. Or a make ahead potato salad like this Old Fashioned Potato Salad.

    Any vegetable is a good choice. May I recommend Honey Butter Skillet Corn, Brown Sugar Green Beans with Bacon, or during the Fall months this Rode Kool braised red cabbage recipe.

    If you want a more rustic feel meal, serve this oven brisket with these Slow Cooker Cowboy Beans.

    Got leftovers? Make simple brisket tacos or BBQ Brisket Pizza.

    Make Ahead, Storing Brisket And How To Reheat Brisket

    • Make Ahead: Need to make a brisket in advance? This oven brisket can be made a few days in advance. Cook the brisket, let it cool, then store in the refrigerator still sealed with foil. To reheat, preheat your oven to 300 degrees F. Left the foil and pour about one cup of beef broth over the brisket. Place the pan in the oven and reheat for about 45 minutes or until the internal temperature reaches 165 degrees. Let the meat rest for about 10 minutes before slicing.
    • Storage: Store any leftover brisket, wrapped tightly in the refrigerator. I like to wrap in in parchment paper, followed by a layer of aluminum foil. It will keep in the refrigerator for up to 5 days.
    • Reheat: To reheat, preheat your oven to 300 degrees. Place some slices of brisket in foil and reheat for 15 – 20 minutes. You can place the foil packet of brisket directly on the oven rack, or on a sheet pan. I don’t recommend reheating cooked brisket in the microwave as it will compromise the tender texture.

    Oven Brisket Recipe with BBQ Sauce

    I hope you give this smoky oven brisket recipe a try. There’s so much hands-off time, this is an easy way to enjoy a brisket without the fuss.

    It’s a great recipe for entertaining, so instead of cooking individual steaks, make it easy on yourself and prepare one large cut of beef. It will save you time and it will save you money, without sacrificing flavor.

    More Main Course Beef Recipes You Might Like

    • Sliced grilled Flank steak and chimichurri on a white platter.
      Flank Steak With Chimichurri Sauce
    • Pot roast dinner with potatoes, carrots and gravy.
      Old Fashioned Sunday Pot Roast Dinner With Gravy
    • Slow cooker beef tips with gravy plated with mashed potatoes and broccoli.
      Slow Cooker Beef Tips with Gravy
    • Beef tournados with red wine mushroom sauce served with mashed potatoes and green beans
      Beef Tournedos Steak with Red Wine Mushroom Sauce

    And don’t miss my category for Beef Recipes. You’ll find lots of steak, burger and meatloaf recipes. Including the most popular on my site for Beef Tagliata. An easy Italian Steak recipe that will win your heart.

    And if you’re looking for a unique way to serve corned beef brisket, take a look at my recipe for Glazed Corned Beef Sliders. It will completely change your outlook on corned beef.

    Oven brisket served with baked potato and fried cabbage.
    Print Recipe
    5 from 3 votes

    Smoky Oven Brisket Recipe with BBQ Sauce

    This is an oven brisket recipe. How to cook a beef brisket low and slow in the oven so that it's oh so tender and oh so delicious. 
    Prep Time10 minutes mins
    Cook Time5 hours hrs 15 minutes mins
    Over night Marinade1 day d
    Total Time1 day d 5 hours hrs 25 minutes mins
    Course: Main Course Beef
    Cuisine: American
    Servings: 14
    Calories: 526kcal
    Author: Lea Ann Brown

    Equipment

    • Roasting pan
    • Digital probe thermometer

    Ingredients

    • 5 – 7 pounds beef brisket
    • 3 Tablespoons Liquid smoke
    • 1 Tablespoon Garlic powder Or garlic granules
    • 1 Tablespoon Onion powder
    • 1 Tablespoon Celery salt
    • 1 teaspoon Kosher salt
    • ½ teaspoon Freshly ground black pepper
    • 3 Tablespoons Worcestershire sauce.
    • 1-2 Cups BBQ Sauce

    Instructions

    • Place brisket in a roasting pan and sprinkle with garlic powder, onion powder and celery salt. Rub the seasonings into the meat a bit. Drizzle on the Liquid Smoke Cover tightly with aluminum foil and allow to stand in the refrigerator for 24 hours.
    • The next day, preheat oven to 275 degrees and sprinkle with salt, pepper and Worcestershire sauce. Cover and bake 5 hours or until a digital probe thermometer reads 190 degrees. After about 4 hours, I gently left the foil and using a meat thermometer, inserted into the thickest piece of the meat, read the internanal temperature. Then base my finishing time on that reading.
    • Drain the grease and remove the brisket to a cutting board. Let this brisket rest, tented with the foil for 10 minutes. Slice brisket against the grain and coat with BBQ sauce. Return to the roasting pan, cover with the foil and let the brisket cook, warming the bbq sauce. About 15 minutes.

    Notes

    Expert Tip: Larry, over at Big Dude’s, a brisket expert, adds this about oven baked brisket. “Every piece of brisket is different and cooks differently so it’s hard to use a single cooking time and temperature for all of them.  It is also a piece of meat with a very small window of just right and it goes from tough (under cooked) to dry (over cooked) very quickly.  Nearly all pro-brisket cooks monitor the internal temp until it gets to about 195* then use the prob test – when a probe slides in and meets little resistance (like room temperature butter) its done.”  
    Very important! Meat cuts like brisket, flank steak, skirt steak or even flap steak have muscle fibers that run in one direction. It’s crucial to cut this type of meat against the grain, meaning across the grain. This will shorten the fibers making it tender to chew. If you don’t follow this rule, you’ll have pieces of meat that are simply impossible to break down with your teeth.
    Don’t be tempted to raise the temperature to rush the cooking time. Your oven brisket will turn out tough. Slow oven roasting allows the fats to break down slowly, tenderizing the meat during this process.
    Before seasoning and cooking, find the grain and slice a small corner off the brisket. This will help you find the direction of the grain after it’s cooked = easier slicing decisions.

    Nutrition

    Calories: 526kcal | Carbohydrates: 10g | Protein: 65g | Fat: 23g | Saturated Fat: 8g | Cholesterol: 193mg | Sodium: 939mg | Potassium: 1114mg | Fiber: 1g | Sugar: 7g | Vitamin A: 48IU | Vitamin C: 1mg | Calcium: 28mg | Iron: 6mg

    If you liked this recipe, please leave a star ⭐⭐⭐⭐⭐ rating in the recipe card below and leave a comment. I always appreciate your feedback and hearing how everything went.

    And, don’t forget to subscribe to my newsletter for more delicious recipes and cooking tips. Make it a delicious day … every day.

    Oven Brisket …It’s what’s for Dinner.
    « Previous Page
    Next Page »

    I'm Lea Ann

    Welcome to my Colorado kitchen. If you're a fan of rustic homestyle cuisine, you've come to the right place. I'm a Culinary School Grad with a passion to inspire you to cook as often as you can. I offer reliable, approachable and easy to follow recipes. So grab that skillet and let's cook.

    More about me

    Favorite Grilling Recipes

    • Beef kabobs on a bed of fresh spinach.
      Lemon Curry Marinade for Steak Kababs
    • Grilled t-bone steaks served with cowboy butter.
      Grilled T-Bone Steaks with Cowboy Butter
    • Southwestern grilled ground chicken burgers served with watermelon.
      Grilled Southwest Ground Chicken Burgers, Juicy and Flavor Packed
    • Best grilled shrimp recipe served with dipping sauce.
      Best Grilled Shrimp Recipe
    • Steak Sauce Burgers.
      Jalapeno Steak Sauce Burgers
    • Maple syrup glazed grilled chicken breast kabobs served over spinach greens.
      Maple Syrup Glazed Grilled Chicken Breast Kabobs

    Reader Favorites

    • Super Moist Cheesy Cornbread with Creamed Corn
    • Flemings steakhouse macaroni and cheese in a white bowl.
      Flemings Steakhouse Mac and Cheese
    • Layered Mexican Casserole in a 9 x 13 pyrex dish with ground beef and corn tortillas, garnished with tomatoes and cilantro
      Mexican Casserole with Ground Beef and Corn Tortillas
    • Beef Tagliata, thin sliced flank steak served over arugula and cherry tomatoes.
      Beef Tagliata (Italian Steak)
    • Ham and cheese quesadilla made with corn tortillas and topped with a fried egg.
      Crispy Ham and Cheese Corn Tortilla Quesadillas
    • Spinach chicken mushroom skillet dinner.
      Chicken Mushroom and Spinach Skillet

    Footer

    • Contact
    • About
    • Privacy Policy
    • Accessibility Statement
    • ↑ back to top

    Copyright © 2024 Cooking on the Ranch • Powered by Feast+

    Rate This Recipe

    Your vote:


    A rating is required
    A name is required
    An email is required