Cooking On The Ranch

  • Home
  • About
  • Recipe Roundup
  • Contact Me
  • Join Community
menu icon
go to homepage
  • Home
  • Soups and Stews
  • About
  • Recipes
  • Contact Me
    • Facebook
    • Instagram
    • Pinterest
  • search icon
    Homepage link
    • Home
    • Soups and Stews
    • About
    • Recipes
    • Contact Me
    • Facebook
    • Instagram
    • Pinterest
  • ×
    Home

    New Mexico Pork Posole (Pozole)

    January 30, 2021 By Lea Ann Brown 58 Comments

    New Mexico Pork Posole topped with sliced radishes and grated cheese.

    This New Mexico Pork Posole Recipe is a must have for your Southwestern recipe collection. Hearty with hominy and chunks of tender pork, it’s earthy rich and satisfying comfort food with a flavor that’s pure Southwestern bliss.

    And if you love the flavors of the Southwest as much as we do, take a look at this recipe for Green Chile Pork Stew. Heart and full of warming spices.
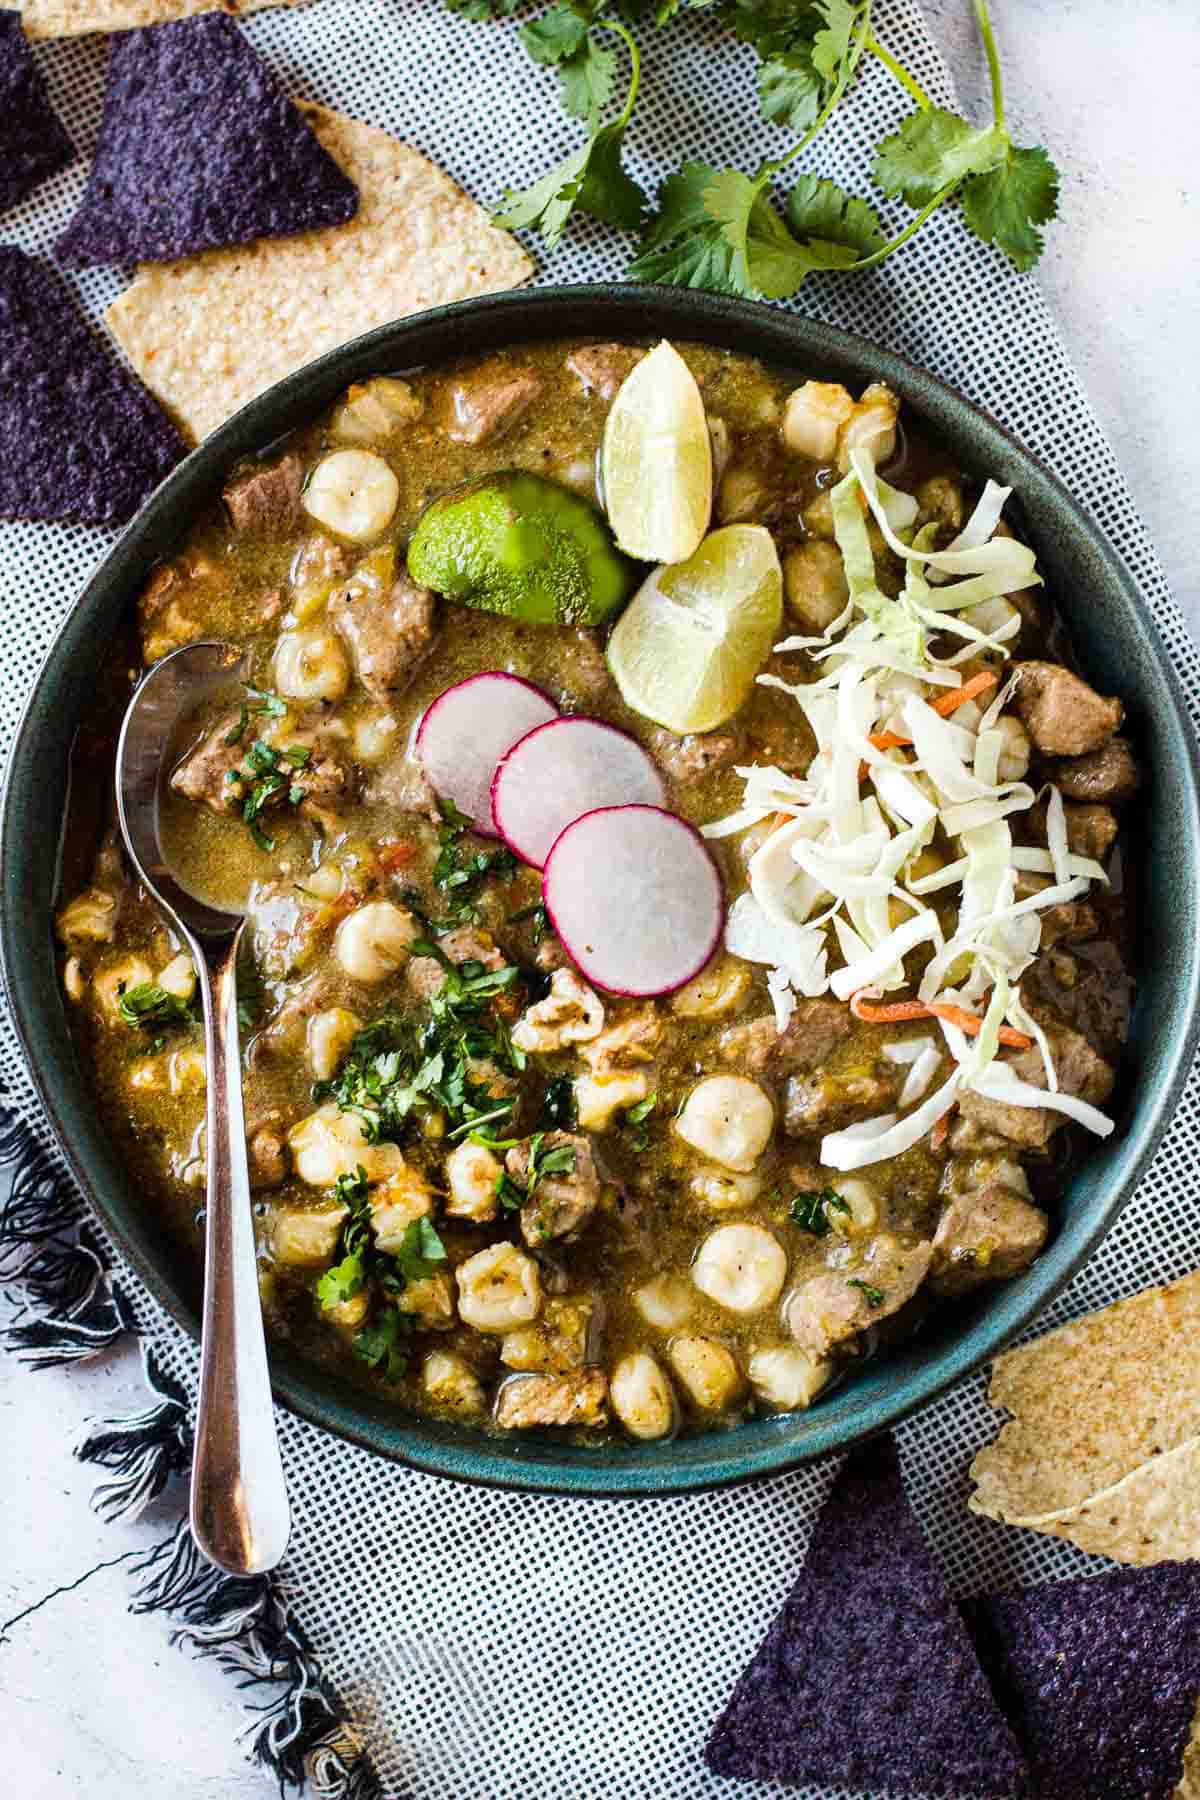
    New Mexico Pork Pozole served with blue corn chips.

    What Is Pork Posole?

    Pozole (or Posole) simply translates to “hominy”. And pork pozole is a traditional soup or stew from Southwestern Cuisine. Hominy, is the backbone of this soup and pronounced “puh-soh-lay”. It’s a savory, hearty, rather soupy stew. This classic Mexican and Southwestern recipe is traditionally made with pork and chile peppers.

    Why New Mexico Style Matters

    My first experience of New Mexico pork posole dates back to the 1970’s, when upon a visit to Taos, New Mexico, a waiter urged me to try this hearty New Mexico style stew, clueing me in that it was their specialty. I’ve been hooked ever since.

    • Simple With Ingredients: Authentic New Mexico Pozole is a pork and red or green chile-based stew that is served as a hearty soup. Keeping the ingredients simple, it prioritizes New Mexico green chiles and the rich flavor of New Mexico red chile powder.
    • New Mexico Peppers: New Mexico is renowned for its chile peppers, especially those grown in the celebrated Hatch Valley. Much like Napa Valley wines, the unique soil and climate create an exceptional product. If you've ever lived in or visited New Mexico, you know how deeply these chile peppers are woven into the state's culture and heritage. They're also the true backbone of this recipe.
    • Blue Corn Tortilla Chips: In New Mexico, blue corn tortillas and chips is a connection to culture. With their unique earthy flavor and their distinctive color, the grain has been cultivated for thousands of years in the Southwest. These chips are a traditional topping for New Mexico Posole. I love this article, What Is Blue Corn, Tradition and Taste, about the rich cultural history of

    Let’s get started.

    Ingredients You’ll Need
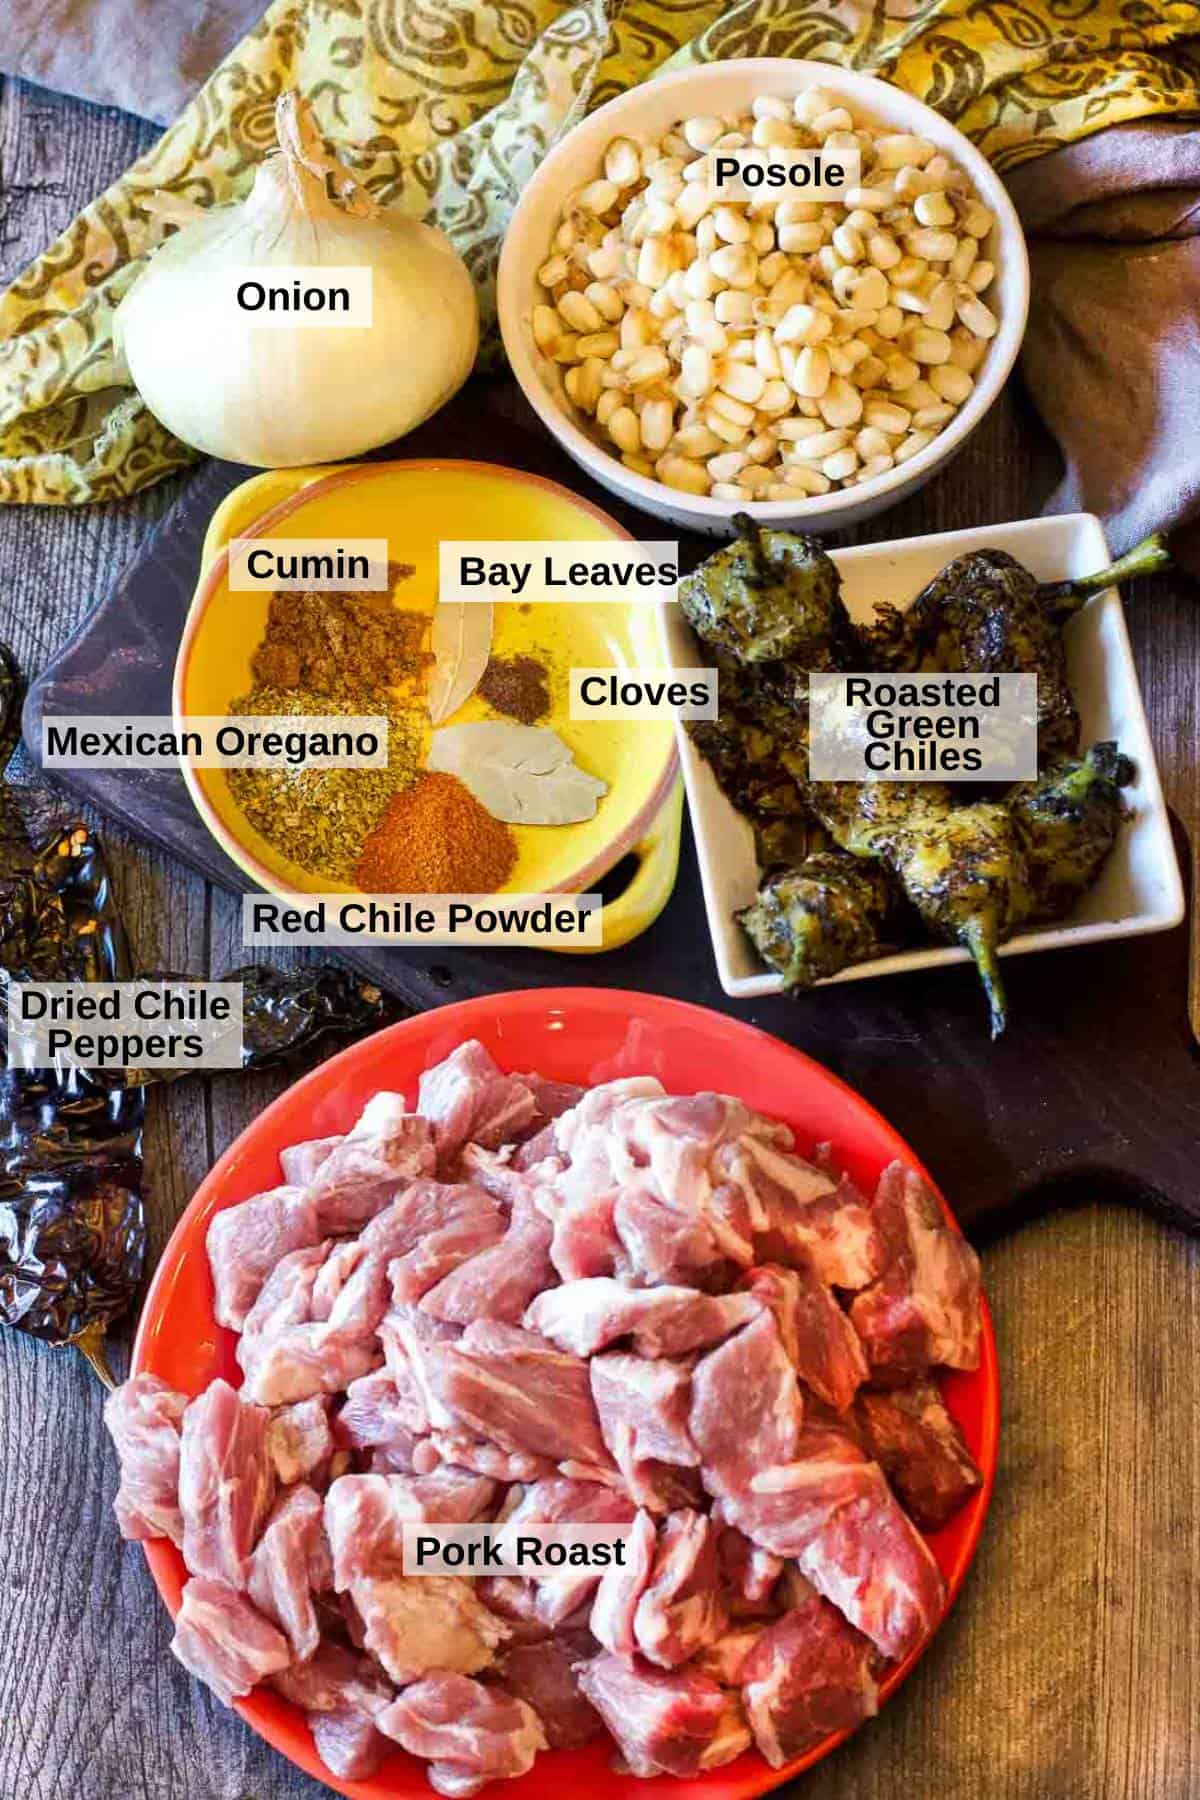
    Ingredients to make New Mexico Style Pork Pozole.
    • Posole: Frozen posole is preferred because it doesn’t have to be soaked ahead of time. Simply thaw and add it to the posole. You can use dried posole, (nixtamalimized corn) found on the Mexican food aisle at the grocery store, but plan ahead to soak it overnight.
    • New Mexico Roasted Green Chile Peppers, roasted, tops and seed pods removed, and charred skin removed with your hands. (don’t rinse those roasted peppers, you’re washing some of that smoky flavor down the drain).
    • Red Chile For Pozole: Chimayo chile powder is my preference, or any kind of New Mexico red chile powder. Ancho chile powder is a good choice here. You can also use Red Chile Sauce.
    • Pork Roast: Use a bone in pork shoulder roast, you’ll need to trim as much excess fat as possible when cutting the roast into chunks.
    • Dried Chile Pods: Are readily available on the Mexican aisle of your local grocer. If you can find New Mexico chile pods, all the better.

    Tip: This recipe calls for 6 cloves of chopped garlic. Roast a head of garlic ahead of time. The caramelized flavor adds a complex layer of flavor to this recipe.

    Ingredient Notes and Swaps

    • Chile Peppers: If you don’t have fresh chile peppers, use two 4-ounce cans of roasted chopped Hatch Chile peppers found on the Mexican food aisle of your local market. Or roast 3 – 4 large poblano peppers, remove skins and seed pods and chop.
    • Dried Chile Pods: Dried Guajillo, a dried mirasol pepper, is readily found and very commonly used in Mexican recipes. Dried ancho chile peppers are a good substitute here. Have fun and experiment with dried pasilla, cascabel, or New Mexico dried chile peppers.

    Step by Step Instructions, It’s Easy
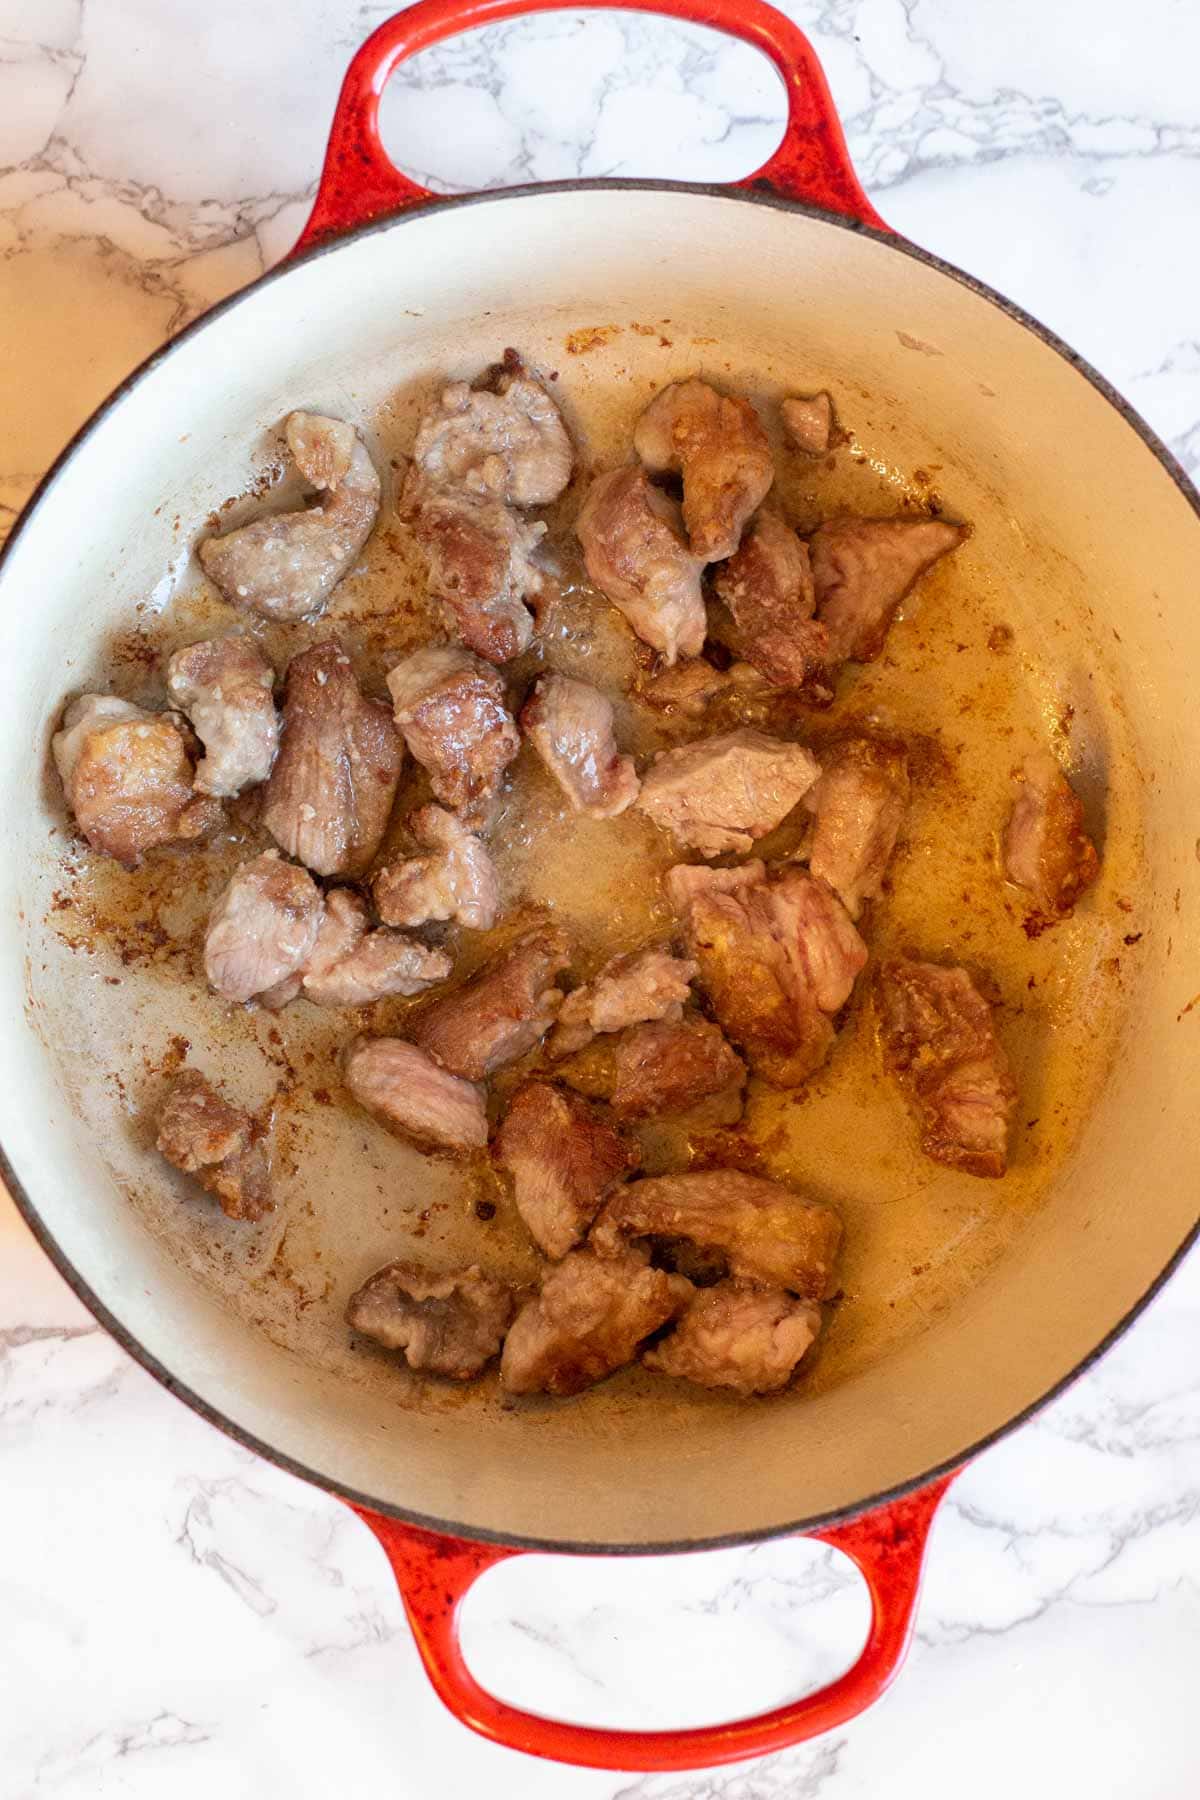
    Browning pork in a dutch oven to make posole recipe with pork
    Adding ingredients to dutch oven to make new mexico posole recipe
    1. Step 1, Brown The Pork: Use a 7 quart Dutch oven to make this a one pot meal. Heat the pan stovetop over medium high heat. Once the pan is hot, add oil. When the oil is shimmering, add pork pieces. Brown on one side, turn and brown the other side. You’ll need to do this is steps so you don’t over-crowd the pork pieces. Over-crowding the pork will result in the pieces not searing and browning properly. Remove the pieces to a plate and then add the next few batches of cubed pork.
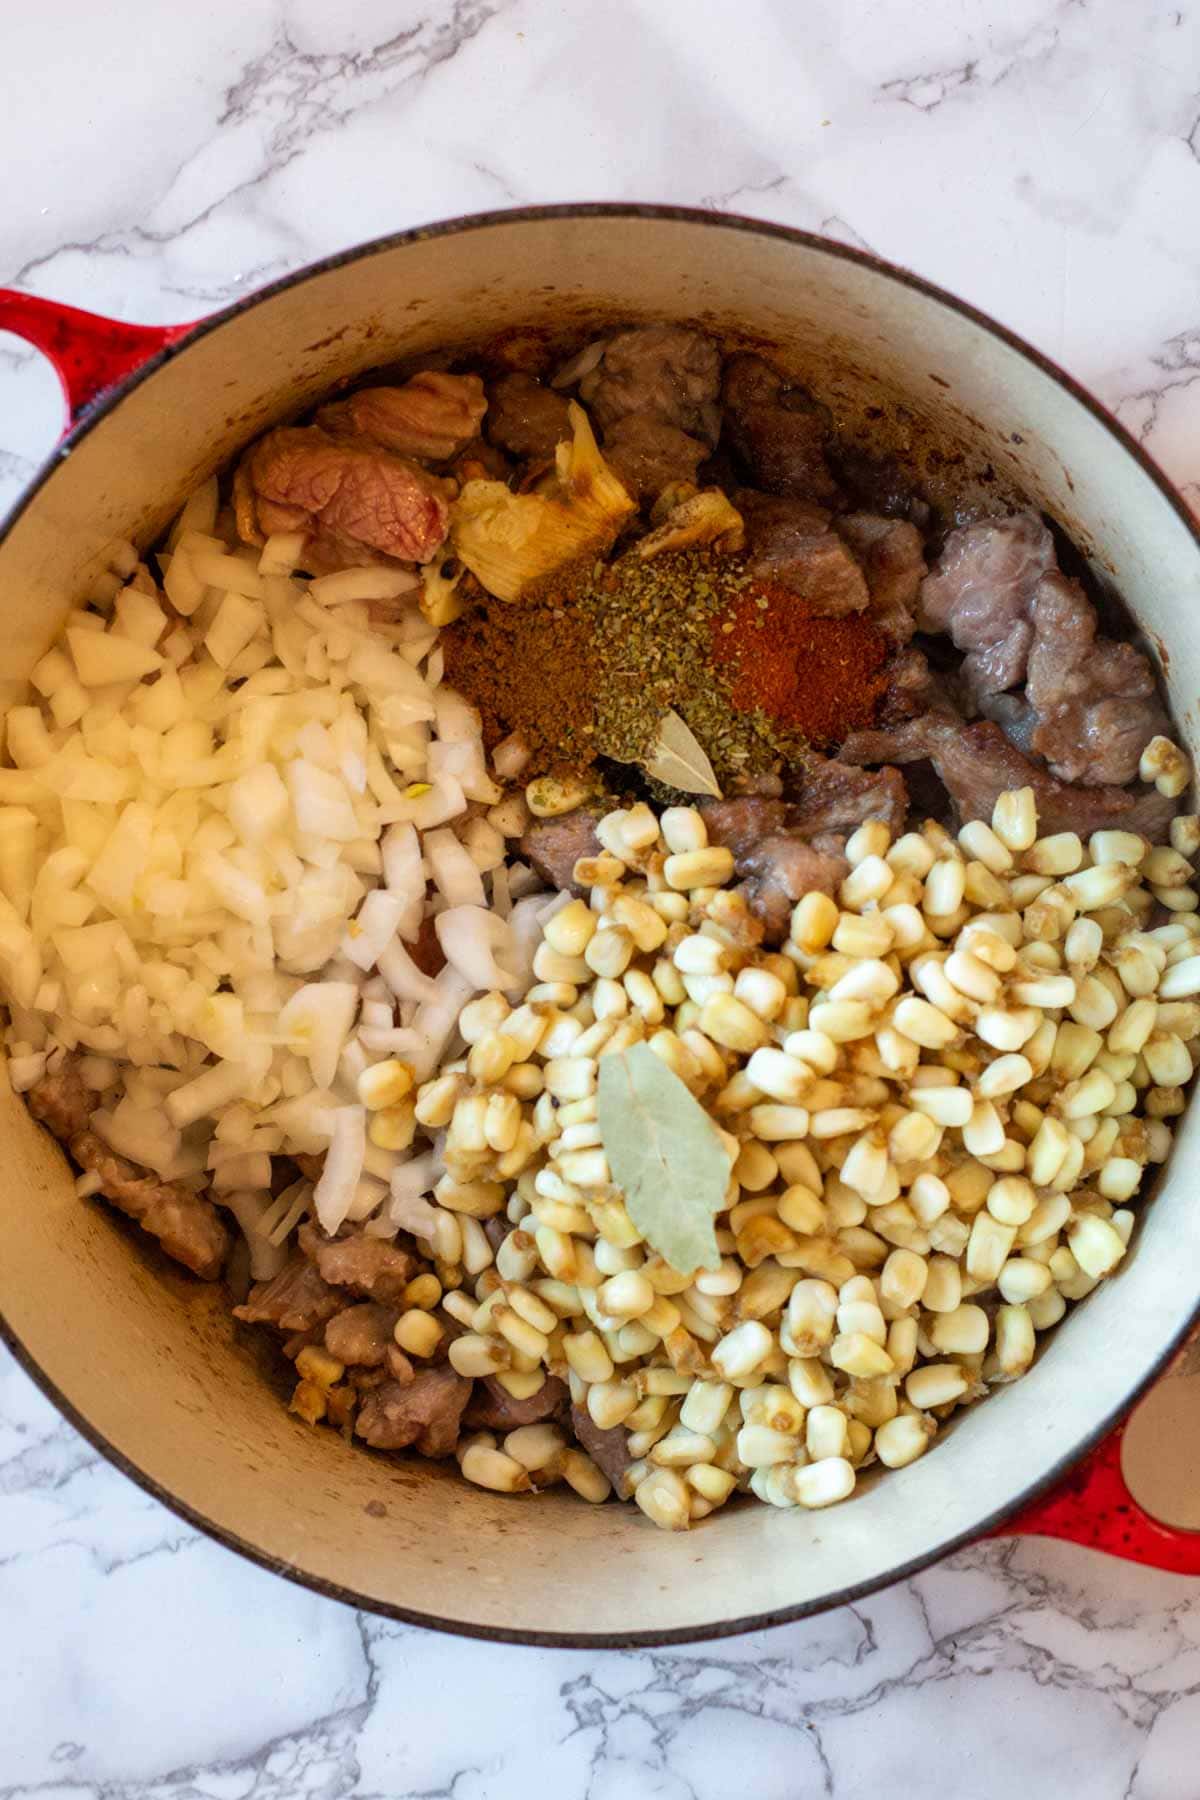
    2. Step 2: You’re ready to add the ingredients to the Dutch oven. Place all of the browned pork, the hominy, chopped onion, spices and bay leaf.

    Pro Tip: Don't skip searing the meat. This is a crucial step in getting the most flavor out of this meal. Searing creates what is technically called Maillard reaction. Maillard reaction is the process where a crust is created. Simply stated, it's responsible for the complex flavors and aroma that makes bread taste toasty, and a grilled or pan seared seared steak, like my recipe for Denver Steak, taste charred. It's a technique that brings science to your cooking skills.
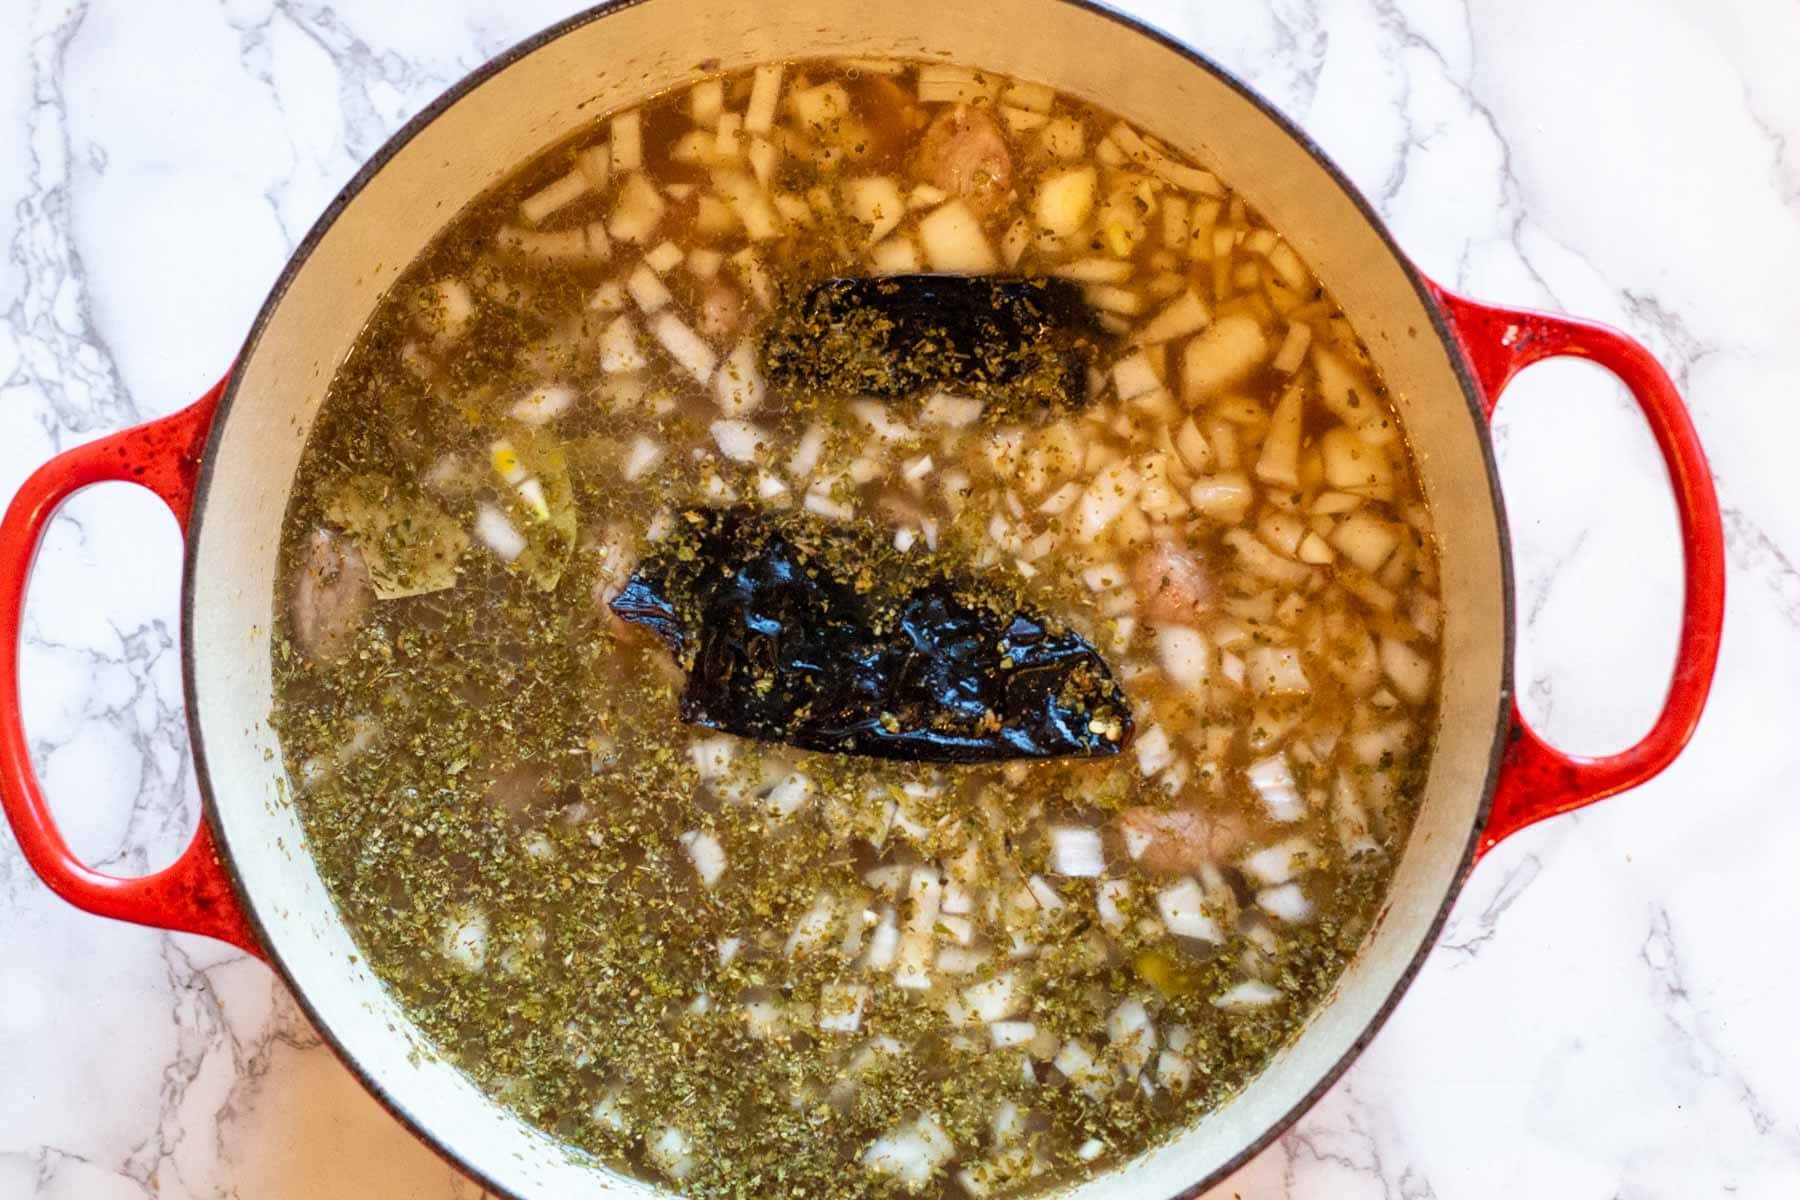
    Adding spices and dried guijillo peppers to pork pozole ingredients in a dutch oven
    1. Step 3: Add the broth and dried chile peppers. Break the tops of the chile peppers off and shake out the seeds. Simply float them on top of the ingredients.

    Pro Tip: Before placing the dried chile pods into the soup, place them in a dry hot skillet. Use a spatula to press them down. Toasting chile pods intensifies their flavor, releasing a smoky, fruity and rich flavor. Which will add an additional layer of flavor to the posole.

    Easy Pork Posole Recipe
    1. Step 4: Simmer on stove-top for 2 – 3 hours, or until pork and hominy are tender.

    How To Serve It

    Remove the dried chile pods and bay leaves. Grab your favorite soup bowls and add a big scoop of pork posole. Offer a variety of toppings to pass at the table. You can also include blue corn chips, toasted blue corn tortillas or warmed flour tortillas.

    Pro Tip: Once you remove the chile pods from the soup, place them into a grinder or food chopper, along with ¼ cup of the broth. Grind to a smooth consistency and return to the soup for a deeper chile flavor.

    Tips for Success

    • Season the pork well, and on all sides, with salt and freshly ground pepper before searing. Salt draws out moisture and will aid in the browning process, as well as seasoning.
    • Don’t crowd the pork when searing. If the piece of meat are too close together, they’ll create moisture which will result in a steaming effect rather than browning.
    • Don’t skimp on toppings. The crunch of fresh vegetables is what makes this pork posole a special treat.

    Pork Posole Toppings

    Pozole is never complete without an array of toppings with various flavors and textures. Aside from traditional topping of blue corn tortilla chips, here are some welcome additions.

    • Shredded, thin sliced cabbage
    • Raw chopped sweet onion
    • Sliced radishes
    • Chopped avocado
    • Salsa
    • Fresh chopped tomatoes
    • Chopped cilantro
    • Lime wedges for squeezing

    Make Ahead, Storing and Freezing

    • Make Ahead: You can make this posole recipe up to five days in advance. Keep it in the refrigerator and then reheat stovetop. Its best to wait until the day of serving to prepare the fresh toppings.
    • Once cooked, store in an air-tight container in the refrigerator. It makes great leftovers and will keep for 3 – 4 days. Reheat in a pan stove-top or in the microwave.
    • Freezing: Once posole has cooled, place in air-tight freezer friendly containers. I like to use freezer zip-lock style bags. Once filled and standing up, you can squeeze the air of them and lay them flat in the freezer to optimize freezer space.
    • Reheating: If frozen, allow the posole to thaw in the refrigerator overnight. To reheat, the 50% power feature on your microwave oven is your best friend. Just spoon a portion of the posole into a bowl, and cook in 30 second increment at 50% power until hot enough. You can also reheat stovetop in a saucepan.

    Resources: Where To Buy New Mexico Chiles and Chile Powder

    • Chiles: For fresh/frozen Hatch chile peppers, New Mexico red chile powders, and New Mexico dried chile pods, take a look at the Hatch Chile Store. I’ve ordered from them and have been very pleased with the product quality and delivery service.
    • Blue Corn Tortillas: Some Whole Foods locations carry Masienda Blue Corn Tortillas. Or you can order them directly from the source as Masienda. Blue corn tortilla chips are widely available on the snack aisle at local grocers.
    • Posole: I highly recommend ordering Posole Prepared Hominy from Rancho Gordo. Rancho Gordo is such a quality source for all things “dried”.
    • Chimayo Chile Powder: My choice when cooking with New Mexico Chile Powders lies with Chimayo Chile Powder. Highly sought after and with an exquisite copper red color and a bold flavor, it simply can’t be beat. This chile powder from the Chimayo, New Mexico area in Northern New Mexico is a sweet, medium heat chile. It's my chile powder of preference for my recipes, and I'm lucky to live close enough to the village of Chimayo to purchase it in locally. To read more about this highly prized chile, I like this article from The Chimayo Chile Brothers. You can order it from them, or I like to purchase from the  Trading Post next to El Santuatio de Chimayo.

    FAQ’s

    What’s the difference between posole and pozole?

    Pozole with a “z” is the proper spelling in Mexico. While posole with an “s” is a more common spelling in New Mexico and the Southwestern United States.

    Can I make this This Recipe in the Slow-Cooker?

    Yes. Pork pozole can easily be made in a crock-pot. You’ll find the instructions in the recipe card.

    Are hominy and posole the same thing?

    Hominy which is canned, is soaked in an alkaline bath and is soft and ready to cook. Dried posole must be soaked overnight and cooked much longer. The texture is chewy and the flavor sweeter.

    How Do I Keep Posole's hominy from getting mushy in storage?

    Please know that once Pozole is frozen, and once thawed, the hominy may lose it’s firm texture and become a bit mushy. If you do plan on freezing any leftovers, you can slightly undercook the hominy to a chewy state, rather than soft. It will still be edible and will freeze better.

    New Mexico Pork Posole Recipe
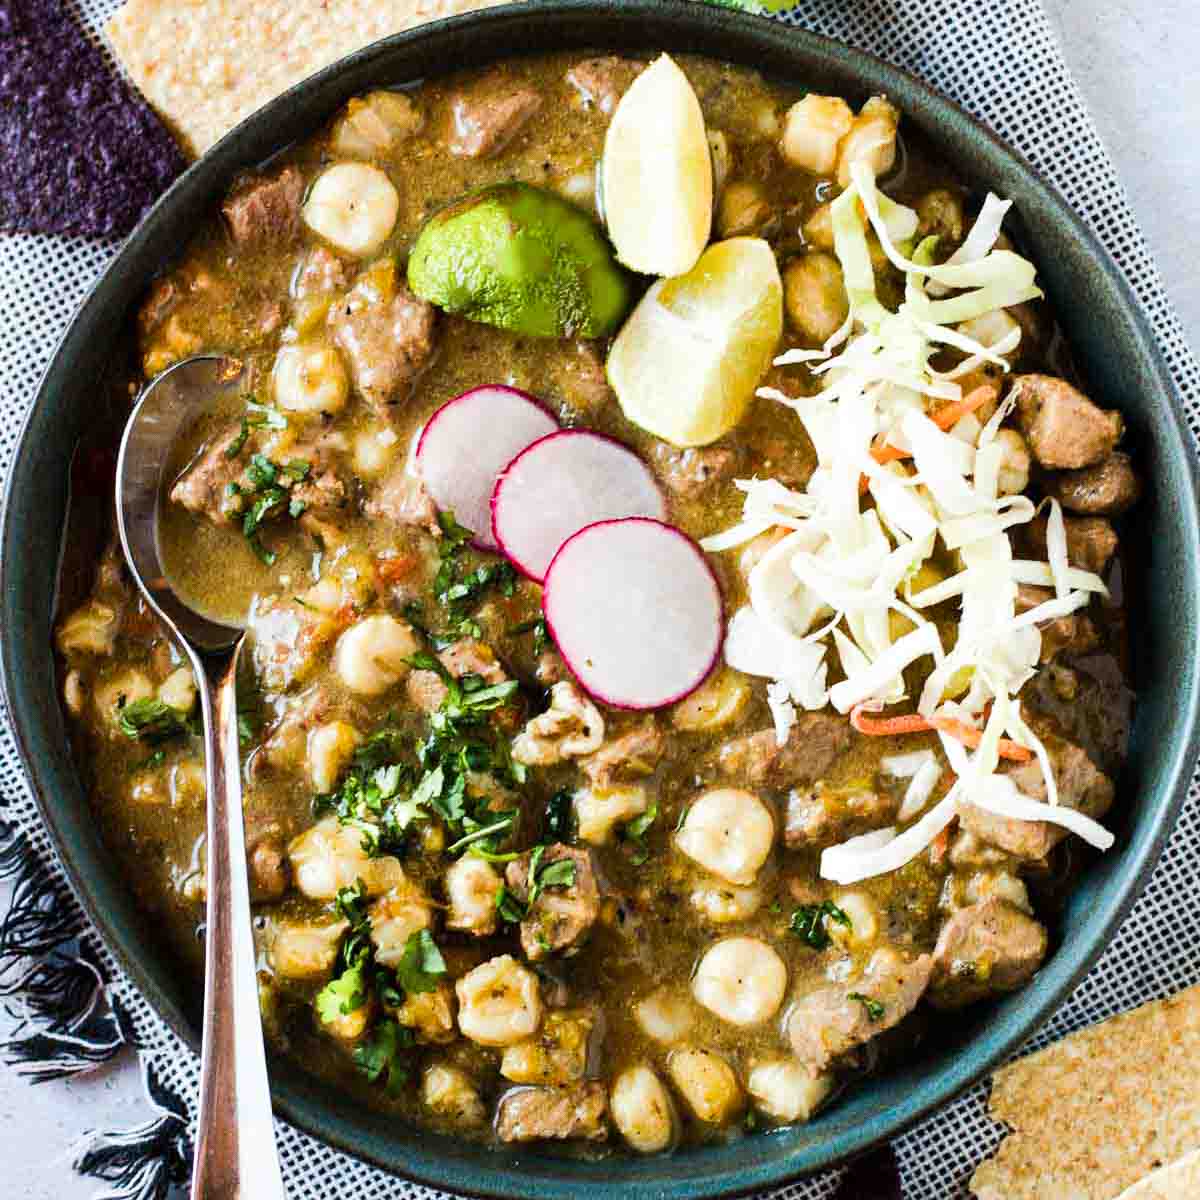
    New Mexico Pork Posole topped with sliced radishes and grated cheese.

    I wouldn’t think of celebrating the Fall season without a steamy bowl of this New Mexico posole recipe. And did you know pozole is often served Christmas Eve in Mexico? Served with tamales and a Southwestern Salad, it’s a festive meal.

    No matter how you serve it, naked, or with toppings, you’re going to love every bite.

    More New Mexico Recipes

    I frequently visit our neighbors to the South and have fallen in love with their unique cuisine. Below are some New Mexico specialties you don’t want to miss.

    • New Mexico Stacked Enchiladas topped with a fried egg.
      New Mexico Stacked Enchiladas
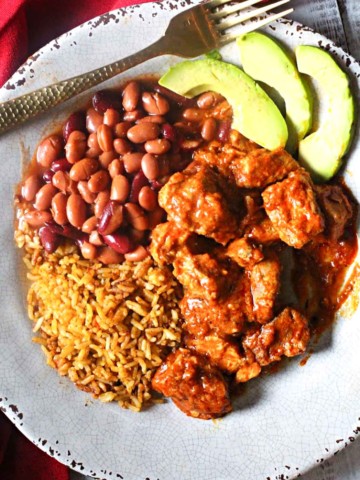
    • Carne adovada served with rice and beans.
      Authentic New Mexico Carne Adovada
    • Tortilla burger in a tortilla shell with lettuce and cheese.
      New Mexico Tortilla Burger Recipe
    • Anthony Bourdaine's Hatch chile beef chili recipe made with pot roast with lime and tortilla chips
      Anthony Bourdain’s New Mexico Style Beef Chili Recipe

    And if you’re soup lovers like us, don’t miss my Soup Category. You’ll find lots of great recipes, including the most popular on my site for New Mexico Colorado Green Chili.

    And if you're looking to learn more about Colorado and New Mexico Chile Peppers and how to use them, don't miss my article on Chile vs Chili … Know The Difference.

    If you liked this recipe, please leave a star ⭐⭐⭐⭐⭐ rating in the recipe card below and leave a comment. I always appreciate your feedback and hearing how everything went.

    And, don’t forget to subscribe to my newsletter for more delicious recipes and cooking tips. Make it a delicious day … every day.

    New Mexico Pork Posole topped with sliced radishes and grated cheese.
    Print Recipe
    5 from 7 votes

    New Mexico Pork Posole (Pozole)

    Keeping this pork posole recipe simple and savory, you can pass chopped tomato, onions, cilantro, jalapenos and lime wedges at the table to add an array of fresh flavors to finish.
    Prep Time20 minutes mins
    Cook Time20 minutes mins
    Total Time40 minutes mins
    Course: Main Course Pork
    Cuisine: Southwestern
    Diet: Gluten Free
    Servings: 10
    Calories: 272kcal
    Author: Lea Ann Brown

    Ingredients

    • 3 pounds pork shoulder Butt roast visible chunks of fat removed, and cut into bite sized pieces. You will end up with about 1 ½ – 2 pounds of pork.
    • 6 cloves garlic roasted and chopped, or raw chopped
    • Salt and pepper
    • 1 onion diced
    • 6 cups chicken stock or water
    • 1 bay leaf
    • 1 ½ Tablespoons Mexican oregano dried
    • 1 teaspoon New Mexico Red Chile Powder or Ancho
    • 2 teaspoons ground cumin
    • 1 pinch ground cloves
    • 2 dried red chile pods Guajillo are easily found
    • ½ pound frozen posole Or 30 ounces canned hominy, or two cups dried hominy soaked over night with enough water to cover by 2 inches.
    • 2 cups Hatch Green Chile roasted, peeled, coarse chopped. About 8 – 10 peppers.

    Instructions

    • If using dried posole, soak overnight in enough water to cover by two inches. If using frozen hominy you don't need to soak overnight.
    • Cut pork roast into large bite sized chunks. Remove excess fat as you cut.
    • Heat a 6 – 7 quart soup pot, or Dutch oven over medium high heat. Once the pot is hot, add the oil. Once the oil is shimmering, add pieces of pork. Don't over-crowd and sear in batches. Searing both sides. As you sear, remove the pork to a plate and continue with remaining pieces of pork.
    • Add all of the browned pork back into the soup pot. Add remaining ingredients. Add more water or broth if needed to cover all the ingredients.
    • Bring to a boil, turn down heat to a simmer and cover with a lid, leaving lid ajar.
    • Cook on low for 2 – 3 hours or until pork and posole are tender. If using canned Hominy, add the drained hominy once the pork is tender. Simmer for another 15 minutes.
    • Remove chile pods and bay leaf. Place cooked chile pods into a grinder or food chopper, along with ¼ cup of the broth. Grind to a smooth consistency and return to the soup.
    • Ladle the posole into bowls. Pass with the cilantro, onion, jalapeño, chopped tomatoes or even some thin sliced cabbage, and lime wedges at the table. Serve with warm warm flour tortillas, or toasted blue corn tortillas, or blue corn chips.

    Notes

    • For this easy pork posole recipe, I’ve used dried hominy. You can use canned drained hominy. Just add the pork mixture and the hominy to the crockpot and let it simmer on low or until flavors are married. 
    • I’ve used a pork shoulder BUTT for this recipe. A fattier pork roast, which means more flavor. 
    • You can use a pork loin roast, a less fattier roast to avoid this step. Don’t worry, you’ll still have plenty of delicious pork flavor.
    Tips for Success:
    • Season the pork well, and on all sides, with salt and freshly ground pepper before searing. Salt draws out moisture and will aid in the browning process, as well as seasoning.
    • Don’t crowd the pork when searing. If the piece of meat are too close together, they’ll create moisture which will result in a steaming effect rather than browning.
    • Don’t skimp on toppings. The crunch of fresh vegetables is what makes this pork posole a special treat.
    New Mexico Pork Posole in the Slow Cooker: 
    This recipe can easily be made in the crock-pot. Follow the instructions for browning the pork, then place all ingredients into the slow cooker.  Cook on low for 6 – 8 hours or until pork and hominy are tender.
     

    Nutrition

    Calories: 272kcal | Carbohydrates: 14g | Protein: 35g | Fat: 8g | Saturated Fat: 2g | Polyunsaturated Fat: 1g | Monounsaturated Fat: 3g | Cholesterol: 90mg | Sodium: 457mg | Potassium: 706mg | Fiber: 3g | Sugar: 5g | Vitamin A: 83IU | Vitamin C: 5mg | Calcium: 36mg | Iron: 2mg

    New Mexico Pork Posole … It’s whats for dinner
    How To Make Your Best Accompaniment Salad (Tossed Salad)

    January 18, 2021 By Lea Ann Brown 2 Comments

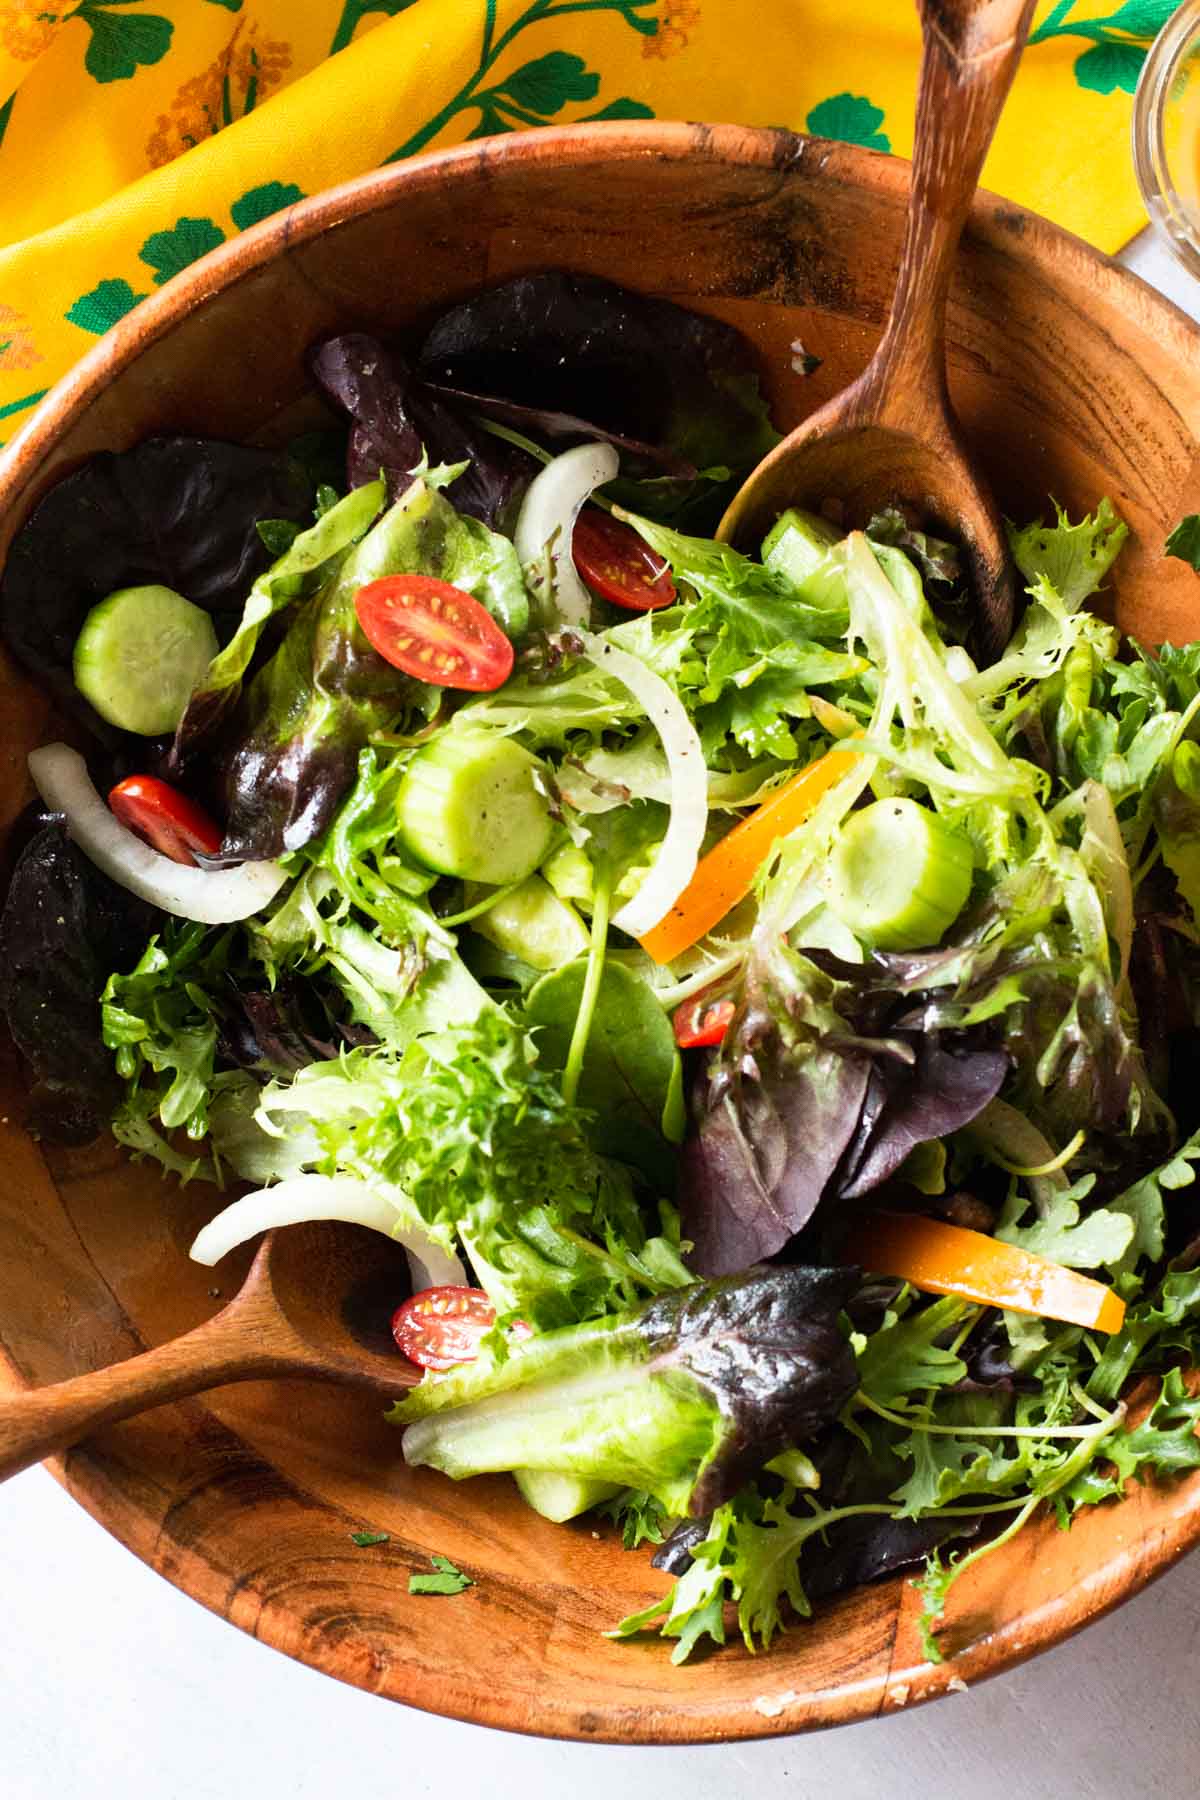
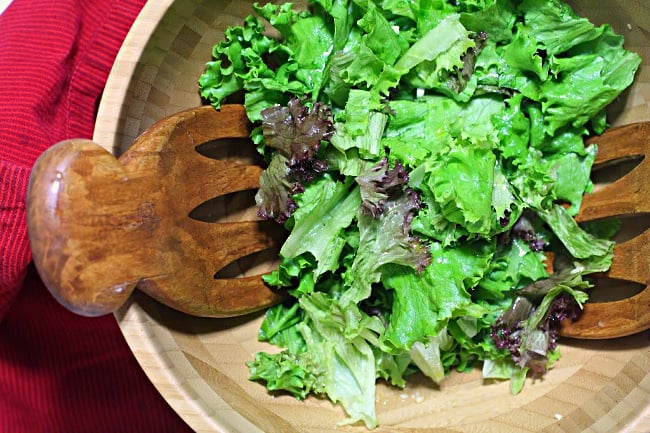
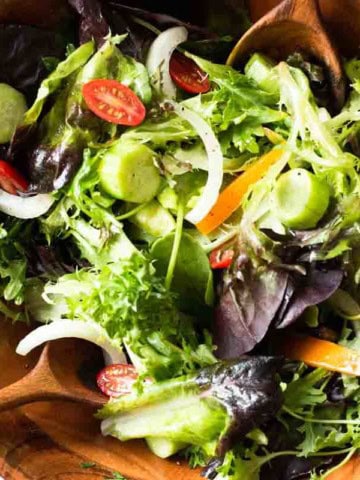
    Accompaniment salad in a wooden salad bowl.

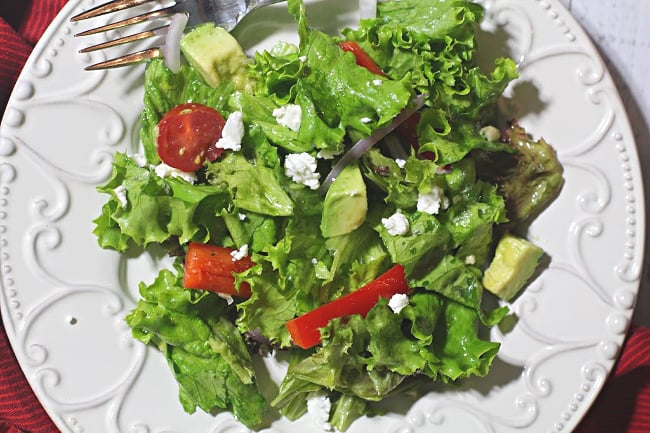
    Learning how to make a good restaurant quality tossed salad, or Accompaniment Salad as we learned to call it in Culinary School, is a mark of a good cook. Turn your next tossed salad into one of quality that’s vibrant in color, well balanced, well dressed and remarkable in flavor and texture.

    A perfect tossed salad in a wooden salad bowl.

    What You Can Expect From This Recipe

    You’ll learn how to make an accompaniment salad, step by step, a simple technique, so easy to do but a bit time consuming to explain.

    When is a good salad ever out of style, or place? Never! It’s pure, it’s palate cleansing and full of nutrition.

    Well-made, and dressed with care, it’s a thing of itself. No need to endlessly search for good green salad recipes, learning this solid method will turn out delicious tossed salad every time. It’s an essential skill for any home cook to know how to make a good salad.

    Bonus Info: Below in the recipe card, you’ll find the standard Accompaniment Salad Dressing Recipe from Culinary School. A traditional simple vinaigrette that brings out and enhances the natural flavors of greens without disguising or over powering their delicate and fresh flavors.

    But what makes a tossed salad a great salad? The characteristics of an accompaniment salad should consist of natural flavors that are heightened and not disguised. Not complex or difficult, but rather fresh, crisp and balanced.

    You’ll also learn what to put into a tossed salad, and when. Example, it’s important to know when to add a porous mushroom, or a hard vegetable like a bell pepper. No one wants to bite into a soggy mushroom or mushy cheese.

    Follow these secrets, then sit back and wait for your guests to ask you why it’s so good. 

    What Is The Definition Of An Accompaniment Salad?

    An accompaniment salad is an official name for a tossed salad. A salad of fruit, or vegetables which is served alongside a main course for dinner. The flavors of this salad are to compliment the flavors of the meal.

    Table of contents

    • What You Can Expect From This Recipe
      • What Is The Definition Of An Accompaniment Salad?
    • Step by Step Instructions
      • Step 1: Choose Quality Salad Ingredients
      • Step 2: Give Those Greens A Good Washing
      • Step 3: How To Wash Lettuce and Keep It Crisp?
      • Step 4: Thoroughly Dry The Lettuce Leaves
      • Step 5: How To Store The Lettuce Properly
      • Step 6: How To Properly Prepare A Tossed Salad
      • Step 7: Chill Those Salad Plates
      • Step 8: Construction Time, How To Build A Tossed Salad
    • Tips For Success
      • Step 9: How To Properly Dress A Salad
    • Ingredients. What To Put in A Tossed Salad and When
      • Hard, crisp and non moist ingredients
      • Delicate and porous ingredients .
      • Ingredients to add only at the end .
    • Questions You May Have
      • Some of Our Best Accompaniment Salad Recipes

    Step by Step Instructions

    Secrets to making the best tosses salad

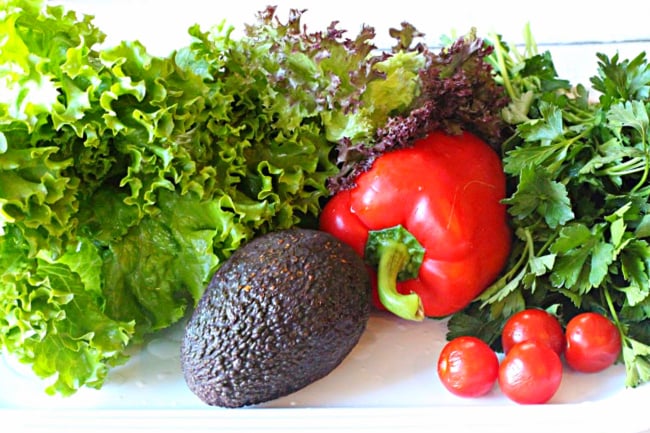
    Step 1: Choose Quality Salad Ingredients

    • Seek out the freshest lettuces and greens you can find. When choosing a head of lettuce for a tossed salad, turn it upside down and look at the bottom of the stalk where it has been cut. It should be fresh, green and with no discoloring. Leaves should be vibrant and free of dark and shriveled leaves.
    • Mix up lettuce varieties for texture and color. I like to start with Red Leaf for its showy beauty. Then look to add romaine, spinach, butter leaf, arugula and curly green leaf. This is only a start, but these are salad greens that are readily available. If you can find a good head of Frisee, grab it. It’s curly leaves a beautiful addition.
    Secrets to making the best tossed salad.

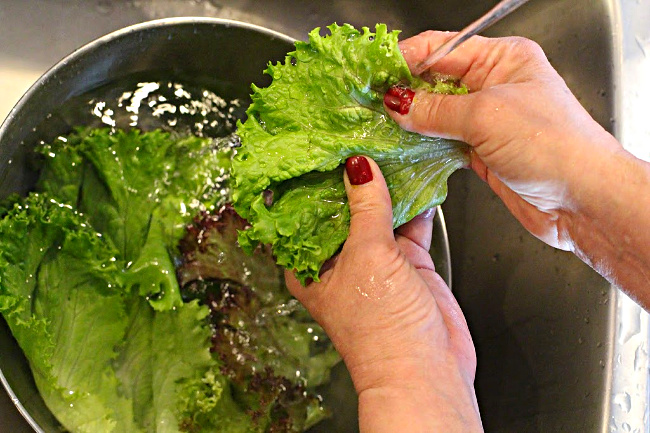
    Step 2: Give Those Greens A Good Washing

    Lettuce washing is not difficult, but dedication is required to do the job right.

    • Separate the lettuce into individual leaves.
    • Rinse each leaf under cold running water and place the leaves in a large bowl.
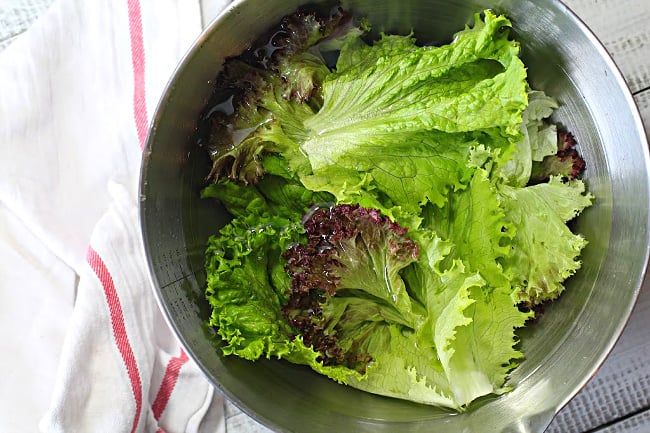
    • Run the bowl as full with fresh water, swish the leaves around, then remove them to a colander to drain.
    The secret to making the best tossed salad

    Step 3: How To Wash Lettuce and Keep It Crisp?

    • Don’t let lettuce leaves soak in the water for long or you’ll rid them of vitamins, flavor and crispness.
    • This second rinsing step is important, as you’ll be surprised to find there will still be some dirt at the bottom of the bowl even after that initial cold water rinse.
    • After the final bath, run a blast of cold water over the leaves in the colander.
    • Let them drain while you prepare for step #3.
    Drying lettuce leaves to make an accompaniment salad.

    Step 4: Thoroughly Dry The Lettuce Leaves

    Wet greens may be just alright, but dry leaves make a great salad greater. Why are wet leaves a less desirable? Wet leaves become soggy leaves. But most important, the moisture on the leaves will dilute the dressing when we apply it.

    • Dry each leaf carefully with paper towels
    • Or better yet, use a salad spinner. I’ve had several salad spinners, and OXO Good Grips is my spinner of choice.
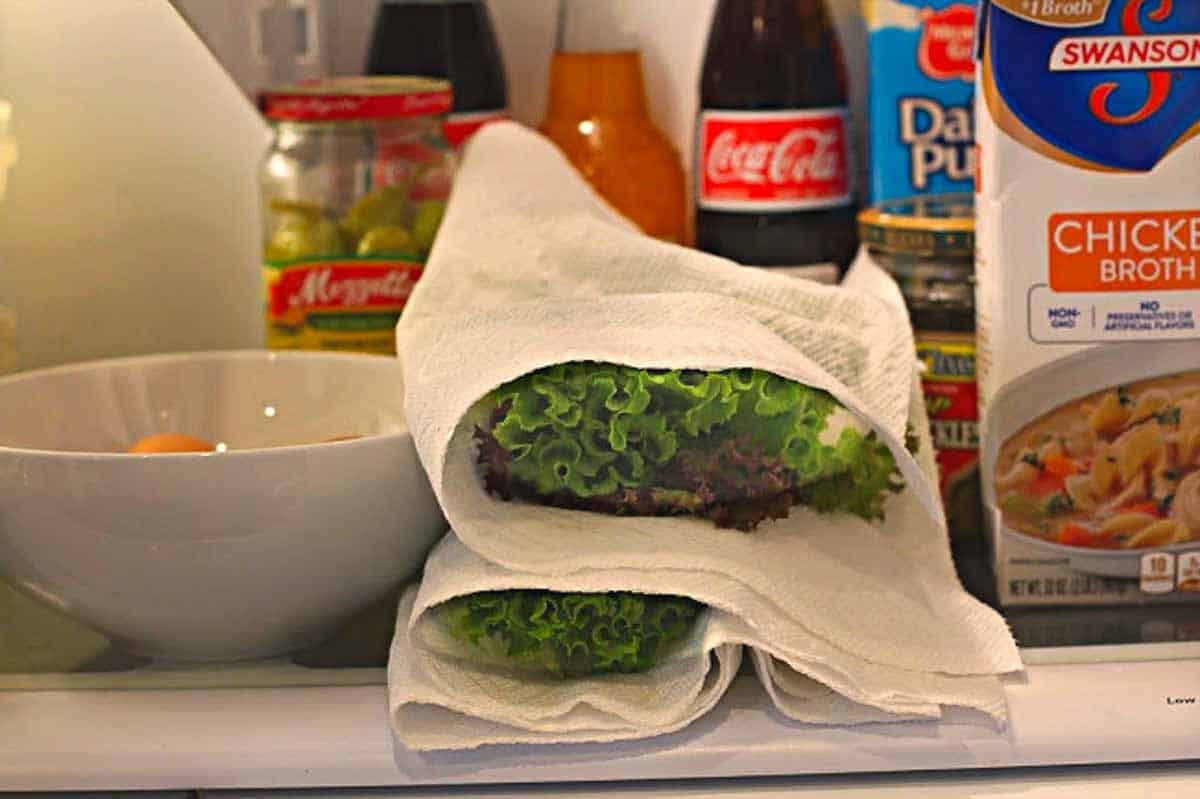
    Storing lettuce leaves in the refrigerator for an accompaniment salad.

    Step 5: How To Store The Lettuce Properly

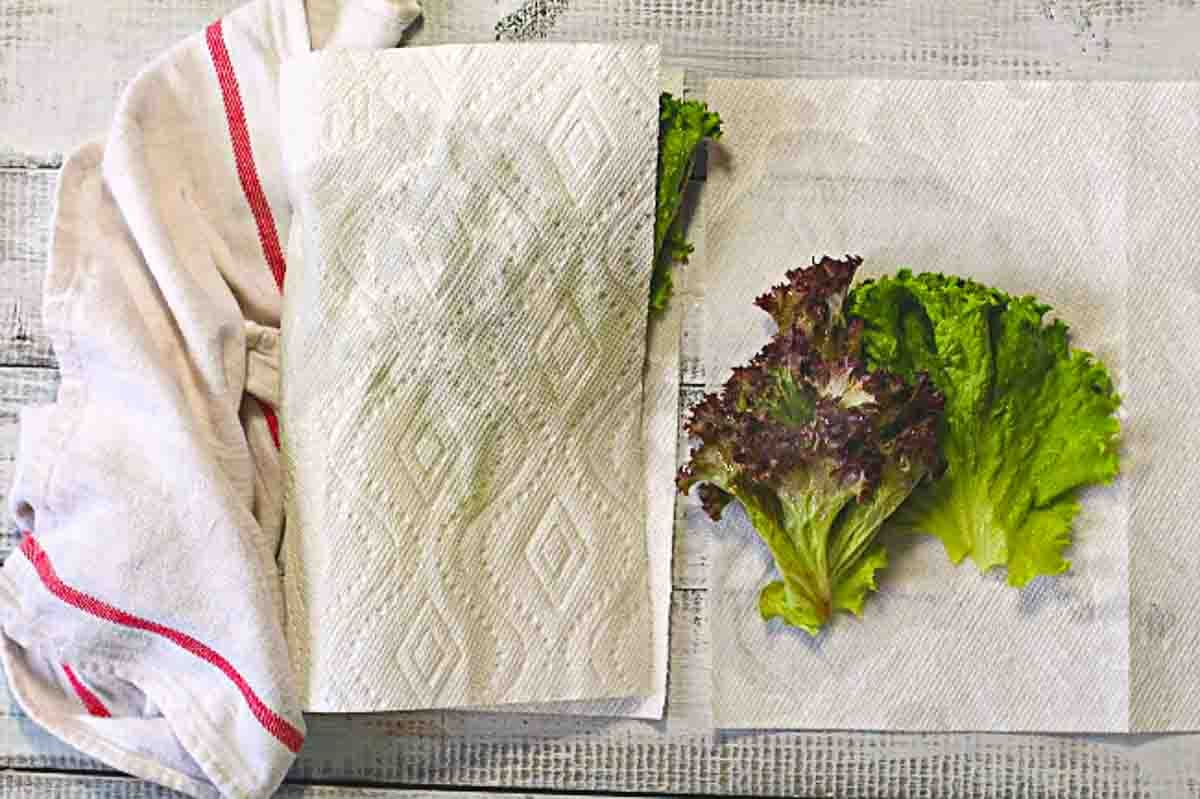
    Tucking lettuce leaves into paper towels was one of the best tricks I learned about storing greens in Culinary School.

    • After the lettuce has been dried, lay out a length of paper towels or very clean cloth towels.
    • Lay the washed greens on top and either roll them jelly roll style or gently fold the towels over the top of the greens.
    • Place the covered greens in the refrigerator until you’re ready to use them. 
    • TIP: If you are planning to store them for a day, place the paper towel filled leaves in a sealed container or plastic bag.
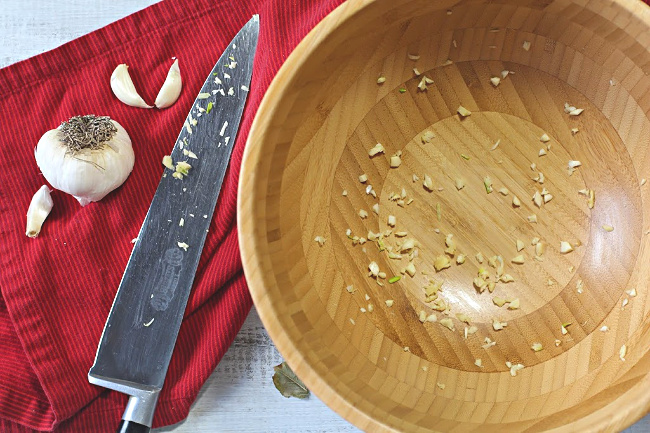
    How to put garlic in a salad bowl to make a tossed salad

    Step 6: How To Properly Prepare A Tossed Salad

    Start by adding Garlic To A Wooden Salad Bowl.

    Some suggest merely rubbing your wooden salad bowl with a clove of garlic and then tossing the clove of garlic away. I call that wimpy.

    • Either fine chop or use a garlic press to add garlic to the salad bowl.
    • Rub the chopped garlic against the sides and bottom of the bowl and leave the pieces there until you’re ready to go.
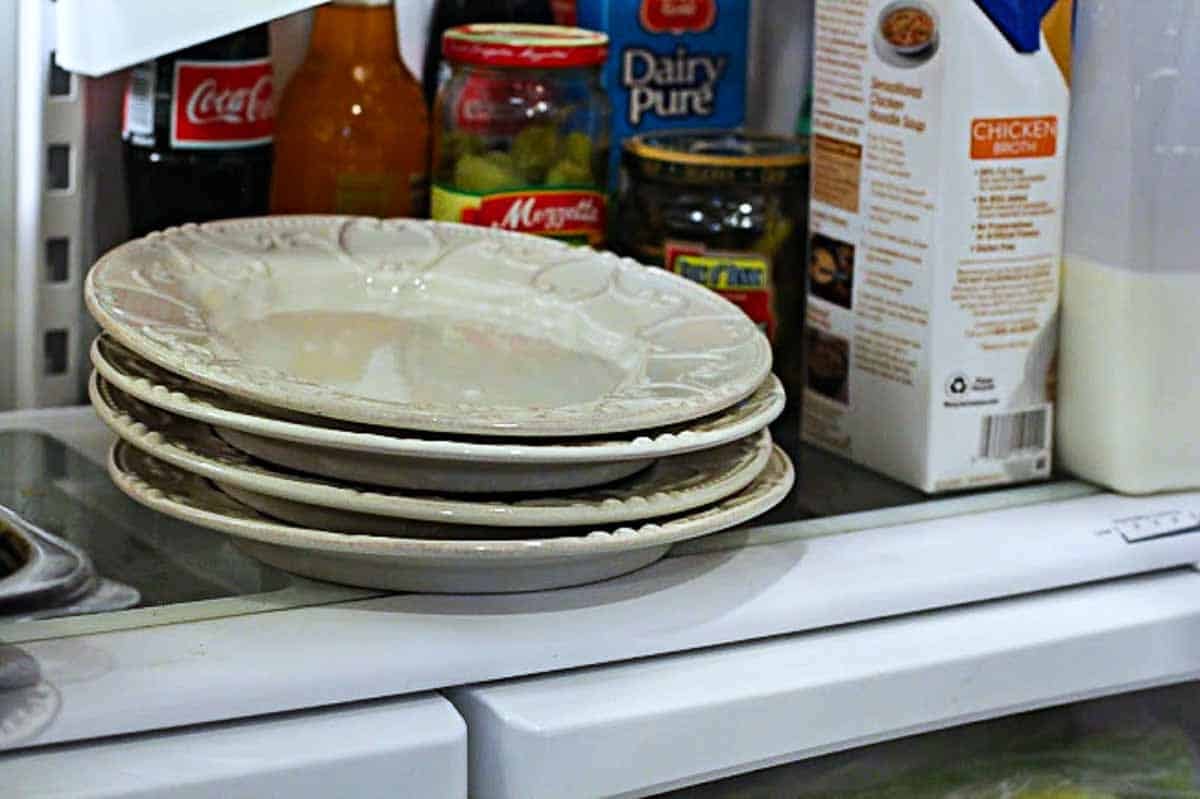
    Chilling salad plates to make an accompaniment salad.

    Step 7: Chill Those Salad Plates

    Chill salad plates in the refrigerator, or even better in the freezer. A salad on a chilled plate just tastes better. Try it!

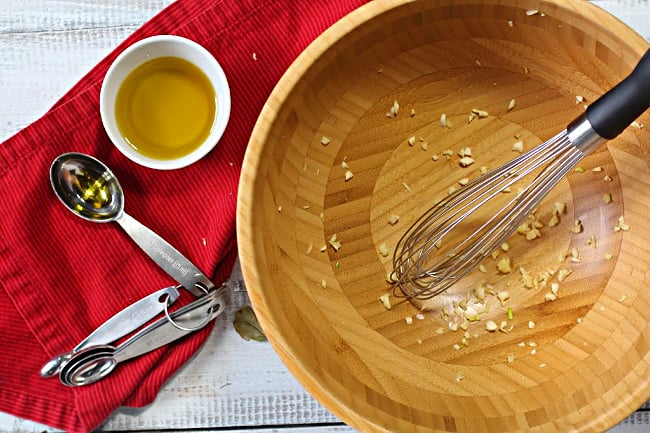
    Adding oil and garlic to a wooden salad bowl to make an accompaniment salad.

    Step 8: Construction Time, How To Build A Tossed Salad

    Don’t begin construction of the salad until a few minutes before serving. Of course, you can chop and slice any vegetables you’re adding in advance.

    • Remove the salad leaves from the refrigerator and tear them into bite sized pieces.
    • Add the lettuce pieces to that garlicky salad bowl on top of the olive oil.
    • Using tongs, salad tossers, or even your very clean hands, toss the greens until each leaf glistens beautifully with olive oil.

    TIP: The olive oil seals in the leave’s moisture keeping each leaf crisp, the crispness that was achieved by following the previous steps.

    Tips For Success

    • Purchase a good quality olive oil. An easy to find mass produced brand is Pompeian. Add four tablespoons of good fruity aromatic olive oil to that garlicky salad bowl. Looking to learn more about olive oils, I like this article from Food Network, Top 12 Best Olive Oils For Cooking.
    • Use a wooden salad bowl and rub chopped garlic over it’s interior surface before making your salad.
    How to make the best tossed salad. Wooden Salad hands for tossing.

    Step 9: How To Properly Dress A Salad

    Right after you’ve coated the salad leaves with the oil, sprinkle the following over the salad greens:

    • Juice of ½ lemon, squeezed directly into the bowl, picking out seeds
    • ½ teaspoon salt
    • Several grindings of black pepper
    • In a small bowl, combine 1 teaspoon Dijon mustard, ½ teaspoon Worcestershire Sauce, and a dash of Tabasco Sauce (then add to salad)
    • 2 Tablespoons finely chopped fresh parsley

    Toss the salad greens again vigorously, but gently to distribute the dressing ingredients.

    At this time, add any vegetables, such as bell pepper, cucumbers, onions, etc. Toss until add-in ingredients have been well distributed among the lettuce leaves.

    Taste and adjust seasonings. Grab those chilled salad plated from the refrigerator and plate that beautiful salad.

    Ingredients. What To Put in A Tossed Salad and When

    Looking to add more ingredients to your perfect tossed salad? Here’s a list of green salad ingredients, what you can add, and when you should add it.

    Hard, crisp and non moist ingredients

    Can be added with the lettuce with the first tossing, Step #8.

    • Celery
    • Broccoli
    • Cauliflower
    • Carrots
    • Onion
    • And Cabbage for example.

    Delicate and porous ingredients.

    After the olive oil, at the same time you’re dressing the salad in Step #9.

    • Sliced fresh mushrooms
    • Firm cheeses
    • Chilled meats
    • Whole grapes
    • Raisins (I like to add soaked raisins)
    • Fresh apple
    • Radishes
    • Olives
    • Seeds or nuts would fall into this category.

    Ingredients to add only at the end.

    Right before serving would be delicate or crumbly items that will serve as a topping. Examples:

    • Hard boiled egg
    • Ripe avocado
    • Juicy fresh tomatoes
    • Soft cheeses and most fresh fruit

    Questions You May Have

    Are Wooden Salad Bowls Better?

    I say yes! Not only for nostalgic appearance reasons, but also their ability to capture the fresh garlic flavor. A ceramic or glass bowl simply can’t do what a wooden bowl can do. Think wooden and think large. A wooden salad bowl needn’t cost you an arm and a leg. There are some absolutely beautiful showy bowls if you’re willing to spend. I found one that works quite nicely at Ikea for under $15.

    Simply stated, a salad just looks better and presents better in a wooden salad bowl.

    How Do You Clean A Wooden Salad Bowl?

    To clean a wooden salad bowl, just use a mild dish soap, a sponge and rinse it well under under warm water. Important: dry the bowl thoroughly, as liquid is the enemy of wooden salad bowls. Never put a wooden salad bowl in the dishwasher. It will warp or crack.

    Tossed salad recipe

    Now that you’re a salad making expert you’re probably looking for more ideas to make your best tossed green salad recipe for your next meal. Try the technique on these mixed green salad recipes.

    Some of Our Best Accompaniment Salad Recipes

    • Baby Kale Salad with Cider Vinaigrette
    • Hearts of Palm Salad with Avocado
    • Southwestern Salad Recipe
    • Lettuce Salad with Crispy Chow Mein Noodles

    And one of the most popular on my site for a salad with Mango Dressing.

    If you liked this recipe, please leave a star ⭐⭐⭐⭐⭐ rating in the recipe card below and leave a comment. I always appreciate your feedback and hearing how everything went.

    And, don’t forget to subscribe to my newsletter for more delicious recipes and cooking tips. Make it a delicious day … every day.

    Accompaniment salad in a wooden salad bowl.
    Print Recipe
    5 from 3 votes

    How To Make The Best Accompaniment Salad (recipe)

    Looking for the best tossed salad recipe? A recipe and a method that turns a good salad into a great salad? Learn how to make a restaurant quality accompaniment salad step by step, one that's well balanced, well dressed and remarkable in flavor and texture. 
    Prep Time40 minutes mins
    Total Time40 minutes mins
    Course: Salads, Salad Dressings and Vinaigrettes
    Cuisine: American
    Servings: 6
    Calories: 142kcal
    Author: Lea Ann Brown

    Ingredients

    • 4-5 cups lettuce leaves mixed varieties
    • 4 tablespoons olive oil good quality and fruity
    • ½ lemon juiced
    • ½ teaspoon sea salt
    • ¼ teaspoon black pepper fresh grouned (several grindings)
    • 1 clove garlic minced or pressed through a garlic press
    • 1 teaspooon Dijon mustard
    • 1 teaspoon Worcestershire Sauce
    • 1-2 dashes Tabasco Sauce
    • 2-3 Tablespoons parsley fresh, fine chopped
    • 1 red bell pepper cut into slivers
    • ½ cup red onion cut into slivers
    • ½ cup olives halved
    • ¼ cup goat cheese small chunks
    • ½ – 1 avocado chopped into small chunks
    • 1 pinch oregano dried, for sprinkling at the end

    Instructions

    • Chill salad plates in either refrigerator or freezer.
    • Wash, rinse and dry lettuce: Wash each leaf under cold running water. Then place leaves in a large bowl filled with lukewarm water. Swish the leaves around and immediately place them in a colander to drain.
    • Dry the leaves by wiping them with paper towels or using a salad spinner. Make sure to get as much as the moisture off as possible.
    • Place the dried leaves on paper towels. Roll the leaves up jelly roll style or fold the paper towels over the leaves. Place them in the refrigerator to store until you’re ready to construct the salad. If you want to store them a day in advance, place the paper towel stored leaves in a plastic bag.
    • Fine dice or press the garlic clove through a garlic press. Rub the garlic on the side of your salad bowl.
    • Add the olive oil to the bowl.
    • Remove the lettuce from the refrigerator and with your clean hands, tear into bite-sized pieces.
    • Place the torn lettuce leaves on top of the olive oil.
    • With clean hands, or salad tossers, toss the lettuce gently but vigerously until each leaf glistens with olive oil.
    • Squeeze on the juice of ½ lemon. Remove any seeds that landed in the bowl. 
    • In a small bowl mix together the mustard, Tabasco and Worcestershire sauce. Add the salt,  Worcestershire sauce mixture, red bell pepper strips slivered red onion, olives and fresh parsley to the salad greens. Mix well. 
    • Top with chunks of avocado and goat cheese. I also like to sprinkle on just a touch of dried oregano at the end. Serve immediately.

    Notes

    Tips for Success
    • Purchase a good quality olive oil. An easy to find mass produced brand is Pompeian. Add four tablespoons of good fruity aromatic olive oil to that garlicky salad bowl. Looking to learn more about olive oils, I like this article from Food Network, Top 12 Best Olive Oils For Cooking.
    • Use a wooden salad bowl and rub chopped garlic over it’s interior surface before making your salad.

    Nutrition

    Calories: 142kcal | Carbohydrates: 4g | Protein: 2g | Fat: 13g | Saturated Fat: 2g | Cholesterol: 4mg | Sodium: 422mg | Potassium: 120mg | Fiber: 1g | Sugar: 2g | Vitamin A: 2060IU | Vitamin C: 35.9mg | Calcium: 32mg | Iron: 0.7mg

    How To Make A Professional Accompaniment Salad … It’s a skill to learn.

    Baked Cheese and Chorizo Empanadas

    January 16, 2021 By Lea Ann Brown 10 Comments

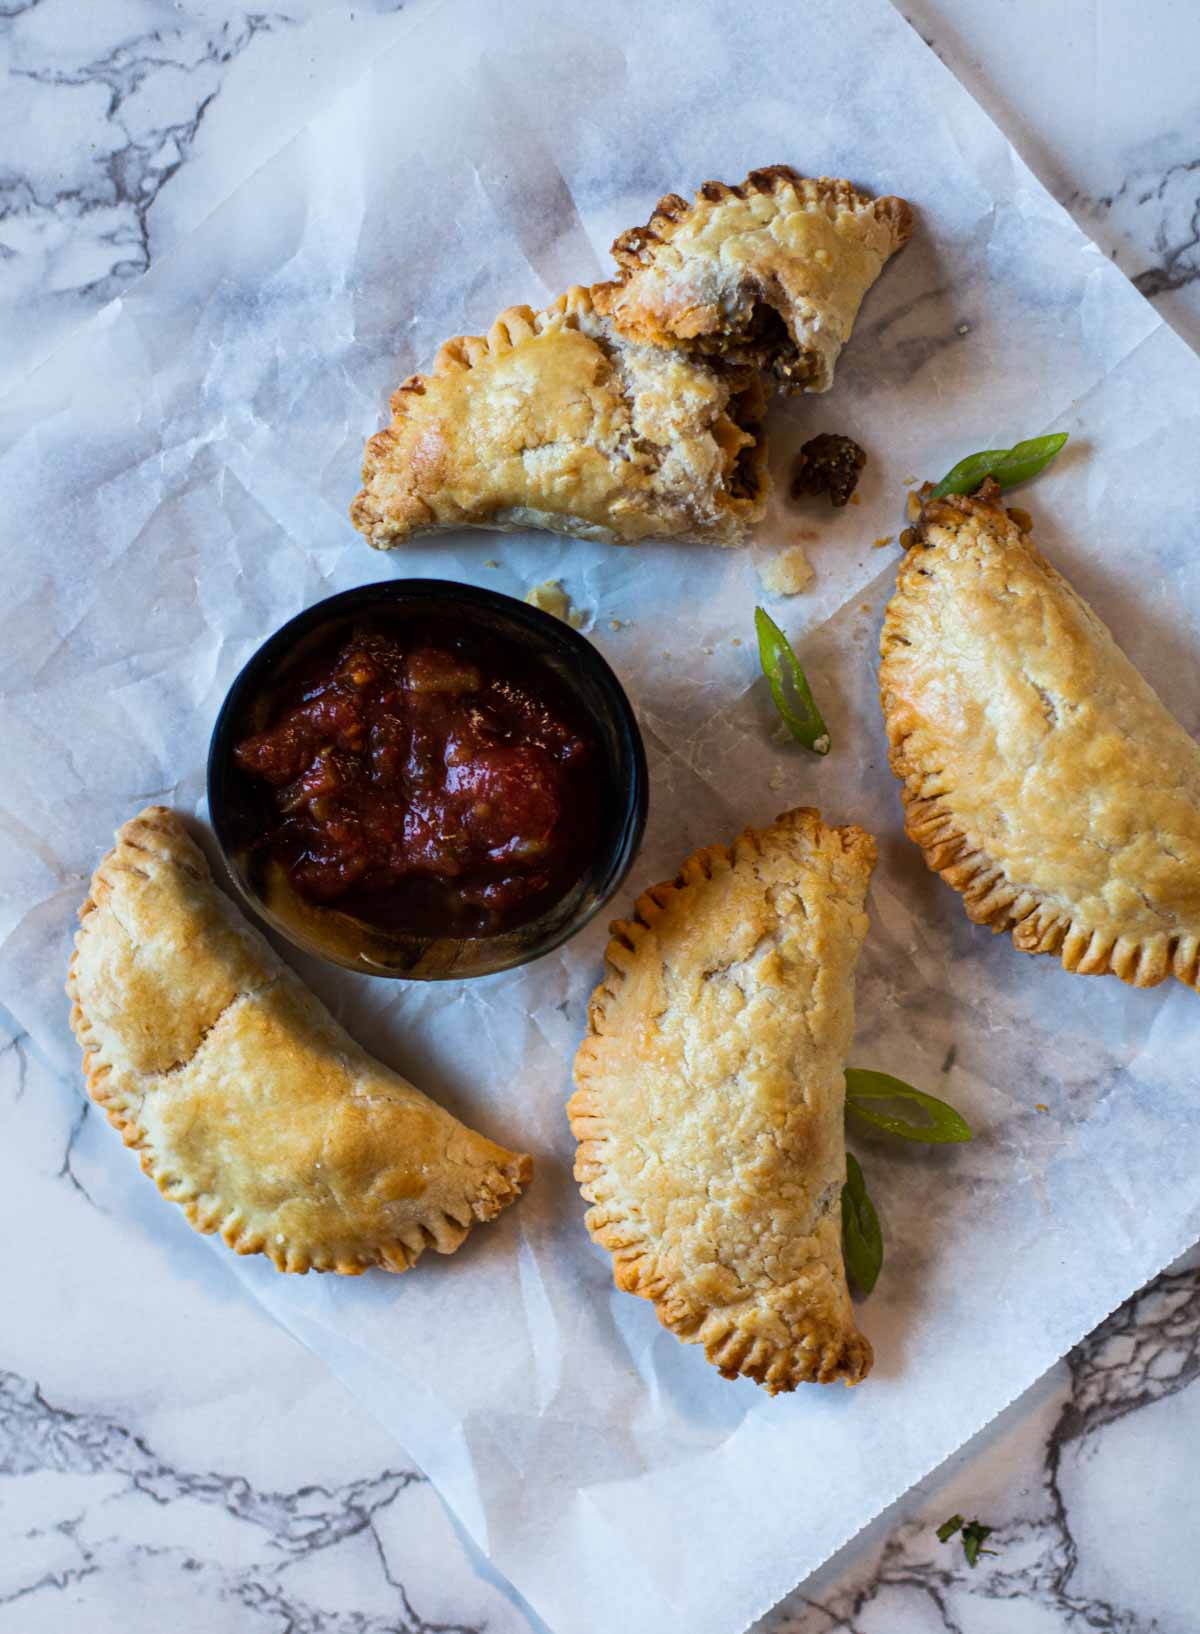
    Empanadas de Chorizo

    These empanadas de chorizo are baked rather than fried and this Argentinian specialty takes a Tex-Mex spin with a filling of chorizo, cheese, and roasted chile peppers. Adding cream cheese to empanada dough allows for elasticity and produces tender and flaky results. Give these chorizo empanadas a try.

    Chorizo empanadas served with salsa

    About this Recipe and Why it Works

    Making empanadas is really not as hard as it looks.

    What are empanadas? Empanadas are crescent shaped pastries filled with a variety of ingredients. Empanadas are either fried or baked golden for a perfect handheld treat.

    Fillings can include anything from seasoned beef, chicken, pork, seafood or vegetables and even pumpkin.

    For this recipe, we’re baking chorizo empanadas.

    One afternoon in Culinary School, we made around four hundred authentic Argentinean empanadas. We learned the technique of holding the filled empanada in one hand and using the other hand to twist the pasty into a beautiful braided border to seal the package. That braided border is called a repulgue.

    There were about a dozen of us in an unsupervised assembly line and unfortunately I remember more about our conversations than I do the learning experience.

    Once the empanadas were filled and sealed, they were handed over to Nathan who was manning the deep fryer for their traditional cooking method.

    Some were burnt, some fell apart because they weren’t sealed properly, or overfilled, and some were greasy due to not keeping the deep fryer at proper temperature. It was somewhat of a mess.

    It wasn’t until this past Fall, when our son had us over for happy hour, that my interest in making these at home became a quest. His girlfriend Julie served some of the most delicious chorizo empanadas I’ve ever had, and when she announced they were baked, I was all in.

    Let’s take a look.

    Ingredients for Making Baked Empanadas Dough

    Mise en place. Always gather ingredients before starting any recipe. It will save you time and organize your mind.

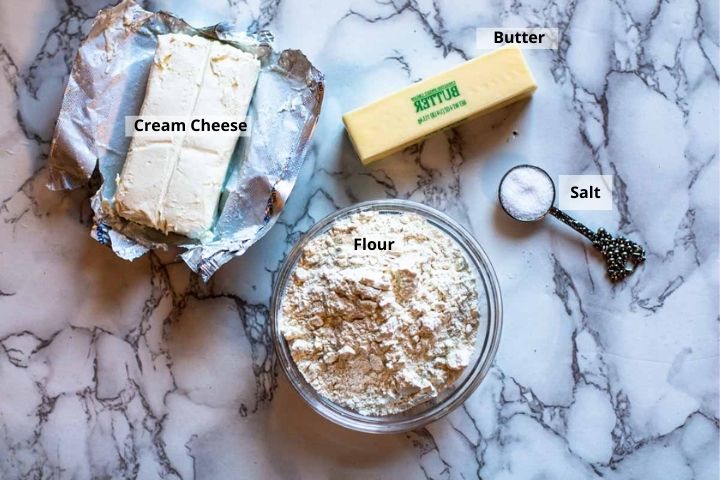
    Ingredients to make cream cheese empanada dough
    Ingredients for Cream Cheese Empanada Dough
    • Cream Cheese: Full fat cream cheese not only adds an additional depth of flavor, but also brings elasticity to the dough, which in turn yields a tender flaky crust once baked.
    • Butter: My favorite “fat” for making pastry dough. It produces a beautiful all butter pie crust, as well as for this empanada dough. And it brings that buttery flavor that we all love.
    • Salt and Flour: The backbone of the dough.

    Filling Ingredients Chorizo Empanadas

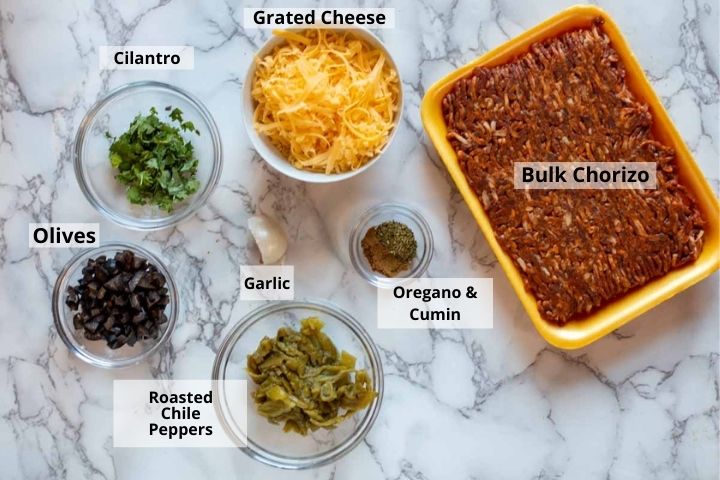
    Ingredients to make chorizo empanadas
    • Cilantro: Fine chopped.
    • Grated Cheese: I chose a medium sharp cheddar cheese.
    • Chorizo: Purchased bulk packaged, rather than a tube of chorizo.
    • Spices: Oregano and Cumin
    • Chile Peppers: Roasted, peeled and chopped. I use either Hatch Chiles or Colorado Pueblo Chiles.
    • Olives: I chose black olives, chopped. They add a briny flavor note and additional texture.
    • Seasoning: Chopped garlic, salt and pepper, to taste.

    Ingredient Swaps

    • Protein: Use ground beef, ground chicken or turkey in place of the chorizo. If using a lean protein, you’ll need to add a splash of oil to the pan before frying.
    • Cheese: Use any type of cheese for this recipe, as long as it’s a hard cheese that will grate well. Monterey Jack is a good choice here, or Muenster.
    • Chile Peppers: This recipe calls for Hatch chile peppers. If you don’t have a stash of roasted peppers in your freezer, substitute canned Hatch chiles. Roasted poblano peppers are a good choice here.
    • Olives: Next time I make these, I want to use chopped green olives in place of the black olives.

    How to make Baked Empanada Dough

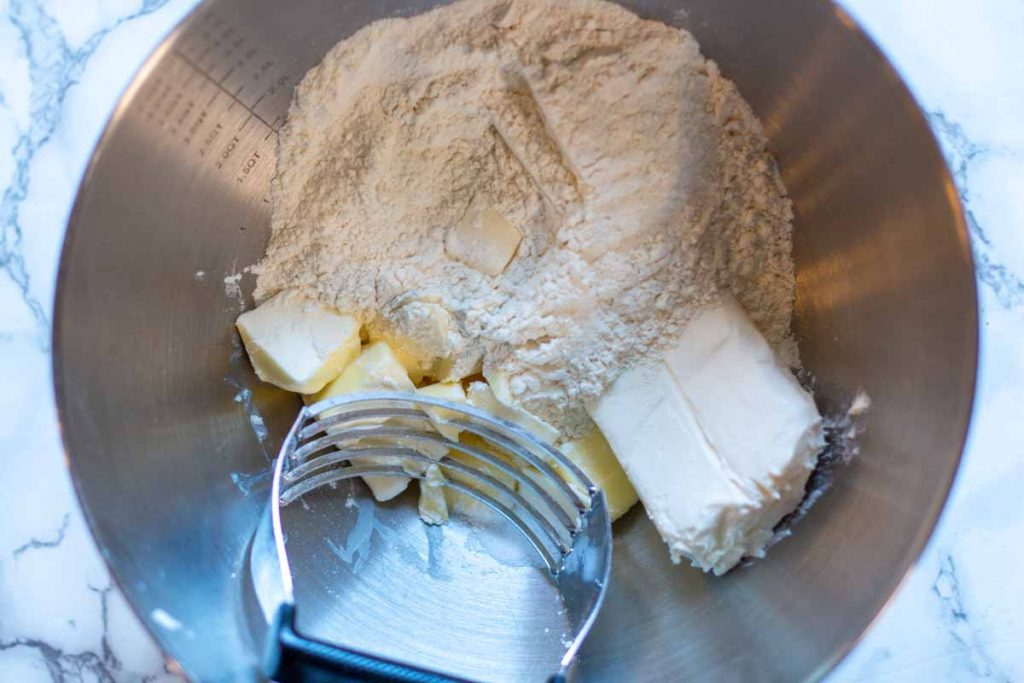
    Mixing cream cheese dough to make empanadas
    Step 1

    Step 1: In a large bowl, add room temperature cream cheese, cold butter, flour and salt. Using a dough blender, start combining ingredients.

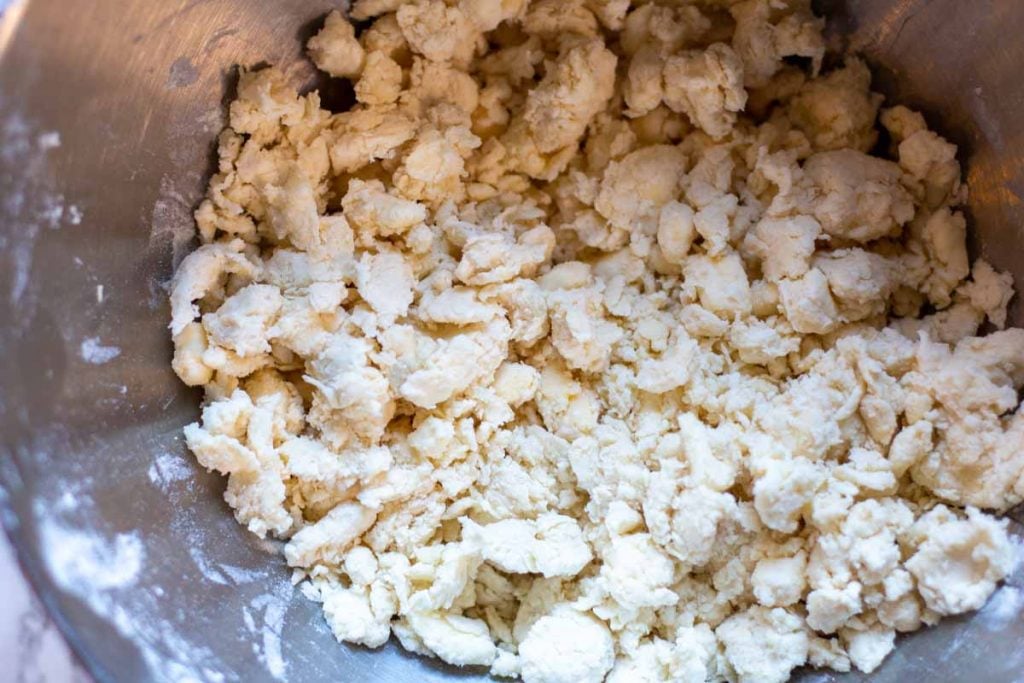
    Shaggy mass dough stage for empanadas
    Step 2

    Step 2: Mix the dough until you achieve the “shaggy mass” stage. Dough will be crumbly but begins to clump together. This stage will easily form a ball.

    Wrapping empanada dough in plastic wrap to rest in the refrigerator.
    Step 3

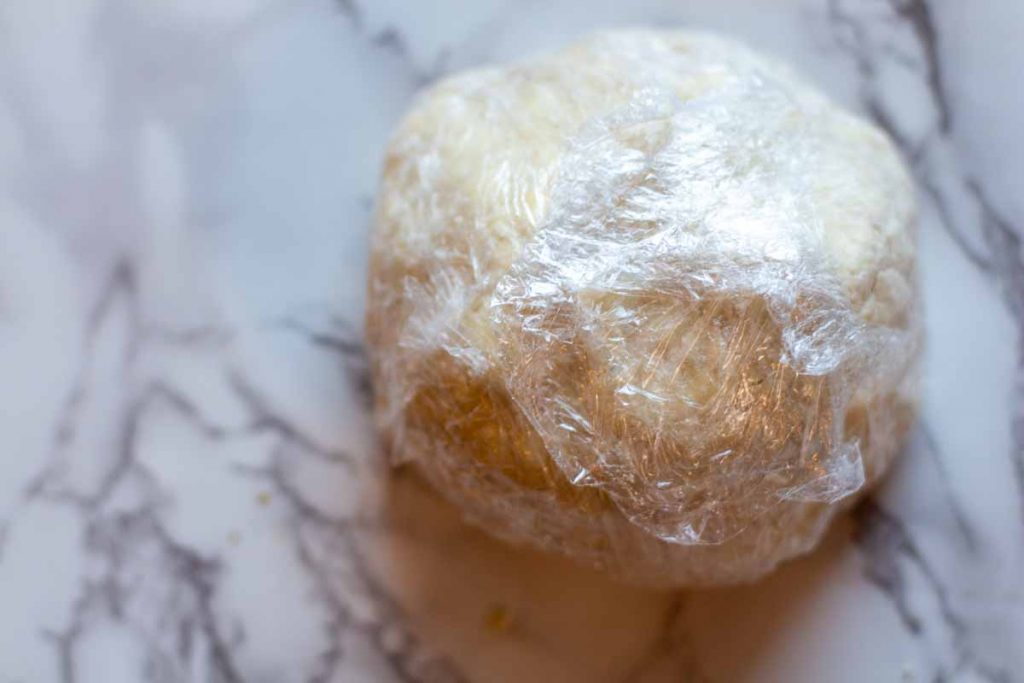
    Step 3: Press the cream cheese empanada dough together to form a ball and wrap in plastic wrap. Refrigerate for thirty minutes or even overnight if you wish.

    The Filling

    How to cook chorizo filling for empanadas
    Step 4

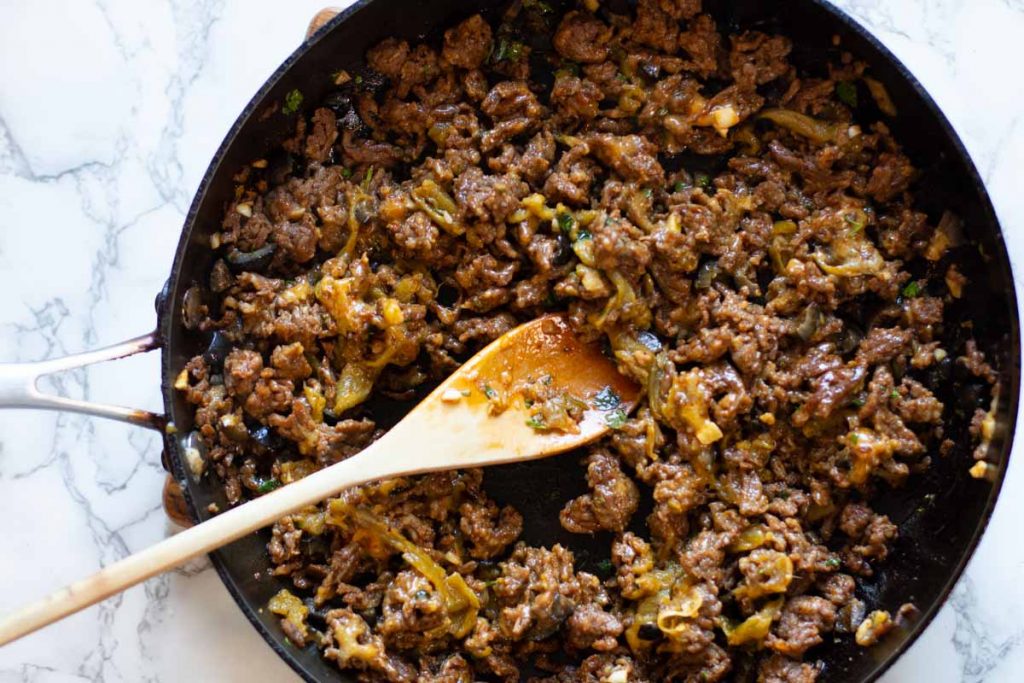
    Step 4: In the meantime, prepare the filling for the empanadas. Simply brown chorizo and remove from heat. Drain excess grease, if needed, and stir in remaining ingredients.

    It’s time to fill and seal chorizo empanadas.

    How to fill empanadas
    Step 5
    • Step 5. Roll the dough and fill the empanadas. Using a rolling pin and a floured surface, roll the dough to ⅛ inch thick. Cut the dough into circles. I used a 4-inch mini tart pan to cut my circles.
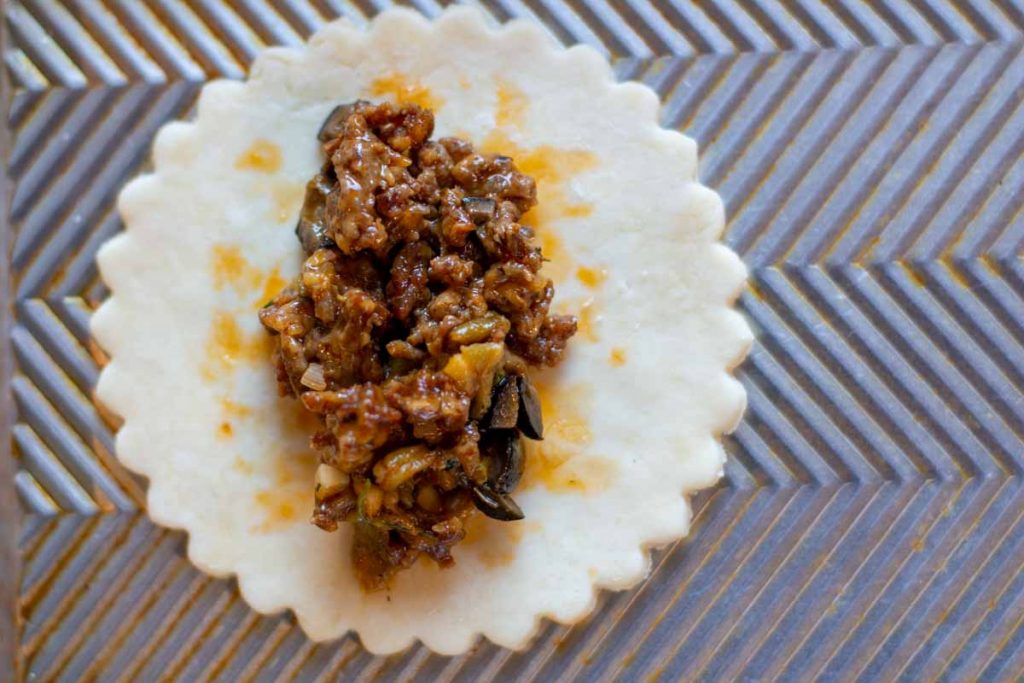
    • Step 6: Place a small amount of filling in the center. Make sure you have a clean margin of dough around the edge of the filling. Don’t overfill the empanadas, or you’ll end up with filling that leaks out during baking, or an empanada that breaks.
    how to seal empanadas
    Step 7

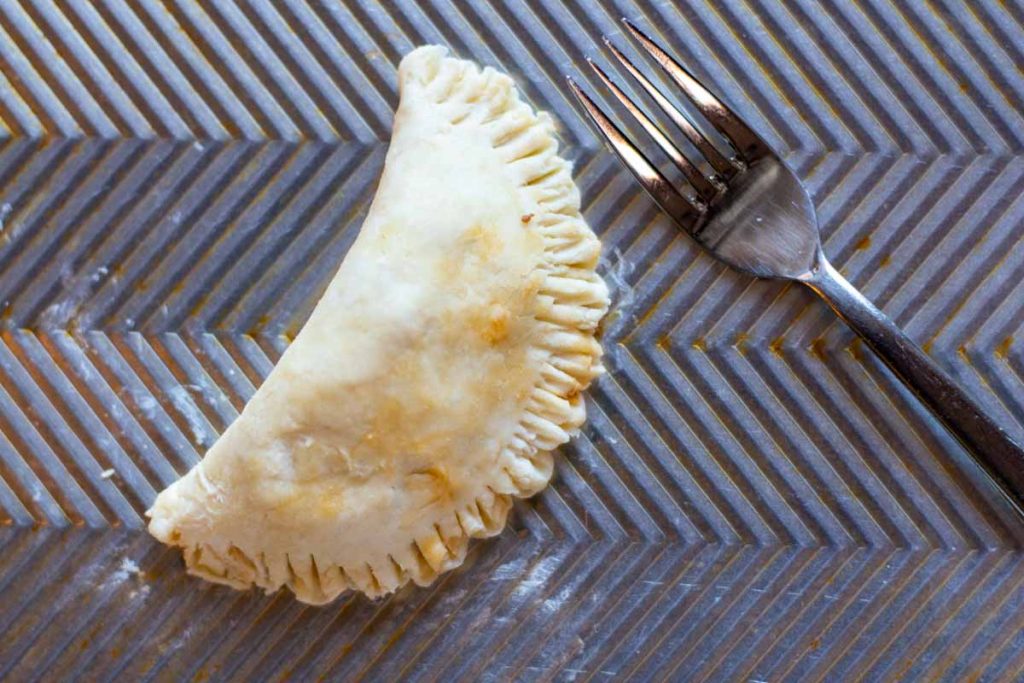
    Step 7: Fold the dough over and using the back of a fork to press the edges together.

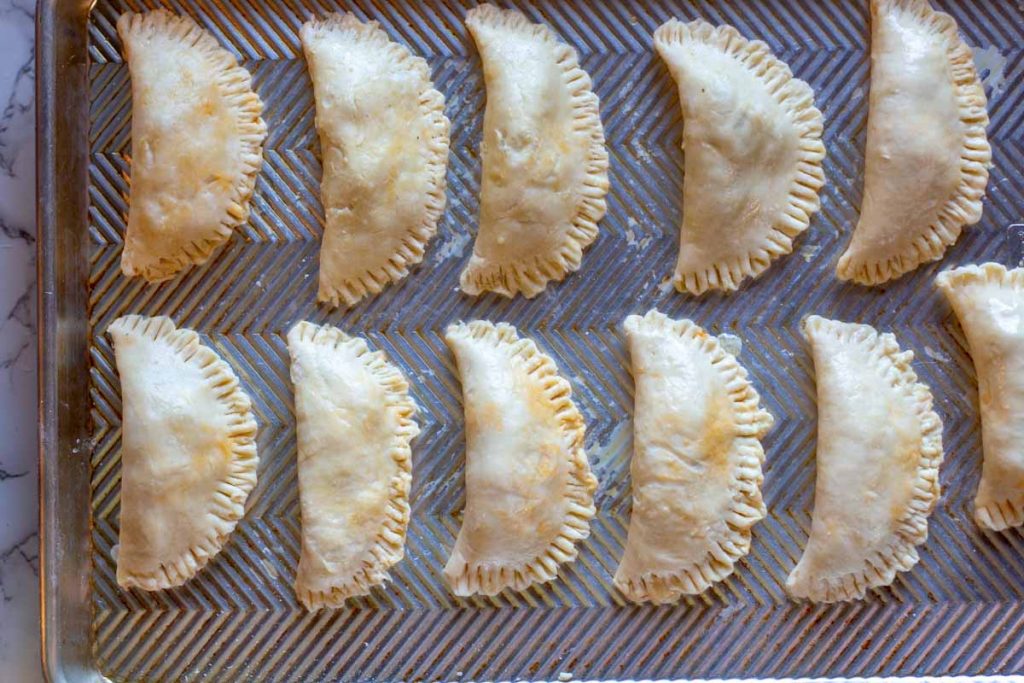
    Empanadas made with cream cheese dough ready to bake
    Step 8

    Step 8: Place the sealed empanadas de chorizo on a sheet pan and brush with an egg and milk mixture. This will help them to turn that beautiful golden brown while baking.

    FAQ’s, Empanadas de Chorizo

    Use cold butter.

    Keep that butter nice and cold before blending the empanada dough. If the butter is too warm, it will blend too quickly to achieve that shaggy mass stage.

    How do I successfully roll baked empanada dough?

    Using a floured surface and a rolling pin. Roll dough to ⅛ inch thick. And yes, use a ruler to measure the thickness. Consistency will result in even baking. Once you cut your circles, you’ll have left over dough. Carefully shape the scraps into a ball and roll out again.

    What size should empanadas be?

    I used a 4″ mini tart pan to cut my empanadas. They can be 4″, 5″ or 6″, whichever you prefer.

    What should I use to cut the empanada dough?

    A mini tart pan works well, or a bowl that doesn’t have a wide rim. You can also purchase empanada makers or empanada presses.

    Can I make chorizo empanadas ahead of time?

    Yes, and it’s actually a benefit for both the dough and the filling. Refrigerating the dough overnight will allow the dough to relax and lose its stretchiness. The filling will also be less runny and will be easier to manage when filling the empanadas.

    Can I freeze empanadas?

    Absolutely! They will keep in the freezer for about three months.

    How to reheat empanadas:

    If reheating frozen empanadas, let them thaw and then heat them on low on a sheet pan at 200 degrees until they’re nice and warm. Watch them carefully, you don’t want to cook them again, just warm them up. Using a microwave will compromise the flaky crispy texture of the baked empanada dough.

    Pro Tip: Use Cold Butter. Keep that butter nice and cold before blending the empanada dough. If the butter is too warm, it will blend too quickly and you will not achieve that shaggy mass stage.

    Recipe for Baked Chorizo Empanadas (Empanadas de Chorizo)

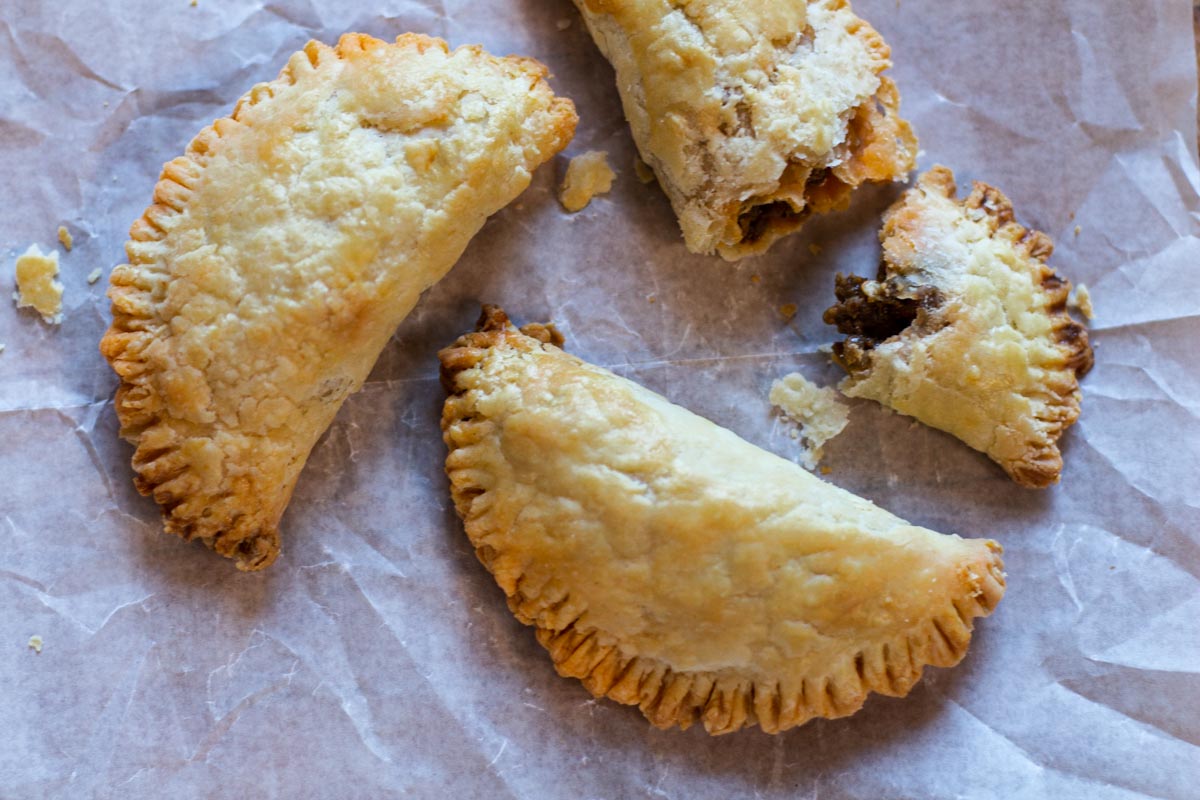
    Baked empanadas ready to eat

    I hope you give this chorizo empanada recipe a try, and if you do, please come back and give the recipe a star rating. And scroll down and leave a comment about your experience with the recipe.

    And if you have a favorite empanadas de chorizo recipe, let me know. Now that I had such success with this recipe, I’m looking for more filling ideas for chorizo.

    Dipping sauce for empanadas: Serve with either Tomato Salsa or Roasted Hatch Chile Sauce.

    And if you love Mexican food as much as we do, check out my Mexican Food Category. You’ll find plenty of fun recipes, including the most popular on my site for Hatch Green Chili.

    Empanadas de Chorizo
    Print Recipe
    5 from 6 votes

    Chorizo Empanadas ( Empanadas de Chorizo )

    Adding cream cheese to empanada dough allows elasticity and produces tender and flaky results. These empanadas are baked rather than fried and this Argentinian specialty takes a Tex-Mex spin with a filling of chorizo, cheese, and roasted chile peppers.
    Prep Time1 hour hr
    Cook Time20 minutes mins
    Resting Time30 minutes mins
    Total Time1 hour hr 50 minutes mins
    Course: Appetizer Recipes
    Cuisine: Southwestern Mexican
    Servings: 20 empanadas
    Calories: 176kcal
    Author: Lea Ann Brown

    Ingredients

    • For the empanada dough
    • 8 ounces cream cheese room temperature
    • ½ cup unsalted butter cut into cubes. Keep the butter cold until ready to use.
    • 1-½ cups all-purpose flour
    • ½ teaspoon salt
    • For the empanada filling:
    • 1 pound Mexican chorizo bulk, or removed from casings
    • ½ cup cheddar cheese grated
    • ¼ cup black olives pitted and chopped
    • 1 clove garlic minced
    • 4 roasted green chile peppers seeds, skin and stems removed, diced. Or 1 4 ounce can chopped Hatch chile peppers
    • 2 tablespoons chopped cilantro
    • ½ teaspoon ground cumin
    • ¼ teaspoon Mexican Oregano
    • salt and pepper to taste

    Instructions

    • Preheat oven to 375 degrees
    • For the empanada dough: In a large bowl, combine cream cheese, flour, butter and salt. Using a pastry blender, Mix all ingredients until a shaggy mass stage is reached. Press the dough into a ball, wrap in saran wrap and chill 30+ minutes. (or overnight)
    • For the empanada filling: Brown chorizo and remove from heat. Stir in remaining ingredients and stir until well mixed.
    • Using a rolling pin and a floured surface, roll empanada dough very thin, ⅛ inch thick. Use a ruler to measure.
    • Cut the dough into circles. Use a mini-tart pan, or a bowl with a thin rim to cut into circles. Once circles are cut, gather the excess dough and roll into another ball. Roll out again and make more circles.
    • Add a spoonful of filling and crimp closed using the back of a fork. Place the sealed empanadas on a baking sheet as you complete them.
    • In a small bowl, combine 1 egg with 2 tablespoons of milk. Whisk together using a fork Brush each empanada with the egg wash.
    • Bake at 375 for 20-25 minutes, or until golden.

    Notes

    Dipping sauce for empanadas: Serve with either Tomato Salsa or Roasted Hatch Chile Sauce.
    Protein: Use ground beef, ground chicken or turkey in place of the chorizo. If using a lean protein, you’ll need to add a splash of oil to the pan before frying.
    Make Ahead: it’s actually a benefit for both the dough and the filling. Refrigerating the dough overnight will allow the dough to relax and lose its stretchiness. The filling will also be less runny and will be easier to manage when filling the empanadas.
    Empanadas can be frozen. 
    If reheating frozen empanadas, let them thaw and then heat them on low on a sheet pan at 200 degrees until they’re nice and warm. Watch them carefully, you don’t want to cook them again, just warm them up. Using a microwave will compromise the flaky crispy texture of the baked empanada dough.
    Depending of the size of the empanadas, this will make 15 – 20 empanadas.

    Nutrition

    Calories: 176kcal | Carbohydrates: 4g | Protein: 5g | Fat: 15g | Saturated Fat: 8g | Cholesterol: 42mg | Sodium: 331mg | Potassium: 22mg | Fiber: 1g | Sugar: 1g | Vitamin A: 453IU | Vitamin C: 1mg | Calcium: 34mg | Iron: 1mg

    Chorizo Empanadas …. They’re what’s for dinner.

    If you like this recipe … you might like:

    • Mexican deviled eggs with chorizo served on a white platter.
      Smoky Mexican Deviled Eggs with Chorizo
    • Mexican Chorizo Soup Recpie.
      Mexican Chorizo Soup (Sopa Caldosa)
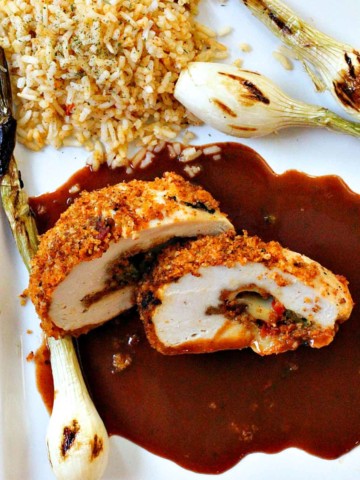
    • Chorizo cheese stuffed chicken breast served with rice and grilled knob onions.
      Chorizo Cheese Stuffed Chicken Breast
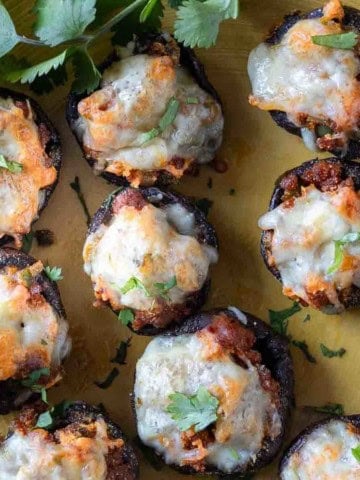
    • Chorizo mushrooms appetizer.
      Ultimate Cheesy Chorizo Stuffed Mushrooms

    Best Homemade Blue Cheese Dressing Recipe

    January 4, 2021 By Lea Ann Brown 43 Comments

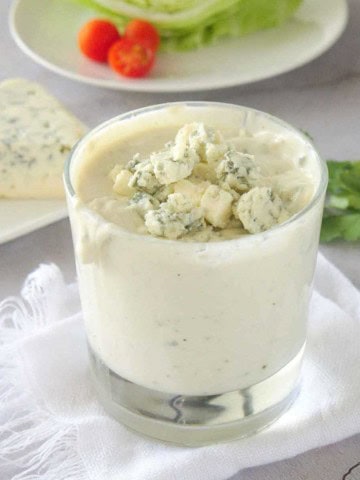
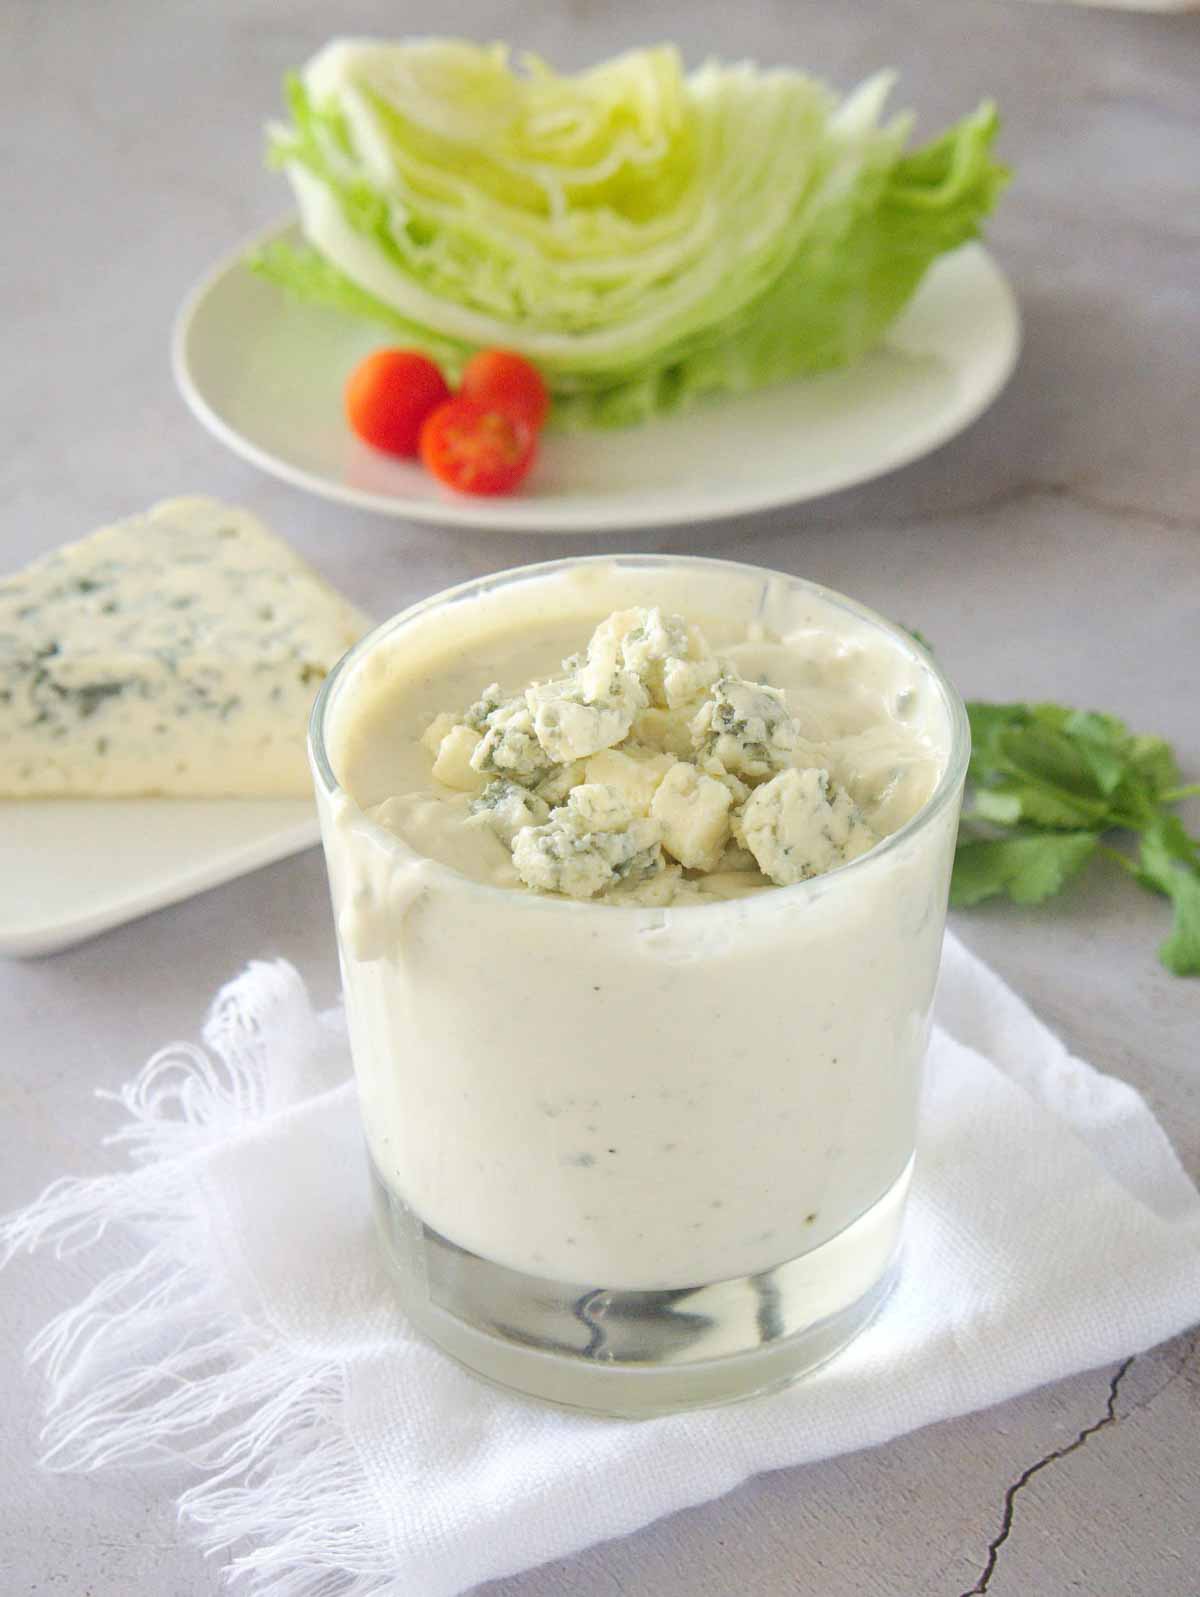
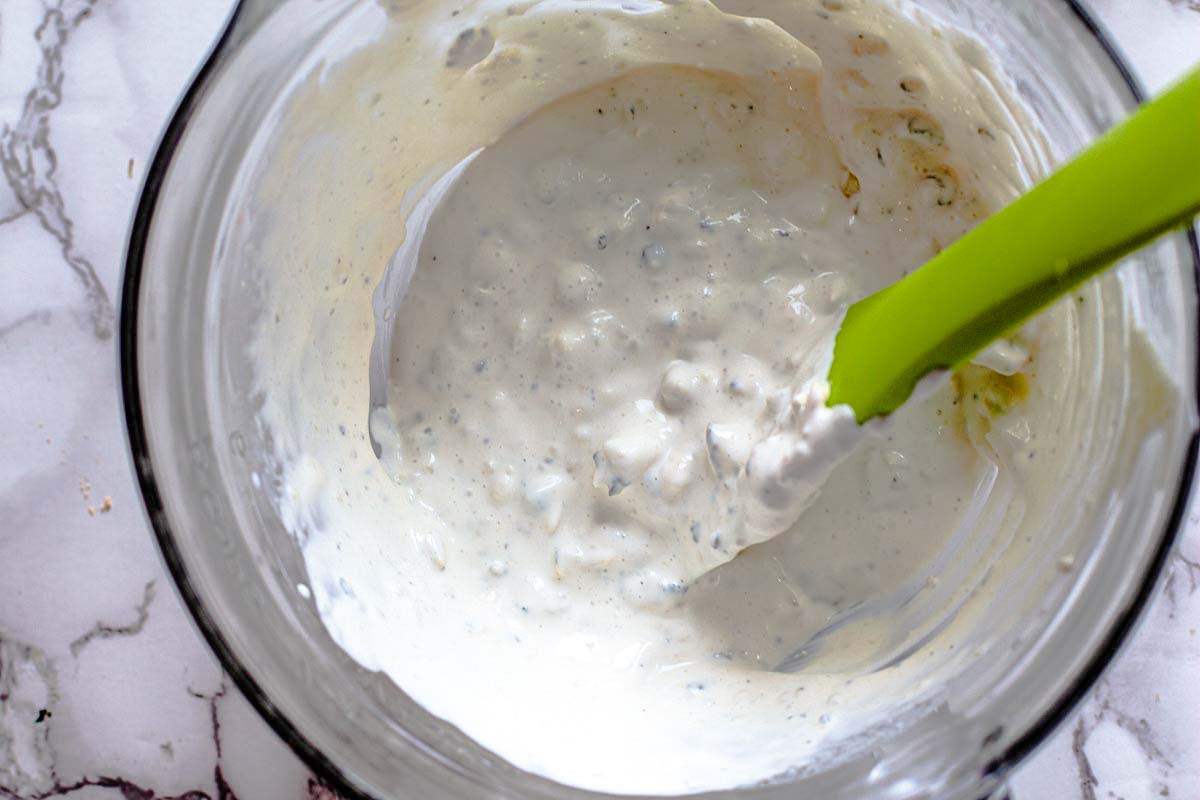
    A container of homemade blue cheese dressing.

    Simply stated, this is the best homemade blue cheese dressing you’ll find. You’ll never buy store-bought again. An easy creamy and chunky blue cheese dressing perfect for salads or a dipping sauce for wings and vegetables.

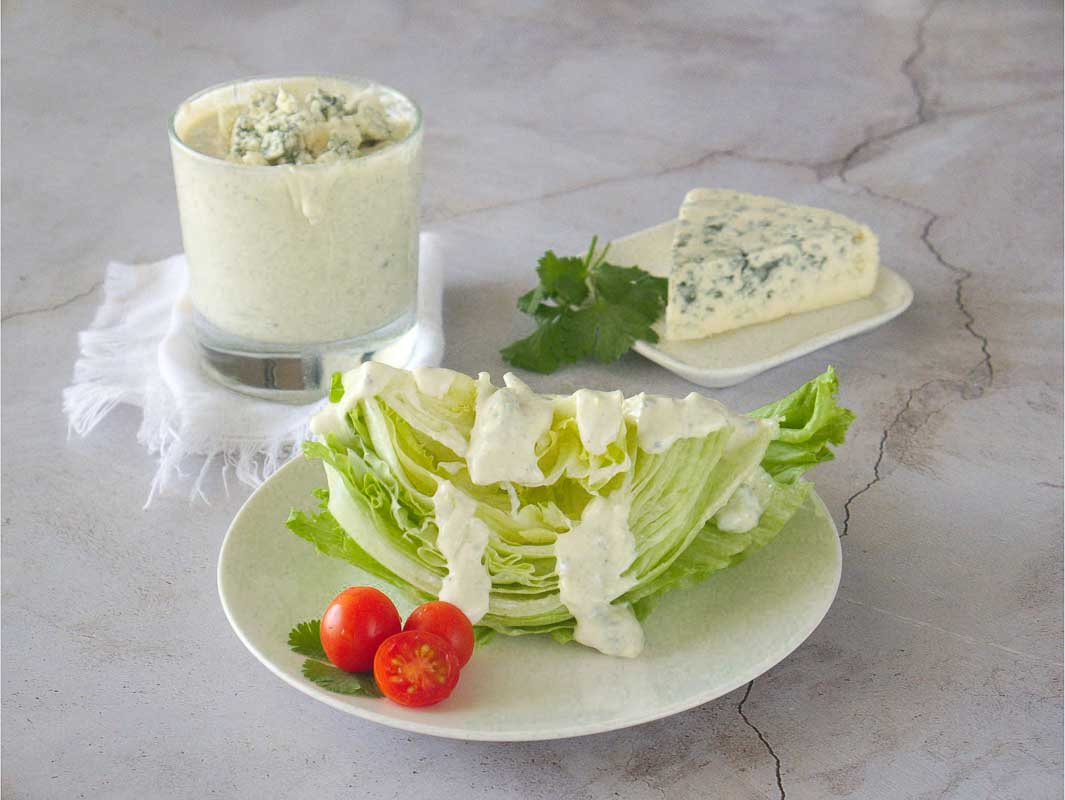
    Chunky Homemade blue cheese dressing to serve on a wedge salad

    What You Can Expect From This Recipe

    Why is this the best homemade blue cheese dressing recipe? With a line-up of 5-star reviews, this Homemade Blue Cheese Dressing Recipe will become your “go-to”.

    This recipe is everything you’d expect from a blue cheese dressing. A perfect balance of super creamy and chunky with plenty of crumbled blue cheese. Blue cheese dressing should be brash with flavor, yet still refined and gutsy with cheese.

    And using fresh ingredients makes this homemade blue cheese dressing recipe better than anything you can buy at the store. I’ve never ever, EVER found a bottled blue cheese dressing that’s as good as this homemade version.

    A couple of reasons this recipe is unique:

    • This is a blue cheese dressing recipe using no buttermilk. The base of the dressing is a mix of sour cream, half and half and mayonnaise.
    • Adding Worcestershire to homemade blue cheese dressing recipe brings an irresistible layer of umami flavor.
    • This is a recipe I learned in Culinary School, a classic chunky steakhouse style blue cheese dressing. It’s a absolutely perfect for a classic wedge salad and beyond.

    Cooking is all about making things fresh from scratch? Don’t you agree?  And this homemade blue cheese dressing recipe is a great place to start.

    Let’s take a look:

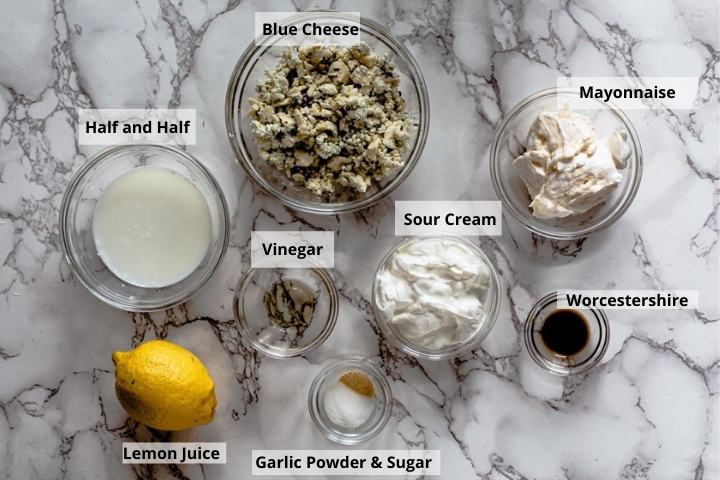
    Noteworthy Ingredients You’ll Need

    Mise en place. Always gather ingredients before starting any recipe. It will save you time and organize your mind.

    Ingredients to make creamy chunky homemade blue cheese dressing.
    • Blue Cheese: Choose a wedge of blue cheese from the specialty cheese section.
    • The Creamy: This recipe calls for both sour cream and mayonnaise. A perfect rich combination of tangy and creamy. And using both ingredients makes this recipe extra creamy.
    • Worcestershire Sauce: The secret ingredient that gives this chunky blue cheese dressing just the savory kick it needs. Worcestershire Sauce is used in many steakhouse blue cheese recipes.
    • Acid: We’ll use lemon juice and apple cider vinegar. Not only does an acid introduce a slight sour undertone to the flavor. Adding any acid to any recipe brightens and enhances flavors in a way that salt can’t do.
    • Seasoning: Garlic powder and sugar, salt and pepper to taste.

    How To Make Blue Cheese Dressing, It’s Easy

    So easy! Once you’ve gathered the ingredients, the rest is a cinch. Just grab a large mixing bowl and start adding ingredients.

    Adding sour cream and mayo to make homemade blue cheese dressing.
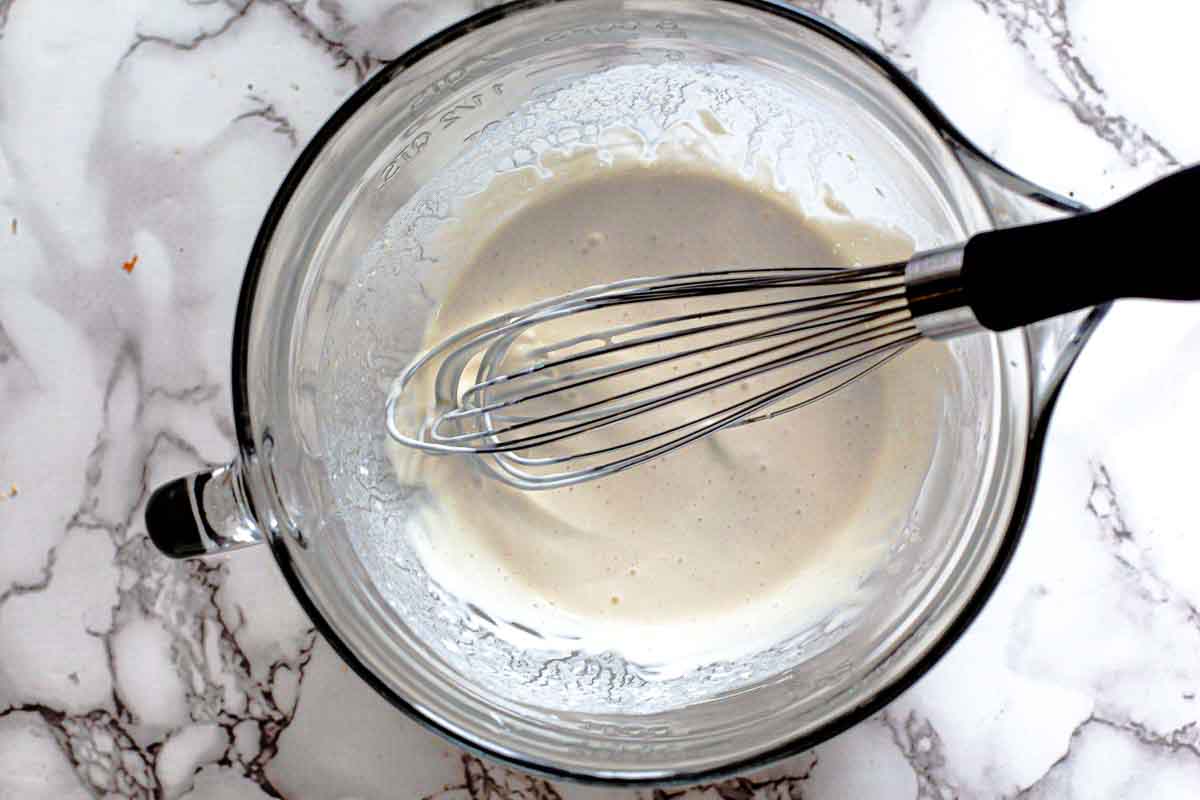
    1. Step 1: Using a whisk, mix the sour cream, half and half, mayonnaise, lemon juice, Worcestershire sauce, vinegar, sugar, garlic powder, and salt and pepper.
    How to make homemade blue cheese dressing.
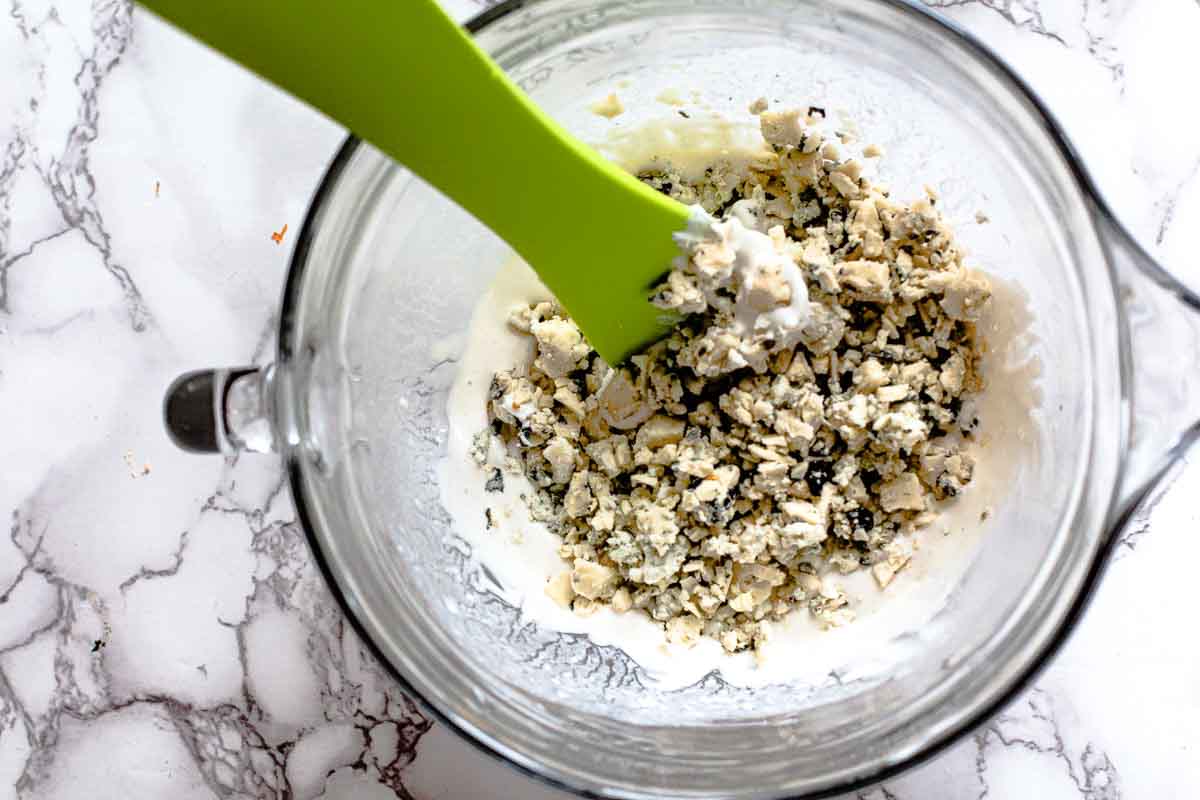
    1. Step 2: Switch to a spatula and fold in the chunks of blue cheese. If you try to mix the ingredients with a whisk, the chucks of blue cheese will get stuck in between the wires.
    Adding chunked blue cheese to make homemade blue cheese dressing recipe.
    1. Step 3: Simply stir until all ingredients are well blended.

    What Type of Blue Cheese Should I Use?

    • Maytag Blue Cheese: I have received no incentive to mention this name brand, it’s simply the brand I prefer. It’s an American made blue cheese produced in Iowa. A cow’s milk cheese that is creamy and mild in flavor and easy to find.
    • Roquefort Blue Cheese: Roquefort is a sheep milk’s cheese. Creamy and aromatic, complex and intense. This cheese will add a stronger funky flavor to blue cheese dressing. This cheese and its strong personality is made for serious blue cheese lovers.
    • Traditional Danish Blue Cheese: A strong blue veined cheese that is rich and creamy, with a slight bitterness and salt. Made with cow’s milk, it’s milder than Roquefort and an excellent choice for blue cheese dressing.
    • Stilton Cheese: The best known British Blue Cheese that has a strong spicy flavor. I use it whenever I can find it.
    • Gorgonzola: Gorgonzola, from Italy, is soft and spreadable. Depending on age, the flavor ranges from mild to sharp. Due to its softness, your chunky factor will be compromised. I’d save this one to spread on a burger.
    • Amish Blue Cheese: Made in Wisconsin, it’s a medium strength cow’s milk cheese and a good value and I’ve made this recipe many times using this cheese. The color variation isn’t as crisp as other blue cheeses, making it not my first choice.

    In summary, any blue cheese will work for the blue cheese dressing recipe. Try them all, find your favorite and make it your own.

    FAQ’s

    How Long Will Homemade Blue Cheese Dressing Last?

    This recipe will keep for 7 days stored in an airtight container in the refrigerator.

    Will This Recipe Work As A Dip?

    Yes. Whenever I make Buffalo Style Chicken Wings, this is the recipe I use as a dip for the wings and the celery. It’s absolutely perfect.

    Is This Dressing Gluten Free?

    Yes. All the ingredients in this blue cheese dressing recipe are naturally gluten free.

    Tips For Success

    • Purchase a wedge of blue cheese in the specialty cheese section, rather than a plastic container of pre-crumbled blue cheese. Pre-crumbled blue cheese is a dryer product. The creamier wedge is easy to crumble and the texture will enhance and blend better with the creamy ingredients.
    • When mixing the ingredients together, use a fork to smash some of the blue cheese crumbles. It will help distribute the blue cheese flavor better.
    • Let this dressing sit in the refrigerator for an hour or so before serving. A quick rest will allow those flavors to marry.

    Storage and Make Ahead

    • Refrigerator: Store in an airtight container in the refrigerator for up to 7 days.
    • Make Ahead: Because of it’s long storage time, this is a great make-ahead recipe. Prepare a double batch so you can drizzle it on every salad and use for a vegetable dip all week long.

    How to use this dressing

    • A big beautiful salad of course: Our favorite salad is bowl of fresh greens, topped with bell pepper, sliced mushrooms, tomato wedges finished with a generous grating of mozzarella cheese. And topped with blue cheese dressing, Just like our favorite Italian Restaurant serves.
    • Chicken Wings: Use it as a blue cheese dipping sauce. We prefer Blue Cheese Dressing over Ranch dressing for spicy chicken wings.
    • Vegetables: Place a small bowl of this dressing in the middle of a fresh veggie platter. It’s tasty for dipping raw cauliflower, carrots, celery and beyond.
    • Baked Potato: You bet, add a spoonful to your next baked potato instead of sour cream. Give that one a try, you’ll be glad you did.
    • Steak and Burgers: Beef entrees and a salad with blue cheese dressing is a steakhouse specialty. A perfect pairing for a Denver Steak or a Steakhouse Burger.

    The Best Homemade Blue Cheese Dressing Recipe

    Homemade blue cheese dressing recipe served over a wedge salad.

    More Popular Homemade Salad Dressing Recipes

    • A jar of sweet red wine vinegar salad dressing.
      Sweet Red Wine Vinegar Salad Dressing
    • A jar of homemade mango dressing with habanero.
      Spicy Mango Dressing With Habanero
    • Catalina dressing in a mason jar.
      Homemade Catalina Dressing Recipe
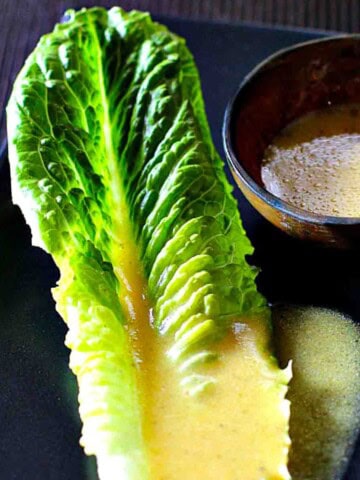
    • Dijon Vinaigrette on a leaf of Romaine Lettuce.
      Ina Garten’s Creamy Dijon Vinaigrette

    And if you’re looking for more salad recipes, don’t miss my Salad Category. You’ll find lots of great salad and dressing recipes, including the most popular for everyone’s favorite Old Fashioned Taco Salad Recipe with Catalina Dressing. And this creamy Red Chile Buttermilk Ranch Dressing ,a riff on Ranch Dressing from a James Beard Winning Restaurant.

    If you liked this recipe, please leave a star ⭐⭐⭐⭐⭐ rating in the recipe card below and leave a comment. I always appreciate your feedback and hearing how everything went.

    And, don’t forget to subscribe to my newsletter for more delicious recipes and cooking tips. Make it a delicious day … every day.

    A container of homemade blue cheese dressing.
    Print Recipe
    5 from 93 votes

    The Best Chunky Homemade Blue Cheese Dressing

    Simply stated, this is the best homemade blue cheese dressing recipe. A recipe from Culinary School, you'll never buy store-bought again. An easy Creamy and chunky blue cheese dressing recipe for salads and a dipping sauce for wings.
    Prep Time10 minutes mins
    resting time1 hour hr
    Total Time1 hour hr 10 minutes mins
    Course: Salads, Salad Dressings and Vinaigrettes
    Cuisine: American
    Servings: 6
    Calories: 259kcal
    Author: Lea Ann Brown

    Ingredients

    • ½ cup sour cream full fat is best
    • ½ cup mayonnaise
    • ¼ cup half and half or milk
    • 1 tablespoon fresh lemon juice
    • ¼ teaspoon Worcestershire Sauce
    • ⅛ teaspoon garlic powder
    • ½ teaspoon sugar
    • ⅛ teaspoon apple cider vinegar
    • ¼ teaspoon salt
    • ⅛ teaspoon pepper
    • 1 cup crumbled blue cheese

    Instructions

    • Using a whisk, mix sour cream, mayonnaise, half and half, lemon juice, Worcestershire, garlic powder, sugar, vinegar and salt and pepper together in a medium sized bowl. Stir until well blended.
    • Switching to a spatula, fold in the crumbled blue cheese and mix well. If you try to mix the blue cheese crumbles in with a whisk, the'll get stuck between the wires of the whisk.
    • Let sit in the refrigerator for about an hour for flavors to blend. Take a little taste and add more salt if needed.

    Video

    Notes

    There are many types of blue cheese available to make this recipe. Just find your perfect balance of sharp, to mild and make this recipe your own.
    This recipe will keep for 7 days stored in an airtight container in the refrigerator.
    Tips For Success: 
    • You can purchase a container of already crumbled blue cheese, but a wedge of blue cheese is the better choice. Blue cheese is easy to crumble, so I always reach for my favorite wedge in the specialty cheese section. Pre-crumbled blue cheese may be a dryer product.
    • Let this dressing sit in the refrigerator for an hour or so before serving. A quick rest will allow those flavors to marry.
     

    Nutrition

    Calories: 259kcal | Carbohydrates: 2g | Protein: 6g | Fat: 25g | Saturated Fat: 9g | Cholesterol: 38mg | Sodium: 454mg | Potassium: 98mg | Sugar: 1g | Vitamin A: 339IU | Vitamin C: 1mg | Calcium: 150mg | Iron: 1mg

    Chunky Homemade Blue Cheese Dressing Recipe … It’s what’s for a Salad

    This recipe was first published June, 2017 and updated January 2025.

    Quick Easy Homemade Enchilada Sauce

    January 2, 2021 By Lea Ann Brown 5 Comments

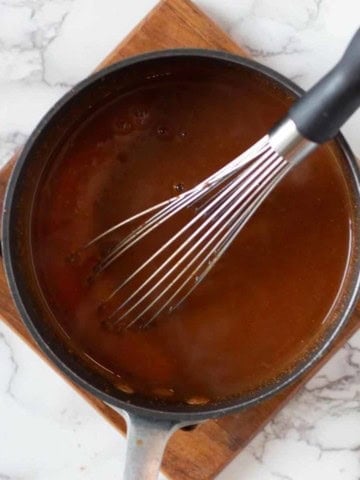
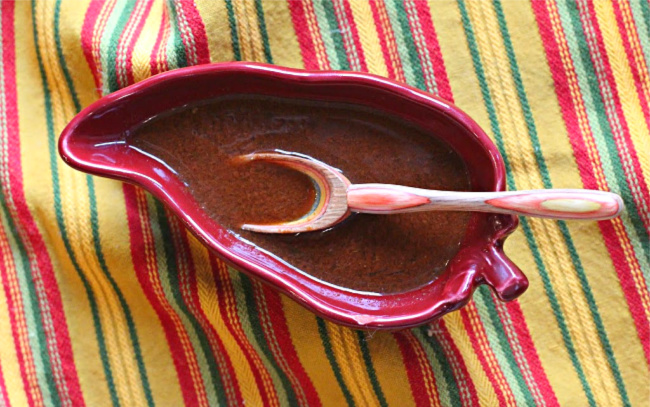
    Quick Easy Enchilada Sauce in a saucepan.

    Deeply flavored, rich, this easy enchilada sauce is wonderful earthy with flavor. Making enchilada sauce from scratch is quick and easy and using cocoa powder is the secret ingredient. And it’s ready in under 30 minutes. This quick enchilada sauce is a perfect red sauce for enchiladas, tacos, burritos and beyond.

    Looking to ramp up your Mexican food recipes with more authentic sauces? You won’t want to miss this one for Homemade Red Chile Sauce for Tamales.

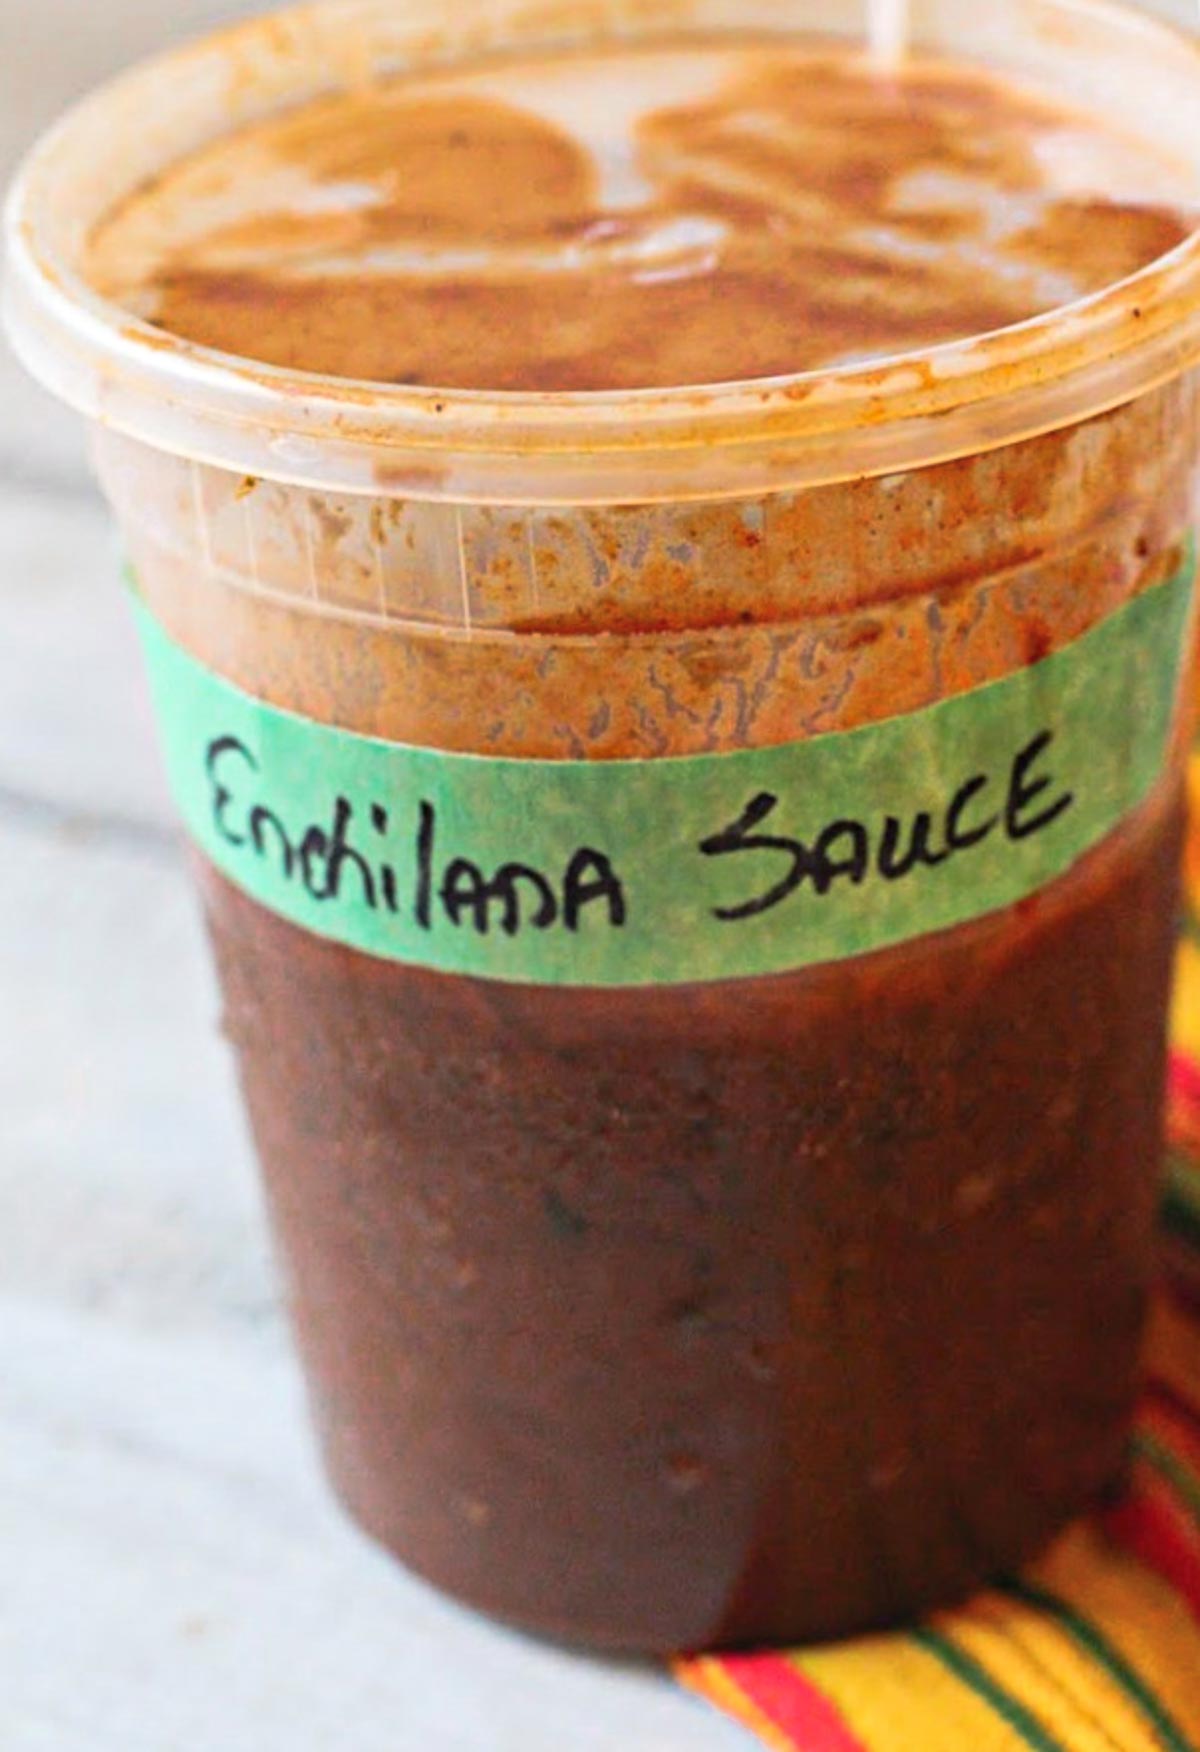
    Quick homemade Mexican red enchilada sauce in a deli container

    Flavor is such a subjective thing. A personal thing. Our tastebuds all crave different flavors, seasonings and spices. It’s what makes the world go round … as they say. But in my book, this is simply the best easy homemade enchilada sauce recipe that I’ve found. It’s got everything you’d expect from a Mexican enchilada sauce.

    It comes from a friend, who was born and raised in Mexico, and served this rich brick red saucy blanket of goodness over the best enchiladas I’ve ever had. Oh-my…g-o-o-d-n-e-s-s good.

    Reasons To Love This Recipe

    • If you don’t dally, this recipe comes together in just about 20 minutes. Which means, you can easily ditch the canned versions from the store.
    • This sauce is full of authentic Mexican flavor. It gets it irresistible flavor from Mexican spices, tomato sauce and the key ingredient = cocoa powder.
    • This enchilada sauce is thick and creamy, just like you’d expect of an enchilada sauce.
    • It’s made using chile powder, which saves time from preparing enchilada sauce using chile pods.
    • Adding a splash of vinegar at the end brings out the brightness in the final flavor.
    • It’s fresh and preservative free. This recipe is so easy you can ditch those canned enchilada sauces.

    Making enchilada sauce with chile powder is an easy method. One pan, cooked on the stovetop, and using ingredients you probably already have in your pantry … let’s take a look.

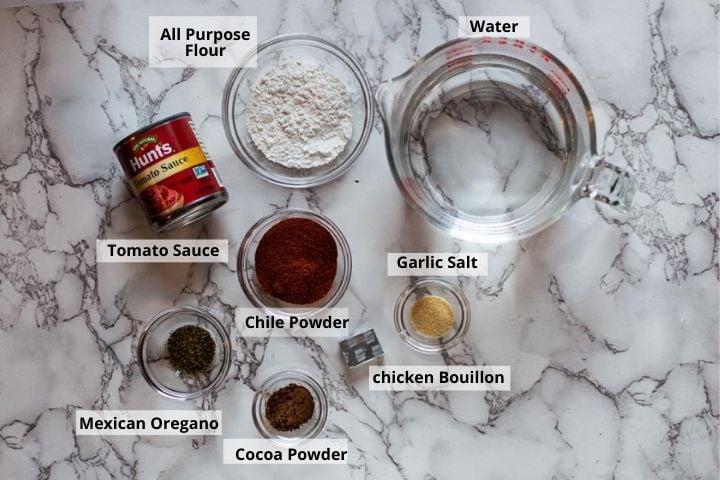
    Ingredients You’ll Need

    Ingredients to make quick enchilada sauce
    • The Roux: To make this thick and luxurious, we’ll make a roux with flour and water.
    • Spices: This quick enchilada sauce gets its ‘ole from a good quality Chile Powder. We prefer a New Mexico version such as Chimayo chile powder. Ancho Chile powder will work also. Garlic salt, Mexican Oregano.
    • Seasoning: Chicken Bouillon gives this enchilada sauce just the salty savory kick it needs.
    • Tomato: Every enchilada sauce needs a tomato component. For this recipe we’ll use Tomato Sauce.
    • Cocoa Powder: Natural Unsweetened Cocoa Powder tastes very bitter and brings a deep chocolate flavor to this enchilada sauce. It’s your secret ingredient to make enchilada sauce a very special enchilada sauce. You don’t need anything fancy. Hershey’s cocoa powder will work fine.

    Note about chile powder: The recipe calls for three tablespoons of pure chile powder. As opposed to chili (with an i) powder. The later is a blend of ground chile peppers with added seasonings. It’s used to season soups like Chili with Beans. Take a look at my article on Chili vs. Chile for more information.

    Other Ingredients You Can Use

    • Make it a gluten free enchilada sauce: Simply switch out the all purpose flour with gluten free all purpose flour. A high quality like Bob’s Red Mill is a good choice.
    • Mexican Chocolate: I’ve used a deep rich flavored cocoa powder for this recipe. If you can find it, use Mexican Chocolate in place of cocoa powder, for a more authentic experience.
    • Make it smoky: In place of the New Mexico Chile Powder, use Chipotle Chile Powder. Chipotle chile powder is made purely from dried chipotle peppers. Chipotle chile peppers are dried smoked jalapeno peppers. It has a sweet smoky flavor and packs a little heat, so be careful.
    • Mexican Oregano: I prefer Mexican oregano for all Mexican food recipes. With slightly citrus notes, it pairs well with the flavors in Mexican recipes. If you don’t have Mexican oregano, just use regular oregano.
    • Tomato Paste: Don’t have tomato sauce on hand, but you do have a can of tomato paste? Perfect. A substitution that will work well. Just mix ¼ cup tomato paste with ¼ cup water.

    How To Make This Recipe

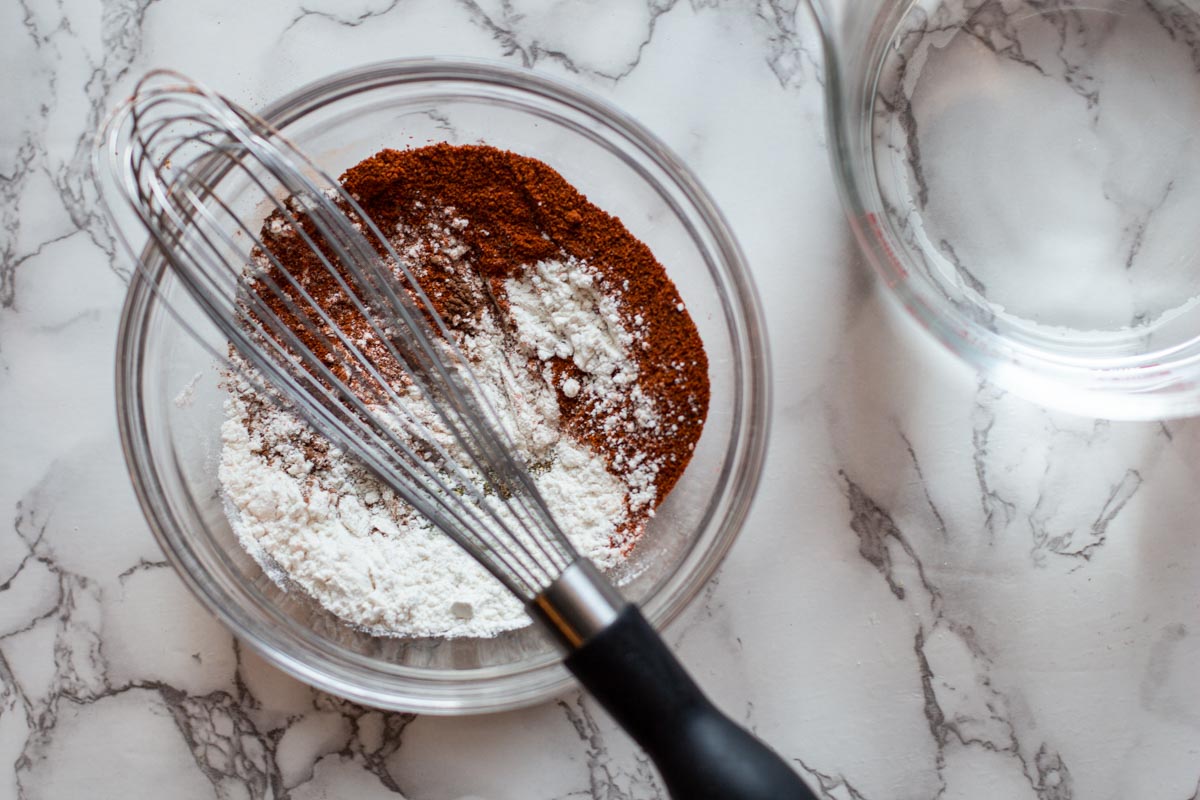
    Mixing flour and red chile powder to make Mexican enchilada sauce
    1. Step 1: In a bowl, combine all of the dry ingredients. Simply stir them with a whisk to combine.
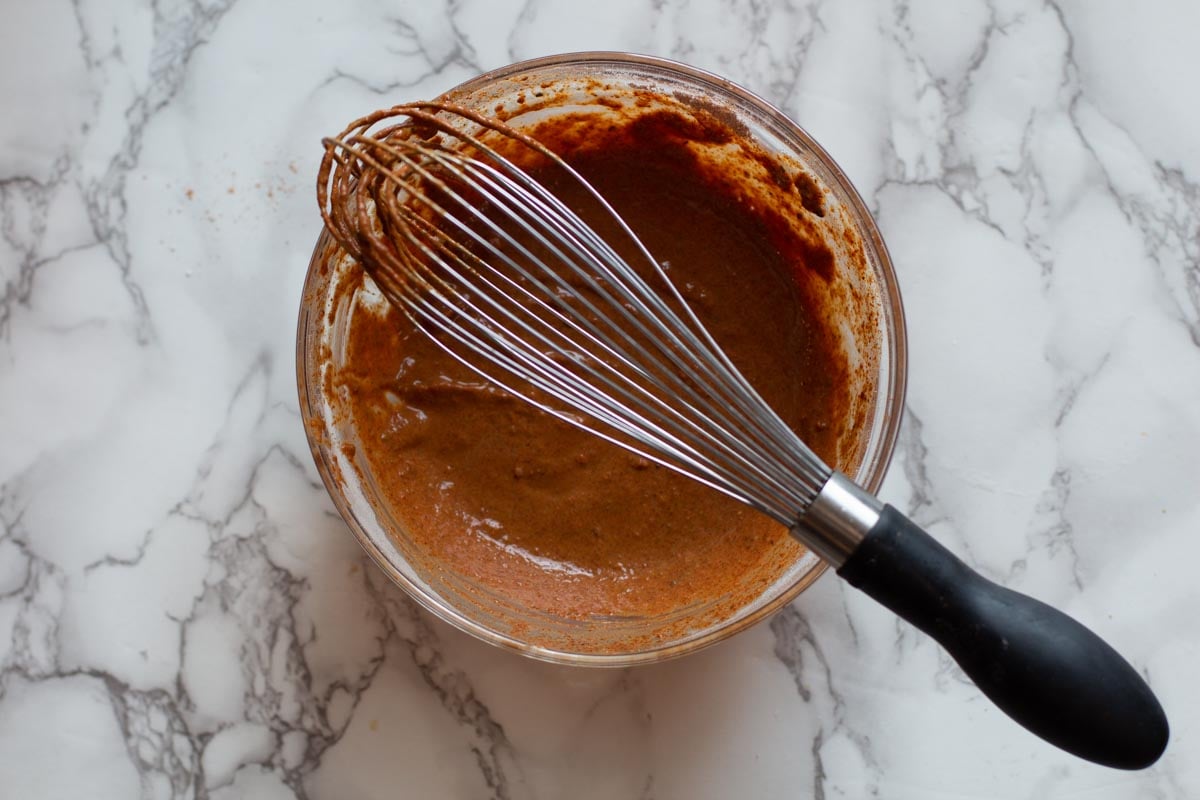
    Combining water and dry ingredients to make enchilada from scratch
    1. Step 2: Stirring constantly, slowly add enough of the water to the dry ingredients to make a thin paste.
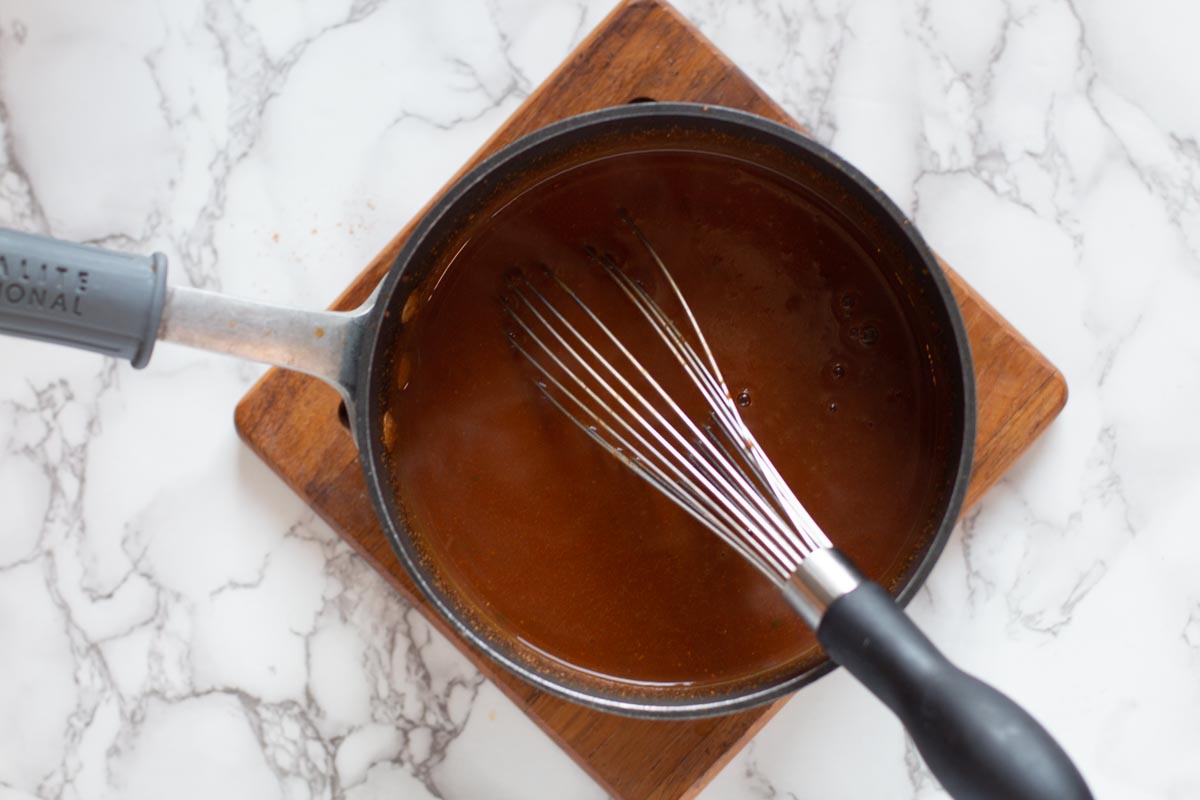
    Cooking sauce to make quick enchilada sauce
    1. Step 3: Pour the mixture into a sauce pan and add the rest of water. Cook over medium heat, stirring constantly, until mixture thickens. Stir in tomato sauce and stir until the mixture is hot.

    Voila! Done! Now that’s some quick enchilada sauce! We love this sauce and I’m certain you will too.

    FAQ’s

    Storing Enchilada Sauce

    Once the enchilada sauce has cooled to room temperature, pour it into an air-tight container. It will keep in the refrigerator for about 3 weeks.

    Can You Freeze Enchilada Sauce?

    Absolutely! Store in an airtight container and it will keep in the freezer for up to three months. I like to use a freezer-safe zip lock bag. You can fill the bag, squeeze the air out and then store it flat, which saves room in the freezer.`

    Whats A Substitute For Enchilada Sauce?

    The best substitute for enchilada sauce is Mexican Red Sauce made from dried chile peppers and Mexican spices. It’s best use if a sauce for tamales, but it will work equally well for enchladas, tacos and burritos.

    How Spicy Is This Enchilada Sauce?

    That’s up to you. This recipe calls for 3 tablespoons of pure Mexican red chile powder. As opposed to our American Chili Powder blend we use for chili soups. Some of these powders can be hot. Start with one tablespoon and then gradually add more until you achieve your tolerance to the heat.

    Tips for Success

    • With a broad range of pure ground chile powders available, you can make this as spicy or as tame as you want. Just add a little at a time until you reach your heat tolerance.

    Ways to use Enchilada Sauce

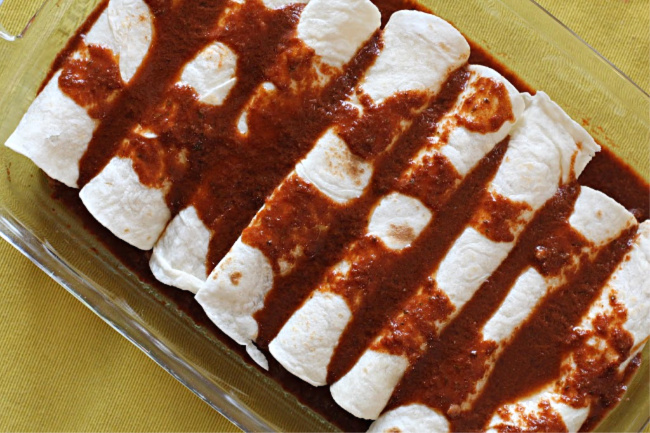
    Best homemade enchilada sauce over beef bean burritos

    Here’s this homemade enchilada sauce recipe in action. I’ve made beef and bean burritos and generously bathed them with the sauce before heaping on plenty of cheese and baking.

    • Enchilada Burritos
    • Chorizo Chile Stuffed Chicken Breast
    • Homemade Easy Ground Beef Enchiladas

    And my favorite way is to drizzle it over New Mexico Stacked Enchiladas.

    Quick and Easy Enchilada Sauce Recipe

    Best enchilada sauce recipe served in a festive chili pepper shaped bowl.

    I hope you give this Enchilada Sauce recipe a try. Your enchiladas will thank you. It’s a thousand times better than store bought. Nothing beats homemade!

    And if you’re looking for more Mexican Recipes, don’t miss my category for Mexican Food Recipes. You’ll find lots of recipe to spice up your meal plans, including the most popular on my site for Hatch Green Chili with Pork.

    Related Recipes

    • Homemade Taco Seasoning
    • Salsa Macha
    • Red Chile Sauce Made From Powder

    And speaking of condiments, a homemade recipe for Green Chile Sauce is a must have in any Southwestern kitchen. It's easy and simple with ingredients. Check it out.

    If you liked this recipe, please leave a star ⭐⭐⭐⭐⭐ rating in the recipe card below and leave a comment. I always appreciate your feedback and hearing how everything went.

    And, don’t forget to subscribe to my newsletter for more delicious recipes and cooking tips. Make it a delicious day … every day.

    Quick Easy Enchilada Sauce in a saucepan.
    Print Recipe
    5 from 2 votes

    Quick And Easy Enchilada Sauce Recipe

    Making enchilada sauce from scratch is quick and easy. Deeply flavored, rich homemade red enchilada sauce is wonderful earthy with flavor. Using cocoa powder is my secret ingredient and it's ready in under 30 minutes.
    Prep Time10 minutes mins
    Cook Time10 minutes mins
    Total Time20 minutes mins
    Course: Mexican
    Cuisine: Mexican
    Servings: 4 cups
    Calories: 40kcal
    Author: Lea Ann Brown

    Ingredients

    • 3 tablespoons chile powder good quality. New Mexico or Ancho
    • 3 tablespoons flour
    • 1 tablespoon chicken bouillon
    • 1 teaspoon cocoa powder Hershey's is what I use
    • ½ teaspoon garlic salt or granulated garlic
    • 1 teaspoon Mexican oregano or regular oregano
    • 3 cups water
    • 8 ounces Canned tomato sauce
    • ¼ teaspoon Vinegar Apple Cider or White vinegar

    Instructions

    • Combine all dry ingredients in a small bowl. Using a whisk, stir to blend.
    • Stirring constantly, slowly add enough of the water to make a thin paste. It should be the consistency of gravy.
    • Pour into a sauce pan and add the rest of water.
    • Cook over medium heat, stirring constantly, until mixture thickens. About 5 – 10 minutes.
    • Stir in tomato sauce and continue to heat until the tomato sauce has blended and the enchilada sauce is hot. About 2 minutes.

    Notes

    Note about chile powder: The recipe calls for three tablespoons of chile powder. With a broad range of pure ground chile powders available, you can make this as spicy or as tame as you want.
    Ancho chile pepper is a milder powder that delivers lots of chile flavor. I like using New Mexico Chile powder.
    Chimayo, which can be quite spicy, is my favorite. I’d test the waters if I were you, adding a tablespoon at a time, tasting as you go, until you reach the power you’re looking for.
    Don’t use chili (with an i) powder. It’s a blend of spices used to season chili soup. 
    Storage: Once the enchilada sauce has cooled to room temperature, pour it into an air-tight container. It will keep in the refrigerator for about 3 weeks.
    You can also freeze enchilada sauce and it will keep in the freezer for about 3 months.
    Gluten Free: Simply switch out the all purpose flour with gluten free all purpose flour. A high quality like Bob’s Red Mill is a good choice. 
    This recipe makes about 4 cups with is an ample amount or a big pan of enchiladas.

    Nutrition

    Serving: 1cup | Calories: 40kcal | Carbohydrates: 8g | Protein: 2g | Fat: 1g | Saturated Fat: 1g | Polyunsaturated Fat: 1g | Monounsaturated Fat: 1g | Sodium: 424mg | Potassium: 140mg | Fiber: 3g | Sugar: 1g | Vitamin A: 1796IU | Vitamin C: 1mg | Calcium: 35mg | Iron: 2mg

    Quick and Easy Enchilada Sauce … It’s what’s for enchiladas

    « Previous Page
    Next Page »

    I'm Lea Ann

    Welcome to my Colorado kitchen. If you're a fan of rustic homestyle cuisine, you've come to the right place. I'm a Culinary School Grad with a passion to inspire you to cook as often as you can. I offer reliable, approachable and easy to follow recipes. So grab that skillet and let's cook.

    More about me

    Soup and Stew Recipes

    • Southwest chicken soup with hominy and potatoes.
      Sopa Ranchera, Southwest Chicken Soup
    • Creamy chicken tortilla soup with rotel tomatoes.
      Southwestern Creamy Chicken Tortilla Soup
    • Cowboy chili garnished with grated cheese and jalapeno pepers.
      New Mexico Style Cowboy Chili
    • Ground chicken chile with white beans.
      Giada’s Ground Chicken Chili with White Beans
    • Beef stew with mushrooms served in a skillet.
      Beef Stew With Mushrooms – Crock Pot Method
    • 7-can taco soup with ranch dressing.
      Original 7 Can Taco Soup with Ranch Dressing

    Reader Favorites

    • Super Moist Cheesy Cornbread with Creamed Corn
    • Flemings steakhouse macaroni and cheese in a white bowl.
      Flemings Steakhouse Mac and Cheese
    • A slice of Layered Mexican Casserole with ground beef and corn tortillas.
      Mexican Casserole with Ground Beef and Corn Tortillas
    • Beef Tagliata, thin sliced flank steak served over arugula and cherry tomatoes.
      Beef Tagliata (Italian Steak)
    • Ham and cheese quesadilla made with corn tortillas and topped with a fried egg.
      Crispy Ham and Cheese Corn Tortilla Quesadillas
    • Spinach chicken mushroom skillet dinner.
      Chicken Mushroom and Spinach Skillet

    Footer

    • Contact
    • About
    • Privacy Policy
    • Accessibility Statement
    • ↑ back to top

    Copyright © 2024 Cooking on the Ranch • Powered by Feast+

    Rate This Recipe

    Your vote:


    A rating is required
    A name is required
    An email is required