Adding a layer of sliced sweet tomatoes on top of macaroni and cheese brings a whole new layer of flavor to everyone’s favorite comfort food. This mac and cheese with tomatoes recipe becomes even more special and creamy by using both gruyere and sharp cheddar. Let’s take a look.
And if you love macaroni and cheese recipes as much as we do, don’t miss this super-easy recipe for White Cheddar Mac and Cheese.

What You Can Expect From This Recipe
Here’s what I know for sure at this very moment. If you could eat happiness, it would be mac and cheese. And if Ina is involved in a recipe you know it’s going to be both delicious and reliable.
Cue this Mac and Cheese with Tomatoes recipe.
This recipe makes enough for an army, so gather your loved ones around a big steaming pan of creamy macaroni and cheese. And with a crispy bread crumb topping every single bite is delightful.
- This recipe starts with the usual lineup of ingredients to make a classic mac n cheese roux. Butter and flour. Milk is added and cooked until the white sauce starts to thicken.
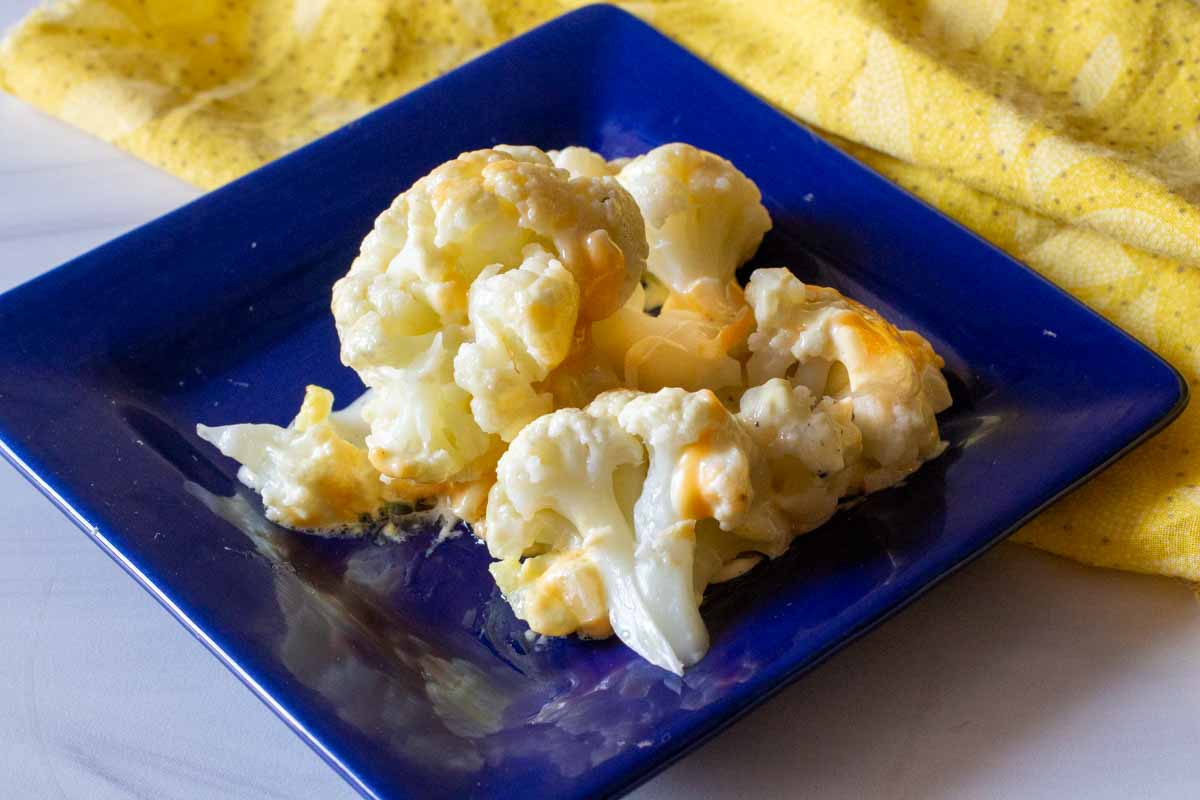
- The flavors of Gruyere and sharp cheddar compliment each other to create a decadent cheesy creamy pasta sauce for mac and cheese with tomatoes.
- Curly spiral Cavatappi pasta brings charm before finishing with a topping of tomatoes and bread crumbs.
This is a recipe for mac and cheese using fresh tomatoes. A perfect side for tomato season. And it’s a baked mac and cheese recipe, starting stove-top and finished in the oven.
Why Tomatoes Elevate Classic Mac and Cheese
It’s quite simple really. Fresh tomatoes add a layer of acidity, freshness and sweetness that blend so well with a creamy cheese sauce and tender pasta.
We love both the tart and sweet flavors that the topping of tomatoes brings to the overall flavor…and those crunchy sprinkles of buttered bread crumbs that toast while baking makes this is a keeper.
Best Tomato Types For Mac and Cheese
The most common types of fresh tomatoes available during the Summer months are Big Boy, Early Girl, Celebrity, or Fantastic. These are all firm and juicy tomato varieties that are good for slicing raw, chopping or dicing.
If making this in the Winter, choose Roma tomatoes which are available year round. Romas are firm and will slice well.
Table of contents
- What You Can Expect From This Recipe
- Why Tomatoes Elevate Classic Mac and Cheese
- Best Tomato Types For Mac and Cheese
- Ingredients To Make Mac and Cheese with Tomatoes
- Ingredient Swaps and Substitutions
- Recipe Variations
- Steps To Make Mac and Cheese with Tomatoes
- Tips and FAQ’s
- Tips For Success
- Storage and Reheating
- Recipe for Ina Garten’s Macaroni and Cheese with Tomatoes
Ingredients To Make Mac and Cheese with Tomatoes

- Milk: I rarely purchase low fat milk. Using full fat will make this creamy baked mac and cheese recipe ever more creamy and wonderful. What, no cream? This mac and cheese recipe is rich enough from the butter and cheese that cream would be over-kill.
- Pasta: Try Cavatappi pasta for this recipe. It’s unique spiral shape is attractive once covered with sauce. Plus all those curves work well to cradle the thick creamy white sauce. A white sauce just may the best sauce for cavatappi.
- Tomatoes: Fresh tomatoes, sliced.
- Gruyere Cheese: Gruyere is a smooth melting type of Swiss cheese. Sweet, nutty and slightly salty in flavor. Using Gruyere for mac and cheese makes this a very special treat.
- Extra Sharp Cheddar Cheese: Sharp and Extra Sharp Cheddar Cheese are simply aged longer to create tangier, complex, deep flavors. Extra Sharp is a nice compliment to Gruyere.
- Bread Crumbs: Got a loaf of bread in the pantry. Just remove about five slices and let them set on the counter for a few hours. Then using a sharp knife, slice into cubes. Easy!
- Nutmeg: Adding nutmeg adds a sweet nutty flavor and a warm undertone to white sauces. Please don’t skip it. And even better if you have a whole nutmeg. Just use a zester to grate some into the sauce = divine.
Ingredient Swaps and Substitutions
- Milk: Even though full fat is a creamier more flavorful option, any reduced fat milk will work for this recipe. No reason to use half and half or cream, the recipe is rich enough without it.
- Gruyere: If you need a substitute for Gruyere cheese try Jarlsberg, a Norwegian variant. Emmentaler is a type of Swiss cheese known for its melting properties. The flavor profile won’t be the same, but you can also substitute a mild white cheddar to compliment the color and flavor of sharp cheddar.
- Pasta: If you need a substitute for Cavatappi, elbow macaroni is a perfect partner for thick white sauces.
- Tomatoes: Fresh Summer tomatoes are the preferred choice for mac and cheese with tomatoes. But if you’re making this off season, choose some nice sized Roma tomatoes and let them ripen on the counter for a few days.
Recipe Variations
Classic Slow Roasted Tomato Version:
- Take this recipe a step further by slow roasting grape tomatoes. If you’ve never tasted slow roasted tomatoes you’re in for a treat. It brings a caramelized rich flavor that you’ll love. Check out my recipe for Slow Roasted Tomato Pasta Sauce for more information on the process.
Spicy Tomato Mac and Cheese
- Add two chopped jalapeno peppers and substitute the cheddar cheese for a spicier Pepper Jack cheese.
Stove Top vs. Baked, Which To Choose
- Stove-top mac and cheese, when prepared properly is a super easy and creamy way to enjoy mac and cheese. For this recipe, using fresh sliced tomatoes and topping with a crunchy bread crumb topping, we’ll need to bake this mac and cheese recipe for maximum texture experience.
Steps To Make Mac and Cheese with Tomatoes

- Step 1: Make the roux. In a large pan, melt the butter. Add the flour and combine until smooth. Cook for two minutes over medium heat.

- Step 2: Add warm milk and using a whisk, blend until smooth and cook for two minutes until it starts to thicken.

- Step 3: Remove the pot from the heat and add the grated cheeses, salt, pepper and nutmeg.

- Step 4: Add the cooked pasta and stir well. Stir in ¼ – ½ cup of the water the pasta has cooked in.

- Step 5: Transfer to a three-quart casserole baking dish.

- Step 6: Place sliced tomatoes over the top of the macaroni and cheese.

- Step 7: Sprinkle on the bread crumbs.

- Step 8: Bake for 30 to 35 minutes at 375 degrees, or until the sauce is bubbly and the bread crumbs are browned on the top and the tomatoes blistered.
Tips and FAQ’s
It's liquid gold. It's a must to add to any sauce for any pasta dish. It's high in starch and this salty starchy water helps the sauce cling to the pasta while helping to thicken the sauce. It turns any pasta dish into a luxurious pasta dish.
Somewhat of a Chef’s secret ingredient, nutmeg adds a warm undertone to to enhance the flavor of white sauces. Use ground nutmeg, or even better, whole nutmeg grated with a zester.
You can, but drain them well. Use 2-14.5 ounce cans of diced tomatoes, spreading them over the macaroni and cheese before baking.
I recommend cooking right away for the most creamy result. But you can do a make-ahead. Prepare the recipe, place in the casserole, but do not bake. Cover tightly and place in the refrigerator for one to two days. When ready to bake, add about ¼ cup milk over the top of the pasta, as during the time spent in the refrigerator, the pasta will have absorbed some of the liquid. Then slice tomatoes and place over the mac and cheese. And prepare the bread crumbs and sprinkle on top. Let the casserole sit on the counter to warm up for about thirty minutes before baking.
It’s easy to turn this recipe into a gluten free dish. Use a gluten free pasta and gluten free bread to make the bread crumbs. Substitute a gluten free flour for the all purpose flour.
Tips For Success
- Think al dente: Whenever I’m cooking pasta that will be used in a baked casserole-type recipe, I like to cook it slightly al dente. Which means slightly undercooked. The pasta will continue to cook in the casserole in the oven. Starting out with slightly undercooked pasta will keep it from becoming too mushy during bake time.
- Avoid lumpy sauce: The simple trick is to use warmed milk, and pour the milk slowly into the flour and butter mixture, whisking as you go.
- Grate Your Own Cheese: I know it’s always tempting to grab those packages of pre-grated cheese in the produce section. But please purchase blocks of cheese and grate them yourself. It’s more work, but the packaged product contains fillers to keep the cheese from clumping. Which also means it won’t melt as beautifully as cheese you grate yourself.
Storage and Reheating
- How long will mac and cheese keep in the refrigerator? To store leftovers, cover tightly with plastic wrap or foil. It will keep well for 3 – 4 days. To reheat, spoon individual portions into bowls. Microwave at 50% power stirring every thirty seconds until heated through.
- How Do I Reheat Without Drying Out? Using the microwave and adding a splash of milk will do the trick.
- Can you freeze mac and cheese? Before cooking: Yes. Assemble the unbaked casserole, minus the tomatoes and bread crumbs, cover and freeze. Thaw on the day that you’re going to bake and serve, add tomatoes and bread crumbs and bake according to directions. You can also freeze any leftovers in a well sealed container.
Recipe for Ina Garten’s Macaroni and Cheese with Tomatoes

Ina Garten gives this recipe a modern take by adding gruyere cheese and using Cavatappi pasta shape. It’s truly a delicious recipe.
What To Serve with Macaroni and Cheese with Tomatoes. This will accompany practically any main course protein dinner from Bobby Flay’s Burger with Coleslaw, Campfire Ribs, Grilled Flank Steak, to Pan Seared Cod.
More Irresistible Macaroni and Cheese Recipes
If you’re looking for more macaroni tomato and cheese style recipes, don’t miss my recipe for Mexican Mac and Cheese with Tomato Sauce. Along with these recipes below.


And if you’re looking for more side dish recipes for that family meal take a look at my Side Dish Category. You’ll find lots of macaroni salads and potato recipes to WOW that crowd. And the most popular macaroni and cheese recipe on my site for Flemings Steakhouse Mac and Cheese. A recipe straight from the Executive Chef.
If you liked this recipe, please leave a star ⭐⭐⭐⭐⭐ rating in the recipe card below and leave a comment. I always appreciate your feedback and hearing how everything went.
And, don’t forget to subscribe to my newsletter for more delicious recipes and cooking tips. Make it a delicious day … every day.

Gruyere Mac and Cheese with Tomatoes
Ingredients
- 2 Tablespoons Kosher salt To boil the macaroni
- 1 pound Cavatappi pasta Or elbow macaroni
- 1 quart milk
- 8 tablespoons unsalted butter divided, 1 stick
- ½ cup all-purpose flour
- 12 ounces Gruyere grated = (4 cups)
- 8 ounces extra-sharp Cheddar grated = (2 cups)
- ½ teaspoon freshly ground black pepper
- salt to taste cheese is salty, so taste before you salt.
- ½ teaspoon ground nutmeg
- ¾ pound fresh tomatoes 4 small to medium
- 1 ½ cups fresh white bread crumbs 5 slices, crusts removed, dried and cut into small cubes.
Instructions
- Preheat the oven to 375 degrees F.
- Bring a large pot of salted water to a boil. Add the pasta and cook about a minute shy of the directions on the package, about 8 minutes. Drain well, reserving ½ cup of the cooked pasta water.
- Meanwhile, heat the milk in a small saucepan, but don't let it boil.
- Melt 6 tablespoons (reserving 2 tablespoons for the bread crumbs) of butter in a large (4-quart) pot and add the flour. Cook over low heat for 2 minutes, stirring with a whisk.
- While whisking, add the hot milk and cook for a minute or two more, until thickened and smooth.
- Off the heat, add the Gruyere, Cheddar, salt and pepper to taste and nutmeg. Add the cooked macaroni and the pasta water and stir well. Pour into a 3-quart baking dish.
- Slice the tomatoes and arrange on top.
- Melt the remaining 2 tablespoons of butter, combine them with the fresh bread crumbs, and sprinkle on the top.
- Bake for 30 to 35 minutes, or until the sauce is bubbly and the macaroni is browned on the top.
Notes
Nutrition
Gruyere Macaroni and Cheese with Tomatoes …It’s What’s for Dinner
This recipe was originally published May of 2013 and republished April 2021 to include step by step instructions.