Cooking On The Ranch

  • Home
  • About
  • Recipe Roundup
  • Contact Me
  • Join Community
menu icon
go to homepage
  • Home
  • Soups and Stews
  • About
  • Recipes
  • Contact Me
    • Facebook
    • Instagram
    • Pinterest
  • search icon
    Homepage link
    • Home
    • Soups and Stews
    • About
    • Recipes
    • Contact Me
    • Facebook
    • Instagram
    • Pinterest
  • ×
    Home

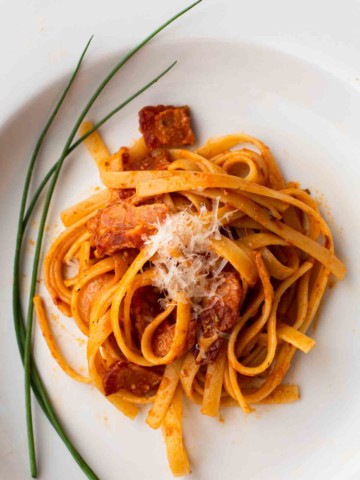
    Fettuccine Mio Amore Recipe (Lincoln Highway Pasta)

    July 19, 2022 By Lea Ann Brown 10 Comments

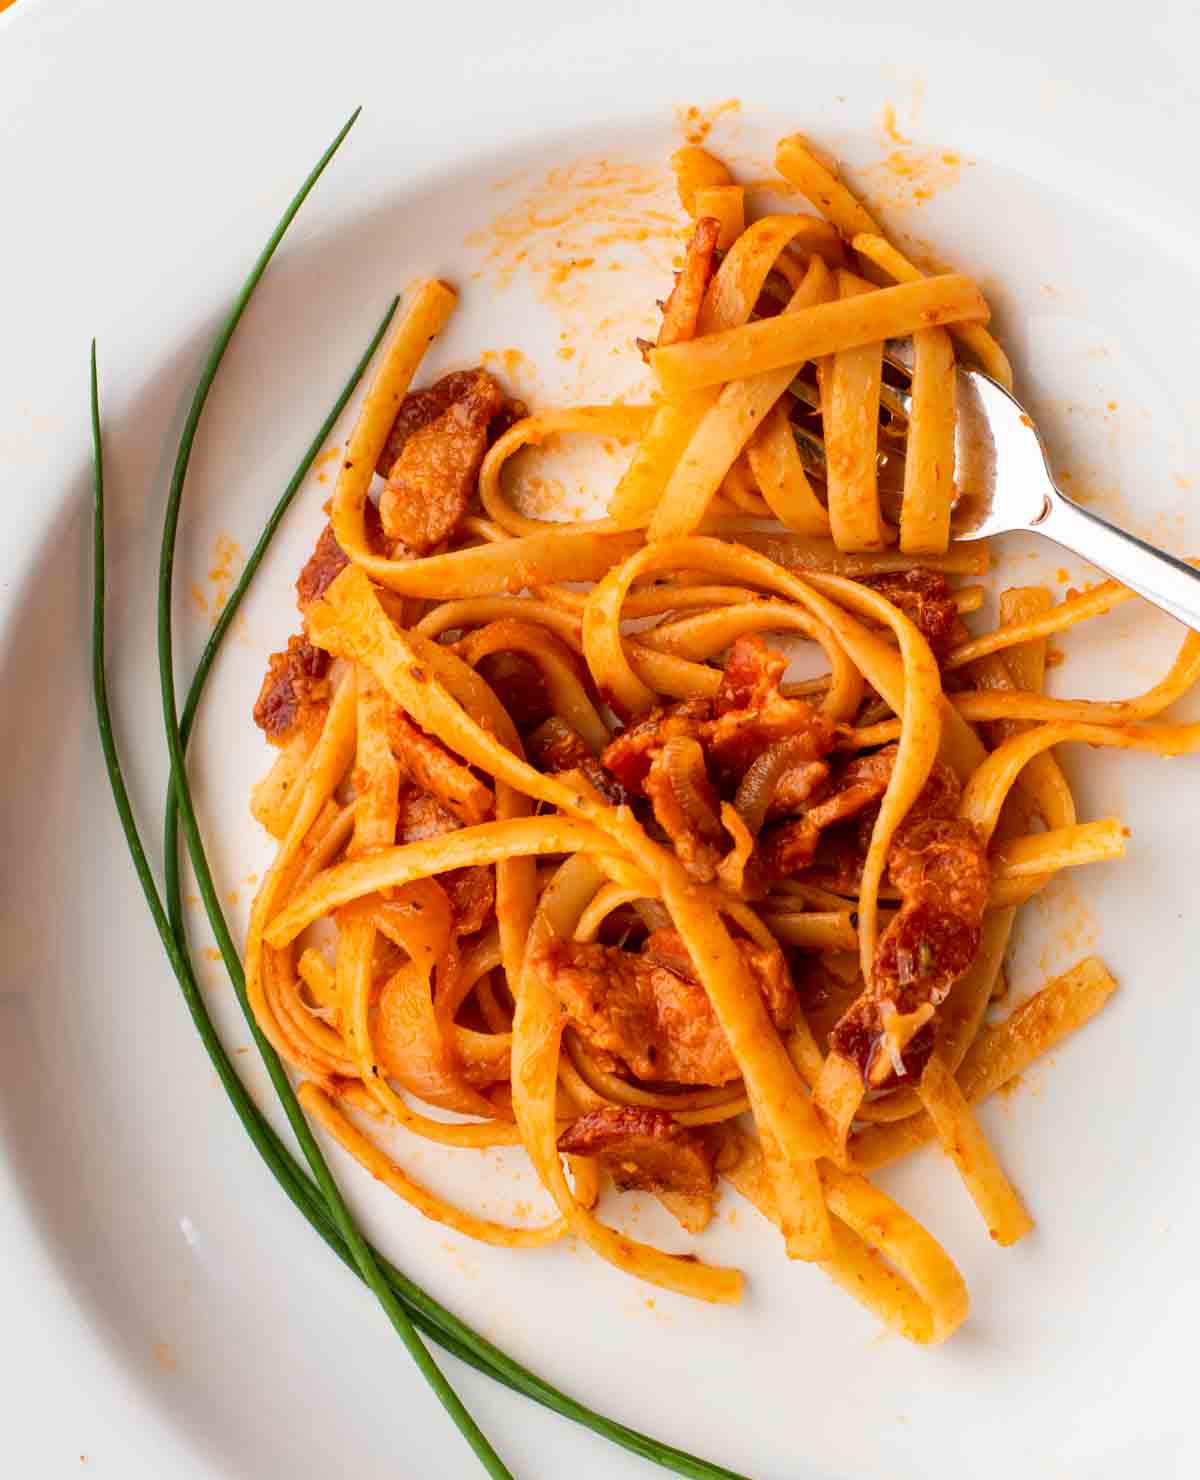
    Fettuccini mio amore pasta in a white pasta bowl garnished with chives.

    Fettuccine Mio Amore is an Italian pasta dish that highlights fettuccine noodles with bacon and onions to make a unique and exciting tomato pasta sauce. Rich and deep with flavor, this is a very special pasta entree.
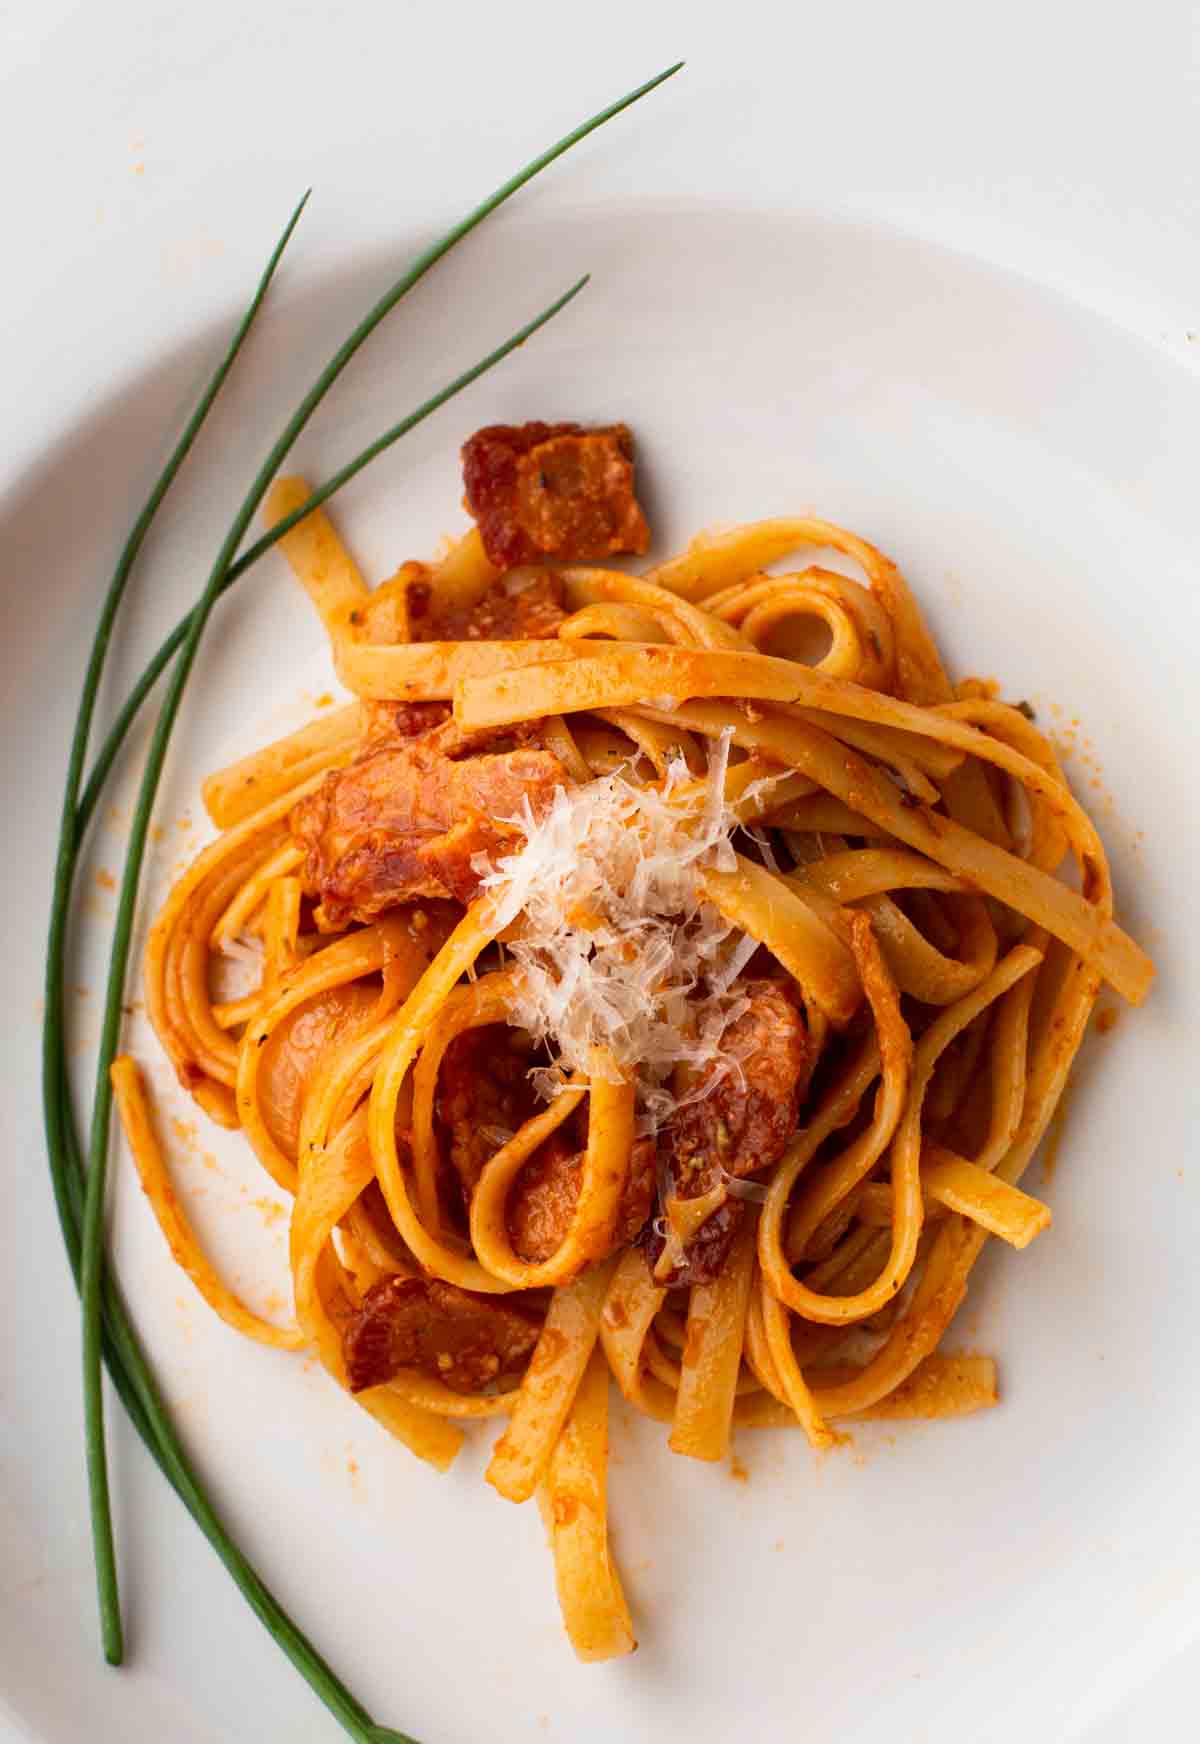
    Fettuccini mio amore pasta in a white pasta bowl garnished with chives.

    Our book club read for July was Amor Towles latest novel The Lincoln Highway. And Fettuccine Mio Amore is the dish that the character Duchess makes for Emmett, Woolly, Billy, and Sally on their last night together. The recipe is a homage to Towles’ friend and a favorite of the Towles family.

    The recipe is featured on his website and here is Towles description of its origins.

    One of my best friends growing up was an Italian-American named Claudio, who lived in Milan. When we were boys in the 1970s and Claudio would come to New England for the summer, he would be horrified by the American insistence upon drowning all pasta in a thick red sauce. A household should serve pasta in twenty different ways, he would argue, and each preparation should highlight a few essential flavors through intensity rather than volume.

    Fettuccine Mio Amore is an absolutely decadent pasta dish where onions and bacon bring a unique magical twist. Easy enough for a weeknight meal, and elegant enough for entertaining.

    Let’s take a look.

    Ingredients You’ll Need

    Mise en place. Always gather ingredients before starting any recipe. It will save you time and organize your mind.
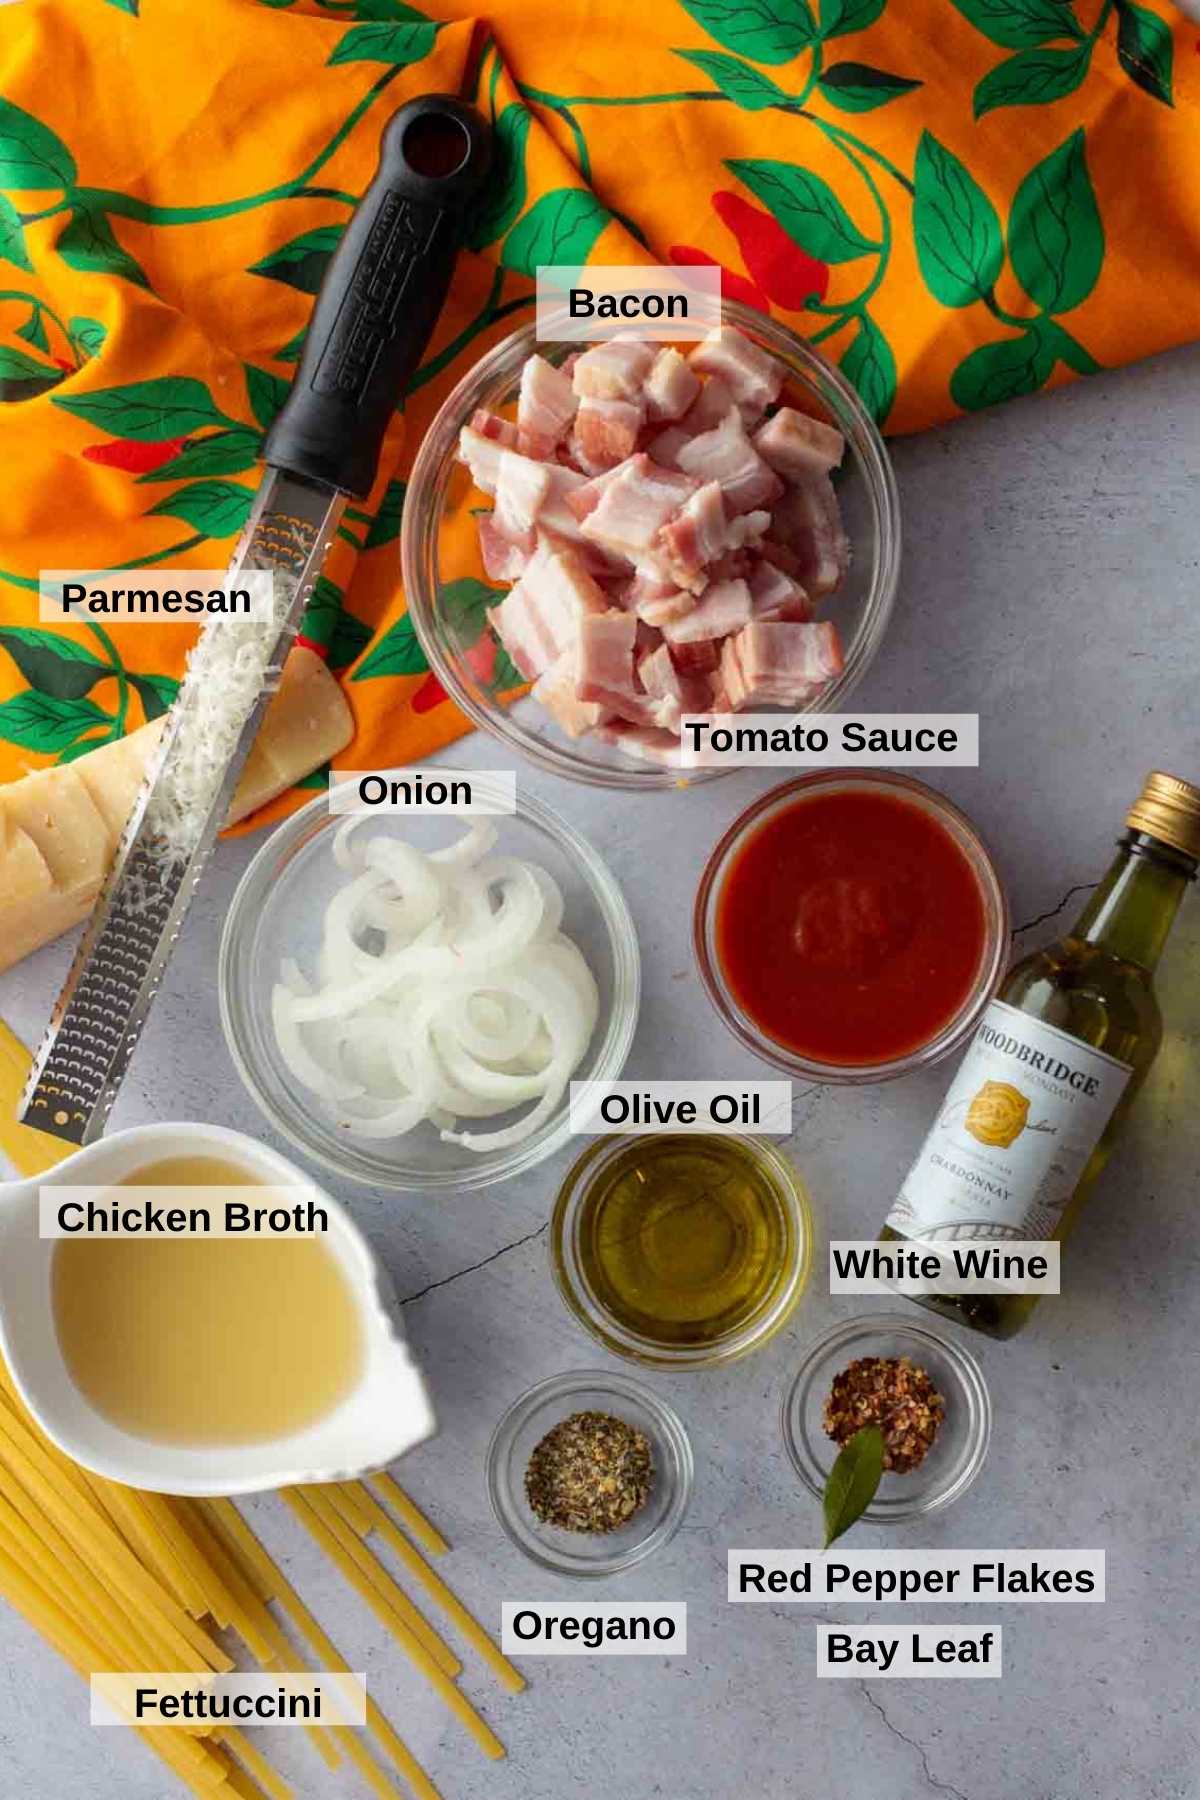
    Ingredients to make Fettuccini Amore (Lincoln Highway Pasta)
    • Bacon: Preferably good quality thick cut bacon. Applewood smoked brings a good flavor to this recipe.
    • Parmesan Cheese: Grated.
    • Onion: Sweet or Yellow
    • Tomato Sauce
    • Chicken Broth
    • Olive Oil
    • White Wine
    • Fettuccine Noodles
    • Dried Oregano
    • Red Pepper Flakes
    • Bay Leaf

    Subs and Swaps

    • Bacon: Next time I make this, I’d like to try this fettuccine with chopped pancetta. However, pancetta is cured and not smoked like bacon. So, I’ll be losing that smoky flavor.
    • Tomato Sauce: This recipe calls for using either tomato sauce or crushed tomatoes.
    • White Wine: If you don’t have any white wine, just substitute the ¾ cup with an additional ¾ cup of chicken broth. So you’ll be using 1 ¼ cup total chicken broth.

    If using crushed tomatoes, consider San Marzano Tomatoes. They are prized by chefs for their thick flesh and sweet flavor, making them a popular choice for Italian sauces. Pomi brand tomatoes are also an excellent choice, and what we used exclusively in Culinary School.

    Step by Step Instructions
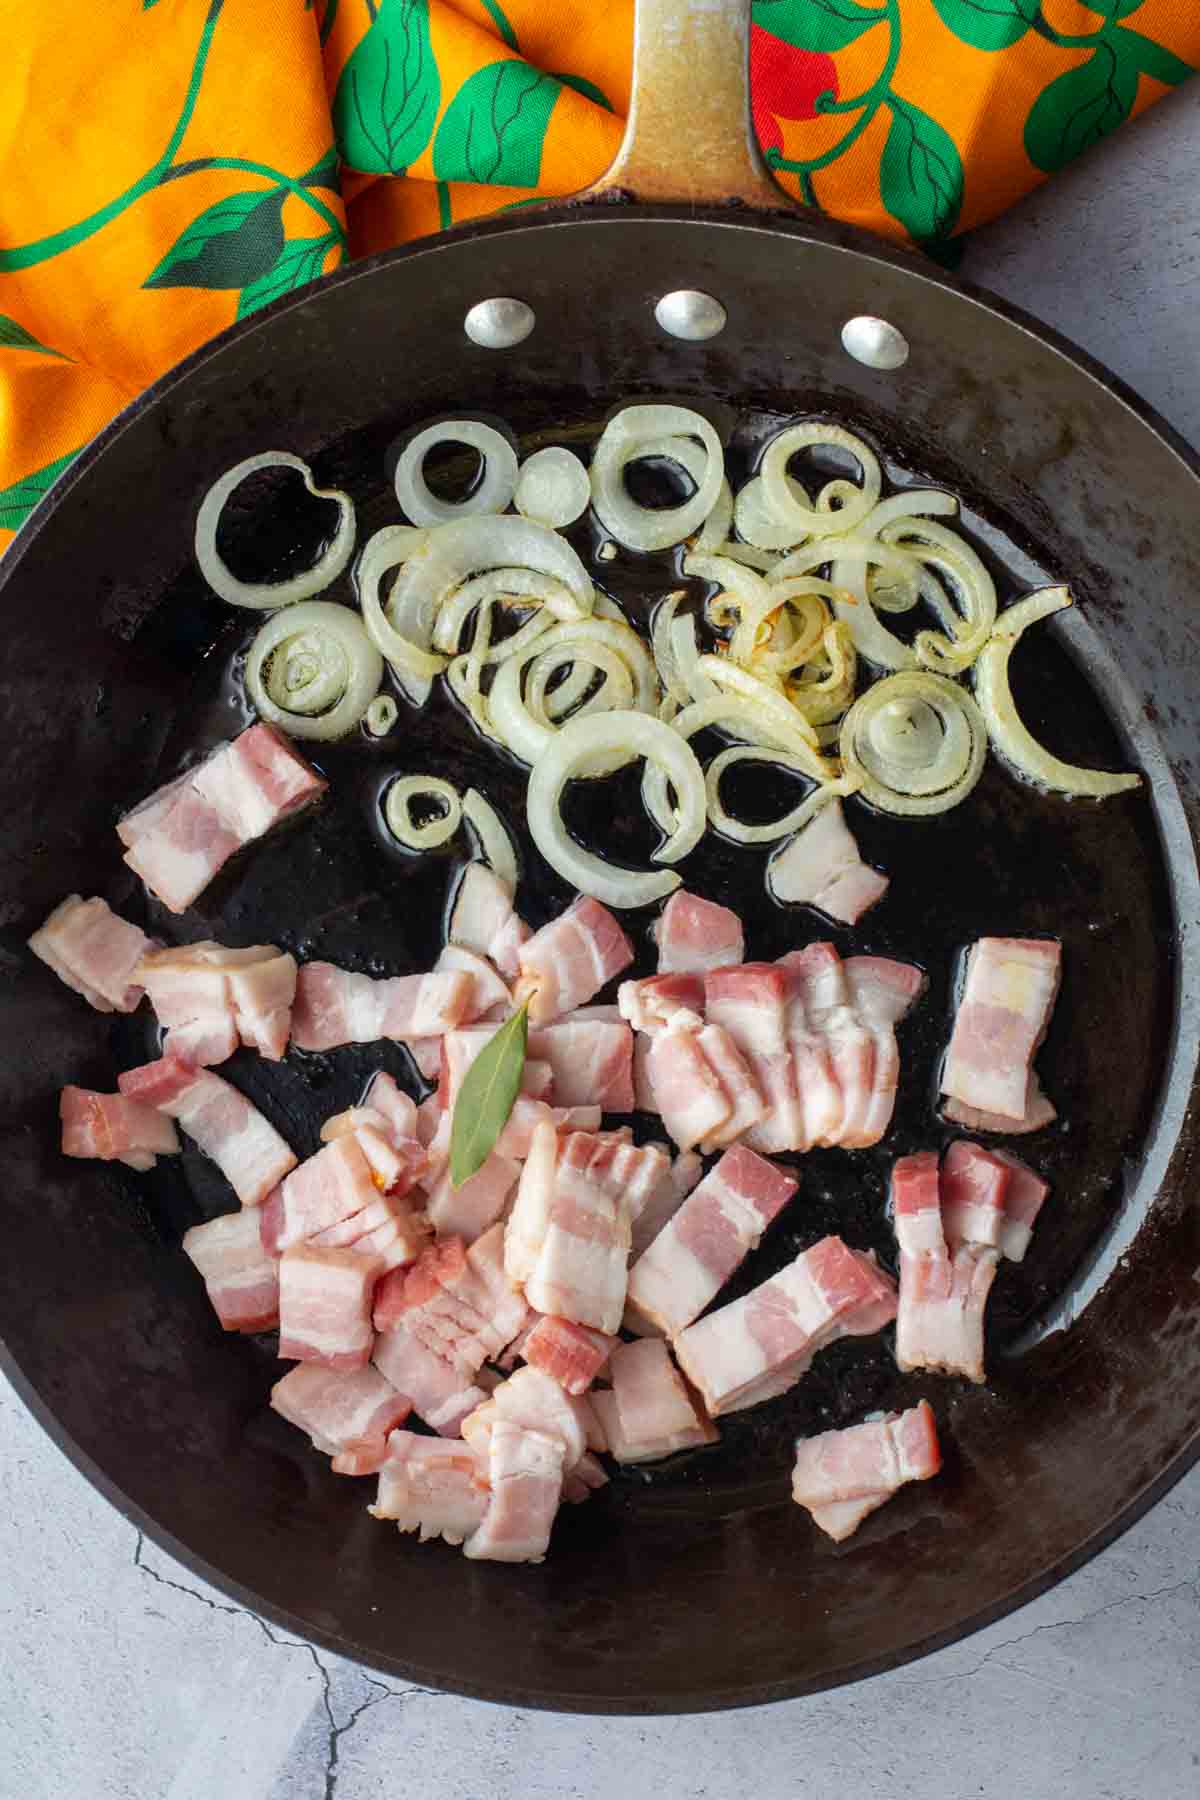
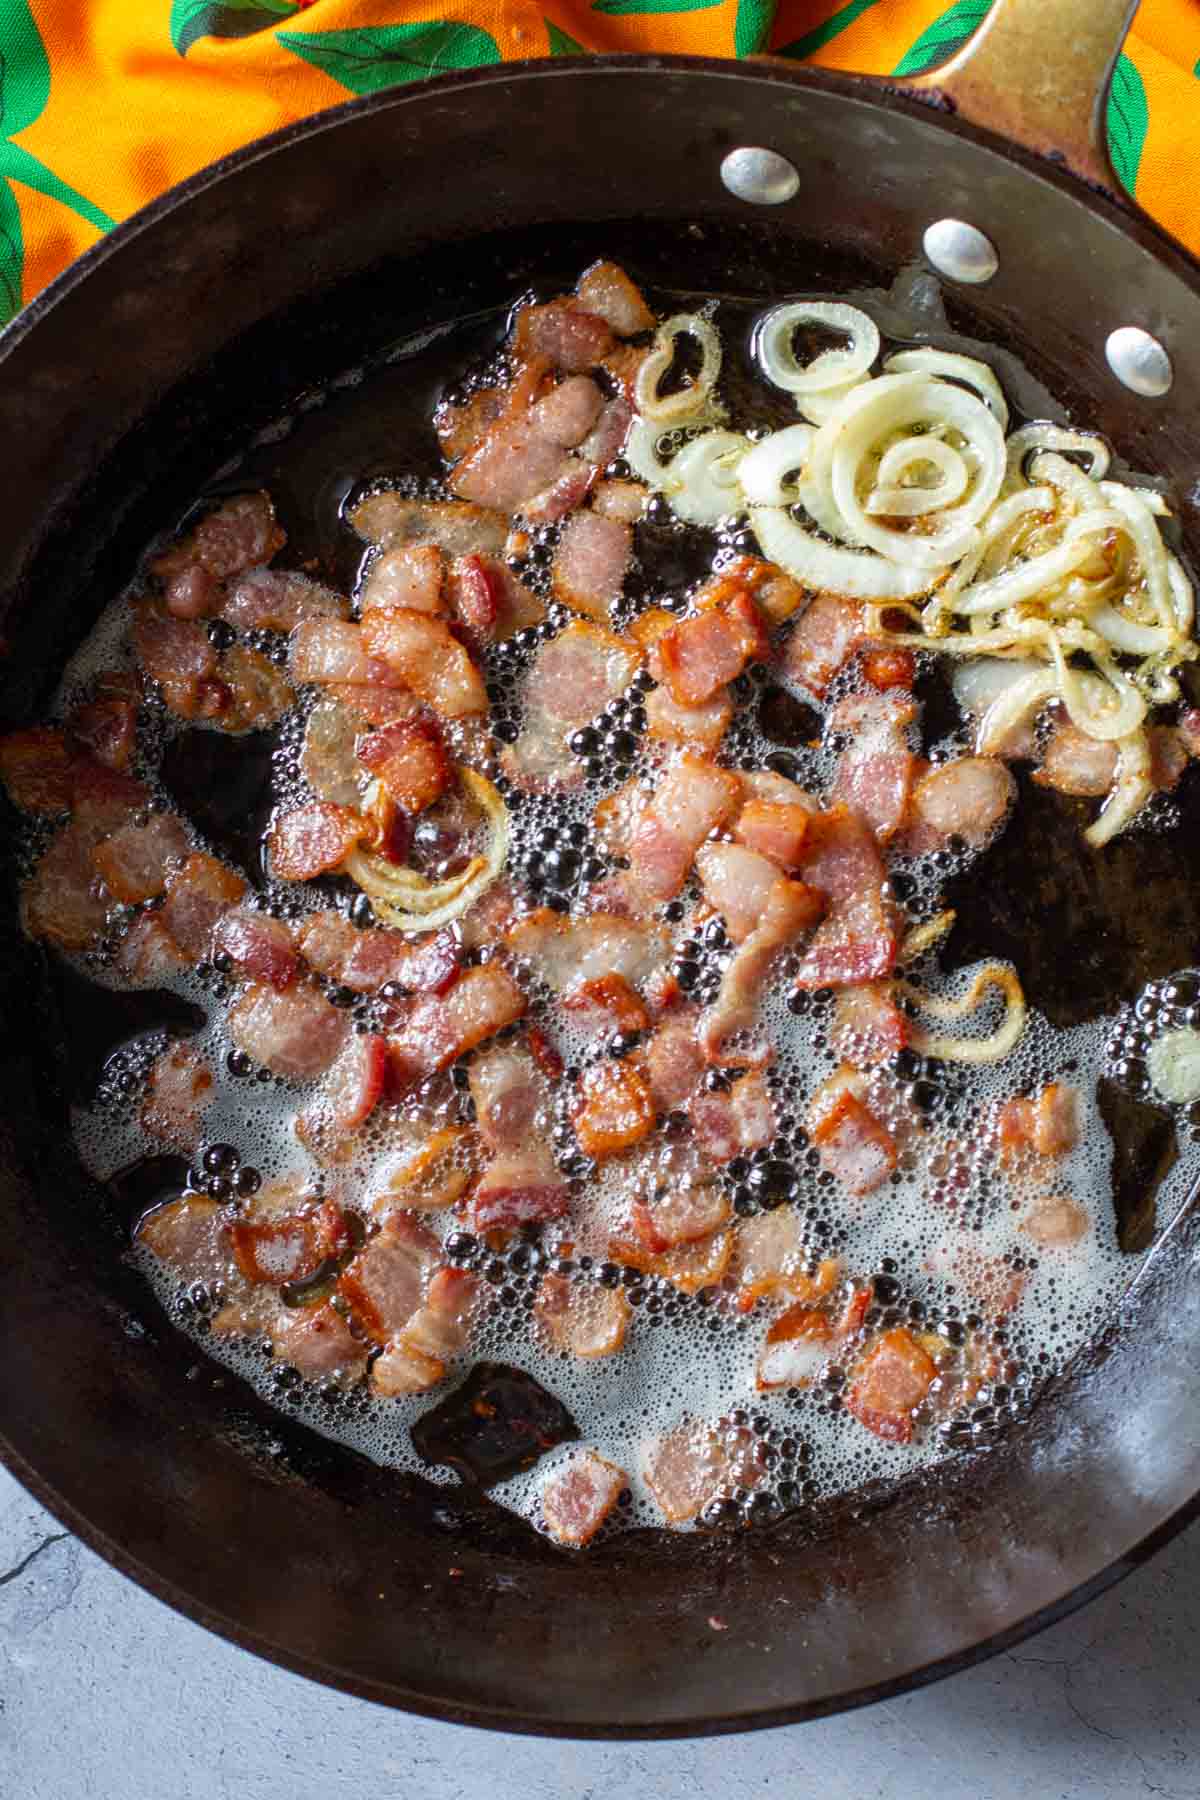
    Frying onions and bacon to make Pasta mio Amore.
    Fried bacon and onions to make Lincoln Highway Pasta.
    • Step 1: In a large fry pan, saute onions in olive oil until tender.
    • Step 2: Move onions aside, or remove them from the pan and cook bacon pieces until fat has rendered but not crispy.
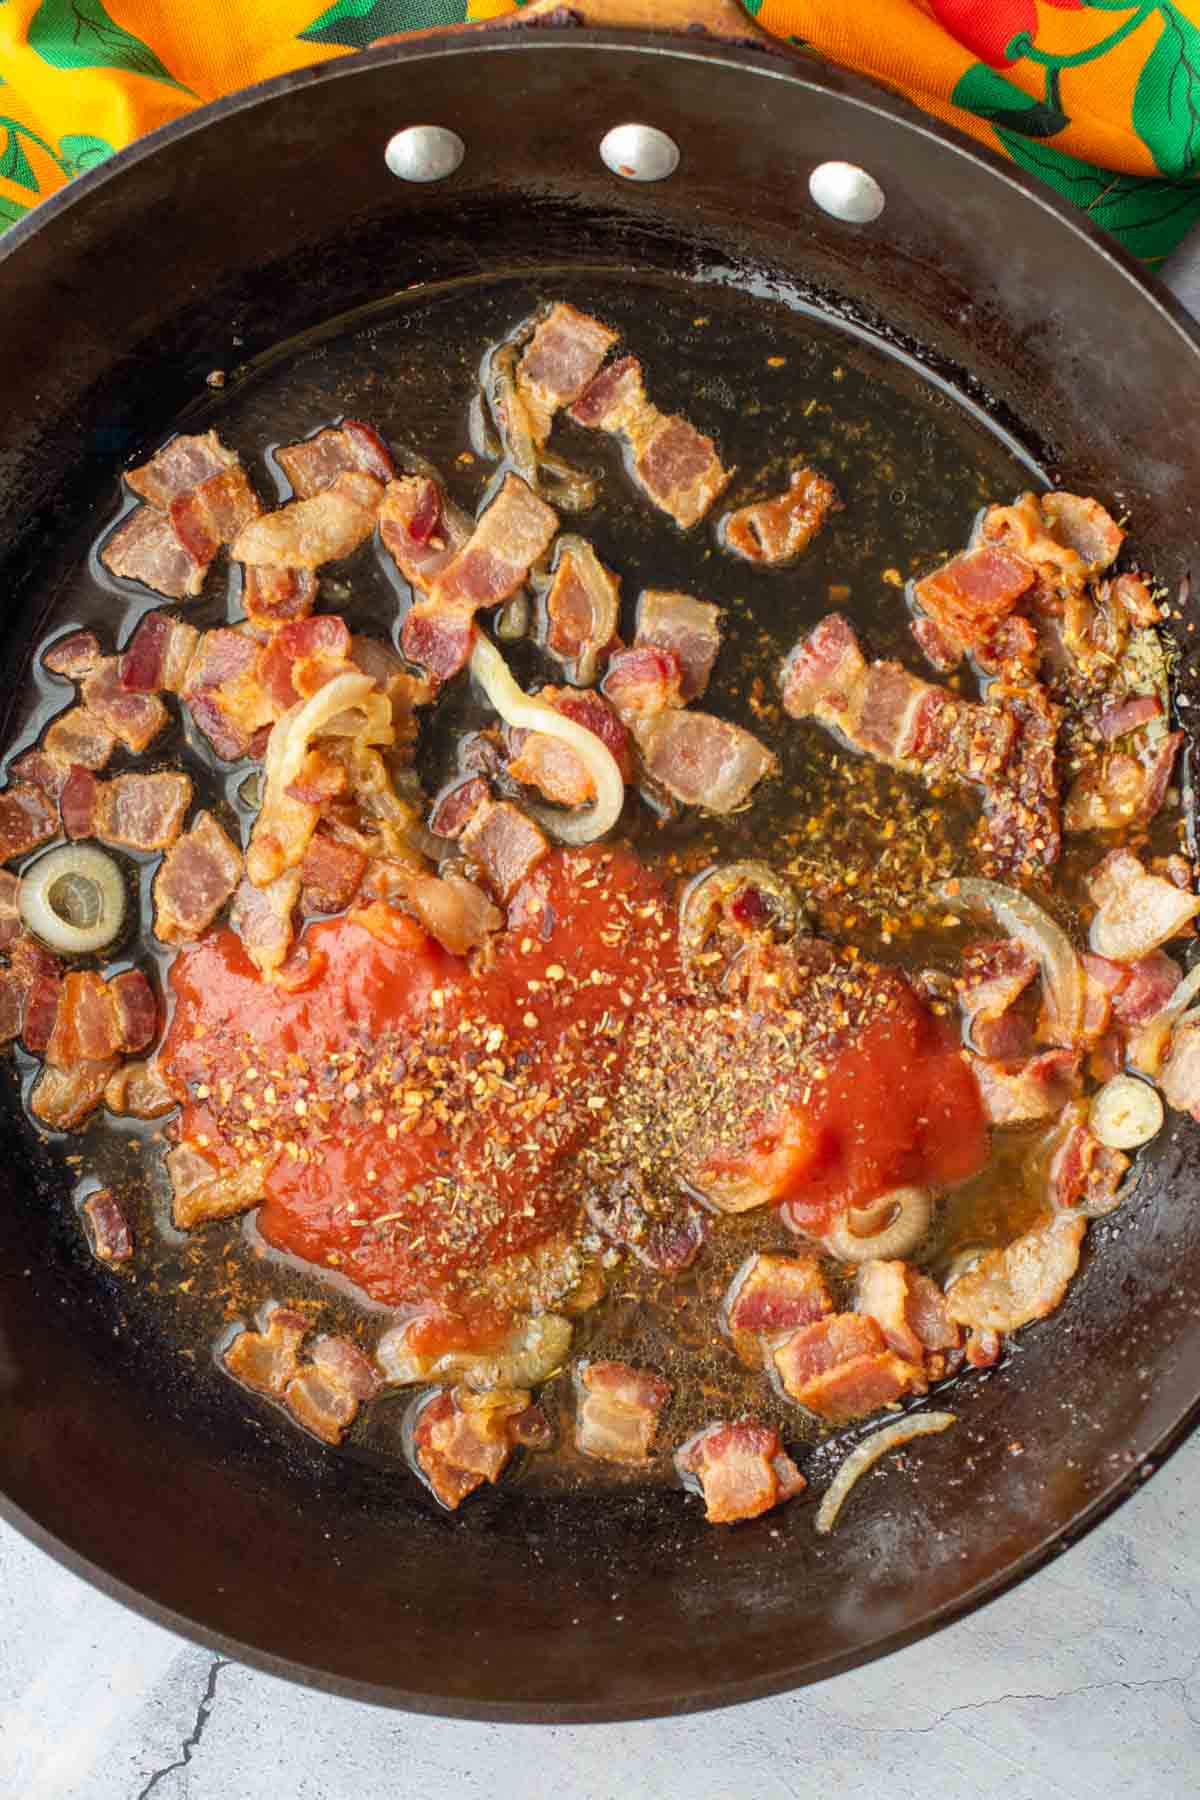
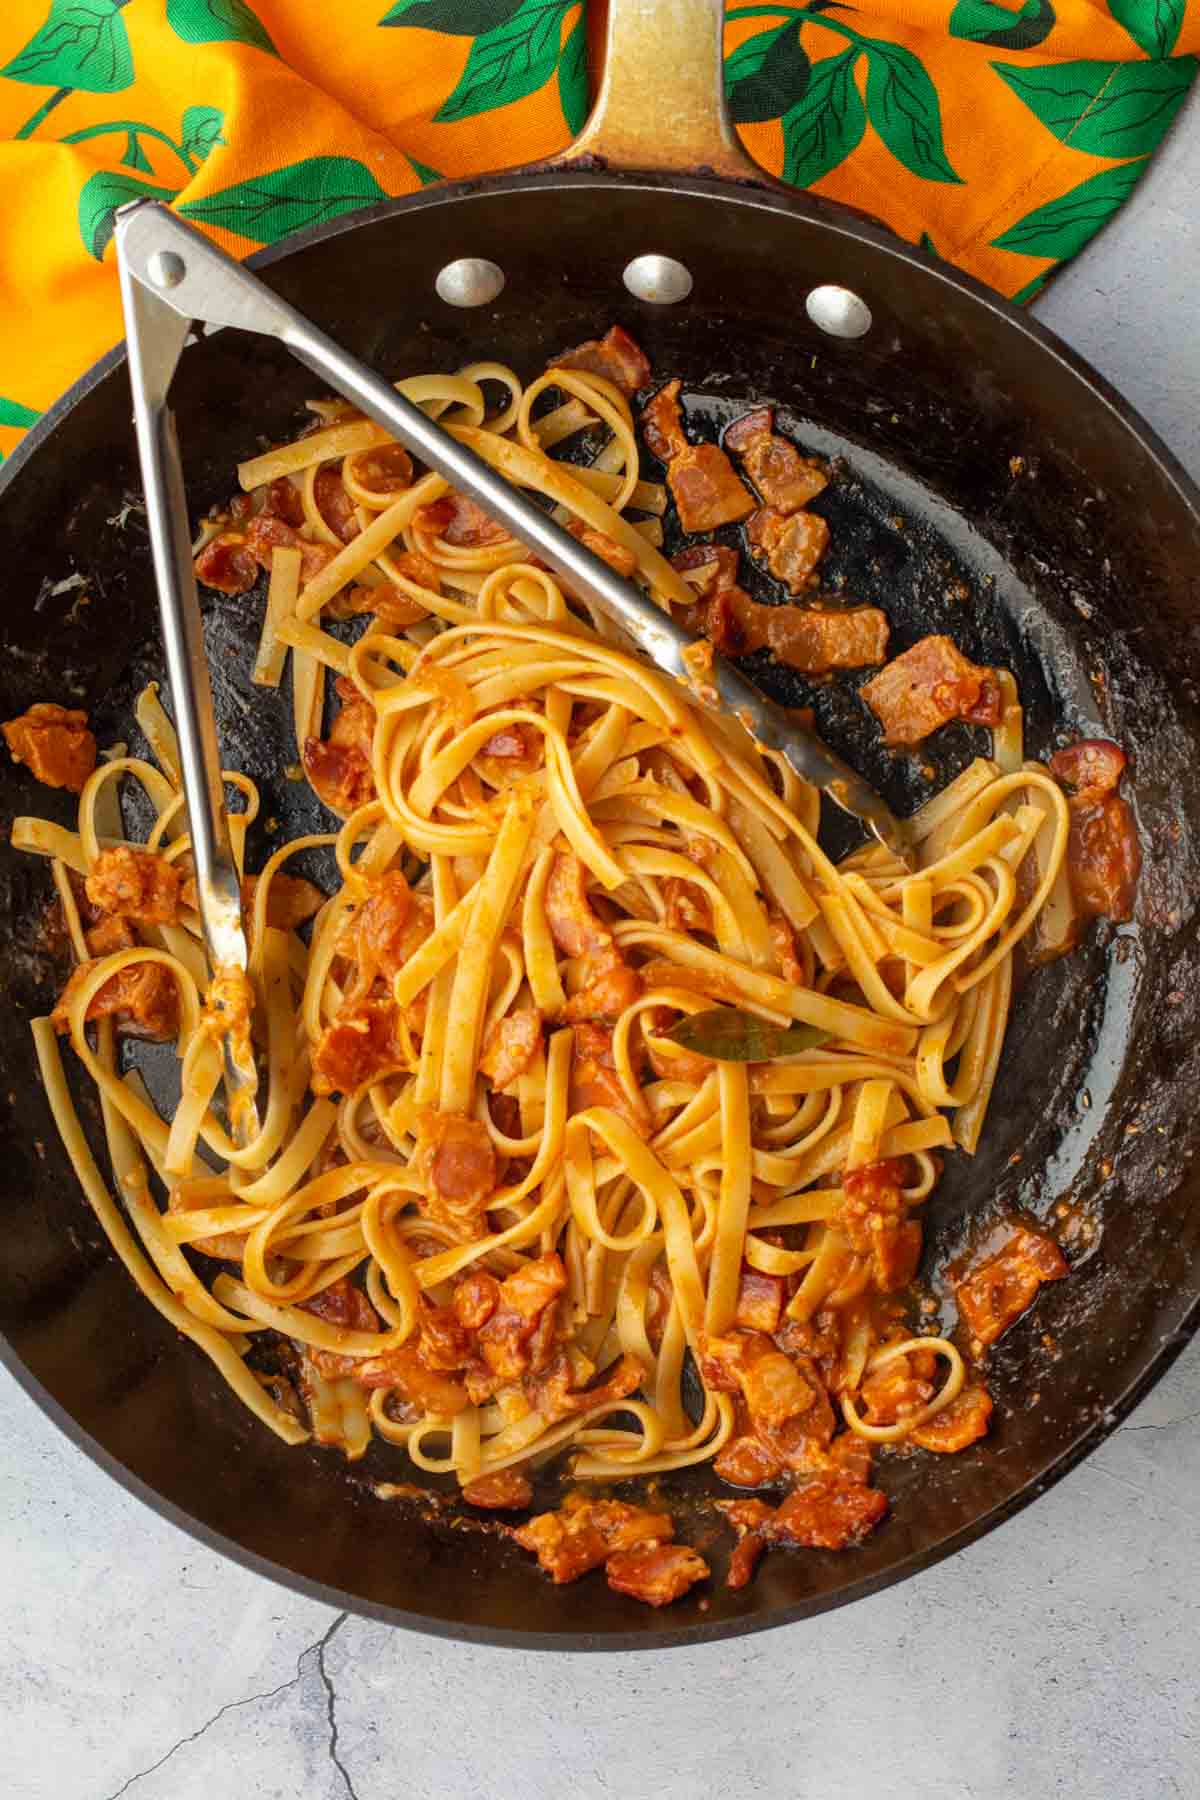
    Adding spices and tomato sauce to onions and bacon for Lincoln Highway fettuccini recipe.
    Mixing fettuccini with tomato sauce to make fettuccini mio amore.
    • Step 3: Drain most of the bacon grease from the pan. Add spices and tomato sauce.
    • Step 4: Add the pasta and Parmesan to the pan and using tongs, toss to coat. Transfer to plates and top with more grated Parmesan Cheese.

    Tips For Success

    • Bacon Bits: Do not try to make this dish with purchased bacon bits. You need the bacon fat for that extra flavor that makes this pasta recipe so delicious. And purchase thick cut bacon. You’ll love that thicker texture when you dig into this meal.
    • Fresh Parmesan: Buy the best wedge of Parmesan style cheese that you can afford and grate the cheese yourself. Tubs of pre-grated parmesan will fall short in flavor and texture.
    • Red Pepper Flakes: This recipe calls for using 1 whole teaspoon red pepper flakes, which makes for a spicy pasta dish. Use ½ teaspoon for a milder experience.

    Pro Tip: Why is pasta water good for pasta sauce? Don’t throw all of that pasta cooking liquid down the drain, It's liquid gold. It's a must to add to any sauce for any pasta dish. It's high in starch and this salty starchy water helps the sauce cling to the pasta while helping to thicken the sauce. It turns any pasta dish into a luxurious pasta dish.

    Fettuccine Mio Amore Recipe

    If you’ve read Amor Towles’ “The Lincoln Highway”, you most certainly were taken in by the description and pride taken by Dutchess when he prepared this recipe for his friends. And as a lover of almost any Italian dish, I knew I had to make this Northern Italian recipe.

    What does mio amore mean in Italian? My love.

    Who can resist a pasta with bacon recipe and combined with a simple red sauce. Fettuccine mio Amore is a recipe your family will fall in love with.
    Recipe for Lincoln Highway Fettuccini pasta recipe.

    Related Recipes

    • Ricotta Pasta Sauce with Italian Sausage, cherry tomatoes over pappardelle pasta
      Ricotta Pasta Sauce with Italian Sausage
    • Chicken bolognese served on a pasta plate topped with parmesan cheese.
      Quicker Chicken Spaghetti Bolognese
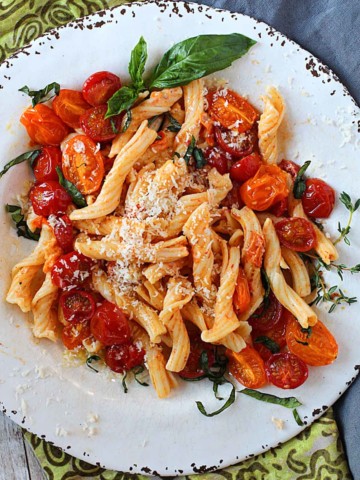
    • Slow Roasted Cherry Tomatoes Pasta Sauce With Cream
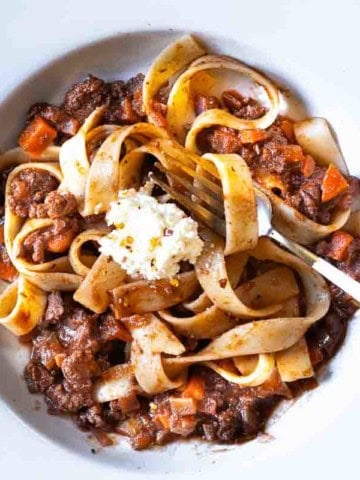
    • Lamb ragu with pappardelle pasta.
      Lamb Ragu Sauce with Pappardelle Pasta

    Looking for more pasta recipes? Don’t miss my Pasta Category. You’ll find lots of main course pasta recipe along with pasta salad recipes, like this popular Smoked Mozzarella Penne Pasta Salad.

    If you liked this recipe, please leave a star ⭐⭐⭐⭐⭐ rating in the recipe card below and leave a comment. I always appreciate your feedback and hearing how everything went.

    And, don’t forget to subscribe to my newsletter for more delicious recipes and cooking tips. Make it a delicious day … every day.

    Fettuccini mio amore pasta in a white pasta bowl garnished with chives.
    Print Recipe
    5 from 9 votes

    Fettuccine Mio Amore (Lincoln Highway Pasta)

    Fettucini Mio Amore is an Italian pasta dish that highlights fettuccine noodles with bacon and onions to make a unique and exciting tomato pasta sauce.
    Prep Time15 minutes mins
    Cook Time30 minutes mins
    Course: Pasta Recipes
    Cuisine: Italian
    Servings: 4
    Calories: 635kcal
    Author: Lea Ann Brown

    Ingredients

    • ¼ cup olive oil
    • 1 large onion peeled, halved and thin sliced
    • 1 pound Smoked bacon cut crosswise into ¼ inch strips
    • 1 bay leaf
    • ¾ cup dry white wine
    • 1 teaspoon oregano
    • 1 teaspoon red pepper flakes
    • ¾ cup crushed tomatoes or tomato sauce
    • ½ cup chicken broth
    • ½ cup Parmesan Cheese grates
    • 8 ounces Fettucini noodles dry or fresh

    Instructions

    • In a reasonably deep saucepan, cook the onions in the olive oil until soft and translucent, then set the onions aside. If your pan is large enough, move them to the side, or completely remove them from the pan.
    • In the same pan, fry the bacon with the bay leaf until the bacon has rendered it's fat, is brown but not crisp. 
    • Pour off most, but not all of the bacon fat. Add back the onions, the white wine, and let simmer for a few minutes.
    • In the meantime, cook the fettuccine noodles according to package directions. Once cooked, drain reserving about ½ cup of the starchy pasta water.
    • Add the tomato sauce, chicken broth, oregano and pepper flakes, stir and let simmer another ten minutes. (Add a little more chicken broth, or better yet, some of the starchy pasta water, as necessary, if the sauce is drying out.)
    • Toss about ¼ of the sauce with the fettuccine and parmesan, divide the pasta on the plates, then spoon the rest of the sauce on top of the pasta. Sprinkle with more grated parmesan and serve.

    Notes

    Tips for Success
    • Bacon Bits: Do not try to make this dish with purchased bacon bits. You need the bacon fat for that extra flavor that makes this pasta recipe so delicious. And purchase thick cut bacon. You’ll love that thicker texture when you dig into this meal.
    • Fresh Parmesan: Buy the best wedge of Parmesan style cheese that you can afford and grate the cheese yourself. Tubs of pre-grated parmesan will fall short in flavor and texture.
    • Red Pepper Flakes: This recipe calls for using 1 whole teaspoon red pepper flakes, which makes for a spicy pasta dish. Use ½ teaspoon for a milder experience.

    Nutrition

    Calories: 635kcal | Carbohydrates: 51g | Protein: 37g | Fat: 27g | Saturated Fat: 7g | Polyunsaturated Fat: 3g | Monounsaturated Fat: 15g | Trans Fat: 0.04g | Cholesterol: 113mg | Sodium: 1419mg | Potassium: 781mg | Fiber: 4g | Sugar: 5g | Vitamin A: 390IU | Vitamin C: 7mg | Calcium: 216mg | Iron: 3mg


    Fettuccine Mio Amore … It’s Whats For Dinner

    Homemade Peach Ice Cream Custard Style

    July 18, 2022 By Lea Ann Brown 5 Comments

    Homemade peach ice cream in a waffle cone.

    Fresh homemade peach ice cream is truly one of Summer’s biggest treats. With simple ingredients, peaches and cream is simply an irresistible combination.

    Once our Colorado peaches arrive, it’s time to put them to good use. My first project is always this homemade Peach Ice Cream recipe. More favorites are Vanilla Roasted Peaches, and Freezer Peach Jam.

    And don’t forget to use them in savory dishes like Pork Medallions in Bourbon Peach Sauce or this Peach Pizza with Bacon and Jalapeno.

    Homemade peach ice cream in a waffle cone.

    There’s not a more fun kitchen project in the Summer than making rich and creamy homemade ice cream. And when fresh peaches are in season, Homemade Peach Ice Cream is truly a special treat.

    With simple ingredients, peaches and cream are a flavor combo made in heaven.

    As with any homemade ice cream recipe that I make, you’re actually making a frozen custard for your ice cream base.

    Dairy, sugar and eggs are combined stove top to make a thick luscious custard, which will sit overnight in the refrigerator before it’s ready for the ice cream maker.

    About Palisade Peaches

    Palisade Peaches are famously grown on our Western slope, in and around the town of Palisade. Colorado peaches are known for being extra juicy and extra sweet, thanks to the long sunny hot days and cool Colorado Summer nights. That equals perfect conditions for fruity sugars to develop. To learn more about what makes a Colorado Peach so special, check out this article about Colorado Western Slope Peaches.

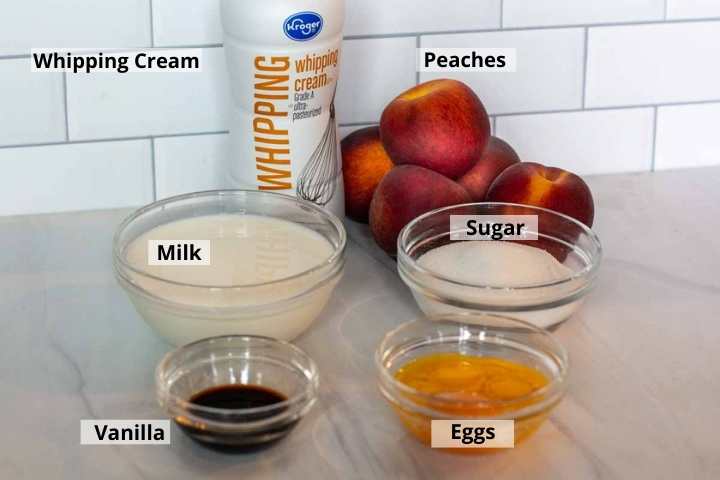
    Ingredients You’ll Need

    Ingredients to make homemade peach ice cream.
    • Whipping Cream or heavy cream.
    • Peaches
    • Milk, preferably whole milk as opposed to reduced fat.
    • Sugar
    • Vanilla Extract
    • Egg yolks

    Step by Step Instructions – It’s Easy

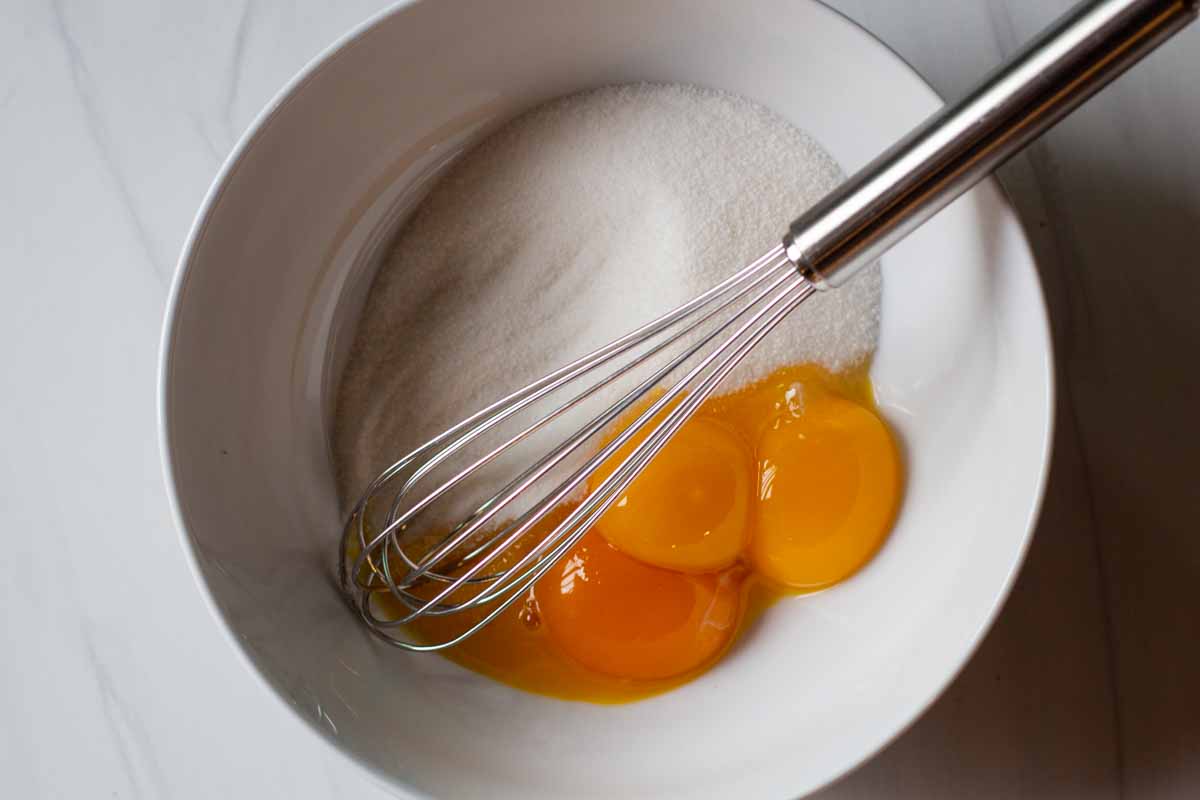
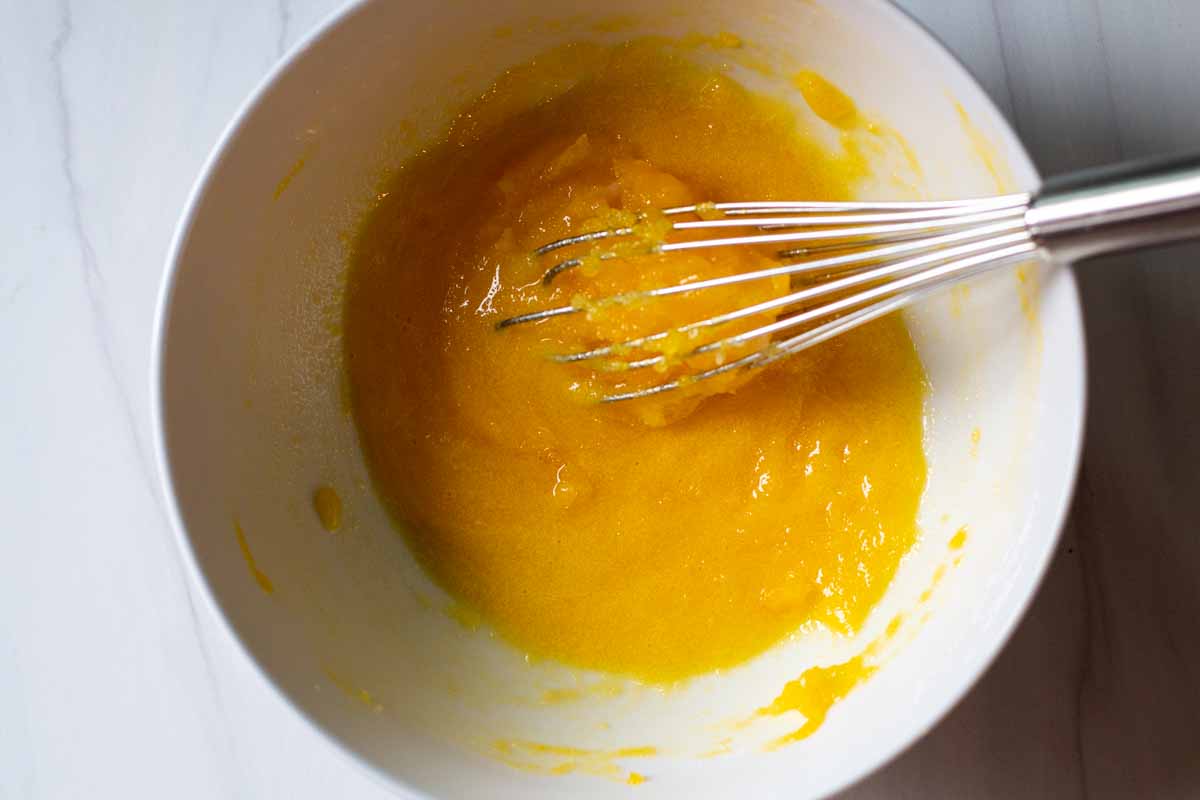
    Two egg yolks and sugar in a bowl.
    Whisking sugar and egg yolks together to make homemade peach ice cream.
    • Step 1: Start making the ice cream custard by combining three egg yolks and sugar.
    • Step 2: Using a whisk, blend until smooth.
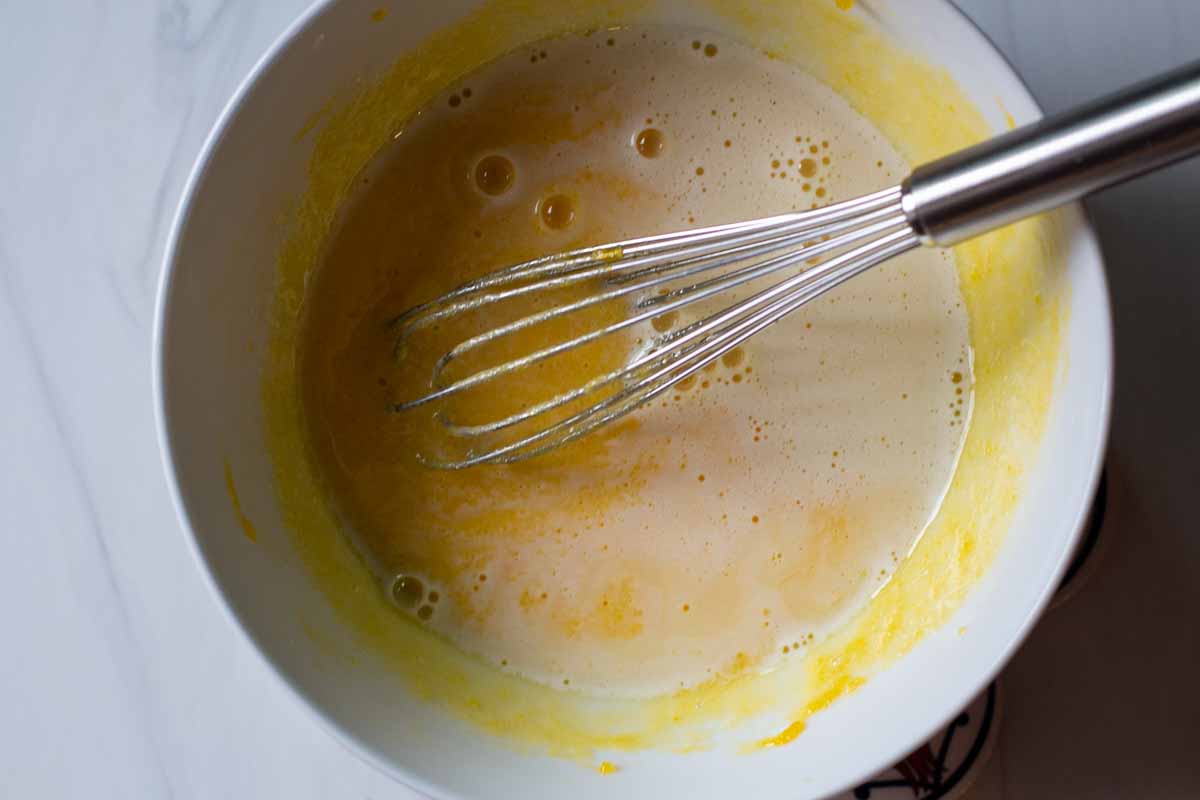
    Making custard for homemade peach ice ccream.
    Tempering eggs to make homemade peach ice cream.
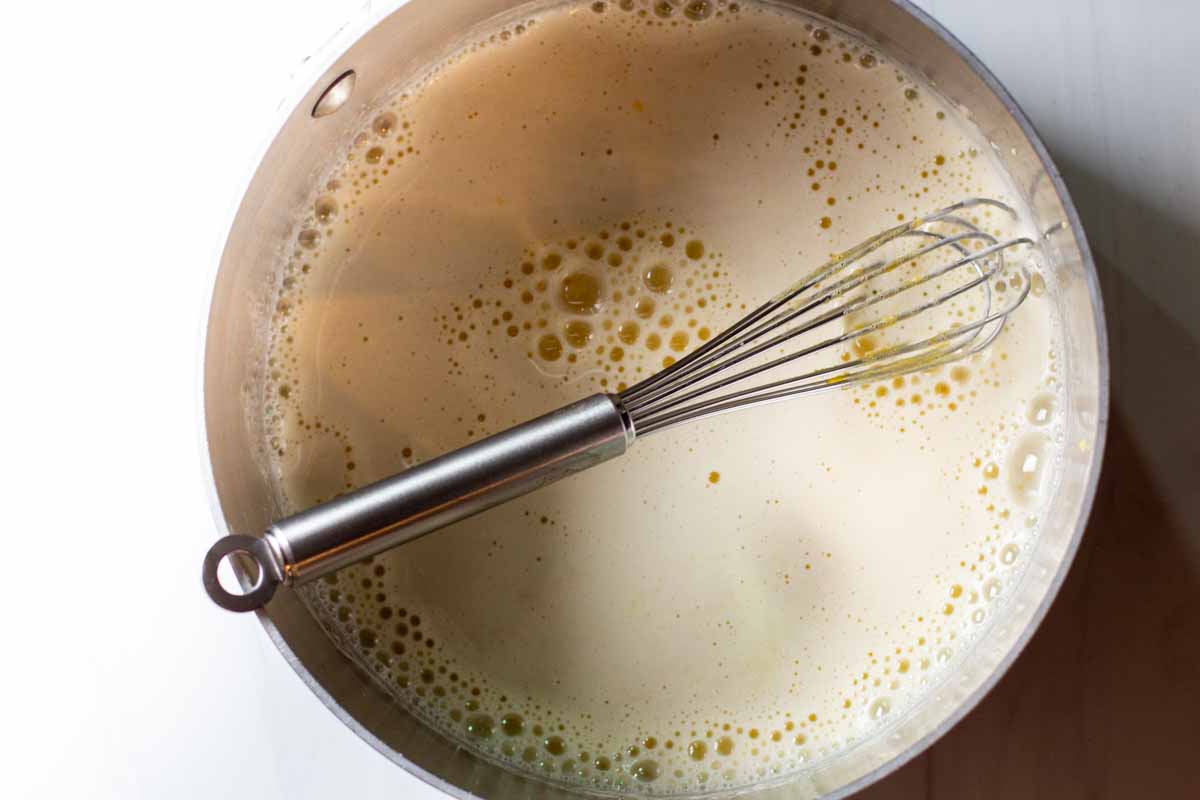
    • Step 3: Warm the milk stovetop in a small pan until nice and steamy but not boiling or even simmering.
    • Step 4: Slowly add some of the warm milk to sugar and egg mixture continuing to whisk. This will temper the eggs, meaning the hot mixture will not cook them.
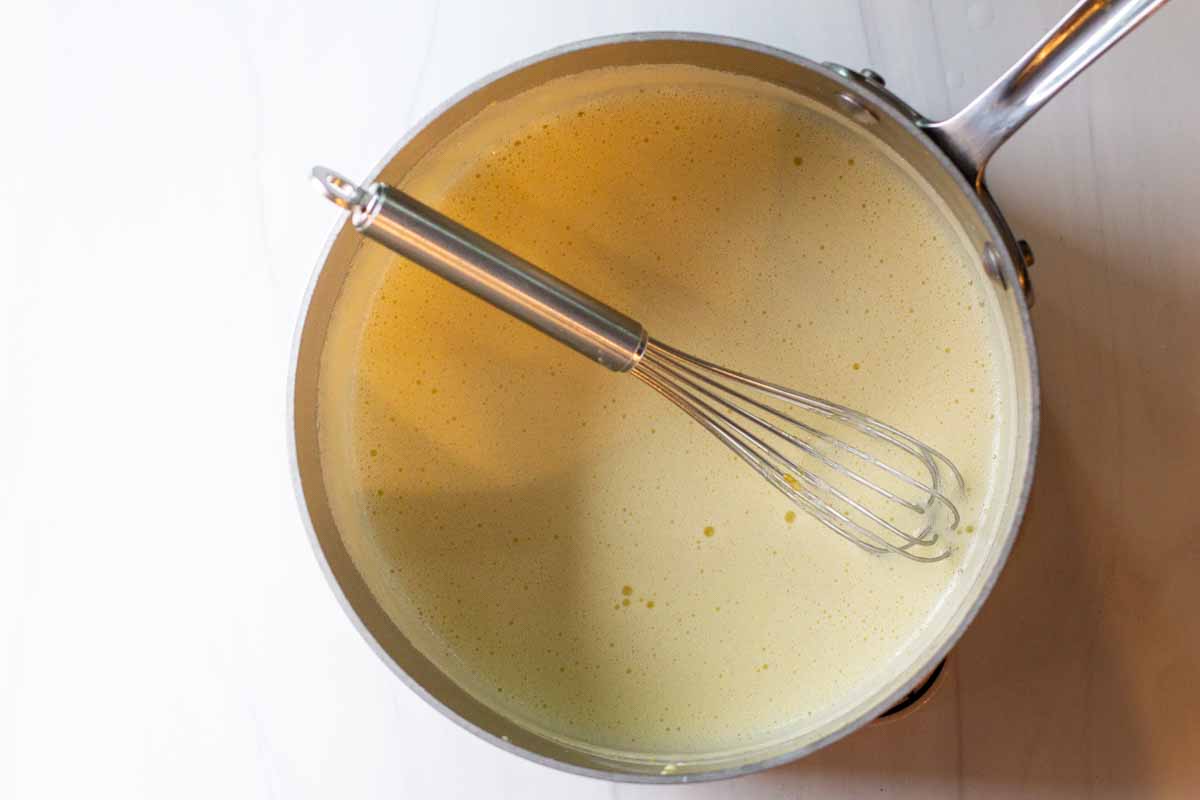
    Making a custard in a saucepan to make homemade ice cream.
    Adding vanilla and cream to milk egg mixture to make peach ice cream.
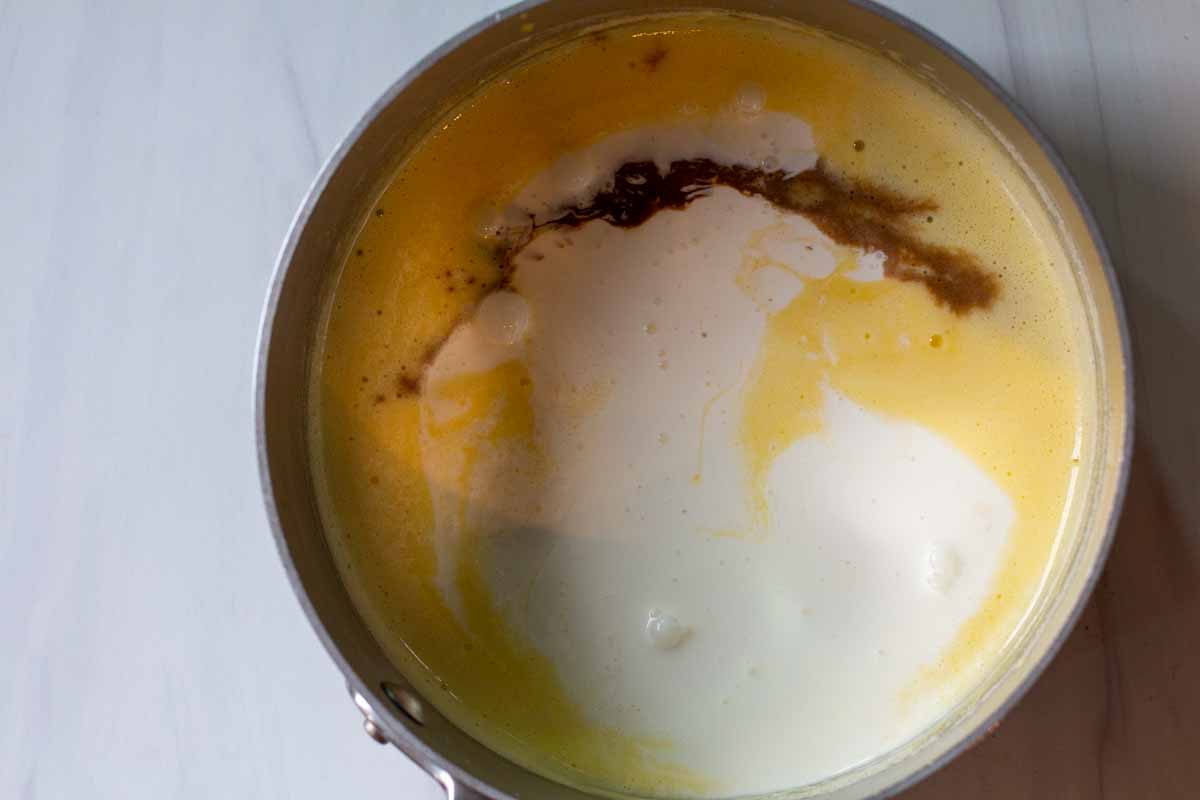
    • Step 5: Pour mixture egg and milk mixture back in the pan and heat slowly until thickened, stirring constantly. It should look like very liquid pudding. Do not boil!
    • Step 6: Let cool to room temperature add cream, and vanilla. Stir to combine and place in refrigerator overnight.
    Simmering peaches for easy peeling.
    Boiled peaches in an ice bath for easy peeling.
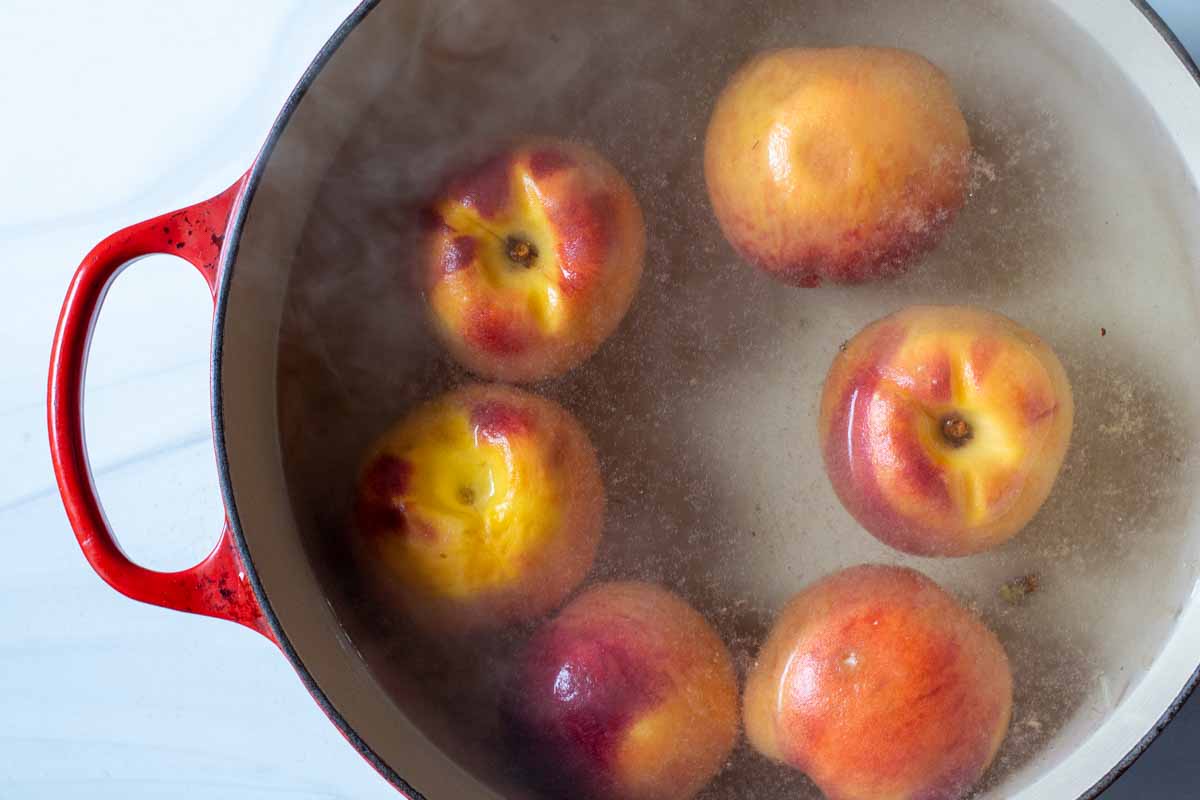
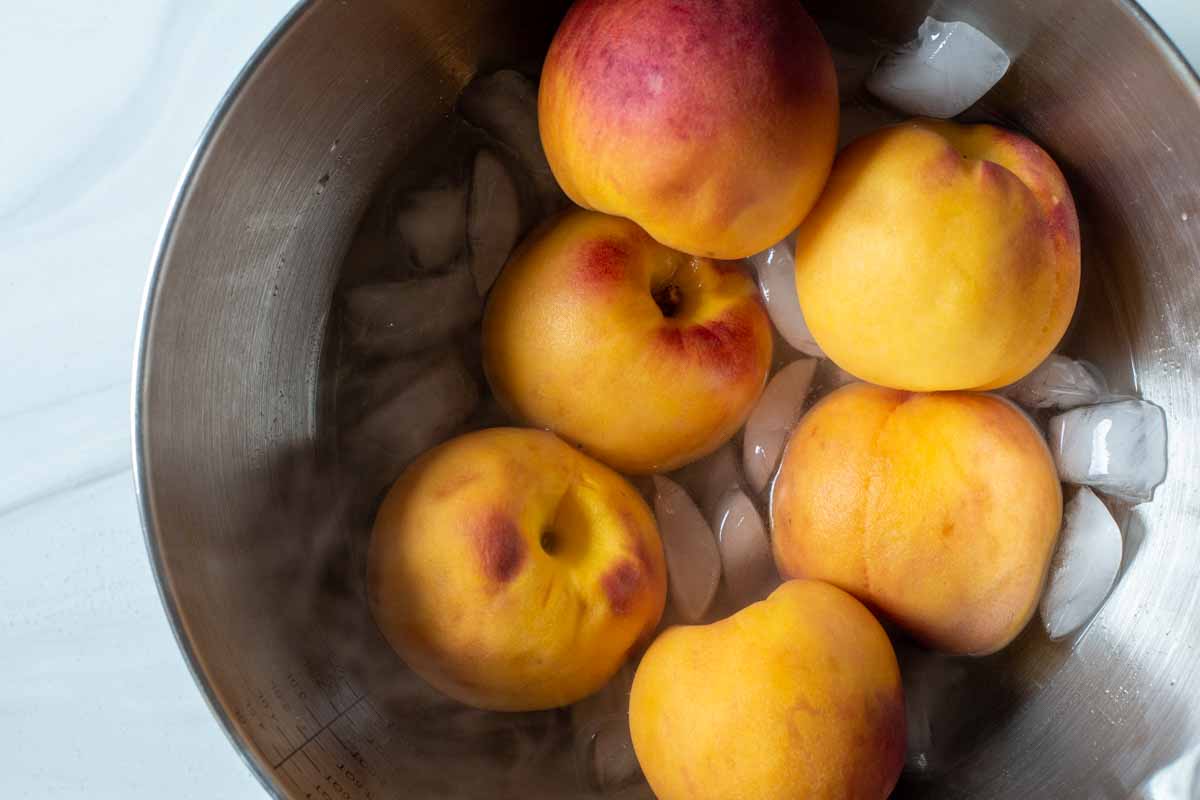
    • Step 7: Prepare the peaches. What’s The Easiest Way To Peel Peaches? Drop peaches into a sauce pan of simmering water. Let them simmer for a minute or two and then place them into an ice bath. The skins will literally fall right off. Make sure you’re using ripe peaches for this to work.
    Chopped peaches on a white cutting board to make homemade peach ice cream.
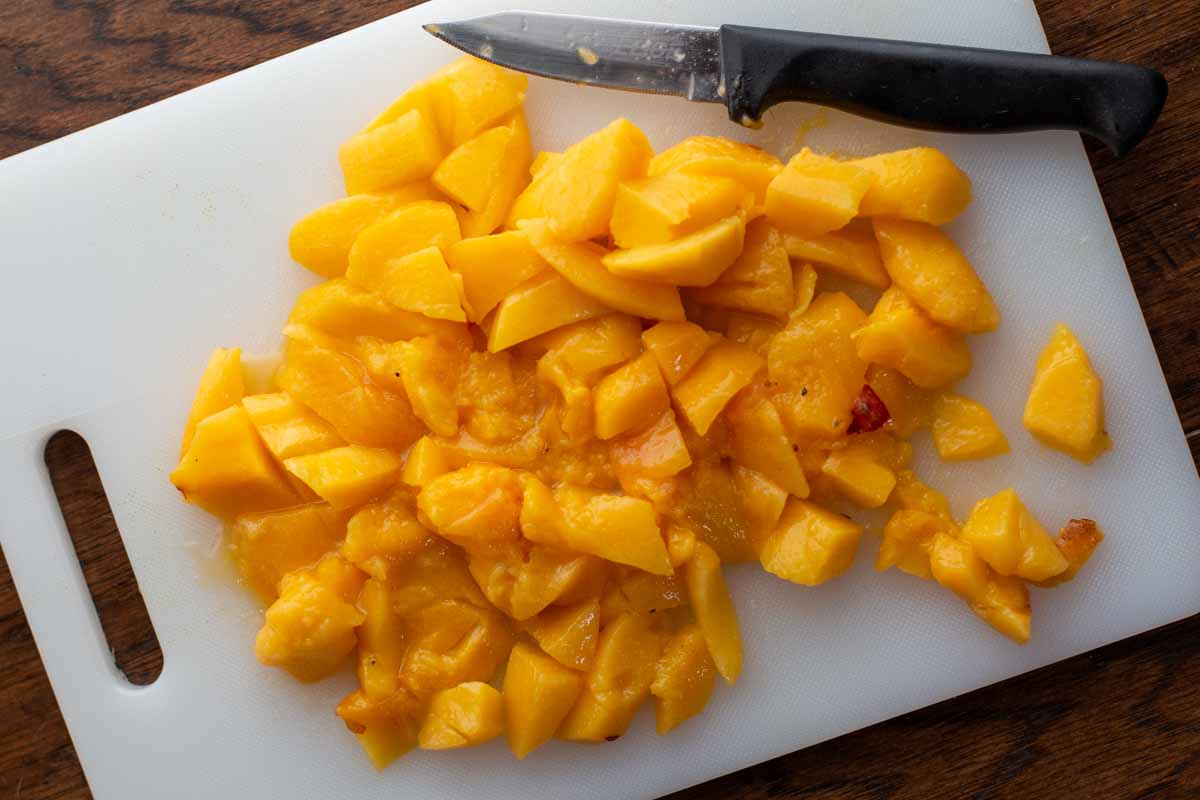
    • Step 8: Rough chop the peaches and set aside. Using fresh peaches that are ripe are a key to the pure fresh peach flavor in this recipe.
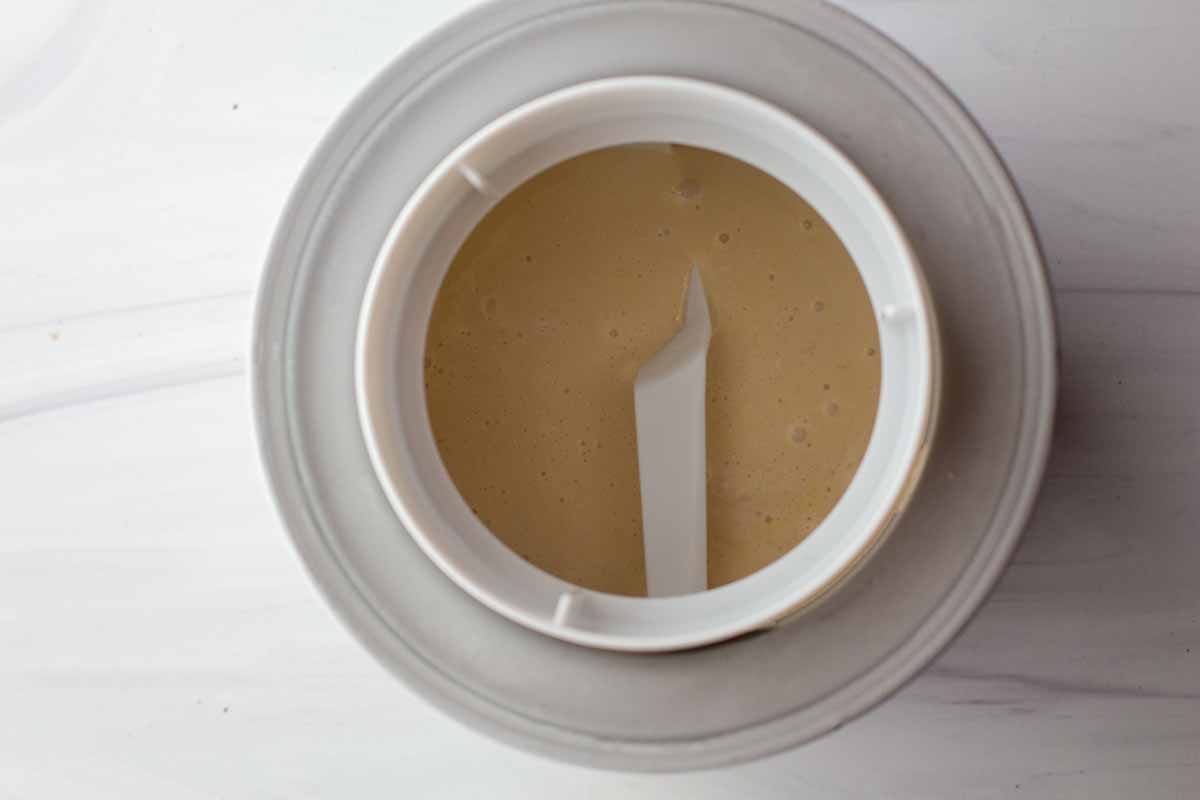
    Adding custard to an ice cream maker cylinder to make homemade ice cream.
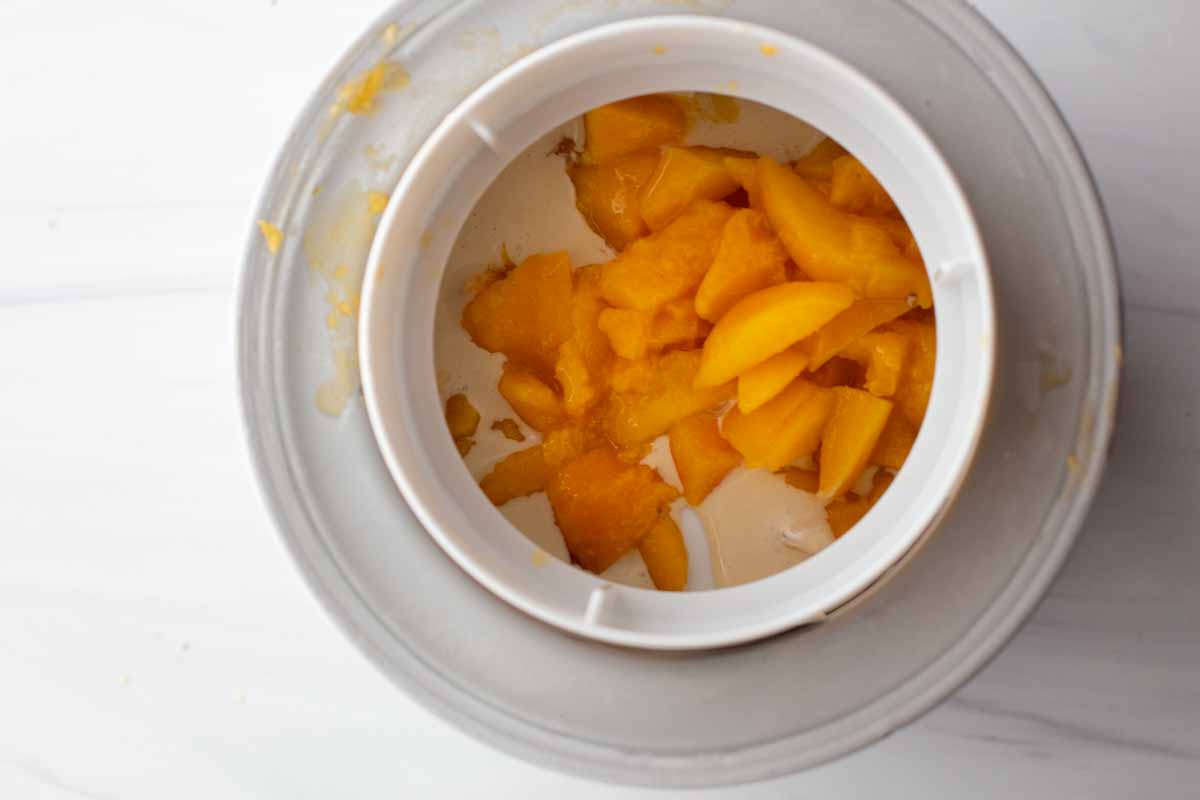
    Adding peaches to ice cream custard in an ice cream maker.
    • Step 9: Pour the ice cream mixture into the cylinder of your ice cream machine.
    • Step 10: Add cut up peaches to the ice cream mixture in the cylinder and follow directions on the ice cream maker to churn the ice cream.

    Tips For Success

    • Before making this ice cream recipe, read the instructions for your ice cream maker. Most makers require that you freeze the cylinder for up to 2 days in advance of making ice cream.
    • On Tempering Eggs: It’s important to follow the directions for tempering eggs. Adding to much hot milk to eggs too quickly will cause the eggs to curdle or even scramble. Which will compromise the creamy texture of the ice cream.
    • If eating this ice cream right after churning in the ice cream maker, the texture will be more like soft serve ice cream. Place in an air-tight container and place in the freezer for a more solid texture ice cream experience.
    • Important: Start the motor of the ice cream maker before adding ice cream base. Place the frozen cylinder into the ice cream maker and start the motor. THEN add the ice cream base and peaches. If you add the ice cream before starting the motor, the ice cream will freeze to the sides of the maker. Believe me, it’s somewhat of a mess.
    How Long Is Homemade Ice Cream Good For

    This homemade peach ice cream will keep in the freezer for 2 weeks. It doesn’t last as long as store purchased ice cream as this contains pure fresh ingredients with no preservatives or additives to keep it from crystalizing.

    Can I Make Custard Ice Cream with Half and Half?

    You can, however the lower fat content will keep it from being as creamy and luscious.

    Why Do I Have To Refrigerate the Ice Cream Base Overnight?

    Its a step in every egg-based ice cream recipe. This step is used for custard based ice cream recipes, not Philly-style or other egg-free ice cream bases. The obvious benefit is that the ice cream base will be colder once it its the ice cream maker cylinder. Also aged bases will gain volume and thickness with refrigerating overnight. Thicker bases churn faster and easier. And simply taste better.

    Can I Use Frozen Peaches?

    Yes. I routinely keep frozen fresh peaches (chopped) in the freezer. Separate the pieces as much as you can, or if using frozen peach halves or slices, chop them before adding to the ice ream. Simply add them to the ice cream while they’re still frozen.

    Recipe For Homemade Peach Ice Cream

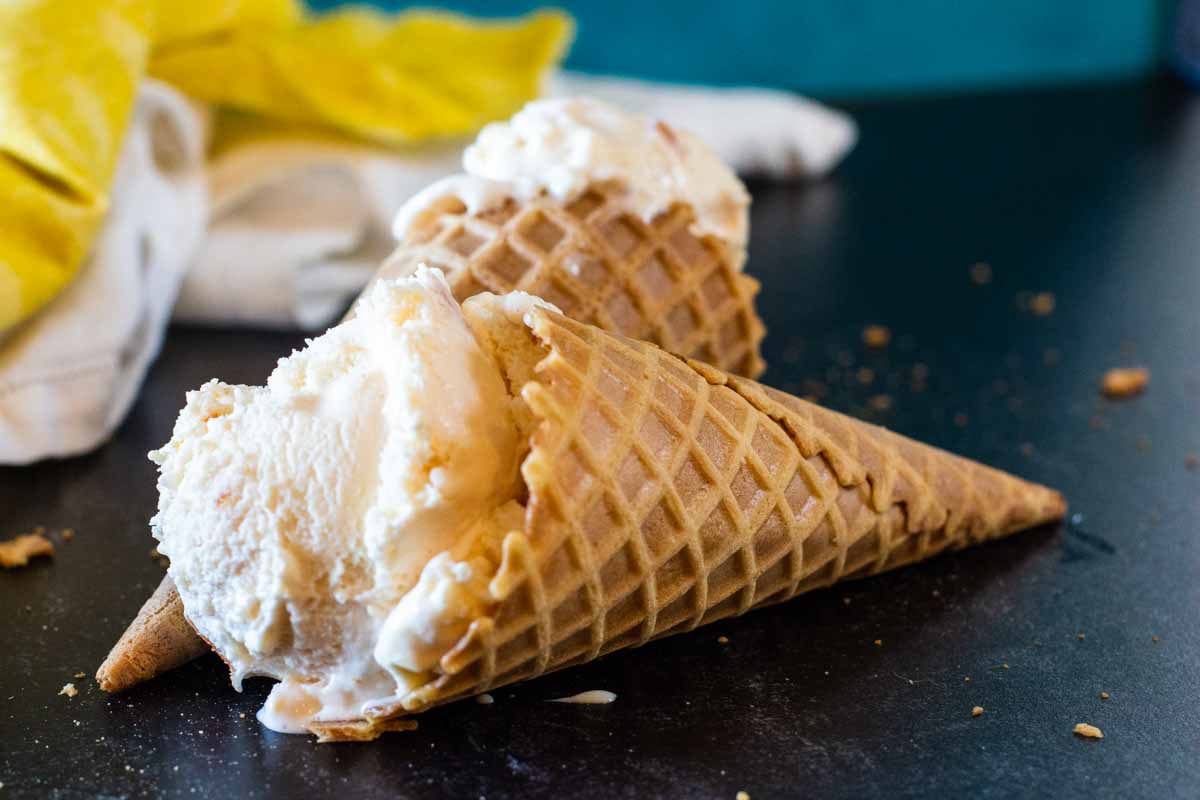
    Two homemade peach ice cream cones laying on their side.

    When it comes to dessert recipes, ice cream is hands down my favorite. And we love this homemade peach ice cream recipe. This may be our favorite ice cream of the season.

    Nothing says Summer like homemade ice cream. Give this recipe a try, your kids will love it.

    Here Are Some More Of Our Favorite Recipes Using Colorado peaches

    • Homemade peach bread.
      Cinnamon Pecan Peach Bread
    • Peach Pizza.
      Peach Pizza With Bacon and Jalapeno
    • Vanilla roasted peaches with mascarpone, raspberries on a Versace plate.
      Vanilla Roasted Peaches With Mascarpone Cheese
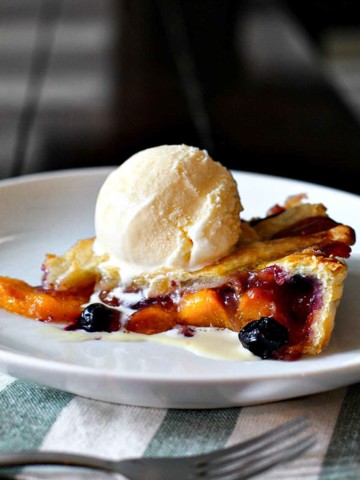
    • Peach and blueberry pie topped with a scoop of vanilla ice cream.
      Fresh Peach Blueberry Pie

    And don’t miss my category for Palisade Peaches Recipes. You’ll find lots of great ways to use up fresh Summer peaches, including the most popular on my site for Pork Tenderloin Medallions with Bourbon Peach Compote.

    If you liked this recipe, please leave a star ⭐⭐⭐⭐⭐ rating in the recipe card below and leave a comment. I always appreciate your feedback and hearing how everything went.

    And, don’t forget to subscribe to my newsletter for more delicious recipes and cooking tips. Make it a delicious day … every day.

    Homemade peach ice cream in a waffle cone.
    Print Recipe
    5 from 1 vote

    Homemade Peach Ice Cream Recipe

    Use fresh peaches to make this classic peach ice cream recipe
    Prep Time10 minutes mins
    Cook Time15 minutes mins
    Resting Time8 hours hrs
    Total Time8 hours hrs 25 minutes mins
    Course: Dessert
    Cuisine: American
    Servings: 8
    Calories: 341kcal
    Author: Lea Ann Brown

    Ingredients

    • 1 cup whole milk
    • ½ cup sugar
    • 4 whole egg yolks
    • 2 cups heavy cream
    • 2 teaspoons vanilla extract
    • 5 peaches peeled and chopped

    Instructions

    • Warm the milk in a small saucepan over medium low heat. Let it get nice and steamy, but don't let it simmer or boil. This is important.
    • While the milk is warming, whisk the eggs with the sugar in a separate bowl.
    • Slowly add some of the warm milk to sugar mixture, whisking as you do so.
    • Pour the egg/milk mixture back in the saucepan pan and heat slowly until thickened, stirring constantly. It should look like very liquid pudding. Do not boil!
    • Let cool to room temperature add cream, and vanilla. Place pan in refrigerator, covered with lid or plastic wrap. Let the mixture sit overnight.
    • Important: When you're ready to churn the ice cream, remove the frozen ice cream maker cylinder from the freezer, place it in the maker base and start the motor. Never add the ice cream before the cylinder is turning. The ice cream will freeze to the sides of the bowl and you'll have a mess. And I'e read that you could damage the ice cream maker.
    • Add the ice cream base and then add chopped fresh peaches. Follow directions on ice cream maker for churning.

    Notes

    Tips for Success: 
    • Before making this ice cream recipe, read the instructions for your ice cream maker. Most makers require that you freeze the cylinder for up to 2 days in advance of making ice cream.
    • On Tempering Eggs: It’s important to follow the directions for tempering eggs. Adding to much hot milk to eggs too quickly will cause the eggs to curdle or even scramble. Which will compromise the creamy texture of the ice cream.
    • Don’t skip the overnight refrigerator step. The obvious benefit is that the ice cream base will be colder once it its the ice cream maker cylinder. Also aged bases will gain volume and thickness with refrigerating overnight. Thicker bases churn faster and easier. And simply taste better.
    • If eating this ice cream right after churning in the ice cream maker, the texture will be more like soft serve. Place in an air-tight container and place in the freezer for a more solid texture ice cream experience.

    Nutrition

    Calories: 341kcal | Carbohydrates: 25g | Protein: 4g | Fat: 26g | Saturated Fat: 15g | Cholesterol: 182mg | Sodium: 40mg | Potassium: 273mg | Fiber: 1g | Sugar: 22g | Vitamin A: 1359IU | Vitamin C: 7mg | Calcium: 90mg | Iron: 1mg

    Homemade Peach Ice Cream … It’s What’s For Summer

    Vanilla Roasted Peaches With Mascarpone Cheese

    July 7, 2022 By Lea Ann Brown 24 Comments

    Vanilla roasted peaches with mascarpone, raspberries on a Versace plate.

    Vanilla Roasted Peaches is a beautiful and easy Summer peach dessert recipe. Peaches are roasted in a vanilla butter sauce then placed in an angel food dessert cup and topped with mascarpone cheese. Garnished with raspberries and mint = restaurant quality easy baked peaches dessert.

    Vanilla roasted peaches with mascarpone, raspberries on a Versace plate.

    Colorado Western Slope Peaches are making abundant appearance in our grocery stores, farmer’s markets and our kitchen. Beautiful fuzzy fruit full of wonderful juicy flavor. 

    We’ve been cherishing every single bite. With our record-breaking hot summer temperatures and traditional Colorado cool evenings, this year’s crop has seemed even better than ever.

    About Palisade Peaches

    Palisade Peaches are famously grown on our Western slope, in and around the town of Palisade. Colorado peaches are known for being extra juicy and extra sweet, thanks to the long sunny hot days and cool Colorado Summer nights. That equals perfect conditions for fruity sugars to develop. To learn more about what makes a Colorado Peach so special, check out this article about Colorado Western Slope Peaches.

    Why We Love This Recipe

    If you’re looking for Desserts with Mascarpone Cheese, and sweet mascarpone recipes you’ve got to give this baked peaches recipe a try.

    This easy dessert is one of my favorite things to make during peach season.

    Simple fresh flavors that work so well together. Caramelized peaches flavored with vanilla, lemon and butter and topped with a big dollop of creamy mascarpone cheese most certainly makes for a wonderful treat.

    Where I Learned To Make This Recipe

    Years ago, Whole Foods Market was featuring Colorado peaches and serving up bite-sized servings of this roasted peaches dessert during an in-store demo for easy desserts using fresh peaches.

    Quite a frenzied crowd had gathered, but with persistence, I managed to get a dribble by dribble description of how to make this at home.

    Easy to make, let’s take a look:

    Ingredients You’ll Need

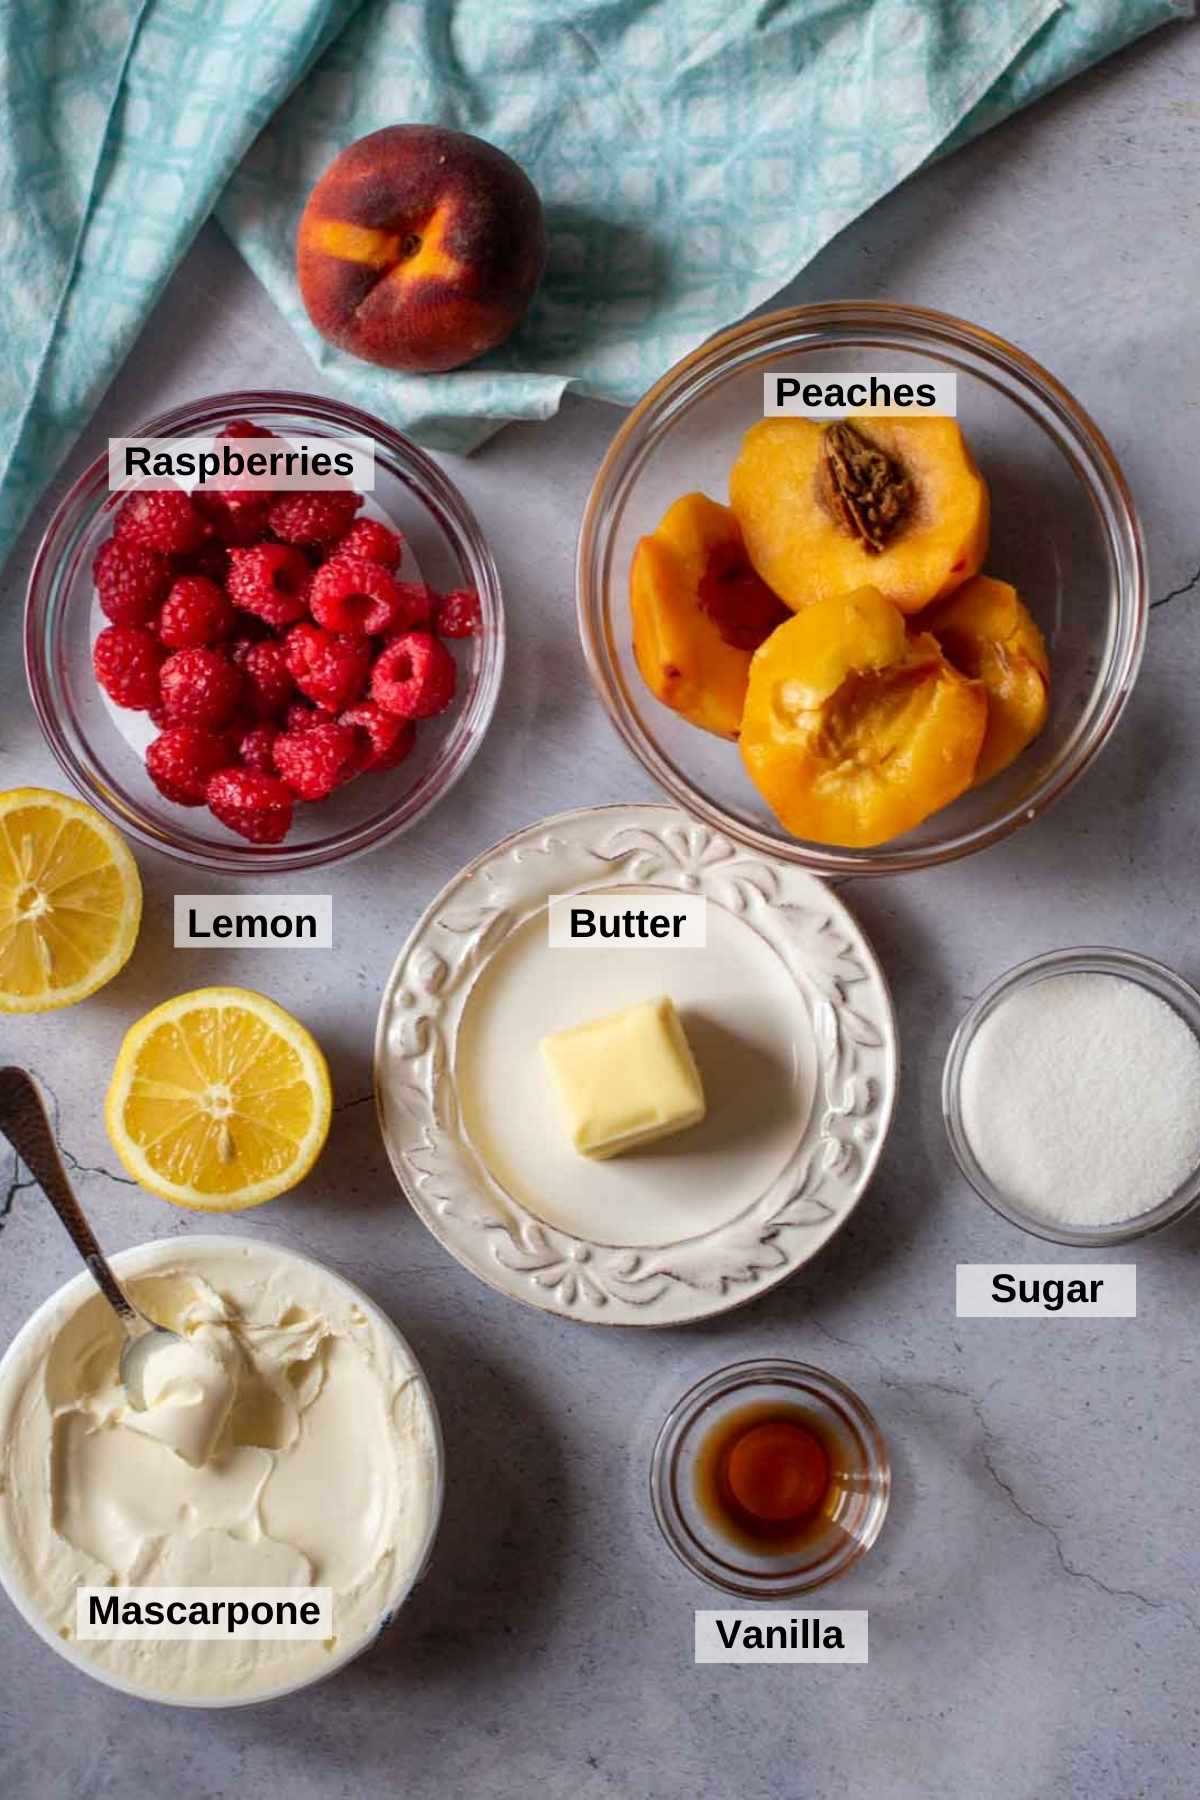
    Ingredients to make roasted peaches with mascarpone.
    • Fresh Raspberries
    • Fresh Peach Halves
    • Lemon
    • Butter
    • Sugar
    • Mascarpone Cheese
    • Vanilla
    • Dessert Shells

    Ingredient Substitutions

    • Raspberries. Substitute strawberries, blueberries or blackberries for the raspberries.
    • Sugar: For a richer vanilla butter sauce, substitute brown sugar or even maple syrup for the granulated white sugar.
    • Mascarpone Cheese: Substitute whipped cream or Cool Whip for the Mascarpone. A dollop of vanilla ice cream would also be a sweet treat. Try Greek Yogurt for a healthier option.
    • Dessert Shells: You can also use a slice of Angel Food Cake in place of the Dessert Shells.

    Roasted Peaches with Mascarpone – How To

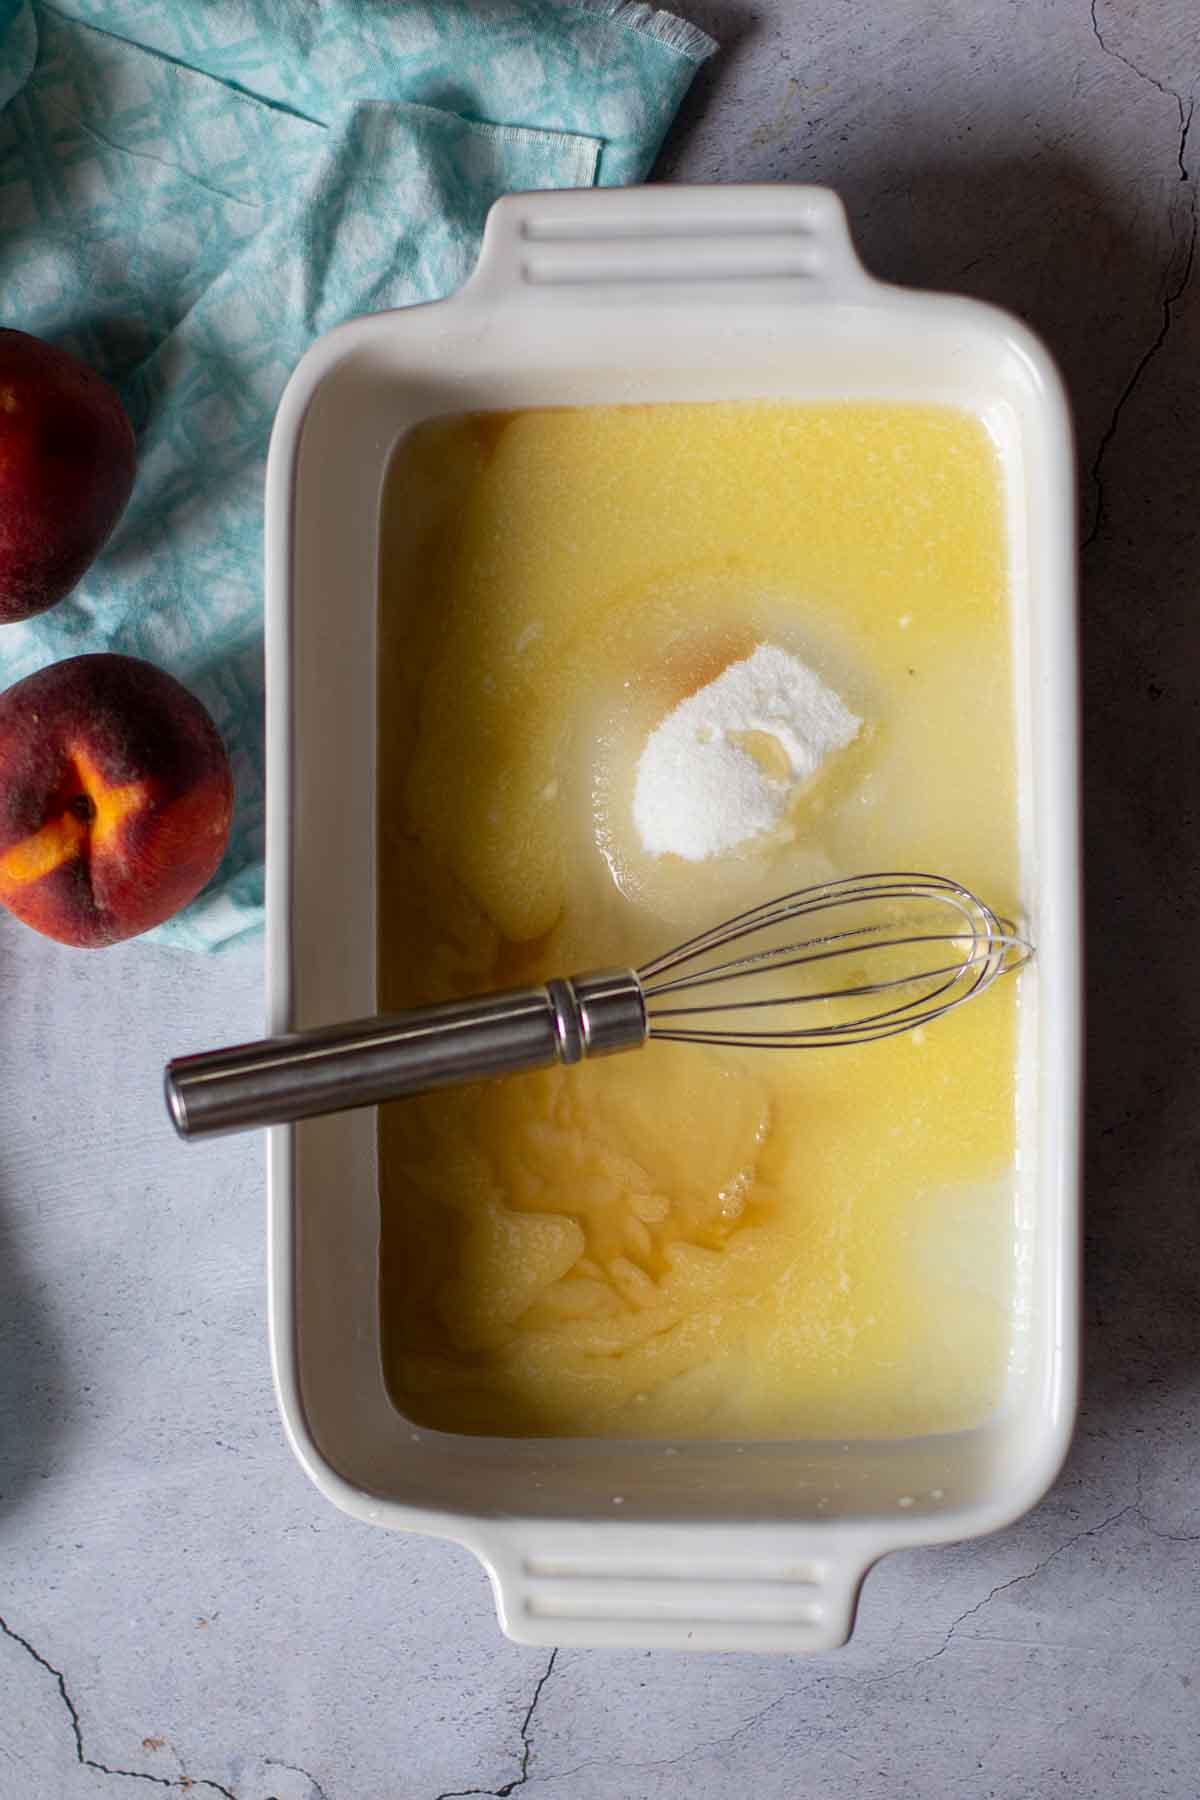
    Making vanilla glaze for roasted peaches in a baking dish.
    Fresh peach halves in a butter vanilla glaze.
    Baked roasted peaches in a vanilla butter sauce.
    • Step 1: Preheat that oven. We’re going to get that oven nice and toasty to caramelize the peaches. Preheat the oven to 400 degrees.
    • Step 2: Prepare the vanilla flavoring for the peaches In a shallow baking dish or baking sheet pan, combine melted butter, lemon juice, sugar and vanilla. Add peeled and pitted peaches and turn to coat with butter mixture. Arrange, cut side down in a single layer.
    • Step 3: Baby those peaches. Roast until peaches are tender and cooking liquid is syrupy, 15 – 20 min, brushing with cooking liquid halfway through.

    How To Build This Dessert

    A vanilla dessert shell on Versace dessert plate.
    Roasted peach half on a vanilla dessert shell.
    • Step 1: Place the vanilla dessert shells on dessert plates.
    • Step 2: Place a roasted peach cut side up on each dessert shell.
    A roasted peach on a vanilla dessert shell topped with mascarpone cheese.
    Roasted peaches with mascarpone cheese on a dessert shell drizzled with vanilla butter sauce.
    • Step 3: Top each peach with a dollop of mascarpone cheese.
    • Step 4: Drizzle each dessert with a big spoonful of the vanilla butter sauce from the baking pan.
    Vanilla roasted peaches with mascarpone cheese and raspberries.

    Presentation Tip

    Finish the dessert by garnishing with a mint leaf and sprinkle fresh raspberries around the dessert shell. Sprinkle a few dots of the vanilla butter syrup along the perimeter of the dessert shell.

    What’s The Easiest Way To Peel Peaches?

    Fill a medium sauce pan ¾ way full with water. Bring water to a boil then turn down to a simmer. Lower ripe peaches into the simmering water and blanch them for 1 minute. Remove peaches from the water, place in an ice bath and the skins will fall right off.Simmering peaches for easy peeling.Boiled peaches in an ice bath for easy peeling.

    How To Store Left Over Roasted Peaches?

    These baked peaches will store easily and are delicious the next day. Place roasted peaches in an airtight container and store in the refrigerator for up to 3 – 4 days. Microwave them individually for about 30 seconds to warm them up.

    Can This Recipe Be Made Ahead?

    You can roast the peaches up to a couple of days in advance. Store the peaches and the syrup in an air tight container. Either bring the peaches and syrup to room temperature, or microwave in 15 second increments until the syrup is back to melted stage and peaches are warm. Proceed with the recipe.

    Recipe for Roasted Peaches with Mascarpone Cheese

    I hope you give this easy mascarpone dessert with baked peaches recipe a try. It’s a lovely fresh peach recipe for entertaining. And it’s easy.

    More Peach Dessert Recipes

    • Peach and blueberry pie topped with a scoop of vanilla ice cream.
      Fresh Peach Blueberry Pie
    • Peach curd tart topped with peaches and whipped cream.
      Fresh Peach Curd Tart with Basil Sugar Whipped Cream
    • A slice of peach crumble pie topped with a scoop of vanilla ice cream.
      Classic Peach Pie With Canned Peaches
    • Homemade peach ice cream in a waffle cone.
      Homemade Peach Ice Cream Custard Style

    And if you’re looking for more dessert recipes, don’t miss my dessert category. You’ll find lots of great recipes to satisfy that sweet tooth, including the most popular dessert recipe on my site for Cream Cheese Flan.

    If you liked this recipe, please leave a star ⭐⭐⭐⭐⭐ rating in the recipe card below and leave a comment. I always appreciate your feedback and hearing how everything went.

    And, don’t forget to subscribe to my newsletter for more delicious recipes and cooking tips. Make it a delicious day … every day.

    Vanilla roasted peaches with mascarpone, raspberries on a Versace plate.
    Print Recipe
    5 from 2 votes

    Vanilla Roasted Peaches with Mascarpone and Raspberries

    An easy restaurant quality peach summer dessert.
    Prep Time10 minutes mins
    Cook Time20 minutes mins
    Total Time30 minutes mins
    Course: Dessert
    Cuisine: American
    Servings: 4
    Calories: 1742kcal
    Author: Lea Ann Brown

    Ingredients

    • 2 Tablespoons unsalted butter melted
    • 2 Tablespoons fresh lemon juice 1 lemon
    • 2 Tablespoons sugar
    • 1 teaspoon vanilla extract
    • 2 whole peaches firm/ripe/halved
    • 8 ounces mascarpone cheese room temperature
    • 1 pint raspberries
    • 4 Vanilla dessert shells

    Instructions

    • Preheat oven to 400 degrees.
    • In a large shallow baking dish combine butter, lemon juice, sugar and vanilla. Add fresh peaches and turn to coat with butter mixture. Arrange, cut side down in a single layer.
    • Roast until peaches are tender and cooking liquid is syrupy and starting to turn a golden color. 15 – 20 min. Brush with vanilla butter sauce halfway through.
    • Place a roasted peach in a dessert shell. Fill the center with a dollop of room temperature mascarpone cheese. Drizzle some of the vanilla butter sauce. Garnish with mint leaves and scatter a few raspberries around the dessert shell.

    Notes

    Presentation Tip: Finish the dessert by garnishing with a mint leaf and sprinkle fresh raspberries around the dessert shell. Sprinkle a few dots of the vanilla butter syrup along the perimeter of the dessert shell.
    Best Way To Peel Peaches: Fill a medium sauce pan ¾ way full with water. Bring water to a boil then turn down to a simmer. Lower ripe peaches into the simmering water and blanch them for 1 minute. Drain and when cool enough to handle, the skins will fall right off.

    Nutrition

    Calories: 1742kcal | Carbohydrates: 143g | Protein: 32g | Fat: 113g | Saturated Fat: 53g | Cholesterol: 140mg | Sodium: 843mg | Potassium: 179mg | Fiber: 21g | Sugar: 25g | Vitamin A: 1008IU | Vitamin C: 34mg | Calcium: 109mg | Iron: 27mg

    Vanilla Roasted Peaches with Mascarpone and Raspberries…It’s What’s for Dessert.

    Grilled Southwest Ground Chicken Burgers, Juicy and Flavor Packed

    July 3, 2022 By Lea Ann Brown 18 Comments

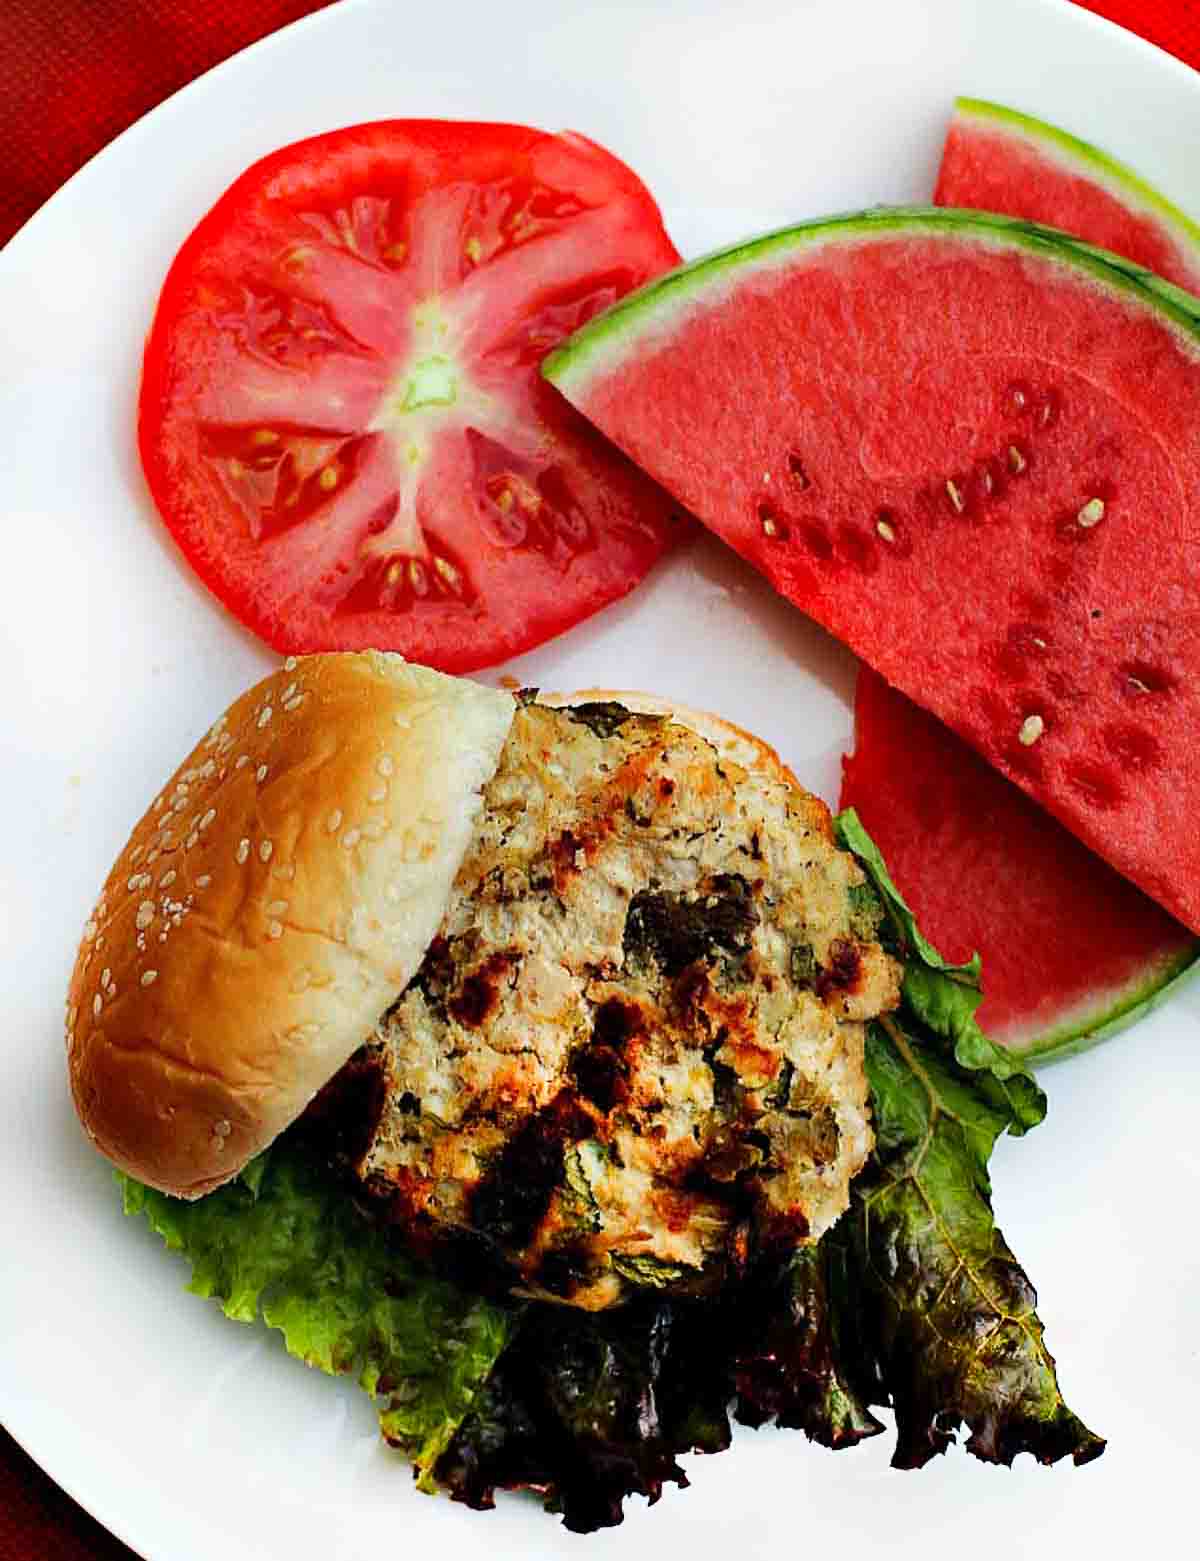
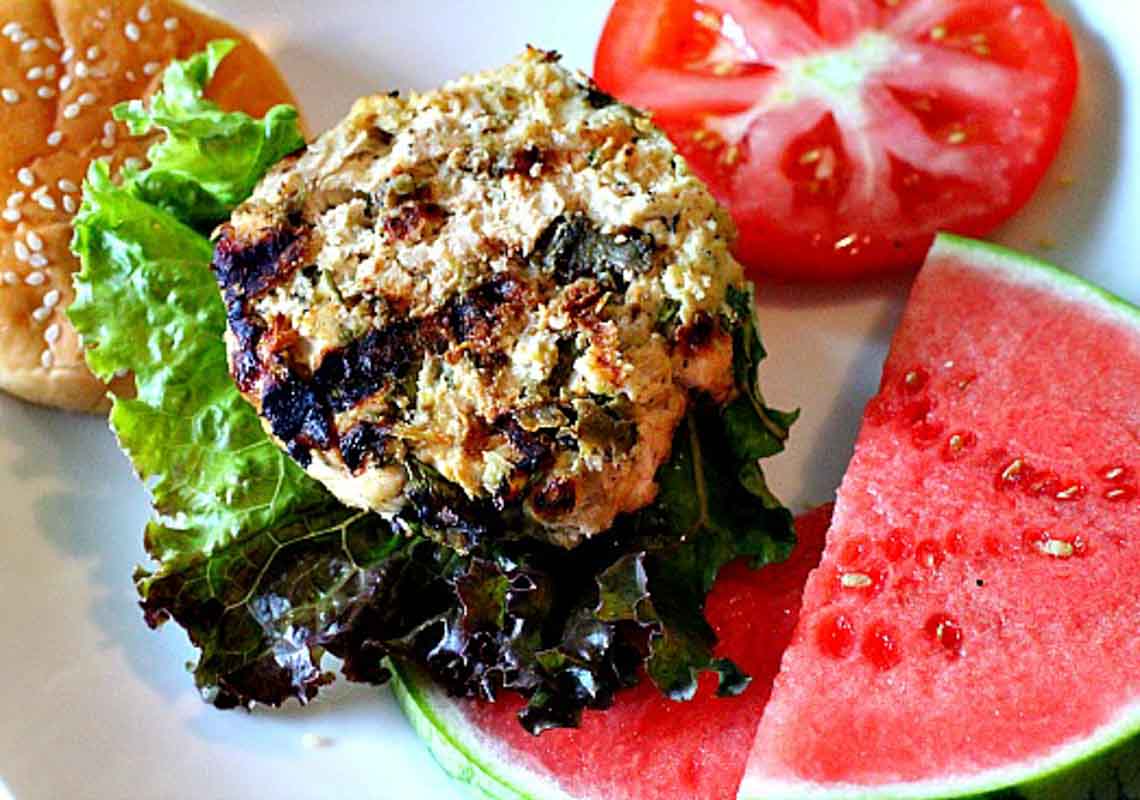
    Southwestern grilled ground chicken burgers served with watermelon.

    Juicy, and packed with bold Southwest flavor, these ground chicken burgers with green chile peppers prove that chicken burgers don't have to be bland or boring. Roasted green chiles bring just the right amount of heat, and with warm spices, you’ll want to make this again next week.

    Southwest Grilled Ground Chicken Burgers served with watermelon and tomato.

    Why You’ll Love These Grilled Chicken Burgers

    • These burgers stay juicy on the grill.
    • They are just right spicy in a warming sort of way.
    • The flavor is bold enough that you don't need a mile of toppings to make them interesting.
    • I've made a lot of chicken burgers that felt like a sad compromise to beef burgers. These aren't that. They taste like something you'd actually crave, not something you eat while wishing you'd made beef burgers instead.

    How to Keep Ground Chicken Burgers Juicy On The Grill

    Ground chicken burgers have a notorious reputation for having a rubbery, dry texture. I’ve made some of these, and here’s what I’ve done to correct that.

    • I’ve added moisture directly to the ground chicken meat, rather than brushing it on the ground chicken patties once they hit the grill. Adding a vegetable with high moisture content, like roasted chopped Hatch Chile peppers will keep these burgers nice and moist, and bring Southwestern flavor. This combination also creates a flavor combo that doesn’t fall flat.

    Ground Chicken Burgers That Won’t Fall Apart On The Grill

    It’s been my experience that you can’t just form ground chicken into patties and expect them to behave like a beef burger one they hit those hot grates or your indoor grill pan. Ground Chicken is much softer than ground beef and has a tendency to fall apart. I’ve added Panko bread crumbs to the ground chicken mixture. It’s an easy trick, and along with a quick trip to the refrigerator will insure a solid chicken burger patty recipe that will stay together.

    The chicken burgers will cook up like a charm, lets get started.

    Ingredients For Grilled Southwest Chicken Burgers

    Some recipes can drop a spice list on you that reads like a scavenger hunt list. Here’s what matters for a flavorful Southwest chicken burger.

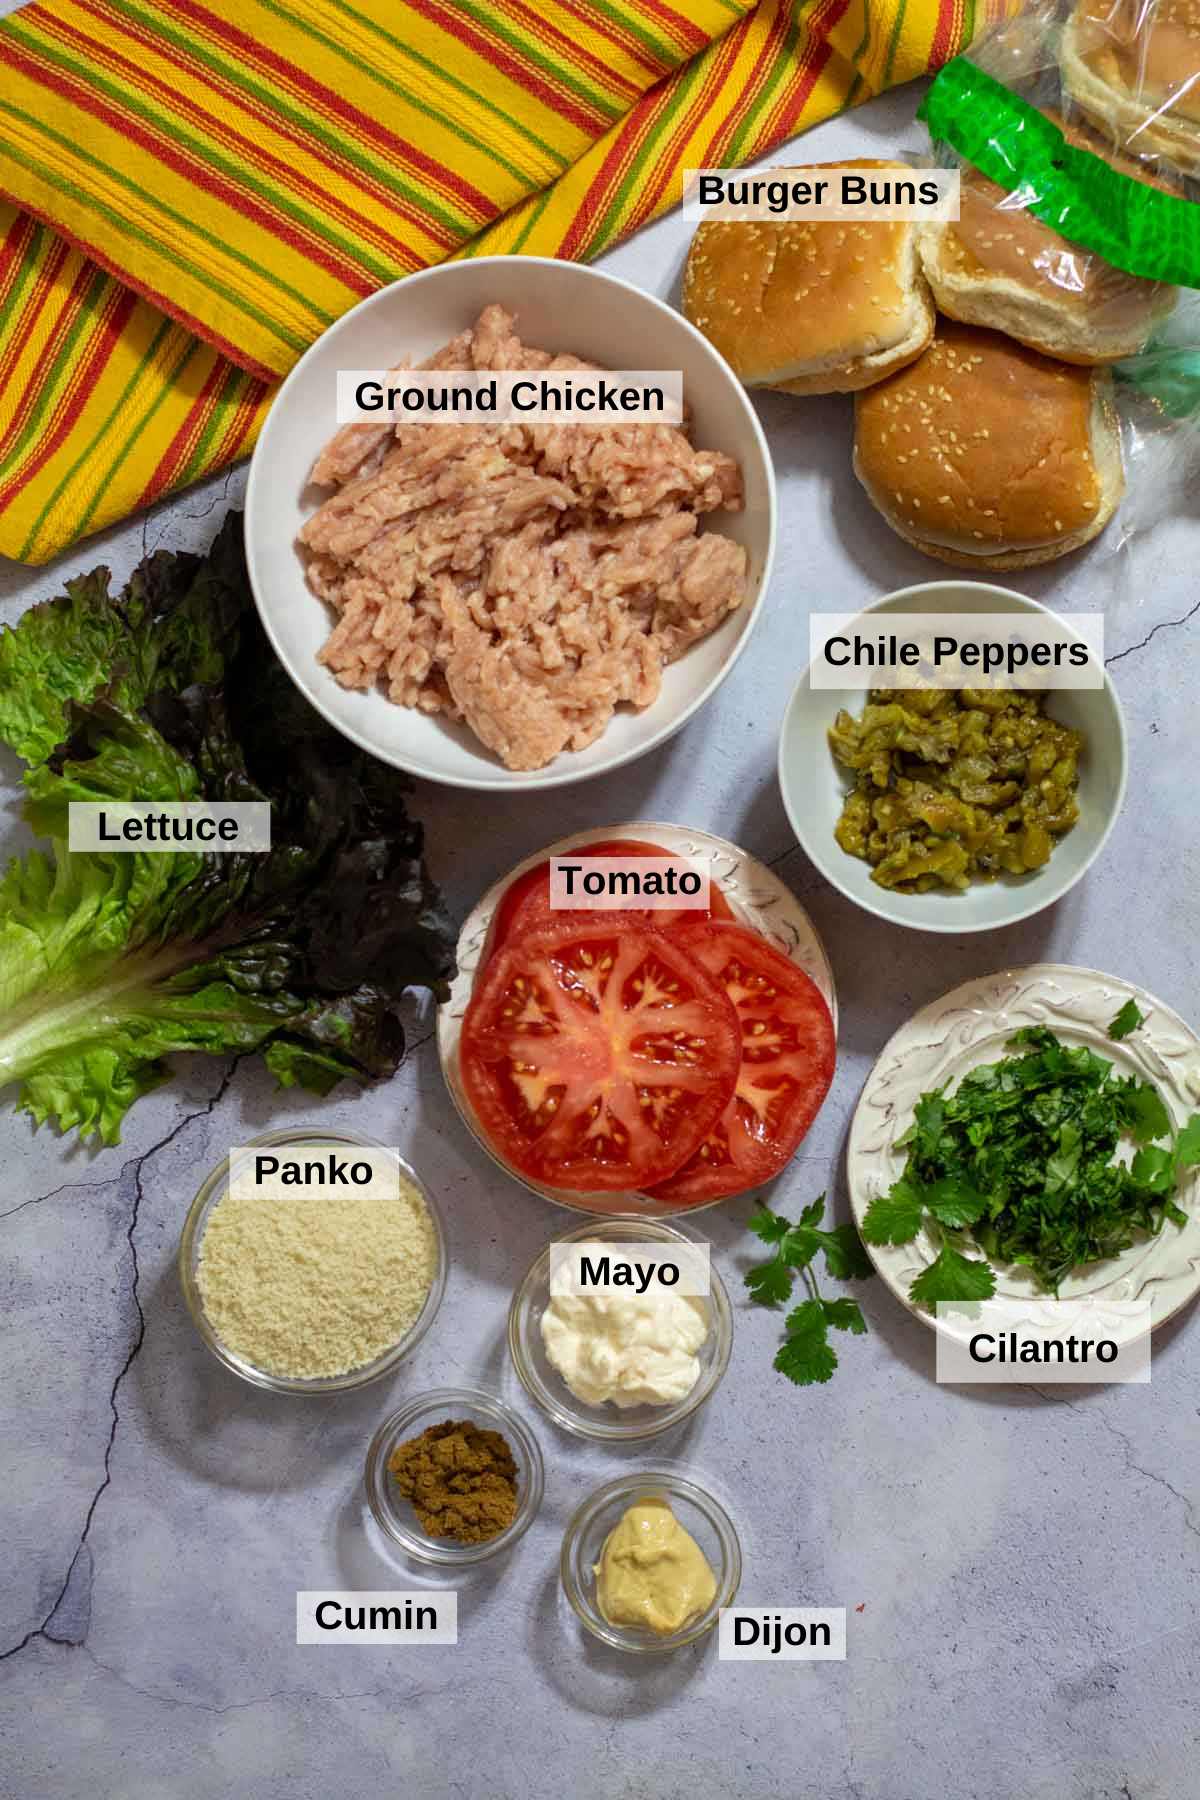
    ingredients to make ground chicken burgers.
    • Ground Chicken: I like to use a package of ground chicken labeled “ground chicken”. Its a mix between breast and dark meat, providing a little more fat and flavor. Ground chicken breast will work well here also.
    • Chile Peppers: Use roasted, peeled, seeded and chopped Hatch Chile Peppers. You can purchase canned, which are readily found on the Mexican aisle at the supermarket. I keep a stash of fresh roasted chile peppers in my freezer. If you don’t have access to chile roasters each Fall, you can order them directly from The Hatch Chile Store. They’re a great resource for all things related to New Mexico Hatch Chiles.
    • Seasonings: Cumin brings an earthy and almost smoky flavor to these burgers and cilantro a bright grassy citrus note.
    • Fat, Moisture and Binder: Mayonnaise, Dijon and Panko Bread Crumbs.

    Ingredient Substitutions

    • Cilantro: If you simply don’t like cilantro, just omit it.
    • Dijon: Substitute regular yellow mustard for Dijon.
    • Mayonnaise: Substitute Sour Cream for extra tang. Or be brave and use Chipotle Mayo in it’s place.

    Tip: On Cleaning Roasted Chile Peppers: Friends don’t let friends use water to remove the blistered skins off roasted chile peppers. Just scrape the skins off with your hands. If you rinse them with water, you’re washing away some of that smoky flavor that we all love.

    How to Make Ground Chicken Burgers

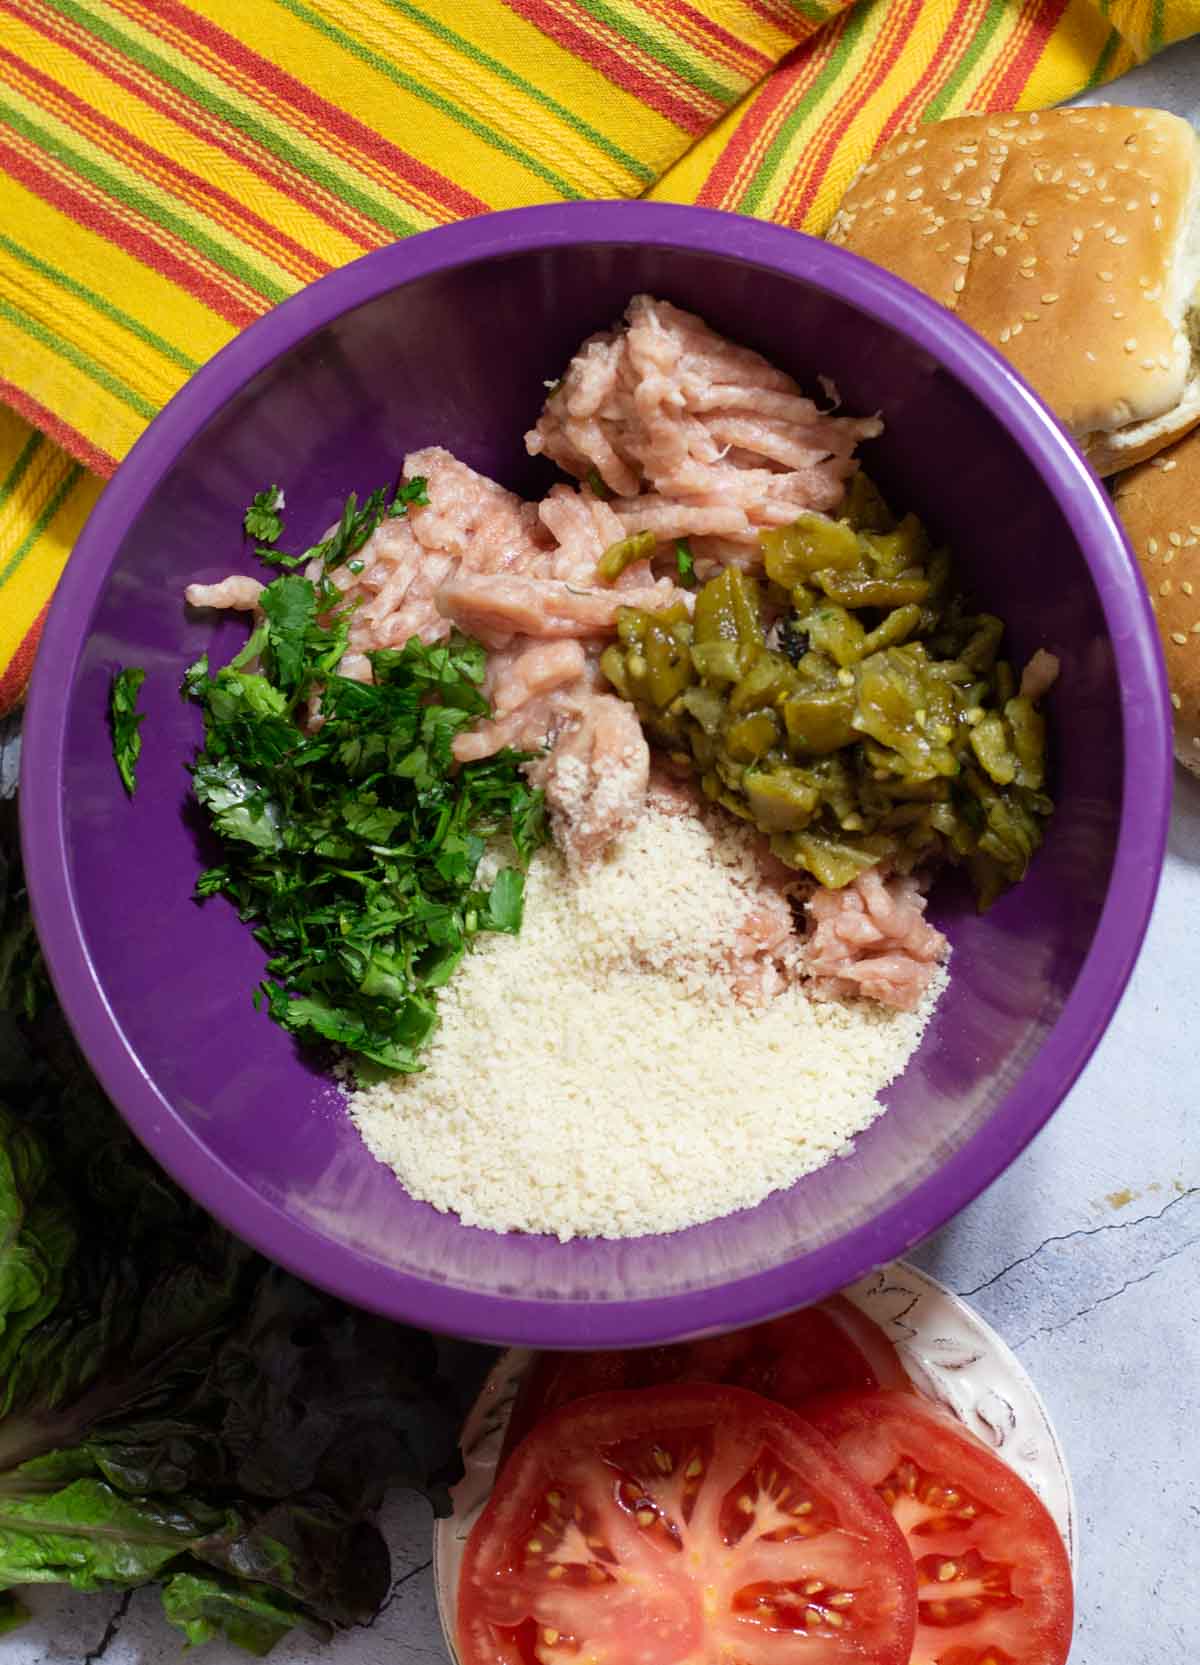
    Ground chicken and ingredients in a bowl to make ground chicken patties.
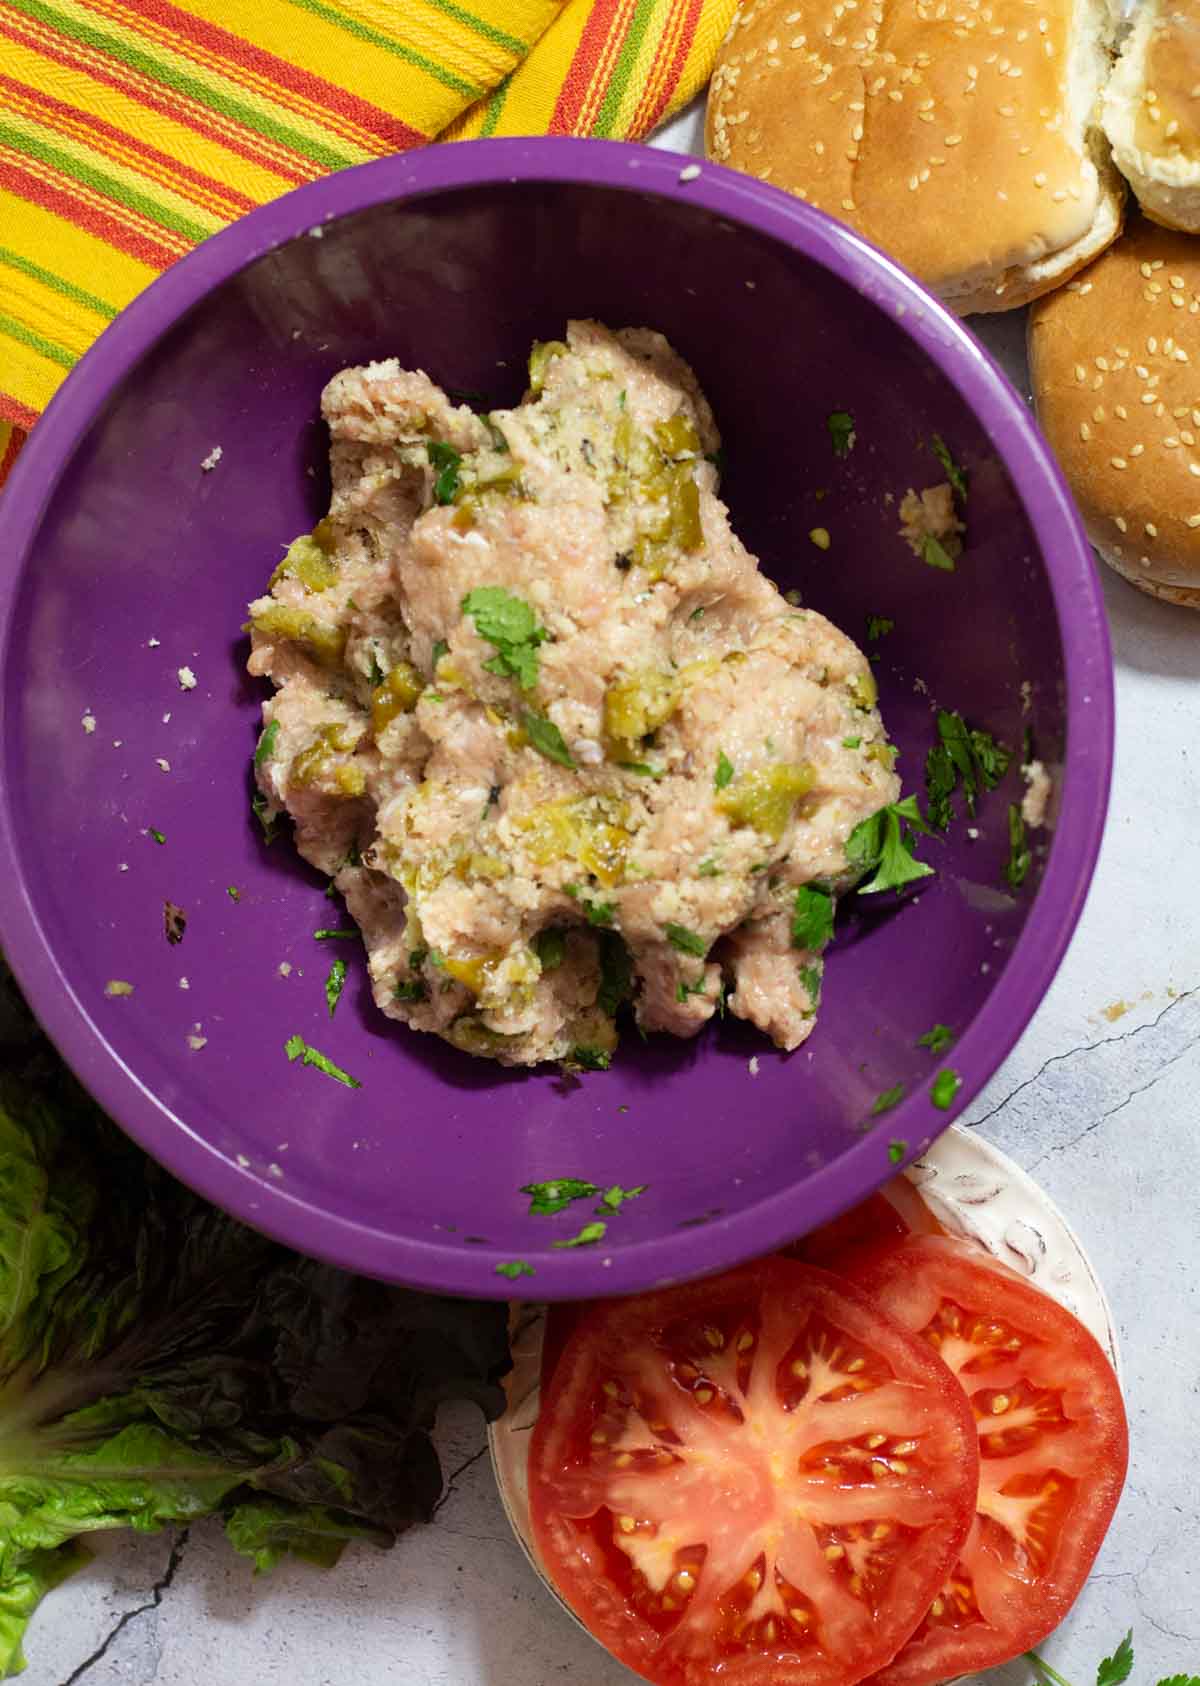
    Ground chicken meat ready to make chicken patties.

    How To Shape Chicken Burger Patties So They Don’t Fall Apart

    1. Step 1: Combine ground chicken, cumin, chopped chiles, chopped cilantro, bread crumbs and salt and pepper. 
    2. Step 2: Using your hands to gently mix until well combined. Don’t over mix or over work the patties, this will cause the meat to pack together which will result in a rubbery texture. Gently form them meat into patties until you feel they are holding together well.

    Tip” Hands are always the best tool for mixing ground meat. Using a large spoon will crush everything together, creating a tighter mix, which can cause the meat mixture to be dry and too dense in texture = rubbery end result.

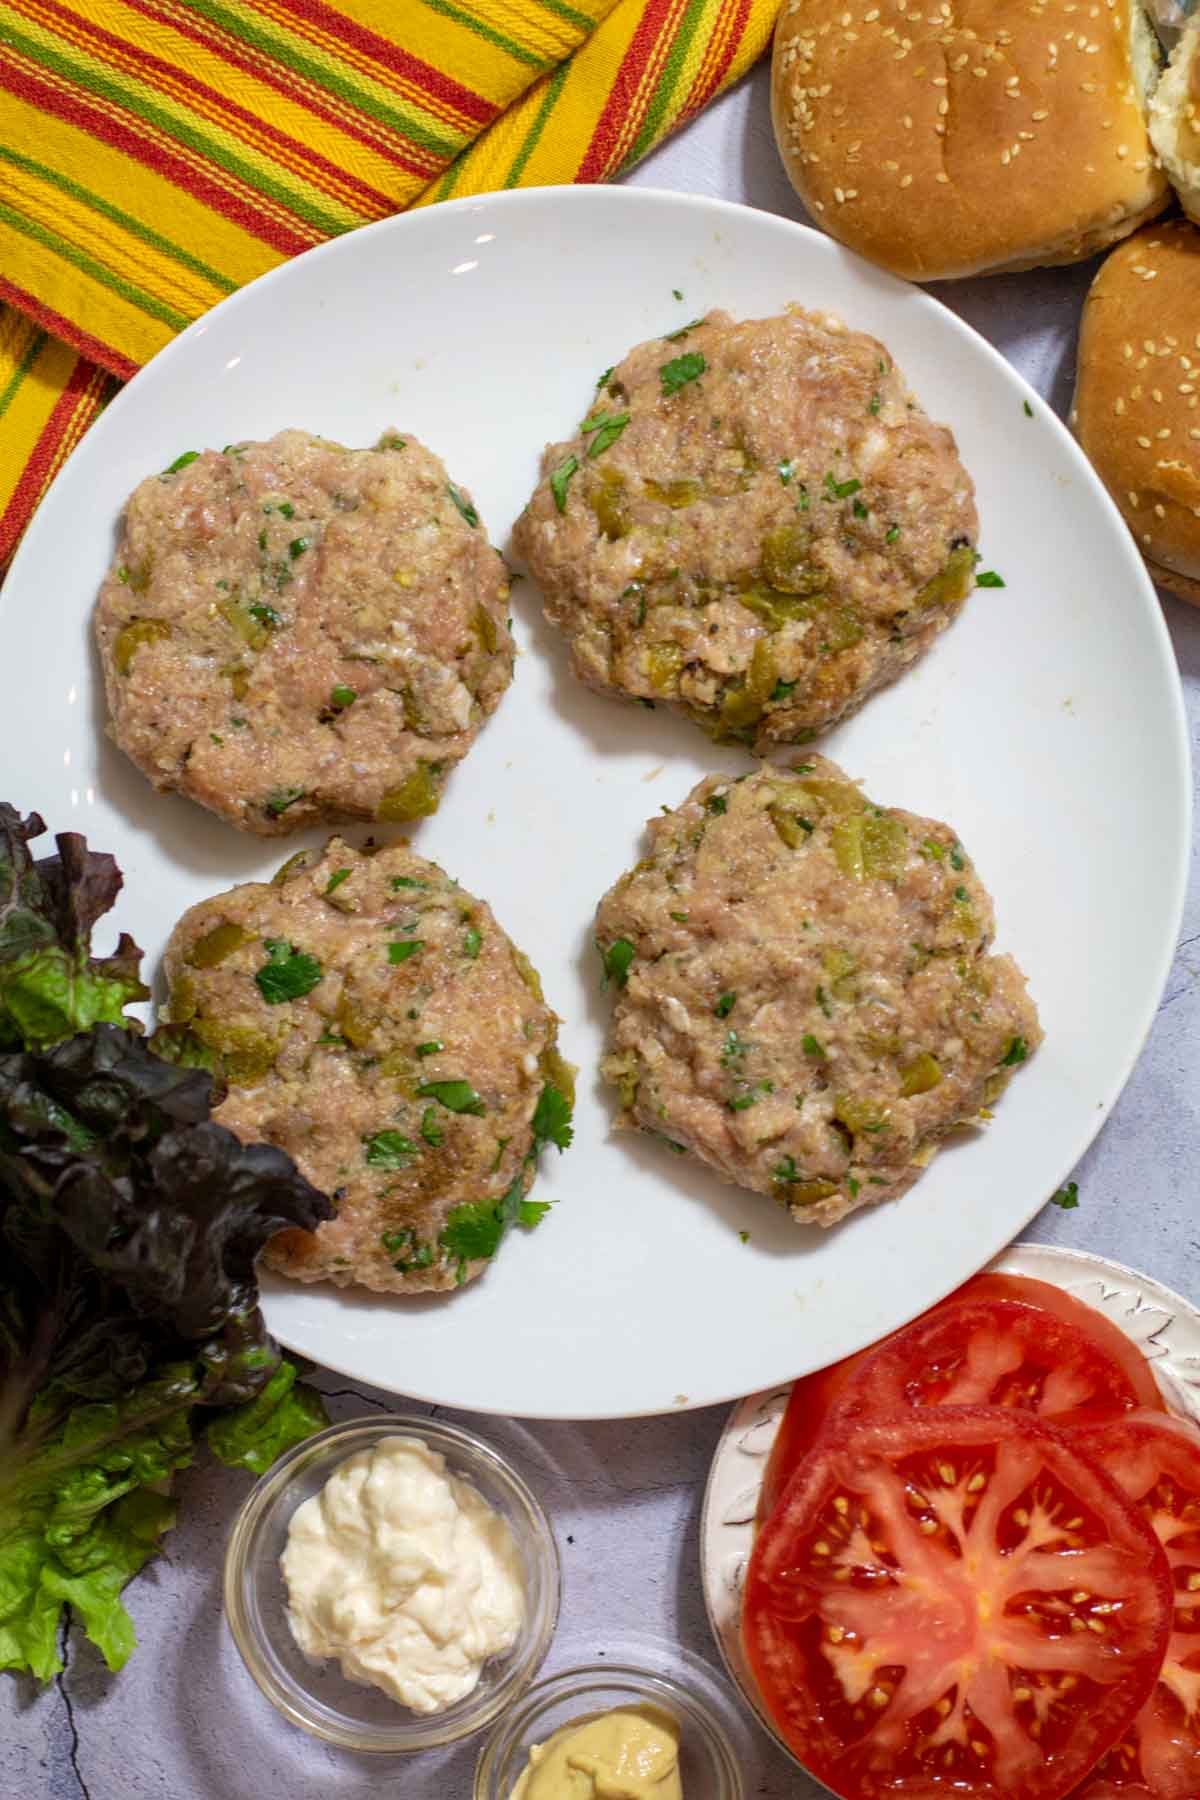
    Ground chicken burger patties.
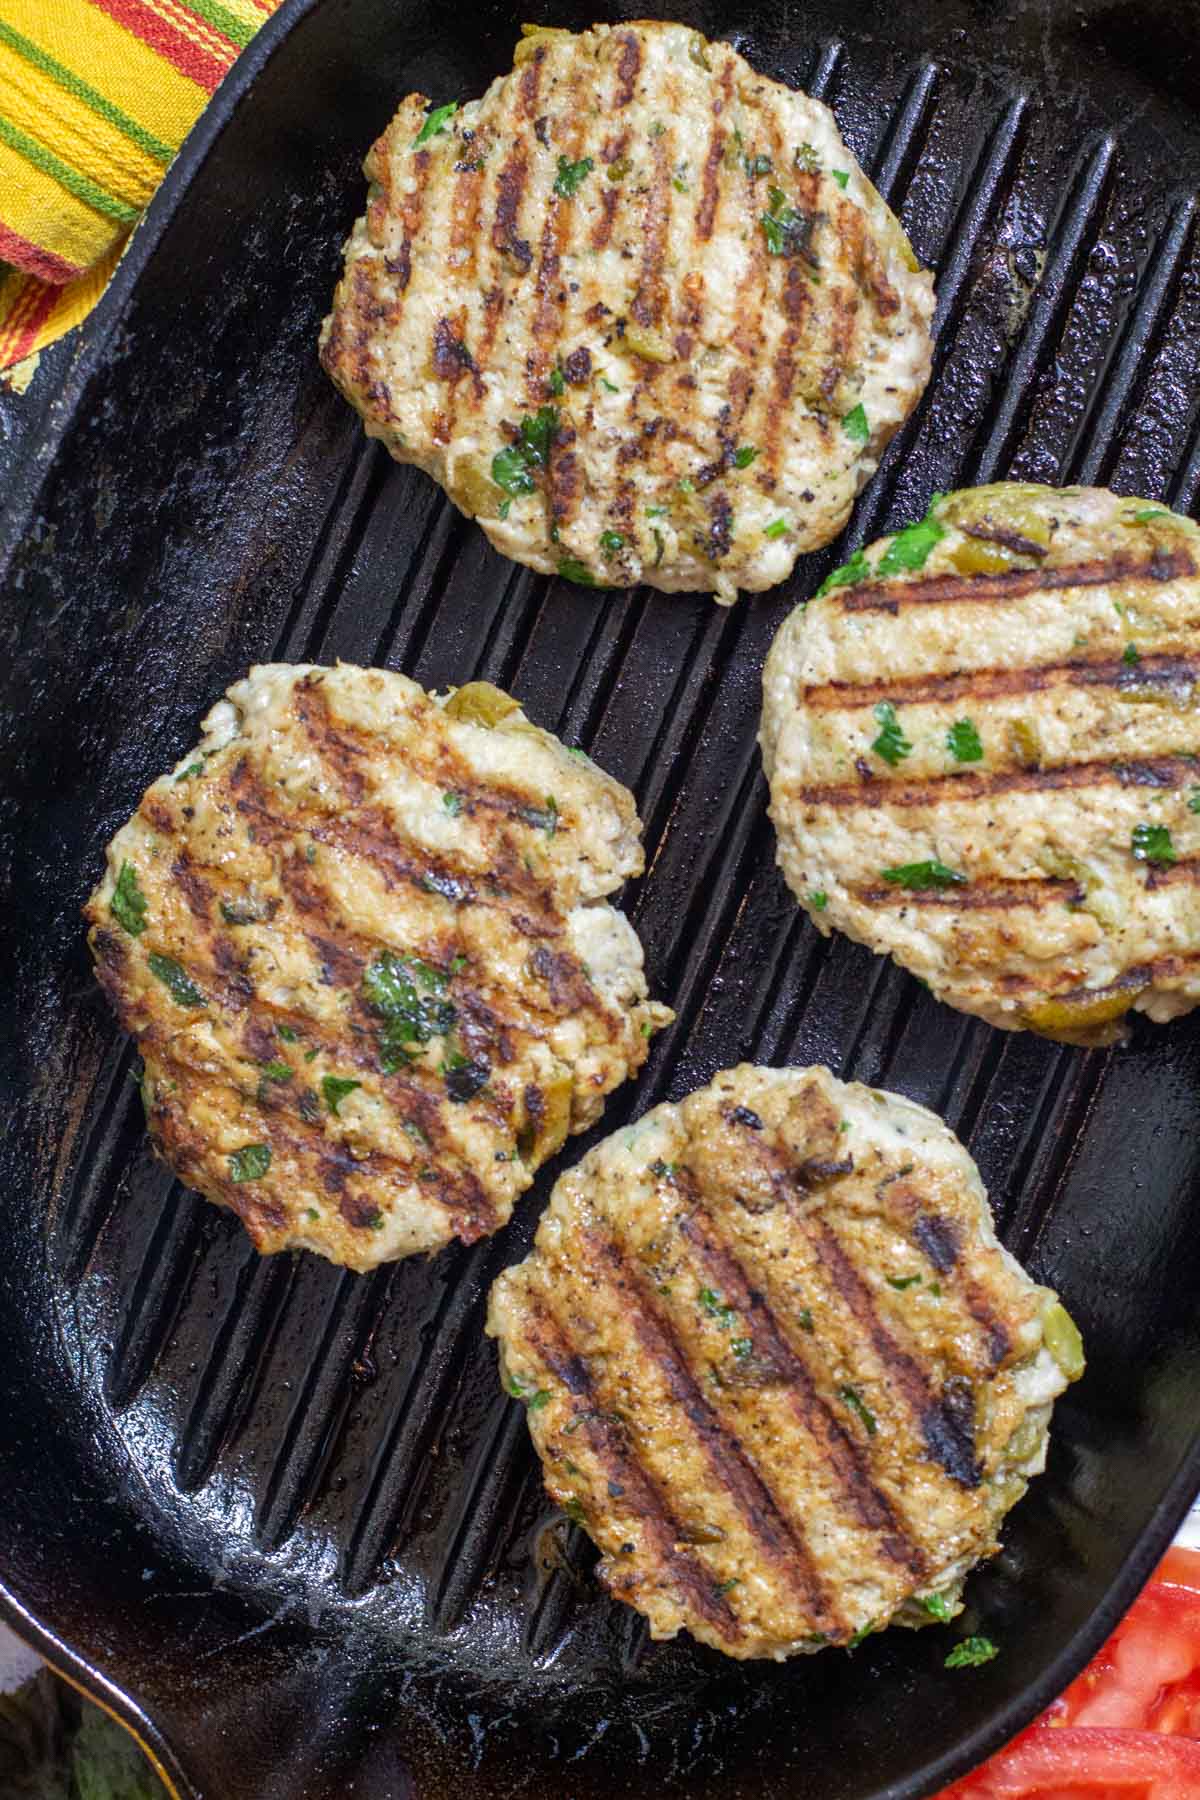
    Cooking ground chicken patties stove top in a grill pan.
    1. Step 3: Divide the meat mixture into four patties. Important: Refrigerate the ground chicken patties for 30 minutes before grilling. This will help them firm up and bind together and keep them from falling apart on the grill.
    2. Step 4: Brush grill grates or grill pan with oil and grill burgers, flipping a few times, until good grill marks are present.

    How Long To Grill Ground Chicken Burgers

    Internal Temperature and Food Safety: Grill ground chicken patties until good grill marks are visible and instant read meat thermometer reads 165 degrees internal temperature. About 8 – 10 minutes.

    Best Buns and Best Toppings for Southwest Chicken Burgers

    • Toppings: You don’t need much. Avocado. Crisp lettuce and a slice of tomato. Maybe grilled onions. Keep it simple. The burger already has personality. Let it show.
    • Salsa: Try a topping of Jalapeno Pineapple Salsa, or Chipotle Peach Salsa.
    • Buns: Choose a regular hamburger bun that's soft, sturdy and flavorful. No need to go gourmet here. Tip: I discourage the use of Brioche buns simply because they are too soft, too sweet, and their high butter and sugar content can lead to a soggy bun that will fall apart under the weight of a juicy burger.
    • Best Way To Toast A Hamburger Bun: Just smear the inside of each bun with a little butter, margarine, or even a thin smear of mayonnaise (preferred). Place each bun half, oiled side down in the fry pan or on the grill until they're starting to toast. No need to scrape out the skillet to toast buns, those tiny bits of left over meat will add flavor.

    Tips for Grilling Chicken Burgers Without Sticking or Drying Out

    • Don’t skip the green chiles. Vegetables have a high water content and will help bring moisture and texture to that chicken burger. Example. This recipe contains chopped Hatch Chile Peppers. Or you can use small diced bell peppers. Sautee them until soft before adding them to the chicken patties.
    • Oil The Grates: Oiling the grill grates will keep these chicken burger patties from sticking. Heat the grill, then use tongs and an oil soaked paper towel to wipe the grates. A high smoke point oil like canola or avocado oil work well here.
    • Don’t cook them to death! They’ll dry out. Start with a high temperature to develop a sear, cooking about a minute or so each side, lower heat and finish cooking the burger. Please remember that chicken should be cooked to an internal temperature of 165 degrees. Use a digital meat thermometer to determine temperature.
    • Add tomato and lettuce to your chicken burger bun, they will bring a juicy slice of moisture to the overall experience.

    The French get involved for a delicious finish to this recipe. A mixture of Dijon and mayonnaise make a great condiment for chicken burgers.

    Ground Chicken vs Ground Turkey for Southwest Burgers

    Both work. They're just different.

    Chicken stays softer and juicier and ground turkey has more structure. I reach for chicken when I want tenderness and bold seasoning. Turkey when I want a sturdier bite. No wrong answer. Just preference. Check out my recipe for Turkey Burgers For The Grill for instance.

    What To Serve It With

    Think easy! Grilled corn, a quick slaw, a fresh salad with one of our favorite easy vinaigrettes, Red Wine Vinegar Salad Dressing. Or roasted potatoes like these Smashed Chimichurri Potatoes. I personally like to serve these Southwest Sauteed Mixed Vegetables any chance I get.

    Sides should keep up but not steal the show.

    FAQ’s

    Do I Need Eggs or Breadcrumbs in Chicken Burgers?

    In my opinion the answer to this question is yes and no. I’ve made many a chicken burger patty and my most successful chicken burgers have contained a binder. For my recipe Panko breadcrumbs keep those burgers from falling apart without the addition of egg. I’ve not had good success using egg in chicken burgers.

    How Spicy Are Southwest Chicken Burgers?

    That’s the beauty of cooking with chile peppers. You can purchase mild, medium or hot. I find that a medium heat pepper are more flavorful than mild and without being too aggressive with spicy heat. Choose according to your heat tolerance, you’re in control of the spice level.

    Can I Cook These Stove Top Or In A Grill Pan?

    Absolutely yes. When my outdoor grill is in hibernation for the winter, I cook these stove top using a cast iron skillet, or better yet (for grill marks) a cast iron stove top grill pan. No need for any adjustments to the cooking time.

    Make Ahead, Storing and Reheating

    • Make Ahead: Since this recipe calls for the ground chicken patties to rest in the refrigerator for at least 30 minutes before cooking, this is an excellent candidate for make ahead chicken burgers. Make these up to a day ahead, cover tightly with plastic wrap and store in the refrigerator until ready to grill.
    • Storage: For just the two of us, I make the chicken patties, then cook just two and freeze the other two raw patties to cook at a later date. If you have leftover cooked chicken burgers, store them in the refrigerator for up to 4 days. I like to microwave them to reheat and the 50% power feature on the microwave is your best friend. Place a chicken patty on a microwave safe plate and heat in 30 second increments until warm enough to eat. This lower/slower method avoids any food explosions and will keep the burgers from drying out.
    • Freezer: It’s easy to freeze uncooked chicken burger patties. Just wrap them individually in plastic wrap or a freezer zip lock bag and freeze for up to 3 months. Be sure to label and date the container. Let them thaw overnight in the refrigerator and grill the next day. You can also freeze cooked patties and reheat using my microwave method above.

    Recipe for Southwest Ground Chicken Burgers

    Green chile chicken burger on a sesame bun with red leaf lettuce.

    These homemade chicken burgers are easy enough for a weeknight meal and so satisfying with flavor. They may just be the perfect ground chicken burger.

    And if love Southwestern style burgers, don’t miss my recipe for New Mexico Tortilla Burgers. Easy and full of flavor.

    More Popular Burger Recipes

    • Steakhouse. burger with fry sauce, served with onion rings.
      Steakhouse Burgers with Fry Sauce
    • Buffalo burger with sliced onions, special sauce, served with french fries.
      Juicy Buffalo Burgers – The Ultimate How To Guide
    • Chorizo burgers with cumin lime quick pickles.
      Grilled Chicken Burgers with Chorizo and Cumin-Lime Quick Pickles
    • A blue cheese cheeseburger sided with French fries.
      Blue Cheese Burgers, Juicy Burgers With Cheese Inside

    And if you’re looking for more Burger recipes, check out my category for Hamburger Recipes. You’ll find lots of great recipes, including one of the most popular on my site for Jalapeno Steak Sauce Burger.

    And if you're looking to learn more about Colorado and New Mexico Chile Peppers and how to use them, don't miss my article on Chile vs Chili … Know The Difference.

    This recipe is adapted from a Martha Stewart recipe = always reliable.

    If you liked this recipe, please leave a star ⭐⭐⭐⭐⭐ rating in the recipe card below and leave a comment. I always appreciate your feedback and hearing how everything went.

    And, don’t forget to subscribe to my newsletter for more delicious recipes and cooking tips. Make it a delicious day … every day.

    Southwestern grilled ground chicken burgers served with watermelon.
    Print Recipe
    5 from 5 votes

    Grilled Southwest Ground Chicken Burgers

    How to grill chicken burger patties to stay moist and without falling apart. Jazz up those Summer burgers with these Grilled Southwest Ground Chicken burgers.
    Prep Time15 minutes mins
    Cook Time10 minutes mins
    Refrigeration time30 minutes mins
    Total Time55 minutes mins
    Course: Main Course Chicken
    Cuisine: Southwestern
    Servings: 4
    Calories: 386kcal
    Author: Lea Ann Brown

    Ingredients

    • 1 pound ground chicken Either ground chicken breast, or ground chicken (combo of breast and thigh meat)
    • ½ teaspoon ground cumin
    • 6 large Roasted Hatch Chile Peppers tops and skin removed, chopped (or two cans diced green chile, drained)
    • ¼ cup cilantro leaves fine chopped
    • ½ cup Panko bread crumbs or fresh bread crumbs, chopped well.
    • ½ teaspoon Kosher salt
    • ¼ teaspoon freshly ground pepper
    • Canola oil for brushing
    • 1 tomato sliced
    • leaf lettuce Soft lettuce like red leaf, butter or bibb
    • 4 Hamburger Buns toasted
    • 2 tablespoons mayonnaise or sour cream.
    • 1 tablespoon Dijon mustard

    Instructions

    • Combine chicken, cumin, chiles, chopped cilantro, bread crumbs and salt and pepper.
    • Using your hands, gently mix and divide into 4 patties. Important: Refrigerate the ground chicken patties for 30 minutes before grilling. This will help them firm up and bind together and keep them from falling apart on the grill.
    • Heat grill to medium high, or heat a grill pan over medium high heat stove top. Then use tongs and an oil soaked paper towel to wipe the grates. A high smoke point oil like canola or avocado oil work well here.
    • Grill chicken burgers, flipping a couple of times, until good grill marks are present and a meat thermometer reads 165 degrees internal temperature. 8 – 10 minutes.
    • Grill buns, just until toasted, about one minute. Serve burgers on buns with tomato slices, mayo and mustard mixture, and lettuce.

    Notes

    Substitute Chipotle Mayo for regular mayo and mustard combo.

    Tips for Grilling Chicken Burgers Without Sticking or Drying Out

    • Don’t skip the green chiles. Vegetables have a high water content and will help bring moisture and texture to that chicken burger. Example. This recipe contains chopped Hatch Chile Peppers. Or you can use small diced bell peppers. Sautee them until soft before adding them to the chicken patties.
    • Oil The Grates: Oiling the grill grates will keep these chicken burger patties from sticking. Heat the grill, then use tongs and an oil soaked paper towel to wipe the grates. A high smoke point oil like canola or avocado oil work well here.
    • Don’t cook them to death! They’ll dry out. Start with a high temperature to develop a sear, cooking about a minute or so each side, lower heat and finish cooking the burger. Please remember that chicken should be cooked to an internal temperature of 165 degrees. Use a digital meat thermometer to determine temperature.
    • Add tomato and lettuce to your chicken burger bun, they will bring a juicy slice of moisture to the overall experience.
    Variation: lightly brush tomato slices with oil and while you’re toasting the buns, toast the tomato until grill marks appear.

    Nutrition

    Calories: 386kcal | Carbohydrates: 39g | Protein: 32g | Fat: 11g | Saturated Fat: 2g | Cholesterol: 76mg | Sodium: 539mg | Potassium: 810mg | Fiber: 3g | Sugar: 8g | Vitamin A: 1068IU | Vitamin C: 104mg | Calcium: 121mg | Iron: 4mg

    Hatch Green Chile Ground Chicken Burgers … They’re what’s for Dinner.

    Coyote Corn, Southwest Corn With Jalapenos

    June 30, 2022 By Lea Ann Brown 38 Comments

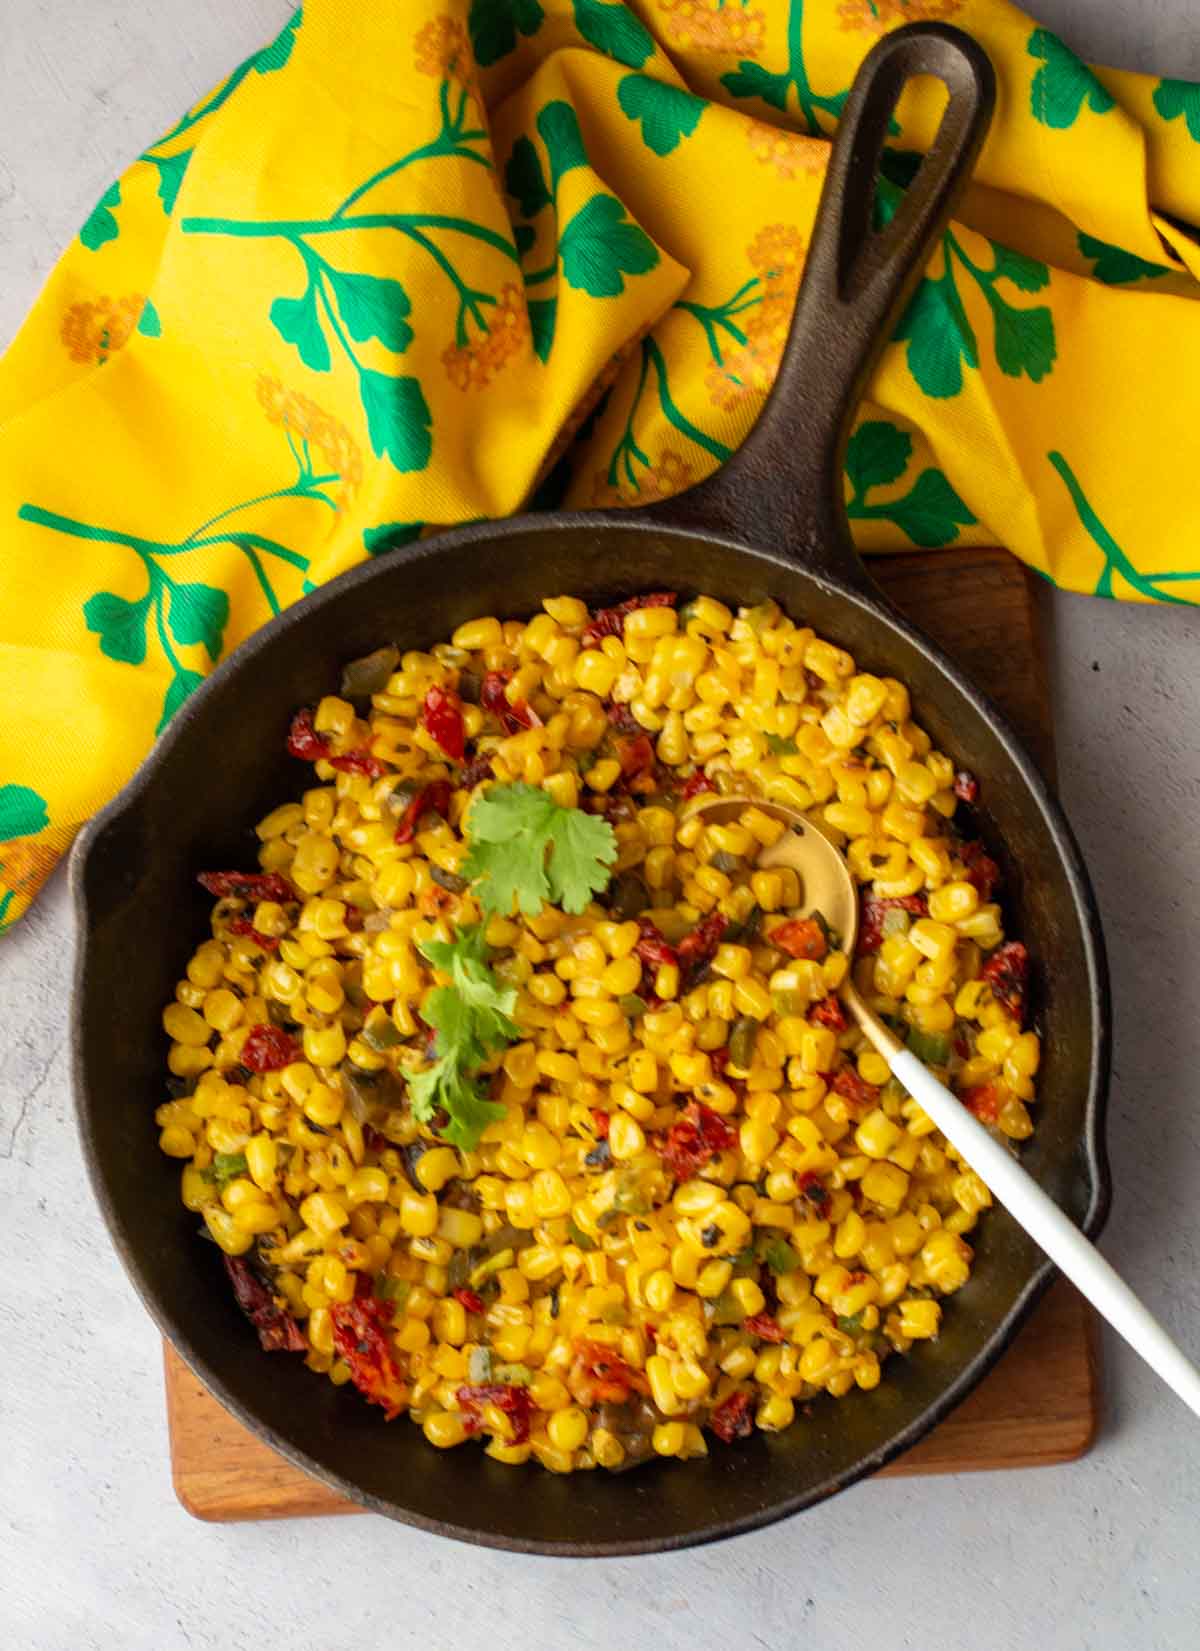
    Southwest corn with jalapeno peppers.

    This Southwest Corn, aka Coyote Corn, is so good that once you serve it to the pack, they’ll be howling for more. Sweet corn, jalapeno peppers and sun-dried tomatoes come together for a fabulous side dish.

    Skillet fried corn with sun dried tomatoes, onion, and garnished with cilantro.

    What You Can Expect From This Recipe

    Bold and earthy sundried tomatoes surprise themselves by complimenting the sweetness of the corn and pickles. The jalapeno peppers bring the excitement and the sliced green onions are a natural lively and crunchy addition. 

    The combination of flavors wrap around each other with creamy help from the melted butter and starch from the corn. 

    The cilantro topping is the icing on the cake for us. A Southwest Corn sidedish that we make over and over.

    For this recipe I used fresh Colorado sweet corn that I had tucked away in the freezer, a  combination of Silver Queen and Super Sweet varieties purchased from the farmer’s market. But you can make this with frozen sweet corn or canned corn.

    It’s a very unique corn side dish recipe that is big on flavor. So grab that cast iron skillet and let’s get started.

    This recipe comes from from a series of my favorite cookbooks. Our Denver Junior League Cookbooks. Award winning cookbooks that give us a goldmine of recipes that reflect Colorado’s casual style of living, rich heritage and natural bounty.

    Let’s take a look:

    Ingredients You’ll Need

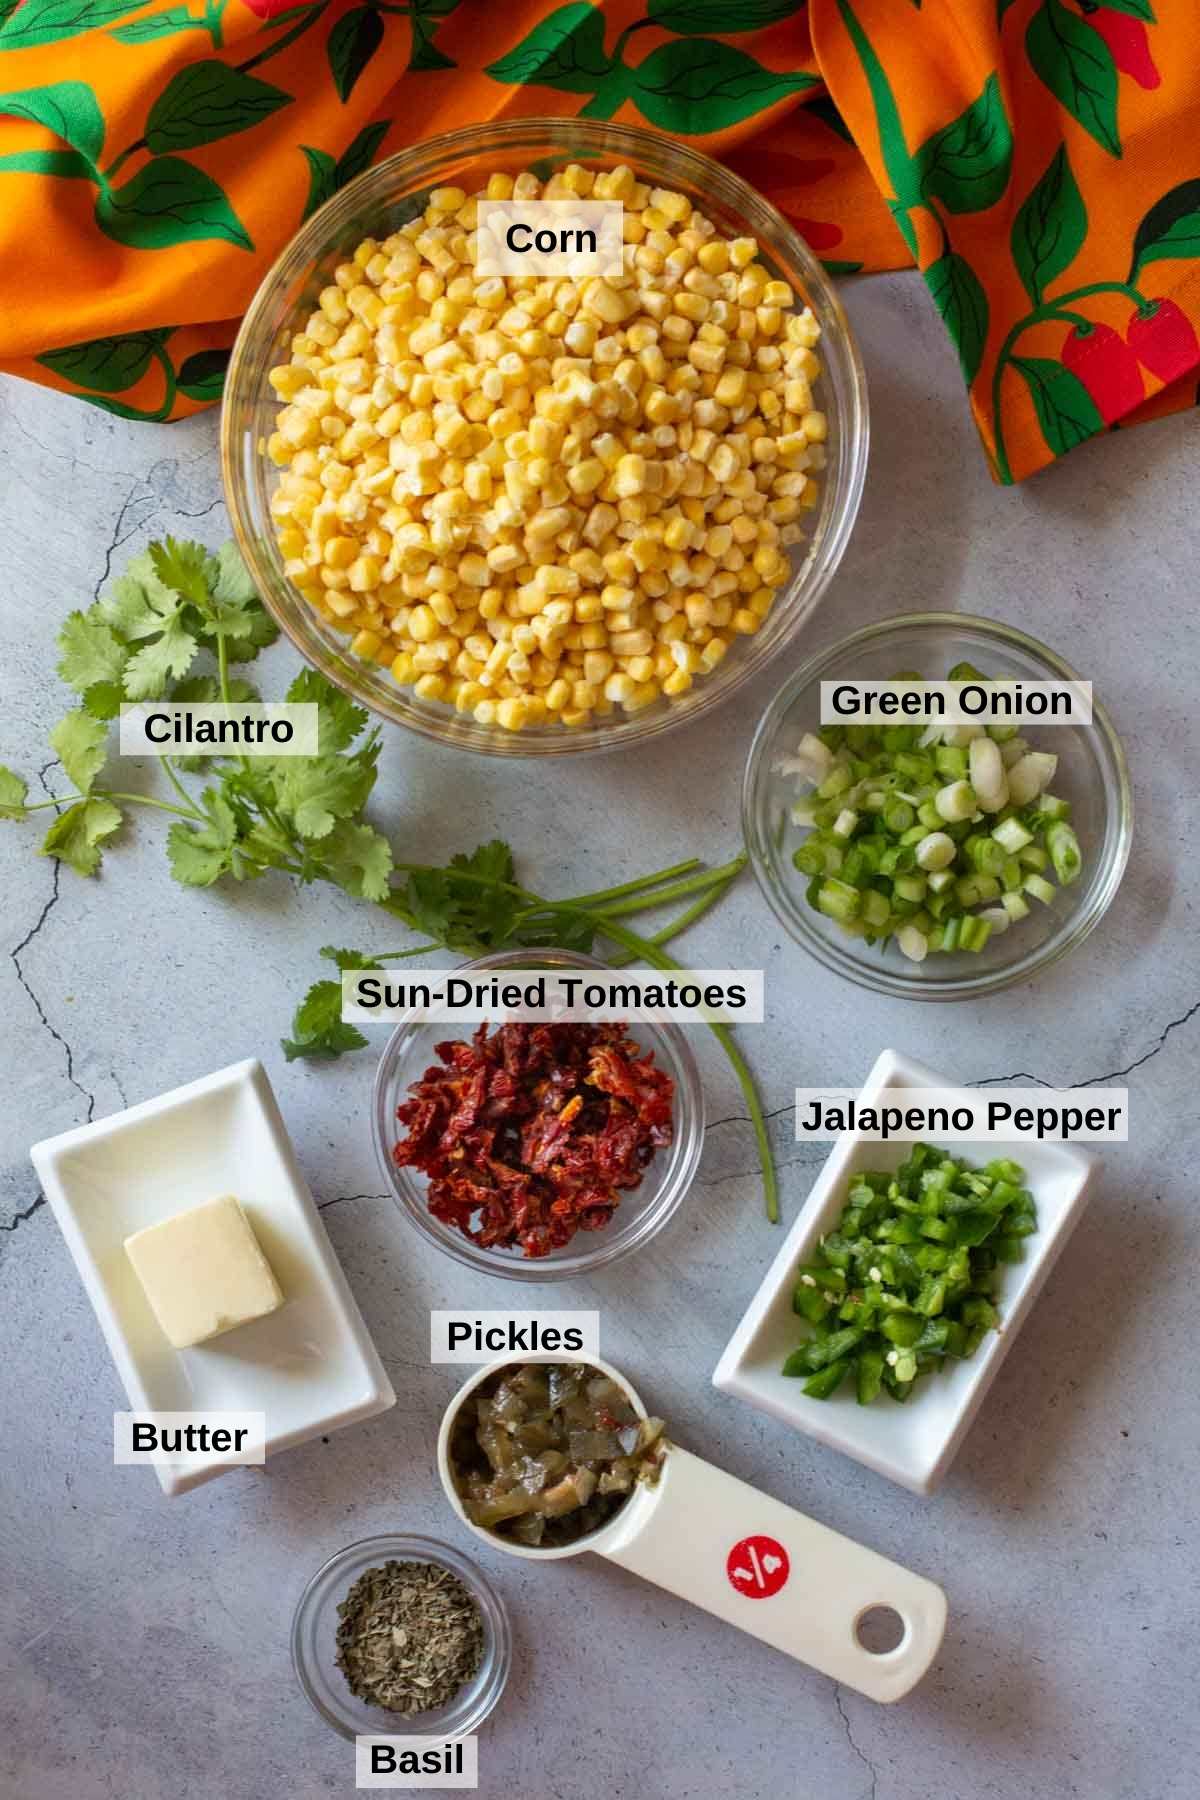
    Ingredients To Make Southwestern Skillet Corn.
    • Sweet Corn. Use either frozen corn, or fresh corn that’s been removed from the cob.
    • Green Onion.
    • Cilantro.
    • Sun-dried Tomatoes. I prefer the ones that come in a bag. They’re softer in texture.
    • Jalapeno Peppers. The backbone to this Southwestern corn recipe.
    • Butter. Salted or unsalted will work good here.
    • Bread and Butter Pickles.
    • Basil. Dried or fresh basil will work here.

    Pro Tip: When substituting dried herbs for fresh, a good rule of thumb is 1 Tablespoon of fresh herbs = 1 teaspoon dried herbs. Some herbs season better when used in dried form. Oregano is a good example.

    Ingredient Subs and Swaps

    • Green Onion: You most certainly can substitute chopped sweet onion for the green onion. Vidalia onions would be delicious here.
    • Jalapeno Pepper: If jalapeno peppers are simply too spicy for you, substitute chopped Poblano peppers, or even a bell pepper.
    • Pickles: I’ve used bread and butter pickles for this recipe as well as spicy style bread and butter pickles. Both are a delicious addition to this Southwest corn recipe.
    • Butter: For a healthier version, substitute olive oil for the butter. And for an even more decadent version, use bacon grease in place of the butter.

    Step by Step Instructions – It’s Easy

    Frying corn for skillet corn with sun-dried tomatoes.
    Adding ingredients to skillet fried corn.
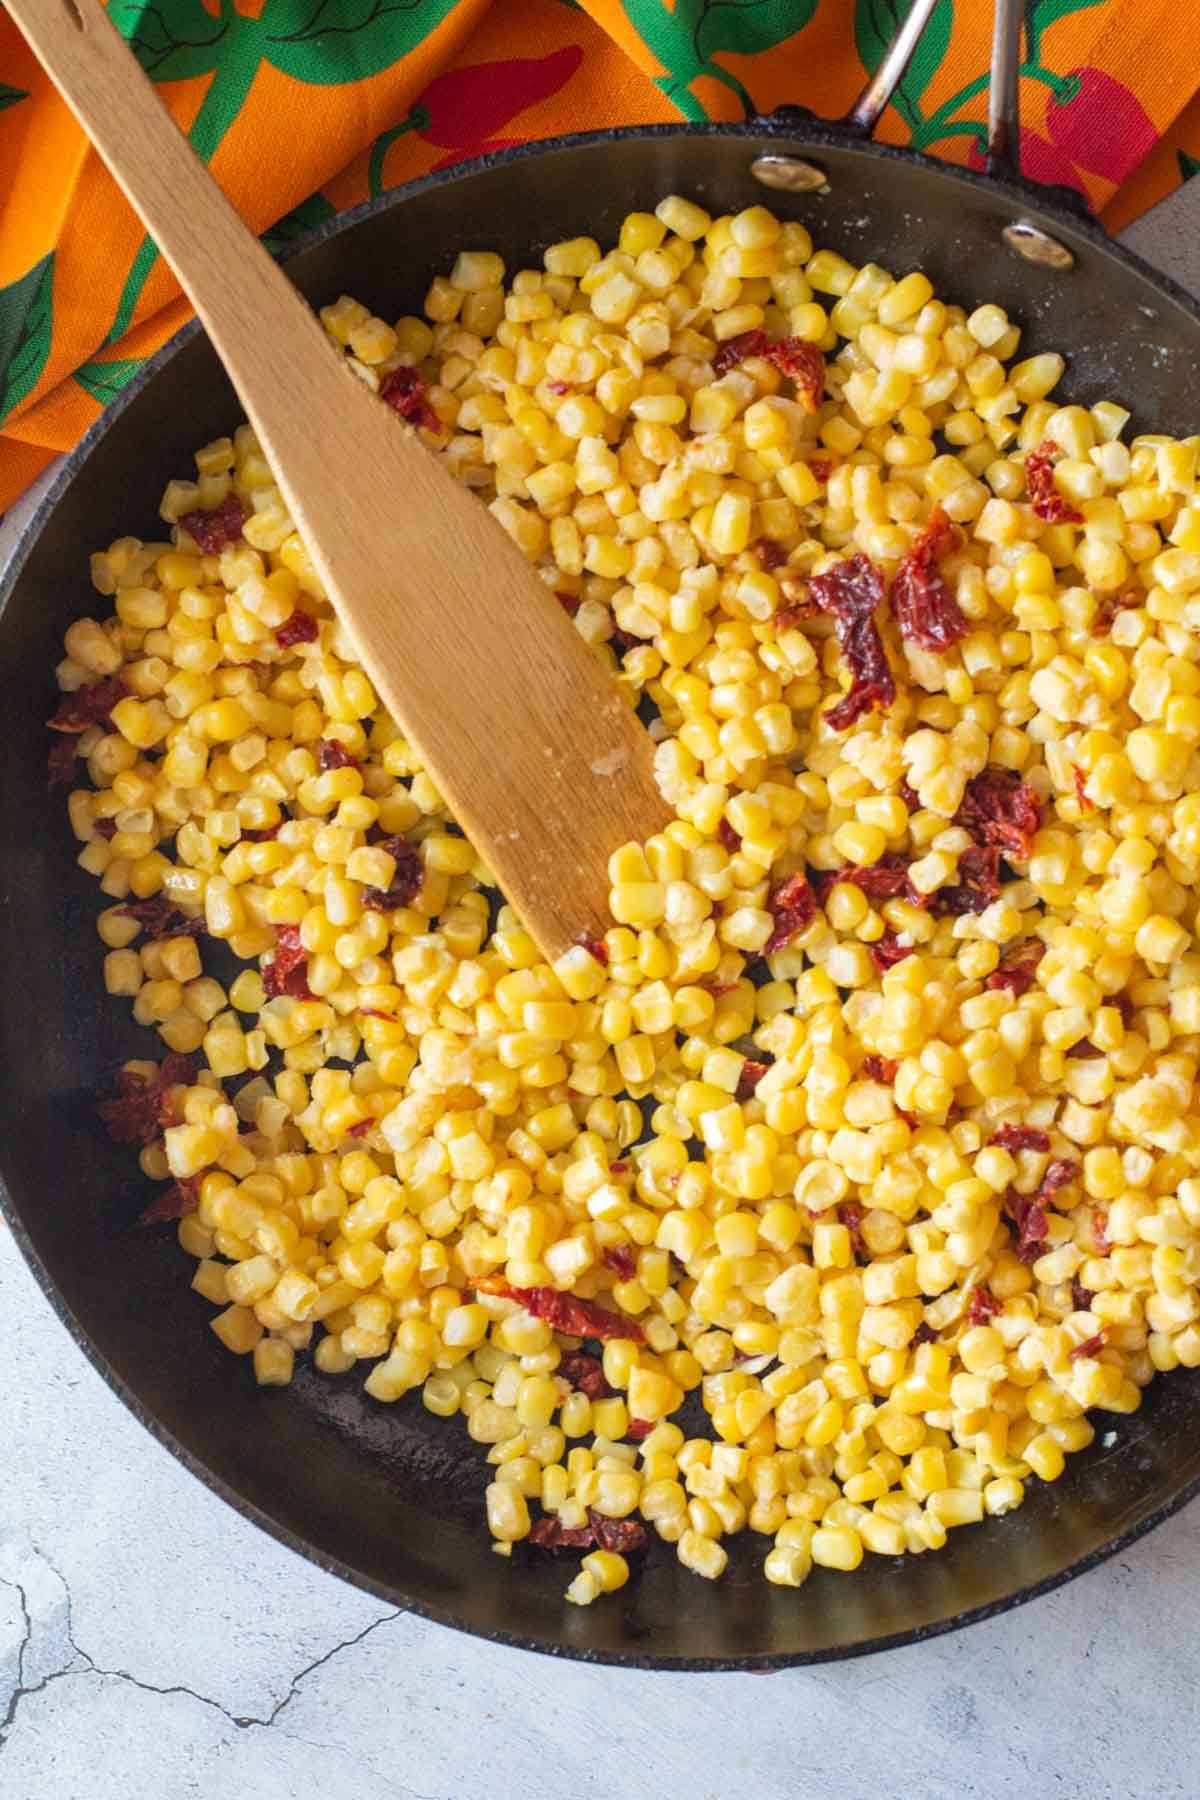
    1. Step 1: In a medium skillet, heat butter over medium high heat until foam subsides. Add corn and sun-dried tomatoes and cook, stirring frequently for about five minutes.
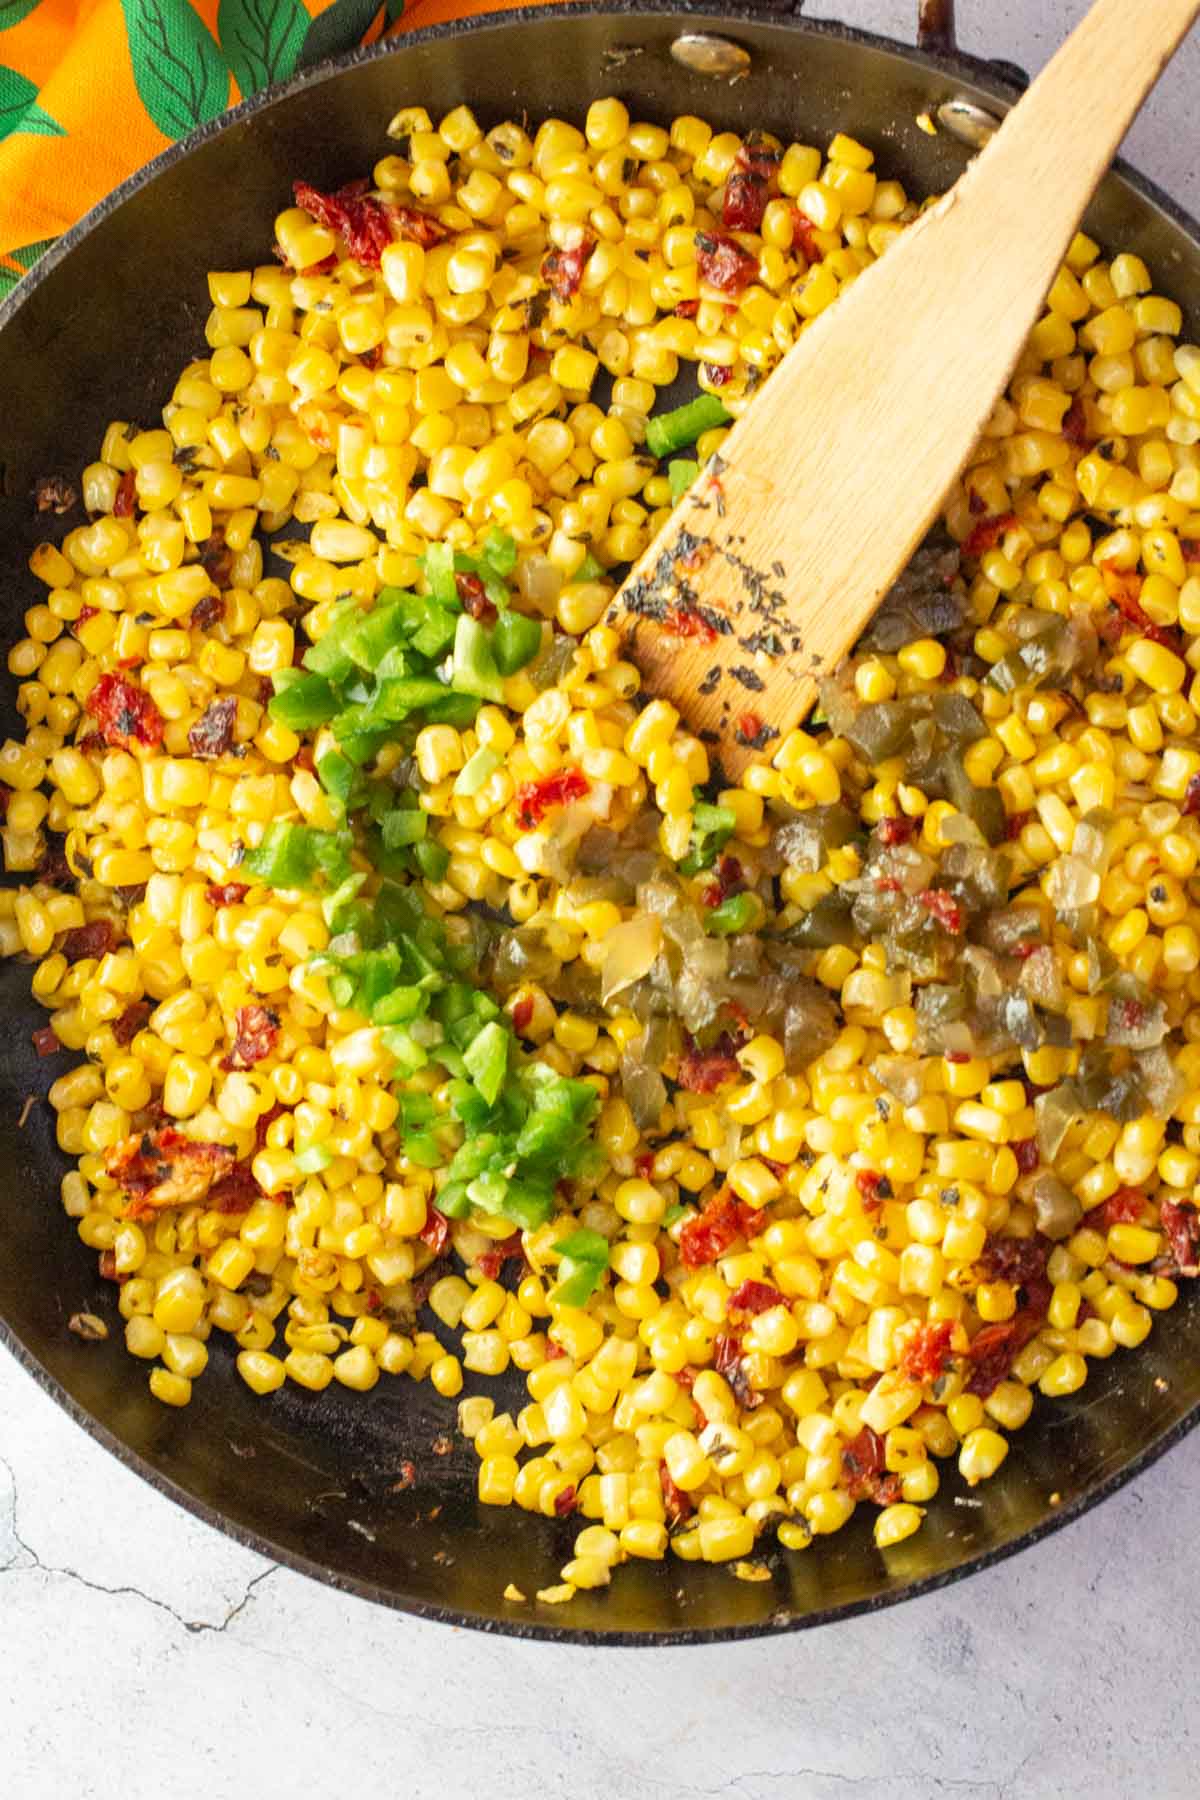
    2. Step 2: Add jalapeno peppers and pickles.
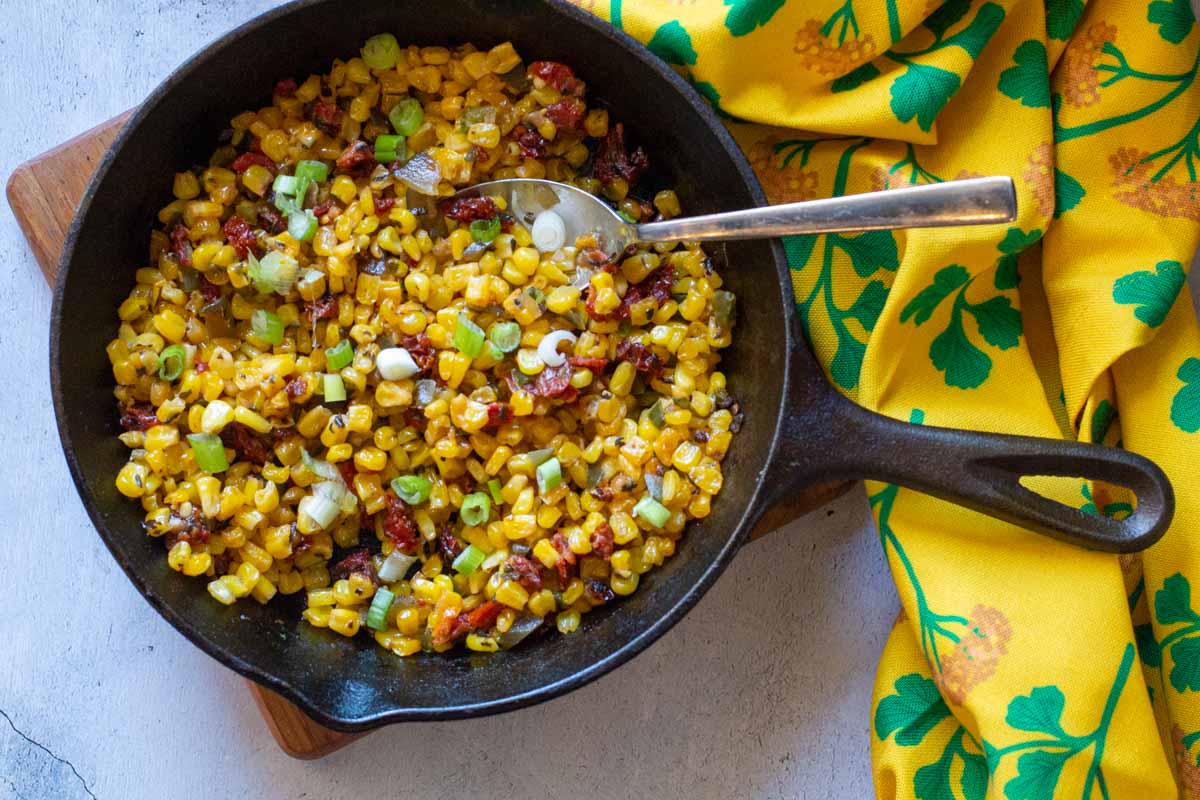
    Fried corn topped with sliced green onions and served in a cast iron skillet.
    1. Step 3: Season with salt and pepper. Place in a serving bowl and toss in basil and green onions. I like to serve it in a cast iron skillet for a rustic presentation. Top with cilantro and serve.

    Tips And Variations

    • Preheat your skillet: Get that skillet nice and toasty over medium high heat before adding the butter. Once you add the corn, this will help the corn start cooking quicker and help seal in flavor and texture. If the pan is only warm, the corn will release moisture rather than start cooking. And use a heavy bottomed pan like a cast iron skillet.
    • Don’t Overcook: Don’t over cook the corn. Frying it too long will cause the corn kernels to dry up and become too chewy.
    • Stir Often: While the corn is frying stir often to avoid the corn sticking to the bottom of the skillet.
    • Add More Flavor: This Southwest Corn recipe is beaming with flavor, but try adding some bacon bits at the beginning of the cooking process. Once they’re turning crispy, proceed with the recipe instructions.
    • Creamier: To make this recipe creamier, add a couple tablespoons of cream at the end of the recipe.
    • Cheesier: Once the dish is complete, stir in a couple of tablespoons of cream cheese and blend, or garnish with crumbled Cotija Cheese.

    Southwest Corn FAQ’s

    What’s The Easiest Way To Remove Kernels From Fresh Corn?

    If you’re using fresh corn for this recipe, the easiest way to remove those kernels from the cob is to grab your bundt pan. Shuck the corn and remove all of the silk strands that are still clinging to the fresh corn. Place a cob on the the cylinder piece of the bundt pan. Using a sharp knife, start at the top of the cob and slice straight down, cutting the kernels from the cob. Turn the cob and repeat until all kernels are removed. The kernels will fall into the belly of the bundt pan. Works so much better than using a plate to catch those kernels.

    Can This Recipe Be Made Ahead

    This recipe is best served as soon as it cooks. If made ahead and then attempting to reheat, will cause the corn to toughen.

    Can I Make Southwest Corn with Canned Corn?

    Yes you can, however make sure you drain the corn well. While the corn is in the colander use a paper towel to pat and absorb even more of the moisture.

    What To Serve With It

    Coyote Corn served as a welcome side dish for this main dish bison steak dinner. Alongside fiery Mexican Micheladas. We love Southwest corn with any grilled burger like this Steakhouse burger, or even Chicken Kabobs.

    And if you’re looking for even more side dishes for picnic style gatherings, don’t miss my Side Dish Category, you’ll find lots of great recipes, including the most popular on my site for Broccoli Rice and Cheese Casserole.

    And don’t miss this line-up of Summer cook-out sides. I’m positive you’ll find something you love.

    Related Recipes Using Sweet Corn

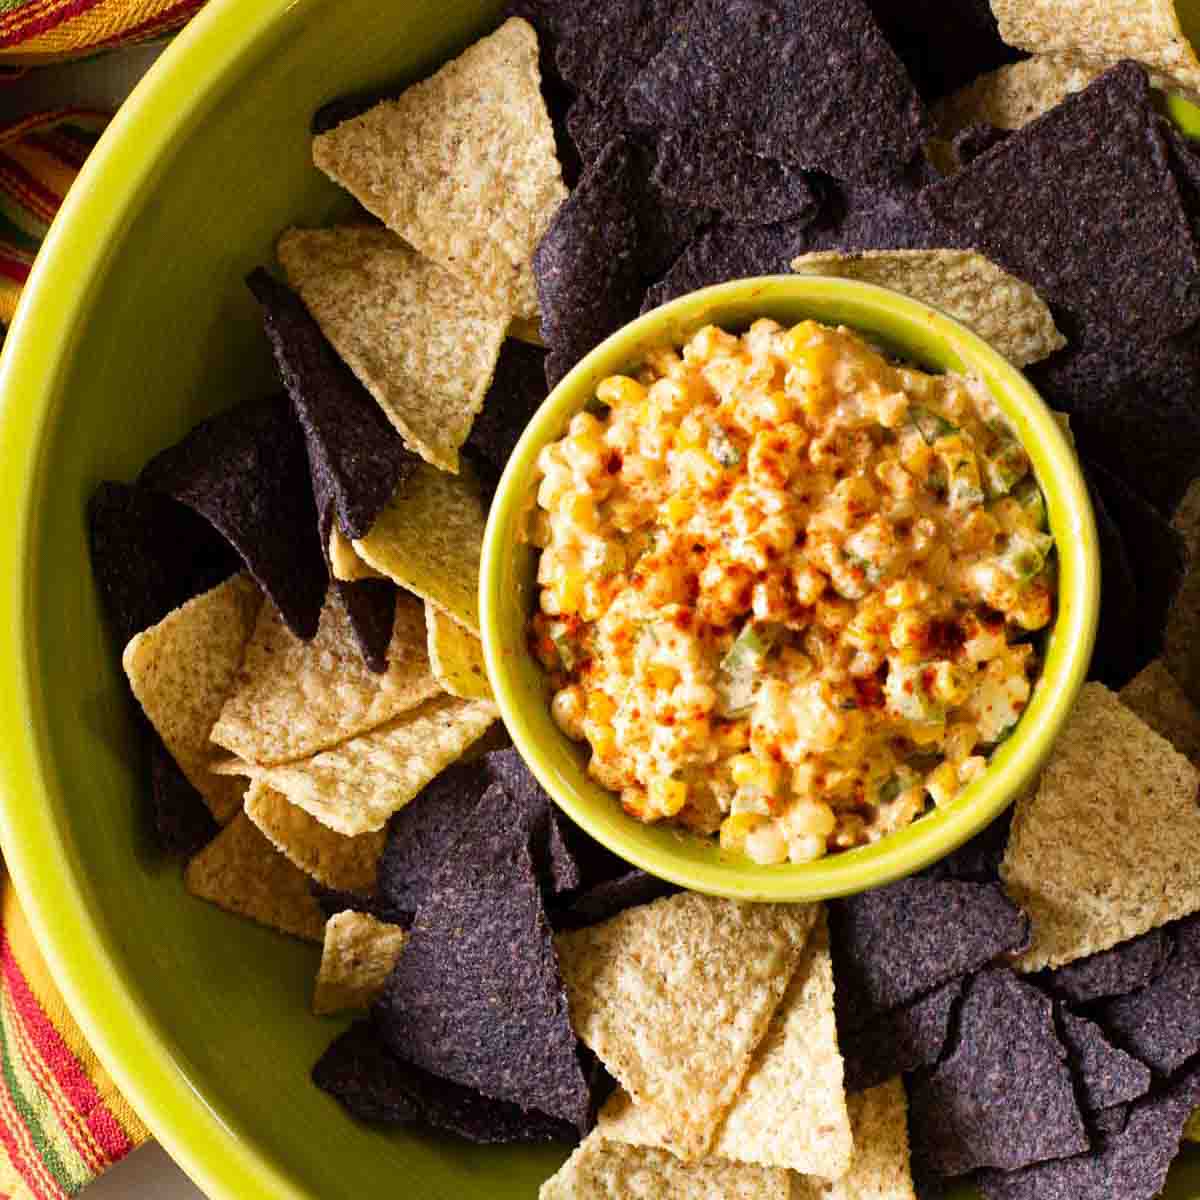
    • Mexican street corn dip served with blue and yellow corn tortillas.
      Make Ahead Mexican Street Corn Dip
    • Corn succotash with edamame and red bell pepper on a blue plate.
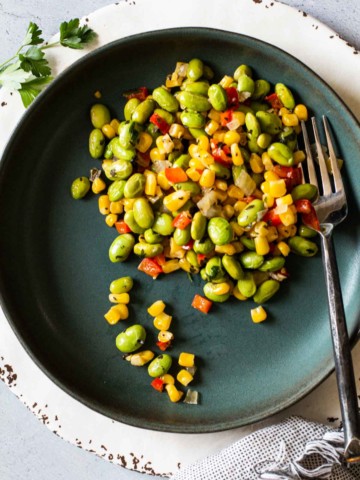
      Sweet Corn Succotash with Edamame
    • Black bean corn salsa dip in a yellow bowl.
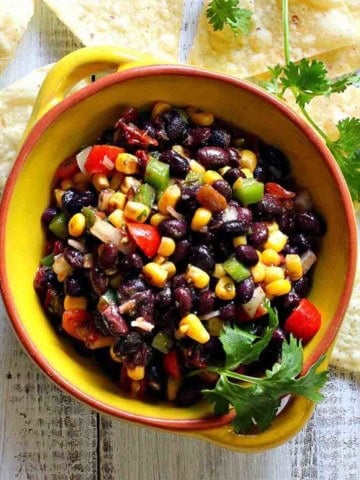
      Black Bean And Corn Salsa
    • Honey Butter Skillet Corn in a blue serving bowl.
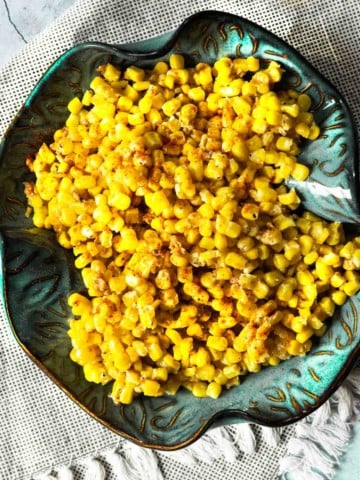
      Honey Butter Skillet Corn

    If you liked this recipe, please leave a star ⭐⭐⭐⭐⭐ rating in the recipe card below and leave a comment. I always appreciate your feedback and hearing how everything went.

    And, don’t forget to subscribe to my newsletter for more delicious recipes and cooking tips. Make it a delicious day … every day.

    Southwest corn with jalapeno peppers.
    Print Recipe
    5 from 1 vote

    Coyote Corn, Southwest Corn Recipe

    A great Southwestern recipe for fresh sweet corn.
    Prep Time10 minutes mins
    Cook Time5 minutes mins
    Total Time15 minutes mins
    Course: Side Dish
    Cuisine: Southwestern
    Diet: Gluten Free
    Servings: 4
    Calories: 160kcal
    Author: Lea Ann Brown

    Ingredients

    • 2 Tablespoons butter
    • 16 ounces frozen corn kernels or 3 cups fresh corn kernels
    • ¼ cup sun-dried tomatoes chopped
    • 3 Tablespoons jalapeno pepper chopped
    • ¼ cup bread and butter pickles chopped, a spicy brand is better
    • 3 Tablespoons fresh basil fine chopped, or 1 tablespoon dried basil
    • ⅓ Cup green onions thin sliced, including green tops
    • cilantro for garnish

    Instructions

    • In a medium skillet, heat butter over medium high heat until foam subsides.
    • Add corn and sun-dried tomatoes and cook, stirring frequently for about five minutes.
    • Add jalapeno peppers and pickles. Season with salt and pepper. Stir and cook for 1 minute to blend heat and flavors.
    • Place in a serving bowl and toss in basil and green onions. Serve warm or at room temperature. Garnish with a sprig or chopped fresh cilantro.

    Notes

    Tips for Success
    • Don’t Overcook: Don’t over cook the corn. Frying it too long will cause the corn kernels to dry up and become too chewy.
    • Stir Often: While the corn is frying stir often to avoid the corn sticking to the bottom of the skillet.
    • Add More Flavor: This Southwest corn recipe is beaming with flavor, but try adding some bacon bits at the beginning of the cooking process. Once they’re turning crispy, proceed with the recipe instructions.
    • Creamier: To make this recipe creamier, add a couple tablespoons of cream at the end of the recipe.
    To make this recipe with canned corn. Use three 15 ounce cans of yellow sweet corn. Drain the corn well and pat dry with a paper towel before adding to the pan to fry. 

    Nutrition

    Calories: 160kcal | Carbohydrates: 25g | Protein: 4g | Fat: 7g | Saturated Fat: 4g | Cholesterol: 15mg | Sodium: 300mg | Potassium: 255mg | Fiber: 3g | Sugar: 5g | Vitamin A: 542IU | Vitamin C: 18mg | Calcium: 14mg | Iron: 1mg

     Southwest Corn … It’s What’s For Dinner.

    « Previous Page
    Next Page »

    I'm Lea Ann

    Welcome to my Colorado kitchen. If you're a fan of rustic homestyle cuisine, you've come to the right place. I'm a Culinary School Grad with a passion to inspire you to cook as often as you can. I offer reliable, approachable and easy to follow recipes. So grab that skillet and let's cook.

    More about me

    Soup and Stew Recipes

    • Southwest chicken soup with hominy and potatoes.
      Sopa Ranchera, Southwest Chicken Soup
    • Creamy chicken tortilla soup with rotel tomatoes.
      Southwestern Creamy Chicken Tortilla Soup
    • Cowboy chili garnished with grated cheese and jalapeno pepers.
      New Mexico Style Cowboy Chili
    • Ground chicken chile with white beans.
      Giada’s Ground Chicken Chili with White Beans
    • Beef stew with mushrooms served in a skillet.
      Beef Stew With Mushrooms – Crock Pot Method
    • 7-can taco soup with ranch dressing.
      Original 7 Can Taco Soup with Ranch Dressing

    Reader Favorites

    • Super Moist Cheesy Cornbread with Creamed Corn
    • Flemings steakhouse macaroni and cheese in a white bowl.
      Flemings Steakhouse Mac and Cheese
    • A slice of Layered Mexican Casserole with ground beef and corn tortillas.
      Mexican Casserole with Ground Beef and Corn Tortillas
    • Beef Tagliata, thin sliced flank steak served over arugula and cherry tomatoes.
      Beef Tagliata (Italian Steak)
    • Ham and cheese quesadilla made with corn tortillas and topped with a fried egg.
      Crispy Ham and Cheese Corn Tortilla Quesadillas
    • Spinach chicken mushroom skillet dinner.
      Chicken Mushroom and Spinach Skillet

    Footer

    • Contact
    • About
    • Privacy Policy
    • Accessibility Statement
    • ↑ back to top

    Copyright © 2024 Cooking on the Ranch • Powered by Feast+

    Rate This Recipe

    Your vote:


    A rating is required
    A name is required
    An email is required