Cooking On The Ranch

  • Home
  • About
  • Recipe Roundup
  • Contact Me
  • Join Community
menu icon
go to homepage
  • Home
  • Soups and Stews
  • About
  • Recipes
  • Contact Me
    • Facebook
    • Instagram
    • Pinterest
  • search icon
    Homepage link
    • Home
    • Soups and Stews
    • About
    • Recipes
    • Contact Me
    • Facebook
    • Instagram
    • Pinterest
  • ×
    Home

    Creamy Red Chile Sauce Chicken Enchiladas

    October 6, 2020 By Lea Ann Brown 49 Comments

    Chicken enchiladas made with a creamy red sauce topped with jalapeno peppers and fresh onion.

    Creamy Red Chile Sauce Chicken Enchiladas are baked bubbly in a luscious tomato cream sauce topped with lots of cheese for a crowd pleasing hearty Classic Mexican and Southwestern dish. You’ll agree that these is the best creamy chicken enchilada recipe you’ll ever find.

    Chicken enchilada casserole with tomato cream sauce

    This recipe was first published October 2009 and has been updated in October 2020.

    What You Can Expect From This Recipe

    This Southwestern-style Mexican dish is inspired by my recipe for my New Mexican Red Chile Sauce , a foundational recipe traditional in Southwestern cooking. However, this sauce is more tomato forward than a pure red chile sauce. And becomes irresistibly creamy by adding Mexican Crema.

    I’ve always said, if someone makes enchiladas for you that means they love you. Enchiladas using rolled corn tortillas are always a labor of love. This is not a quick meal to prepare, but it’s an easy meal to prepare. Just allow some time.

    Can you ever go wrong with Southwestern-Mexican Food? It’s perfect weather for a hearty Mexican casserole in the form of this baked creamy red sauce chicken enchiladas casserole. Your hungry family will love this creamy version of a classic.

    This recipe comes with impressive credentials as it’s an adaptation of a Rick Bayless recipe. His expertise lies in the fact that he has spent a few years living in Mexico and brings us fresh, delicious creations inspired by authentic Mexican cuisine. 

    Along with it’s pedigree, this recipe has everything you want in an enchilada casserole:

    Table of contents

    • What You Can Expect From This Recipe
    • Ingredients You’ll Need
    • Ingredient Swaps
    • Step by Step Instructions, Let’s Get Started
    • Garnish Ideas for Chicken Enchiladas
    • Tips For Making Red Sauce Chicken Enchiladas
    • Questions You May Have
    • Storage
    • Creamy Red Sauce Chicken Enchiladas
      • Explore More Southwestern Enchilada Recipes

    Ingredients You’ll Need

    Ingredients for baked chicken enchiladas with tomato cream sauce.
    • Roasted Chile Peppers Chile peppers are a staple in New Mexican Cuisine. And more than likely they’re roasted to bring a hint of smoky flavor and that “just right” spicy heat. Use any combination of chile peppers that you like. Jalapeno, Poblano, Anaheim, Hatch or Mirasol.
    • Mexican Crema A creamy tangy Mexican condiment that’s thicker and richer than American Sour Cream. It’s higher in fat so it doesn’t curdle as easy which makes it a perfect choice for stirring into hot soups and creamy sauces, like this tomato cream sauce for this recipe. It puts the “creamy” into this chicken enchilada recipe.
    • Fresh Tomatoes When in season, sweet juicy fresh tomatoes will take this recipe over the top.
    • Chicken Breast Roasted to perfection, juicy, tender and shredded, chicken breast makes this a healthier option when making enchiladas.
    • White Cheese Enchiladas would be enchiladas without that ooey-gooey melty cheese factor. For this recipe we’re using a white melting cheese.

    Pro Tip: Purchase good quality cheese and grate it yourself. Pre-grated cheese in bags includes additives to keep it from clumping, which will also compromise the melting factor. Grating cheese from a block of cheese will result in a creamier and more consistent melting experience. Plus, it’s less expensive.

    Ingredient Swaps

    • Canned Tomatoes: If fresh tomatoes are not in season, please don’t turn to those sad hot-house tomatoes that we find in our markets during the winter. Canned tomatoes make a good choice. San Marzano tomatoes are an excellent choice. No need to drain them, and no need to roast them with the peppers.

    Step by Step Instructions, Let’s Get Started

    Shredded chicken and cheese to make enchiladas
    1. Step 1: Cook The Chicken Generously brush three boneless skinless chicken breast halves with olive oil and roast for about 30 minutes at 350 degrees.  Once cooked, cool the chicken and using your hands or two forks to shred. Set aside.
    2. Step 2: This is also a good time to grate the cheese.
    Roasted Tomatos and Peppers for Tomato Cream Sauce for Chicken Enchiladas.
    Roasted chile peppers and tomatoes for Chicken Enchiladas with Tomato Cream Sauce
    1. Step 3: Make The Creamy Red Chile Sauce: Place about 15 medium sized tomatoes and 3-4 chile peppers on a baking sheet. Broil in oven about 5 inches from heat for five minutes. When you start to see charred spots, turn the tomatoes and peppers over and broil another 5 minutes. 
    Using a food processor to make Tomato Cream Sauce for chicken enchiladas
    1. Step 4: Puree the Red Chile Sauce: Place tomatoes and peppers along with the juices from the baking sheet into a food processor and puree until smooth. You can also use an immersion blender.
    Cooking onions for chicken enchiladas with tomato cream sauce
    Making tomato cream sauce for chicken enchiladas
    1. Step 5: Cook the Onions: In a Dutch oven saute one chopped onion in olive oil until tender, about 7 minutes. 
    2. Step 6: Turn up heat to medium high and add pureed tomato/chili mixture to onion. Add chicken broth.  Partially cover and simmer for 15 minutes.  When done, the texture of the sauce should be soupy.  If the sauce is too thick add a little more broth.  Stir in ½ Cup of Mexican crema, set aside and keep warm. You’re ready to prep the corn tortillas to make this creamy chicken enchilada recipe.
    How to heat corn tortillas in the oven.
    1. Step 7: Prepare the corn tortillas: An easy way to heat corn tortillas to make them pliable to roll, is to spray them with oil and bake them. The oil creates a slight barrier which will help them soak up a little bit of the sauce when you dip them. But not too much to make them soggy. On a baking sheet, place 12 oiled corn tortillas.  Bake for 5 minutes. Remove from oven and cover with a towel to keep warm.
    Filling tortilla shells enchiladas
    1. Step 8: Roll the enchiladas: Spoon ½ of the tomato cream sauce into a casserole baking pan.  Working fast, so tortillas don’t cool, place shredded chicken inside a warm tortilla and roll.
    How to roll tortillas for Chicken Enchiladas with Tomato Cream Sauce
    How to spoon tomato cream sauce over chicken enchiladas
    1. Step 9 : Start placing enchiladas seam side down into the sauce. Use your imagination on spacing the enchiladas to fit. Spoon the remaining sauce over the chicken enchiladas.
    Sprinkling cheese over Chicken Enchiladas with Tomato Cream Sauce
    1. Step 10 : Sprinkle with grated cheese.  Bake at 350 degrees for 15 minutes or until bubbly and cheese just starts to brown.

    Garnish Ideas for Chicken Enchiladas

    • Fresh onion, chopped or in rings is a customary topping for any authentic Mexican Enchilada.
    • Chopped cilantro.
    • We love and rings of sliced fresh jalapeno peppers, or try pickled jalapeno peppers.
    • Guacamole or chopped fresh avocados.

    Tips For Making Red Sauce Chicken Enchiladas

    • Traditional Enchiladas are made with corn tortillas. You simply can’t take a corn tortilla out of the package and use it without first making it pliable. You can warm them by gently heating them in the microwave, or stovetop using a Comal. You can also use a sheet pan and heat them in the oven, as I’ve illustrated above.
    • This recipe is a great way to use leftover chicken or even turkey. You can even purchase a rotisserie chicken and shred the meat.
    • This creamy red sauce is also a great choice to use with shredded beef, like my recipe for Beef Machaca
    • Experiment with cheeses. Not all cheeses are good for melting. For this recipe choose Monterey Jack, Pepper Jack, Muenster. A good quality Mexican melting cheese is a great choice. Choose Chihuahua, Quesadilla, or Asadero. All can be found in well stocked produce section. Try my new favorite, Sargento Fiesta Pepper Jack. It’s got a nice heat to it.

    Questions You May Have

    Can I Substitute Flour Tortillas for Corn Tortillas?

    Please Don’t. A flour tortilla rolled with any type of filling is a burrito not an enchilada. Flour tortillas are thicker and will soak up too much of the sauce called for in this recipe. You’ll be left with a very dry casserole.

    How To Get The Skin Off Chile Peppers?

    Once peppers are roasted, place them in a plastic bag. No need to seal the bag. Let them steam for about 5 minutes. Remove the peppers from the bag and slide most of the skins off with your hands. DO NOT run chiles under water to remove skin. You’re washing away that smoky flavor. I like to leave some little patches of skin on for the flavor.

    Can I Make Chicken Enchiladas Ahead?

    I’m not a fan of make ahead chicken enchiladas. If you assemble and refrigerate the casserole the night before, the corn tortillas will become mushy. I advise to bake this very soon after preparing, as a mushy corn tortilla will break your heart.

    Storage

    • Store any leftovers in the refrigerator covered with aluminum foil. Gently reheat in a 250 degree oven, or individual servings in the microwave. Enchiladas will keep in the refrigerator up to four days.
    • This chicken enchilada recipe will freeze well. Cover any leftovers first with plastic wrap and then top with aluminum foil. Three months is a good rule of thumb for freezing any casserole. Thaw in the refrigerator overnight and then gently reheat in a 250 degree oven.

    Creamy Red Sauce Chicken Enchiladas

    Creamy chicken enchiladas casserole baked in a pyrex baking dish.

    I hope you give this Rick Bayless Chicken Enchiladas recipe a try, and if you do, please give the recipe a star rating and scroll down a leave a comment about your experience with the recipe. I love hearing from my readers.

    Explore More Southwestern Enchilada Recipes
    • Ground Beef Red Chile Sauce Enchiladas.
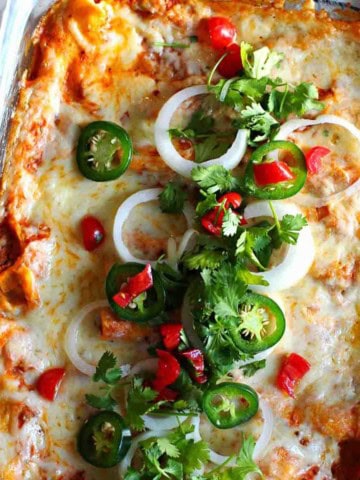
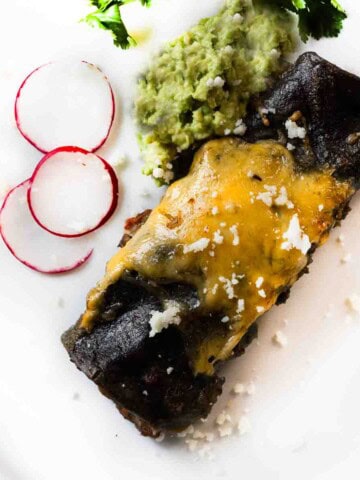
      Blue Corn, Red Chile Ground Beef Enchiladas (New Mexico Style)
    • Pork enchiladas verde served with a side of black beans.
      Beer Braised Pulled Pork Enchiladas Verde
    • Two chile con carne enchiladas served with Mexican rice.
      Truck Stop Enchiladas (Chili Con Carne Enchiladas)
    • New Mexico Stacked Enchiladas topped with a fried egg.
      New Mexico Stacked Enchiladas

    And if you love Mexican food, don’t miss my Mexican Southwest Category. It’s chock full of ole’ goodness. And if you enjoy New Mexico Red Chile flavors, you won’t want to miss this recipe for Carne Adovada, one of new Mexico’s most celebrated dishes.

    If you liked this recipe, please leave a star ⭐⭐⭐⭐⭐ rating in the recipe card below and leave a comment. I always appreciate your feedback and hearing how everything went.

    And, don’t forget to subscribe to my newsletter for more delicious recipes and cooking tips. Make it a delicious day … every day.

    Chicken enchiladas made with a creamy red sauce topped with jalapeno peppers and fresh onion.
    Print Recipe
    5 from 2 votes

    Creamy Red Chile Sauce Chicken Enchiladas

    Hands down the best chicken enchiladas ever. And it's all due to a very special (and easy) homemade tomato cream sauce that will knock your socks off.
    Prep Time1 hour hr
    Cook Time15 minutes mins
    Total Time1 hour hr 15 minutes mins
    Course: Main Course Chicken
    Cuisine: Mexican
    Diet: Gluten Free
    Servings: 8
    Calories: 338kcal
    Author: Lea Ann Brown

    Ingredients

    • 3-4 whole green chiles poblano, jalapenos, Hatch or Mirasol or a mixture.
    • 1 medium yellow onion chopped
    • 2 cups chicken broth plus a little extra if needed
    • ½ cup Mexican Crema or creme fraiche or heavy whipping cream
    • 3 pounds fresh tomatoes or 2-28 ounce cans good quality whole tomatoes, drained
    • 1 ½ Tablespoon vegetable oil Or lard. Plus a little for brushing or spraying the tortillas
    • 2 cups coarsley shredded chicken breast grilled, roasted, or rotisserie
    • ⅔ cup Mexican Cheese Shredded. Monterey Jack, Chihuahua, quesadilla, asadero
    • 12 corn tortillas
    • 6 slices yellow onion separated into rings for garnish
    • Fresh Cilantro for garnish

    Instructions

    • Heat the oven to 350°.
    • For fresh tomatoes: Roast the tomatoes and chiles in the oven on a baking sheet 4 inches below a hot broiler. Turning to roast all sides until they show dark spots. Remove from oven and cool.  Working over the same baking sheet, remove skins and cores from the tomatoes and remove skins from the peppers. 
    • Place roasted peppers and tomatoes in a food processor and blend to a smooth puree.
    • If using canned tomatoes: No need to roast canned tomatoes. Once the chiles are roasted, place canned tomatoes and roasted peppers into a food processor and blend to a smooth puree.
    • Cook The Onions: In a 4-5 quart Dutch oven, heat the oil (or lard, or bacon fat) over medium heat. Add the onion and cook, stirring regularly, until golden, about 5-7 minutes.
    • Make the Sauce: Raise the heat to medium-high, and stir in the tomato/pepper puree. Cook, stirring, until darker in color and thickened to the consistency of tomato paste, about 15 minutes.
    • Stir in the chicken broth, partially cover and simmer 15 minutes. Taste and season with salt, usually about ½ teaspoon. The sauce should be a slightly soupy consistency-not as thick as spaghetti sauce. If it is too thick, stir in a little additional broth. Stir the Mexican crema into the sauce. Keep warm over low heat.
    • Season the Chicken: Put the chicken in a bowl and stir ½ cup of the sauce mixture into it. Taste and season with additional salt if you think it needs it.
    • Soften the Corn Tortillas: Lay the tortillas out on a baking sheet (2 sheets if you have them, for more even heating), and lightly brush or spray both sides of the tortillas with oil. Bake just to warm through and soften, about 3 minutes. Stack the tortillas and cover with a towel to keep warm.
    • Build the Enchiladas: Smear about half of the sauce over the bottom of a 13×9-inch baking dish.
    • Working quickly so the tortillas stay hot and pliable, roll a portion of the chicken into each tortilla, (don't over-fill) then line them all up in the baking dishes. Douse evenly with the remaining sauce, then sprinkle with the cheese.
    • Bake until the enchiladas are hot through (the cheese will have begun to brown), about 15 minutes. 
    • Garnish with onion rings, slices of jalapeno pepper and cilantro sprigs. These are best served piping hot from the oven.

    Notes

    Can I substitute flour tortillas for corn tortillas? No. A flour tortilla rolled with any type of filling is a burrito not an enchilada. Flour tortillas are thicker and will soak up too much of the sauce called for in this recipe. You’ll be left with a very dry casserole.
    How to remove the skins from chile peppers. Once peppers are roasted, place them in a plastic bag. No need to seal the bag. Let them steam for about 5 minutes. Remove the peppers from the bag and slide most of the skins off with your hands. DO NOT run chiles under water to remove skin. You’re washing away that smoky flavor. I like to leave some little patches of skin on for the flavor.
    Use a 9 x 13 inch casserole dish or a lasagna pan. If you use a 9 x 13, you’ll be able to line the enchiladas up for easy serving once they’re baked, but you’ll need an additional small casserole to hold all of the enchiladas. A 9 x 13 pan will hold 9 – 10 enchiladas. A lasagna pan will hold more but they’ll be facing different directions. 

    Nutrition

    Calories: 338kcal | Carbohydrates: 37g | Protein: 20g | Fat: 14g | Saturated Fat: 6g | Cholesterol: 54mg | Sodium: 550mg | Potassium: 940mg | Fiber: 7g | Sugar: 9g | Vitamin A: 2075IU | Vitamin C: 40mg | Calcium: 193mg | Iron: 2mg

    Creamy Red Sauce Chicken Enchilada Recipe … It’s Whats for Dinner

    Goat Cheese Pumpkin Appetizer with Pecans and Caramelized Onions

    October 3, 2020 By Lea Ann Brown 1 Comment

    If you’re looking for easy Fall Appetizer ideas, you’ve got the check this one out. Canned pumpkin and tangy goat cheese with sweet caramelized onions and crunchy pecans for one great cracker spread. This easy pumpkin goat cheese appetizer is truly a treat.

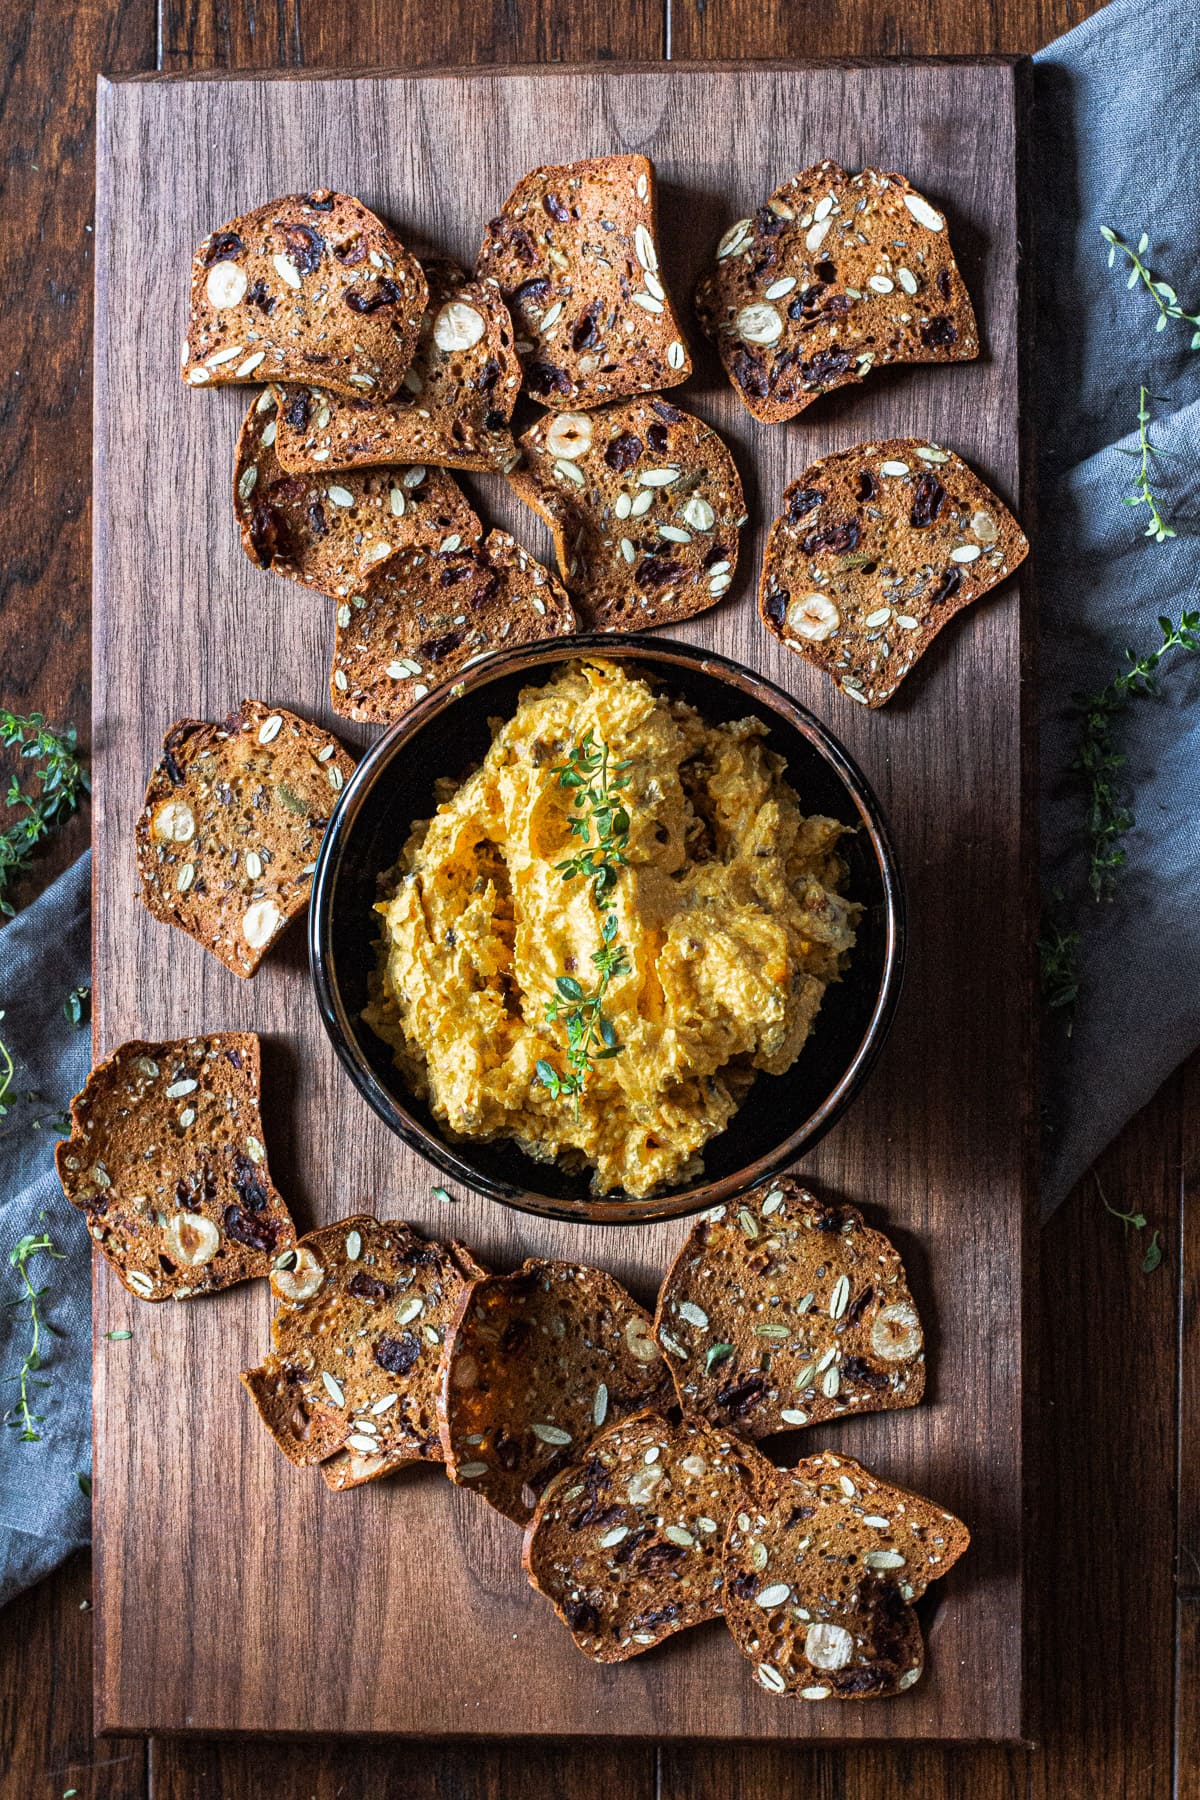
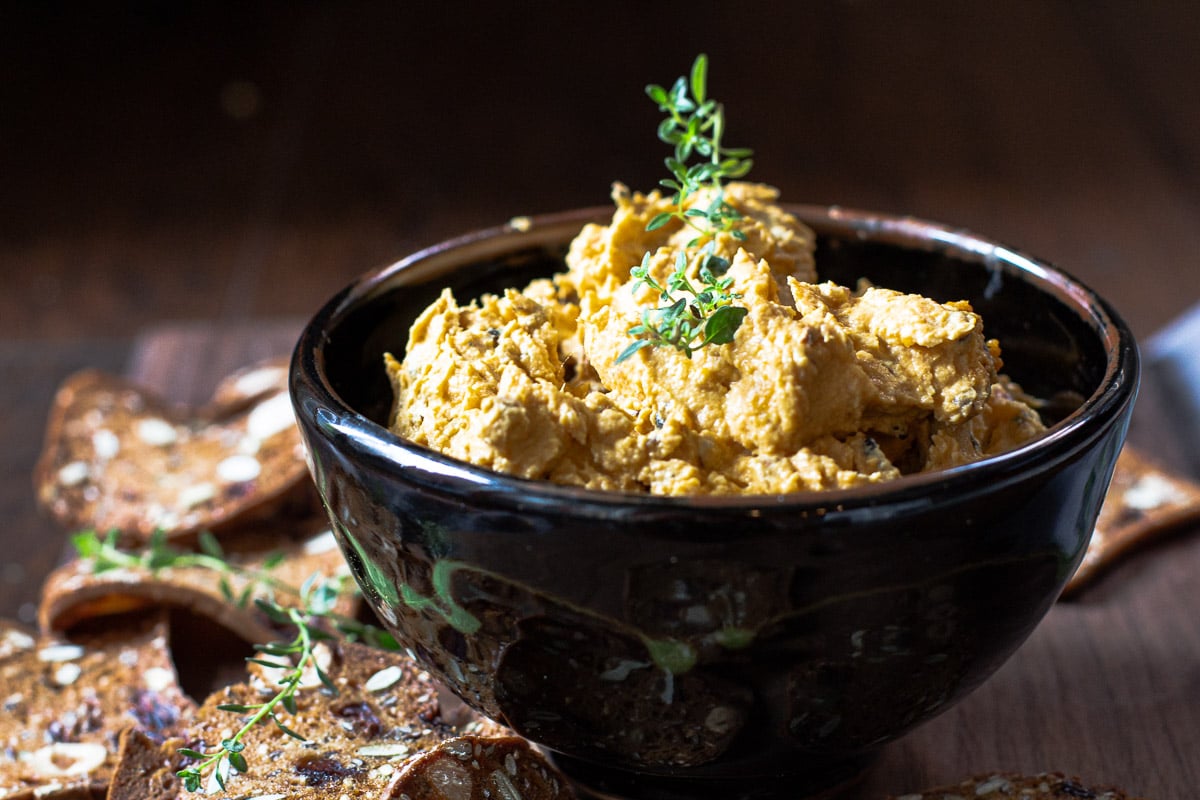
    Goat cheese appetizer with raincoast crisp crackers garnished with fresh thyme

    About This Recipe and Why it Works

    It’s always fun to celebrate Fall foods. Grilled burgers are replaced with soups and stews, and suddenly vegetable casseroles are filling those serving bowls instead of pasta salads.

    And of course, before we know it, we’re obsessed with everything pumpkin.

    This easy fall appetizer recipe was given to me by a friend years ago. She served it at a holiday gathering and I truly felt it was one of the ultimate appetizers for Fall.

    It’s rather on the decadent side, earthy and savory with pumpkin, creamy, sweet and toasty with caramelized onions. It’s a pumpkin appetizer that will charm your guests.

    Once those onions are caramelized this comes together in a flash. Let’s take a look.

    What Goes Into This Recipe

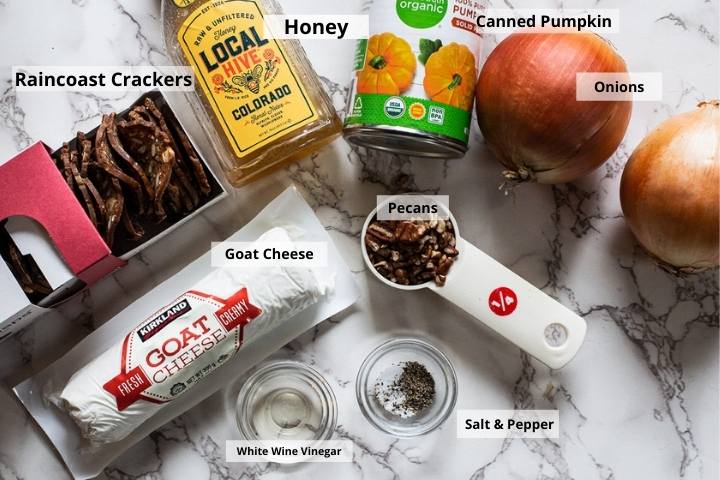
    Ingredients for pumpkin goat cheese appetizer spread
    • Raincoast Crisp Crackers: Any flavor of these chewy wonderful crackers will work here, but the saltier the better. Try their date and almond flavor.
    • Caramelized Onions: Yellow or Spanish onions work very well for caramelizing.
    • Canned Pumpkin: Plain canned pumpkin for this recipe. Not the spiced or flavored canned pumpkin that some people buy to make pumpkin pies.
    • Goat Cheese: Plain flavored goat cheese. I like to buy Kirkland Brand at Costco for the cost factor. And that tangy flavor is spot on.

    How to Make This Pumpkin Appetizer

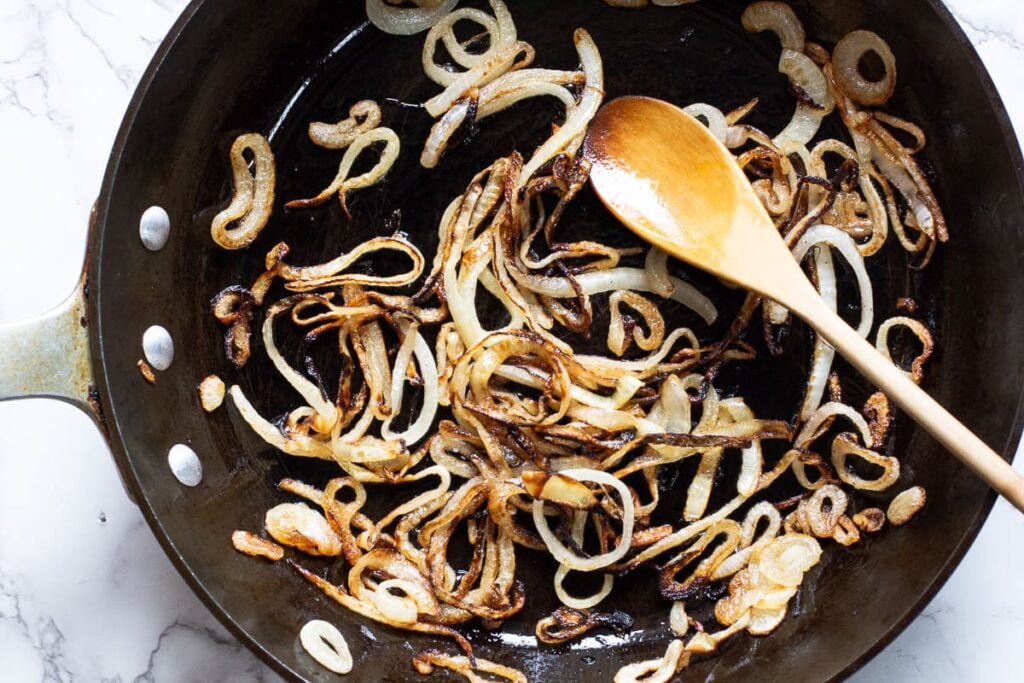
    sliced onions in a fry pan read to caramelize
    Step 1
    Caramelized onions
    Step 2

    We’ll start with the onions.

    Caramelized onions take anywhere from 30 to 45 minutes to turn golden and caramelized.

    • Caramelize the onions: Place the sliced onions, along with one tablespoon butter and one tablespoon oil in a large skillet.
    • Heat the pan on medium low heat and once the onions start to cook keep that heat on medium low and stir often. Once the onions are soft and golden in color they’re done.
    • Deglaze the Pan: There’s a lot of flavor on the bottom of that pan. Push the onions to one side of the pan and add vinegar. With a spoon scrape and stir to incorporate all of that flavor into the vinegar. Move the onions back into the vinegar mixture and stir. Remove the onions and set aside.
    • Mix Well: Place all ingredients (except crackers and honey) in a large mixing bowl and with the back of a fork mix until well blended.

    Ingredient Swaps

    • Cream Cheese: If you’re not a fan of goat cheese you can substitute cream cheese. However, the overall flavor will be milder.
    • Crackers: Of course you can substitute any brand and flavor of crackers. Triscuits are a good choice here, as they’re nice and salty and will compliment the flavors in this pumpkin spread. I would not recommend a sweeter cracker such as Ritz.
    • Walnuts: Swap out the pecans for walnuts.

    Frequently asked questions

    How Do You Caramelize Onions Without Burning Them?

    Don’t slice the onions too thin, because they’ll burn easier. Cut them ⅛″ widths, or even a bit larger.

    Use Oil and Butter To Caramelize Onions.

    Using butter only will raise your risk of burning the onions. Use both butter and oil. The oil has a higher heat index and the butter will infuse those onions with buttery flavor.


    What kind of onions do you use in the caramelizing process?

    Any kind of onion will caramelize. I like to use sweet, yellow, or Spanish onions. Their sugar content is higher and they’ll caramelize quicker. Caution, using red onion will change the color of this dip.

    Goat cheese appetizer with pumpkin served with raincoast crisps and garnished with thyme.

    Recipe Notes and Tips

    • Presentation and Garnish: We eat with our eyes. A touch of green will bring a beautiful accent to this appetizer. Fresh delicate thyme works well here. Chopped chives are an option and roasted pepita seeds would bring even a more festive flair.
    • Maximum Flavor: For maximum flavor, let this pumpkin appetizer sit in the refrigerator overnight. The flavors will marry and the caramelized onions will shine.

    More Fall Appetizer Recipes

    • Queso Fundido al Tequila
    • Cream Cheese Hatch Green Chile Dip
    • Goat Cheese Bruschetta with Capers and Anchovies

    I love hearing from you. If you’ve tried this Pumpkin Appetizer, scroll down, give it a star rating and leave a comment about your experience with the recipe.

    Print Recipe
    5 from 2 votes

    Pumpkin Appetizer with Goat Cheese, Pecans and Caramelized Onions

    Time: 5 min
    Prep Time15 minutes mins
    Cook Time30 minutes mins
    Course: Appetizer Recipes
    Cuisine: American
    Servings: 12
    Calories: 78kcal
    Author: Lea Ann Brown

    Ingredients

    • 5 ounces goat cheese softened
    • 6 ounces canned pureed pumpkin
    • ¼ cup chopped pecans or walnuts
    • 2 medium onions peeled, sliced and caramelized
    • 1 Tablespoon butter unsalted
    • 1 Tablespoon oil olive or canola will work here
    • 1 teaspoon white wine vinegar
    • salt & pepper
    • honey to drizzle
    • crackers for serving salty date and almond raincoast crisps

    Instructions

    • Peel and slice the onions at least ⅛ inch thick. Heat a large skillet over medium low heat. Add the butter and the oil. Add the onions and sauté until caramelized. 30 – 40 minutes. Stirring often. Be careful not to let them burn. That flavor will transfer to the flavor.
    • Once the onions are golden in color, move the onions to one side of the skillet and add the vinegar to deglaze the pan. Scrap and stir to combine the flavor from the skillet. Stir the onions into the vinegar. Set aside, let cool and then cut them into smaller pieces.
    • In a large bowl combine the softened goat cheese with the pumpkin, onions, salt and pepper and pecans. Using the back of a fork, blend well.
    • Transfer to your favorite appetizer serving bowl and surround by the crackers.
    • Add a light drizzle of honey. (optional)

    Notes

    For Maximum flavor: You can serve this right away, but for maximum flavor let this pumpkin appetizer sit overnight in the refrigerator.
    Any kind of onion will caramelize. For this recipe I recommend sweet, yellow, or Spanish onions. Their sugar content is higher and they’ll caramelize quicker. Using red onions will change the overall color of the spread.
    If you’re not a fan of goat cheese, you can substitute Cream Cheese. The overall flavor will be milder.
    You can substitute walnuts for the pecans.
    You can also use Triscuit crackers for this recipe. Or even sliced and toasted baguette.
    A touch of green will bring a beautiful accent to this appetizer. Fresh delicate thyme works well here. Chopped chives are an option and Pepita Seeds would bring even a more festive flare.
     

    Nutrition

    Calories: 78kcal | Carbohydrates: 3g | Protein: 3g | Fat: 6g | Saturated Fat: 3g | Cholesterol: 8mg | Sodium: 53mg | Potassium: 68mg | Fiber: 1g | Sugar: 1g | Vitamin A: 2357IU | Vitamin C: 2mg | Calcium: 26mg | Iron: 1mg

    Sweet-Spicy Honey Sriracha Meatballs With Cranberry Sauce

    September 28, 2020 By Lea Ann Brown 10 Comments

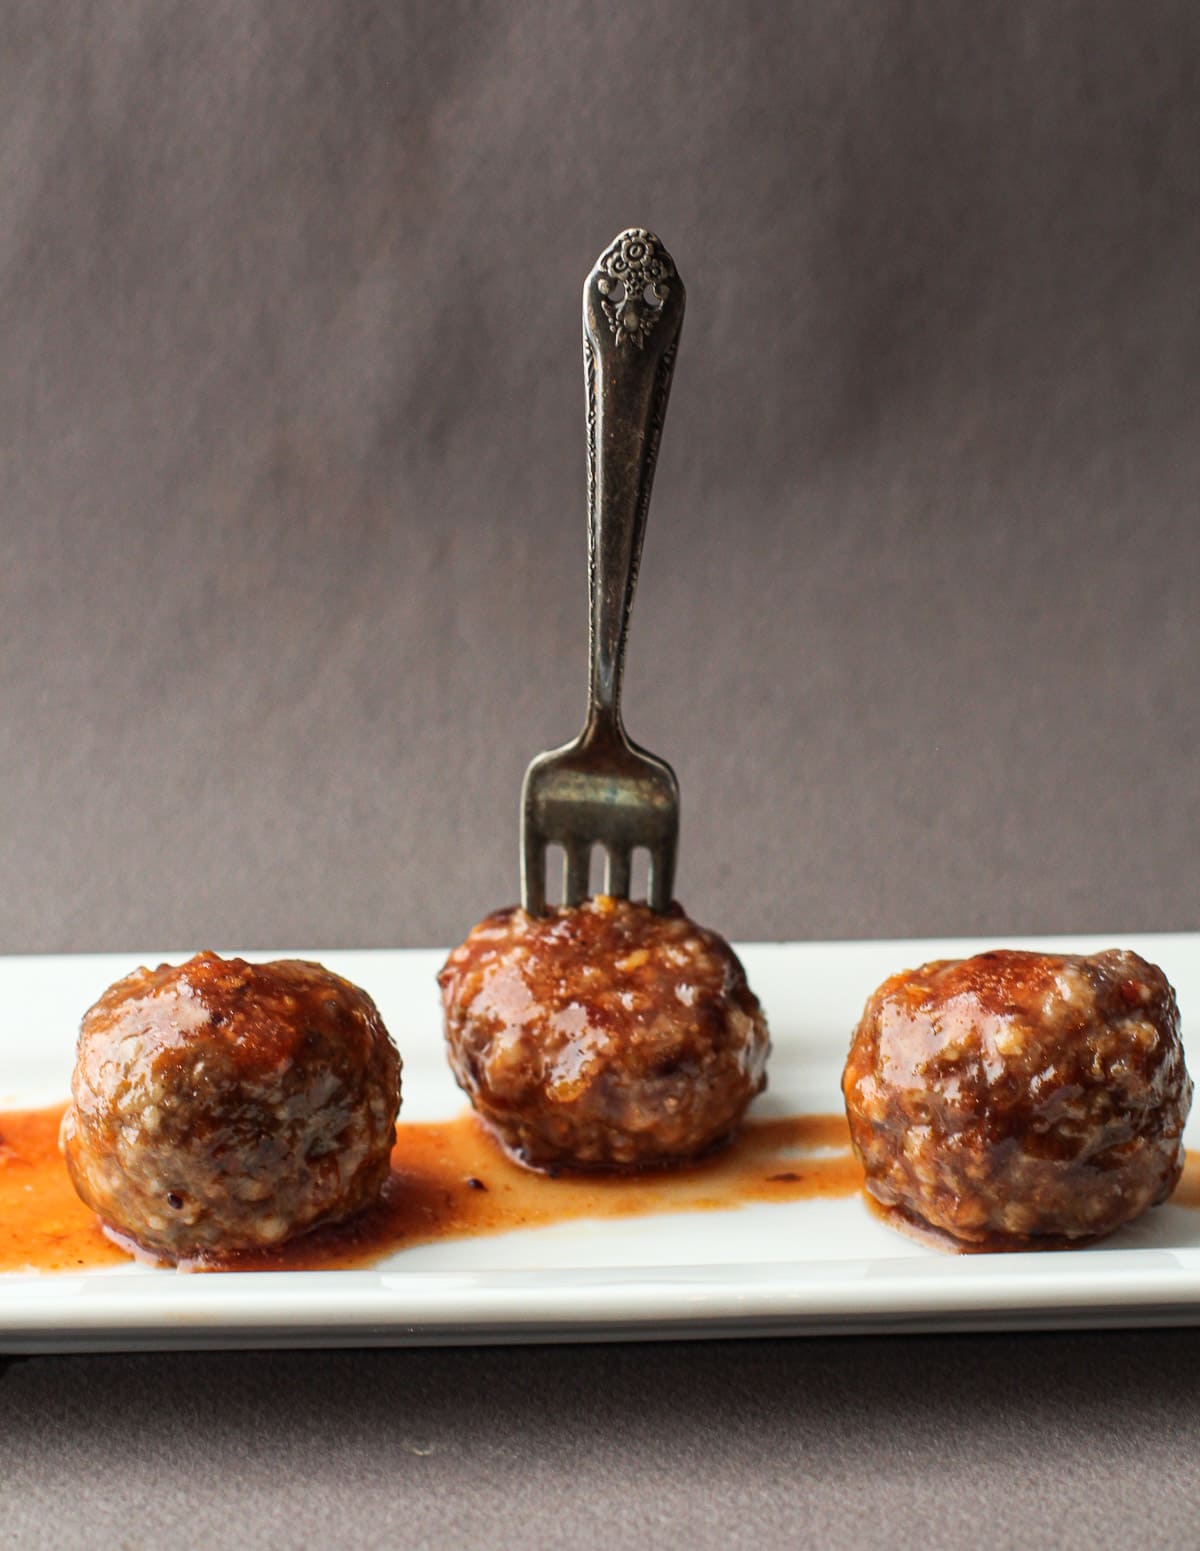
    Honey sriracha meatballs served on a white platter.

    This recipe for Honey Sriracha Meatballs with Cranberry Sauce is a quick, super easy and a crazy delicious party appetizer. Ready in just 30 minutes, using just 5 ingredients, you’re going to love these party meatballs and your party crowd will go wild.

    Sriracha Cranberry Meatballs served on a white plate.

    What You Can Expect From This Recipe

    • You can expect a fun new appetizer recipe and a guaranteed pot-luck crowd-pleaser.
    • The sweet, savory, spicy flavor combination is truly a treat.
    • And making this recipe couldn’t be easier. 30 Minutes, 5 Ingredients.
    • These meatballs with cranberry sauce are a perfect appetizer for that holiday table.

    Looking for an easy, crowd-pleasing party appetizer? These Honey Sriracha Meatballs with Cranberry Sauce are sweet, spicy, and irresistibly sticky. Think classic Italian meatballs coated in a bold, tangy glaze made from honey, Sriracha, and an unexpected star-canned cranberry sauce.

    This recipe is perfect for last-minute gatherings or game-day spreads. No need to wait for the holidays to use that pantry-staple cranberry sauce-these meatballs come together fast and disappear even faster. I make them often, and they're always a hit.

    After all, glazed meatballs never go out of style!

    Ingredients You’ll Need

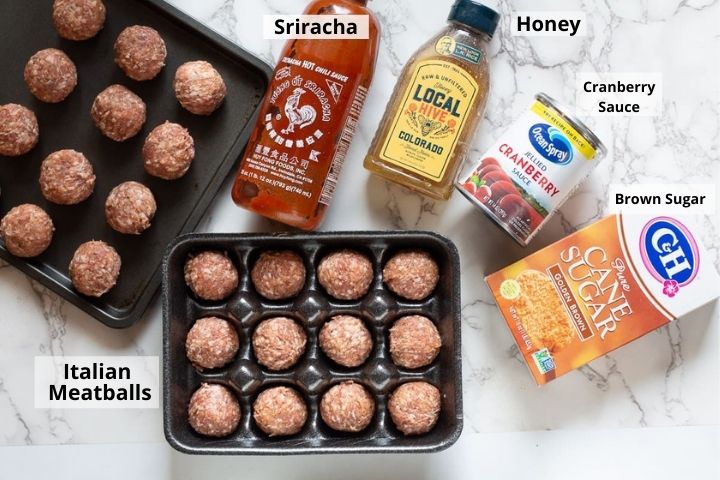
    Ingredients for Sriracha Cranberry meatballs

    What a timely recipe, as we’re right in the middle of appetizer season. Football parties, tailgating parties and soon the Holiday invitations will come pouring in. And cranberry sauce for meatballs is so “holiday”.

    Let’s keep it easy, and here’s how:

    • Italian Meatballs: I purchase pre-made, but not pre-cooked Italian meatballs from King Soopers. Their Kroeger brand has a great flavor and cook up nice and tight. Tight enough so they don’t fall apart in this thick sauce.
    • Pantry Items: And don’t we always have a bottle of Sriracha sauce on hand? And brown sugar and honey in the pantry?
    • Cranberry Sauce: Straight off the grocery shelf. Stock up next time you’re at the store, because you’ll want to make these Honey Sriracha Meatballs often.

    Ingredient Swaps

    • Can I Use Frozen Meatballs? Yes, I’ve used frozen Italian meatballs for this recipe. Just cook according to package instructions and then gently toss in the sweet Sriracha sauce.
    • Can I use Homemade Italian Meatballs? Yes, and Homemade Italian Meatballs are easy enough to make and sturdy enough to hold up in the sauce and serve as an appetizer. Again, cook according to recipe instructions and add to the sauce.
    • Feel free to use turkey, chicken, or beef meatballs. You can also make this vegetarian by using a vegetarian meat base for meatballs.
    • Maple Syrup: Switch out the honey for maple syrup.

    Step By Step Instructions, It’s Easy

    Honey Sriracha Meatballs are super easy to make, a great appetizer in a jiff.

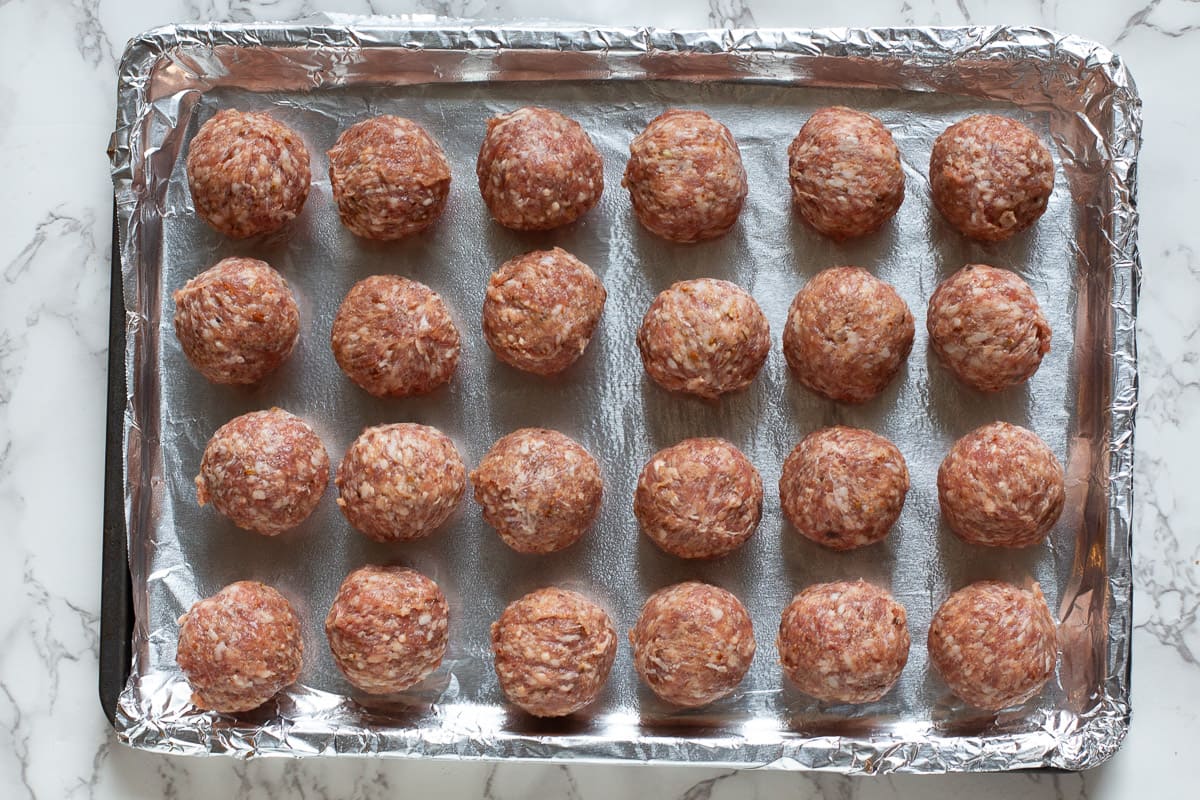
    Italian meatballs ready to bake for Sriracha Meatballs appetizer
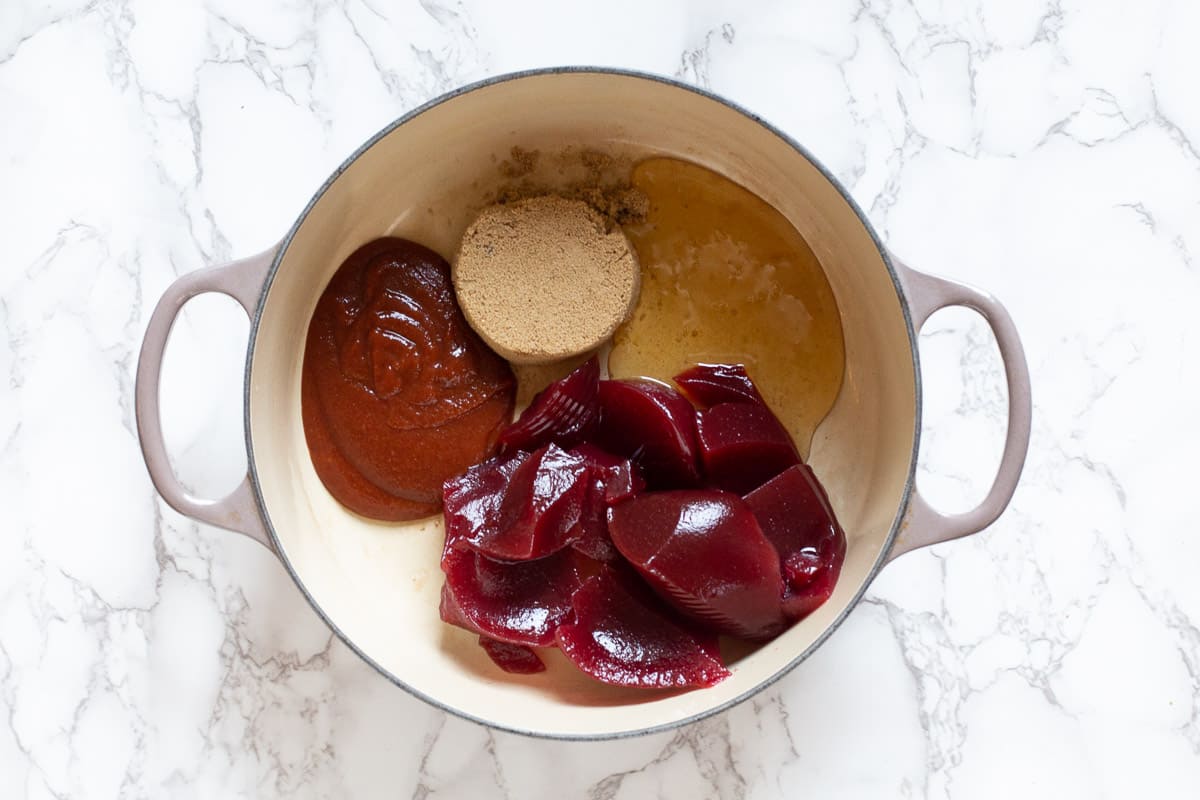
    Ingredients in a dutch oven for Sriracha Cranberry Meatballs
    1. Step 1: Place the Italian Meatballs on a baking sheet, lined with foil and sprayed with non-stick cooking spray. Such as PAM. Bake according to package instructions. In this case, it was at 375 degrees for 15 minutes, turn the meatballs and cook for another 15 minutes.
    2. Step 2: Prepare the honey sriracha sauce. In the meantime, place the cranberry sauce, sriracha sauce, brown sugar and honey in a Dutch oven. Cook on medium heat stirring to combine until smooth. Cook for about 15 minutes on medium low, to thicken the sauce a bit.
    Italian Meatballs in Sriracha Cranberry Sauce
    1. Step 3: Add the baked meatballs to the sriracha honey sauce and using a large spoon, gently turn and stir the meatballs to coat them well with the sauce. Transfer them to your favorite serving bowl and enjoy.

    Variations

    • My favorite way to use it is for a glaze for Italian Meatballs, but it would also work great for chicken wings.
    • Use this honey sriracha sauce for cooked shrimp.
    • Roasted Cauliflower: The cauliflower idea came from a local upscale restaurant, where roasted cauliflower is tossed in this sauce.

    Ways To Serve

    This is a perfect appetizer recipe, but if you’re looking for other ways to serve:

    • Turn these meatballs into a rice bowl. Just scoop some of the meatballs over cooked rice.
    • I love a good lettuce wrap, and these meatballs would be delicious tucked into a leaf of iceberg lettuce.
    • Got a small baguette or Banh Mi bun? These meatballs would make a great little sandwich.

    FAQ’s

    What kind of canned cranberry sauce should I use?

    I’ve used both jellied sauce (shown above) and sauce that contains chunks of cranberries. Both work very well.

    Can I make Honey Sriracha Meatballs in a crockpot?

    I’ve made this recipe in the crockpot using frozen cooked meatballs and didn’t like the final result. Slow cooking releases moisture from the meatballs, thinning the sauce. I like this recipe better as a stove-top thick rich glazed end result.

    Can This Recipe Be Made Ahead of Time?

    It can, but it’s so easy it’s not really necessary. If you do want to make ahead, cook according to instructions and then store in a microwave safe dish. To re-heat, heat in the microwave for 1 minute increments, gently stirring each time to distribute heat and the sauce.

    Are Honey Sriracha Meatballs Spicy?

    I find this sauce a perfect combination of sweet and spicy. With a medium spice level that can be adjusted to your liking. Want it sweeter? Simply increase the honey and decrease the Sriracha. Want it spicier? Add a couple pinches of New Mexico Chile Powder or Cayenne.

    Can I Use Pre-cooked Meatballs?

    There are lots of great frozen pre-cooked meatballs available for purchase. Yes, they will work fine for this recipe. Just cook according to package instructions.

    Storage

    • Refrigerate leftovers in an airtight container in the refrigerator for 4 – 5 days. I like to reheat them in the microwave in 15 second increments. Your 50% power feature is your best friend here. Gentle reheating will keep these meatballs moist and tender.
    • These meatballs will freeze very nicely in a freezer safe container for up to three months. I like to use a zip-lock style freezer bag. Squeeze the air out and lay them flat to optimize freezer space.

    In Conclusion

    Party meatballs with Honey Sriracha Cranberry Sauce

    Having an appetizer recipe that easy to make and ready to go in a jiff can be a party lifesaver. And these honey sriracha meatballs with cranberry sauce are just the ticket.

    If You’re As Crazy About Party Meatballs As We Are:

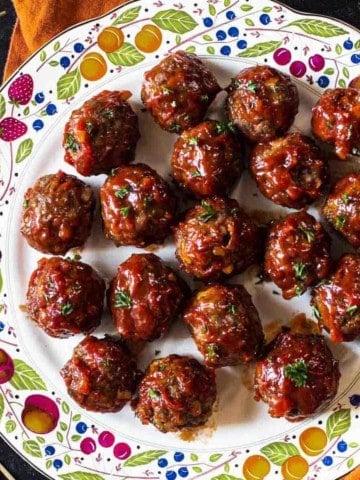
    • BBQ meatballs displayed on a decorative plate.
      Oven Meatballs in BBQ Sauce, Pot Luck Perfect
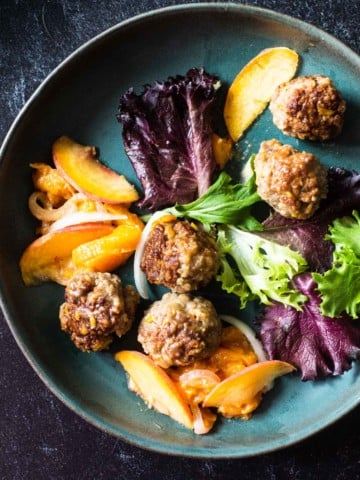
    • Pan fried meatballs with peaches served with mixed greens.
      Juicy Gingery Ground Pork Meatballs with Peaches, Basil and Lime
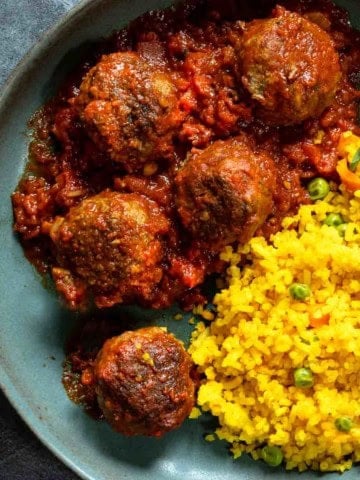
    • Bison meatballs in chipotle salsa served with Mexican yellow rice.
      Smoky Chipotle Bison Meatballs
    • Spicy lamb meatballs on a crudite platter.
      Spicy Lamb Meatballs

    And if you’re looking for more appetizer recipes, don’t miss my Appetizer Category. You’ll find lots of fun finger food recipes, including the most popular meatball recipe on my site for Smoky Chipotle Bison Meatballs. Check it out.

    If you liked this recipe, please leave a star ⭐⭐⭐⭐⭐ rating in the recipe card below and leave a comment. I always appreciate your feedback and hearing how everything went.

    And, don’t forget to subscribe to my newsletter for more delicious recipes and cooking tips. Make it a delicious day … every day.

    Honey sriracha meatballs served on a white platter.
    Print Recipe
    5 from 8 votes

    Honey Sriracha Meatballs with Cranberry Sauce

    This is a recipe for Sweet Sriracha Party Meatballs. Italian meatballs are slathered in a sweet sriracha, brown sugar, cranberry glaze.  A super easy and killer meatball appetizer recipe.
    Prep Time5 minutes mins
    Cook Time30 minutes mins
    Total Time45 minutes mins
    Course: Appetizer Recipes
    Cuisine: American
    Servings: 10
    Calories: 257kcal
    Author: Lea Ann Brown

    Ingredients

    • 36 Italian meatballs
    • ⅓ cup Sriracha Sauce
    • 14 ½ ounce cranberry sauce canned, jellied or with chunks of cranberries
    • ⅓ cup brown sugar
    • ⅓ cup honey

    Instructions

    • Purchase fresh pre-made Italian meatballs from the store, or frozen. Bake according to package instructions.
    • In the meantime, combine the ingredients for the Honey Sriracha Sauce in a Dutch Oven and cook over medium heat until well heated and flavors are combined. Let cook over medium low for about 15 minutes or until it has thickened just a bit.
    • When meatballs are done scoop them into the same pot as the sauce. With a large spoon, gently stir and combine sauce and meatballs. 
    • Transfer to the serving bowl or platter of your choice. Serve warm.

    Notes

    I’ve made this recipe in the crockpot and didn’t like the final result. Slow cooking releases moisture from the meatballs, thinning the sauce. I like this recipe better as a thick and rich stove-top glaze.
    Can this recipe be made ahead of time? It can, but it’s so easy it’s not really necessary. If you do want to make ahead, cook according to instructions and then store in a microwave safe dish. To re-heat, heat in the microwave for 1 minute increments, gently stirring each time to distribute heat and the sauce.
    Can this recipe be frozen? Yes. Combine meatballs that have been mixed with the sauce. To reheat, let them thaw and then follow the microwave instructions above.
    Can I use frozen meatballs for this recipe? Yes, I’ve used frozen Italian meatballs for this recipe. Just cook according to package instructions and then gently toss in the Honey Sriracha sauce. 
    Does this recipe travel well? Just place it in a serving bowl and cover tightly with foil. It should keep fairly warm for about 30 minutes. If you need to reheat once you arrive at your destination, remove the foil and give them a swirl in the microwave. The sauce has a lot of sugar involved, so they’ll heat quickly. Re-heat in 1 minute increments.
     

    Nutrition

    Calories: 257kcal | Carbohydrates: 32g | Protein: 8g | Fat: 10g | Saturated Fat: 3g | Cholesterol: 36mg | Sodium: 254mg | Potassium: 182mg | Sugar: 32g | Vitamin A: 30IU | Vitamin C: 7.2mg | Calcium: 15mg | Iron: 0.7mg

    Honey Sriracha Meatballs with Cranberry Sauce … It’s Whats for an Appetizer

    Eggs Ole’ Mexican Breakfast Casserole

    September 24, 2020 By Lea Ann Brown 36 Comments

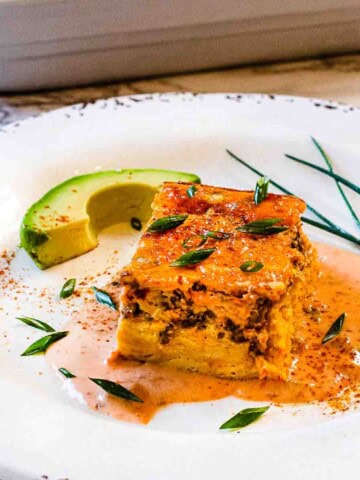
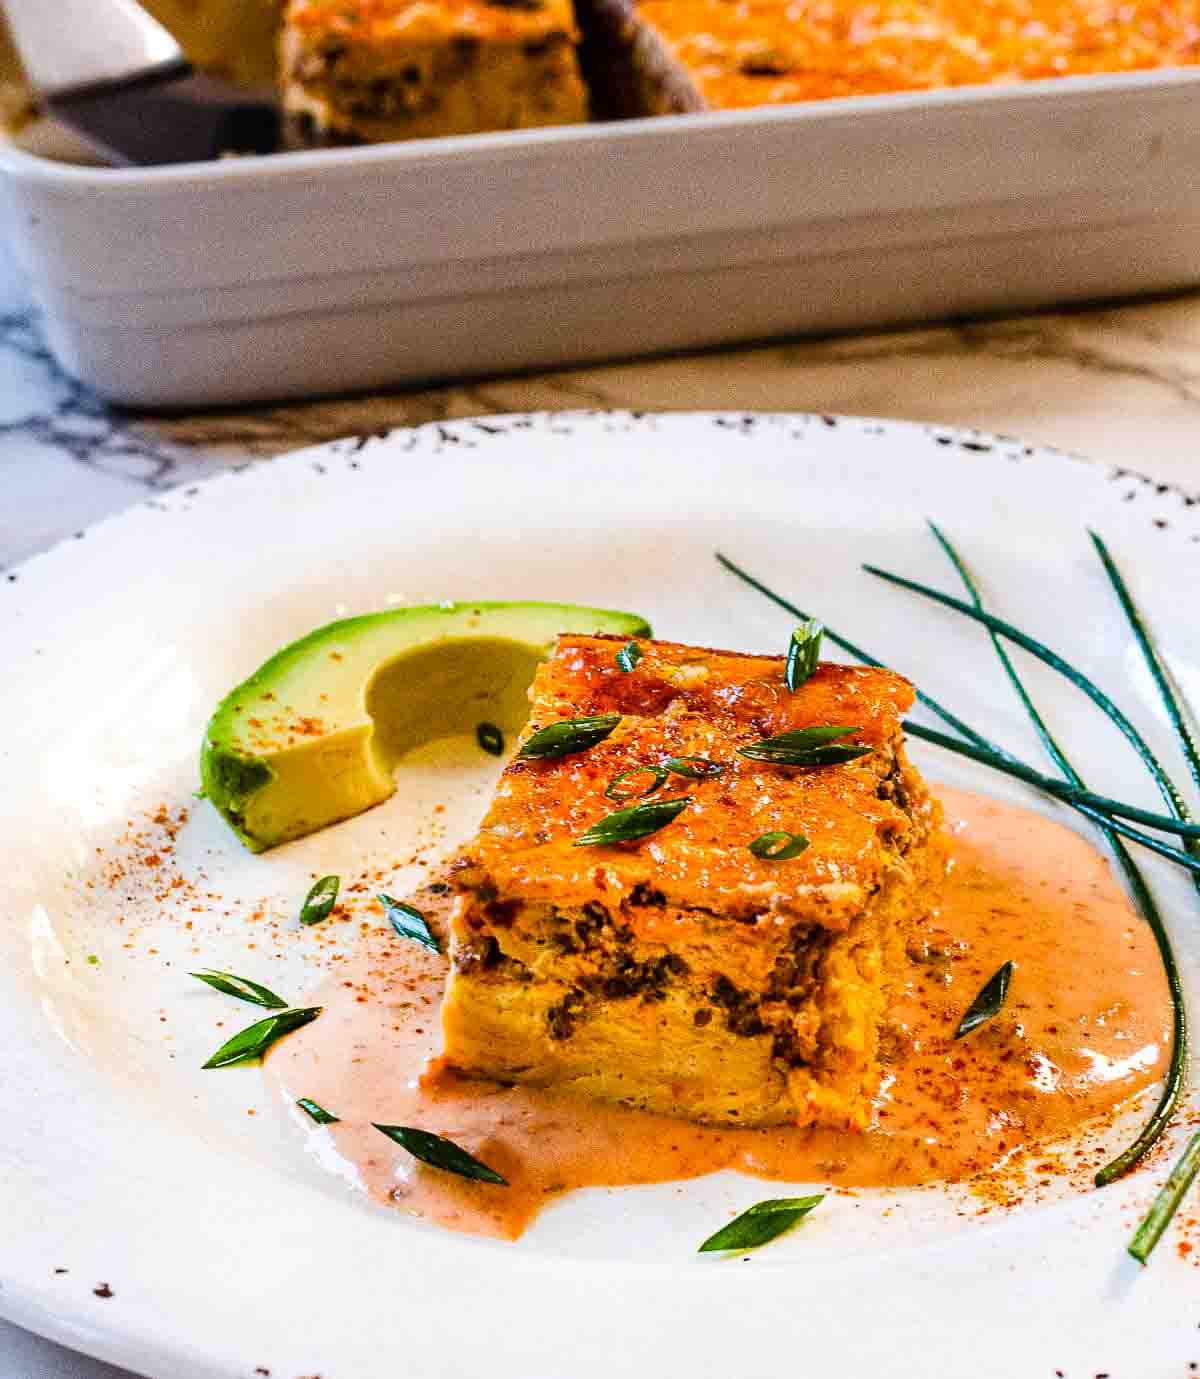
    A slice of chorizo Mexican breakfast casserole.

    We all need a really great Southwest-Mexican Breakfast Casserole Recipe in our back pocket. One that will wow that crowd. This recipe has everything you’ve been looking for. With corn tortillas as the base and layers of cheese, chorizo and eggs, topped with a Velveeta queso sauce, they’ll be asking for seconds. Eggs Ole’ is a recipe from a famous Arizona Bed and Breakfast.

    If you love Southwestern style breakfasts, don’t miss my recipe for Biscuits and Chorizo Gravy.

    A slice of Mexican Breakfast Casserole with chorizo.

    What Is This Mexican Breakfast Casserole (Eggs Ole)?

    Eggs Ole is a Southwestern Mexican breakfast casserole that leans into bold, comforting flavors with a Tex-Mex twist. It's a layered bake. Corn tortillas, eggs, cheese, chorizo, salsa. All stacked up, then baked until it sets into something soft, sliceable, decadent breakfast. Think somewhere between enchiladas and a breakfast strata. However, this casserole uses corn tortillas rather than bread.

    The magic is the egg mixture. It’s a light, fluffy and creamy, almost custard-like base. Not scrambled eggs. Not dry. Soft. Rich. Spoon-worthy but still sliceable.

    What To Expect From This Recipe

    I’ve always said, if a recipe comes from a bed and breakfast, it’s going to be really great. They specialize in amazing experiences, and their top priority is a heart warming breakfast to start your day off right.

    This recipe comes from one of our favorite spots in Southeast Arizona. The Ramsey Canyon Inn, a birdwatching destination in the Huachuca Mountains, located where the Sierra Madre of Mexico, the Rocky Mountains, and the Sonoran and Chihuahuan deserts all come together.

    A perfect atmosphere for a great Southwestern Mexican Breakfast Casserole, wouldn’t you agree?

    • Texture: I've made a lot of bad breakfast casseroles. Dry ones, watery ones, mushy ones. This one fixes all that. Once this casserole is baked, the tortillas remind me of the texture of a cooked tamale masa. And topped with that wonderful cheesy, salsa, chorizo mix this is one irresistible breakfast casserole.
    • It’s Creamy: Eggs. salsa and sour cream makes a beautiful custardy creamy texture. And with a little spice.
    • Chorizo: Brings heat without being aggressive.
    • Perfect for feeding a crowd. Its ideal for brunch gatherings, holidays, or overnight guests.

    What Makes This Version Different?

    Texture, texture, texture.

    • Uses a custard-style base, not just scrambled eggs poured in.
    • Sour cream and salsa create a silky, slightly tangy structure.
    • Layering method prevents collapsing or dense texture.
    • Tested tortilla-to-egg ratio for consistent results.
    • Frying Corn Tortillas keeps the casserole from becoming mushy once baked.
    • Perfect Spice: Built on classic Southwestern flavor balance. This recipe is not just "spicy for the sake of spice"
    • Queso Sauce Topping: Once the casserole is baked, it’s finished with a Velveeta Salsa Queso style sauce.

    I went to culinary school, so I can't help myself. I treat this like a composed dish, not a dump-and-bake situation.

    Let’s take a look at this crowd friendly breakfast casserole.

    How To Build This Mexican Breakfast Casserole

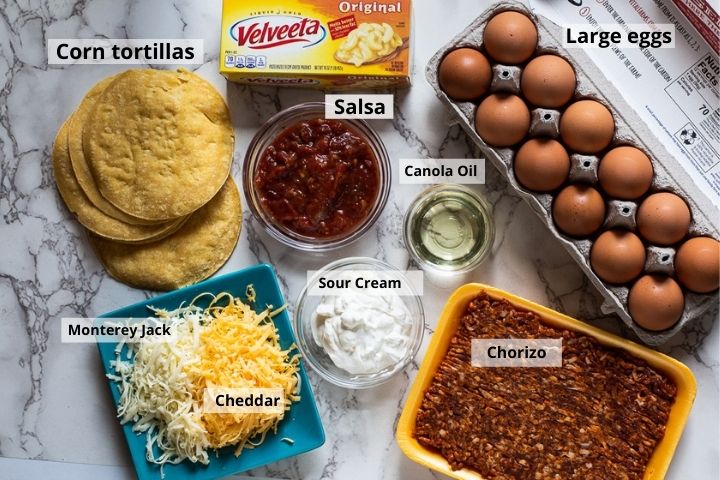
    Mise en place. Always gather ingredients before starting any recipe. It will save you time and organize your mind.

    Ingredients for Mexican Breakfast Casserole with Chorizo
    • Chorizo: Look for bulk chorizo. Chorizo that looks like course ground meat, rather than using chorizo that comes in a tube.
    • Cheese: Popular Mexican casserole cheeses like cheddar and Monterey Jack work well for this casserole.
    • Salsa: Use your favorite brand. I would encourage a chunky salsa, a thin watery salsa may compromise the custard’s rich texture.
    • Sour Cream: I always use full fat for flavor and texture, but reduced fat will work find. Using Mexican Crema is even a better choice.
    • Yellow Corn Tortillas: White corn tortillas will work, however, I recommend yellow. They’re simply sturdier and easier to work with when frying. Also the chewy texture of yellow corn tortillas is just right for this casserole.

    Pro Tip: Purchase good quality cheese and grate it yourself. Pre-grated cheese in bags includes additives to keep it from clumping, which will also compromise the melting factor. Grating cheese from a block of cheese will result in a creamier and more consistent melting experience. Plus, it’s less expensive.

    Step by Step – How To Make Eggs Ole

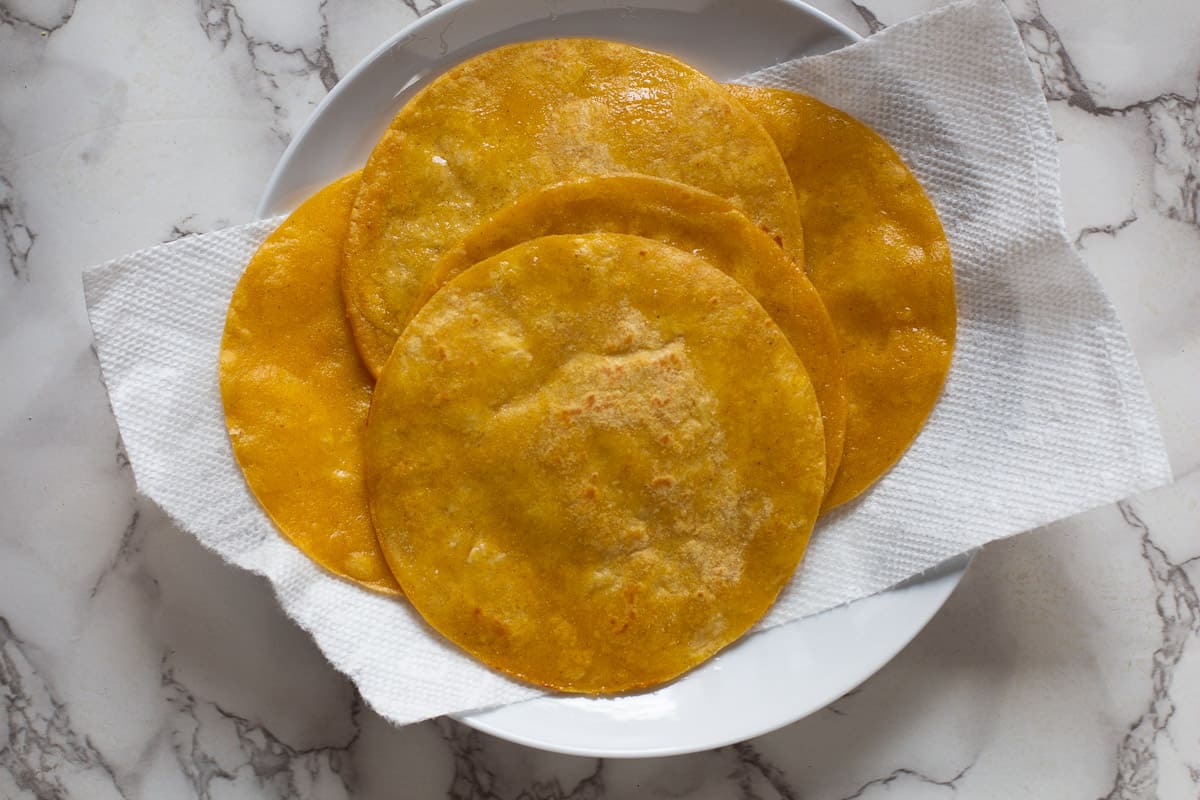
    Fried Corn Tortillas to make a Mexican breakfast casserole.
    1. Step 1: Start by frying fresh soft yellow corn tortillas in oil to soften. Simply heat oil to medium high in a heavy skillet and fry each one individually. Place a corn tortilla in the hot oil, let it brown for 30 seconds and turn. Cook on the 2nd side for for 15 seconds. Remove to a paper towel and continue with the rest of the tortillas. A thin wide metal spatula works well for removing the softened tortilla from the oil.
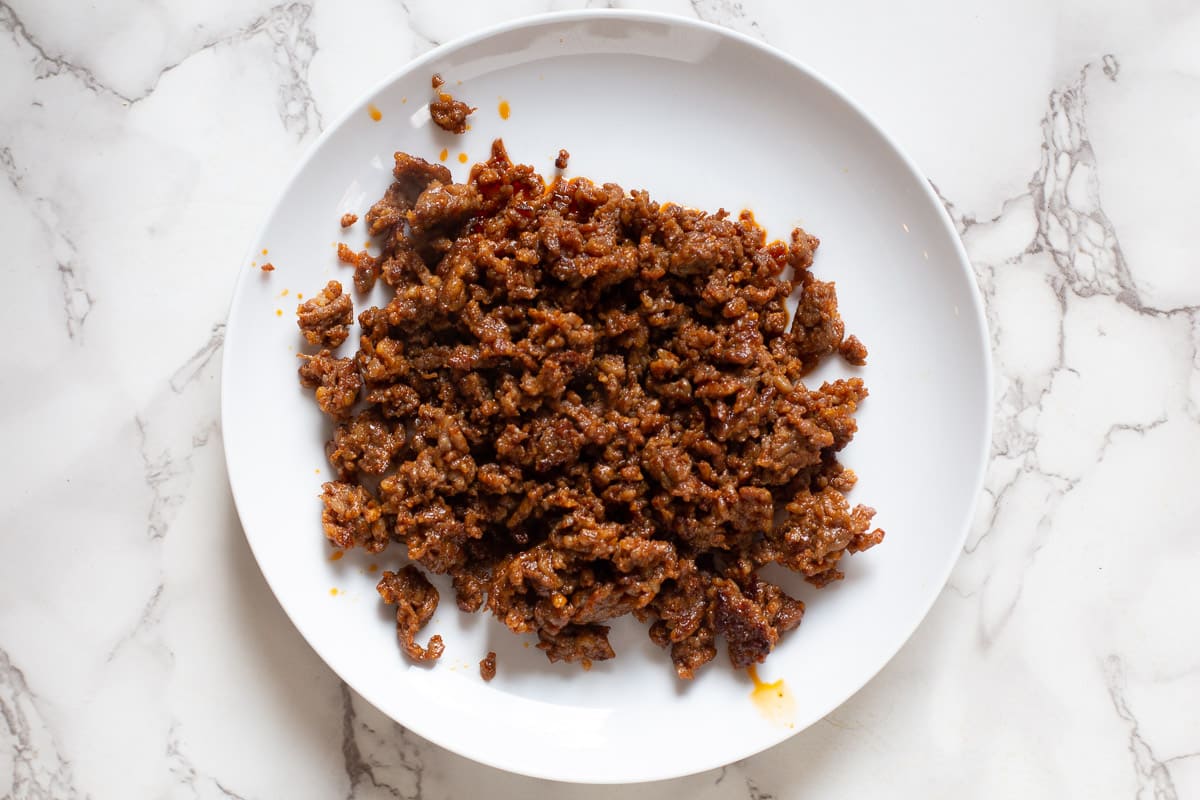
    browned chorizo sausage to make a Mexican Breakfast Casserole.
    1. Step 2: Then fry up your Mexican chorizo. Simply use the same skillet that you fried the tortillas.
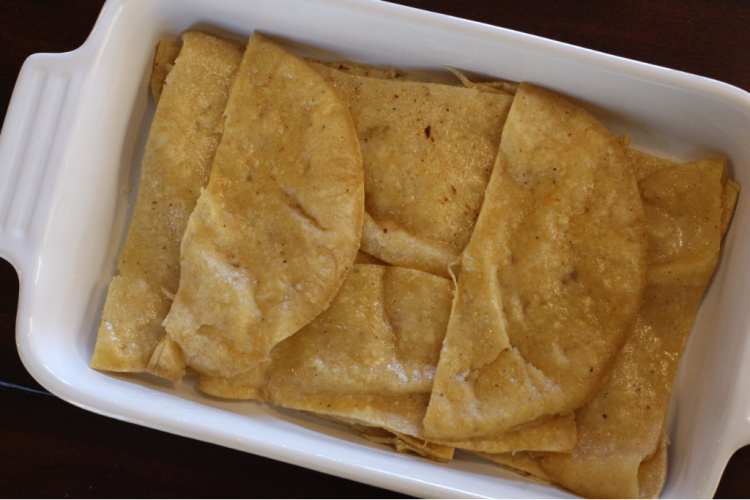
    lining a casserole dish with fried corn tortillas
    1. Step 3: Line a 9 x 13 casserole dish that’s been sprayed with PAM with the fried corn tortillas. As you can see, I’ve cut them in half and turned them all different directions to make them fit evenly and level.
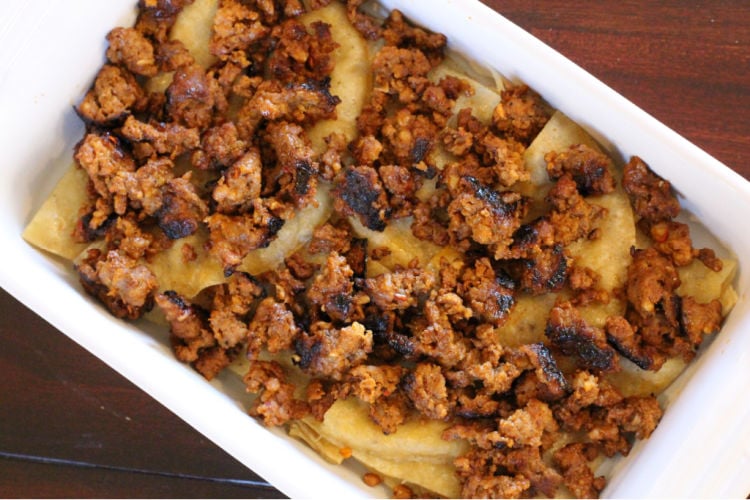
    Adding cooked chorizo to breakfast casserole
    1. Step 4: Then sprinkle on the cooked chorizo sausage.
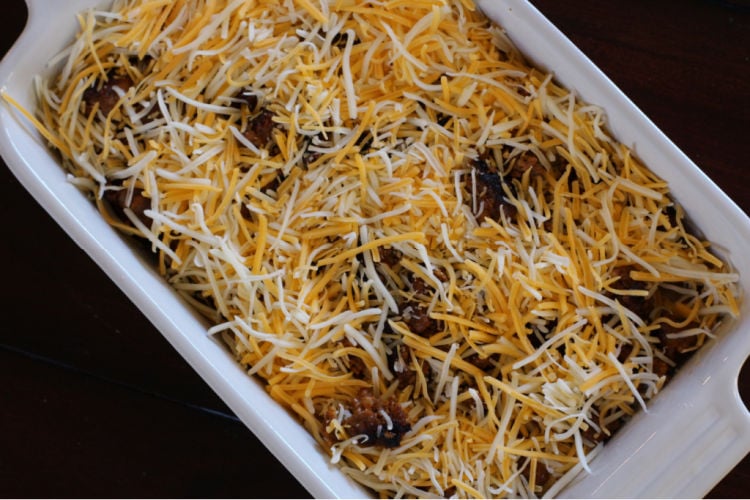
    Adding shredded cheese to a Mexican breakfast casserole
    1. Step 5: Top with the grated cheeses.
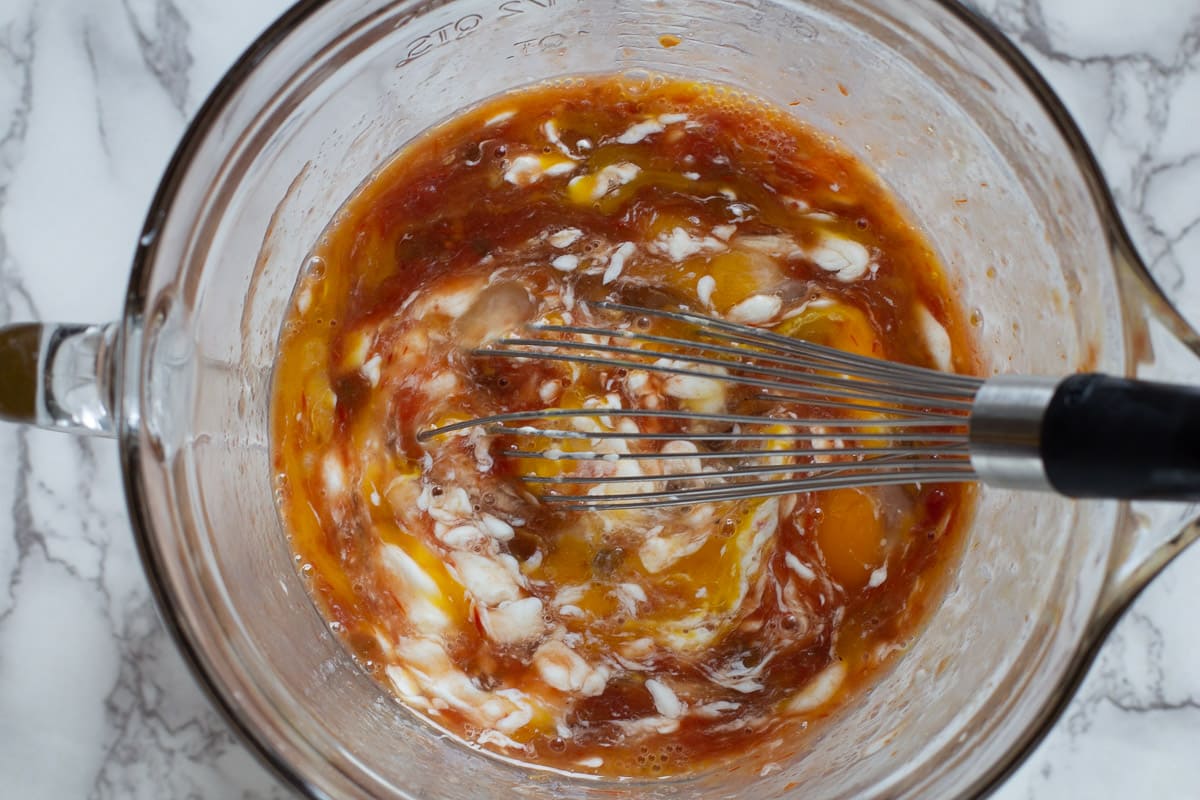
    Mixing together egg custard for Mexican breakfast casserole
    1. Step 6: Make The Egg Queso Sauce; combine the eggs, salsa and sour cream in a large bowl.
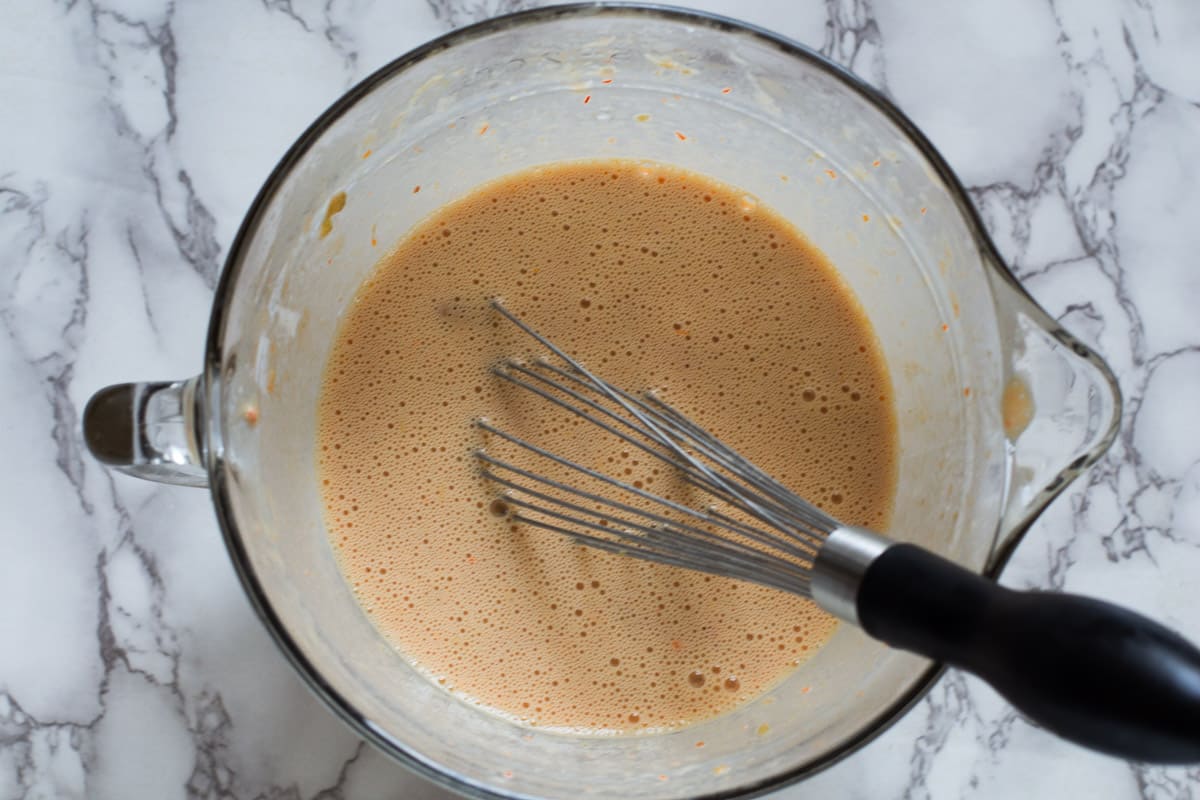
    Egg custard for breakfast casserole
    1. Step 7: Using a whisk, stir until mixture is combined and smooth in texture.
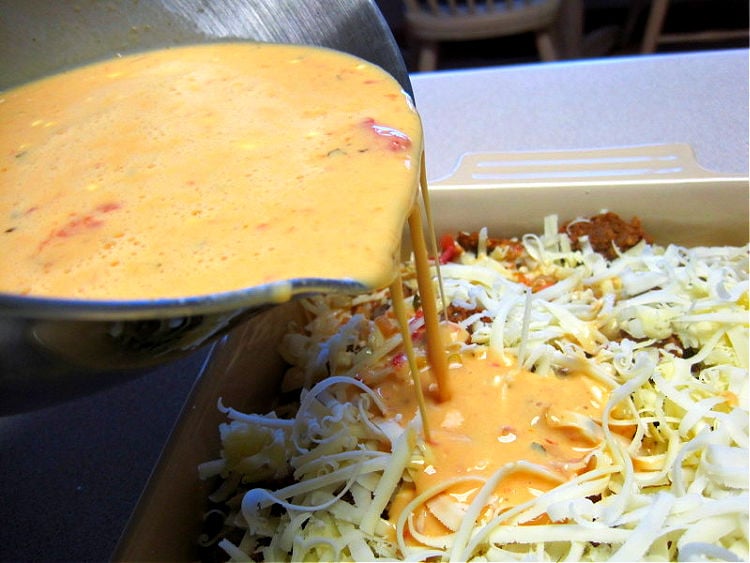
    Pouring egg, salsa, sour cream custard over Mexican Breakfast Casserole
    1. Step 8: Then pour the combination of eggs, salsa and sour cream over the shredded cheese.
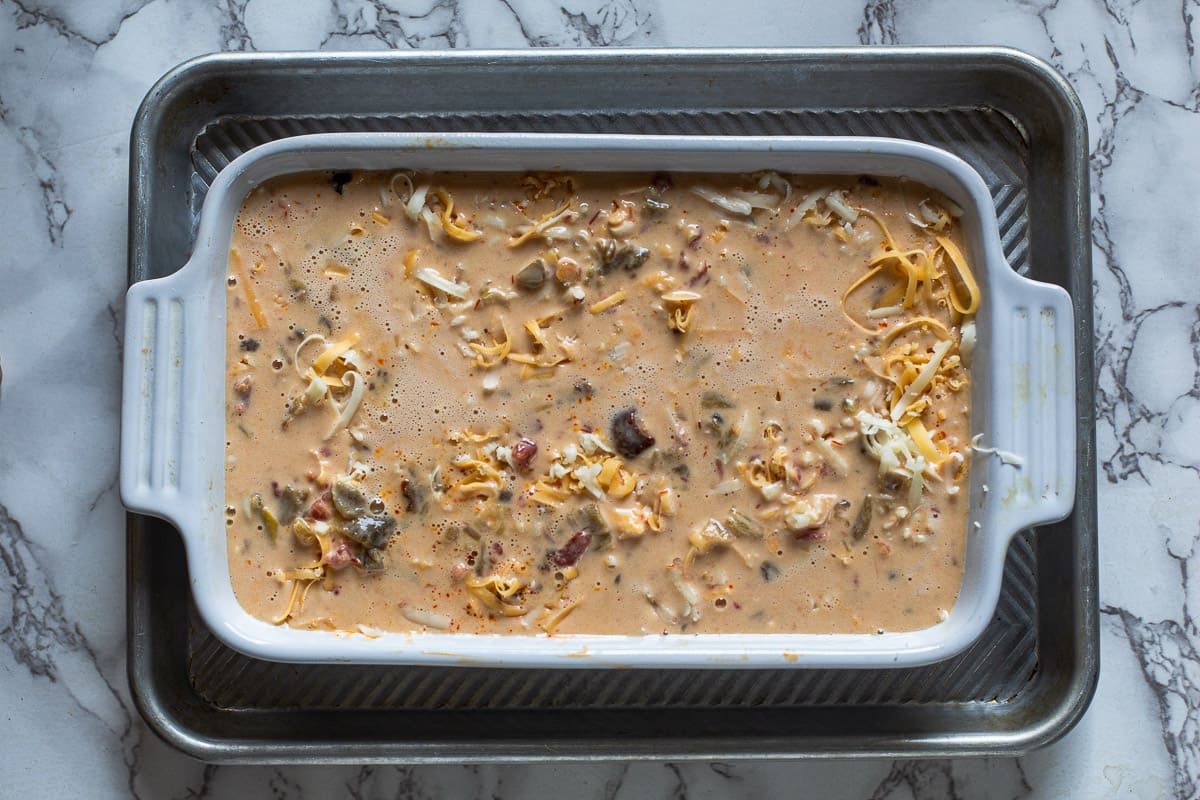
    Mexican Breakfast Casserole ready to bake.
    1. Step 9: To avoid spills, place the casserole on a sheet pan. You’re ready to pop it into the oven. 350 degrees, 30 – 40 minutes.
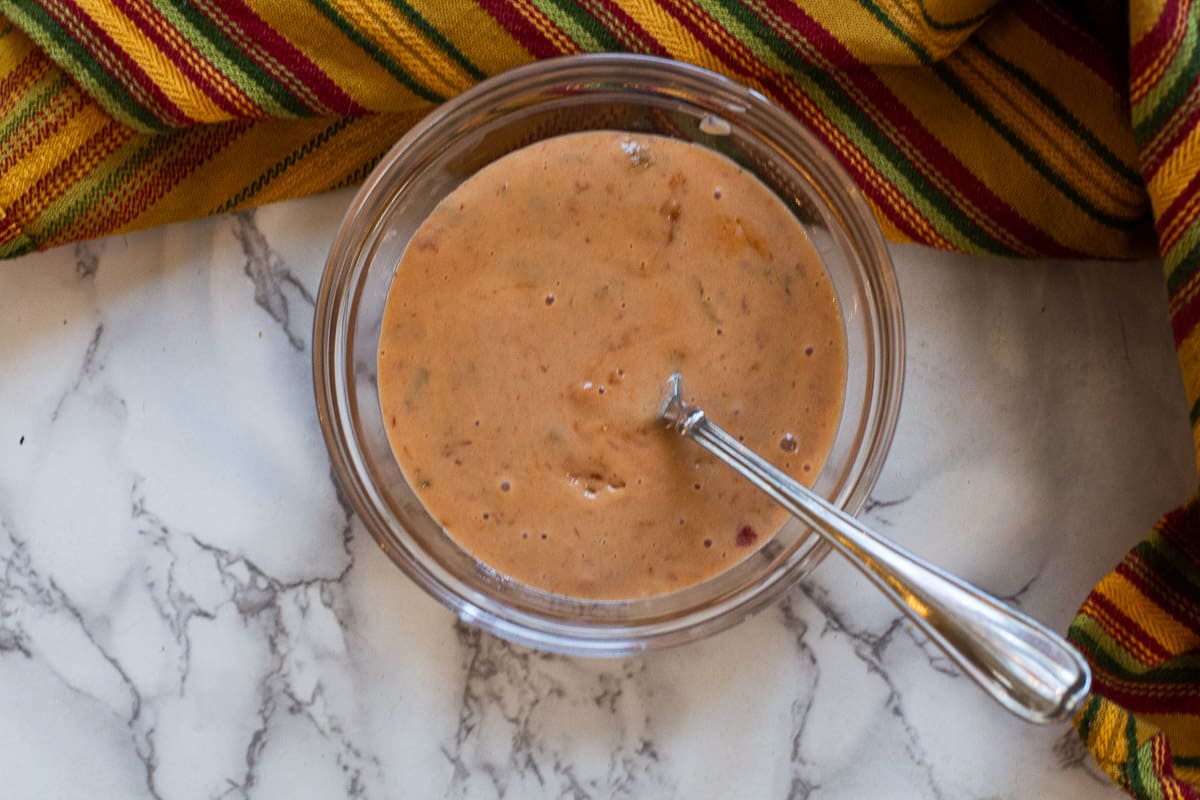
    Queso made with velveeta and jarred chunky salsa
    1. Step 10: While the casserole is baking, prepare the salsa queso topping. Simply add Velveeta, milk and salsa to a microwave safe bowl. Microwave in 30 second increments, stirring each 30 seconds, until mixture is hot and smooth.
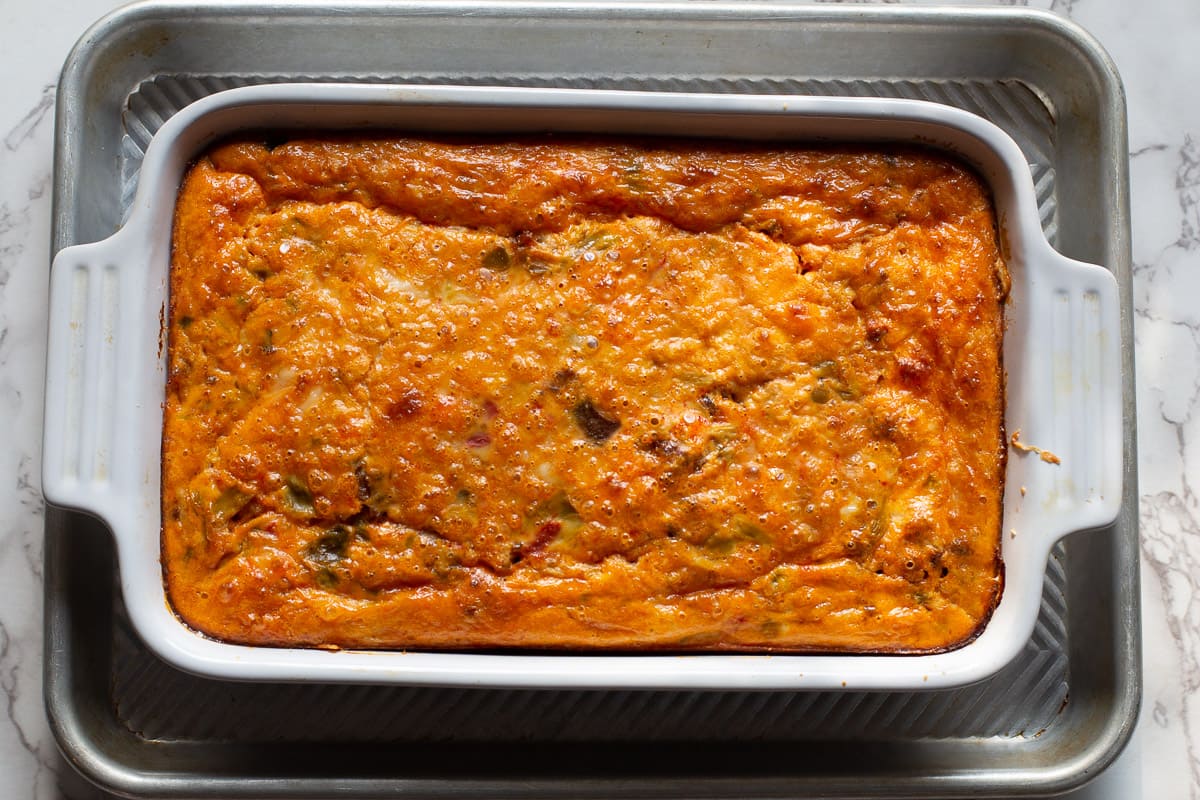
    baked mexican breakfast casserole.
    1. Step 11: Out of the oven. Baked to perfection.
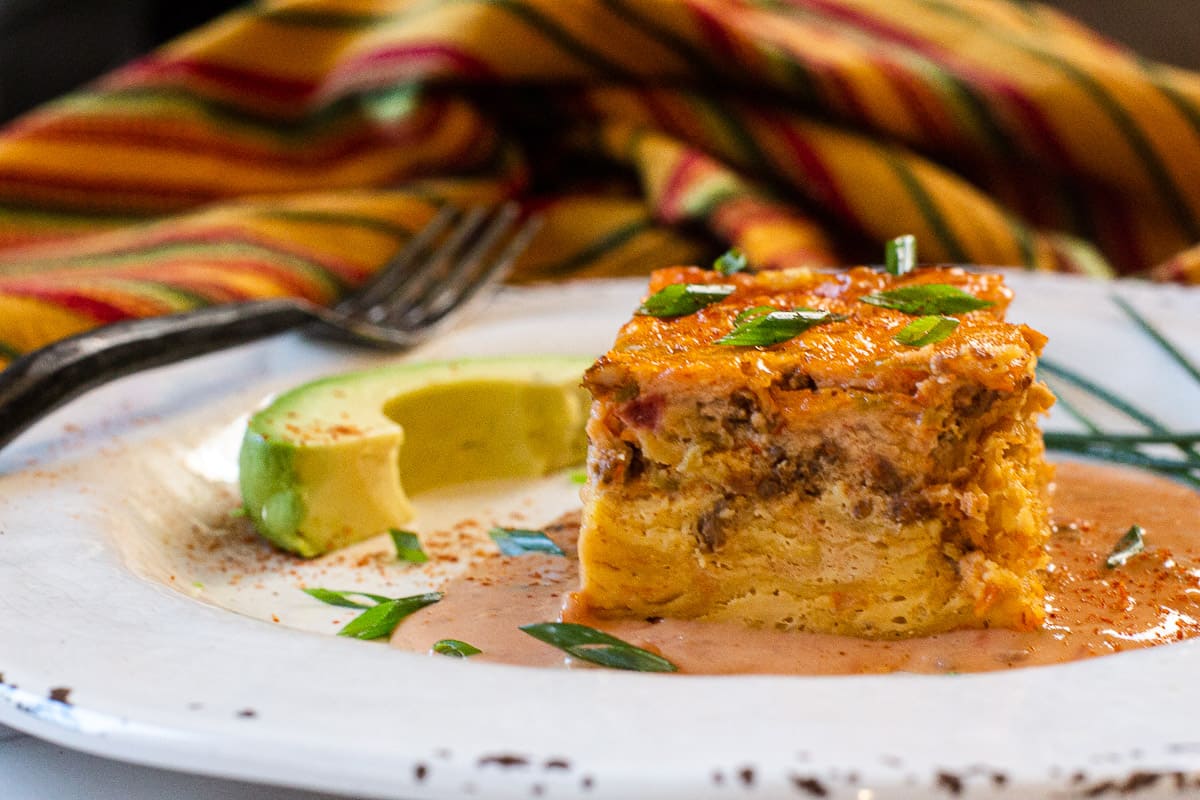
    Eggs Ole. A wonderful crowd pleasing Mexican Southwestern Breakfast Casserole
    1. Step 12: Let the casserole rest for 10 minutes before drizzling on the Velveeta Queso Topping and slicing.

    Tips For Success:

    • About Chorizo: I’m not a fan of the mushy style of chorizo you find in tubes. They contain too much sauce filling and grease that cooks away and you’re left with not much meat. I buy chorizo in a package that has been ground like hamburger. If you purchase the chorizo product in a tube, you’ll need to buy 2 tubes as that product renders down to less meat.
    • Pull it before it looks "fully done". The carry over, resting period finishes it, and makes it easy to slice.
    • Fried Tortillas: Don’t skip frying or toasting the corn tortillas. It gives this casserole structure. Using soft corn tortillas right out of the package will result in a mushy texture.
    • Chorizo: If the cooked chorizo has created a lot of grease, drain it before adding to the casserole to avoid a greasy texture.

    Regional Twist: Colorado & Southwestern Influence

    This Mexican breakfast casserole can most certainly bring a more Southwestern vibe using these suggestions. These additions reflect the bold, chile-forward flavors common across New Mexico and Colorado kitchens.

    • Add roasted Hatch green chiles or Pueblo chiles when in season.
    • Swap salsa for homemade Red Chile Sauce.
    • Add a spoonful of green chile sauce on top before serving.

    What To Serve With It

    This is a hearty Mexican breakfast casserole recipe that would pair lovely with just a bowl of fresh fruit as a side dish or even just a slice or two of avocado or a spoonful of Guacamole. But if you’re looking for traditional Southwestern side dishes, Cowboy Beans are commonly served as a breakfast side dish. Or take a look at these Western style Cast Iron Skillet Fried Potatoes.

    Make Ahead, Storage and Reheating

    • Make Ahead: I’m not a big fan of making this casserole the night before to bake the next morning. It just provides too much time to compromise the texture of the tortillas. We don’t want them mushy. However, I have fried the corn tortillas, topped with sausage and cheese the night before. The rest is quick and easy. Covered tightly in the refrigerator you can add the egg mixture the next morning for a quicker turn around time.
    • Storage: Cover and refrigerate any leftovers for up to four days.
    • Freezing: This casserole will freeze well. Store in a freezer safe container for up to three months. Remember to label and date the container.
    • Reheating: Reheat individual servings in the microwave. The 50% power feature is your best friend. Place squares of the casserole in a microwave safe bowl. For a gentle, no-splatter method, reheat in 30 second increments at 50% power until hot. You can also reheat in a low heat 200 degree oven for about 15 minutes.

    FAQ’s

    Can I Use Flour Tortillas?

    I wouldn’t try it. Flour tortillas are soft and would change the whole texture of the recipe. They can’t be toasted, so would turn this into a mushier casserole, soaking up a good portion of the egg mixture.

    Is This Mexican Breakfast Casserole Spicy?

    That’s the beauty of cooking with Mexican ingredients. You can purchase mild, medium or spicy salsa to accommodate your heat tolerance.

    Can I Half This Recipe?

    Absolutely yes. Most of the time I’ve made this recipe, I’ve halved this ingredients. All ingredients are easily divided by two. Then bake in a 10″ x 6 ½″ or an 8″ by 8″ casserole dish.

    Why Is My Breakfast Casserole Watery?

    Too much salsa or you skipped the rest time. Both will mess with the texture.

    Recipe for Eggs Ole’ Mexican Breakfast Casserole

    Mexican Breakfast Casserole with chorizo and corn tortillas with velveeta cheese sauce

    And if you’re looking for more breakfast recipe ideas, don’t miss my breakfast category. You’ll find lots of ideas including the most popular on my site for Smothered Breakfast Burrito.

    Explore More Southwestern Breakfast Recipes

    • Mexican breakfast scrambled eggs with black beans.
      Eggs Rio Grande, New Mexican Breakfast Eggs
    • Mexican scrambled eggs with sliced avocado.
      Huevos a la Mexicana
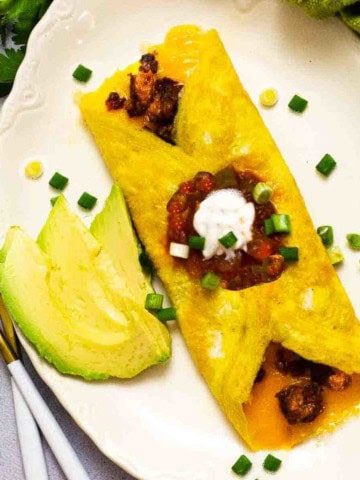
    • Chorizo omelette topped with salsa and sour cream.
      Easy Cheesy Chorizo Omelette
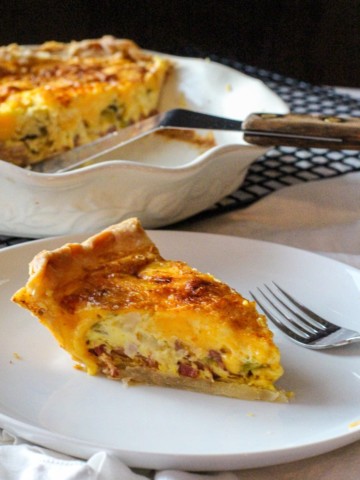
    • A slice of hatch green chile bacon quiche with a deep dish pie pan with quiche and spatula
      Hatch Green Chile Quiche With Bacon

    If you liked this recipe, please leave a star ⭐⭐⭐⭐⭐ rating in the recipe card below and leave a comment. I always appreciate your feedback and hearing how everything went.

    And, don’t forget to subscribe to my newsletter for more delicious recipes and cooking tips. Make it a delicious day … every day.

    A slice of chorizo Mexican breakfast casserole.
    Print Recipe
    5 from 3 votes

    Eggs Ole Mexican Breakfast Casserole

    This recipe has everything you've been looking for. With corn tortillas as the base and layers of cheese, chorizo and eggs, all topped with a cheesy sauce, they'll be asking for seconds.
    Prep Time30 minutes mins
    Cook Time35 minutes mins
    Resting time10 minutes mins
    Total Time55 minutes mins
    Course: Breakfast Recipes
    Cuisine: Mexican, Southwestern
    Diet: Gluten Free
    Servings: 12 people
    Calories: 477kcal
    Author: Lea Ann Brown

    Ingredients

    • To Prepare The Corn Tortillas
    • ¼ cup canola oil
    • 12 yellow corn tortillas
    • For The Casserole
    • 1 pound bulk chorizo browned
    • 1 cup cheddar cheese shredded
    • 1 cup Monterey jack cheese shredded
    • 16 large eggs
    • 12 ounces of your favorite salsa thick and chunky works best
    • 1 cup sour cream full or reduced fat
    • For the queso topping sauce:
    • 12 ounces Velveeta cut in cubes
    • 8 ounces Salsa thick and chunky works best
    • 6 Tablespoons milk

    Instructions

    • Preheat oven to 350 degrees.
    • Heat oil in large skillet over medium high heat. Place tortillas, one at a time, in the skillet. Cook 30 seconds and then turn and cook the other side of each tortilla 15 seconds. Using a wide spatula transfer the tortillas to a paper towel as you cook them.
    • Brown chorizo in a the same pan, remove to paper towels and set aside.
    • Spray a 9×13 casserole dish with Pam.
    • Line bottom of the casserole dish with tortillas. Cut each tortilla in half so they'll fit for an even layer.
    • Top the corn tortillas with the chorizo and grated cheddar and Monterey Jack.
    • Mix eggs, sour cream and salsa together until well blended; pour this mixture over the shredded cheeses.
    • Bake uncovered at 350 for 30 – 40 minutes or until set.
    • Make the Velveeta Queso Topping Sauce: While the casserole is baking, prepare the queso topping. Simply add Velveeta, milk and Salsa to a microwave safe bowl. Microwave in 30 second increments, stirring each 30 seconds, until mixture is hot and smooth.
    • Serve with Velveeta Queso Sauce. Garnish with chopped chives, cilantro and even black olives for color. A slice of avocado is nice here.

    Notes

    • About Chorizo: I’m not a fan of the mushy style of chorizo you find in tubes. They contain too much sauce filling and grease that cooks away and you’re left with not much meat. I buy chorizo in a package that has been ground like hamburger. If you purchase the chorizo product in a tube, you’ll need to buy 2 tubes as that product renders down to less meat.
    • Pull it before it looks "fully done". The carry over, resting period finishes it, and makes it easy to slice.
    • Fried Tortillas: Don’t skip frying or toasting the corn tortillas. It gives this casserole structure. Using soft corn tortillas right out of the package will result in a mushy texture.
    • Chorizo: If the cooked chorizo has created a lot of grease, drain it before adding to the casserole to avoid a greasy texture.

    Nutrition

    Calories: 477kcal | Carbohydrates: 19g | Protein: 26g | Fat: 33g | Saturated Fat: 14g | Cholesterol: 282mg | Sodium: 1454mg | Potassium: 406mg | Fiber: 2g | Sugar: 5g | Vitamin A: 1243IU | Vitamin C: 1mg | Calcium: 390mg | Iron: 2mg

    Eggs Ole Mexican Breakfast Casserole … It’s whats for brunch.

    Sweet Oatmeal Molasses Bread

    September 22, 2020 By Lea Ann Brown 34 Comments

    easy molasses bread with butter

    This Oatmeal Molasses bread is as healthy as it is delicious. With just one tablespoon of added fat, lots of oatmeal and vitamin B rich molasses, this bread is soft, fluffy and a favorite when I make it for friends and family. Not to mention, molasses bread makes the best BLT Sandwich you’ll ever taste.

    easy molasses bread with butter

    About This Recipe and Why It Works

    Have you ever considered turning the Winter months into a food goal project? I suppose you could call it a New Year’s Resolution. Pick something that you’d like to master. Strengthen your kitchen skills.

    January and February would be a perfect time to learn on a new culinary skill. Declare war on your nemesis food.

    Decide on your task…make it once a week until you master the dish.

    Me? I’m working on bread.

    One of the unexpected benefits that resulted from my time in Culinary School was learning that I actually loved making bread.

    I’ve been making bread as much as I can. I’ve become familiar with how the dough should feel and behave during each step of the the process.

    And watching the dough come to life as it rises is truly rewarding. Homemade bread makes a mockery of the mass produced bread we buy on our supermarket bread aisle.

    My favorite bread to make is this Oatmeal Molasses Bread. The aroma as it bakes is simply intoxicating. Not to mention the flavor and texture is out of this world.

    Molasses bread is a wonderful dark, crusty fragrant bread, a recipe made famous from the bed and breakfast, Rabbit Hill Inn, in Lower Waterford, Vermont.

    I found this Molasses bread recipe hiding inside one of my favorite bed and breakfast cookbooks, Dairy Hollow House.

    This cookbook contains some of the best soup recipes you will ever slurp, and where there’s good soup, there’s good bread.  And if I’ve said it once, I’ve said it a hundred times, bed and breakfast recipes are some of the best comfort food recipes you’ll find.

    Molasses bread is great for a breakfast toast served with eggs. Wonderful with an apple butter or jelly. Nice for lunch with a slice of Swiss cheese melted over it. And as a base for egg salad sandwich. And possibly the best bread to make a BLT sandwich – the best you’ll eat in your entire life.

    Let’s take a look.

    Ingredients You’ll Need

    Ingredients for Homemade Oatmeal Molasses Bread
    • All Purpose Flour: No need for anything special for this molasses bread recipe. You most certainly can use bread flour, but all-purpose flour works fine.
    • Quick Cooking Oats: Instant oats are called for in this recipe as they are soaked prior to folding into the dough. They’ll absorb the liquid faster and better and will be a softer option than steel cut oats, which always require a longer cooking time.
    • Dry Active Yeast: As opposed to quick rising yeast.
    • Black Strap Molasses: You’ll find black strap molasses in the baking department. It’s processed differently than regular molasses. It’s more dense, thicker and a carries a somewhat bitter flavor.

    How To Make Oatmeal Molasses Bread

    soaking oatmeal to make molasses oatmeal bread
    blooming yeast to make bread
    • Step 1. In a Kitchen-aid Mixing bowl, pour the boiling water over the oatmeal and butter. Let stand 30 minutes.
    • Step 2: In a small bowl, sprinkle the yeast over the lukewarm water and let stand to dissolve. 5 – 10 minutes.
    soaking oatmeal to make bread
    working with sticky dough for making bread
    • Step 3. Add the yeast, molasses and salt to the oatmeal mixture and stir well. 
    • Step 4. Using your Kitchen-aid paddle attachment, on low, stir in enough of the flour to make a kneadable dough 1 cup at a time, so that is still somewhat sticky to the touch. Switching to the dough hook, knead until smooth and elastic on power 4. About 7 minutes. Keep adding pinches of flour until the bread just starts to clean the side of the bowl. For me, I usually end up adding about 6 – 8 pinches. The dough will still be sticky.
    placing dough in an oiled bowl for its first rise
    dough doubled in size for molasses bread
    • Step 5. Transfer dough to a large oiled bowl. Turn dough to coat and cover with a clean cloth.
    • Step 6. Let rise until doubled. About 1 ½ hours.
    punching down oatmeal bread
    2nd rise for oatmeal bread in 9 x 5 loaf pans
    • Step 7. Punch the dough down and divide it in half. Note: Use a bench knife to divide the dough. It works like a charm.
    • Step 8. Oil two 9 x 5 inch loaf pans. Shape the dough into loaves and place them in the prepared pans. Cover and let rise until doubled in bulk. About 40 minutes.
    2 loaves of molasses bread cooling on rack
    • Step 9. Bake the bread until crusty, about 30 minutes. Turn the loaves out of the pans onto a wire rack. Let cool.

    Expert Tips and FAQ’s

    Why Is Black Strap Molasses Important To This Recipe?

    The role black strap molasses plays is important here, making the bread almost as dark as pumpernickel and with a flavor all its own. Molasses is a key flavoring in many New England breads, such as Boston Brown Bread. A sweetening far more dimensional than plain old sugar or even honey. Sweetness with pleasantly subtle sour bitter under note of flavor.

    Can I Use Regular Molasses For This Recipe?

    The original recipe calls for Blackstrap molasses, which will give the bread a potent bittersweet flavor. I’ve used regular molasses, which will give the bread a milder flavor.

    All I Have Is Quick Rising Yeast, Can I Substitute?

    To substitute instant yeast (or rapid rise yeast) use about 25% less. This recipe calls for 1 Tablespoon of Dry Active Yeast. 1 Tablespoon weighs .5 ounces, so use 0.125 ounces of instant yeast. A kitchen scale is an excellent tool to measure this. You will also not need to prove instant yeast. Just mix it in with the water and continue with recipe.

    How Do I Know If My Water Is Warm Enough For Yeast?

    The water should be between 100 – 110 degrees. Use a thermometer to determine if the water is the right temperature. If the water is too hot, such as 120 degrees, it will damage or kill the yeast.

    Pro-Tip About Punching Down Dough: Punching down dough is a common technique in bread making. It deflates the dough and releases air so that you can form it into other shapes. Make a fist with your hand and push it firmly into the center of the puffy dough. Fold the edges into the center to make a rough ball. Then proceed with recipe instructions.

    More Tips for Success

    • Want more of a Steakhouse feel with the recipe? Simply divide the dough into 6-8 mini loaves and reduce baking time to about 10 minutes. Watch them close to make sure you don’t over-cook.
    • Leave bread to rise in a warm spot. Cold places in your house will compromise the rising process. And could even stop it completely. You can even warm your oven to 200 degrees and then turn the oven off. Wait a few minutes and then place the dough in to rise.

    Recipe for Sweet Oatmeal Bread with Molasses

    Molasses bread with sweet cream butter

    I’m hoping you’ll give this luscious molasses bread recipe a try. It’s a rewarding project that your family will flip over.

    And if you’re looking for more bread recipes, don’t miss my bread category. You’ll find lots of fun recipes including one of the most popular on my site for good old fashioned Banana Nut Bread.

    More Homemade Bread Recipes

    • Italian Herbed Tomato Bread on a cutting board smeared with butter.
      Herbed Tomato Bread Recipe
    • Olive Rosemary Bread. A beautiful homemade bread recipe.
      Homemade Rosemary Olive Bread
    • Super Moist Cheesy Cornbread with Creamed Corn
    • Pumpkin beer bread sliced on a plate.
      Moist Pumpkin Bread Made With Pumpkin Beer

    If you liked this recipe, please leave a star ⭐⭐⭐⭐⭐ rating in the recipe card below and leave a comment. I always appreciate your feedback and hearing how everything went.

    And, don’t forget to subscribe to my newsletter for more delicious recipes and cooking tips. Make it a delicious day … every day.

    Molasses bread with sweet cream butter
    Print Recipe
    5 from 21 votes

    Oatmeal Molasses Bread Recipe

    A wonderful dark crusty fragrant bread from the Rabbit Hill Inn in Vermont.
    Prep Time3 hours hrs
    Cook Time30 minutes mins
    Total Time3 hours hrs 30 minutes mins
    Course: Bread
    Cuisine: American
    Servings: 12 slices
    Calories: 68kcal
    Author: Lea Ann Brown

    Ingredients

    • 2 cups boiling water
    • 1 cup quick-cooking oatmeal
    • 1 ½ tablespoons butter
    • 1 tablespoon active dry yeast
    • ½ cup warm water 110 degrees
    • ½ cup molasses blackstrap preferably
    • 2 teaspoons salt
    • 4 ½ – 5 cups unbleached all-purpose flour

    Instructions

    • In a Kitchen-aid Mixing bowl, pour the boiling water over the oatmeal and butter. Let stand 30 minutes.
    • In a small bowl, sprinkle the yeast over the lukewarm water and let stand to dissolve. 5 – 10 minutes. Add the yeast, molasses and salt to the oatmeal mixture and stir well. 
    • Using your Kitchen-aid paddle attachment, on low, stir in enough of the flour to make a kneadable dough 1 cup at a time, so that is still somewhat sticky to the touch.
    • Switching to the dough hook, knead until smooth and elastic on power 4. About 7 minutes. Keep adding pinches of flour until the bread just starts to clean the side of the bowl. For me, I usually end up adding about 6 – 8 pinches. The dough will still be sticky.
    • Transfer dough to a large oiled bowl. Turn dough to coat and cover with a clean cloth and let rise until doubled. About 1 ½ hours.
    • Oil two 9 x 5 inch loaf pans. Punch the dough down and divide it in half. Shape the dough into loaves and place them in the prepared pans. Cover and let rise until doubled in bulk. About 40 minutes.
    • About 30 minutes into the final rise, preheat oven to 375 degrees. 
    • Bake the bread until crusty, about 30 minutes or until an instant read thermometer inserted into the center of each loaf reads 190 degrees. Turn the loaves out of the pans onto a wire rack. Let cool.

    Notes

    The original recipe calls for Blackstrap molasses, which will give the bread a potent bittersweet flavor. I’ve used regular molasses and find I like the flavor better. 
    If rapid rise yeast is all you have, use 25% less than this recipe call for. Just add it to the water and stir, no need to let it prove for 10 minutes. Just add it to the dry ingredients and proceed with the recipe.
    This recipe works with a somewhat sticky dough. Using a bench knife makes easy work when dividing the dough to place into the bread pans for its second rise. 

    Nutrition

    Calories: 68kcal | Carbohydrates: 12g | Fat: 1g | Cholesterol: 3mg | Sodium: 408mg | Potassium: 222mg | Sugar: 10g | Vitamin A: 45IU | Calcium: 32mg | Iron: 0.8mg

    Oatmeal Molasses Bread … It’s what’s for dinner.

    « Previous Page
    Next Page »

    I'm Lea Ann

    Welcome to my Colorado kitchen. If you're a fan of rustic homestyle cuisine, you've come to the right place. I'm a Culinary School Grad with a passion to inspire you to cook as often as you can. I offer reliable, approachable and easy to follow recipes. So grab that skillet and let's cook.

    More about me

    Soup and Stew Recipes

    • Southwest chicken soup with hominy and potatoes.
      Sopa Ranchera, Southwest Chicken Soup
    • Creamy chicken tortilla soup with rotel tomatoes.
      Southwestern Creamy Chicken Tortilla Soup
    • Cowboy chili garnished with grated cheese and jalapeno pepers.
      New Mexico Style Cowboy Chili
    • Ground chicken chile with white beans.
      Giada’s Ground Chicken Chili with White Beans
    • Beef stew with mushrooms served in a skillet.
      Beef Stew With Mushrooms – Crock Pot Method
    • 7-can taco soup with ranch dressing.
      Original 7 Can Taco Soup with Ranch Dressing

    Reader Favorites

    • Super Moist Cheesy Cornbread with Creamed Corn
    • Flemings steakhouse macaroni and cheese in a white bowl.
      Flemings Steakhouse Mac and Cheese
    • A slice of Layered Mexican Casserole with ground beef and corn tortillas.
      Mexican Casserole with Ground Beef and Corn Tortillas
    • Beef Tagliata, thin sliced flank steak served over arugula and cherry tomatoes.
      Beef Tagliata (Italian Steak)
    • Ham and cheese quesadilla made with corn tortillas and topped with a fried egg.
      Crispy Ham and Cheese Corn Tortilla Quesadillas
    • Spinach chicken mushroom skillet dinner.
      Chicken Mushroom and Spinach Skillet

    Footer

    • Contact
    • About
    • Privacy Policy
    • Accessibility Statement
    • ↑ back to top

    Copyright © 2024 Cooking on the Ranch • Powered by Feast+

    Rate This Recipe

    Your vote:


    A rating is required
    A name is required
    An email is required