Cooking On The Ranch

  • Home
  • About
  • Recipe Roundup
  • Contact Me
  • Join Community
menu icon
go to homepage
  • Home
  • Soups and Stews
  • About
  • Recipes
  • Contact Me
    • Facebook
    • Instagram
    • Pinterest
  • search icon
    Homepage link
    • Home
    • Soups and Stews
    • About
    • Recipes
    • Contact Me
    • Facebook
    • Instagram
    • Pinterest
  • ×
    Home

    Pan Seared Merlot Steak with Blue Cheese Butter

    August 22, 2025 By Lea Ann Brown 1 Comment

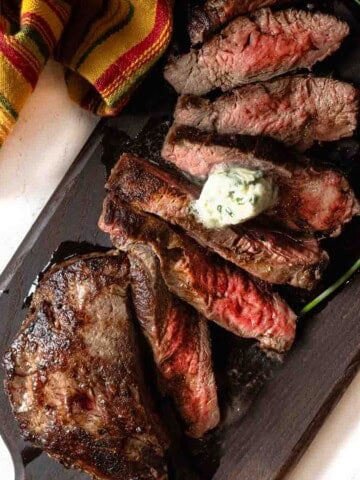
    Sliced pan fried merlot steak topped with blue cheese butter.

    The Merlot Steak, a hidden gem of the beef world, cooks up in just minutes seared in a sizzling hot pan. Juicy, tender and flavorful, slice it thin, and top it with a decadent and easy to make Blue Cheese Butter. A steakhouse worthy dinner at home.
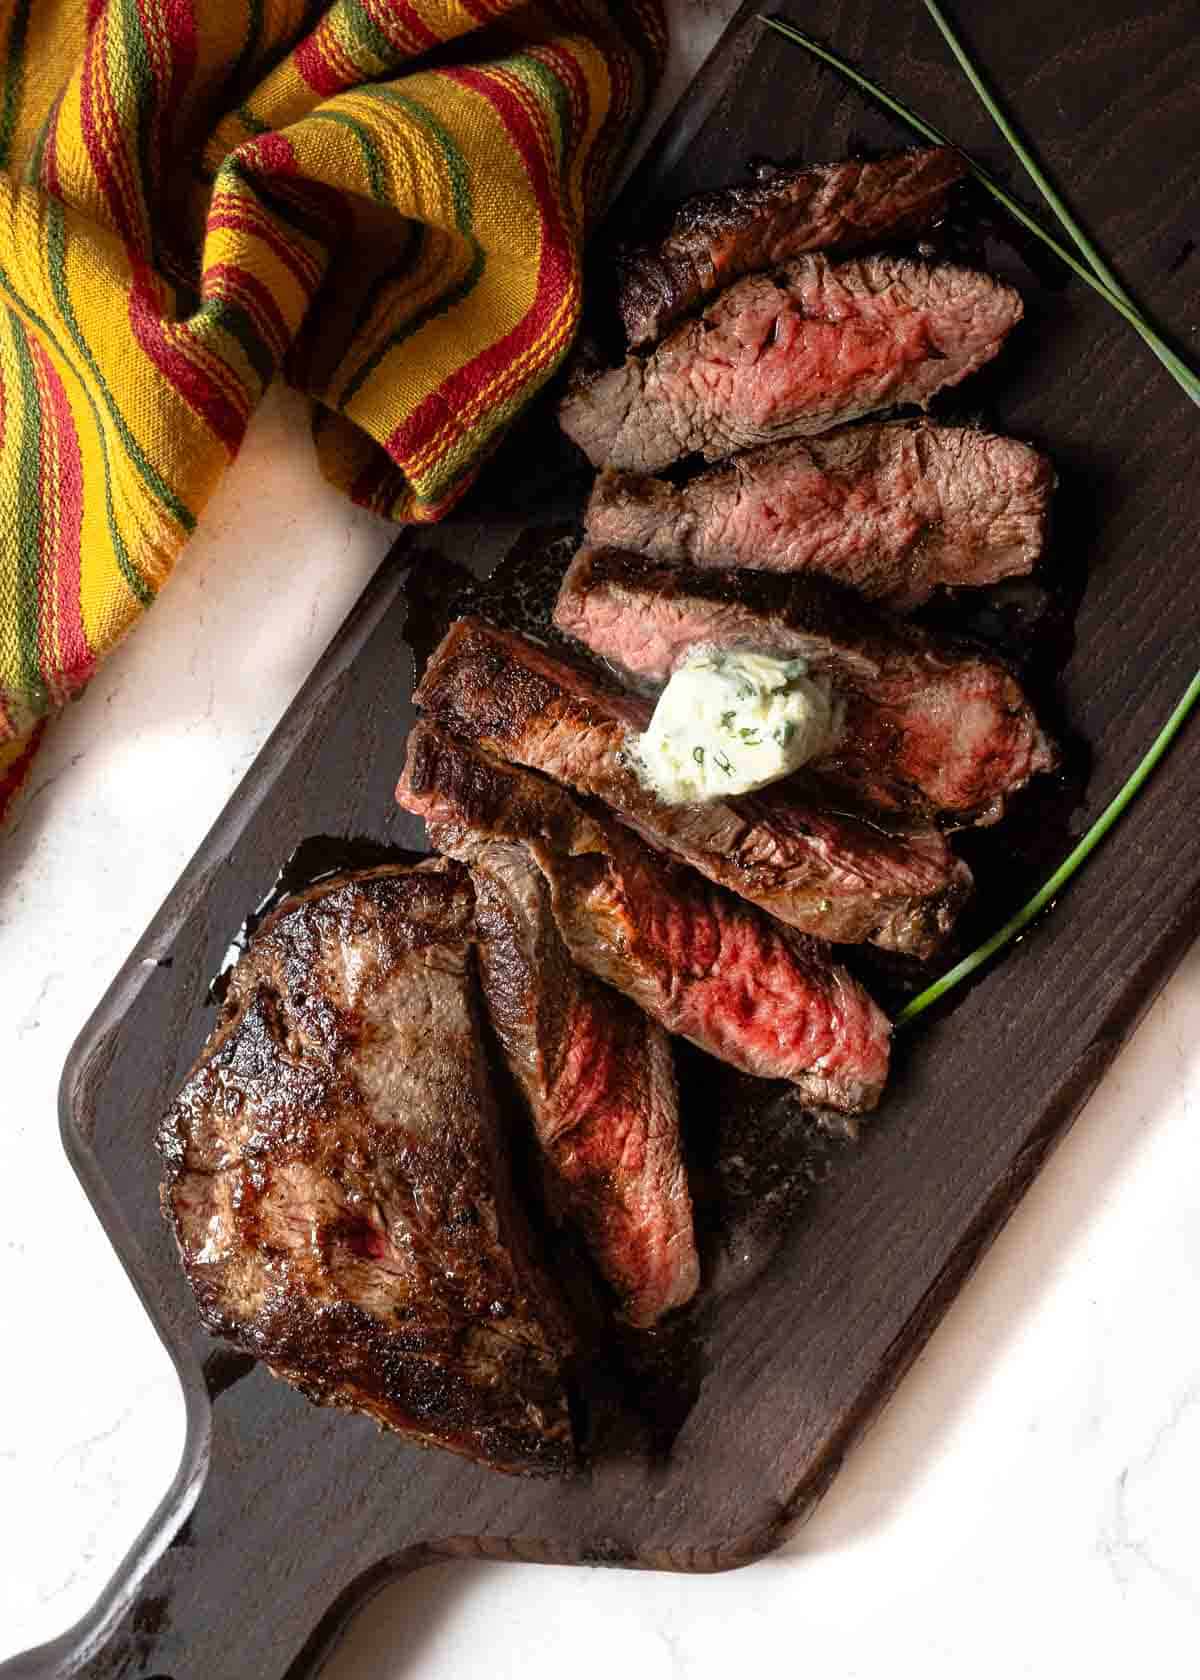
    Pan seared sliced Merlot steak topped with blue cheese butter.

    What Is A Merlot Steak?

    The Merlot Steak is a cut from the hind leg of the steer where the round and shank meet. It’s a well worked muscle, which makes it an incredibly lean cut that needs to be cooked hot and fast to remain tender and juicy. It’s ideal for grilling or pan searing and comes with a nice beefy flavor. The merlot steak has been compared to a Flank Steak, but with a much finer grain. The merlot steak reminds me more of a top sirloin filet.

    Availability, Where To Buy It

    Usually used for ground beef, a Merlot Steak may be hard to find. It’s considered to be a Butcher’s cut which are high quality, flavorful and often overlooked pieces of meat that you may not find at your local grocery store, similar to lesser known steaks, like The Denver Steak and The Chuck Eye Roast. Traditional butcher’s historically keep them for themselves rather than selling. These cuts are typically require skilled butchery to remove from the carcass. They are considered “hidden gems” known for intense beefy flavor and excellent value. Example, I order them from a cattle ranch in Wyoming, Bootheel 7 Ranch.

    I’ve become obsessed with this recipe for blue cheese butter, and it flavored this Merlot Steak to perfection. Let’s take a look.

    Ingredients To Make Blue Cheese Butter

    Fat (butter) plus flavor makes a perfect topping for any lean cut of beef steak. Simply stated, this blue cheese butter for steak is amazing.
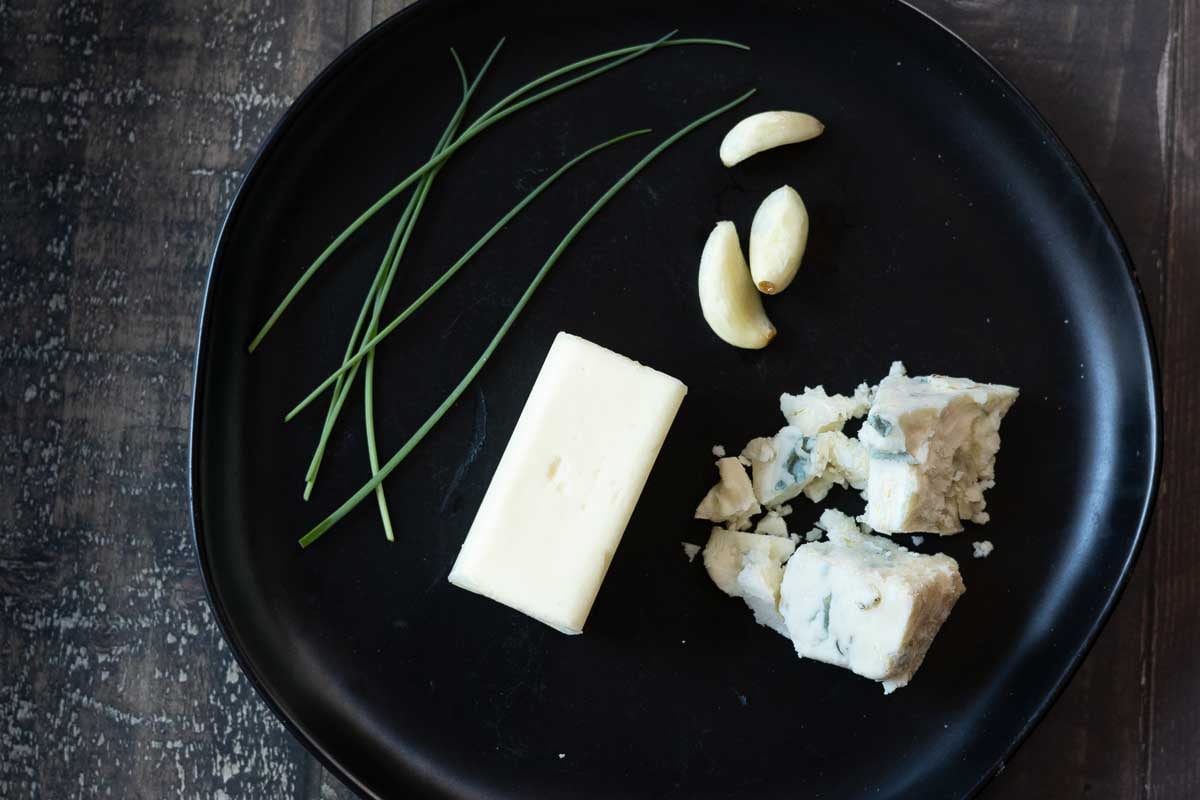
    Ingredients to make blue cheese butter.
    • Butter: ½ stick (4 tablespoons) salted or unsalted. Room temperature.
    • Blue Cheese: Choose a blue cheese that is sold in wedge. It’s a creamy product that will blend well with the butter. Pre-crumbled blue cheese sold in a plastic container is a dryer product. Choose any type of blue cheese, Stilton, Gorgonzola or I like American made Maytag Blue Cheese.
    • Garlic and Chives

    How To Make Blue Cheese Butter
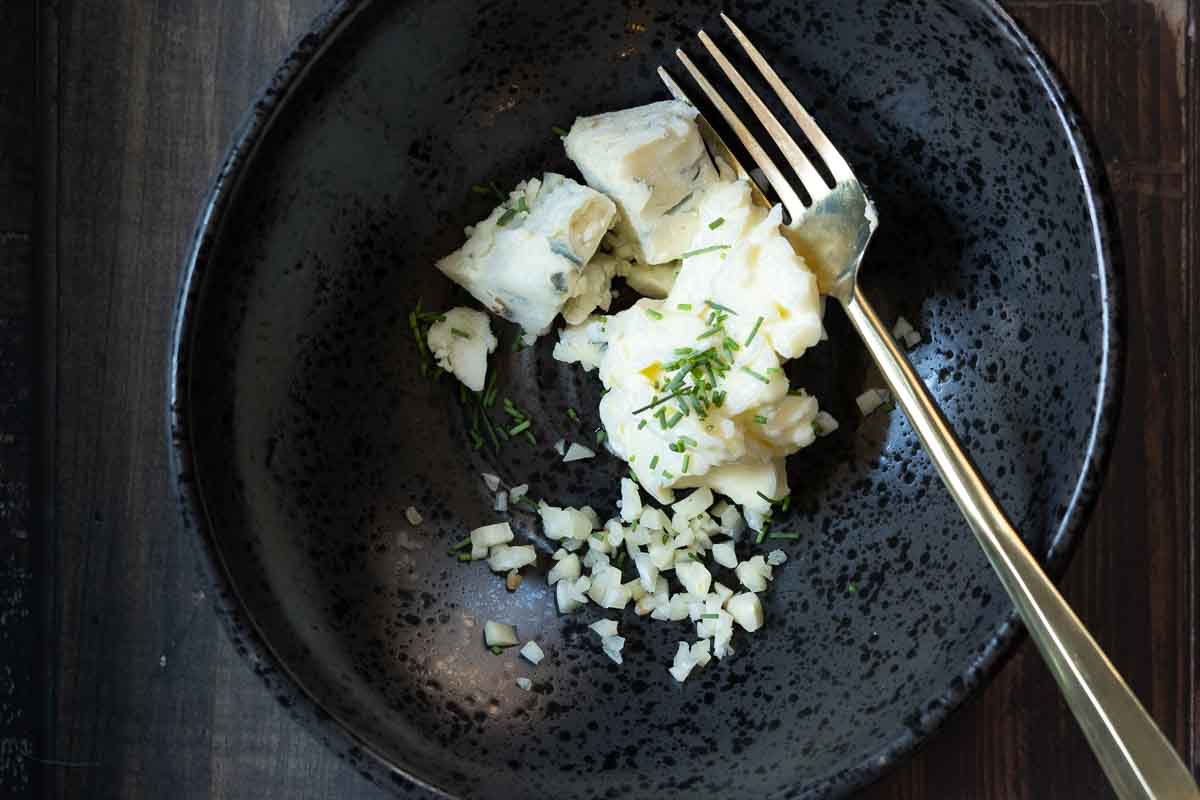
    Ingredients to make blue cheese butter in a bowl.
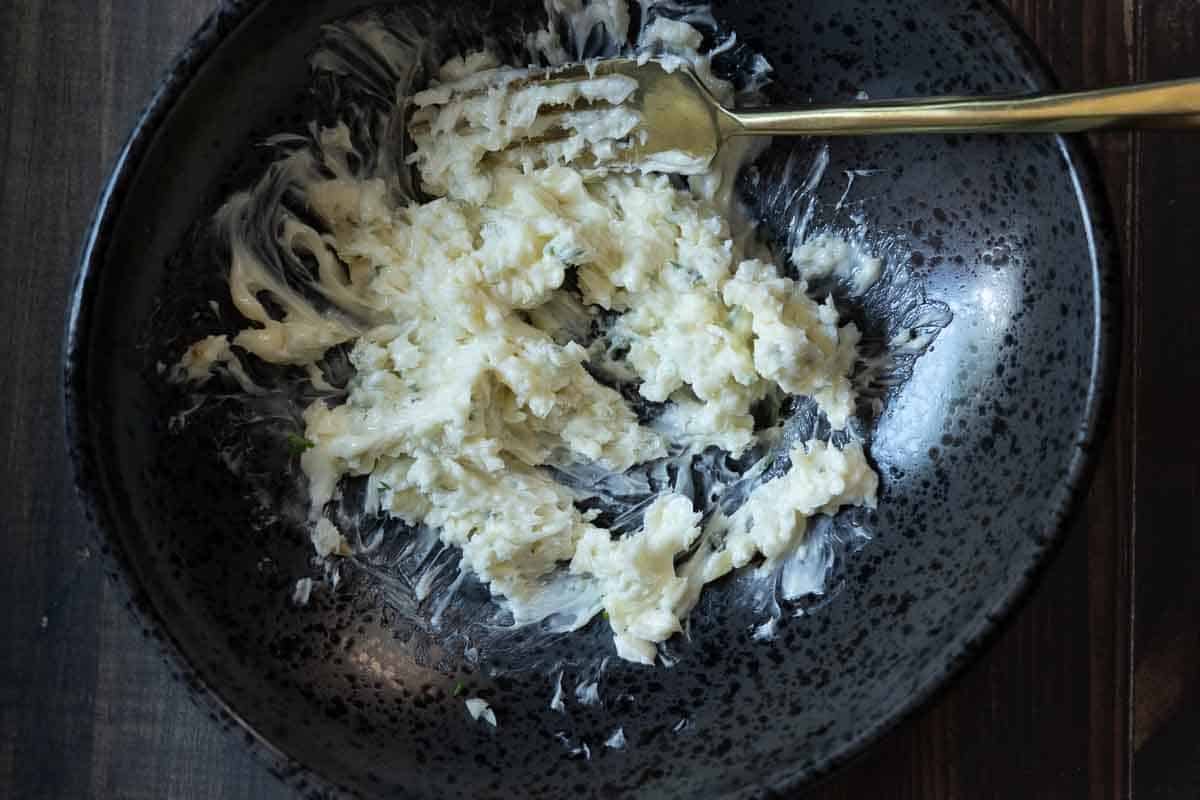
    Smashing ingredients with a fork to make blue cheese butter for Merlot steak.
    1. Step 1: Place the chopped garlic, chopped chives, crumbled blue cheese and softened butter in a bowl.
    2. Step 2: Use a fork to smash the ingredients together until well blended.
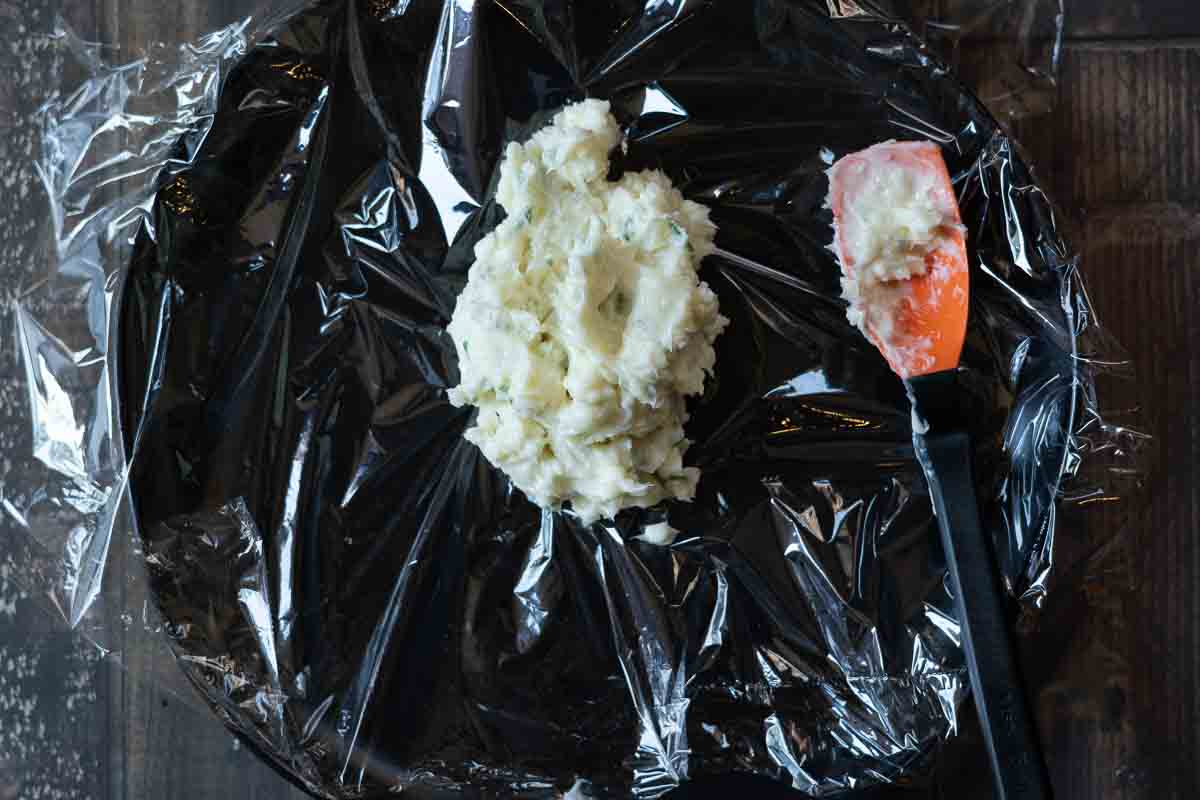
    Rolling compound blue cheese butter into a roll using plastic wrap.
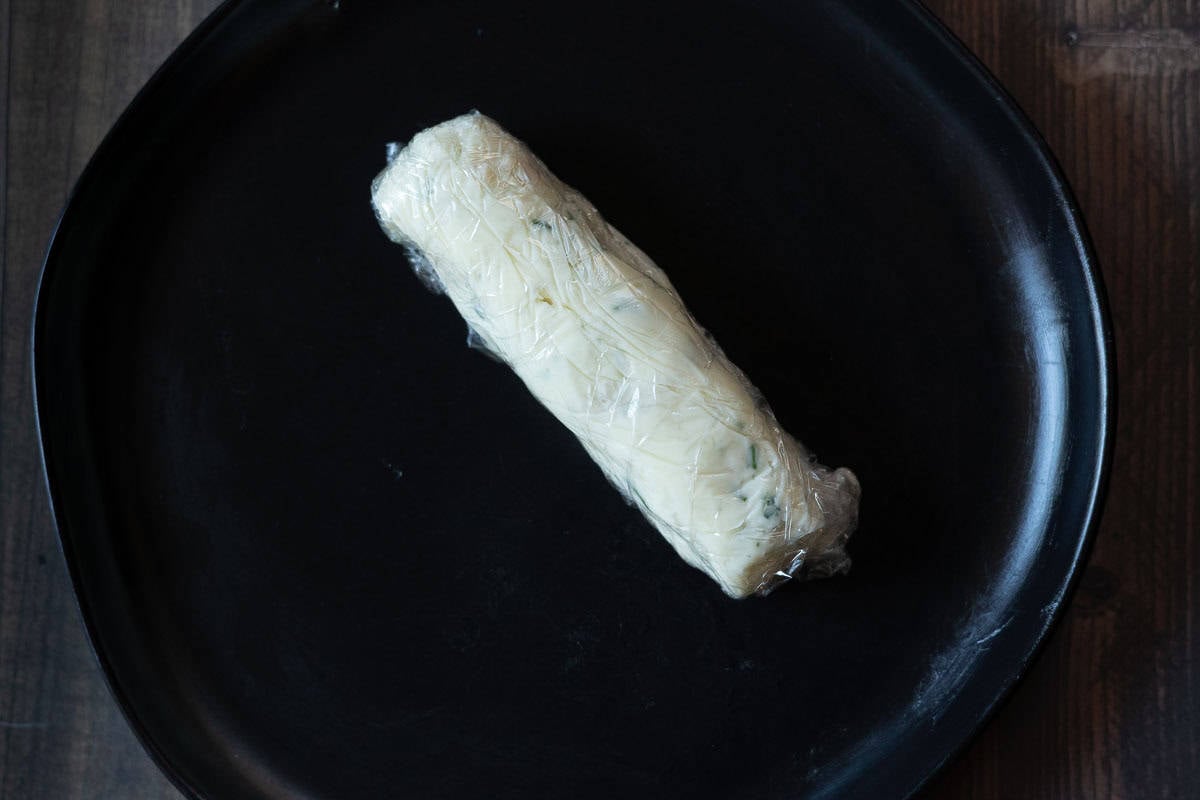
    A roll of blue cheese butter for merlot steak.
    1. Step 3: Use a spatula to scoop the blue cheese butter onto a small sheet of plastic wrap.
    2. Step 4: Roll the butter into a cylinder shape and seal the ends. Place in the refrigerator until the butter is set up and hardened. About 30 minutes.

    How To Cook A Merlot Steak

    As I mentioned above, a Merlot steak is a very lean cut of meat, which makes it a good candidate for either pan searing or grilling. It’s quick to cook because high heat is required to keep the steak tender.

    Thanks to Culinary School, I have gotten into the habit of cooking almost any steak in my Blue Carbon Steel Pan. It’s a pan preferred by chefs and can be found in almost any restaurant kitchen. It heats quickly, it distributes that heat evenly, the metal gets very hot for a good sear. And it’s a stove-top to oven pan. You can also use a cast iron skillet. I prefer the carbon steel because of it’s lighter weight and manageability.

    Disclaimer: I am an Amazon affiliate. If you purchase the carbon steel pan through the link I’ve provided above, I receive a small commission at no extra charge to you.
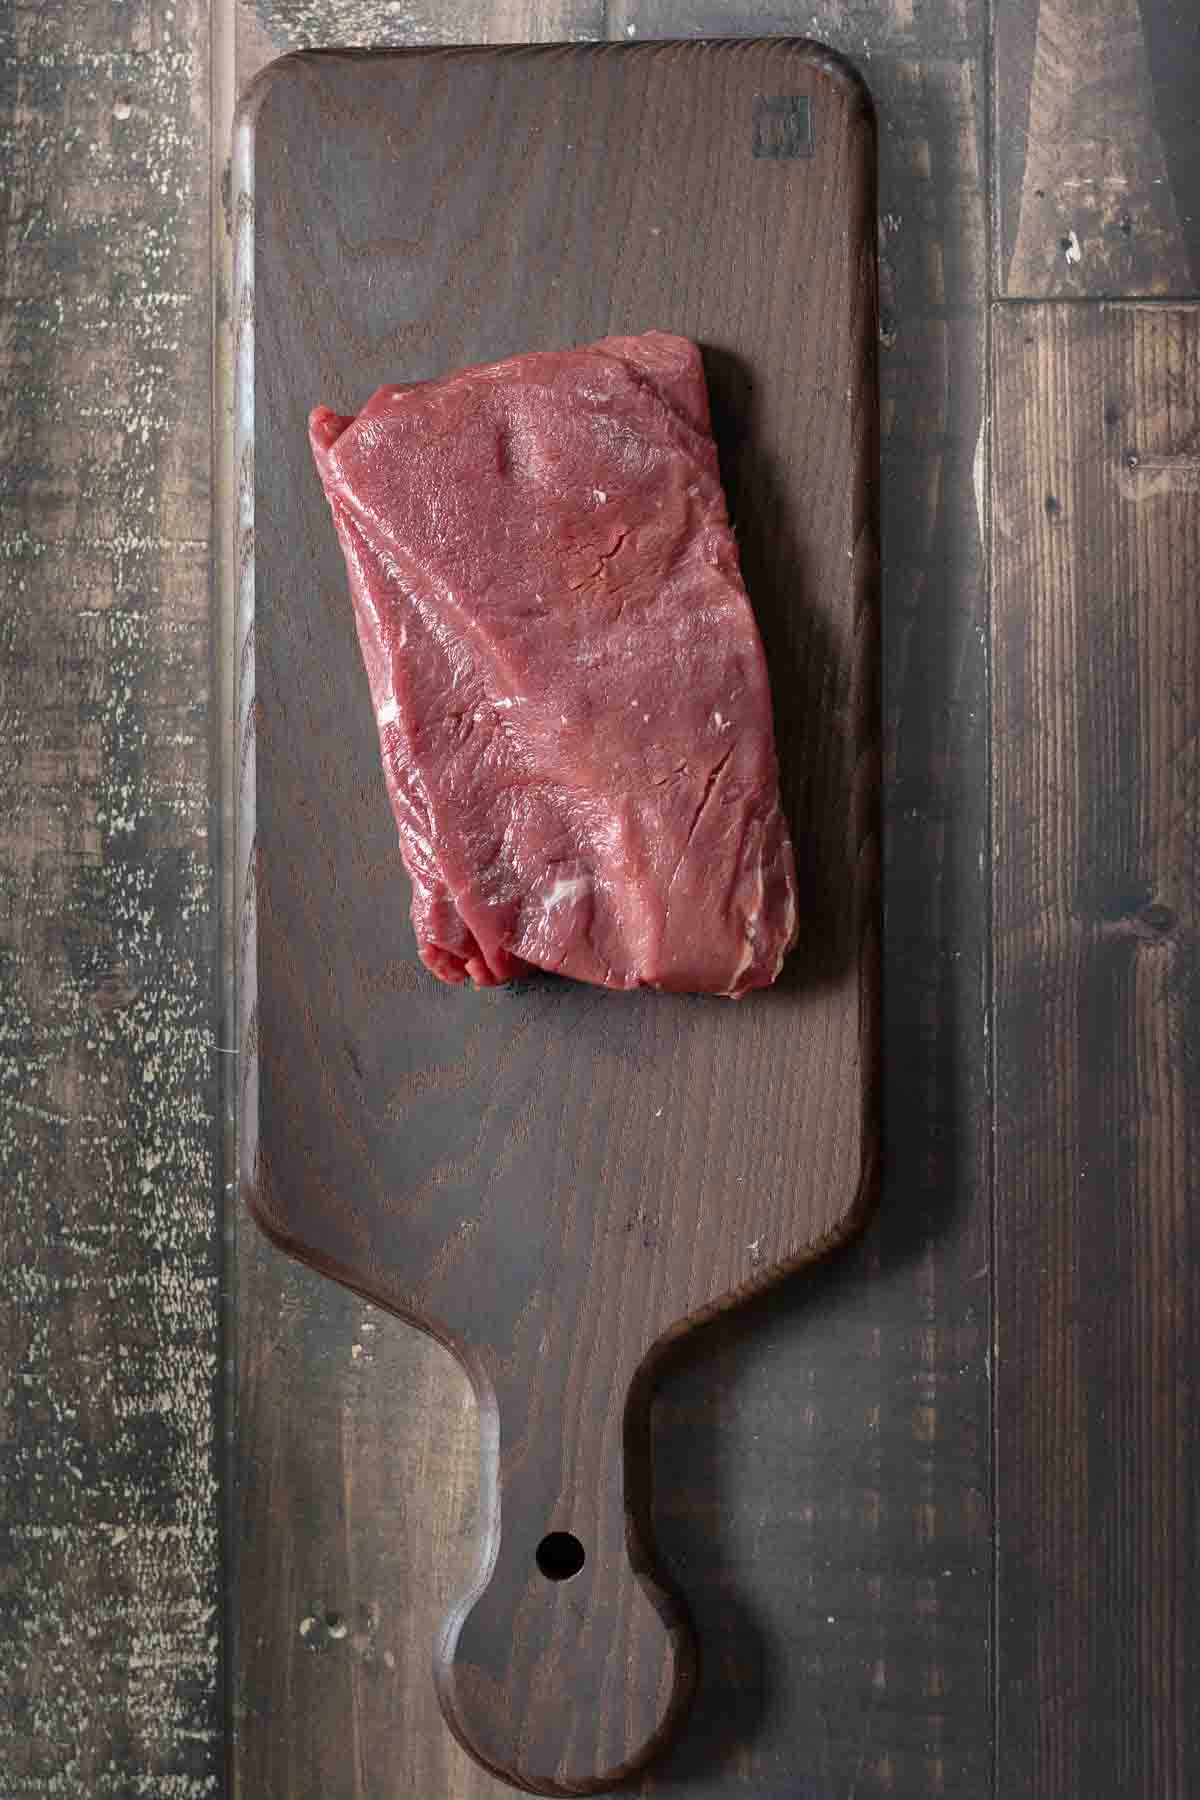
    A merlot steak on a cutting board.
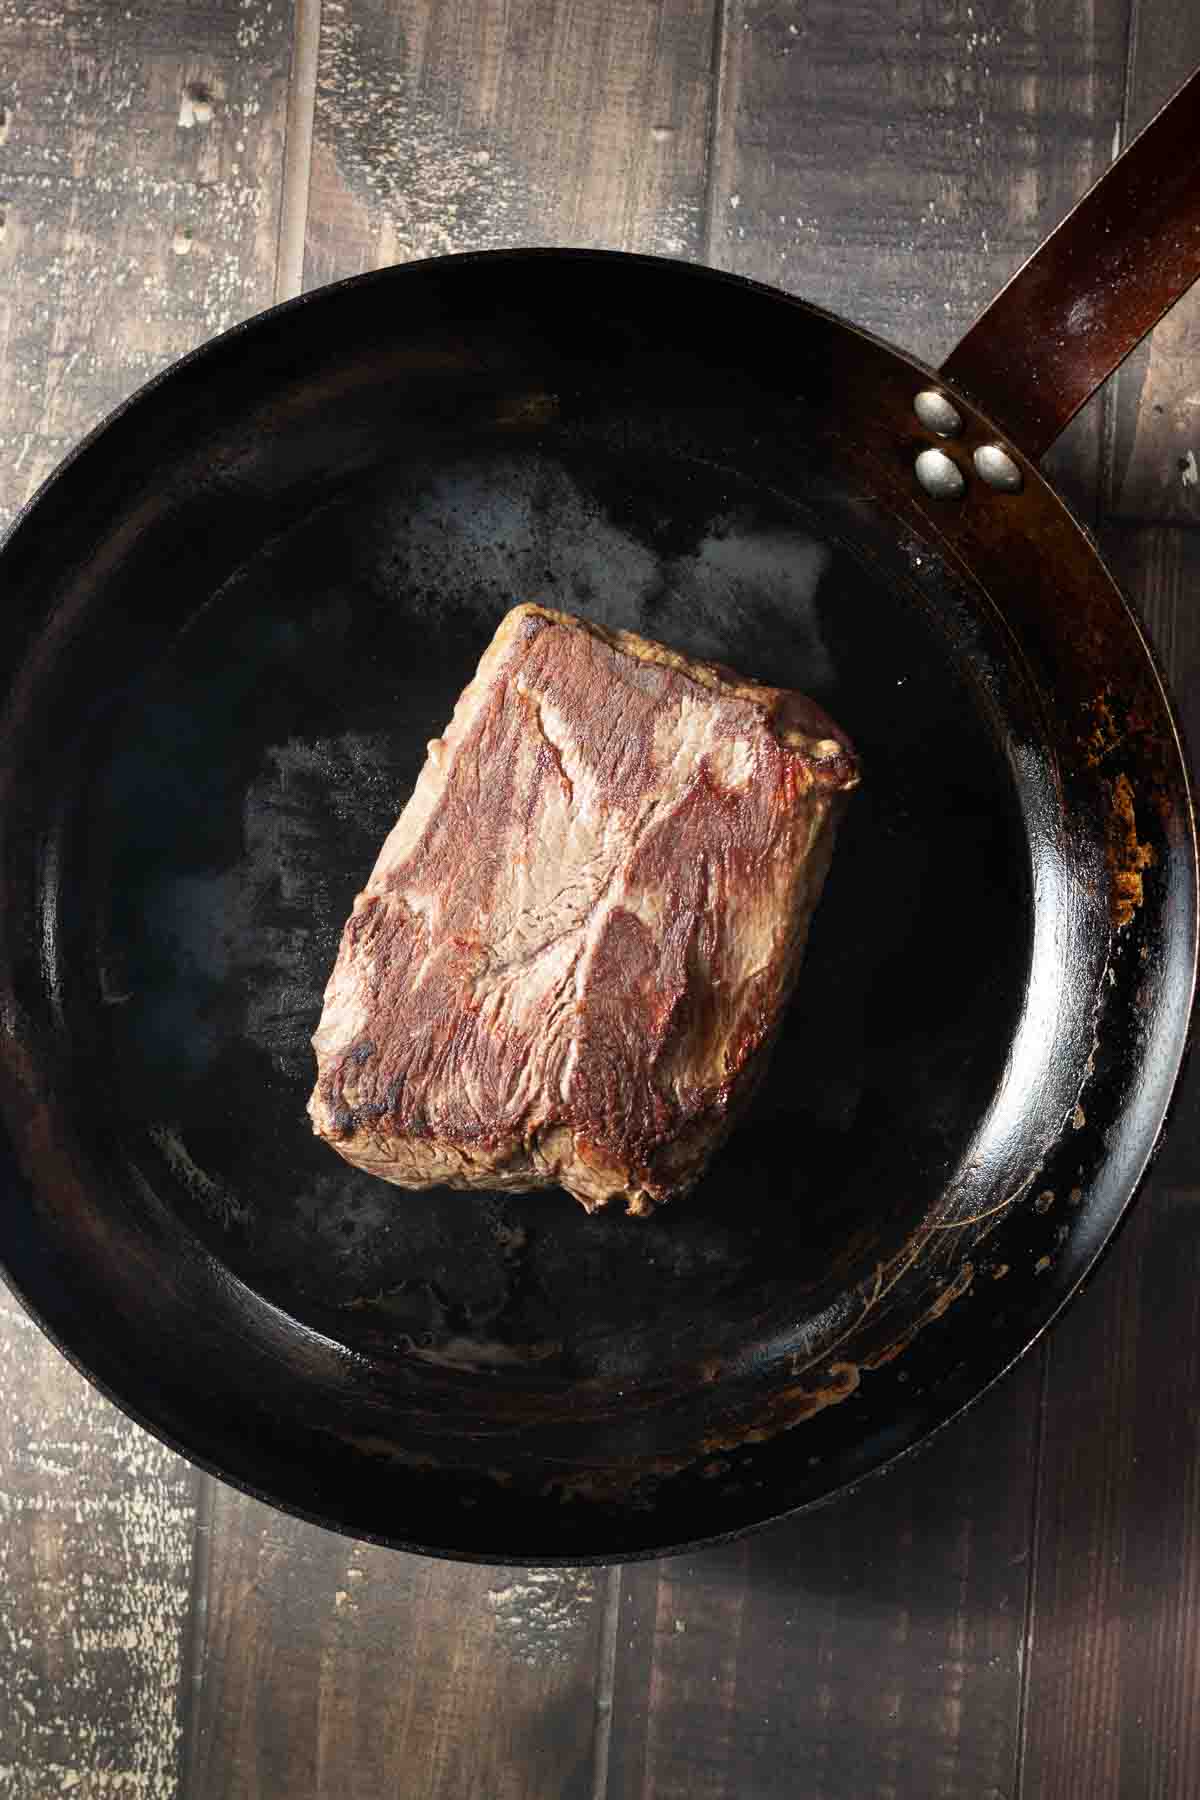
    Pan seared merlot steak in a carbon steel pan.
    1. Step 1: Start by removing the steak from it’s packaging and pat the steak dry with a paper towel. Let the steak sit at room temperature for at least 30 minutes, or up to an hour even better. Season with salt and pepper, or Montreal Steak Seasoning.
    2. Step 2: Use a paper towel to coat the bottom of the pan with oil. Vegetable oil or olive oil work well here.
    3. Step 3: Heat the pan until it’s searing hot. Add the Merlot Steak and sear 2 – 3 minutes. Flip the steak, lower the heat slightly and cook for another 2 – 3 minutes. Use a digital read meat thermometer to determine that the internal temperature has cook to 120 – 130 degrees.
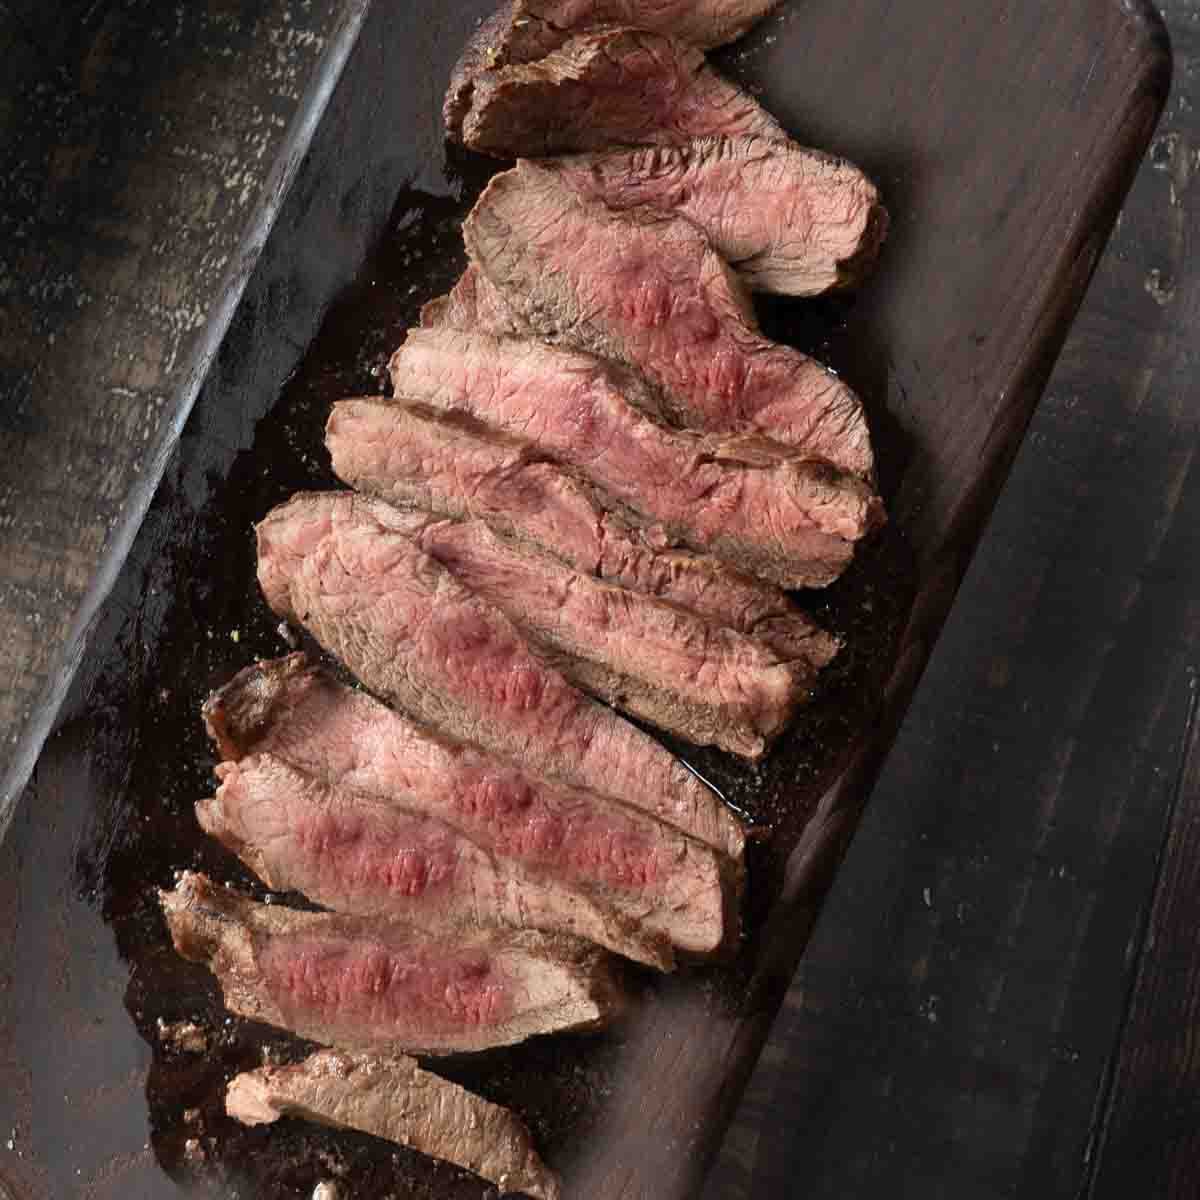
    Sliced merlot steak on a cutting board.
    1. Step 4: Tent and Slice: As with any steak, it’s important to tent the steak with foil before slicing. This allows the juices that were forced out of the edges and into the center, to migrate back to the edges. If you cut a steak too soon, all of that juicy flavor will spill out onto the cutting board rather than stay in the steak.
    2. Step 5: How to Slice A Merlot Steak: It’s also important to know how to slice a Merlot Steak. Slice the steak against the grain and at a bias. Since the Merlot cut is such a lean cut of beef, it won’t be as easy as a flank steak to locate the grain. Look carefully for the grain, then rotate the steak at a 45 degree angle. Thin slice the steak in about ¼ inch slices.

    Tips For Success:

    • Don’t try to sear any steak in a non-stick skillet. They are notorious for not creating enough heat to get a successful sear. Use a good heavy skillet.
    • Not a “rare” steak person? Simply stated, a Merlot Steak needs to be cooked at an internal temperature of 120 – 130 degrees. Anything more than that will produce a dry, unappealing steak. A T-bone steak may be a better choice for those of you who like a well-done steak.

    How To Serve It

    Quickly add a few slices of the steak to a warmed plate and immediately top with about a tablespoon of the Blue Cheese Butter. I always like a traditional potato dish with steak. Either cooked in foil in the oven, or take a look at my recipe for Slow Cooker Garlic Butter Baked Potatoes. A green vegetable like broccoli rounds out the meal.

    Variations

    I truly love this Blue Cheese Butter for a Merlot Steak. The steak’s mild beefy flavor is enhanced with this creamy blue cheese flavor. Here are some other ideas:

    • Country Mustard Whiskey Butter, a blast of flavor for any steak lover.
    • Try this Cowboy Butter, a favorite for when I cook T-bone Steaks.
    • An easy Mustard Sauce is always a good option for any steak.
    • Try serving your Merlot Steaks topped with Chimichurri Sauce.
    • Take a look at my recipes for Horseradish Cream Sauce, it’s not just for Prime Rib after all. and Red Onion Chutney.

    Storage:

    • Store any leftover steak in an airtight container in the refrigerator for up to four days.
    • Gently reheat slices stovetop in a skillet for just a few seconds per side.. Since the steak has been cooked to Medium Rare, you’ll be able to gently reheat without losing much of the tender goodness.
    • Blue Cheese Butter: You’ll have plenty of Blue Cheese Butter leftover. It will keep in the refrigerator in it’s plastic wrap for up to two weeks. Enjoy this treat over any steak, chicken or even green beans. About the green beans: I tried it and it was delicious.

    FAQ’s

    How Do I Make Sure A Merlot Steak Is Perfectly Cooked?

    Again, this is a very lean and thin cut of steak. Sear quickly to get a good crust, and cook to an internal temperature of 120 – 130 degrees, rare or medium rare. Anything over that will cause the steak to dry out.

    How Should I Cook A Merlot Steak?

    Hot and fast. A heavy skillet like a French Carbon Steel Pan is my preferred way. A cast iron skillet works well here. And your outdoor grill is also a good tool. If you’re good at oven broiling steaks, this is also an option.

    Do You Need To Marinate A Merlot Steak?

    A Merlot steak is a good candidate for a steak marinade. Usually I just season with salt and pepper and bring the flavor with a compound blue cheese and butter. If you’re looking for a good steak marinade take a look at this Overnight Steak Marinade, or this one I use for Steak Kabobs.

    Why Is Merlot Steak So Hard To Find?

    It’s a “butcher’s” cut with limited yield per animal. Many processors grind it or keep in in roasts, so retail availability is rare. Ask whole-animal butchers or shop on-line.

    Explore More Specialty Butcher Cuts

    If you’re interested in exploring more lesser known beef cuts that butchers have prized, you’re in the right place. These flavorful, often unknown or overlooked beef cuts can deliver steakhouse quality in your own home. And help you expand your horizons beyond the usual Grilled Ribeye or New York strip. Here are some of my favorite unique butcher’s cuts, along with how-to’s and recipes.
    • Pan Fried Baseball Top Sirloin steak served with green beans.
      Pan-Seared Baseball Top Sirloin Steak, Perfect Every Time
    • Hanging tender steak served with green chile sauce, tomatoes and avocado.
      Hanging Tender Steak (Hanger Steak) - How to Cook It Perfectly
    • A slice of chuck eye roast on a plate served with roasted potatoes.
      Oven Roasted Chuck Eye Roast
    • Denver Steak Recipe.
      Denver Steak: What Is It & How To Cook It Perfectly

    Don’t miss my category for Beef Recipes, you’ll find lots of great burger, steak, brisket and beef soups and stews. Including the most popular pan seared steak recipes on my site for Beef Tagliata. An Italian steak recipe that will WOW the family and wow you because it’s so easy to make.

    If you liked this recipe, please leave a star ⭐⭐⭐⭐⭐ rating in the recipe card below and leave a comment. I always appreciate your feedback and hearing how everything went.

    And, don’t forget to subscribe to my newsletter for more delicious recipes and cooking tips. Make it a delicious day … every day.

    Sliced pan fried merlot steak topped with blue cheese butter.
    Print Recipe
    No ratings yet

    Pan Seared Merlot Steak with Blue Cheese Butter

    The Merlot Steak, a hidden gem of the beef world, cooks up in just minutes seared in a sizzling hot pan. Juicy, tender and flavorful, slice it thin, and top it with a decadent Blue Cheese Butter. A steakhouse worthy dinner at home.
    Prep Time10 minutes mins
    Cook Time10 minutes mins
    Resting time10 minutes mins
    Course: Main Course Beef
    Cuisine: American
    Diet: Gluten Free
    Servings: 4
    Calories: 259kcal
    Author: Lea Ann Brown

    Ingredients

    • For The Blue Cheese Butter
    • 4 Tablespoons Butter ½ stick
    • 2 Healthy Tablespoons Blue cheese
    • 1 teaspoon Garlic minced
    • 1 teaspoon Chives minced
    • For The Merlot Steak
    • 1 pound Merlot Steak
    • 1 teaspoon extra virgin olive oil
    • ½ teaspoon Kosher Salt
    • ¼ teaspoon Freshly Ground Pepper

    Instructions

    • For the Blue Cheese Butter: Allow about 30 minutes for the butter to come to room temperature, or soften the butter in a microwave safe bowl until malleable.
    • Using a fork, mash in and combine blue cheese, chives and garlic until fully mixed.
    • Spoon the butter onto a small sheet of plastic wrap. Form the butter into a cylindar and seal the edges. Return the butter to the refrigerator for about 30 minutes.
    • For the Merlot Steak
    • Remove steak from the fridge 30 minutes before cooking. An hour is even better.
    • Use a paper towel to pat the steak dry and season both sides with salt and pepper, or Montreal Steak Seasoning.
    • Add the olive oil to the skillet. I like to use a paper towel to smear it around to coat the bottom of the pan.
    • Heat the pan over medium high heat, and once hot, add the Merlot Steak. Sear for three minutes. Once the steak is browned on one side, turn and cook for another three minutes. Use a digital meat thermometer to determine that the interior temperature has reached 120 – 130 degrees.
    • Transfer the steak from the skillet and place it on a cutting board. Tent with foil and let it rest for 5 – 10 minutes. Look for the grain and slice the steak against the grain and at a bias. Top with several slices of the Blue Cheese Butter and serve immediately.

    Notes

    A good rule of thumb is to allow ¼ pound of any protein per person. If you want heartier servings, this recipe will serve 2 people. 
    Tips For Success: 
    • Don’t try to sear any steak in a non-stick skillet. They are notorious for not creating enough heat to get a successful sear. Use a good heavy skillet.
    • Not a “rare” steak person? Simply stated, a Merlot Steak needs to be cooked at an internal temperature of 120 – 130 degrees. Anything more than that will produce a dry, unappealing steak. A T-bone steak may be a better choice for those of you who like a well-done steak.

    Nutrition

    Calories: 259kcal | Carbohydrates: 0.4g | Protein: 27g | Fat: 16g | Saturated Fat: 9g | Polyunsaturated Fat: 1g | Monounsaturated Fat: 5g | Trans Fat: 0.5g | Cholesterol: 100mg | Sodium: 459mg | Potassium: 433mg | Fiber: 0.1g | Sugar: 0.02g | Vitamin A: 365IU | Vitamin C: 0.4mg | Calcium: 33mg | Iron: 2mg

    Merlot Steak with Blue Cheese Butter … It’s What’s For Dinner

    Denver Steak: What Is It & How To Cook It Perfectly

    July 31, 2025 By Lea Ann Brown 2 Comments

    Denver Steak Recipe.

    Meet the beef steak you never knew you were missing. The Denver Steak with it’s beefy flavor and tender texture is becoming increasingly more popular and will make you wonder why it isn’t already a staple in your kitchen. In this recipe, the steak is seasoned simply, pan seared and finished in the oven. Served with a rich, bold creamy blue cheese sauce, a satisfying combo that hits all the right notes for any steak lover.

    Pan seared Denver steak served with fried potatoes and Blue Cheese Sauce.

    What Is A Denver Steak?

    The Denver Steak is a cut that comes from the chuck primal, serratus ventralis muscle, just below the shoulder blade. The same area where the famous 7-bone chuck roast lives. Most chuck cuts are heavily used muscles, and can be tough. The Denver Steak, due to it’s location under the blade bone is one cut that isn’t used as much by the animal, rendering it well marbled. Which means it responds to a quick cook time, rather than a roast that requires hours to become tender.

    • Yield: One cow will yield two Denver Steaks.
    • Tip: Buy a Denver Steak from a butcher you trust and ask if the steak has been cut from “under the blade”.

    Why Is It Called Denver Steak When It Comes From The Chuck?

    Interesting story: The name and cut comes from a project from the 2000’s, The Cattlemen’s Beef Checkoff Program, a project designed to discover, identify and promote cheaper cuts of meat coming from the chuck primal area. The program was successful, as it trained butchers to invent three new steaks. The Denver, the Flatiron and Teres Major. The steak’s name has no historical meaning, it was simply a marketing concept debuted in 2009.

    How To Cook It

    This is a pro-level steakhouse method made simple is one I learned in Culinary School. Denver steak is simply seasoned with salt and pepper, pan seared, then finished in the oven. I’m serving it with a rich, creamy blue cheese sauce similar to my creamy blue cheese dressing, that takes it over the top. The result? Melt in your mouth tender steak with a fancy steakhouse restaurant feel. Blue cheese and steak are, without a doubt, a perfect match.

    Flavor, Texture and Value

    The Denver Steak has the qualities of both a Ribeye and a New York Strip Steak in one! This cut carries all the depth of flavor associated with the chuck while remaining super tender like a fine steak. The steak is beautifully marbled with fat which melts during the cooking process, making it incredibly flavorful and moist. The Denver steak is typically less expensive than a Ribeye or New York Strip.

    Availability: Where To Buy It

    You typically won’t find a Denver steak at your local supermarket. Considered a “butcher’s cut”, similar to lesser known cuts, like The Chuckeye Roast and The Merlot Steak. It takes a skilled butcher to know how to extract this cut. Check with your local specialty meat butcher shop, or find an on-line source. Example, I order them from a cattle ranch in Wyoming, Bootheel 7 Ranch. This is also where I found another hard to find cut, The Baseball Top Sirloin.

    I was first introduced to Denver Steak while attending Culinary School. Our Executive Chef praised it as an emerging popular cut that every chef should be familiar with and know how to cook well. That day, we spent hours preparing Denver Steaks, experimenting with different seasonings, sauces and compound butters to compliment this unique cut of beef.

    Let’s get started:

    Ingredients You’ll Need

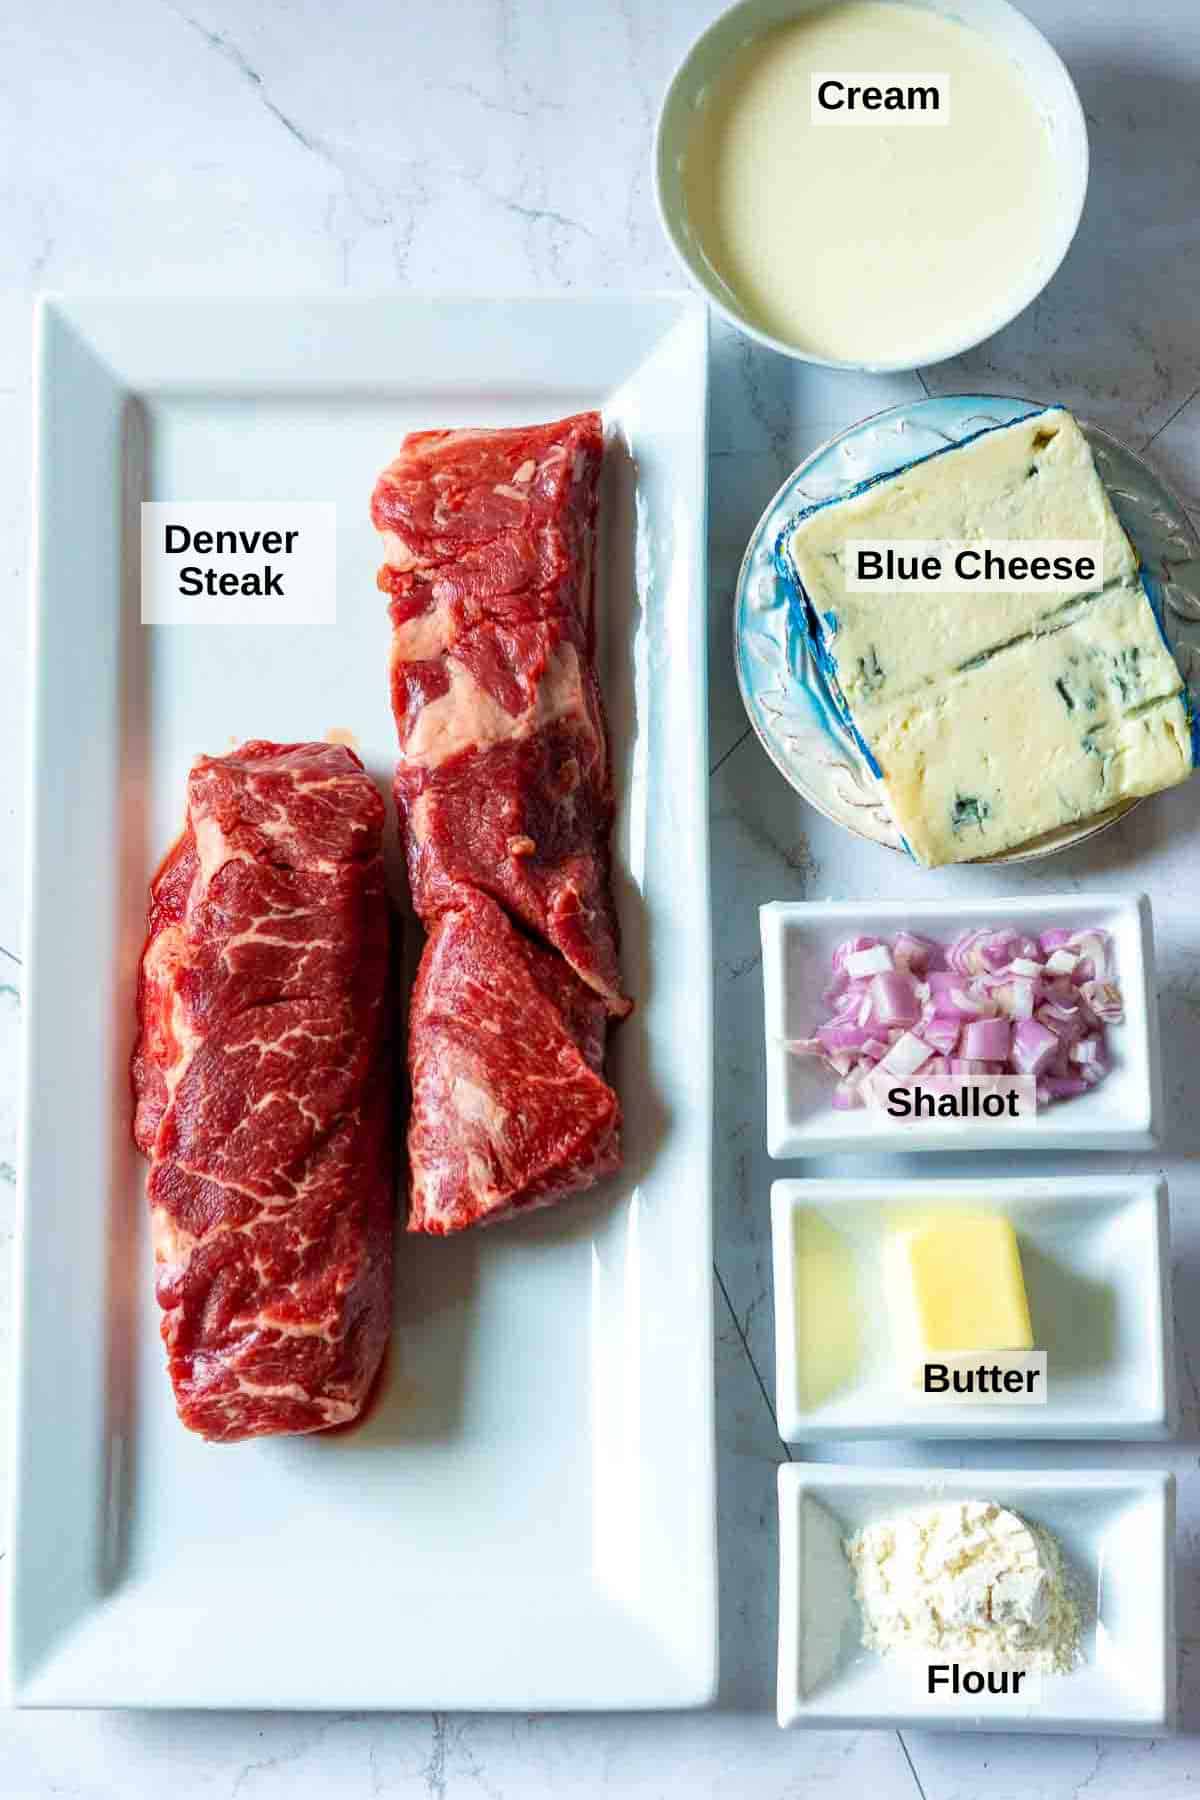
    In Culinary School we served Denver Steaks with a variety of sauces. One of my favorite was this an easy blue cheese sauce. I’ll show all ingredients.

    Ingredients for Denver Steak Recipe
    • Denver Steaks: The two steaks pictured above weigh 1.5 pounds. In my books that’s enough for four people when serving with sides.
    • Heavy Cream will make a luscious, rich blue cheese sauce.
    • Shallot: A shallot’s flavor is milder and more delicate than onion. Whether diced, minced or sliced, they can be used to season about any savory dish. I don’t think a day went by in Culinary School that we didn’t use them.
    • Butter and Flour work together to thicken the sauce.
    • Blue Cheese: Any type of blue cheese will work for this recipe. I prefer Stilton or Gorgonzola. Purchase a wedge of blue cheese rather than already crumbled in a plastic container. The wedge will offer a creamier texture, which will melt easier.

    How To Pan Fry A Denver Steak – Finish In Oven

    I truly believe this is the best method to cook a Denver Steak. Probably because it’s the way we cooked them in Culinary School and with such good results. A hot skillet creates a good sear and transferring that skillet to the oven to finish = restaurant technique and quality.

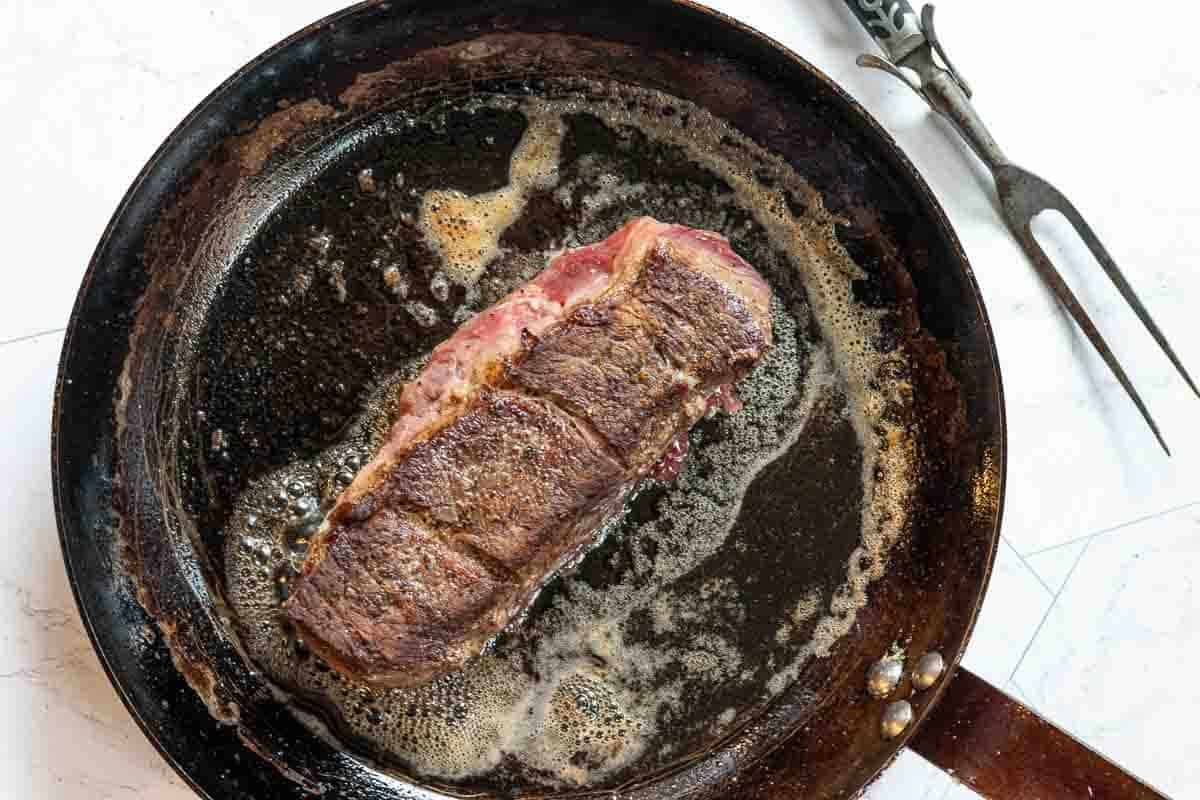
    How To Pan sear a Denver steak.
    1. Step 1: Pan Sear The Steak: All the steak to come to room temperature (allow at least 30 minutes) pat the steak dry using a paper towel. Melt butter in an oven-proof skillet over medium high heat. Once the butter is melted and bubbles have subsided, add the steak. Sear on one side for two minutes, or until golden browned. Turn the steak and cook the other side for another two minutes. Feel free to tilt the pan and spoon butter over the steak as sit cooks. I normally don’t do this, but some chefs like the buttery flavor this method adds
    2. Move the pan to a pre-heated 400 degree oven to finish cooking.  I recommend medium rare, at 135 degrees. Use a digital meat thermometer to determine internal temperature.

    How To Slice Denver Steak

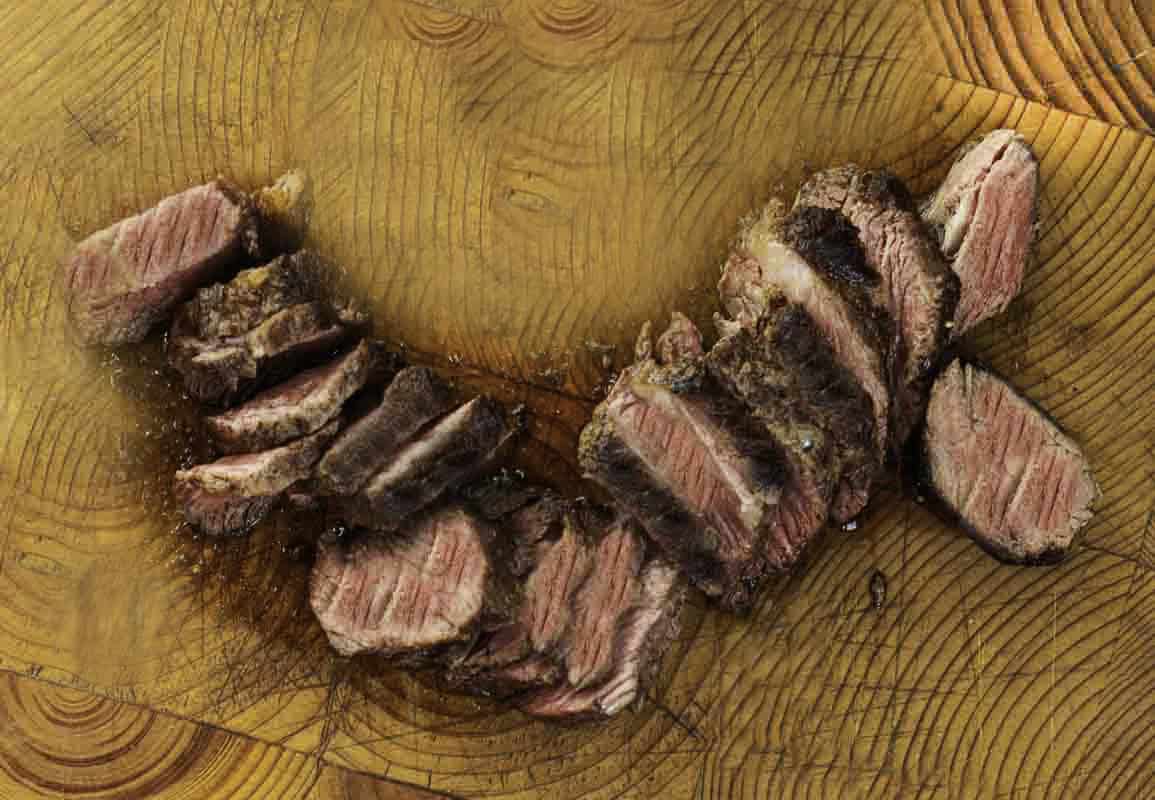
    How to slice a Denver Steak.
    1. Step 3: Move to a cutting board and use a piece of foil to tent for about 10 minutes. Use a Chef’s knife to slice the steak against the grain.

    Blue Cheese Sauce

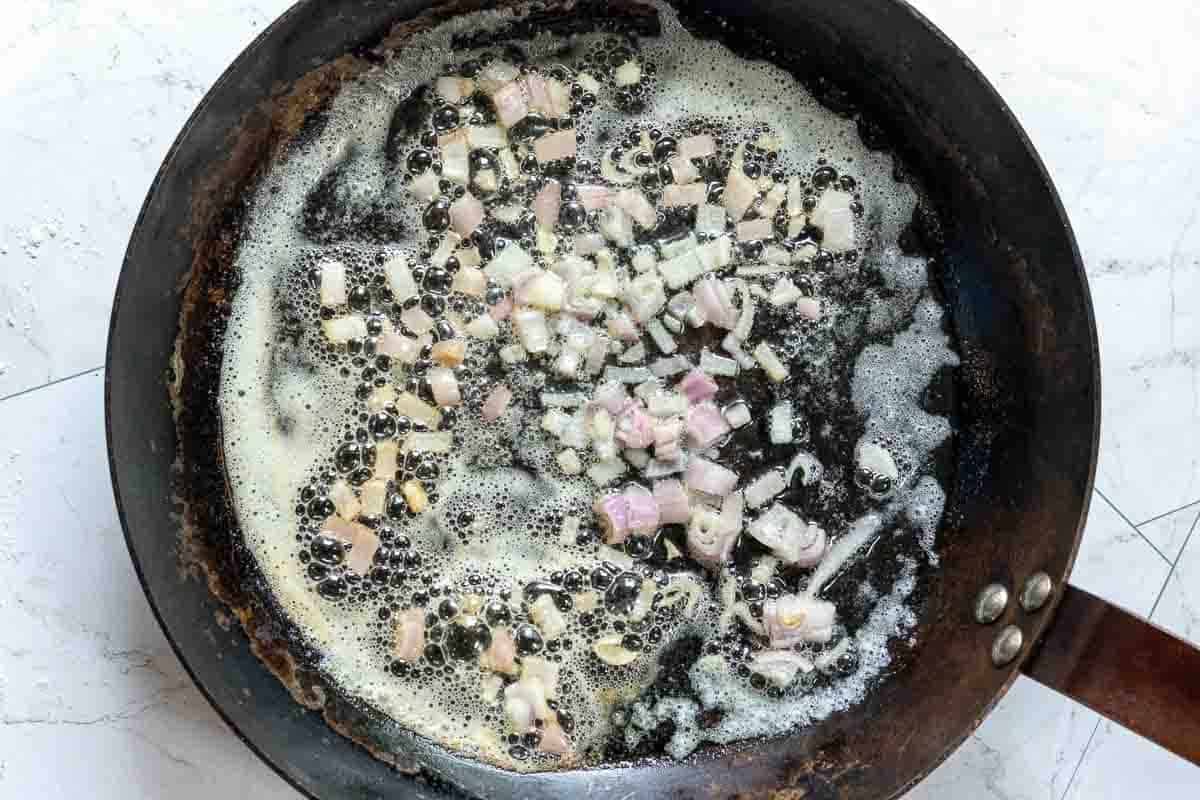
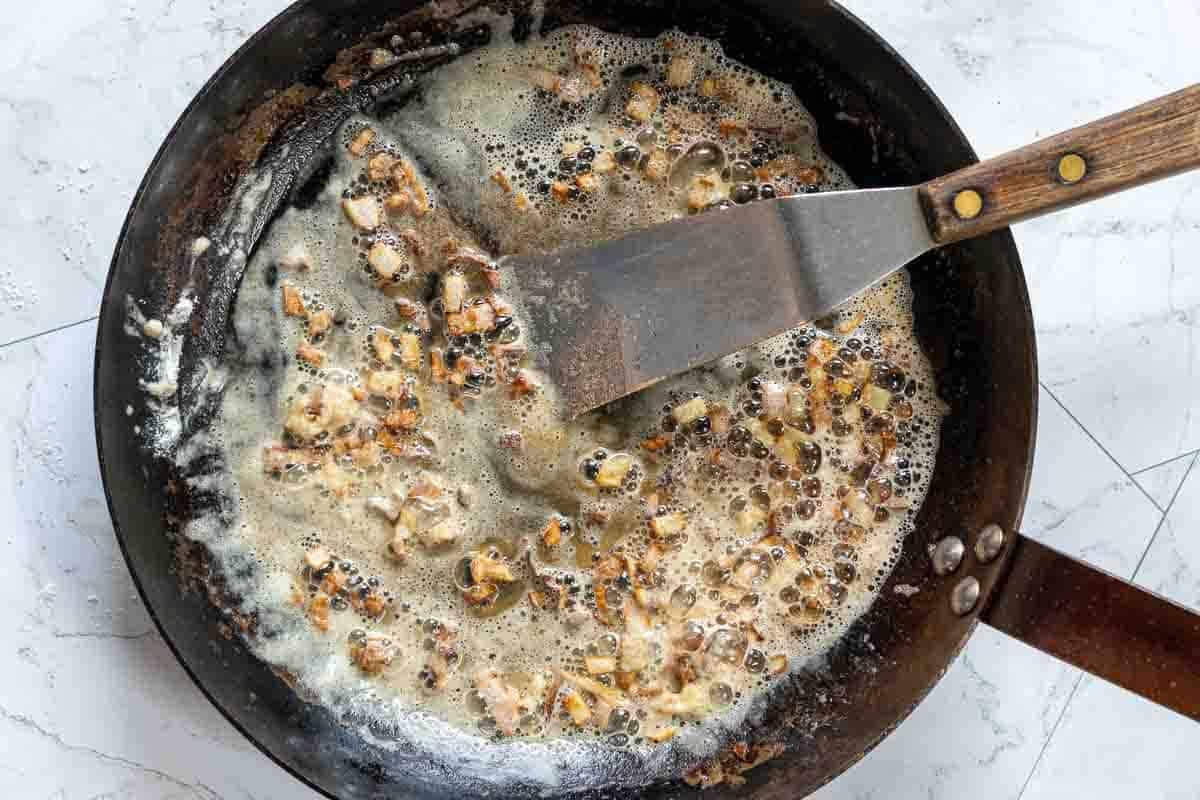
    Cooking shallots to make Blue Cheese Sauce for Denver Steak.
    1. Step 1: Melt 2 Tablespoons butter in a sauce pan over medium heat. Once butter is melted and bubbles subside, add the diced shallot and cook until tender, about 2 minutes.

    Why Wait Until Bubbles Subside When Cooking with Butter? When cooking with butter, it’s important to wait for the foaming to subside before adding food. During the melting process, bubbles appear, meaning that water is evaporating from the butter. This evaporation is necessary for butter to reach a higher cooking temperature. If you add food before the water is gone, the food will absorb the butter, rather than cook in it.

    Cooking shallots to make blue cheese sauce for a Denver steak.
    1. Step 2: Make the roux: Add the flour and whisk until smooth. Cook about 1 minute, stirring, until the flour is starting to have a nutty flavor and is turning slightly golden.
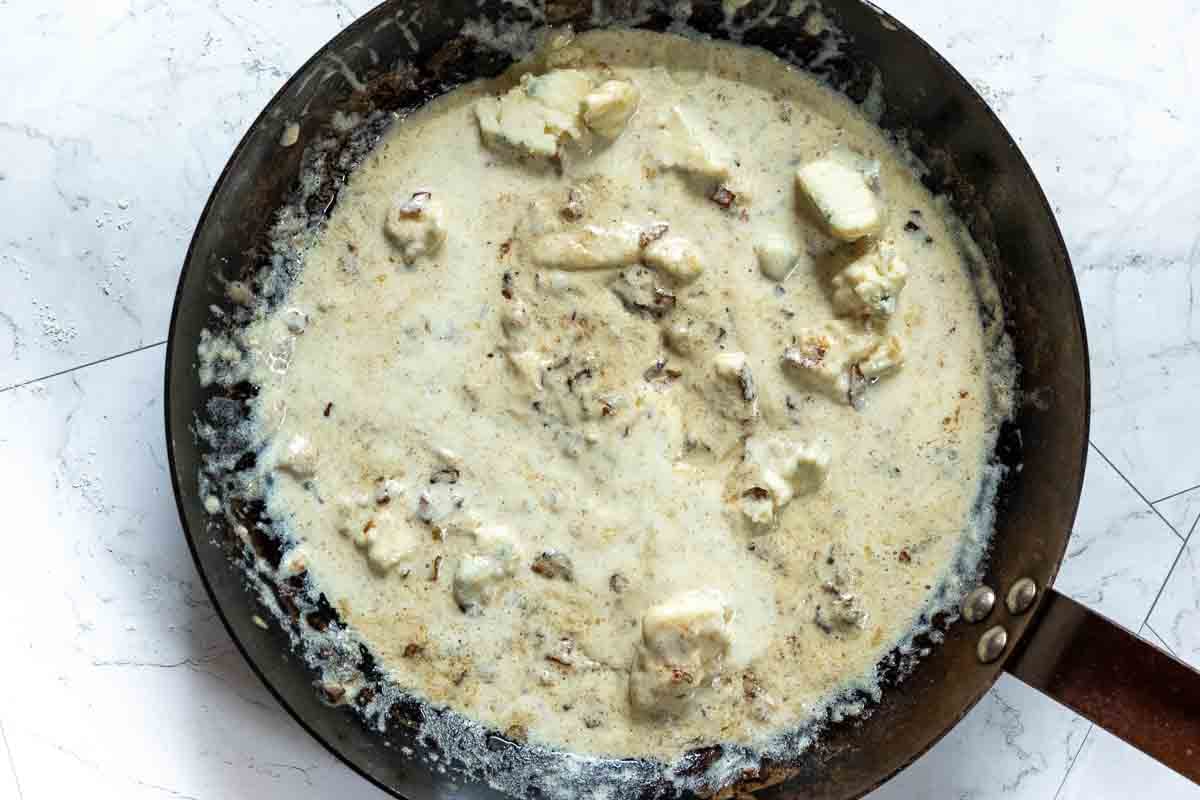
    Step 3, adding blue cheese to make blue cheese sauce for a Denver steak.
    1. Step 3: Add The Dairy: Stir in the cream and whisk until smooth and starting to thicken. Then stir in the crumbled blue cheese.
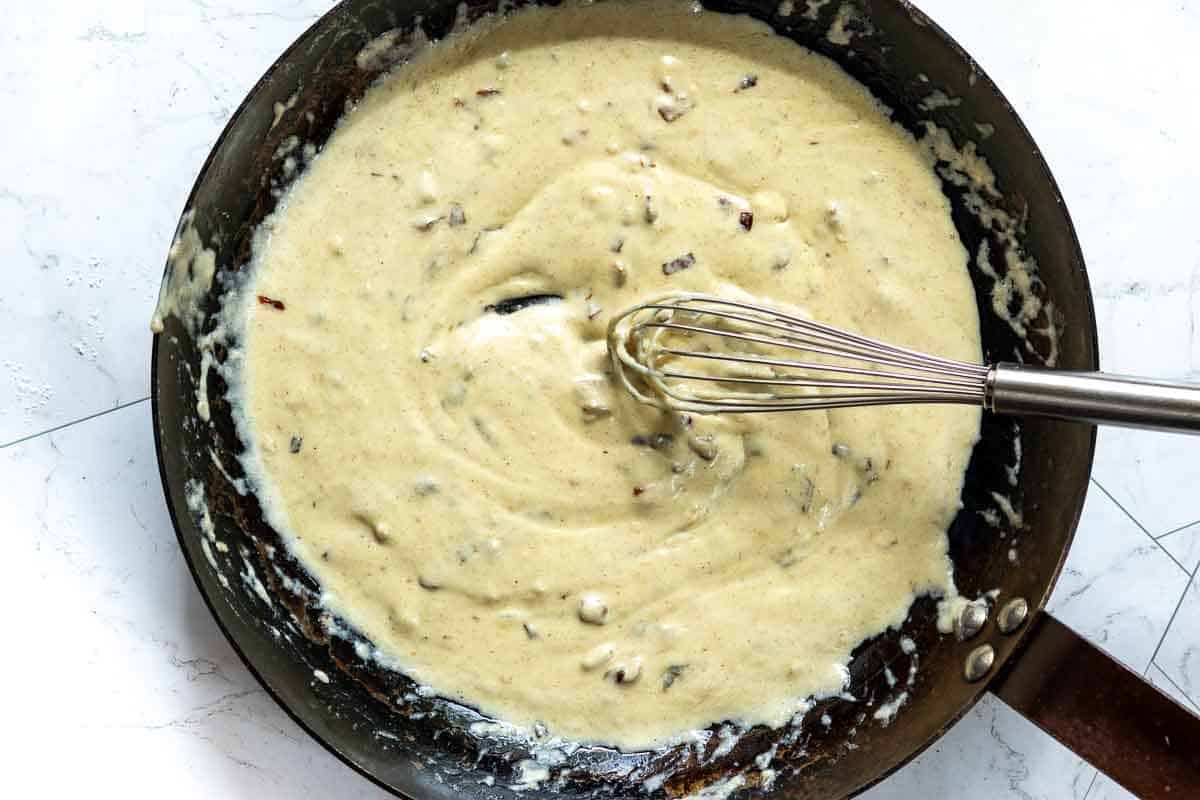
    Stirring blue cheese sauce until smooth and creamy. Step 4.
    1. Step 4: Stir: Whisk on low heat until smooth and creamy. The consistency will be like gravy. Set aside and keep warm while you cook the steak.
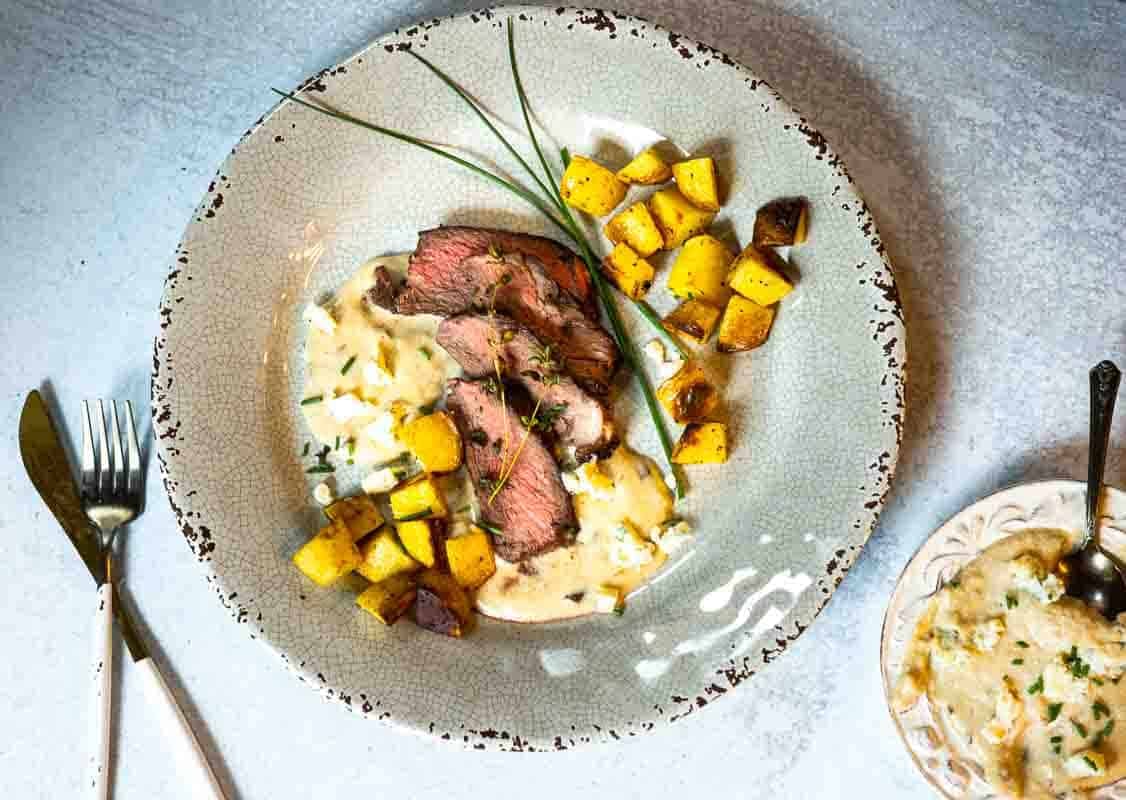
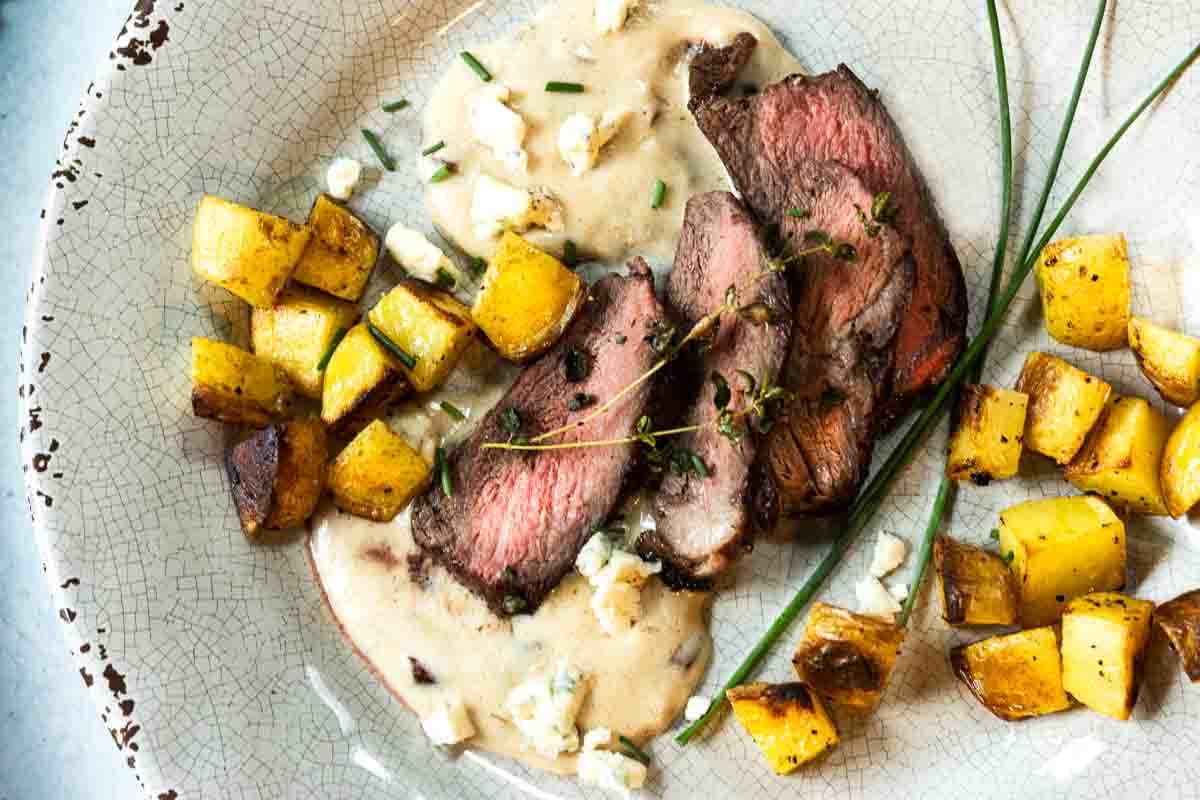
    Pan seared Denver steak served with blue cheese sauce and cubed fried potatoes.
    1. Step 8: To Serve: Spoon a couple of dollops of the blue cheese sauce onto the plate and arrange a few slices of steak on top.

    More Finishing Sauces

    If you’re not a fan of Blue Cheese, try drizzling a Denver steak with either a Balsamic Fig Glaze, or a Balsamic Reduction. Both of these rich sauces are a great partner for beefy flavored steak. Always popular is this Whiskey Compound Steak Butter.

    What To Serve It With

    • Steak and potatoes seem like natural partners. Serve Denver Steaks with these Savory Cast Iron Skillet Potatoes.
    • For a more Summery dinner, try my Mexican Corn Salad.
    • Add some green with a simple steak house salad vibe topped with Homemade Blue Cheese Dressing, or something a little heartier and Southwestern like my recipe for Southwestern Salad.

    Tips For Success

    • Slicing: Once cooked, it’s important to slice a Denver steak against the grain. An easy task, because if the steak has been cut correctly by the butcher, the shape of the steak will intuitively guide you.
    • Pat the steak dry before pan frying. Drying the steak will remove any surface moisture which will result in a quicker and crispier sear.
    • Don’t overcook the steak: Use a digital meat thermometer to measure the internal temperature of the steak. To keep this steak melt in your mouth tender, I highly recommend keeping the cut cooked to medium-rare, which is 130-135 degrees.
    • Don’t overcook the sauce: Once the cheese has melted, remove it from the heat, cover with foil and keep warm. If it continues to cook, the texture will become greasy. If this happens, pour in a splash of milk to reconstitute the creamy texture.
    • Presentation: Place a few sprigs of fresh thyme over each steak once they’re heading into the oven. Not so much to add flavor, but baked stems make for a rustic garnish once the steak is sliced and plated.
    • Finishing Salt: Every kitchen should have a box of Maldon Sea Salt Flakes. It’s flaky, shiny and adds a beautiful garnish for any steak. Just sprinkle a pinch or two on top of each sliced steak serving, once plated.

    Steak Internal Temperature Doneness Guide

    • Rare: 125 – 130 degrees
    • Medium Rare: 130 – 140
    • Medium: 140 – 150
    • Medium Well: 150 – 160
    • Well: Over 160 degrees

    Questions You May Have

    What Is The Best Skillet for Pan Seared Steak?

    A cast iron skillet is always a good choice to sear and cook meats. But, I find them heavy and hard to lift. Another good choice is a Carbon Steel Pan. They’re versatile and durable, they sear meat beautifully and if needed can go from stove top to oven. Chefs prefer these pans and they are a staple in restaurant kitchens. Either pan works great for pan seared meat. (I am an Amazon affiliate. If you make a purchase using the above link, I receive a small commission at no extra charge to you.)

    Can I Grill A Denver Steak?

    Absolutely! Season the steak with salt and pepper, or a steak seasoning mix like Montreal Steak Seasoning. Preheat the grill to get the grates sizzling hot. Cook at 400 degrees, for about 5 – 6 minutes per side or until internal temperature reaches desired doneness. Use a digital real thermometer to determine internal temperature. Remove to a cutting board, tent and let rest before slicing against the grain and serving.

    Can I Cook A Denver Steak From Frozen?

    Yes. Remove as much moisture as you can from the steak, using a paper towel. Sear according to directions, however, once it hits the oven the cook time will increase. Keep a close eye on the steak using a digital read meat thermometer.

    Uses and Serving Suggestions

    • Make a Denver Steak Salad, using my Steak Salad Recipe.
    • Try this cut for Steak Fajitas, or try using it to make a Steak Sandwich.
    • Sauce Options: Not a fan of blue cheese? Try serving it with this Red Wine Mushroom Sauce. Or a favorite, top it with Chimichurri Sauce.

    Storage

    • Store any leftover steak, thin sliced and sealed well in the refrigerator for up to 4 days. To reheat gently fry in a steak pan until just warm. You don’t want to cook the steak again, just heat it up warm enough to eat it. I like to eat left over slices of steak with a fried egg, for a steak and egg breakfast.
    • Store any leftover Blue Cheese Sauce in a air-tight container in the refrigerator for up to 4 days. The 50% power feature on the microwave is your best friend when reheating this sauce. Heat individual portions in the microwave in 30 second increments.

    Explore More Specialty Butcher Cuts

    If you’re interested in exploring more lesser known beef cuts that butchers have prized, you’re in the right place. These flavorful, often unknown or overlooked beef cuts can deliver steakhouse quality in your own home. And help you expand your horizons beyond the usual Grilled Ribeye or New York strip. Here are some of my favorite unique butcher’s cuts, along with how-to’s and recipes.
    • Pan Fried Baseball Top Sirloin steak served with green beans.
      Pan-Seared Baseball Top Sirloin Steak, Perfect Every Time
    • Sliced pan fried merlot steak topped with blue cheese butter.
      Pan Seared Merlot Steak with Blue Cheese Butter
    • A slice of chuck eye roast on a plate served with roasted potatoes.
      Oven Roasted Chuck Eye Roast
    • Hanging tender steak served with green chile sauce, tomatoes and avocado.
      Hanging Tender Steak (Hanger Steak) - How to Cook It Perfectly

    And don’t miss my category for Beef recipes. You’ll find lots of great burgers, steaks and more, including this Southwest Inspired Steak Dinner for Cast Iron Flank Steak. With charred onions and New Mexico Red Chile Powder, it’s a really nice recipe.

    If you liked this recipe, please leave a star ⭐⭐⭐⭐⭐ rating in the recipe card below and leave a comment. I always appreciate your feedback and hearing how everything went.

    And, don’t forget to subscribe to my newsletter for more delicious recipes and cooking tips. Make it a delicious day … every day.
    Denver steak with blue cheese sauce served with fried potatoes.
    Print Recipe
    No ratings yet

    Pan Seared Denver Steak with Creamy Blue Cheese Sauce

    Denver Steaks are seasoned simply, pan seared and finished in the oven, served with a rich, bold creamy blue cheese sauce, a satisfying combo that hits all the right notes for any steak lover.
    Prep Time15 minutes mins
    Cook Time20 minutes mins
    Course: Main Course Beef
    Cuisine: Amerian
    Servings: 4
    Calories: 580kcal
    Author: Lea Ann Brown

    Equipment

    • 1 Oven proof skillet Cast Iron Skillet or French Carbon Steel Pan

    Ingredients

    • For The Blue Cheese Sauce
    • 2 Tablespoons Butter
    • ¼ Cup Shallot Diced
    • 1 Tablespoon All purpose flour
    • ¾ Cup Heavy Cream
    • 3 ounces Blue Cheese crumbled, plus more for garnish
    • For The Denver Steak
    • 2 Tablespoons Butter
    • 2 Denver Steaks about 1 ¼ pounds total
    • ½ teaspoon Kosher salt
    • ¼ teaspoon Freshly ground black pepper

    Instructions

    • Bring steaks to room temperature, allow at least 30 minutes. Preheat oven to 400 degrees.
    • For The Blue Cheese Sauce
    • Melt 2 Tablespoons butter in a sauce pan over medium heat. Once butter is melted and bubbles have subsided, add the diced shallot and cook until tender, about 2 minutes.
    • Add the flour and whisk until smooth. Cook about 1 minute, stirring, until the flour is starting to have a nutty flavor and is turning slightly golden.
    • Stir in the cream and whisk until smooth and starting to thicken. Stir in the crumbled cheese and whisk until melted. Remove from heat, keep warm and cook the steak.
    • Pan Sear The Denver Steak
    • Add butter to an oven proof skillet. A cast iron skillet or a French Carbon Steel Pan. Melt butter over medium high heat. Once the butter is melted and bubbles have subsided, add the steak. Sear until golden browned on one side, about two minutes, then turn and sear on the other side.
    • Transfer the skillet to oven and cook until internal temperature reaches desired doneness. I recommend medium rare, at 135 degrees.
    • Remove the steak to a cutting board and tent with foil and let rest 10 minutes. Slice immediately, against the grain and serve.
    • Spoon a couple of dollops of the blue cheese sauce onto a plate. Add a few slices of the Denver steak.

    Notes

    Tips For Success: 
    • Slicing: Once cooked, it’s important to slice a Denver steak against the grain. An easy task, because if the steak has been cut correctly by the butcher, the shape of the steak will intuitively guide you.
    • Pat the steak dry before pan frying. Drying the steak will remove any surface moisture which will result in a quicker and crispier sear.
    • Don’t overcook the steak: Use a digital meat thermometer to measure the internal temperature of the steak. To keep this steak melt in your mouth tender, I highly recommend keeping the cut cooked to medium-rare, which is 130-135 degrees.
    • Don’t overcook the sauce: Once the cheese has melted, remove it from the heat, cover with foil and keep warm. If it continues to cook, the texture will become greasy. If this happens, pour in a splash of milk to reconstitute the creamy texture.
    • Presentation: Place a few sprigs of fresh thyme over each steak once they’re heading into the oven. Not so much to add flavor, but baked stems make for a rustic garnish once the steak is sliced and plated.
    • Finishing Salt: Every kitchen should have a box of Maldon Sea Salt Flakes. It’s flaky, shiny and adds a beautiful garnish for any steak. Just sprinkle a pinch or two on top of each sliced steak serving, once plated.

    Nutrition

    Calories: 580kcal | Carbohydrates: 6g | Protein: 29g | Fat: 50g | Saturated Fat: 29g | Polyunsaturated Fat: 2g | Monounsaturated Fat: 16g | Trans Fat: 0.5g | Cholesterol: 165mg | Sodium: 698mg | Potassium: 456mg | Fiber: 1g | Sugar: 3g | Vitamin A: 1186IU | Vitamin C: 1mg | Calcium: 159mg | Iron: 2mg

    Pan Seared Denver Steak with Blue Cheese Sauce … It’s What’s For Dinner
    Pork Tenderloin Tacos In Chile Guajillo Red Sauce

    July 7, 2025 By Lea Ann Brown 5 Comments

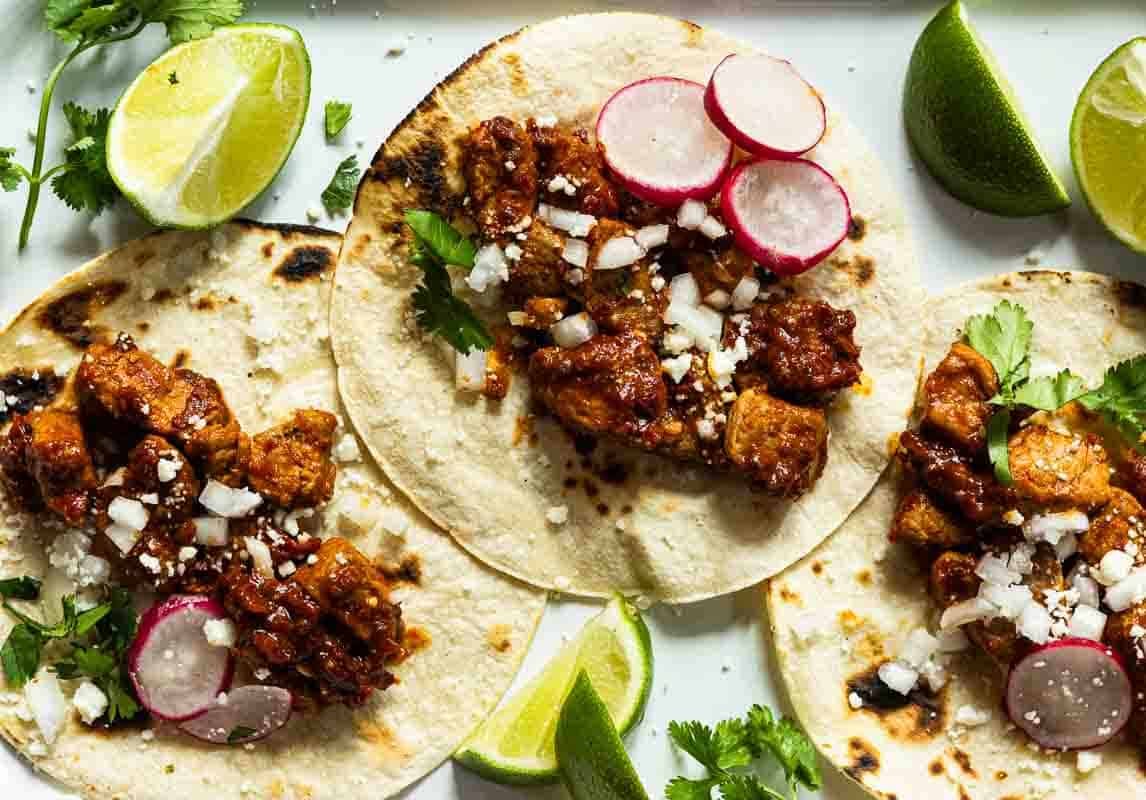
    Pork tenderloin tacos with guajillo chile sauce.

    If you’re craving bold, authentic flavor without the long cook time, these Pork Tenderloin Tacos deliver in every bite. This dish is built on a version of New Mexico Red Chile Sauce, a foundational recipe in traditional Southwestern cooking. This version swaps out the traditional pork shoulder for lean, quick-cooking pork tenderloin-without sacrificing richness or depth. Simmered in a vibrant red chile guajillo sauce made from Guajillo chiles, orange juice, vinegar, and warm spices, the result is juicy, tender pork packed with smoky-sweet heat.

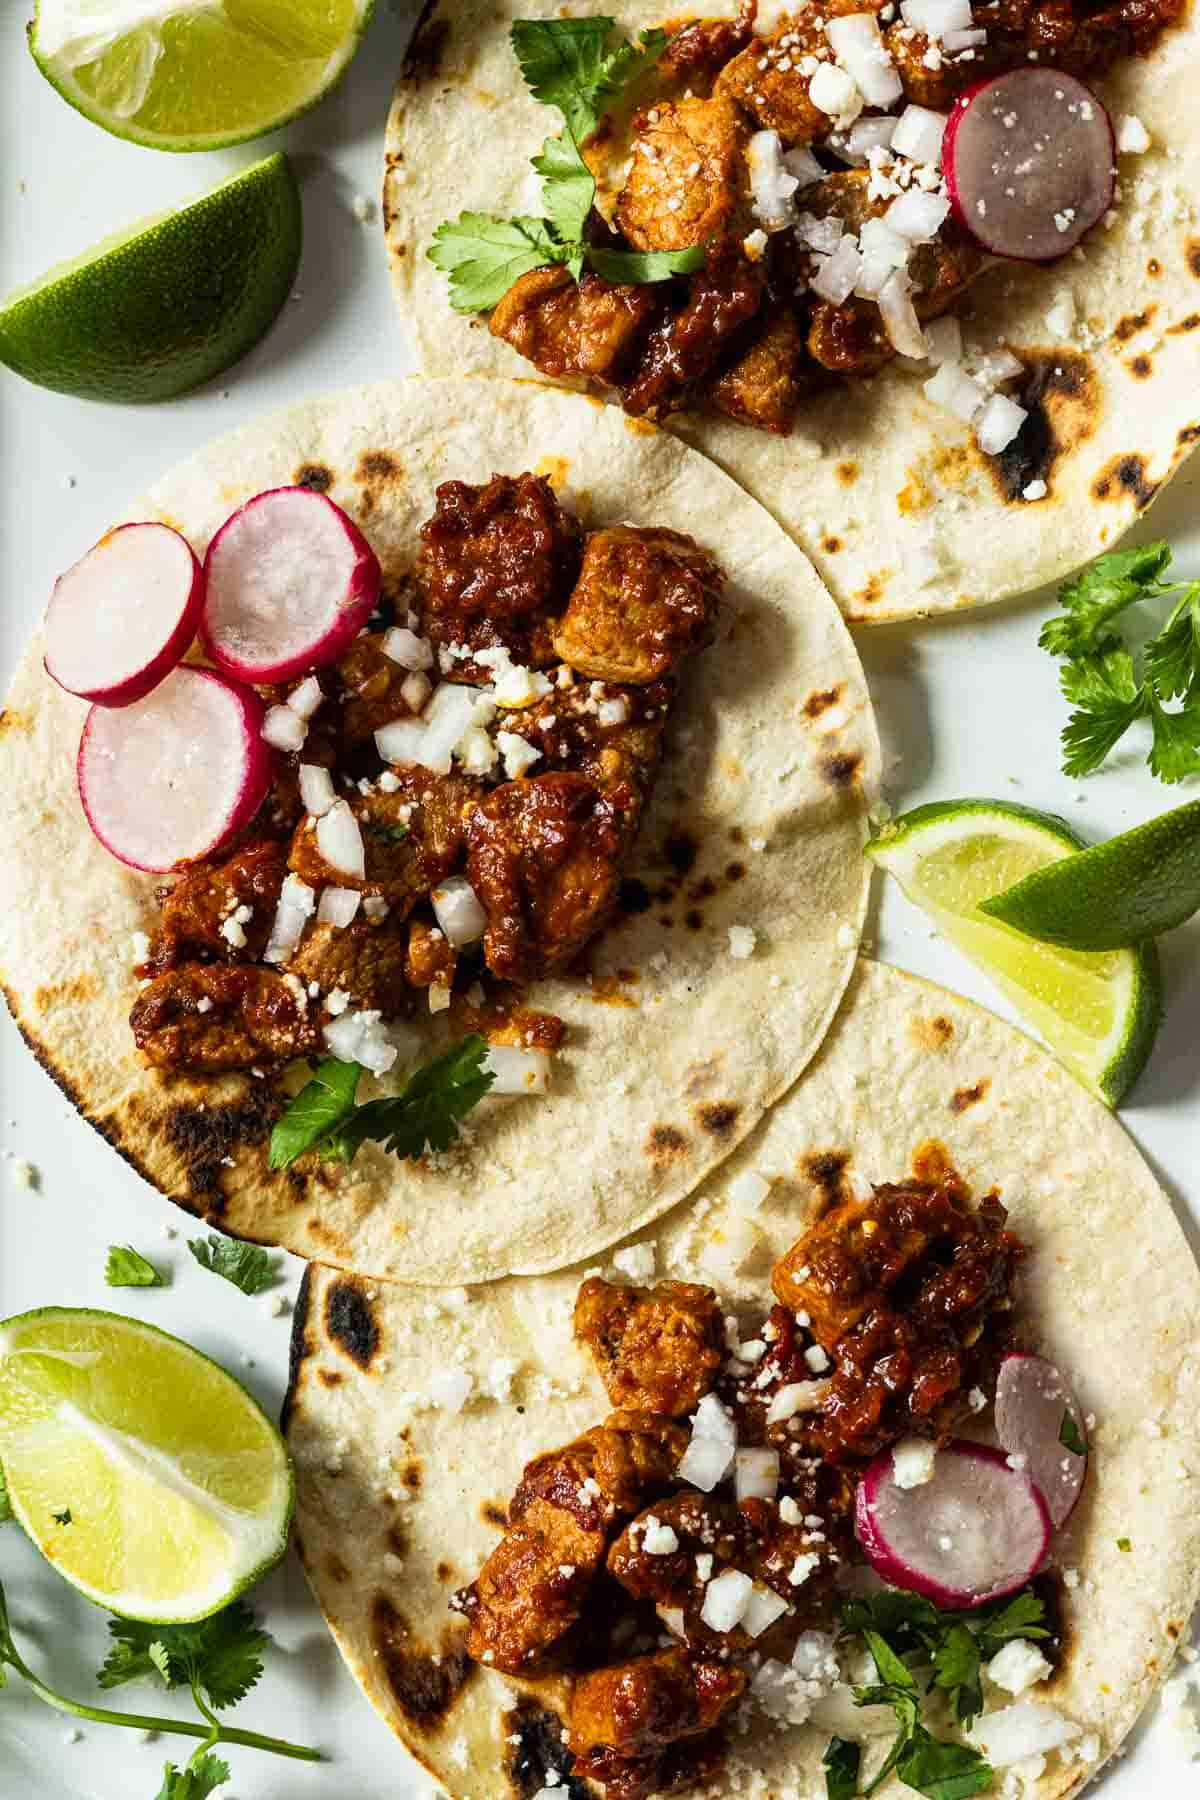
    Three Orange Guajillo Pork Tenderloin Tacos garnished with onions and lime.

    Why These Pork Tenderloin Tacos Are A Game Changer

    I’ve been wanting to create a pork tenderloin taco for months now, and I finally found inspiration from a package of New Mexico Guajillo peppers in my pantry. I personally think pork tenderloin is just as easy to cook with as chicken breast or flank steak. And pork tenderloin is famous for easily soaking up flavor and it’s irresistible tender texture. I’m very proud of the combination of flavors here, let’s take a look:

    Combining bright citrus with the warmth of Guajillo chile peppers and tender pork tenderloin and you’ve got a rich flavored taco that’s worth a look. This pork tenderloin taco recipe is perfect for taco night or if you want to impress guests, and with minimal effort.

    Fresh orange juice amplifies the fruity notes of the guajillo chiles while giving the chile guajillo sauce a citrus sweetness. A little vinegar and honey bring it all together for balanced flavor. Serve these pork tenderloin tacos with Mexican Rice for a simple meal.

    The end result is a pork tenderloin taco seasoned and coated with a rich, red, earthy Guajillo pepper sauce with warming Southwestern heat.

    What Are Guajillo Chile Peppers?

    Guajillo Chile Peppers are dried Mirasol Chiles, and a common pepper used in Mexican Southwestern Cuisine. And commonly used to make Red Chile Sauce. They are readily found on the Mexican aisle of your local supermarket packaged in hanging plastic bags.

    Guajillo peppers are known for their sweetness, and generally considered to be mild to medium heat which makes them a good choice to adding depth of flavor and color to any dish without overwhelming it with spicy heat.

    This recipe that takes advantage of the fruity and smoky flavor of dried guajillo chile peppers.

    Ingredients You’ll Need

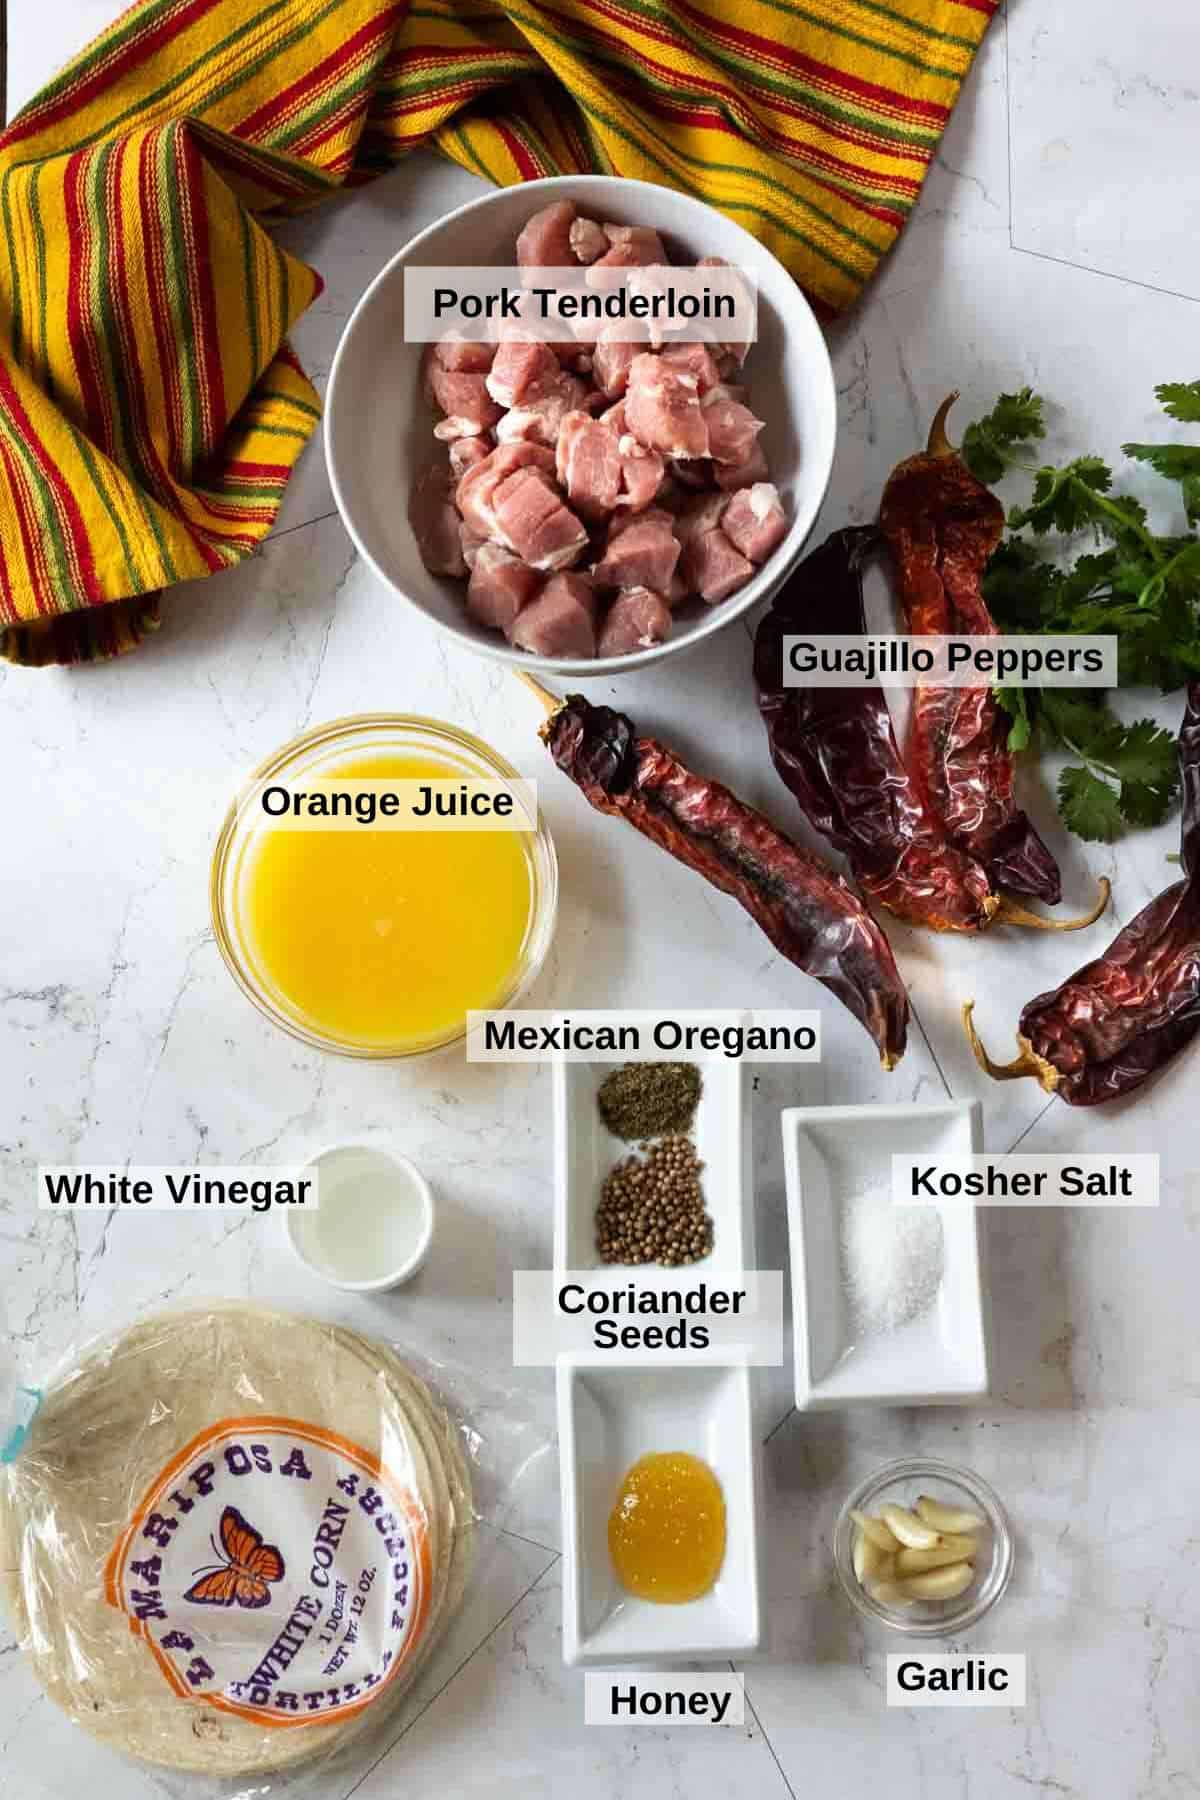
    Ingredients to make pork tenderloin tacos.
    • Pork Tenderloin: Using cubed pork tenderloin will make this a quick cook taco.
    • Guajillo Peppers: A good substitute for Guajillo peppers are Ancho Chiles as they share the same flavor profile. Want a smokier spicier flavor, try this recipe with dried Chipotle Peppers, which are dried Jalapeno peppers.
    • Orange Juice: Will be used as the liquid for the sauce and will amplify the the fruity notes of the Guajillo chiles.
    • Mexican Oregano: Has a robust earthy flavor with prominent citrus and licorice notes, which distinguishes it from Mediterranean oregano.
    • White Vinegar and Honey: Will balance the overall flavors.
    • Whole Coriander Seeds: I didn’t have any ground coriander, but did have some coriander seeds, which offer more intense flavor. I was pleased with the end result.

    Mexican Oregano is preferred for this recipe. It's peppery, grassy, earthy flavor is a good compliment for Mexican Food. If you don't have Mexican Oregano, substitute Marjoram. Known for its aroma and delicate flavor, its related to Mexican oregano and will bring a sweet undertone to any recipe.

    Step by Step Instructions

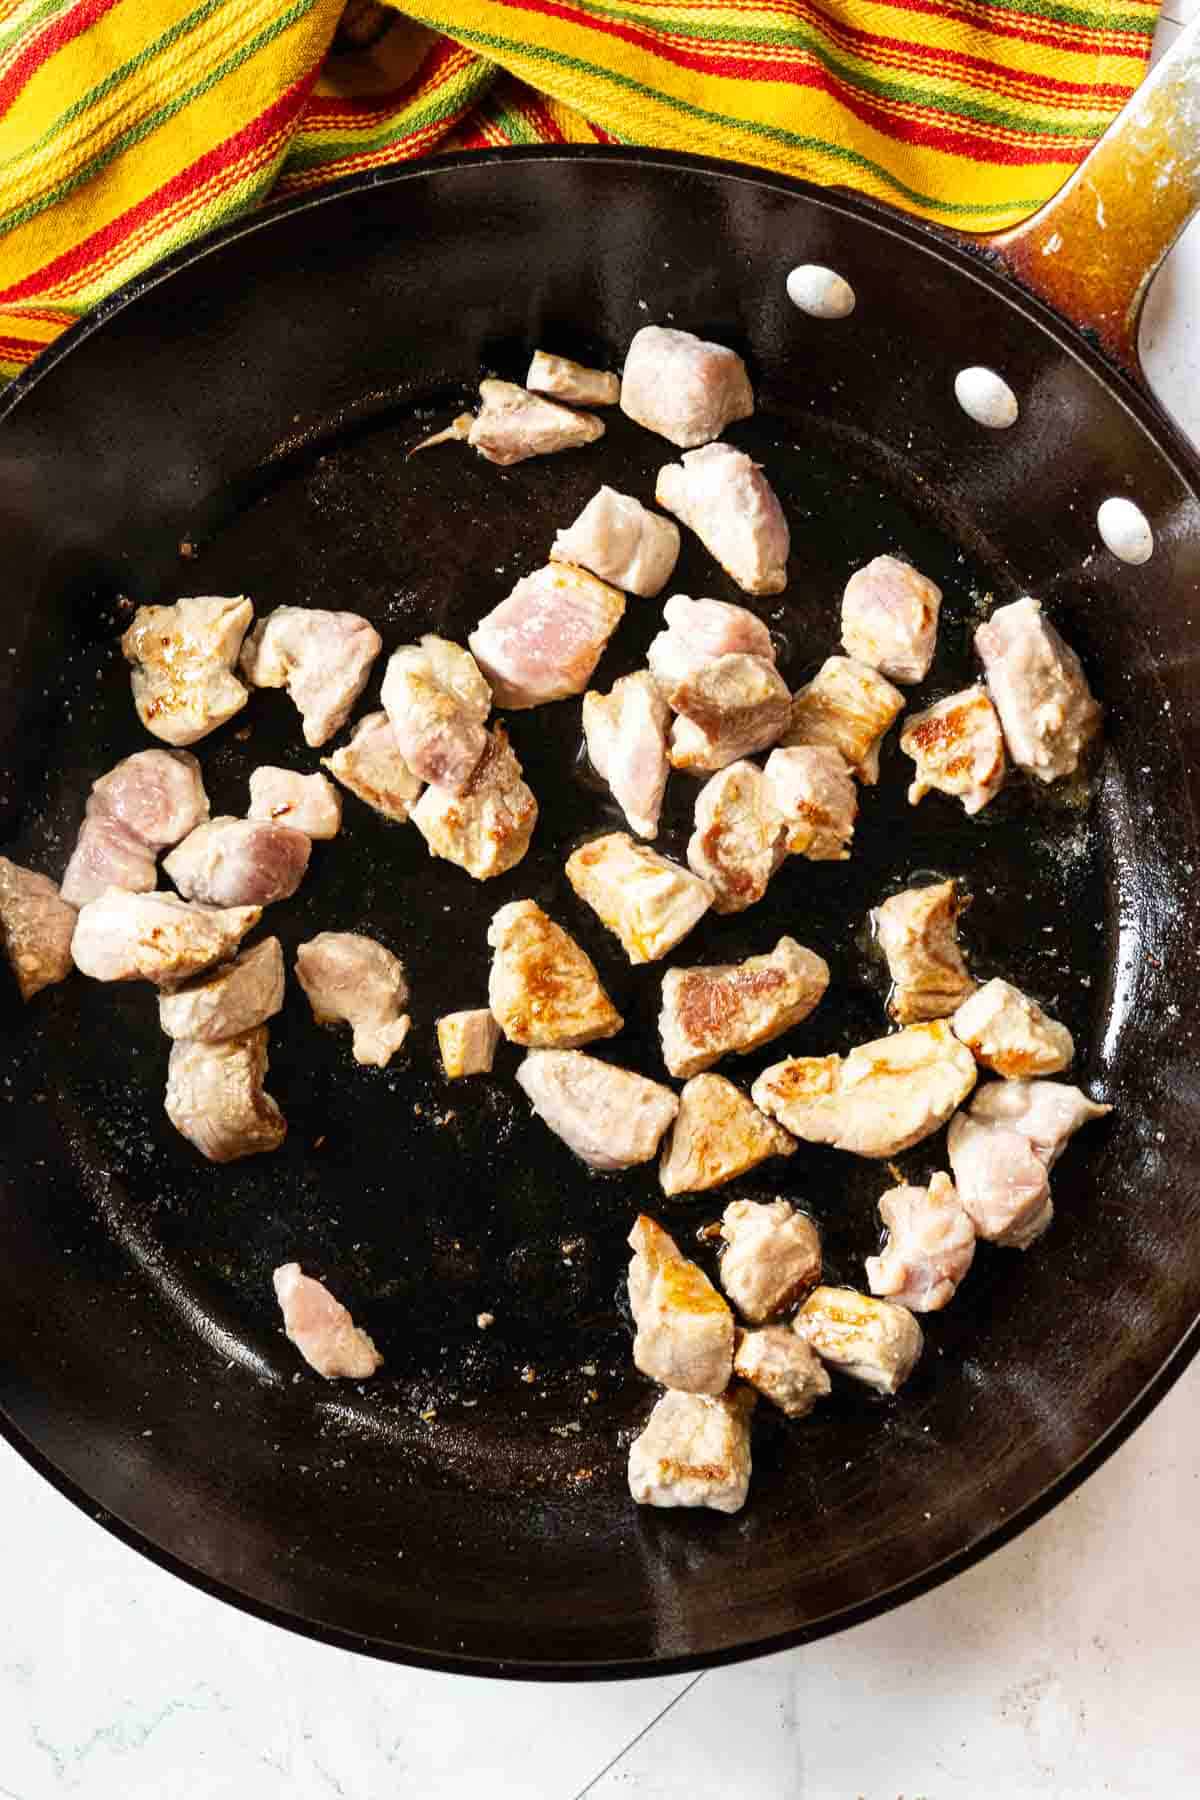
    Step 1 to make pork tenderloin tacos, browning the pork.
    Step 2 to make pork tenderloin taocs, toasting the guajillo chile peppers.
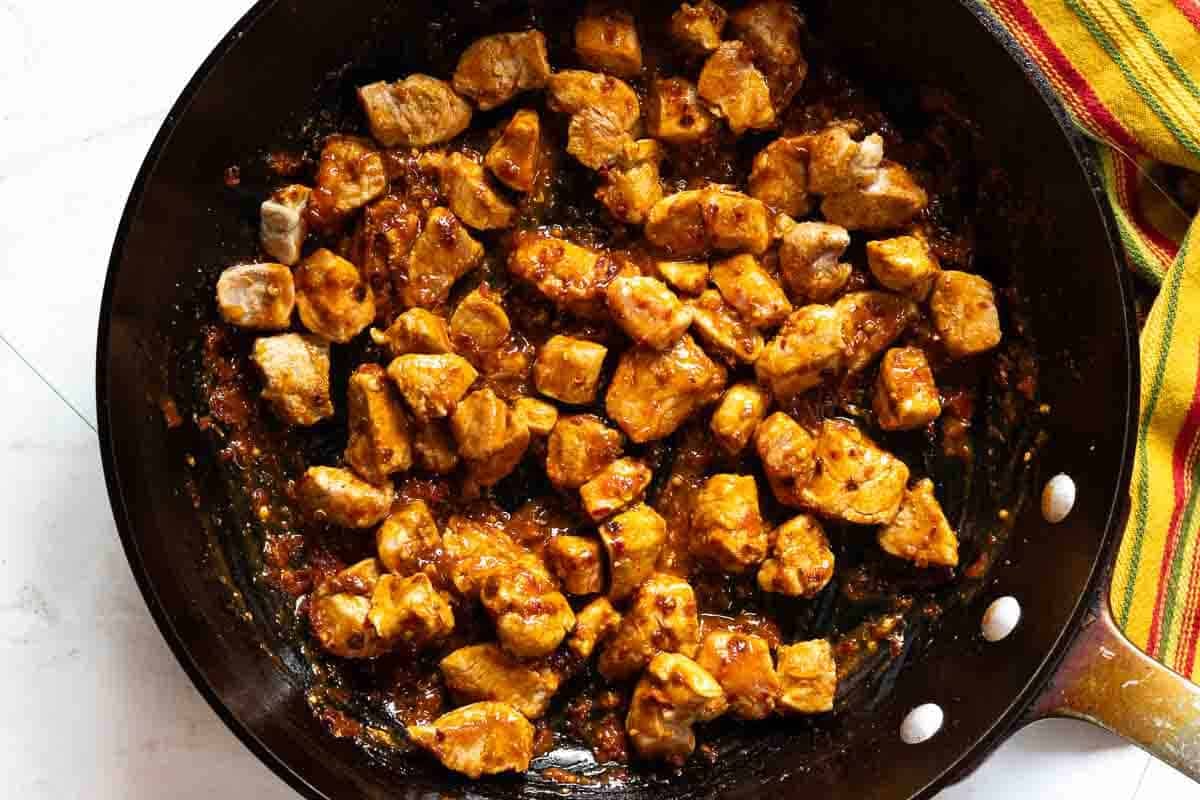
    1. Step 1: Sear the pork tenderloin: Cut the tenderloin into 1-inch bite-sized pieces. Heat 1 tablespoon of oil in a 12-inch heavy skillet over medium-high heat. Once hot, add half the pork pieces in a single layer, season with half the kosher salt, and sear for 4 minutes without turning. Stir, then transfer to a plate-you’re just searing, not fully cooking. Repeat with the remaining pork.
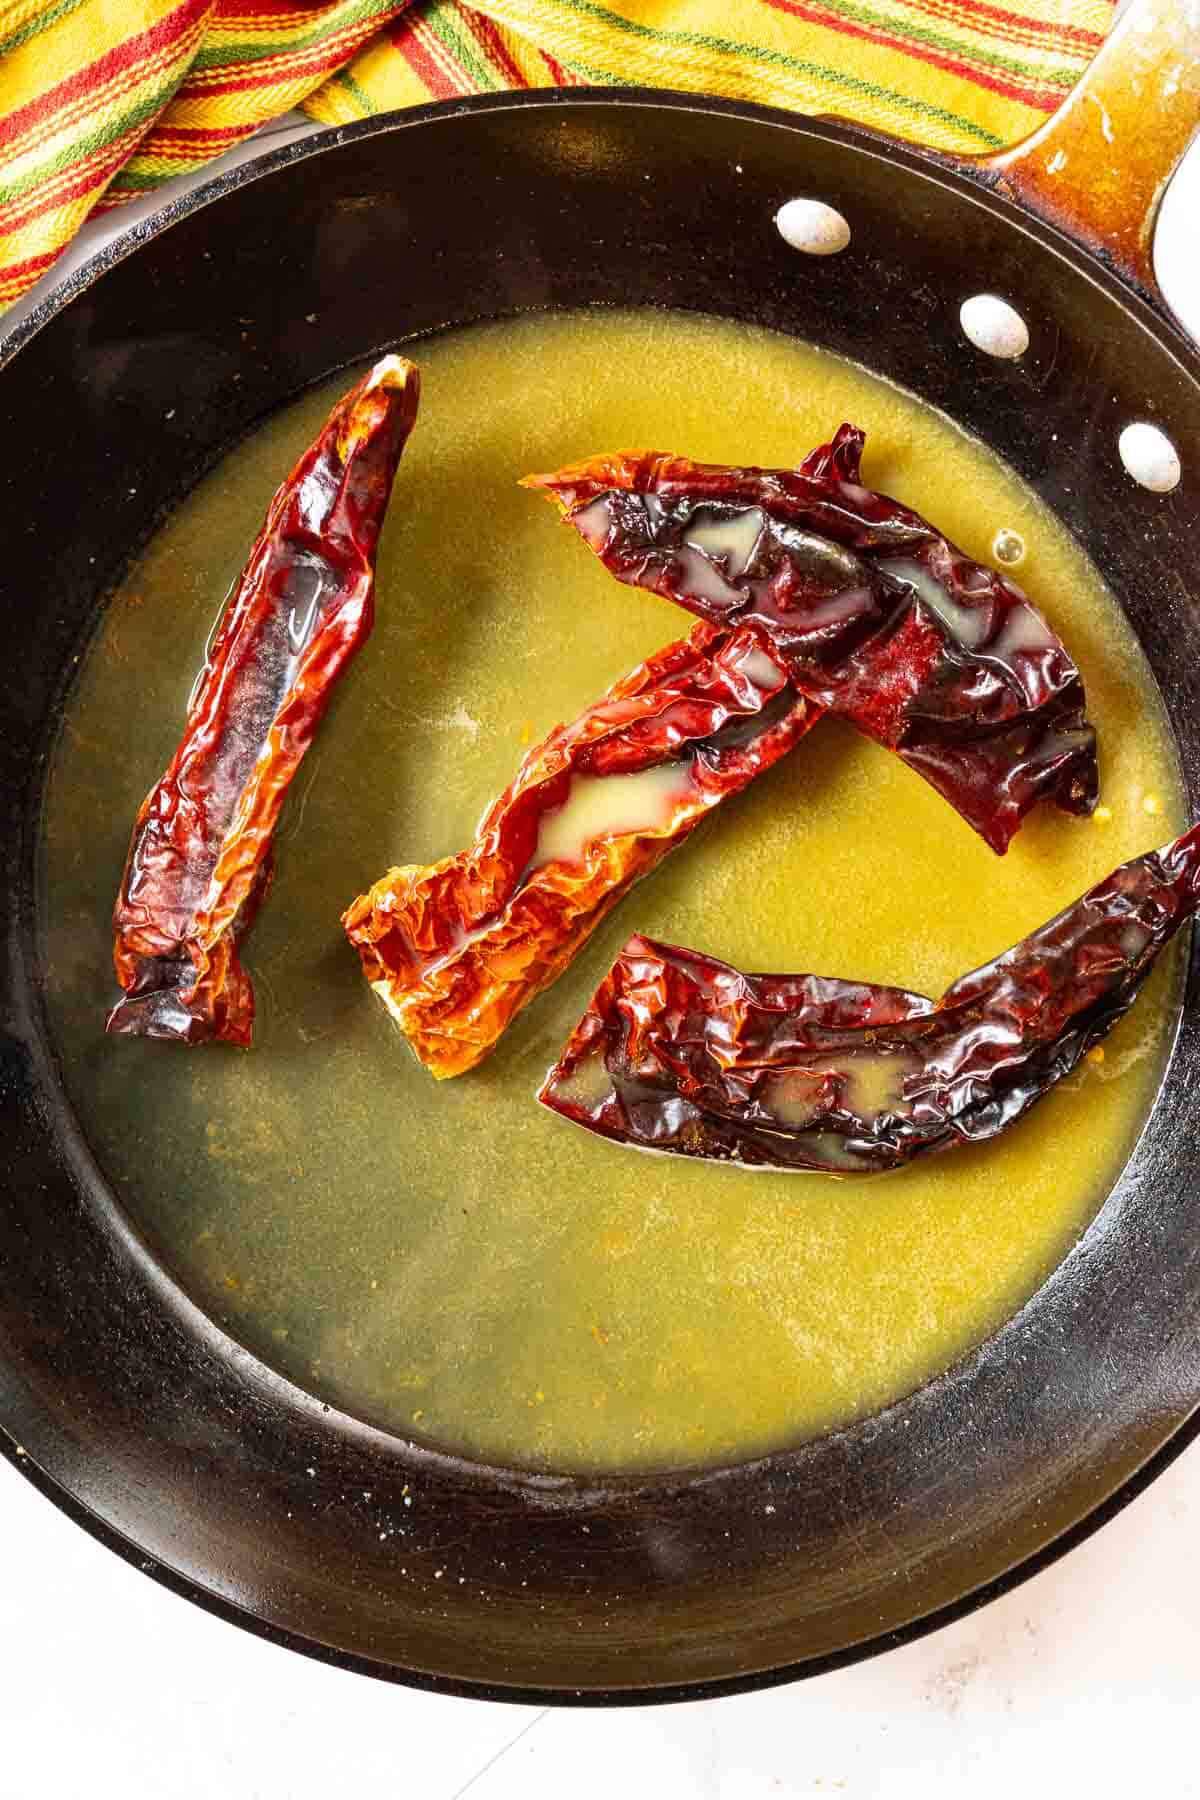
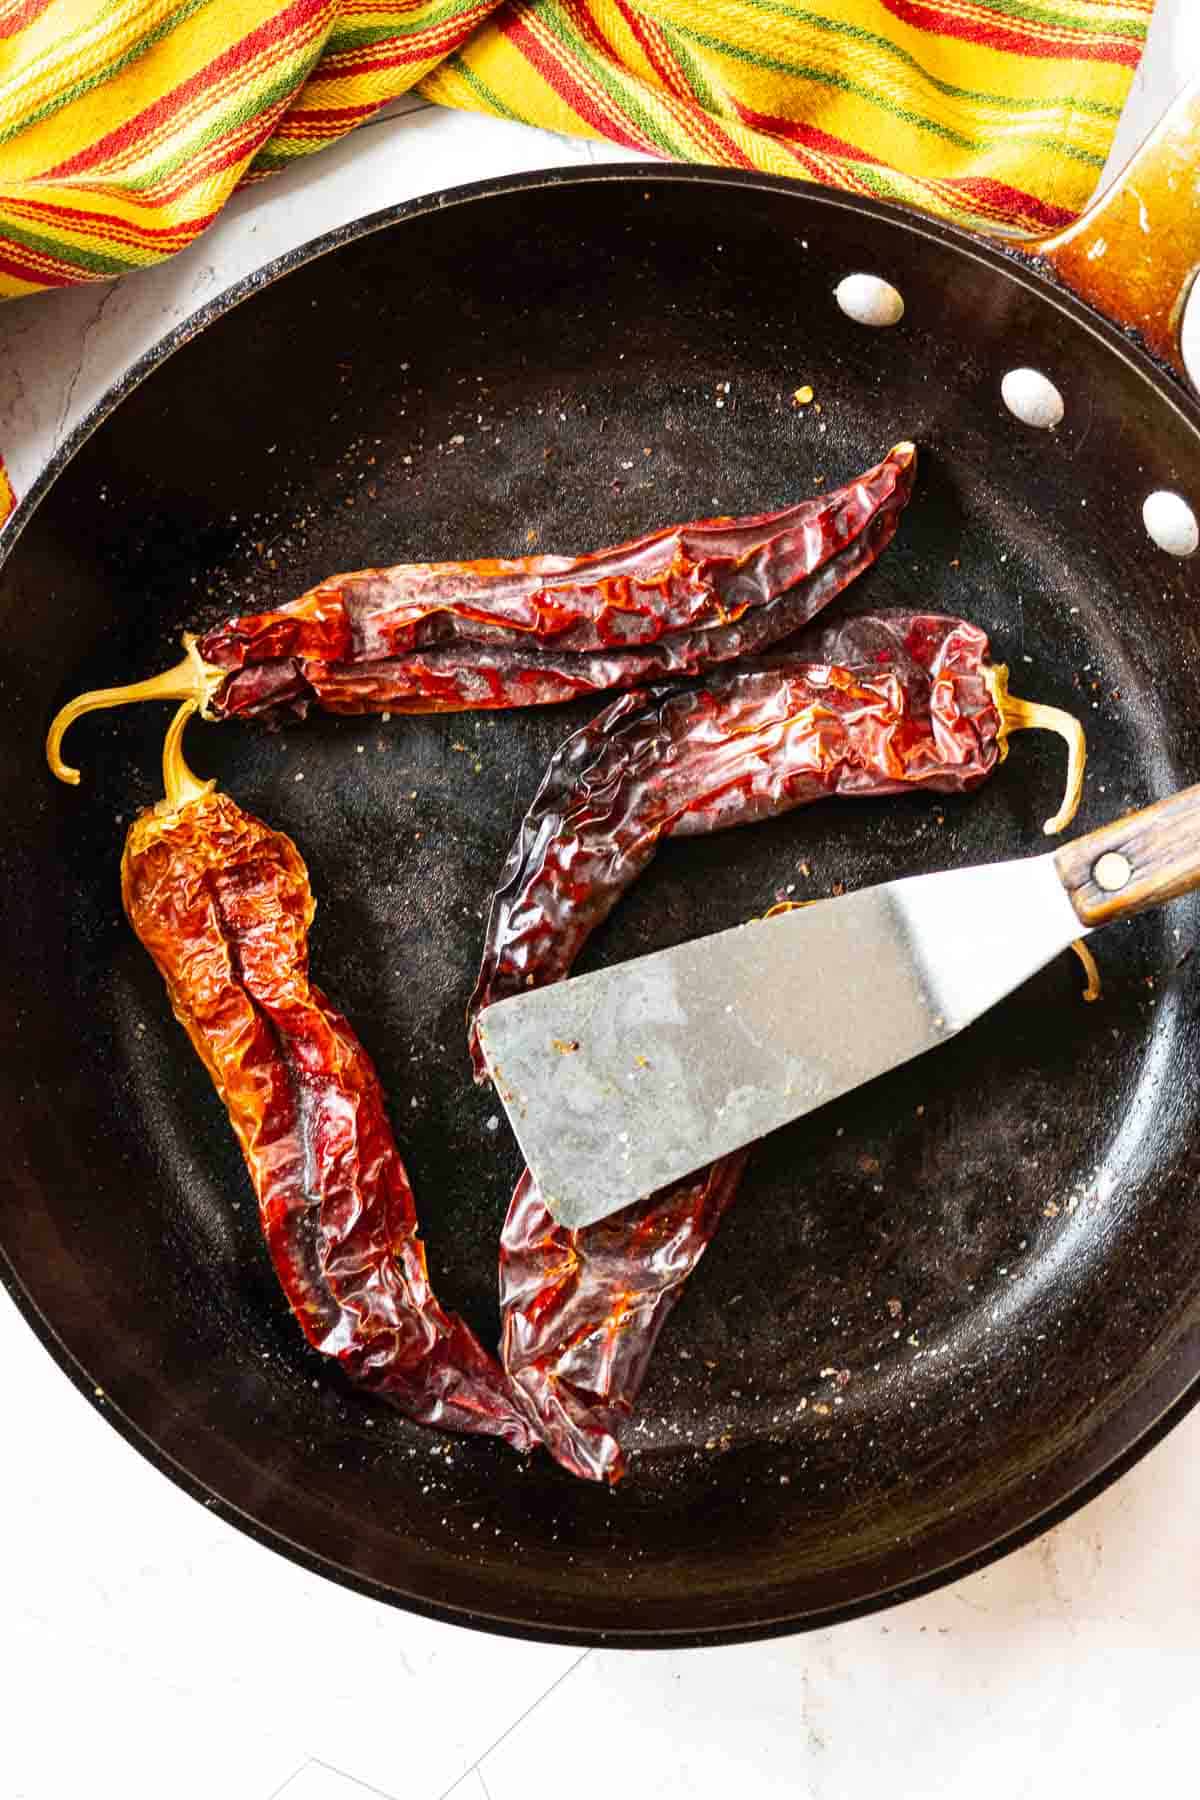
    2. Step 2: Toast The Dried Chile Peppers: Wipe the skillet out with a paper towel and add the Guajillo peppers. Press them with a spatula and cook until fragrant, about 40 seconds. Turn and toast them on the other side.

    Pro Tip: Don't skip searing the meat. This is a crucial step in getting the most flavor out of this meal. Searing creates what is technically called Maillard reaction. Maillard reaction is the process where a crust is created. Simply stated, it's responsible for the complex flavors and aroma that makes bread taste toasty, and a grilled or pan seared seared steak, like my recipe for Denver Steak, taste charred. It's a technique that brings science to your cooking skills.

    Make The Chile Guajillo Sauce

    Step 3, soaking the chile peppers in orange juice to make pork tenderloin tacos.
    Placing a plate over guajillo chiles to keep them submerged in liquid.
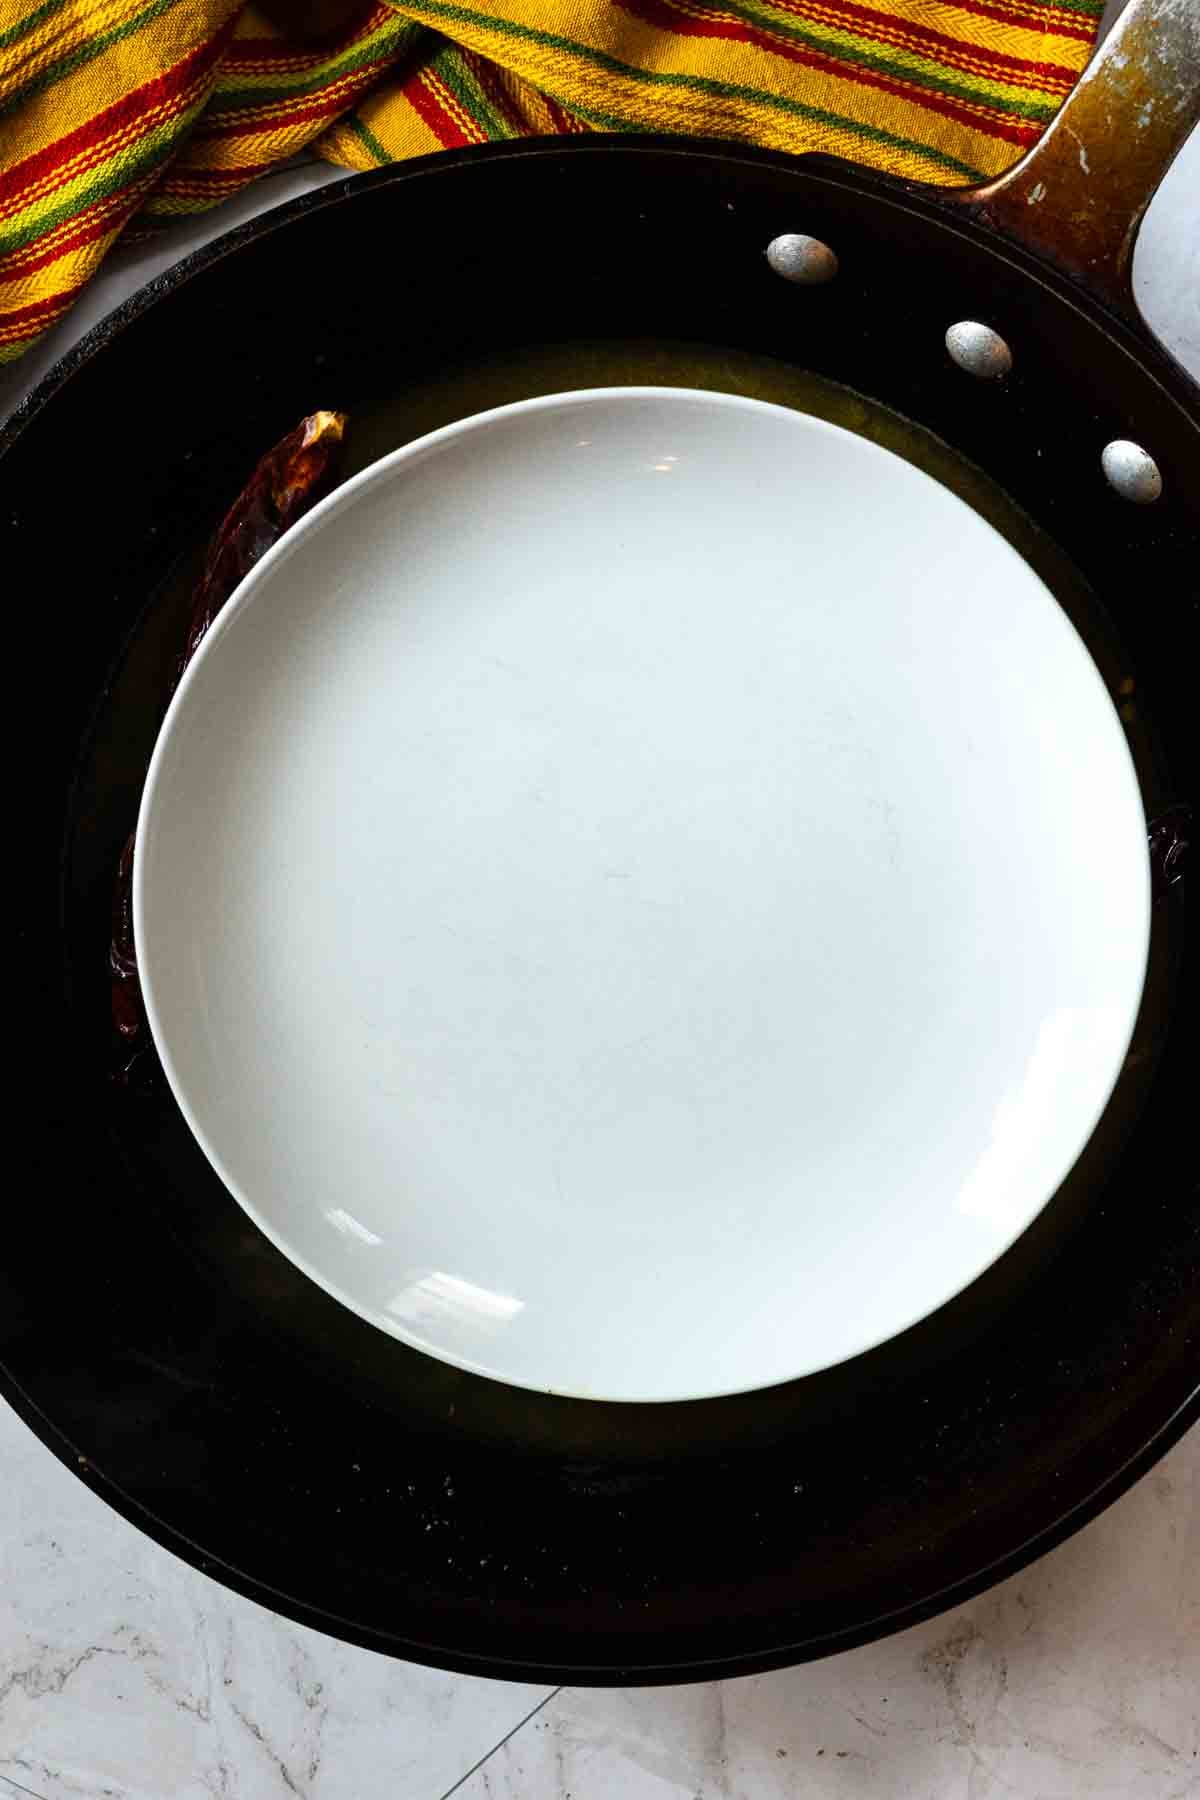
    1. Step 3: Soak the Chiles: Remove the chiles, cut the tops off and bang them against the sink to remove the seeds. Add them back to the skillet and pour the orange juice over them.
    2. Step 4: Top with a salad plate to keep them submerged. Soak them this way for 10 minutes.
    Step 4 to make pork tenderloin tacos, making the sauce in a food processor.
    Guajillo chile sauce made in a food processor to make pork tenderloin tacos.
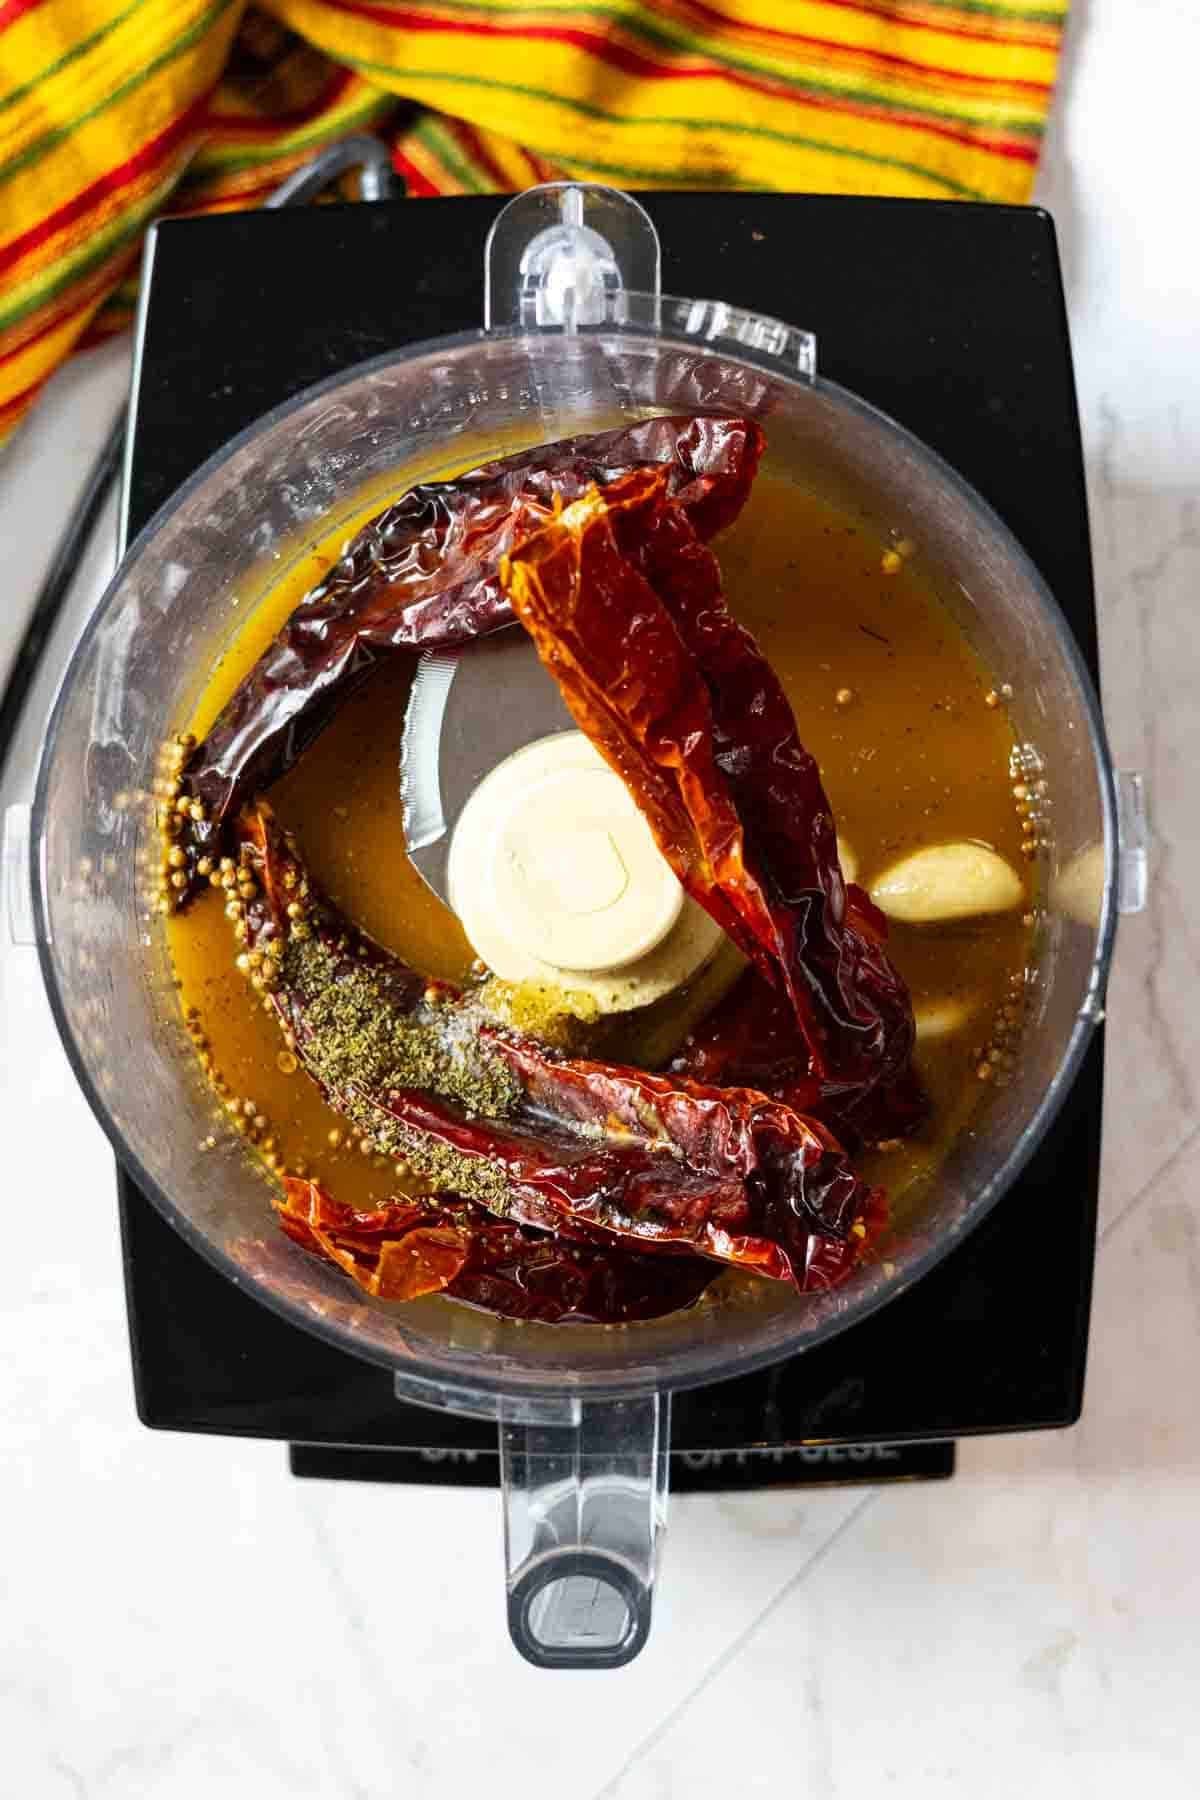
    1. Step 5: Place the dried chiles, along with the orange juice in a food processor or blender. Add the garlic, vinegar, coriander, honey, Mexican oregano and remaining salt.
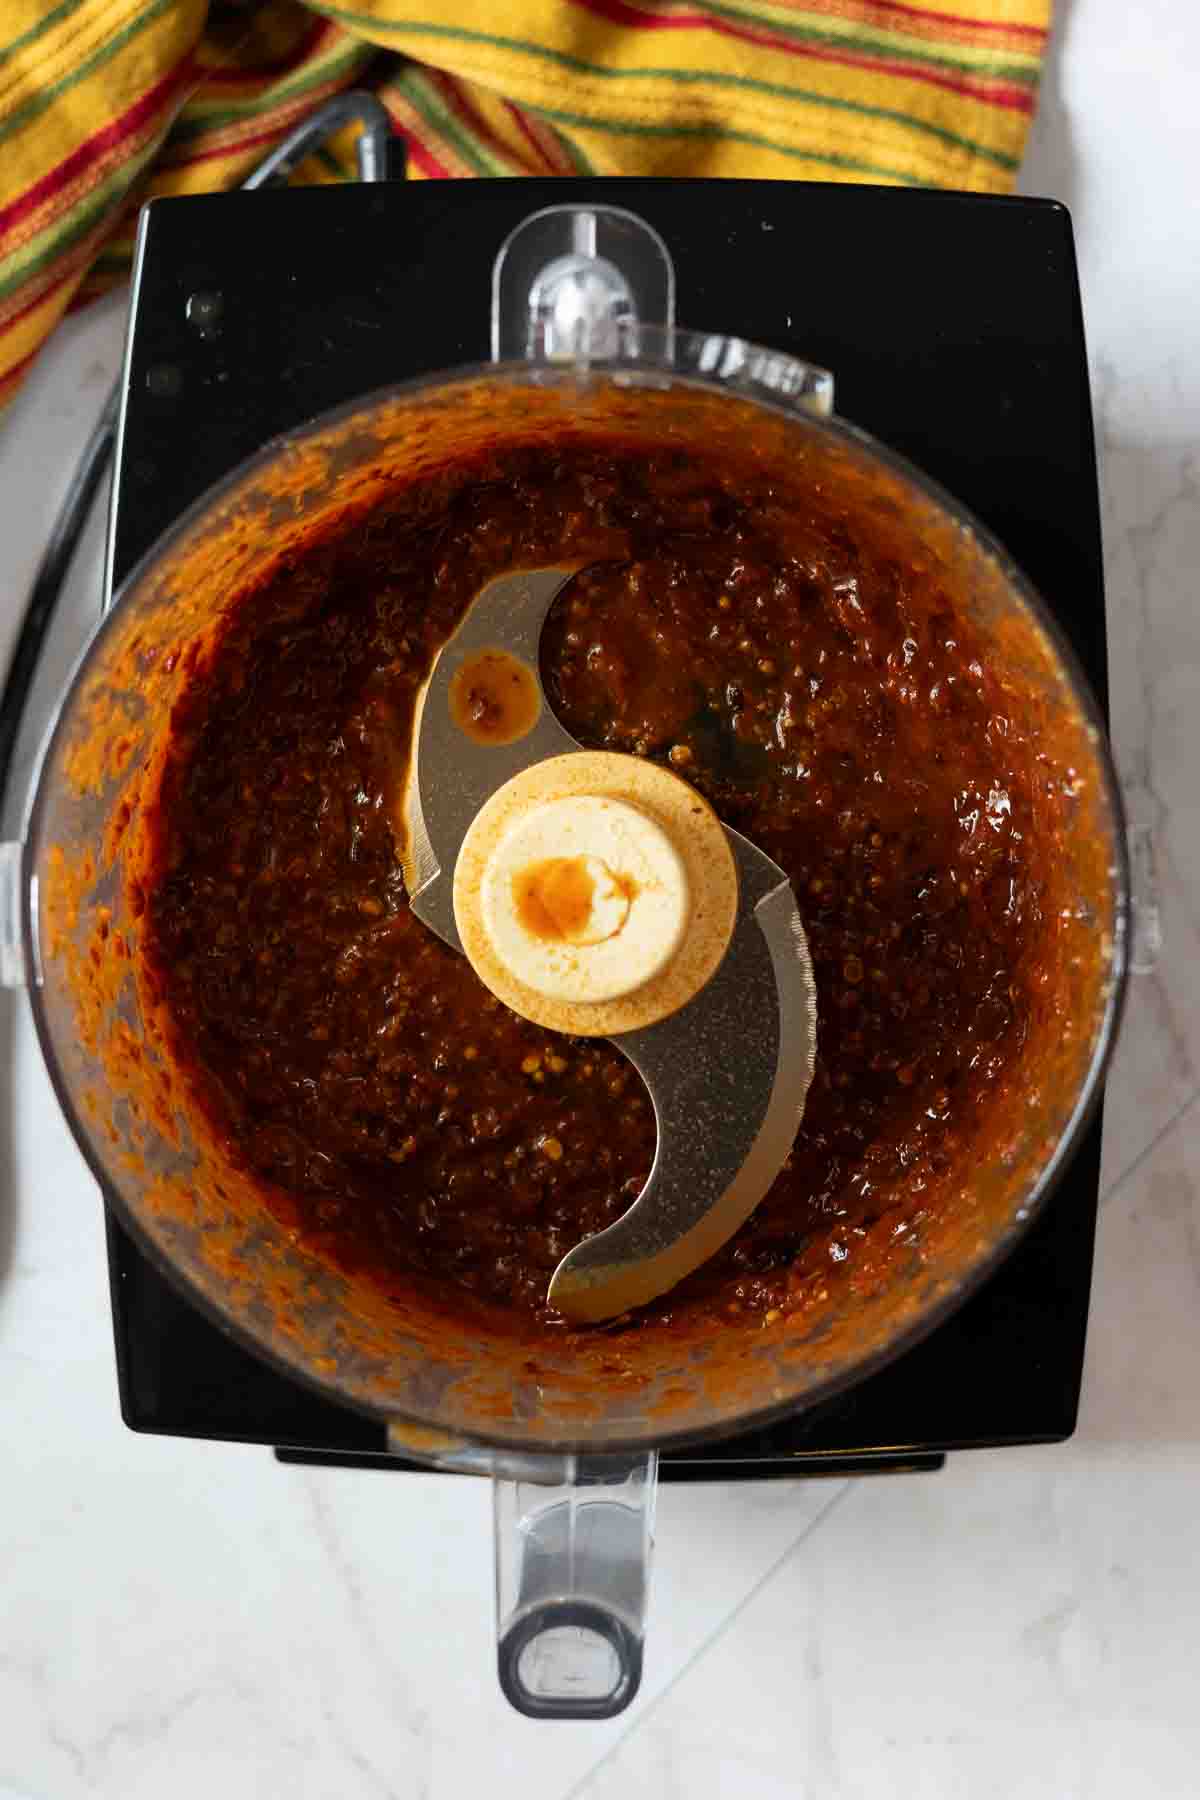
    2. Step 6: Puree until smooth. The consistency of the sauce will resemble a thick salsa. There’s no need to strain this sauce.
    Pork tenderloin simmering in a Guajillo chile sauce.
    1. Step 7: Cook The Pork Tenderloin: Use a spatula to transfer the chile guajillo sauce to the skillet. Add the the pieces of seared pork tenderloin and stir to coat well. Cook on low heat for 10 minutes. Uncover and cook another 10 minutes. Note: If you want to crisp up the pieces of pork tenderloin, slide your oven proof skillet under the oven broiler. Less than a minute will add some crispy texture and flavor.

    Assembly and Serving

    • While the pork is cooking, warm the corn tortillas and prepare your toppings. Chopped onion, chopped cilantro, and crumbled Cotija cheese work well here. Serve with lime wedges. A squeeze of lime juice brightens any Mexican taco recipe.
    • Corn Tortillas vs. Flour Tortillas: Corn tortillas will give you a more rustic feel taco. However, small flour tortillas work very well to make these pork tenderloin tacos. If you want to keep this recipe gluten free, stick with corn tortillas.
    • Warming Corn Tortillas: My favorite way to warm corn tortillas is to place them directly on the grate of your gas stove top, keeping the flame the same size as the tortilla. Use tongs to flip the tortillas after just a few seconds and cook on the other side for about 10 more seconds. The tortilla becomes pliable with some spots of char for flavor. If your have an electric stove top, heat a comal or cast iron skillet to warm them.
    • Taco Building Basics: Starting with that pliable taco shell, and place some of the pork tenderloin along the center.
    • Keep taco toppings simple as to not overwhelm the flavor of the meat. Sparingly add 2 – 3 garnishes and your taco is ready. I like to use traditional Mexican taco toppings like sliced radish, raw onion, cilantro and cotija cheese. Avocado works well here, either sliced or chopped, as well as Mexican Pickled Onions or Guacamole. Don’t forget lime wedges. A squeeze of lime juice brighten flavors.
    Pork Tenderloin tacos in chile guajillo sauce with toppings.

    Variations:

    • This recipe also works well using boneless skinless chicken thighs. Cook the thighs whole in the sauce, and then slice after cooked through.
    • Spice Level Hacks: Want a spicier pork tenderloin taco? Add ¼ teaspoon of New Mexico Red Chile Powder to the sauce during the blending process. Want a less spicier taco? Use dried (California) Anaheim chile peppers. They’re a less spicier alternative to Guajillo peppers.

    Tips For Success

    • You’ll more than likely need to cook the tenderloin in two batches because you don’t want the pieces of meat touching as they cook. Keeping a distance between the pieces of meat will allow air to circulate which will result in a better sear. Touching meat can cause a steaming effect which will compromise texture and sear.
    • For a sturdier taco, use two corn tortillas per taco.

    What To Serve It With

    • Keep things on the spicy side and serve these tacos with my recipe for Southwestern Salad.
    • For a great side dish, try Southwestern Sauteed Mixed Vegetables.
    • And a fun dessert to try is this one for Mexican Brownies.

    FAQ’s

    Can I Use Pork Shoulder In Place of Pork Tenderloin?

    Stick with Pork Tenderloin for this recipe. Pork tenderloin is lean and tender and a quick cooking cut. While pork shoulder (Pork Butt) is fattier, tougher and requires a longer slower cooking methods to become tender enough to eat. A lean pork loin roast is a better substitution than pork shoulder.

    Can I Use Store Bought Guajillo Chile Powder Instead of Dried Peppers?

    One teaspoon of dried Guajillo chile powder is basically equal to one dried chile pod. Please stick with toasting the dried peppers and then grinding them to make the chile guajillo sauce, as the chile powder may compromise the texture and flavor.

    How Do I Keep These Tacos Low Carb?

    Using corn tortillas rather than flour tortillas will slightly lower the carbohydrate levels. Corn tortillas are made from whole grain corn, making them lower in carbs than flour tortillas. I am not a trained Nutritionist, so please reference this article from WebMD for a side by side comparison.

    Storage:

    • Store any leftover pork tenderloin in the refrigerator in an airtight container for up to 4 days. To reheat, the 50% power feature on the microwave is your best friend. Heat individual servings of the pork in 30 second increments, then place them on warmed tortillas.

    Explore More Of Our Other Favorite Southwestern Taco Recipes

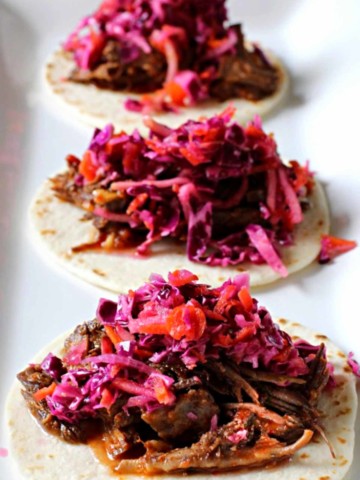
    • Chile Rubbed Braised Beef Tacos with Red Cabbage Slaw
    • Shredded pork tacos with Achiote Sauce topped with slices of avocado.
      Achiote Pork Tacos
    • Tri-tip tacos served on corn tortillas.
      Smoky Dutch Oven Tri-Tip Tacos
    • Tinga chicken tacos with toppings, served on a white platter.
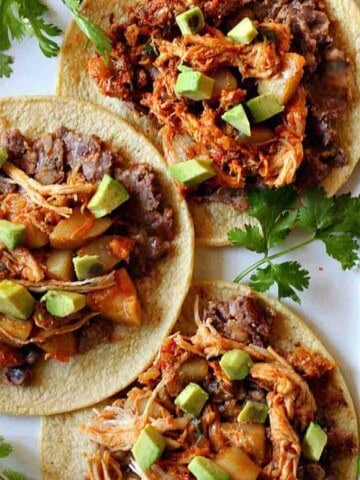
      Mexican Chicken Tinga With Chorizo

    And don’t miss my category for Southwest New Mexican Food Recipes, you’ll find lots of recipes to spice up your next Fiesta, including the most popular on my site for Chorizo Tacos with Potatoes and Mushrooms.

    If you liked this recipe, please leave a star ⭐⭐⭐⭐⭐ rating in the recipe card below and leave a comment. I always appreciate your feedback and hearing how everything went.

    And, don’t forget to subscribe to my newsletter for more delicious recipes and cooking tips. Make it a delicious day … every day.

    Pork tenderloin tacos with guajillo chile sauce.
    Print Recipe
    5 from 1 vote

    Pork Tenderloin Tacos In Chile Guajillo Red Sauce

    If you're craving bold, authentic flavor without the long cook time, these Pork Tenderloin Tacos served in a rich, red earthy Southwestern chile Guajillo sauce delivers in every bite.
    Prep Time15 minutes mins
    Cook Time30 minutes mins
    Total Time45 minutes mins
    Course: Main Course Pork
    Cuisine: Mexican
    Diet: Gluten Free
    Servings: 10 tacos
    Calories: 141kcal
    Author: Lea Ann Brown

    Equipment

    • 1 12" Heavy Skillet

    Ingredients

    • 1 Pound Pork Tenderloin Cut into bite sized pieces
    • 2 Tablespoons Neutral oil Avocado oil, canola and vegetable oils are good choices here
    • 4-5 Dried Guajillo Chile Peppers
    • 1 Cup Orange Juice Fresh squeezed or good quality purchased
    • 5 small Garlic cloves peeled
    • 1 Tablespoon White Vinegar
    • 1 teaspoon Coriander seed or ground coriander
    • 1 Tablespoon Honey
    • ½ teaspoon Dried Mexican Oregano
    • 1 teaspoon Kosher Salt divided
    • 10 Corn Tortillas warmed

    Instructions

    • Cut the tenderloin into 1-inch bite-sized pieces. Heat 1 tablespoon of oil in a 12-inch heavy skillet over medium-high heat. Once hot, add half the pork pieces in a single layer, season with half the kosher salt, and sear for 4 minutes without turning. Stir, then transfer to a plate-you're just searing, not fully cooking. Repeat with the remaining pork.
    • Wipe the skillet out with a paper towel and add the Guajillo peppers. Press them with a spatula and cook until fragrant, about 40 seconds. Turn and toast them on the other side.
    • Remove the chiles, cut the tops off and bang them against the sink to remove the seeds. Add them back to the skillet and pour the orange juice over them. Top with a salad plate to keep them submerged. Soak them this way for 10 minutes.
    • Place the dried chiles, along with the orange juice in a food processor. Add the garlic, vinegar, coriander, honey, Mexican oregano and remaining salt. Puree until smooth.
    • Use a spatula to transfer the sauce to the skillet. Add the the pieces of seared pork tenderloin and stir to coat well.
    • Cook on low heat, covered, for 10 minutes. Uncover and cook another 10 minutes.
    • In the meantime, warm the corn tortillas and prepare your toppings. Chopped onion, chopped cilantro, and crumbled Cotija cheese work well here. Serve with lime wedges. A squeeze of lime juice brightens any Mexican taco recipe.

    Notes

    Tips For Success: 
    • You’ll more than likely need to cook the tenderloin in two batches because you don’t want the pieces of meat touching as they cook. Keeping a distance between the pieces of meat will allow air to circulate which will result in a better sear. Touching meat can cause a steaming effect which will compromise texture and sear.
    • For a sturdier taco, use two corn tortillas per taco.

    Nutrition

    Calories: 141kcal | Carbohydrates: 19g | Protein: 11g | Fat: 3g | Saturated Fat: 1g | Polyunsaturated Fat: 1g | Monounsaturated Fat: 1g | Trans Fat: 0.02g | Cholesterol: 29mg | Sodium: 271mg | Potassium: 287mg | Fiber: 3g | Sugar: 5g | Vitamin A: 53IU | Vitamin C: 13mg | Calcium: 33mg | Iron: 1mg

    Pork Tenderloin Tacos … They’re What’s For Dinner
    Smoky Chipotle Bison Meatballs

    May 30, 2025 By Lea Ann Brown 2 Comments

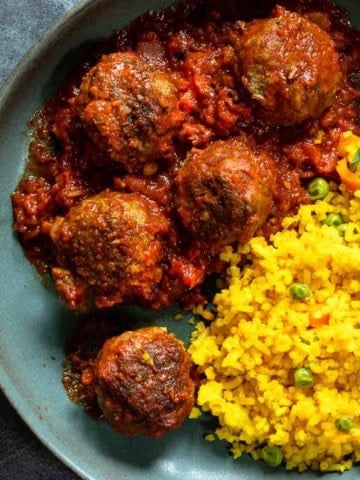
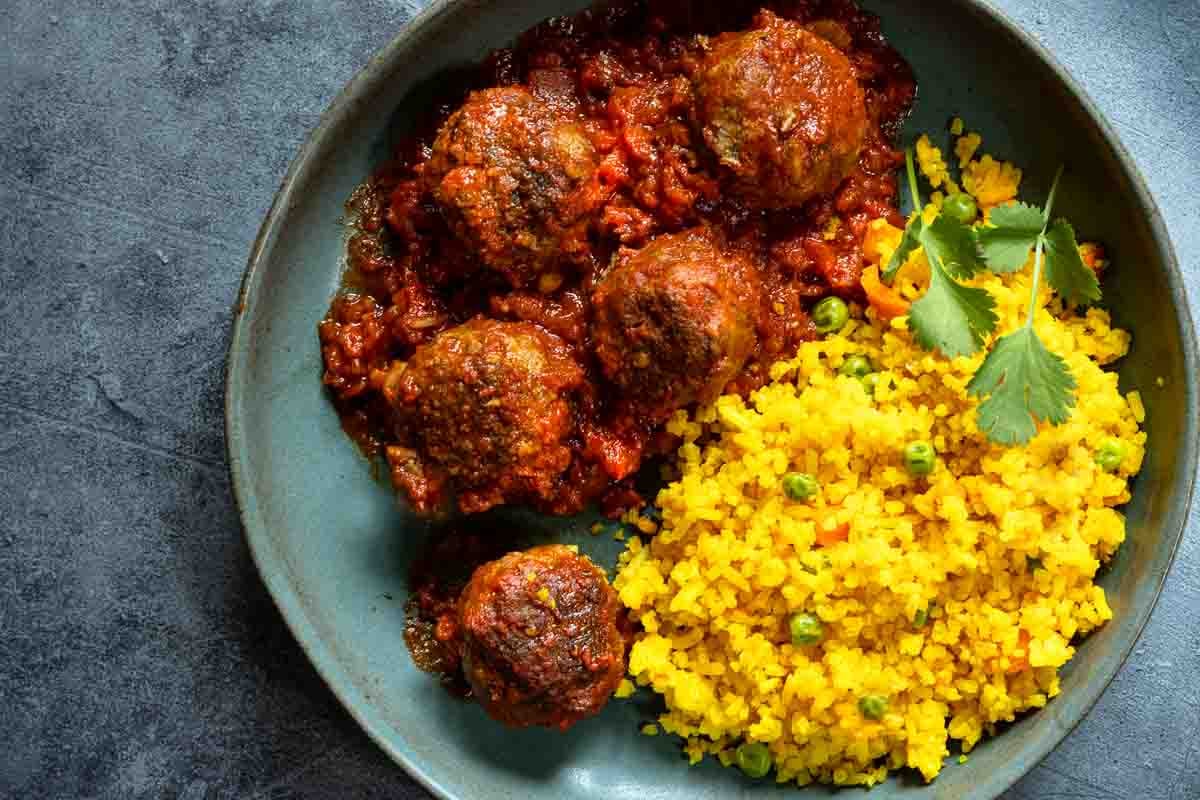
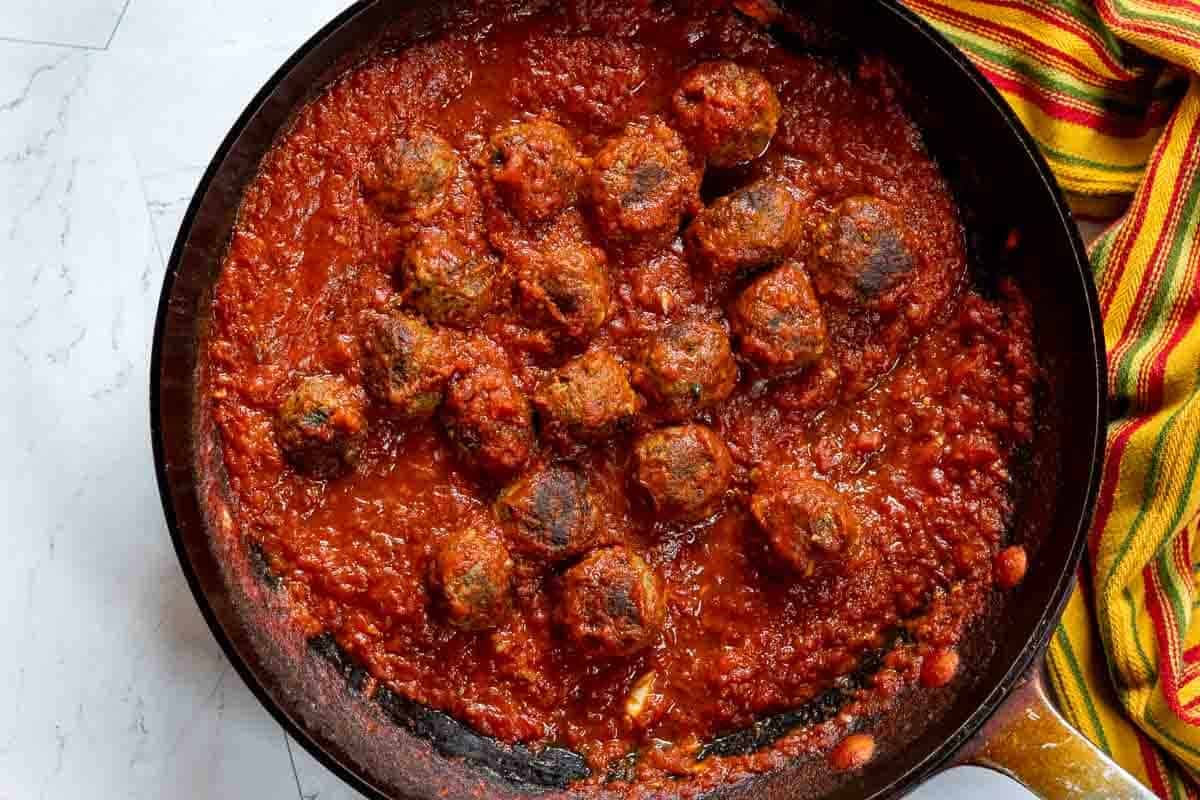
    Bison meatballs in chipotle salsa served with Mexican yellow rice.

    Smoky Chipotle Bison Meatballs

    These Bison Meatballs are seasoned Southwestern-style, browned in a skillet, then simmered in a smoky chipotle tomato sauce to finish, which keeps the meatballs moist and flavorful. Bison has a flavor similar to grass-fed beef, and with a denser texture when cooked as meatballs. All of this simply means the cooking method and sauce matter.

    If you’ve never eaten bison, it’s very similar to grass fed beef. If you’re new to cooking with ground bison, my juicy bison burger recipe is another easy way to learn how this lean meat cooks.

    Bison meatballs with chipotle salsa served with yellow rice.

    Quick Look: Smoky Chipotle Bison Meatballs

    • 🧁 Serves: 20 meatballs
    • ⭐ Features: Southwestern ✓ Juicy ✓Medium “heat” ✓
    • ⌛️ Prep Time: 30 minutes
    • 🍪 Cook Time: 30 minutes
    • 🕑 Total Time: 1 hour
    • 👩‍🍳 Skill Level: Beginner
    • 🏆 Why make THIS version? Tender, richly flavored bison meatballs simmered in a smoky chipotle sauce for an irresistible Southwestern kick.

    SUMMARIZE AND SAVE THIS POST ON

    ChatGPT
    Google AI
    Perplexity
    Claude
    Add us as a trusted site on Google

    What You Can Expect From This Recipe

    • Made with 90/10 ground bison for a rich, beef-like flavor.
    • Southwestern seasoning with cumin, Mexican oregano, cilantro and chipotle.
    • Less Panko than a typical beef meatball recipe.
    • Browned in a skillet for extra toasty flavor.
    • Finished in chipotle tomato sauce to add moisture and flavor.
    • Makes 20 meatballs from 1 pound of ground bison.
    • Medium spice level with a smoky chile flavor.

    How Are Bison Meatballs Different Than Beef Meatballs?

    I’ve found that bison behaves differently from ground beef when making meatballs. Therefore this recipe has been slightly modified to ensure the meatballs remain juicy and flavorful. I find bison meatballs denser in texture, so I use less Panko than I would in a typical beef meatball recipe. The egg and smaller amount of Panko provide enough structure to hold the meatballs together while keeping the texture meaty. After browning, I finish cooking the meatballs in a smoky chipotle tomato sauce, which provides the moisture the lean bison needs while adding Southwestern flavor. All of this simply means the cooking method and sauce matter.

    If you’re looking for another flavorful way to use ground bison, try my bison chili with black beans and lime crema. It’s another recipe where the rich flavor of bison works especially well with Southwestern seasonings.

    Why These Meatballs Need A Flavorful Sauce

    Because bison is lean and the finished meatballs have a denser texture than traditional beef meatballs, the sauce is more than just a flavor addition. It provides moisture and gives the meatballs a chance to absorb additional flavor as they finish cooking.

    That’s why I don’t cook these meatballs until completely done and then top with the sauce. But rather finish cooking the meatballs in the sauce until cooked through.

    If you love the Southwestern flavors in these meatballs, you’ll also want to try my Mexican meatballs with queso blanco, a fun appetizer version served with a creamy cheese sauce.

    What Does Bison Taste Like?

    Bison does not taste gamey. Bison tastes similar to high quality beef but has a slightly sweeter, richer flavor. I find it most similar to grass-fed beef, although bison has its own distinct flavor.

    [feast_advanced_jump_to]

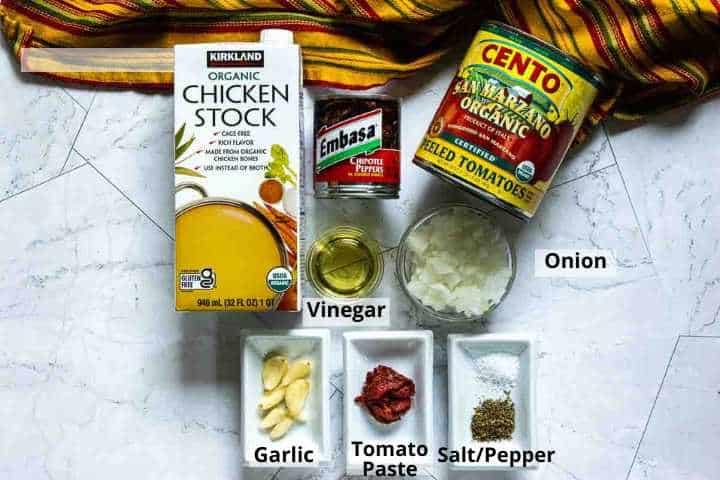
    Ingredients For The Sauce

    Ingredients to make Chipotle Salsa Sauce.
    • Chipotle Peppers in Adobo Sauce: Chipotle peppers in adobo are smoked and dried jalapeno peppers packed in a spicy smoky sauce. I like Embasa brand simply because there’s an ample amount of adobo sauce in the can. Some brands aren’t so saucy.
    • Tomato Paste and Vinegar: Are VIP’s in the kitchen when it comes to tomato based sauces. The long cooking time used to make tomato paste gives it a concentrated sweet rich flavor. Just a dollop can add a subtle burst of robust flavor and body into just about any soup or tomato based sauce. Vinegar is as important as salt to brighten flavor, They’re both brilliant little culinary tricks and the smoky flavor works well for the rich bison meat.

    Chipotles in adobo are one of my favorite ways to add smoky heat to Mexican-inspired dishes. I also use them in my chicken in chipotle cream sauce, where the smoky peppers are paired with a creamy sauce. I also use that same smoky combination in my smoky black bean and corn salsa, where chipotle peppers in adobo add warmth and depth to the Southwestern flavors.

    Ingredients For The Meatballs

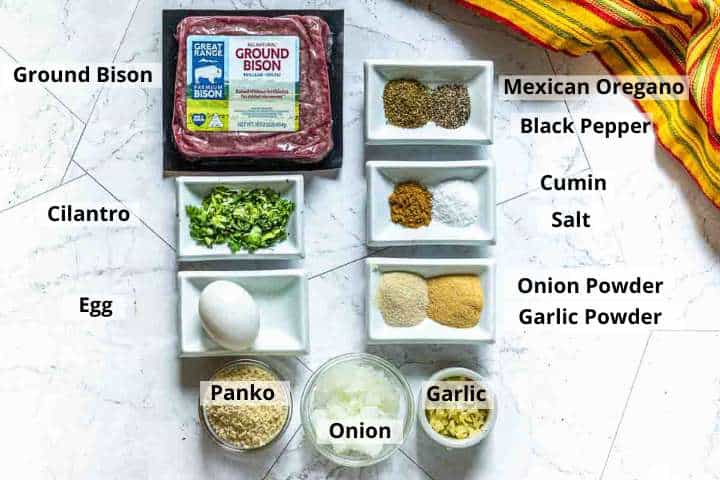
    Ingredients to make bison meatballs.
    • Ground Bison can readily be found at most supermarkets.
    • Chopped Cilantro will add Southwestern flair. Omit if you’re not a fan of the flavor. I will make no difference in the texture of the meatballs
    • Panko Bread Crumbs and Eggs will be used as the binder. There are many binders used to make meatballs, I find Panko to be very reliable for texture and easy to use right out of the box.

    Mexican Oregano is preferred for this recipe. It's peppery, grassy, earthy flavor is a good compliment for Mexican Food. If you don't have Mexican Oregano, substitute Marjoram. Known for its aroma and delicate flavor, its related to Mexican oregano and will bring a sweet undertone to any recipe.

    How To Make Bison Meatballs In Chipotle Sauce

    Recipe testing note: I developed these meatballs using 90/10 ground bison. I found that bison has a sweeter, richer flavor similar to grass-fed beef, but the cooked meatballs have a denser texture. I therefore use less Panko than I would for a traditional beef meatball and finish the meatballs in the chipotle sauce to add moisture and flavor.

    Chipotle Salsa to make Bison Meatballs.
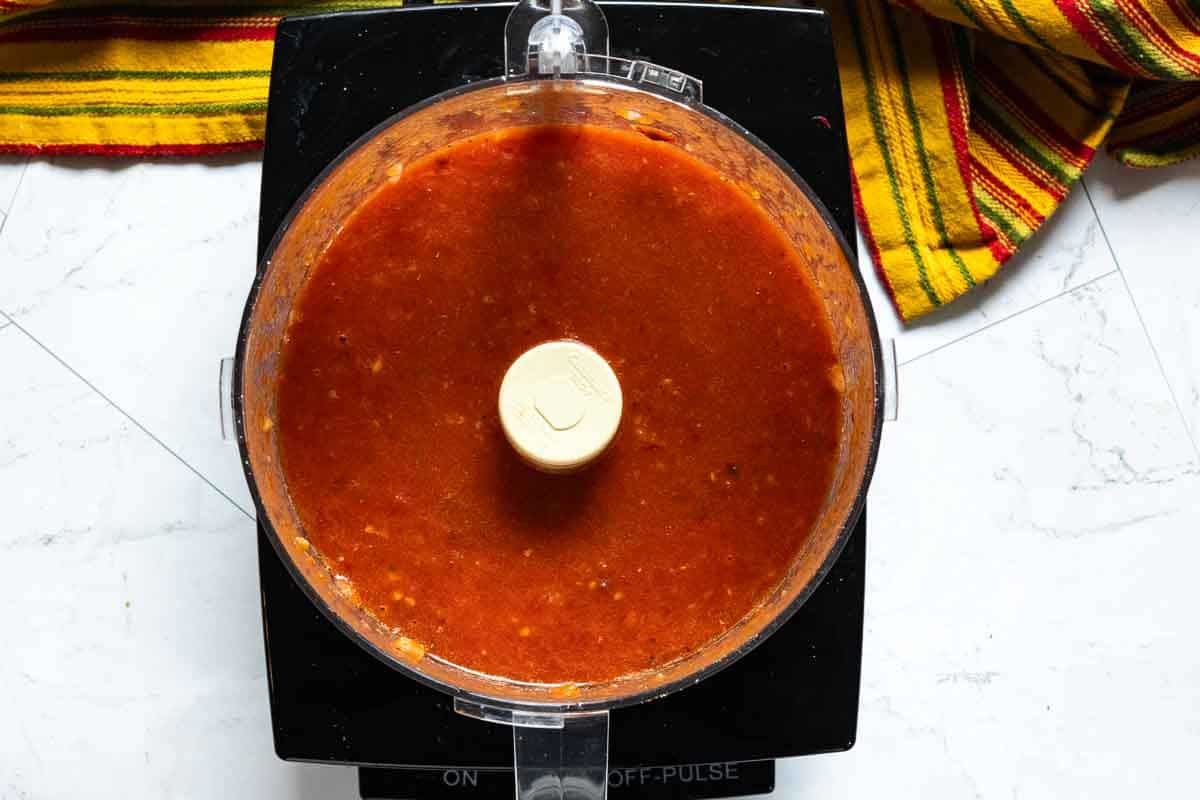
    1. Step 1: Make The Chipotle Salsa Sauce: Combine tomatoes, onion, garlic, chicken broth, chipotle pepper, adobo sauce, tomato paste, Mexican oregano and salt in a food processor or blender. Give it a few pulse whirls just enough to blend, but still leaving it with a chunky texture. This will give this dish a rustic feel.
    Step 1 to make bison meatballs.
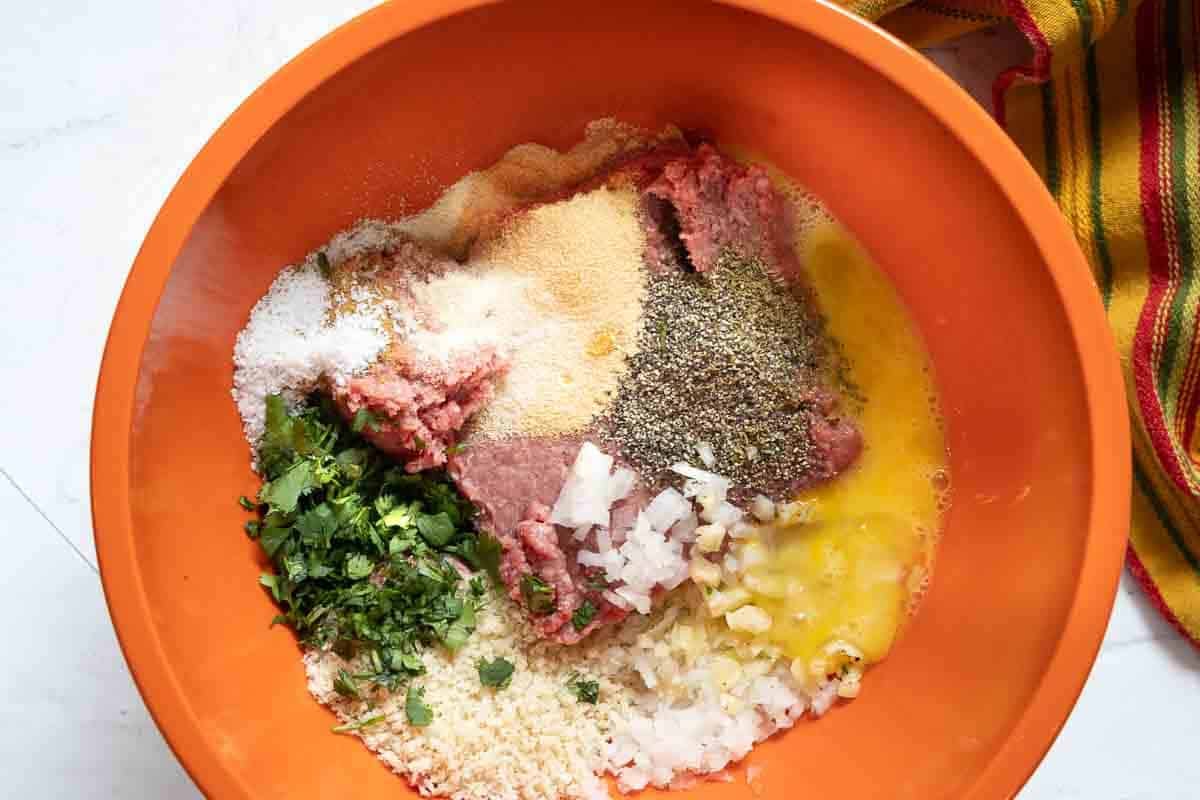
    1. Step 2: Make The Bison Meatballs: Add ground bison, Panko bread crumbs, onion, cilantro, garlic, garlic powder, onion powder, Mexican Oregano, black pepper, cumin, salt and egg to a large bowl. Tip: Just like making Classic Meatloaf, use your hands to combine the mixture. If you use a spoon you will compress the mixture too much which will compromise the texture of the meatballs.
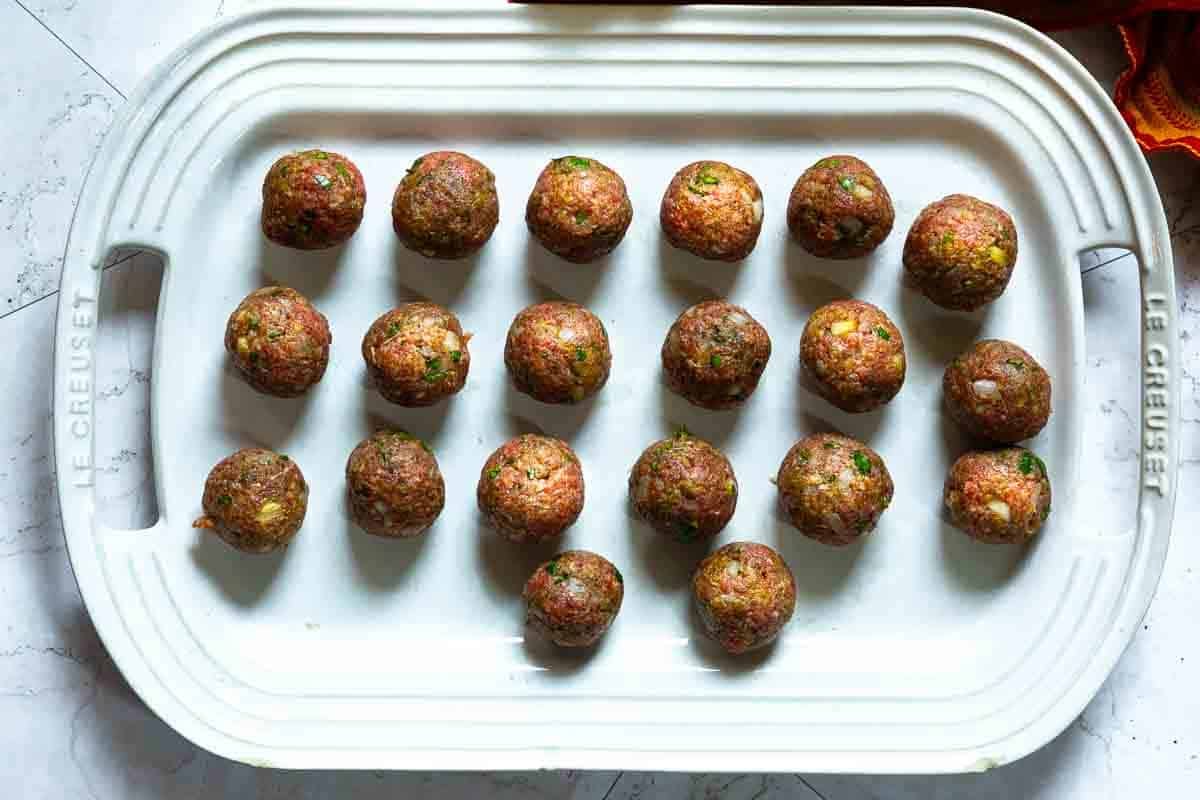
    Uncooked bison meatballs on a white platter.
    1. Step 3: Roll The Meatballs: Use the palms of your hands to roll the bison meat into meatballs that are about 1 ½ inches in diameter. Tip for rolling meatballs: As I roll them I like to count to twenty gentle rolls. That amount of rolls seems to secure a well formed meatball that won’t fall apart.
    Bison Meatballs fried in a skillet.
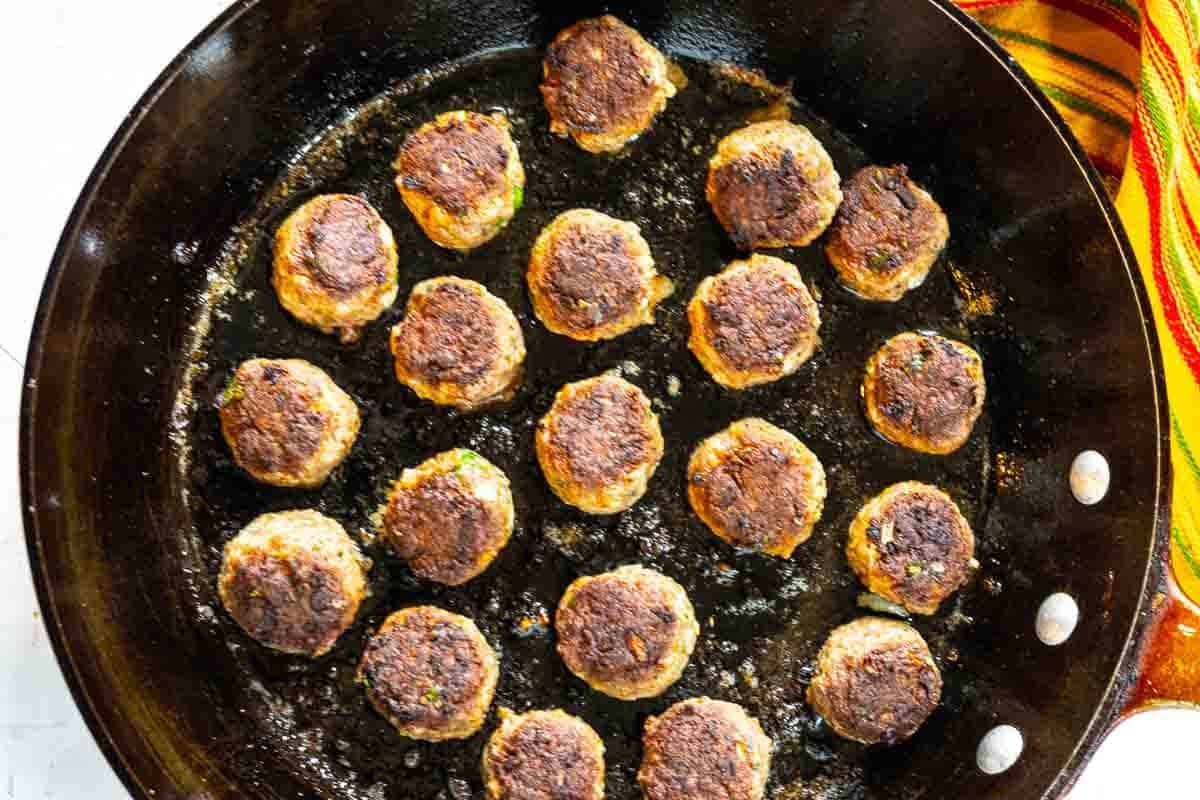
    1. Step 4: Cook The Meatballs: Add a couple of tablespoons of oil to a large skillet over medium high heat. A 12″ skillet should be large enough to fit all of the meatballs, but place them so they don’t touch each other so they’ll brown well. Cook on one side until golden, about 4 minutes. Turn and cook the other side until browned.
    Cooking bison meatballs in chipotle salsa sauce.
    1. Step 5: Simmer The Meatballs: Remove the meatballs to a plate. Add the sauce to the skillet and simmer for about 10 minutes. Add the meatballs to the sauce and simmer for about 5 minutes.

    How To Keep Meatballs Moist

    Most ground bison will range in the lean 90/10 fat ratio. Here are some tips to keep them moist.

    • Don’t overwork the mixture.
    • Don’t add more Panko than this recipe calls for.
    • Form the meatballs gently. Meatballs that are packed too tightly will become dense and won’t absorb the sauce.
    • Brown rather than aggressively cook them through in the skillet.
    • Finish cooking them in the chipotle sauce. Don’t overcook.

    Serving Suggestions

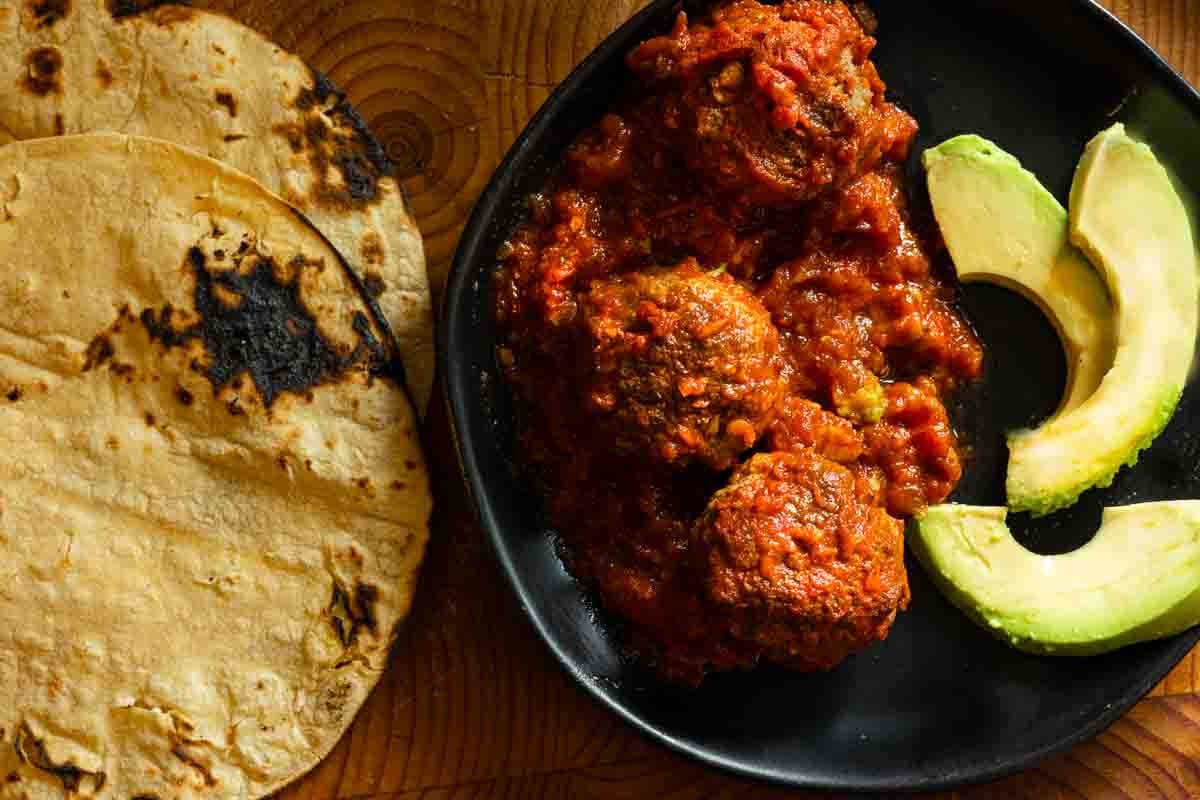
    Bison meatballs served with avocado and toasted corn tortillas.

    What To Serve Them With

    For A Southwest Dinner
    • Serve bison meatballs alongside Mexican Yellow Rice or even Gulf Coast Style Oven Baked Rice. To make quick yellow rice, cook white rice according to package instructions. Once cooked, add a teaspoon of turmeric and a cup of unthawed carrots and peas. Or Rerve with a side of beans, like these Slow Cooker Frijoles Rancheros or a side of Southwestern potatoes, Poblano Mashed Potatoes.

    As An Appetizer

    • Build a charcuterie board with the meatballs in a bowl as the centerpiece. Surround with sliced Mexican cheeses like panela and chipotle cheddar, sliced jicama and pineapple. Tortilla chips, and Homemade Restaurant Style Mexican Salsa. Spanish chorizo, Mexican chocolate and spicy olives … for just a few ideas. Checkout my recipe for Spicy Lamb Meatballs, where I served them on a charcuterie board.
    • Serve bison meatballs on a warm toasted corn tortilla with avocado and a spoonful of smoky black bean and corn salsa.

    Tip For Success

    • Practice those knife skills. Chop the onion and garlic as small as you can. Large chunks of vegetables can cause meatballs to fall apart.

    Storage, Freezing and Reheating

    • Refrigerator: Store any leftover bison meatballs in the sauce, in an airtight container in the refrigerator for up to 5 days.
    • Freezer: The meatballs in sauce can also be frozen. I like to use a freezer safe zip-lock style bag. Just squeeze the air out and lay flat for optimum storage space.
    • Reheat: Let frozen meatballs thaw in the refrigerator overnight. The 50% power feature on your microwave is your best friend when reheating dishes like this. Place individual servings on a microwave safe plate and heat in 30 second increments. This combination will avoid those microwave food explosions.

    Bison Meatballs FAQ’s

    How Do You Keep Bison Meatballs From Drying Out?

    Over cooking is the biggest reason bison meatballs dry out. Since the meat is leaner, most bison recipes call for a shorter cooking time. Also, finishing them in a sauce will prevent dry meatballs.

    What Temperature Should Bison Meatballs Reach?

    Insert a digital meat thermometer into the center of one of the meatballs. 160 degree internal temperature is recommended.

    How Spicy Are These Bison Meatballs?

    Chipotle peppers are dried jalapeno peppers which are packed in a spicy chipotle sauce. These peppers can pack quite a bit of heat. But using only one of the peppers for one pound of ground beef keeps that heat level to a medium range. For milder meatballs, scrape the veins and seeds out of the pepper before chopping.

    Explore More Southwestern Favorites

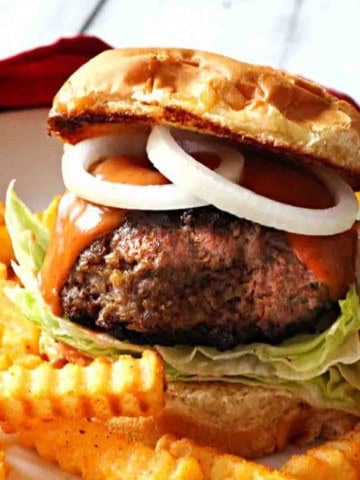
    • Buffalo burger with sliced onions, special sauce, served with french fries.
      Juicy Buffalo Burgers – The Ultimate How To Guide
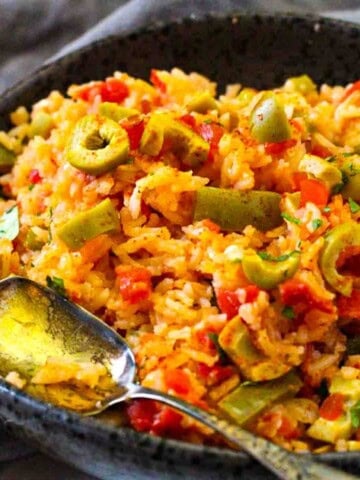
    • Mexican Green Rice served in a black serving bowl.
      Toasted Mexican Green Rice (Arroz Verde)
    • A bowl of red chile sauce made from red chile powder.
      New Mexico Red Chile Sauce From Powder
    • Mexican meatballs on a sheet pan with a bowl of guacamole and queso blanco.
      Mexican Meatballs with Queso Blanco

    And don’t miss this fun recipe for Hawaiian Bison Hotdogs with Pineapple Mango Salsa. The hot dogs are made with Bison Wieners.

    And if you’re meatball fans like us, don’t mis one of my favorite meatball recipes for Meatballs in BBQ Sauce. One of my most popular pot-luck recipes.

    If you liked this recipe, please leave a star ⭐⭐⭐⭐⭐ rating in the recipe card below and leave a comment. I always appreciate your feedback and hearing how everything went.

    And, don’t forget to subscribe to my newsletter for more delicious recipes and cooking tips. Make it a delicious day … every day.

    Bison meatballs in chipotle salsa served with Mexican yellow rice.
    Print Recipe
    No ratings yet

    Smoky Chipotle Bison Meatballs

    Smoky, spicy, and packed with bold flavor, these chipotle bison meatballs are a unique twist on a classic favorite. Perfect for game day or a weeknight dinner, bold chipotle sauce brings a deliciously spicy twist to one of our favorite classic comfort foods.
    Prep Time30 minutes mins
    Cook Time30 minutes mins
    Total Time1 hour hr
    Course: Appetizer Recipes, Main Course Bison
    Cuisine: Southwestern
    Servings: 20 meatballs
    Calories: 90kcal
    Author: Lea Ann Brown

    Ingredients

    • For The Chipotle Sauce
    • 28 Ounce Canned San Marzano Tomatoes undrained
    • ½ Cup Sweet Onion rough chopped
    • 4 Garlic Cloves peeled
    • 1 Cup Chicken Broth
    • ½ teaspoon Mexican Oregano
    • 1 large Chipotle Pepper in Adobo Sauce veins and seeds scraped out
    • 2 Tablespoon Adobo Sauce Add more to make it spicier
    • 1 Tablespoons Tomato Paste
    • 1 teaspoon Kosher Salt
    • 1 teaspoon Vinegar white or cider
    • For The Meatballs
    • 1 Pound Ground Bison Meat
    • ¼ Cup Panko bread crumbs
    • ½ Cup Sweet Onion fine chopped
    • ¼ Cup Cilantro minced
    • 3 Cloves Garlic minced
    • 2 teaspoons Garlic powder
    • 2 teaspoons Onion Powder
    • 1 teaspoon Mexican Oregano or marjoram
    • 1 teaspoon Freshly ground black pepper
    • ½ teaspoon Ground cumin
    • 1 teaspoon Kosher salt
    • 1 large egg lightly beaten
    • ¼ cup Olive Oil

    Instructions

    • For The Chipotle Sauce: Combine tomatoes, onion, garlic, chicken broth, chipotle pepper, adobo sauce, tomato paste, Mexican oregano and salt in a food processor or blender. Give it a few pulse whirls just enough to blend, but still leaving it with a chunky texture. Set aside and prepare meatballs
    • For The Meatballs: Add ground bison, panko, onion, cilantro, garlic, garlic powder, onion powder, Mexican Oregano, black pepper, cumin, salt and egg to a large bowl.
    • Use your hands to gently combine the ingredients.
    • Start rolling the bison meat into meatballs that are about 1 ½ inches in diameter. Use the palms of your hands to give them 20 gentle rolls each.
    • Heat a large skillet over medium high heat. A 12" skillet should be large enough to fit all of the meatballs, but place them so they don't touch each other. Once the oil is hot add the meatballs and cook on one side until golden, about 4 minutes. Turn and cook the other side.
    • Remove the meatballs to a paper towel lined plate. Drain any excess grease and add the chipotle sauce to the pan. Stir, scraping up any meat bits and simmer the sauce for about 10 minutes.
    • Add the meatballs to the sauce and simmer for about 5 minutes.
    • Serve with rice or corn tortillas. Garnish with cilantro or sliced avocado. Or both.

    Notes

    Tips For Success:
    • To keep meatballs from drying out, avoid over mixing the meat mixture. And avoid over-browning them. Once golden on the outside, the meatballs will continue to cook in the sauce.
    • Practice those knife skills. Chop the onion and garlic as small as you can. Large chunks of vegetables can cause meatballs to fall apart.

    Nutrition

    Serving: 20g | Calories: 90kcal | Carbohydrates: 6g | Protein: 6g | Fat: 5g | Saturated Fat: 1g | Polyunsaturated Fat: 1g | Monounsaturated Fat: 3g | Trans Fat: 0.001g | Cholesterol: 22mg | Sodium: 670mg | Potassium: 234mg | Fiber: 1g | Sugar: 3g | Vitamin A: 133IU | Vitamin C: 5mg | Calcium: 30mg | Iron: 1mg

    Southwest Egg Bites with Cottage Cheese And Bacon (In Oven)

    May 5, 2025 By Lea Ann Brown 1 Comment

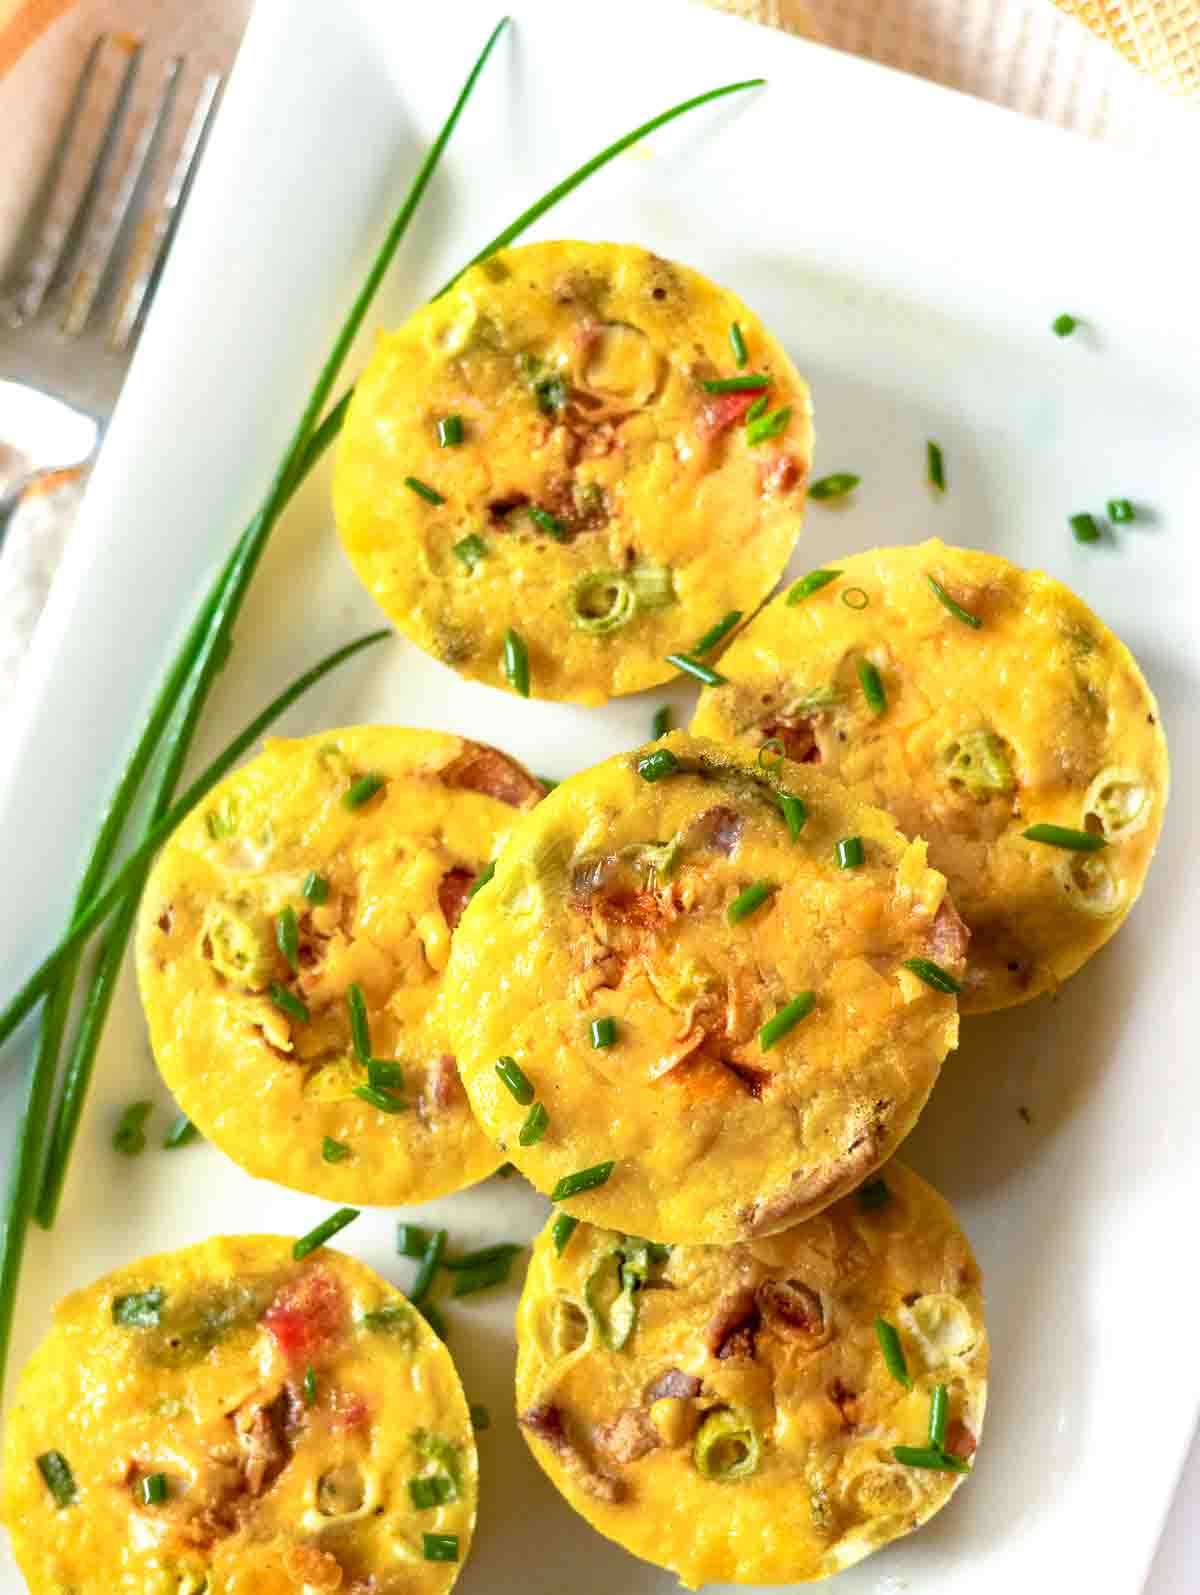
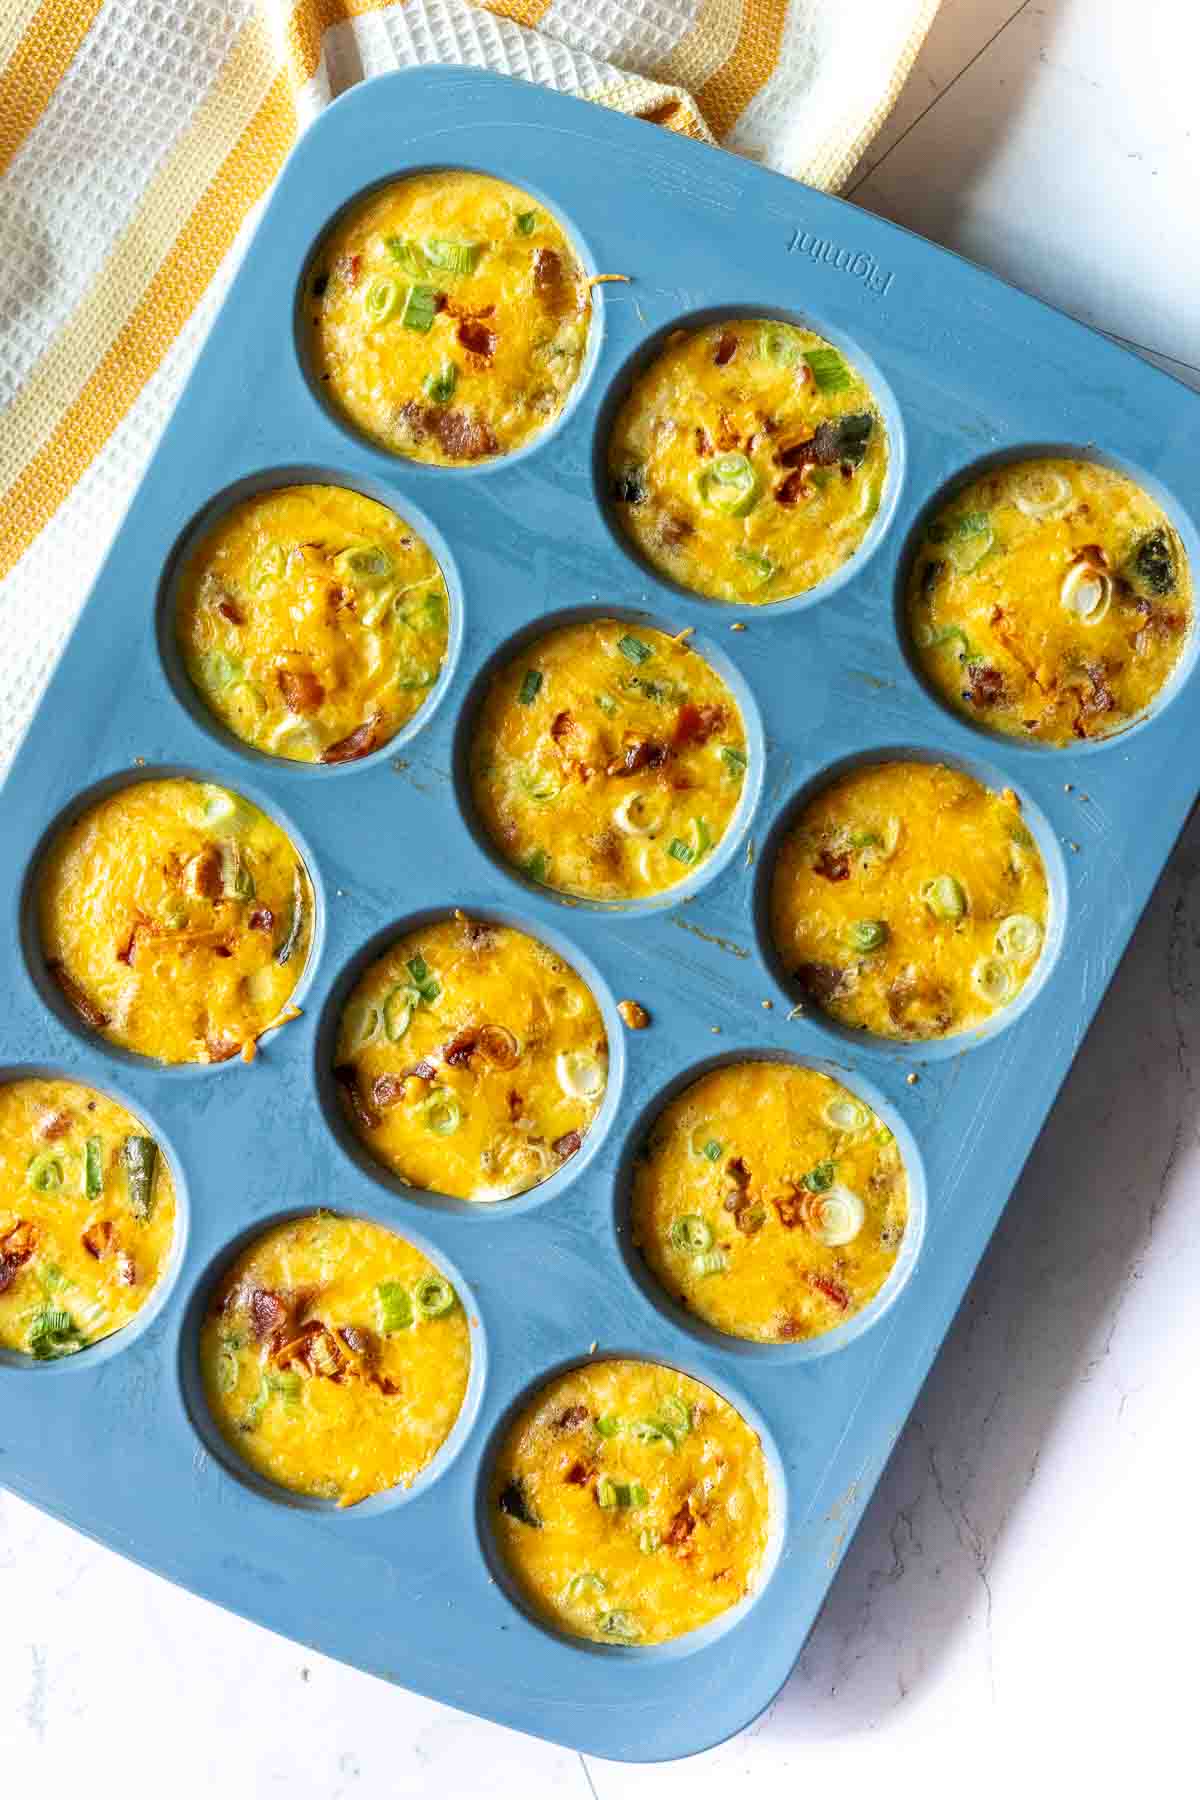
    Cottage cheese egg bites with poblano peppers.

    These Egg Bites with Cottage Cheese are perfect for a meal prep breakfast to enjoy all week. Packed with Southwestern flavors, who can resist an egg filled cup rich and creamy in texture, cheesy, with bacon and “just right spicy” poblano peppers.

    Southwestern cottage cheese egg bites with poblano peppers on a white platter.

    What You Can Expect From This Recipe

    If you’re a fan of Starbucks copycat Instant Pot Egg Bites, you’re going to love this homemade oven egg bite recipe even better. And you purchase egg bites at Starbucks, you’re going to appreciate this cheaper option by making them at home.

    Larger Size: The silicone pan that fits inside an Instant Pot makes very small egg bites. I prefer making egg bites in the oven, and using a regular sized muffin pan to give us larger and heartier sized egg bites.

    Same Fluffy Texture: This oven version uses a water bath to guarantee that same soft and fluffy texture that the pressure cooker, and what Starbucks offers.

    Meal Prep: This is an easy make-ahead meal prep recipe. Make egg cups on a Sunday and enjoy a grab and go breakfast during the week. These are also a popular recipe to serve guests for breakfast or brunch.

    Easy to Eat: Egg bites with cottage cheese are delicious eaten hot and fresh, or straight from the refrigerator, re-heated in the microwave, or even re-heated from frozen.

    Healthier: So skip the store purchased egg bites which are loaded with salt and unnecessary ingredients. These are easy to make and addicting with Southwest flavor.

    Let’s take a look:

    [feast_advanced_jump_to]

    Ingredients

    Nothing fancy, nothing complicated, mostly pantry items.

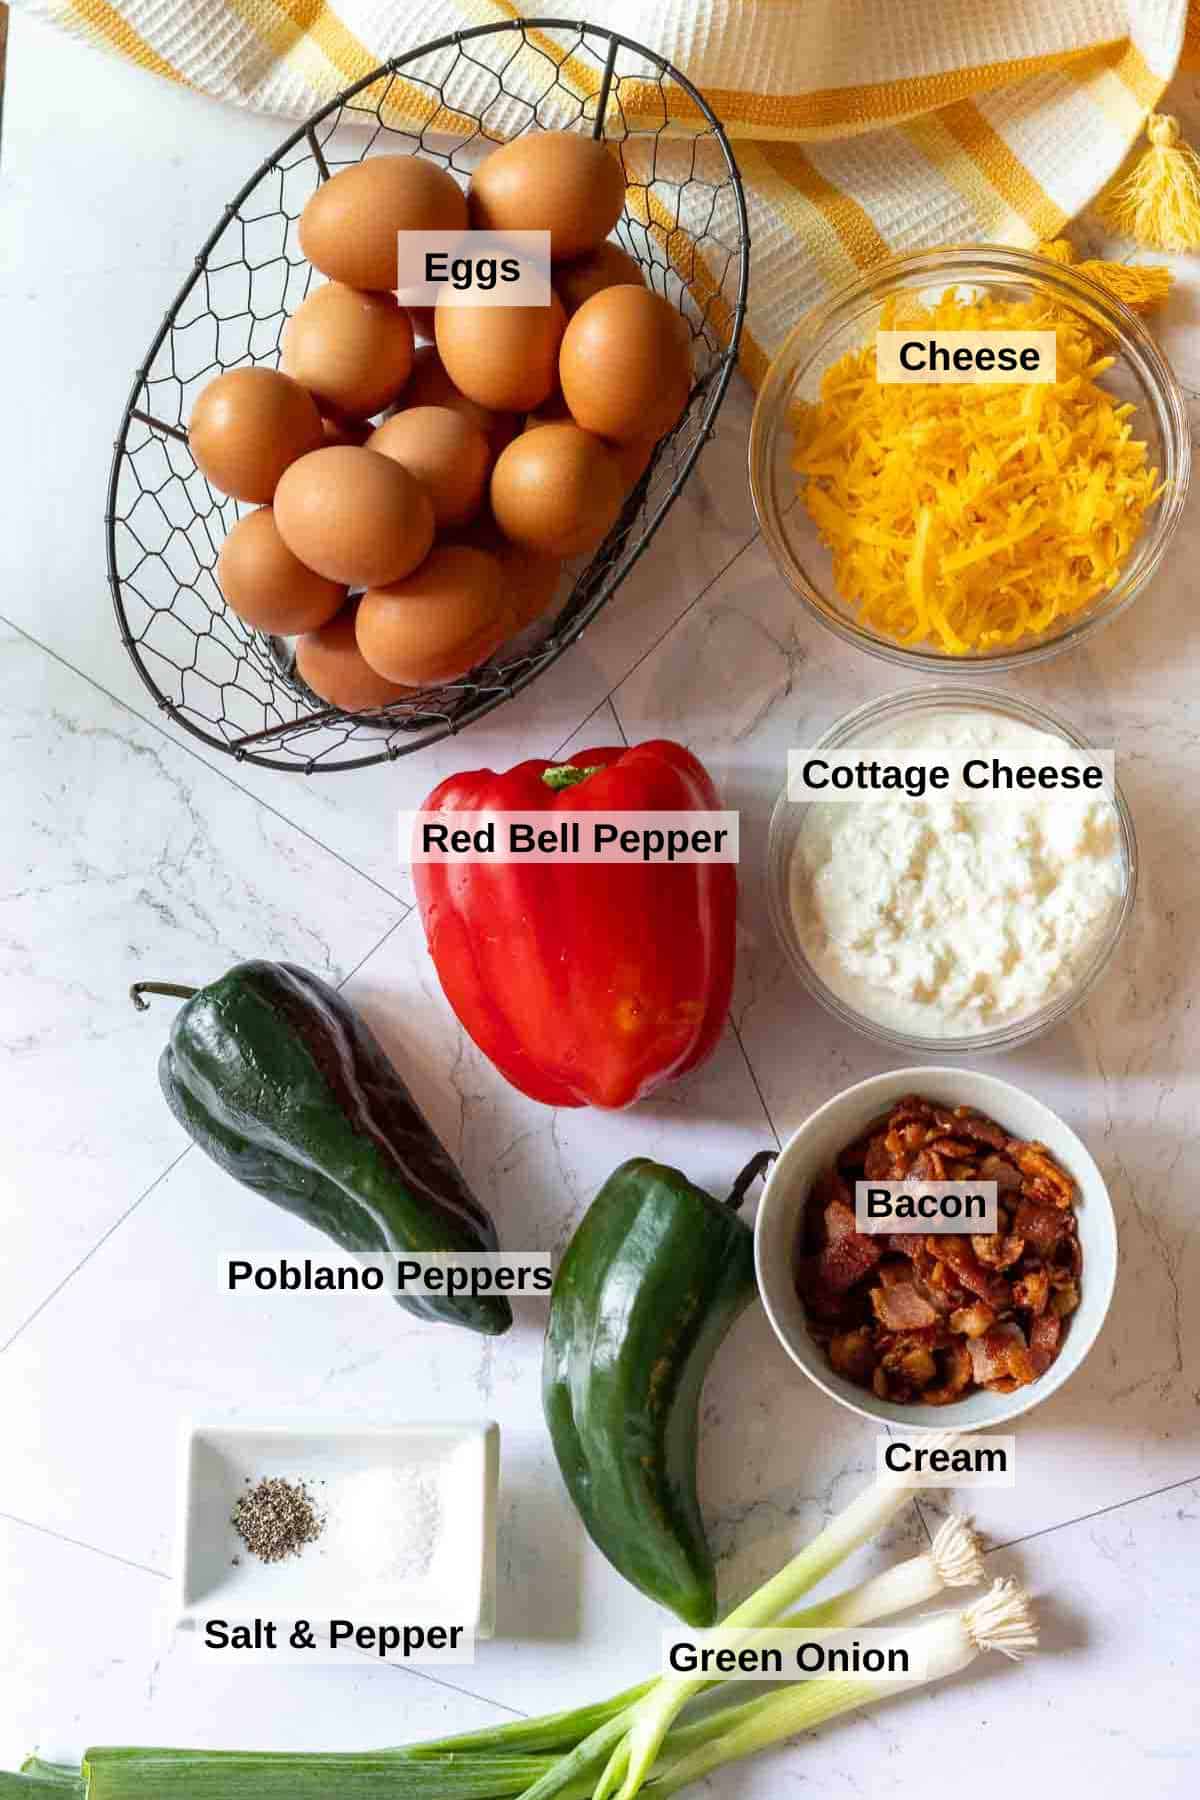
    Ingredients to make Cottage Cheese Egg Bites with Poblano Pepeprs
    • Eggs: You can have egg bites without them.
    • Grated Cheese: I like to use cheddar for these egg bites, but any good melting cheese will work. Try Monterey Jack, Pepper Jack, or even Muenster cheese.
    • Cottage Cheese: For ultimate creamy texture use full fat please. However, reduced fat will work here.
    • Red Bell Pepper
    • Poblano Peppers: Poblano peppers can be a bit unreliable in the heat arena, however they are consistently milder than most chile peppers adding a “just right spicy” note.
    • Bacon Bits
    • Onion: I like to use fine sliced green onion, but you can also use chopped sweet or yellow onion. Red onion will be too strong and over power the overall flavor.

    Pro Tip: Purchase good quality cheese and grate it yourself. Pre-grated cheese in bags includes additives to keep it from clumping, which will also compromise the melting factor. Grating cheese from a block of cheese will result in a creamier and more consistent melting experience. Plus, it’s less expensive.

    Variations

    Egg bites with cottage cheese are incredibly versatile. The sky is the limit for flavor combinations. As long as you don’t over-fill the cups with too many ingredients. Here are some ingredients flavor options.

    Chorizo cheese and jalapeno cottage cheese egg bites.

    One of my favorite Cottage Cheese Egg Bite variations, and to keep the Southwestern flavor profile, try this combo (pictured above) and using the recipe below: ¼ pound bulk chorizo cooked and crumbled, red bell pepper, 1 jalapeno pepper (seeds and veins removed), ½ sweet onion, chopped, and white cheddar cheese.

    More Variations:

    • Cheese: Use any shredded or crumbled melting cheese in place of cheddar. Muenster cheese, Monterey Jack Cheese, Pepper Jack Cheese and even Colby cheese are all good options here.
    • Use Canadian Bacon, chopped ham, Italian sausage or cooked breakfast sausage in place of the bacon bits.
    • Go Italian with cottage cheese egg bites: I’ve made these with Chicken Italian Sausage links, cooked and chopped. Omit the poblano pepper and use only bell peppers or roasted red bell pepper. With a bit of provolone or Parmesan, a small amount of Italian seasoning, they were delicious.
    • Soft Vegetables: Roasted red bell pepper (chopped), chopped spinach, chopped cooked mushrooms, sauteed chopped zucchini are all good options.
    • Vegetarian – These egg bites are easily turned into vegetarian egg bites by omitting the meat.
    • Seasonings: Have fun with seasoning. To kick up the heat, add some pure New Mexico Chile Powder. Onion powder and garlic powder will make them more savory. And I always add some hot sauce.

    How To Make Egg Bites With Cottage Cheese

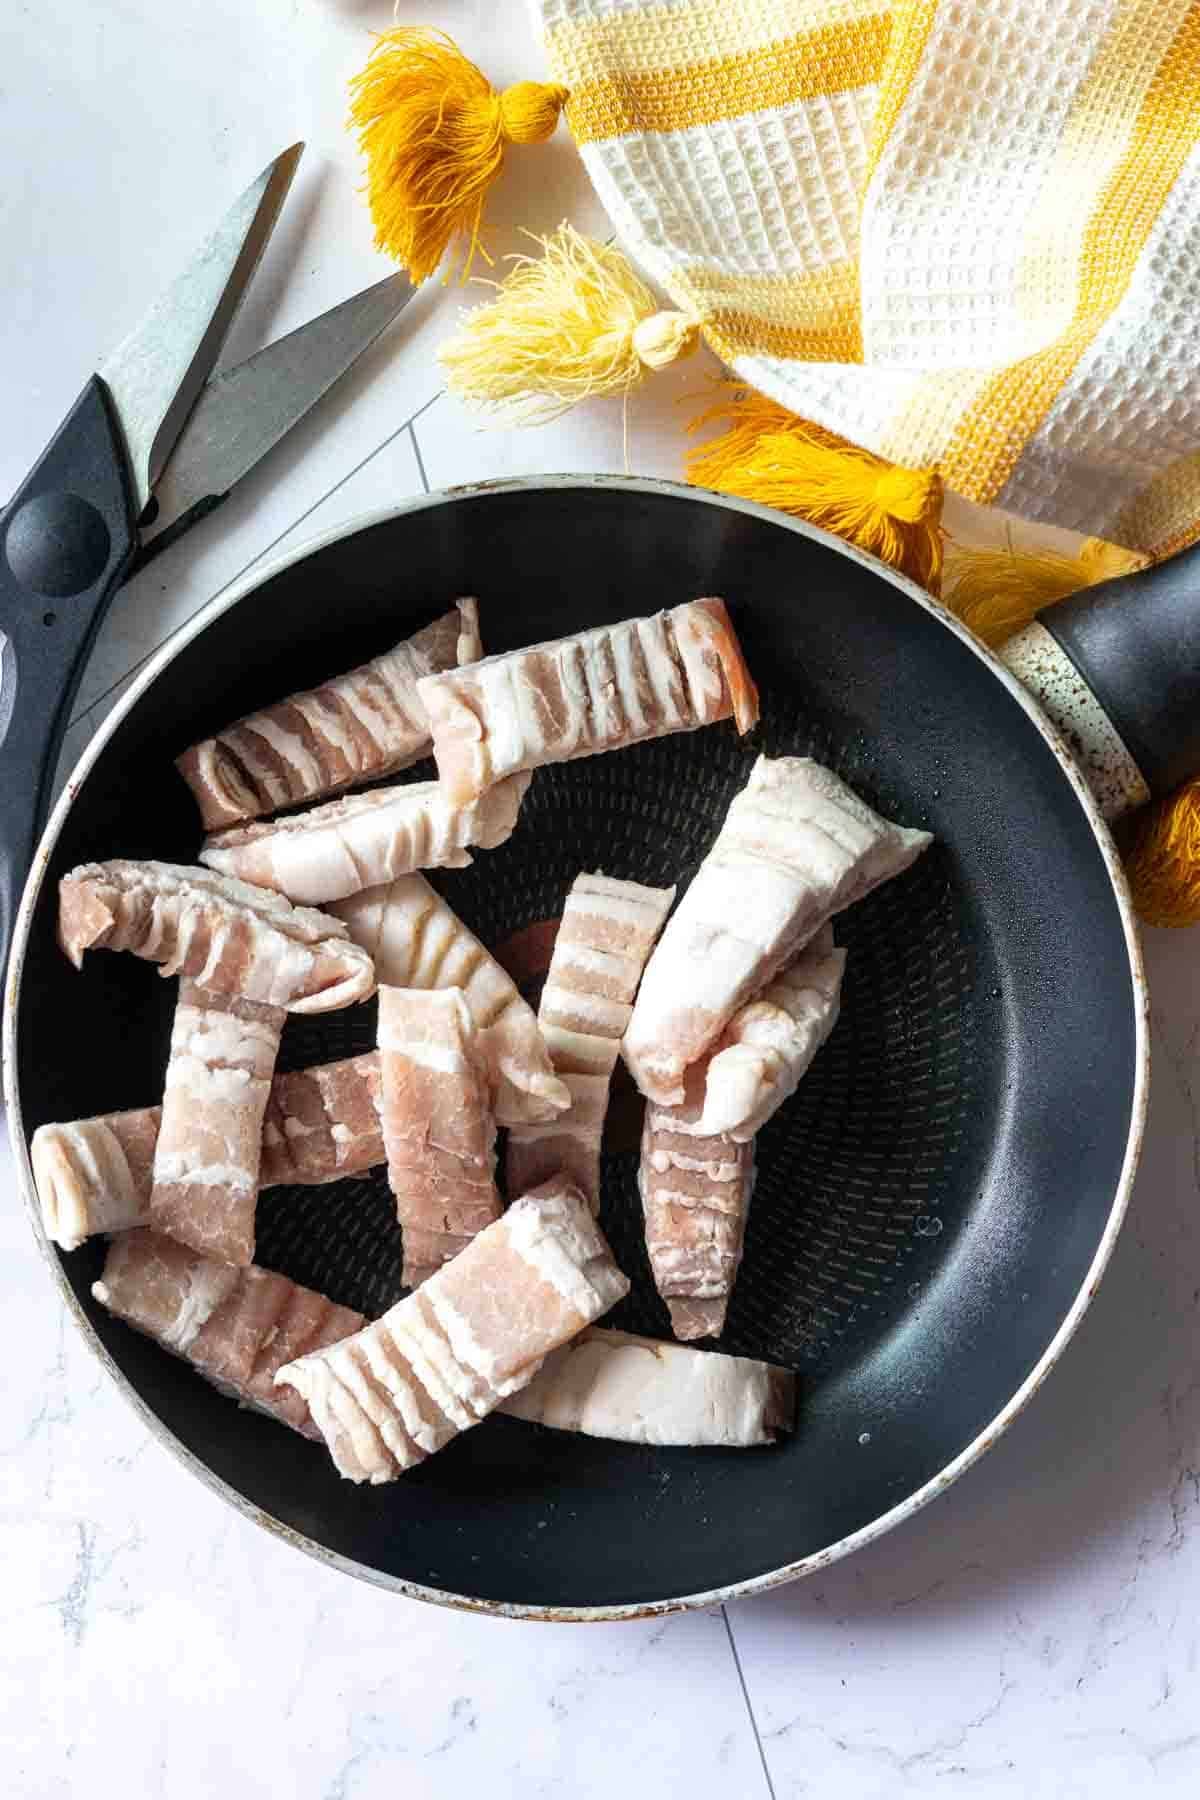
    Cutting raw bacon into pieces to fry and make cottage cheese egg bites.
    1. Step 1: Cut the bacon: Use kitchen shears to cut bacon into lardons.
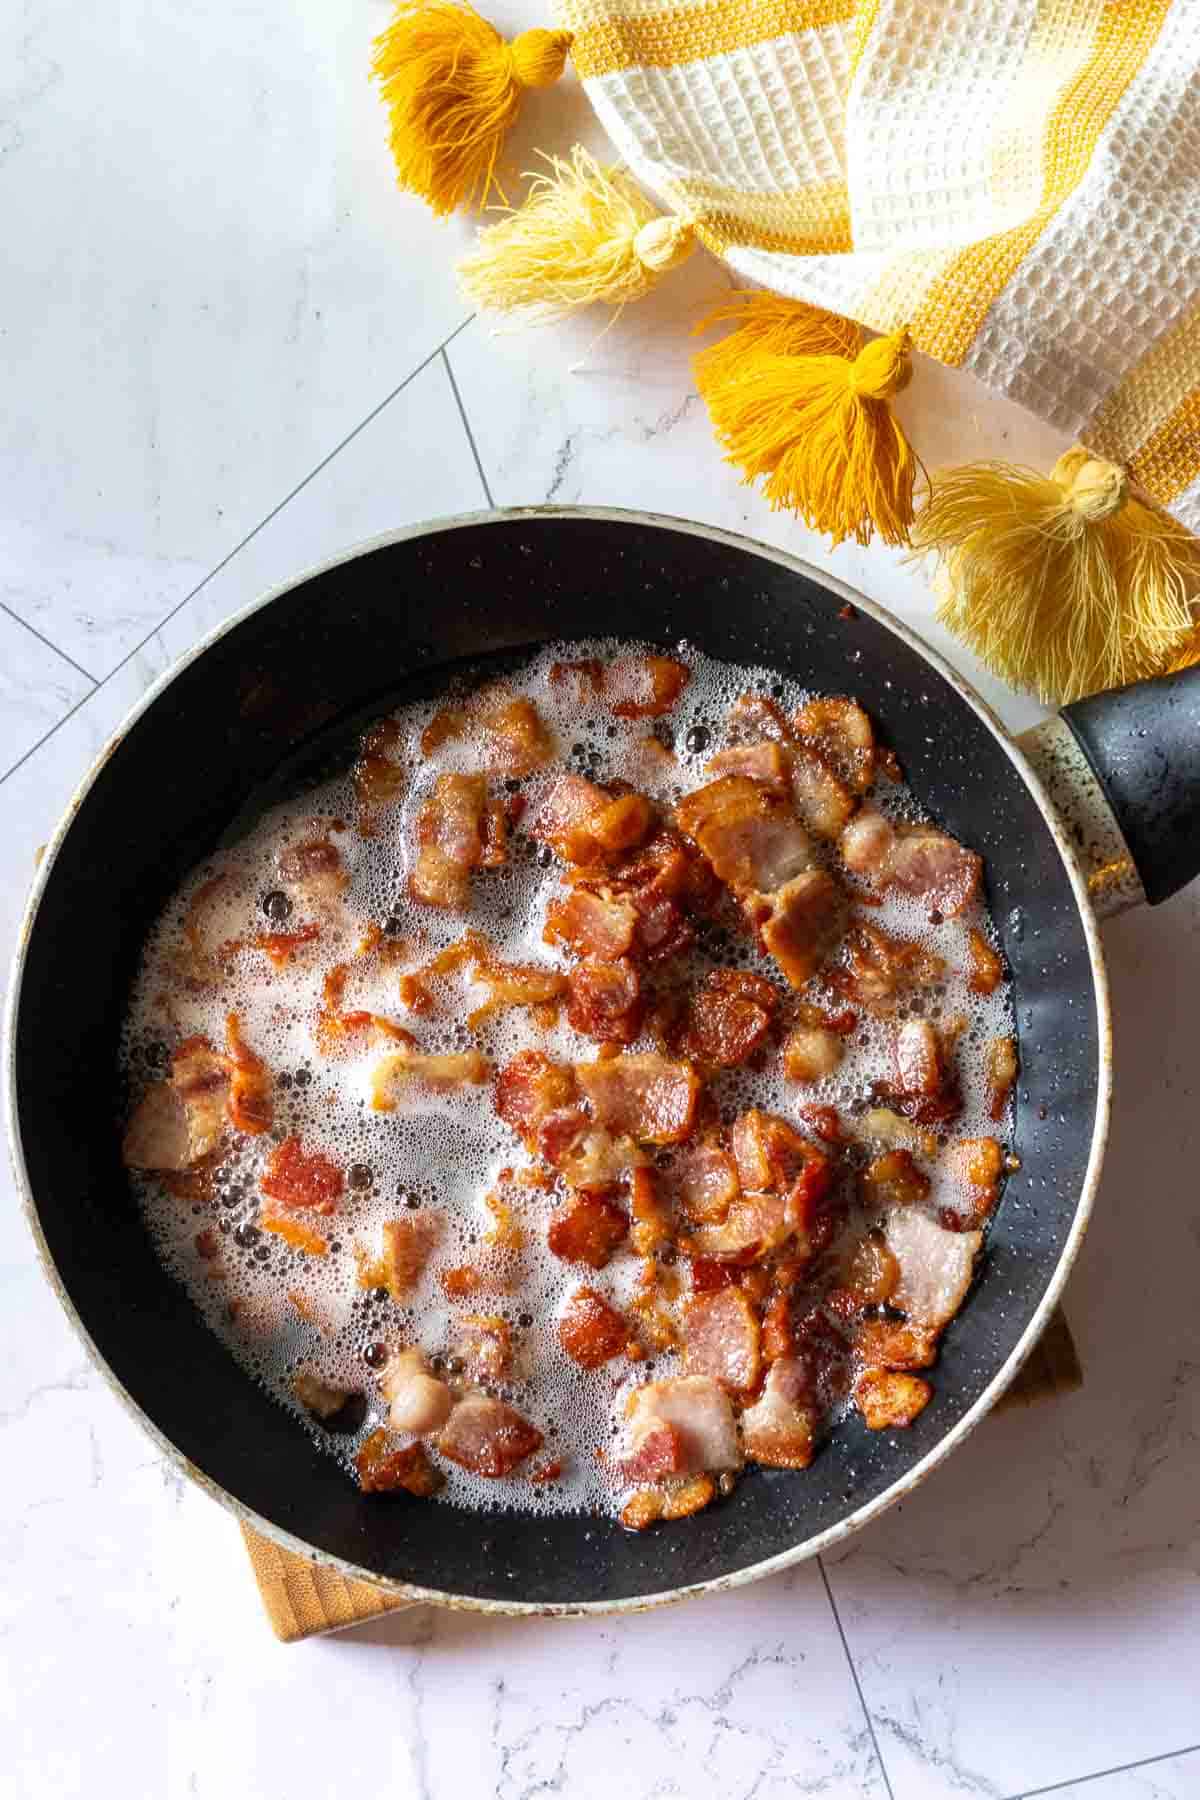
    Cooking bacon bits in a fry pan to make cottage cheese egg bites.
    1. Step 2: Cook The Bacon: In a small fry non-stick pan, cook the bacon until crispy. Drain the grease.
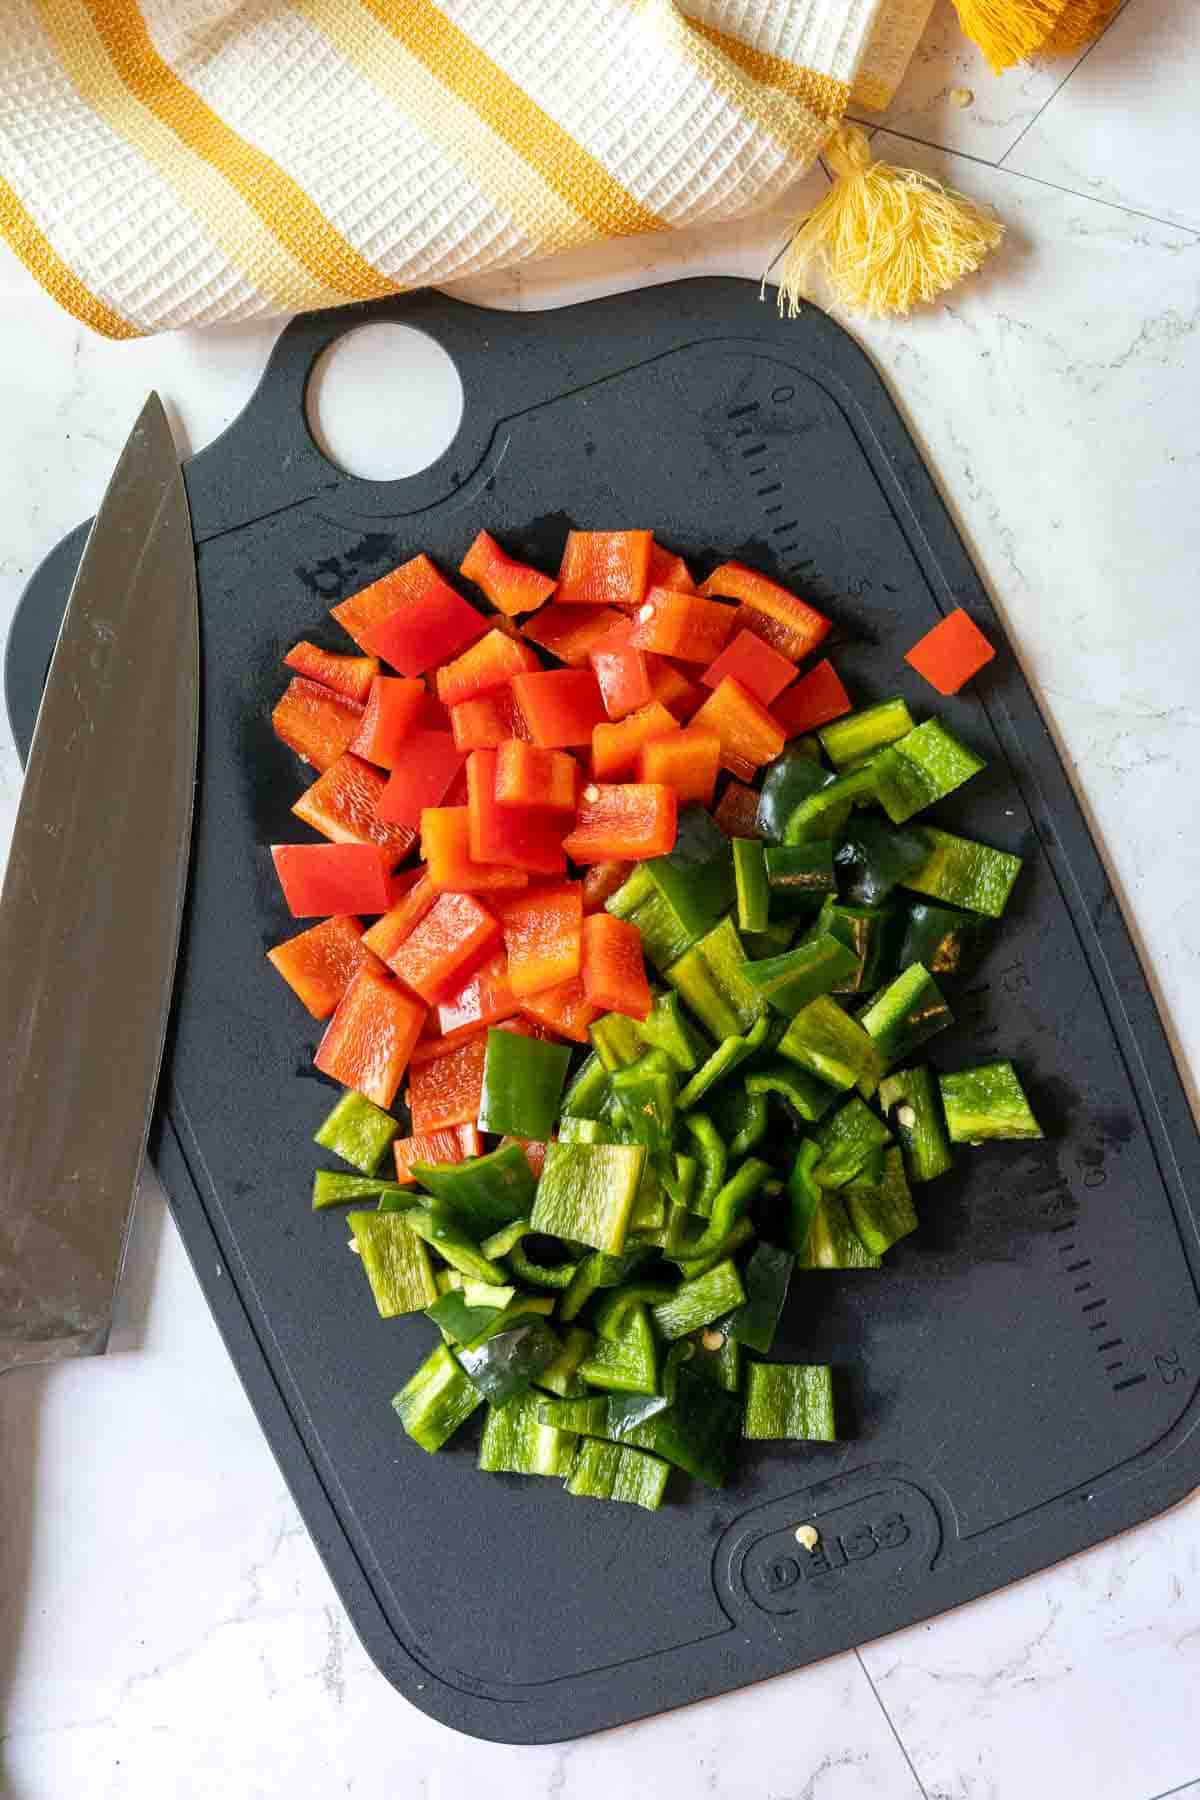
    Chopped peppers to make Cottage Cheese Egg Bites.
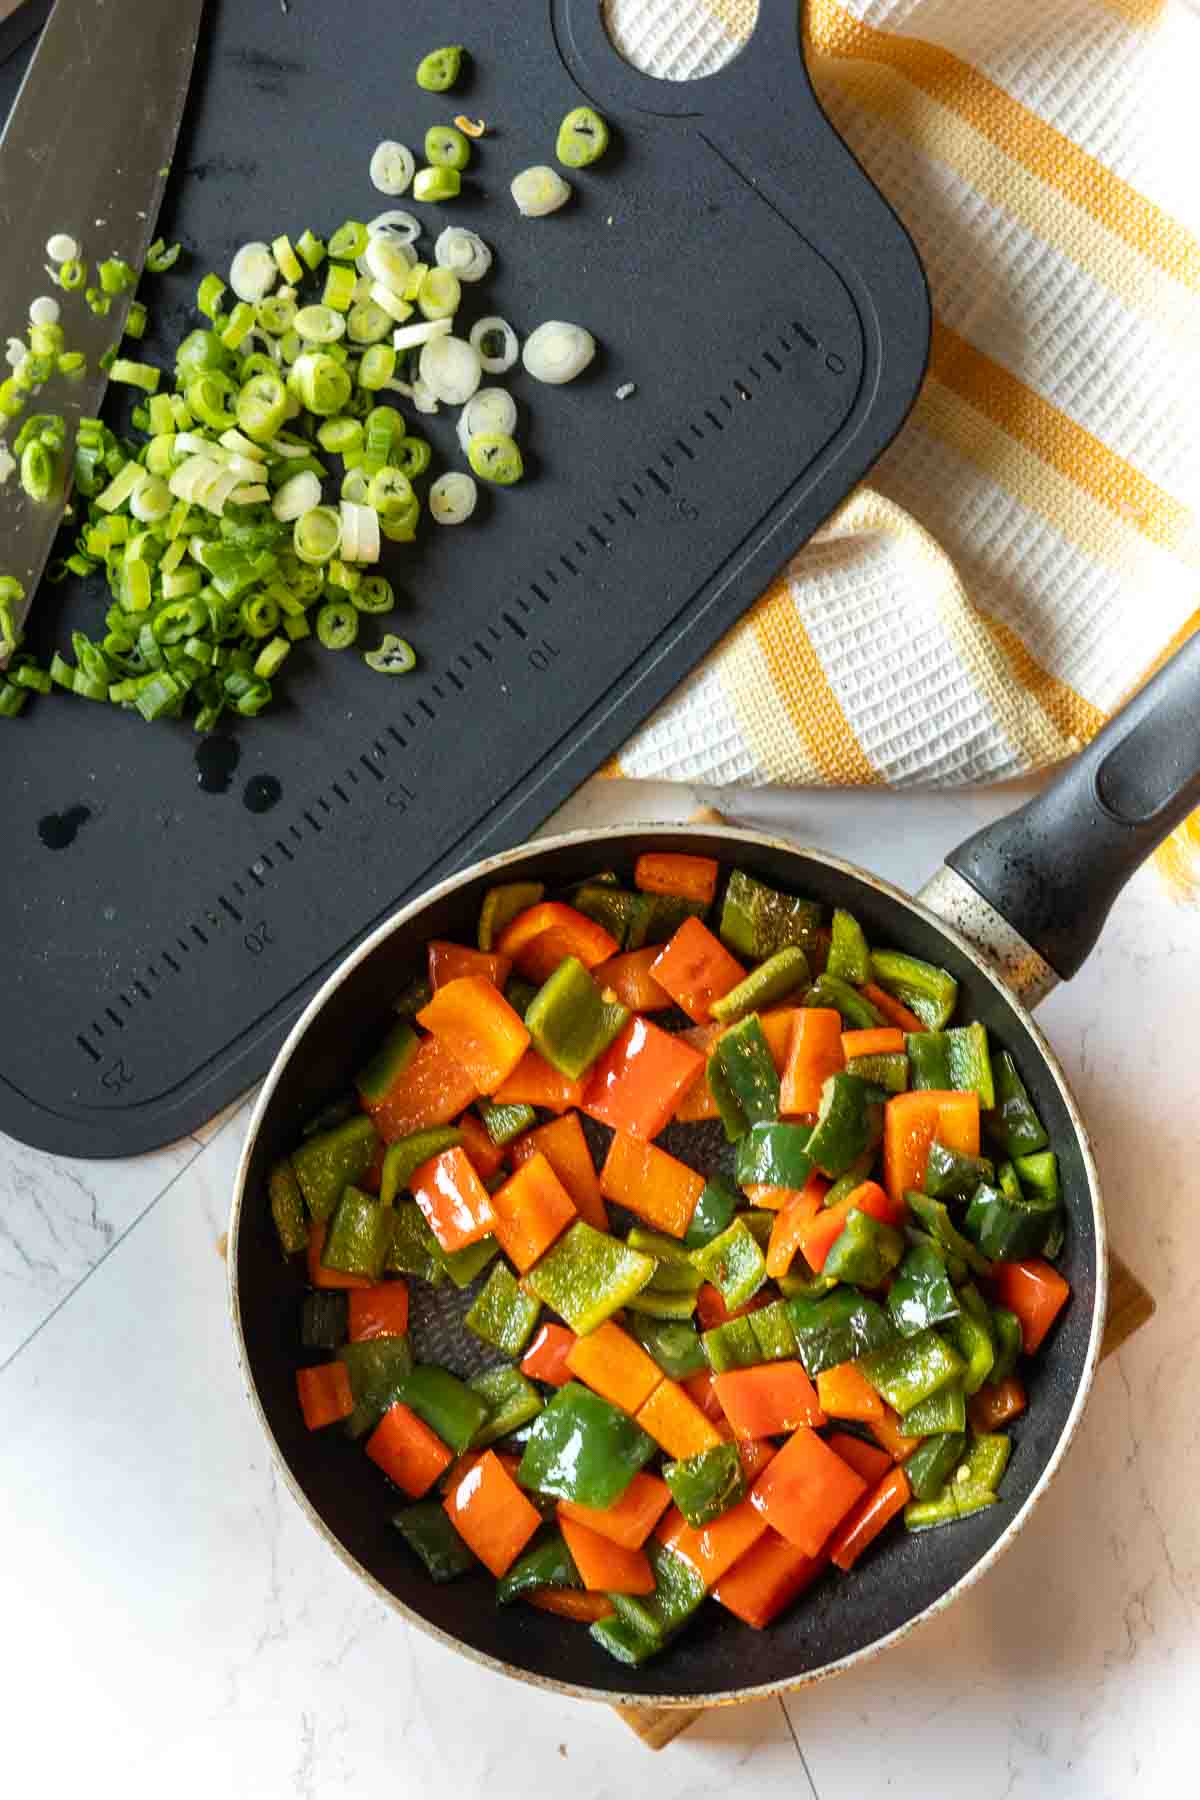
    1. Step 3: Prepare vegetables: Cut red bell pepper and poblano pepper into small squares.
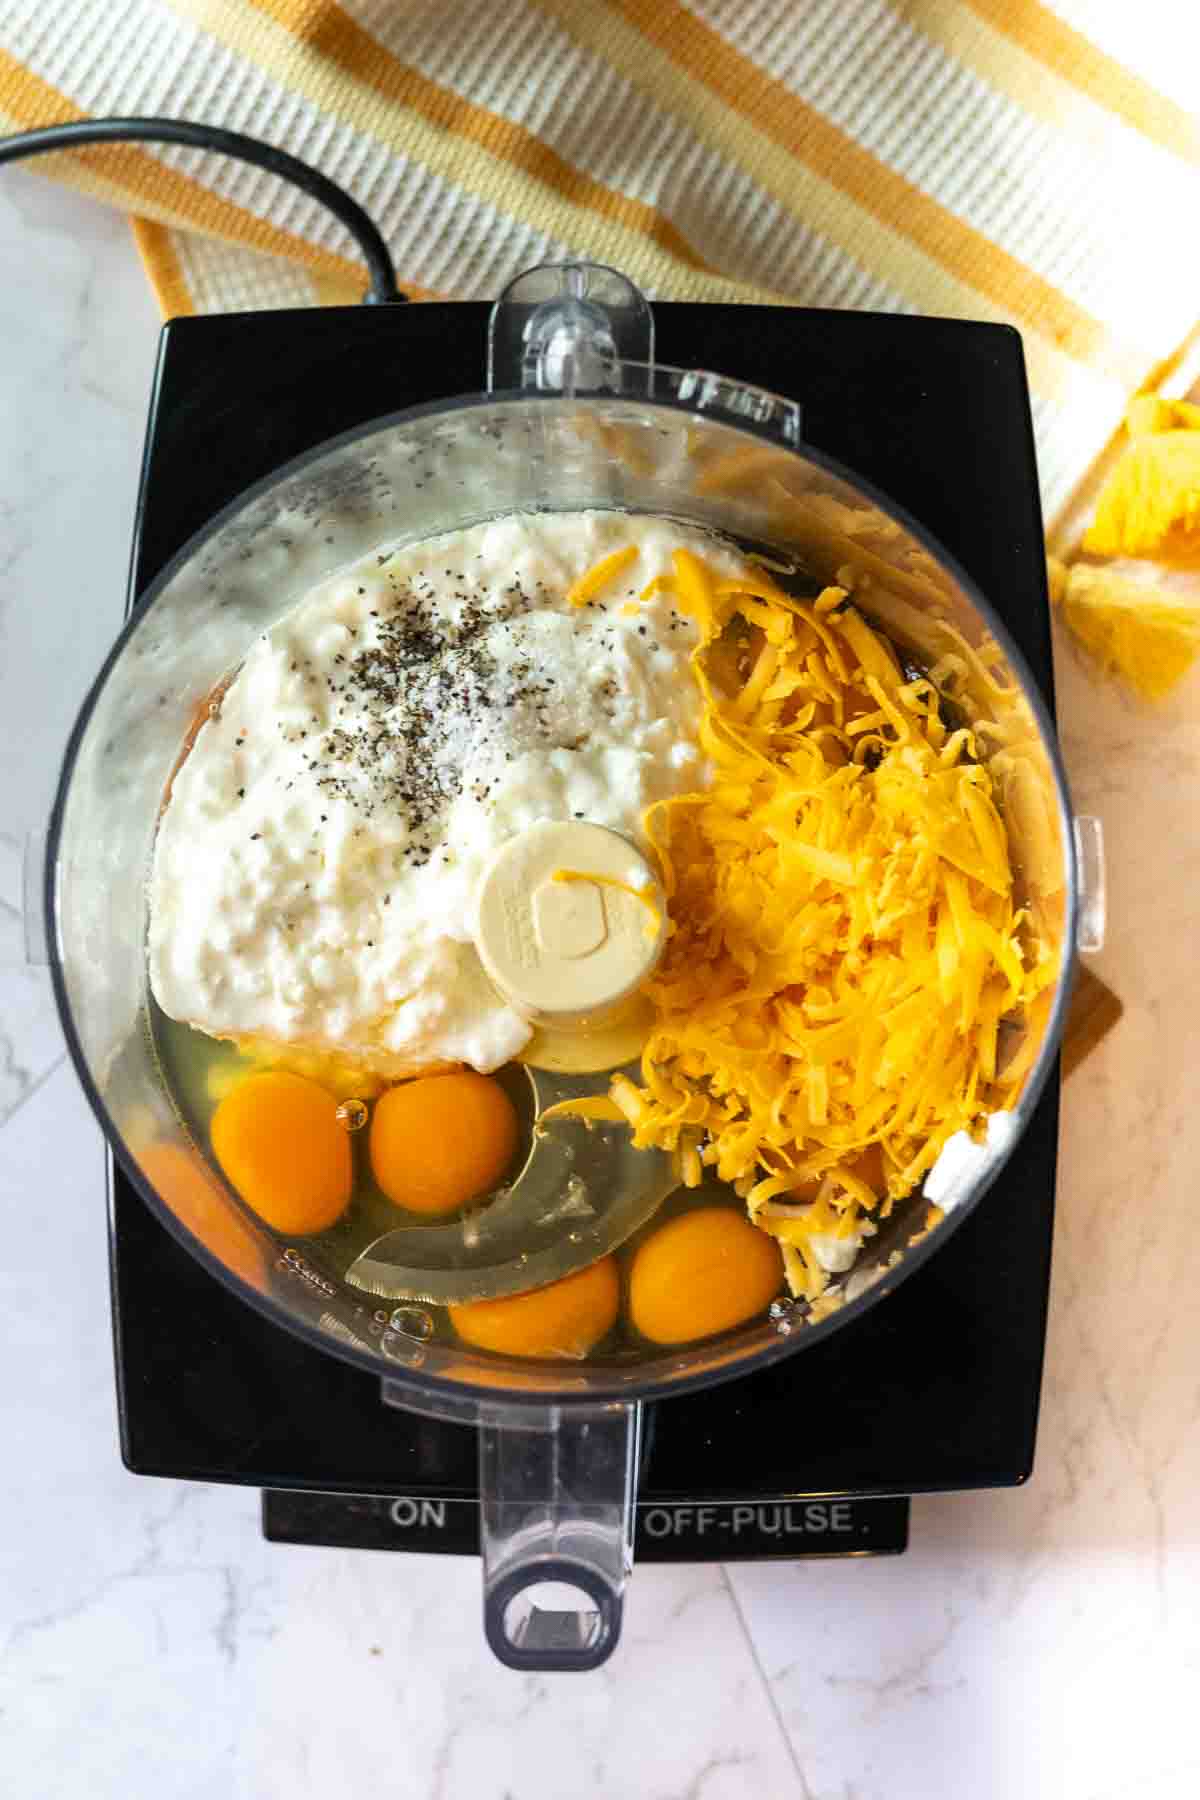
    Custard ingredients in a food processor to make cottage cheese egg bites.
    1. Step 4: Make The Custard: Place eggs, cottage cheese, shredded cheese and salt and pepper into a food processor.
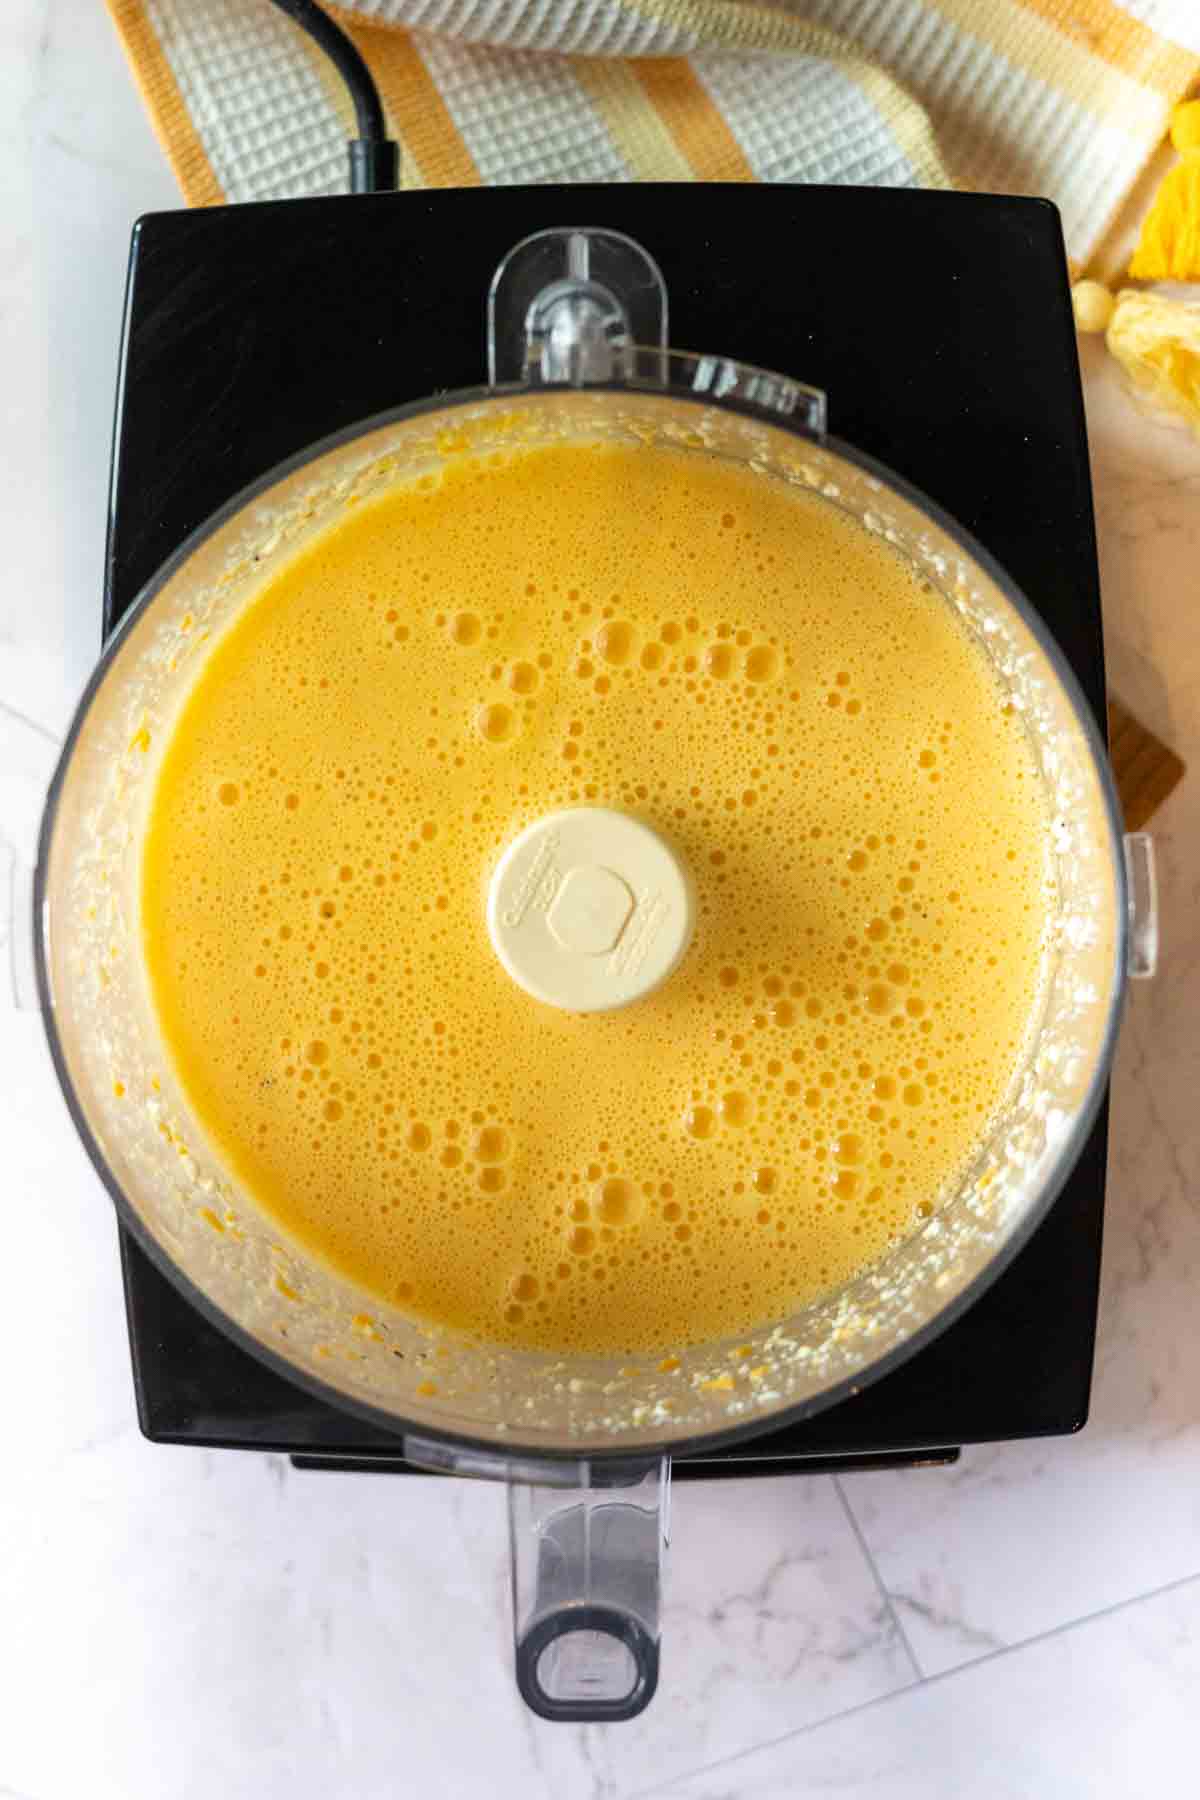
    Cottage cheese egg bites custard.
    1. Step 5: Use the pulse feature to blend the custard egg mixture. Don’t over mix. Mix just until bubbles start to appear.
    Cooked peppers in a fry pan to make cottage cheese egg bites.
    1. Step 6: Sautee the bell pepper and poblano pepper until they are soft and tender. This will take about 7 minutes.
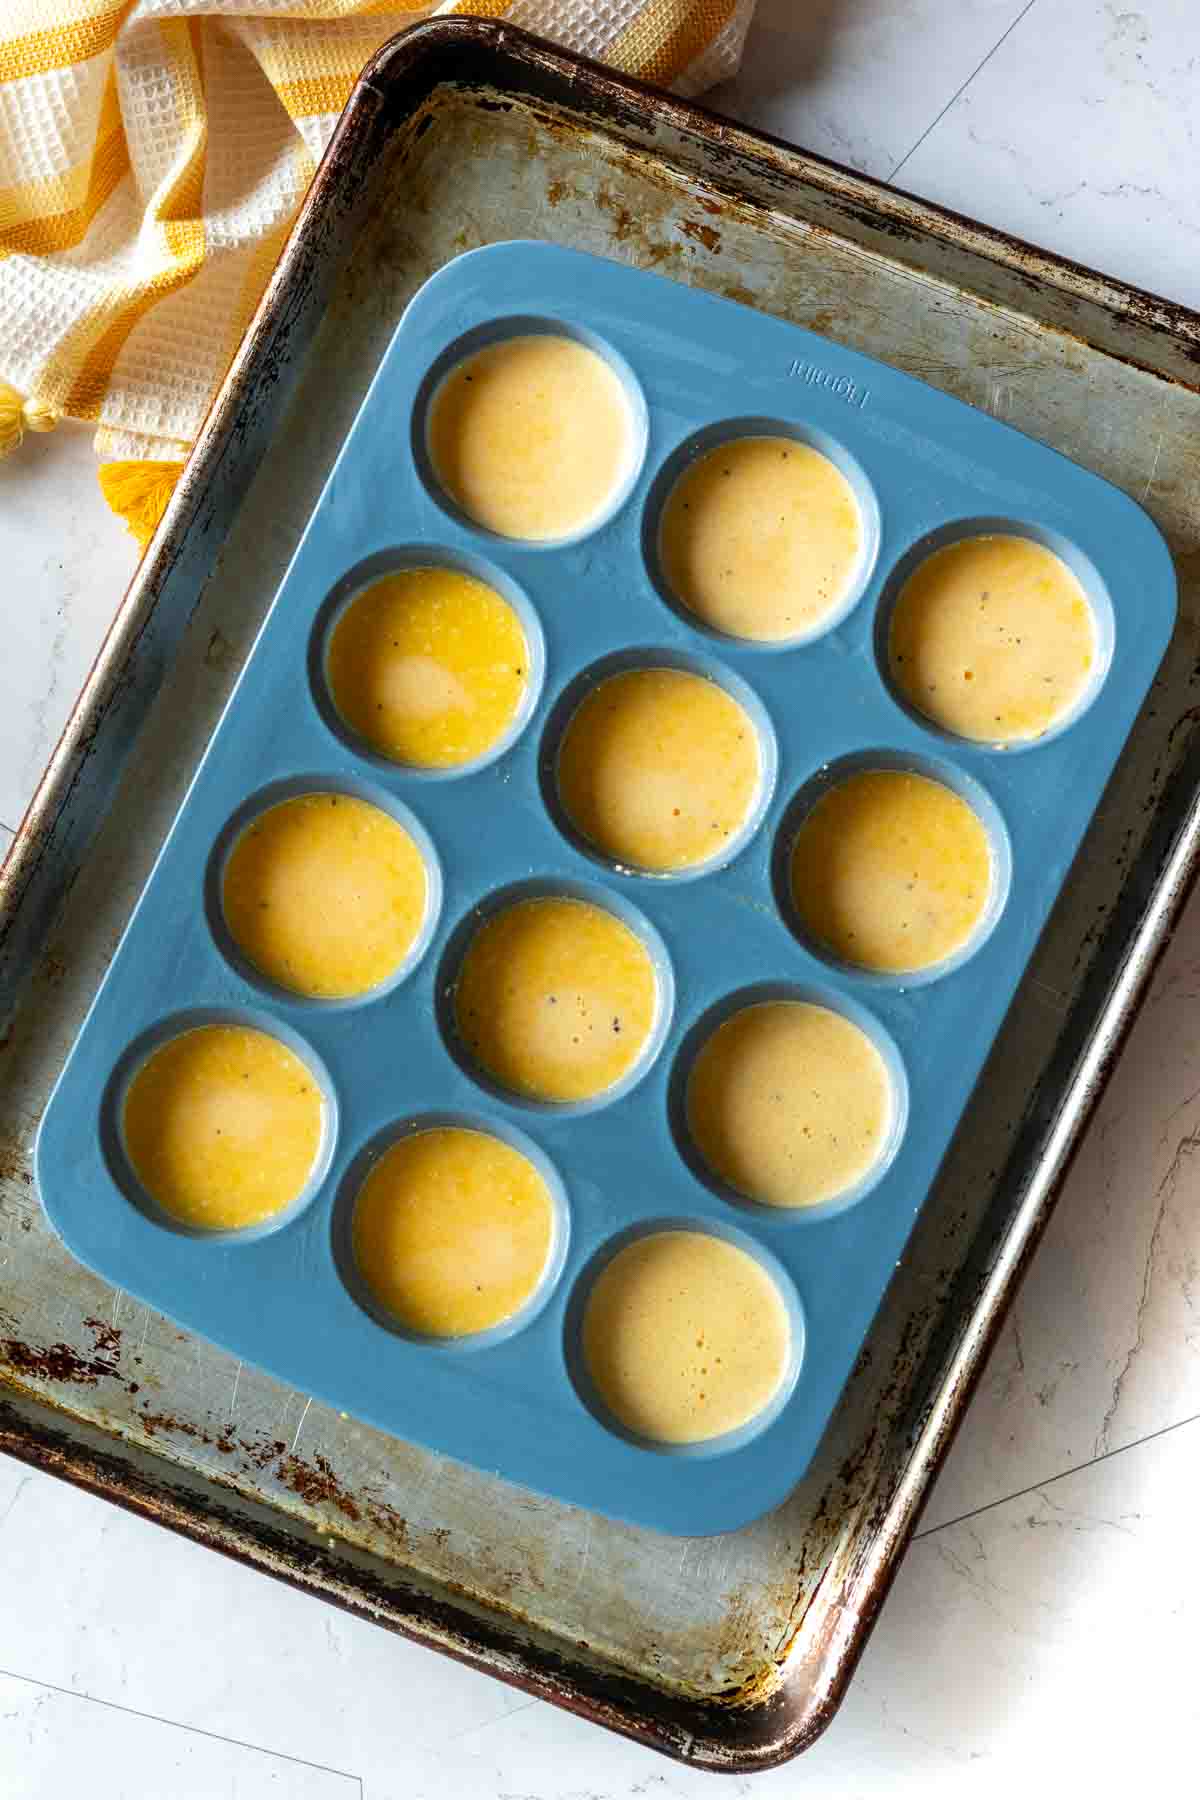
    Filling a muffin tin with egg and cheese batter to make Cottage Cheese Egg Bites.
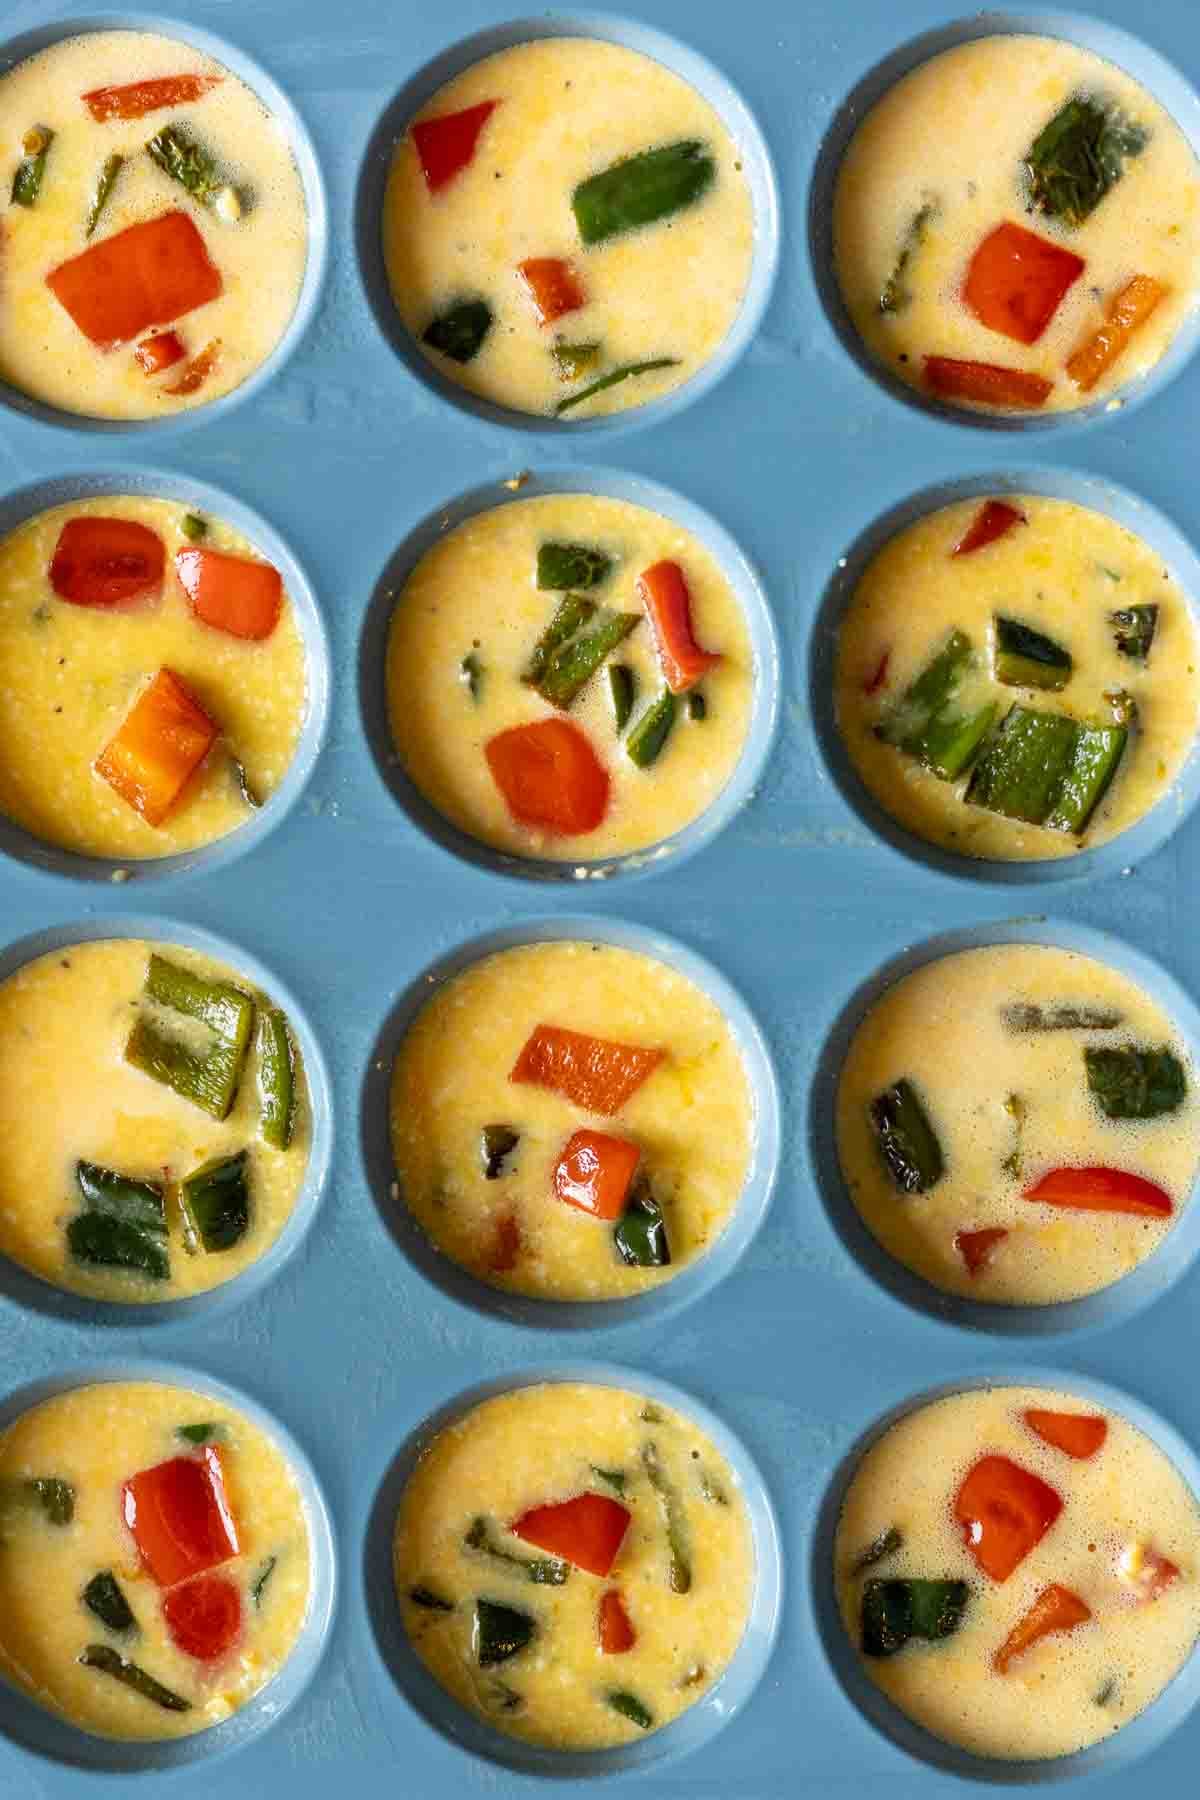
    Adding peppers to cottage cheese egg bites in a muffin pan.
    1. Step 7: Build those egg bites: Place the muffin tin on a sheet pan. Fill each muffin ⅔ of the way full with the custard batter.
    1. Step 8: Start adding filling ingredients: Sprinkle the cooked peppers evenly on top of the egg bite cups.
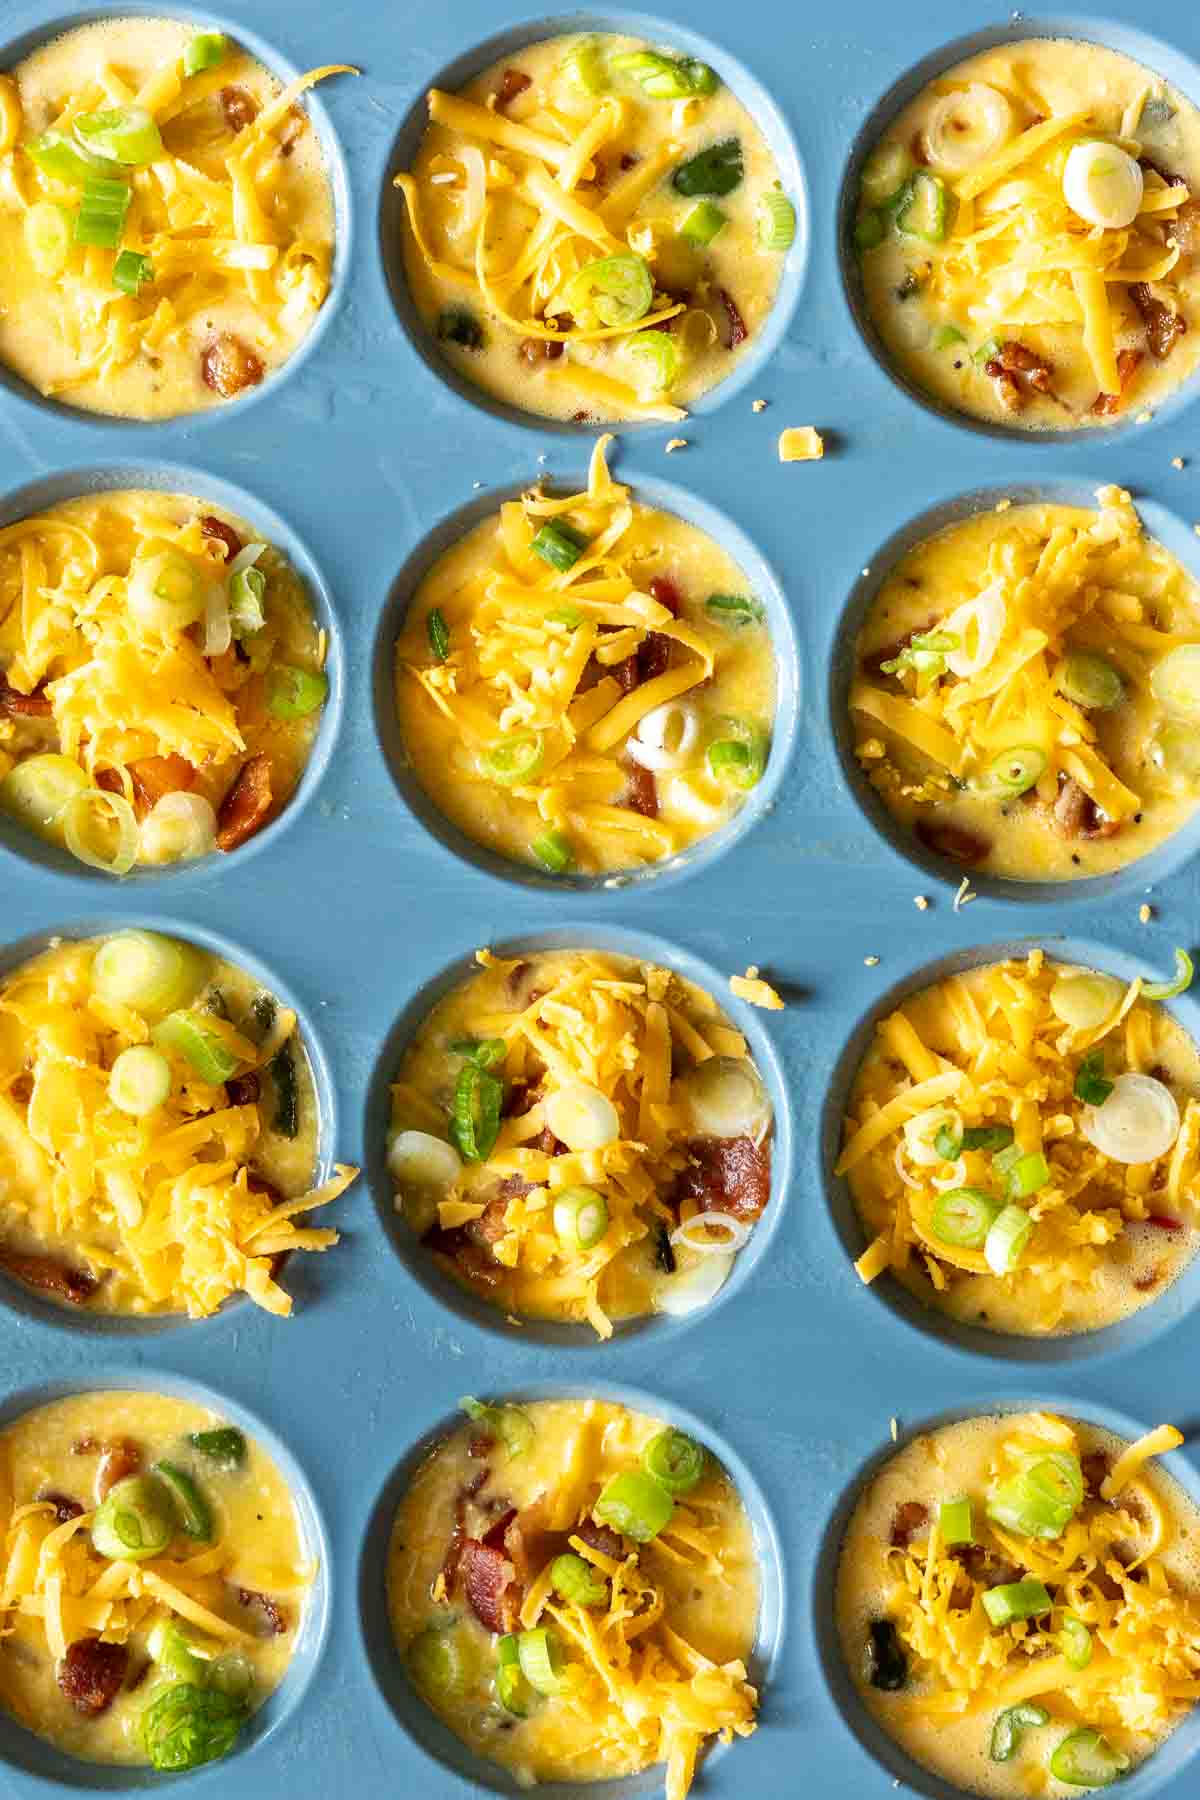
    Adding grated cheese to the top of cottage cheese egg bites before baking.
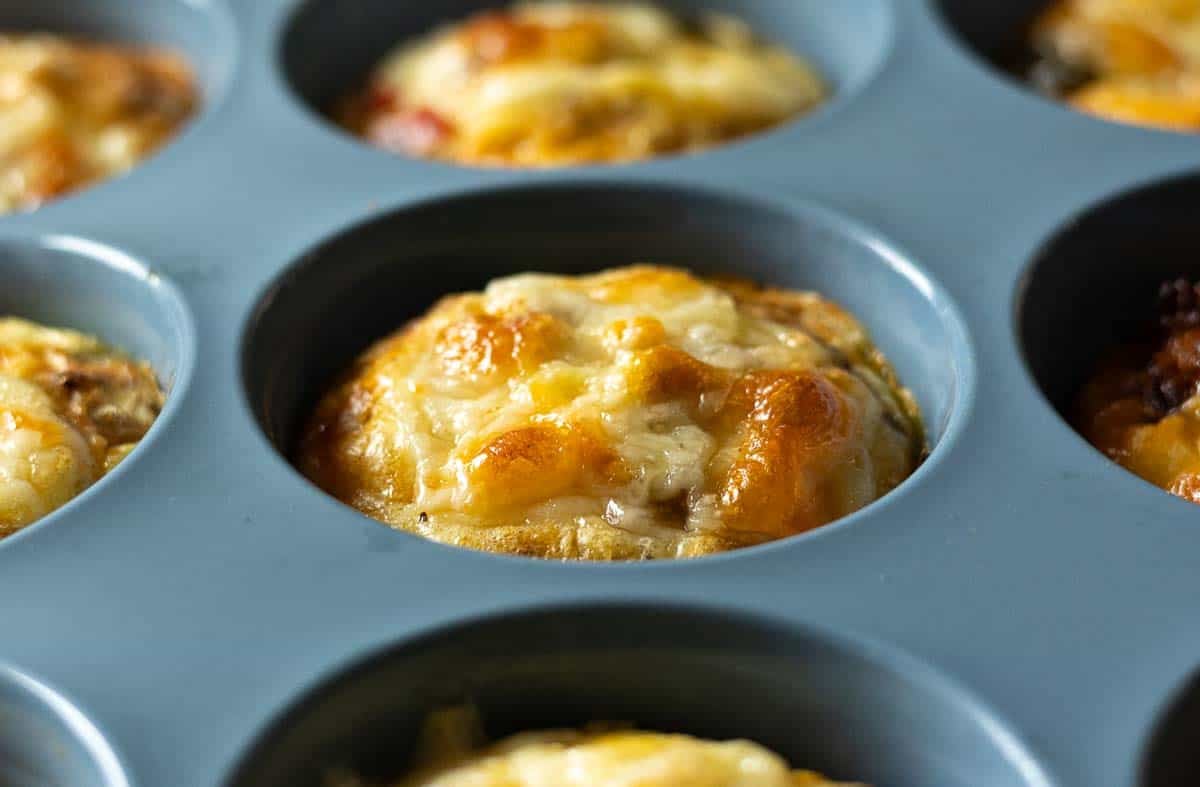
    Baked Cottage Cheese Egg Bites in a silicone muffin tin.
    1. Step 9: Finish the egg bites: Continue the toppings by adding chopped cooked bacon, chopped onion and grated cheese. Again, evenly dividing these ingredients to each muffin cup. Use a knife or spoon to push the ingredients down into the custard.
    1. Step 10: Bake: Bake the Cottage Cheese Egg Bites in a 325 degree oven for 30 – 35 minutes, or until custard is set.

    Use A Silicone Muffin Pan

    I highly recommend purchasing a silicone muffin pan. I’ve used a metal muffin tin to make egg bites, but it can be a chore to remove the egg cups once cooked. Even with a pre-prep of non-stick spray and a sharp knife around the edges, they can still be tedious remove.

    A silicone muffin pan is a life saver and works like a breeze to remove the egg bites once they’re cooked. Just pushing up on the bottom of each cup pushes them right out. Be sure to buy a structured silicone muffin pan that allows you to handle it in a stable manner.

    Tips For Success

    • Highly recommended: Once the muffin tin is filled with the egg bite mixture, pour three cups of hot water around the muffin tin. This water bath will keep those egg bites moist and fluffy. If you skip this step, the Cottage Cheese Egg Bites will be firmer.
    • Do not try to make these egg bites without cooking the peppers. Both the texture and flavor will be compromised. The poblano peppers will taste grassy and somewhat bitter if not cooked, and the texture will not be pleasant with the creamy eggs. Cook both peppers until they’re very soft.
    • Use a non-stick pan to fry the bacon. Once you drain the grease, there will be a light layer of grease left in the pan. Perfect for cooking the bell peppers and adding some bacon flavor as they cook.
    • Don’t oven blend the egg, cheese and cottage cheese mix. Too much air could cause the egg bites to collapse as they bake.

    How To Serve It

    The beauty of these cottage cheese egg bites is the grab and go breakfast perk. If you’re looking for turning egg bites into more of a meal, serve them with a simple tossed salad.

    Make a heartier option by serving them with Cast Iron Potatoes, or some steamed asparagus drizzled with this easy Balsamic Glaze Recipe.

    Serving egg cups for brunch? Serve them with this incredibly popular recipe for Cheesy Potatoes With Cornflakes. A bowl of fresh fruit makes a complete mail.

    Want to make egg bites prettier? Top with fine chopped chives before serving. Or even some fine chopped cilantro.

    FAQ

    How Do I Know If Egg Bites Are Cooked Through?

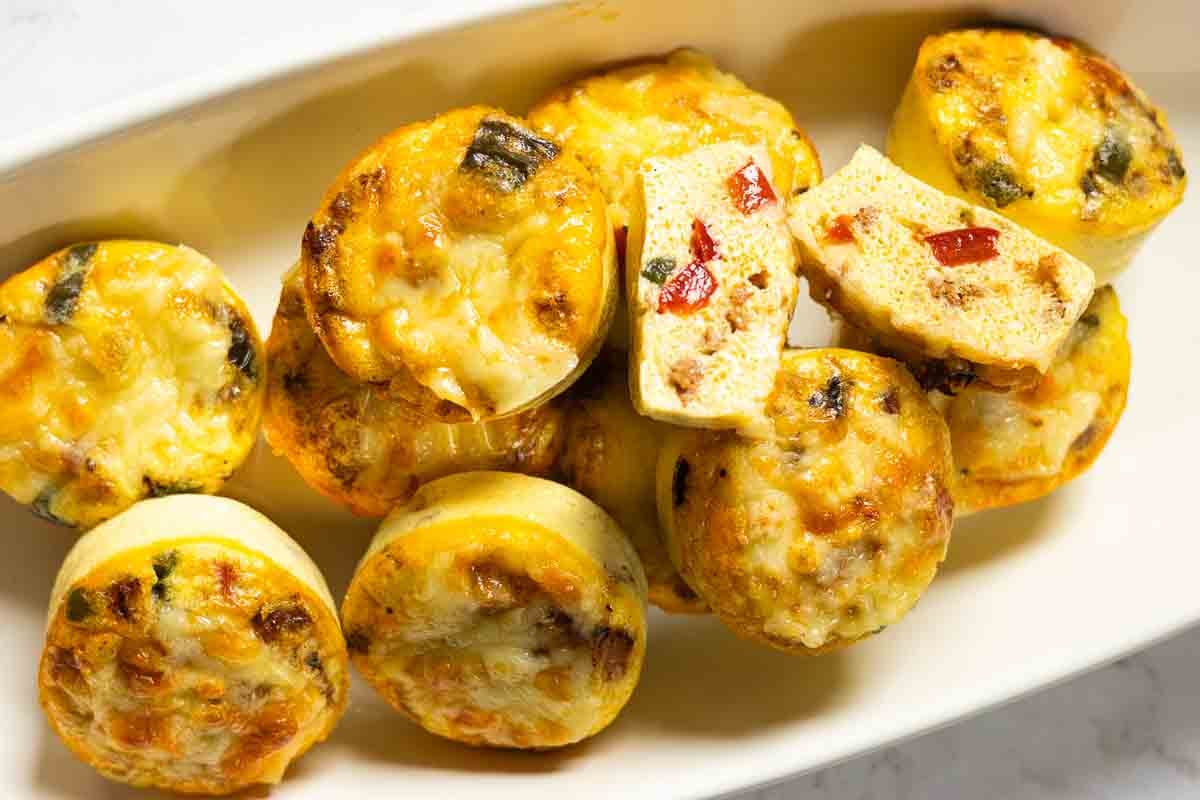
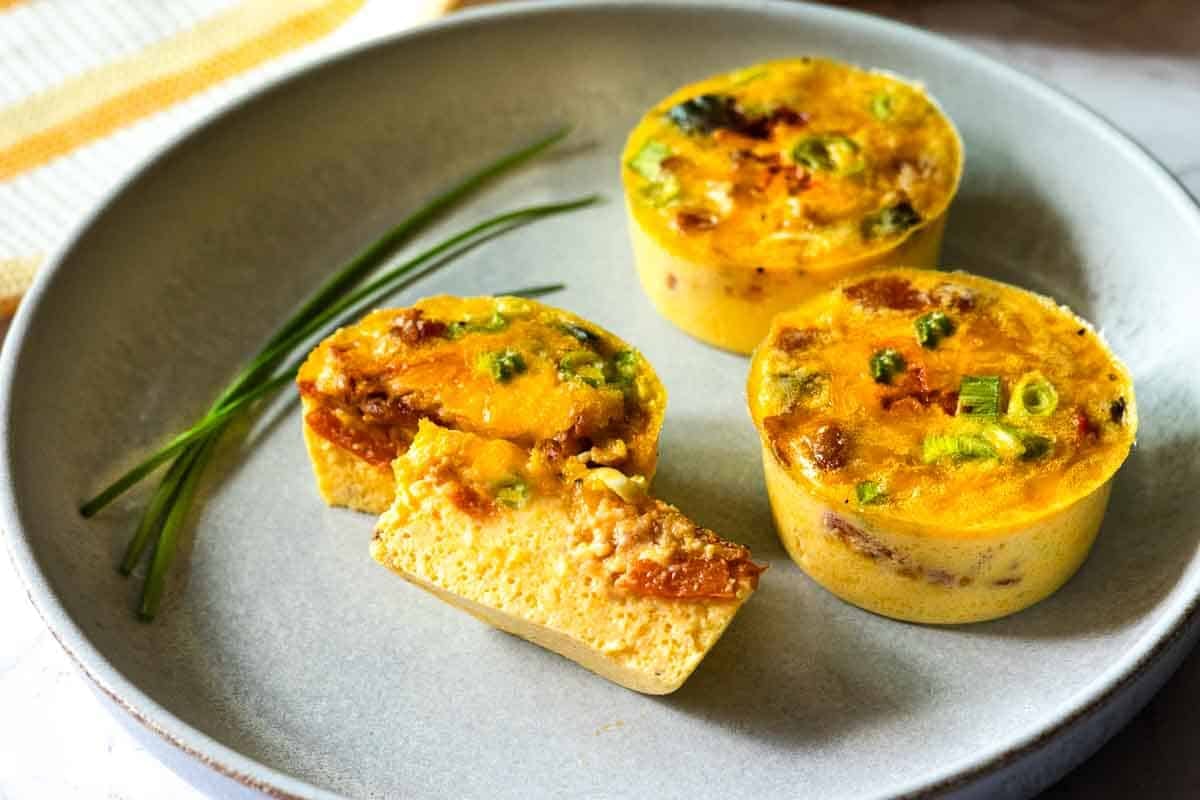
    They’ll puff up a bit, pull away from the edges and have a very small amount of golden spots on the tops. You can use a cake tester, or sharp knife to insert into the center, if it comes out clean, the egg bites are cooked through.A picture of how to tell if cottage cheese eggs bites are done.

    Can You Make These Egg Bites In An Instant Pot?

    To make Starbucks sous vide style egg bites you’ll obviously need an Instant Pot and a silicone muffin pan made especially for the Instant Pot. The Instant Pot silicone pan makes much smaller egg bites, so you’ll make several batches with this large recipe.

    Can You Use A Mini Muffin Pan?

    You can, but I wouldn’t. I prefer the larger muffin cups, as they’re easier to fill with ingredients. And the larger size makes a heartier breakfast option.

    Can You Freeze Cottage Cheese Egg Bites?

    You can, but you’ll be disappointed with the watery texture once thawed. I won’t try freezing them again. But if you do, I would suggest wrapping them individually in plastic wrap. Defrost in the refrigerator overnight for a quick microwave breakfast.

    Storage and Reheating

    The egg cups will keep in the refrigerator for up to 5 days. Just cover with plastic wrap to keep them moist.

    To reheat them, I like using the microwave. Just place a single egg bite on a microwave safe plate and reheat for 30 seconds. Instant breakfast!

    Three Southwest Cottage Cheese Egg Bites on a plate.

    Explore More Southwestern Breakfast Egg Recipes

    Love eggs for breakfast? Don’t forget to check out some of my popular breakfast recipes.

    • Mexican Divorced Eggs served on a plate with corn chips.
      Huevos Divorciados (Divorced Eggs)
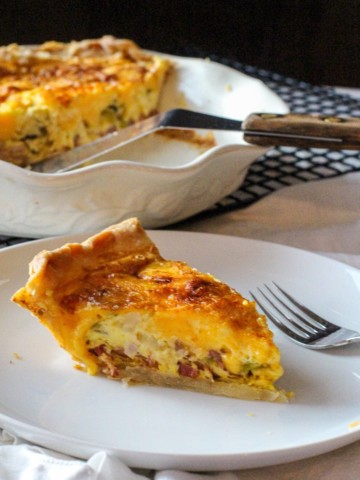
    • A slice of hatch green chile bacon quiche with a deep dish pie pan with quiche and spatula
      Hatch Green Chile Quiche With Bacon
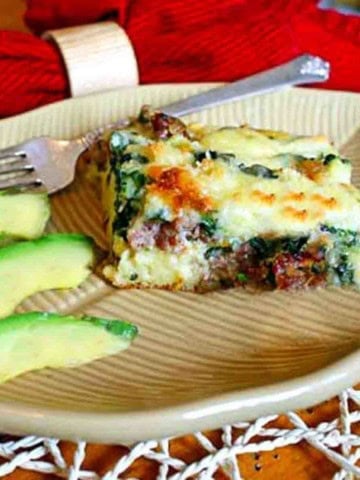
    • A slice of sausage biscuit bake with sliced avocados.
      Southwestern Breakfast Biscuit Casserole – Make Ahead
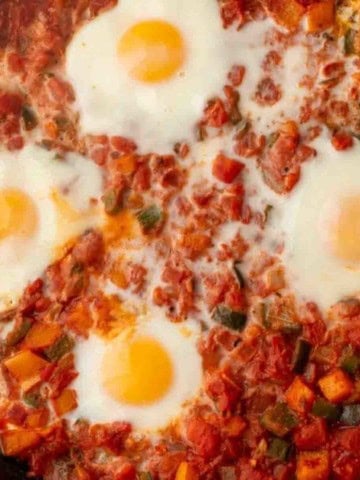
    • Rancheros sauce for making Huevos Rancheros.
      Baked Huevos Rancheros with Chunky Rancheros Sauce

    And don’t miss my category for Breakfast Recipes. You’ll find the most popular and well known Southwestern recipe for authentic New Mexico Huevos Rancheros With Red Chile Sauce.

    If you liked this recipe, please leave a star ⭐⭐⭐⭐⭐ rating in the recipe card below and leave a comment. I always appreciate your feedback and hearing how everything went.

    And, don’t forget to subscribe to my newsletter for more delicious recipes and cooking tips. Make it a delicious day … every day.

    Cottage cheese egg bites with poblano peppers.
    Print Recipe
    No ratings yet

    Southwest Egg Bites With Cottage Cheese

    These Egg Bites with Cottage Cheese are perfect for a meal prep breakfast to enjoy all week. Packed with Southwestern flavors, who can resist an egg filled cup rich and creamy in texture, cheesy, with bacon and "just right spicy" poblano peppers.
    Prep Time15 minutes mins
    Cook Time30 minutes mins
    Course: Breakfast Recipes
    Cuisine: Southwestern
    Servings: 12 egg bites
    Calories: 174kcal
    Author: Lea Ann Brown

    Equipment

    • Food Prosessor or blender

    Ingredients

    • 8 large Eggs
    • 1 Cup Cottage Cheese Full Fat
    • 1 ½ Cup Cheddar Cheese Grated
    • ½ teaspoon Kosher Salt
    • ¼ teaspoon Ground Black Pepper Or New Mexico Red Chile Powder (more spice)
    • 2 small Poblano Peppers veins and seeds removed, small chopped
    • 1 Red Bell Pepper veins and seeds removed, small chopped
    • 6 slices Bacon chopped and cooked
    • 3 Green onions Tops and touch green part removed. Thin sliced.
    • Dashes of hot sauce
    • fine chopped chives or cilantro for garnish

    Instructions

    • Preheat oven to 325 degrees.
    • Use kitchen shears to cut bacon into lardons. In a small fry non-stick pan, cook the bacon until crispy. Drain the grease but don't wipe out the pan.
    • Cut red bell pepper and poblano pepper into small squares.
    • Place eggs, cottage cheese, shredded cheese and salt and pepper into a food processor. Use the pulse feature to blend the custard egg mixture. Don't over mix. Mix just until bubbles start to appear.
    • Sautee the bell pepper and poblano pepper in the same non-stick pan you cooked the bacon. Cook until they are soft and tender. This will take about 7 minutes.
    • Place the muffin tin on a sheet pan. Fill each muffin ⅔ of the way full with the egg custard batter. Sprinkle the cooked peppers evenly on top of the egg bite cups.
    • Continue with the toppings by adding chopped cooked bacon, sliced onion and grated cheese. Again, evenly dividing these ingredients to each muffin cup. Use a knife or spoon to push the ingredients down into the custard. I like a gentle shake of hot sauce in each cup. Tabasco sauce or Cholula sauce work well here.
    • Place the muffin pan on a sheet pan. Pull the middle rack out of the oven and slide the tray back into the oven. Then pour the hot water around the tray. This makes the water bath process much easier.
    • Bake the Cottage Cheese Egg Bites in a 325 degree oven for 30 – 35 minutes, or until custard is set. Slide the oven rack out and use hot pads to remove the muffin pan from the sheet pan water bath. Let sit for about 15 minutes before removing the egg cups from the muffin pan. Once the oven has cooled, then remove the water and sheet pan. No reason to slop hot water in the oven, or worse yet onto yourself.

    Notes

    Tips for Success:
      • Highly recommended: Once the muffin tin is filled with the egg bite mixture, pour three cups of hot water around the muffin tin. This water bath will keep those egg bites moist and fluffy. If you skip this step, the Cottage Cheese Egg Bites will be firmer.
      • Do not try to make these egg bites without cooking the peppers. Both the texture and flavor will be compromised. The poblano peppers will taste grassy and somewhat bitter if not cooked, and the texture will not be pleasant with the creamy eggs. Cook both peppers until they’re very soft.
      • Use a non-stick pan to fry the bacon. Once you drain the grease, there will be a light layer of grease left in the pan. Perfect for cooking the bell peppers and adding some bacon flavor as they cook.
      • Don’t oven blend the egg, cheese and cottage cheese mix. Too much air could cause the egg bites to collapse as they bake.
    • How Do I Know When Egg Bites Are Cooked Through? They’ll puff up a bit, pull away from the edges and have a very small amount of golden spots on the tops. You can use a cake tester, or sharp knife to insert into the center, if it comes out clean, the egg bites are cooked through.

    Nutrition

    Serving: 12g | Calories: 174kcal | Carbohydrates: 3g | Protein: 11g | Fat: 13g | Saturated Fat: 6g | Polyunsaturated Fat: 2g | Monounsaturated Fat: 4g | Trans Fat: 0.03g | Cholesterol: 148mg | Sodium: 366mg | Potassium: 148mg | Fiber: 1g | Sugar: 1g | Vitamin A: 736IU | Vitamin C: 23mg | Calcium: 138mg | Iron: 1mg

    Southwest Cottage Cheese Egg Bites with Bacon … They’re What’s For Breakfast

    « Previous Page
    Next Page »

    I'm Lea Ann

    Welcome to my Colorado kitchen. If you're a fan of rustic homestyle cuisine, you've come to the right place. I'm a Culinary School Grad with a passion to inspire you to cook as often as you can. I offer reliable, approachable and easy to follow recipes. So grab that skillet and let's cook.

    More about me

    Soup and Stew Recipes

    • Southwest chicken soup with hominy and potatoes.
      Sopa Ranchera, Southwest Chicken Soup
    • Creamy chicken tortilla soup with rotel tomatoes.
      Southwestern Creamy Chicken Tortilla Soup
    • Cowboy chili garnished with grated cheese and jalapeno pepers.
      New Mexico Style Cowboy Chili
    • Ground chicken chile with white beans.
      Giada’s Ground Chicken Chili with White Beans
    • Beef stew with mushrooms served in a skillet.
      Beef Stew With Mushrooms – Crock Pot Method
    • 7-can taco soup with ranch dressing.
      Original 7 Can Taco Soup with Ranch Dressing

    Reader Favorites

    • Super Moist Cheesy Cornbread with Creamed Corn
    • Flemings steakhouse macaroni and cheese in a white bowl.
      Flemings Steakhouse Mac and Cheese
    • A slice of Layered Mexican Casserole with ground beef and corn tortillas.
      Mexican Casserole with Ground Beef and Corn Tortillas
    • Beef Tagliata, thin sliced flank steak served over arugula and cherry tomatoes.
      Beef Tagliata (Italian Steak)
    • Ham and cheese quesadilla made with corn tortillas and topped with a fried egg.
      Crispy Ham and Cheese Corn Tortilla Quesadillas
    • Spinach chicken mushroom skillet dinner.
      Chicken Mushroom and Spinach Skillet

    Footer

    • Contact
    • About
    • Privacy Policy
    • Accessibility Statement
    • ↑ back to top

    Copyright © 2024 Cooking on the Ranch • Powered by Feast+

    Rate This Recipe

    Your vote:


    A rating is required
    A name is required
    An email is required