Cooking On The Ranch

  • Home
  • About
  • Recipe Roundup
  • Contact Me
  • Join Community
menu icon
go to homepage
  • Home
  • Soups and Stews
  • About
  • Recipes
  • Contact Me
    • Facebook
    • Instagram
    • Pinterest
  • search icon
    Homepage link
    • Home
    • Soups and Stews
    • About
    • Recipes
    • Contact Me
    • Facebook
    • Instagram
    • Pinterest
  • ×
    Home

    Turkey Supreme, (Turkey Mac and Cheese)

    October 20, 2019 By Lea Ann Brown 11 Comments

    Turkey supreme casserole using leftover thanksgiving turkey.

    Turkey Supreme is made with elbow macaroni, cheddar cheese, cream of chicken soup to turn leftover turkey into a Turkey Mac and Cheese. With a crunchy panko topping, leftover turkey never had it so good.

    Looking for more pasta dishes? Try this one for Chicken Macaroni Salad.
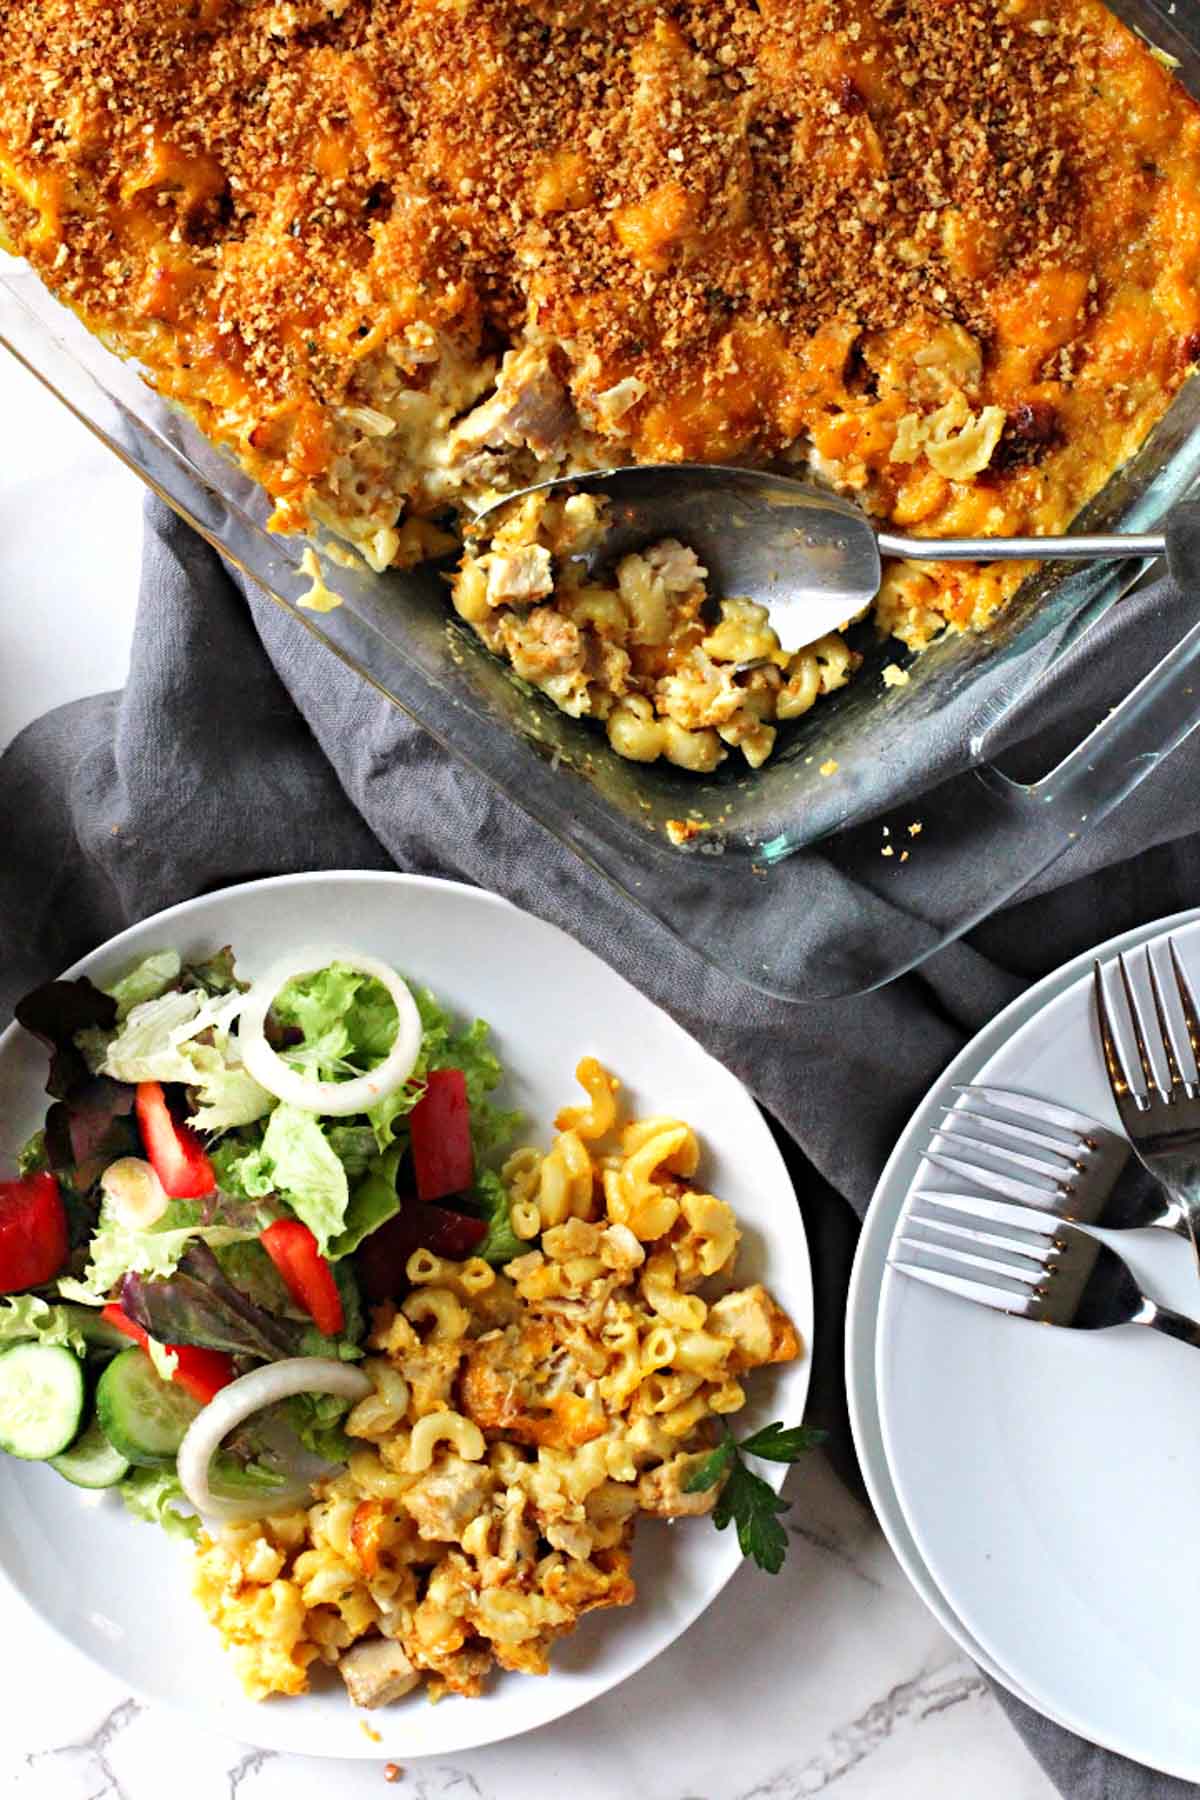
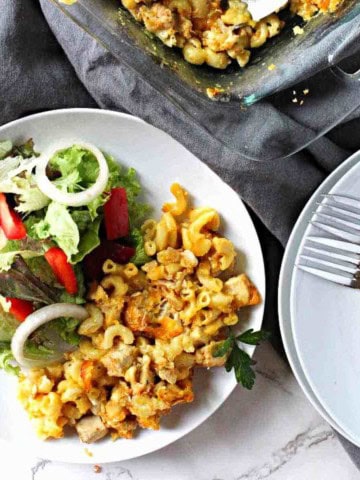
    9 x 13 left over turkey casserole served with a tossed salad

    Looking for a leftover turkey casserole recipe that is creamy, cheesy and will use up a fair chunk of that Thanksgiving roast turkey? Perhaps a turkey mac and cheese recipe?

    Made with cream of chicken soup and topped with toasted Panko bread crumbs. Creamy and cheesy, this turkey mac and cheese casserole uses elbow macaroni and leftover turkey from your Thanksgiving feast.

    It’s simply crazy delicious.

    Straight out of the church cookbook that my Mom’s WWT committee put together over thirty years ago, the title of the recipe is Turkey Supreme.

    As with all church cookbooks, it’s full of good old fashioned comfort food and farm cooking. Just like I grew up on. And a great resource for those casserole recipes made with “cream of” soups.
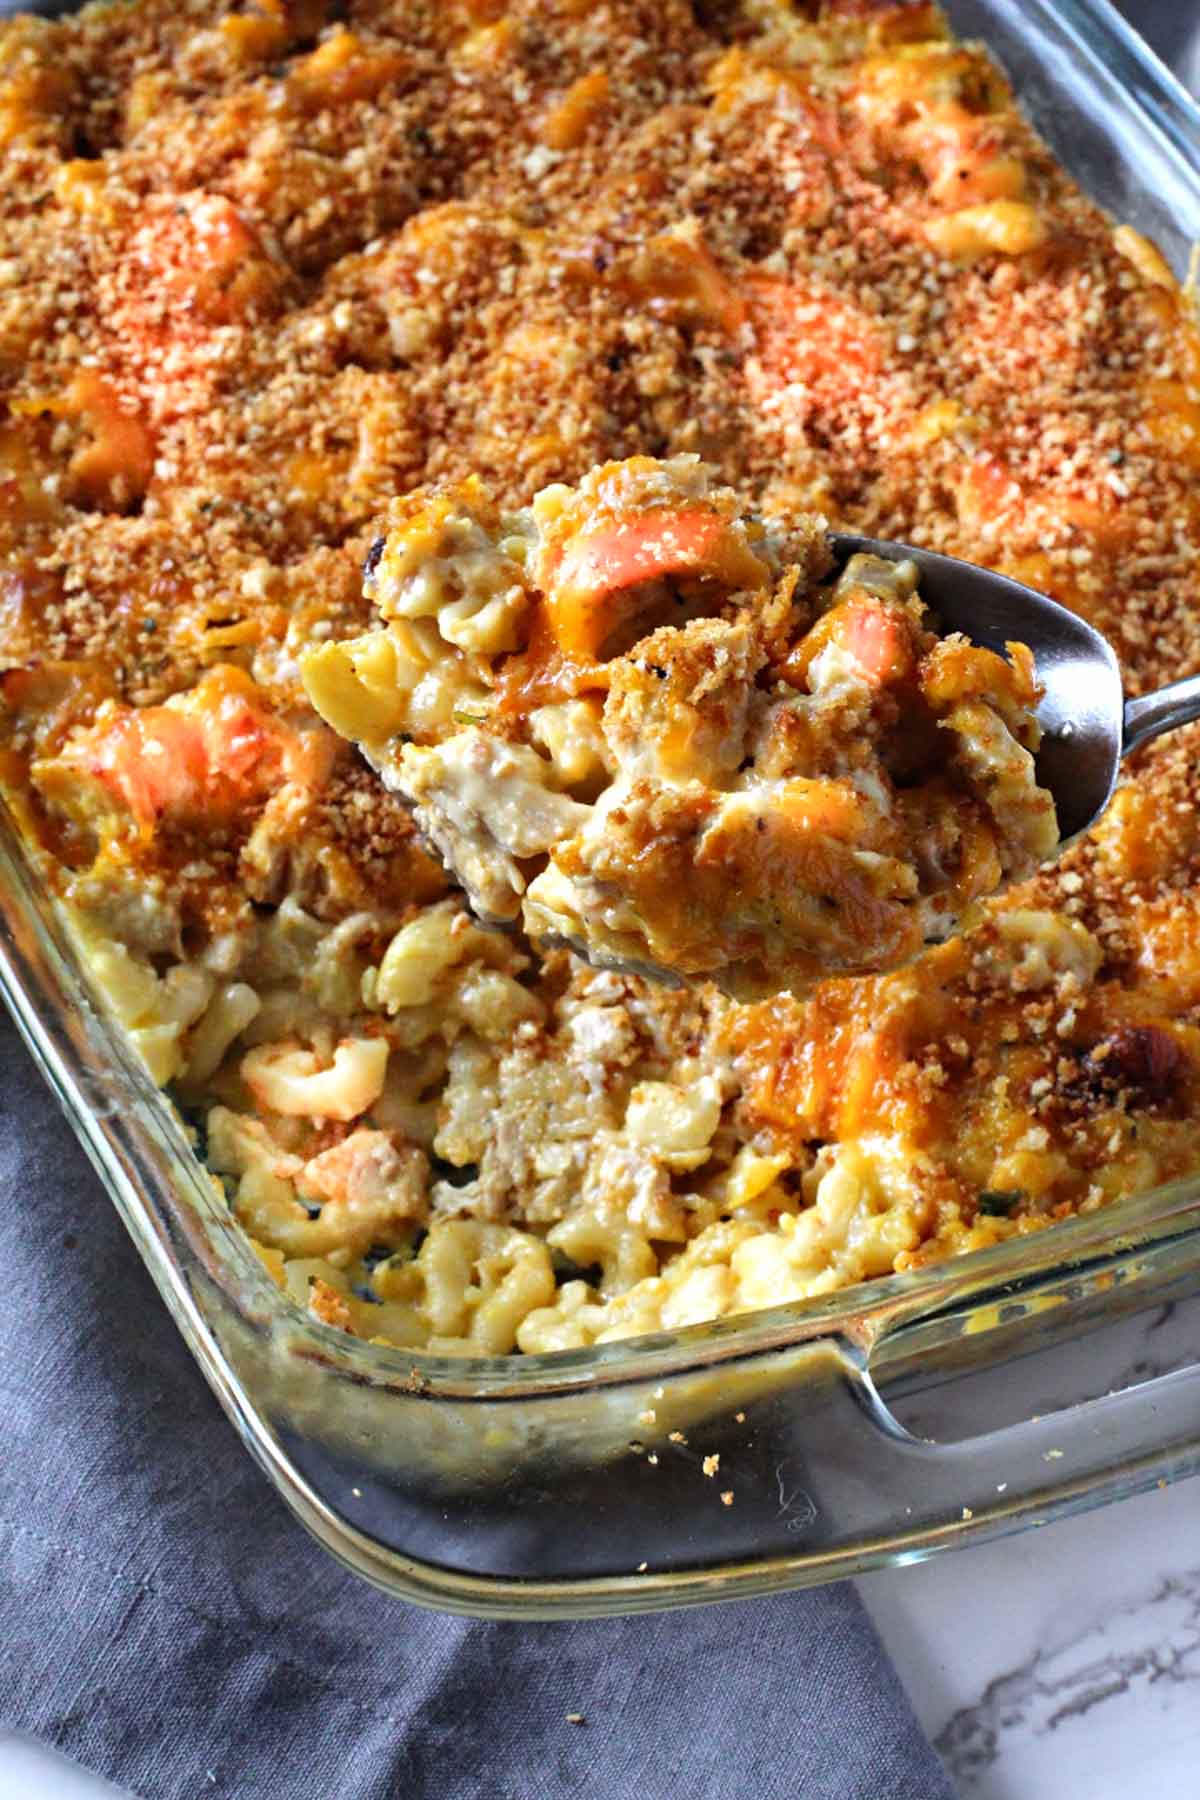
    Left over turkey casserole with pasta and cheese in a 9 x 13 pyrex pan

    How to Make Turkey Supreme (Turkey Mac and Cheese Casserole)

    This is a unique turkey casserole recipe, because the casserole sits overnight in the refrigerator.

    The next day, when you’re ready to cook the casserole, the macaroni has softened due to the milk and soup. This means fewer pans to clean up. It’s somewhat of a one pan meal.

    • Cube leftover Thanksgiving Turkey into bite-sized pieces
    • Saute the chopped onion stove top. The recipe in the church cookbook doesn’t take the extra step to cook the onion first. It’s just a technique I always do for a milder sweeter onion flavor. You can skip this step if you want.
    • In a bowl whisk the milk, the cream of chicken soup, and the chopped onion together.
    • Place the elbow macaroni (shell macaroni would also work nicely here) evenly on the bottom of a Pam sprayed 9 x 13 inch baking dish.
    • Sprinkle on the cubed turkey and then pour in the milk/soup/onion mixture.
    • Cover and let it sit overnight in the refrigerator.
    • The next day, sprinkle with cheese and bake at 350 degrees for about an hour, or until thick, bubbly and wonderfully creamy.
    • While the casserole is cooking, toast Panko bread crumbs.
    • Once the casserole is cooked, and while hot and steamy, sprinkle the toasted Panko bread crumbs evenly over the top of the casserole.
    • Serve with a tossed green salad.

    Can You Freeze Turkey Supreme?

    This recipe makes enough for an army, especially when there’s just the two of us. So you bet, yes you can freeze turkey casserole. Thank goodness!

    Can You Reheat Turkey Casserole?

    • Absolutely. But with any casserole of this type, that includes a pasta product, the pasta, as it sits, may continue to soak up some of that liquid.
    • The casserole may be prone to drying out a tad. You can reheat the casserole directly in baking dish. Just pour a little milk over the top, gently push it around so the milk sill seep into the casserole and reheat in the oven. Covered with foil, and at 300 degrees. This will take about twenty minutes, depending on how much is left.
    • You can reheat turkey casserole by dishing up individual servings on a microwave safe plate. Again, pour a little bit of milk over the individual serving turkey casserole and cover with parchment or your handy plastic microwave lid. About 45 seconds will heat the casserole nicely.

    Storage

    Let the casserole cool completely. Store any leftovers covered tightly in the casserole dish in the refrigerator for up to 3 – 4 days.

    Turkey Mac and Cheese (Turkey Supreme) Recipe

    Turkey supreme casserole made with leftover Thanksgiving turkey, elbow macaroni, cream of chicken soup and milk. Topped with a panko bread crumb topping.

    I hope you give this Turkey Macaroni and Cheese recipe a try. It’s truly a treat and a great way to use leftover turkey.

    More Classic Comfort Food Casseroles

    • Old fashioned broccoli casserole recipe
      Broccoli Cheez Whiz Rice Casserole
    • Sour cream mashed potatoes baked in a casserole dish.
      Make Ahead Sour Cream Mashed Potato Casserole
    • Baked gluten free scalloped potatoes.
      Creamy Gluten Free Scalloped Potatoes Without Cheese
    • Cheesy potatoes with Corn Flakes in a white casserole dish.
      Cheesy Potatoes With Corn Flakes Topping

    And don’t miss my category for Classic American Comfort Food. You’ll find recipe that bring back memories, including one of the most popular for Old Fashioned Meatloaf.

    If you liked this recipe, please leave a star ⭐⭐⭐⭐⭐ rating in the recipe card below and leave a comment. I always appreciate your feedback and hearing how everything went.

    And, don’t forget to subscribe to my newsletter for more delicious recipes and cooking tips. Make it a delicious day … every day.

    Turkey supreme casserole using leftover thanksgiving turkey.
    Print Recipe
    5 from 2 votes

    Turkey Mac and Cheese Casserole

    This leftover turkey casserole recipe comes with lots of appeal, combining elbow macaroni, milk, cheddar cheese and cream of chicken soup. Turkey Supreme (turkey macaroni and cheese) is simply a great way to use leftover turkey.
    Prep Time30 minutes mins
    Cook Time1 hour hr
    Course: Main Course Chicken
    Cuisine: American
    Servings: 12
    Calories: 261kcal
    Author: Lea Ann Brown

    Equipment

    • 9 x 13 casserole dish

    Ingredients

    • 2 cups Turkey cooked, cut into bite sized cubes
    • 1 small sweet onion diced
    • salt and pepper to taste
    • 2 cups elbow macaroni uncooked
    • 2 10.5 ounce Cream of Chicken Soup canned
    • 1 cup cheddar cheese grated
    • 2 cups milk
    • 3 tablespoons butter
    • For the crunchy panko topping
    • 2 tablespoons butter
    • 4 ounces Panko bread crumbs
    • ½ teaspoon salt
    • ¼ teaspoon garlic powder
    • ½ teaspoon dried parsley

    Instructions

    • Cut cooked turkey into bite sized cubes. Set aside
    • Heat a medium fry pan over medium high heat. Add butter. Once butter has just melted and starting to sizzle, add the chopped onion. Saute until soft and just starting to turn translucent. About 5 minutes.
    • Spray a 9 x 13 Pyrex Baking dish with Pam.
    • Spread the uncooked elbow macaroni over the bottom of the baking dish.
    • Spread the cubed turkey over the elbow macaroni.
    • In a medium sized bowl, whisk together the milk and the cream of chicken soup. Add the cooked onion and stir.
    • Pour the soup/milk/onion mixture over the turkey and macaroni.
    • Cover and let sit in refrigerator overnight.
    • The next day, preheat oven to 350 degrees. Spread the grated cheese over the top of the casserole and bake uncovered for up to an hour. Or until bubbly and hot.
    • In the meantime, make the panko bread crumbs.
    • Heat a medium fry pan over medium high heat. Add the butter. Once the butter has almost melted and starting to sizzle, add the panko bread crumbs and seasoning. Turn the heat down to medium. Toast the panko until golden brown. This will require constant supervision and lots of stirring.
    • Once the casserole is cooked, sprinkle the toasted panko bread crumbs evenly on top. Serve. A tossed salad is a perfect side dish for this casserole.

    Nutrition

    Calories: 261kcal | Carbohydrates: 28g | Protein: 12g | Fat: 11g | Saturated Fat: 6g | Cholesterol: 38mg | Sodium: 306mg | Potassium: 203mg | Fiber: 1g | Sugar: 5g | Vitamin A: 315IU | Vitamin C: 1mg | Calcium: 144mg | Iron: 1mg

    Turkey Supreme … It’s What’s For Leftover Turkey
    Peppery Boneless Prime Rib Roast

    October 20, 2019 By Lea Ann Brown Leave a Comment

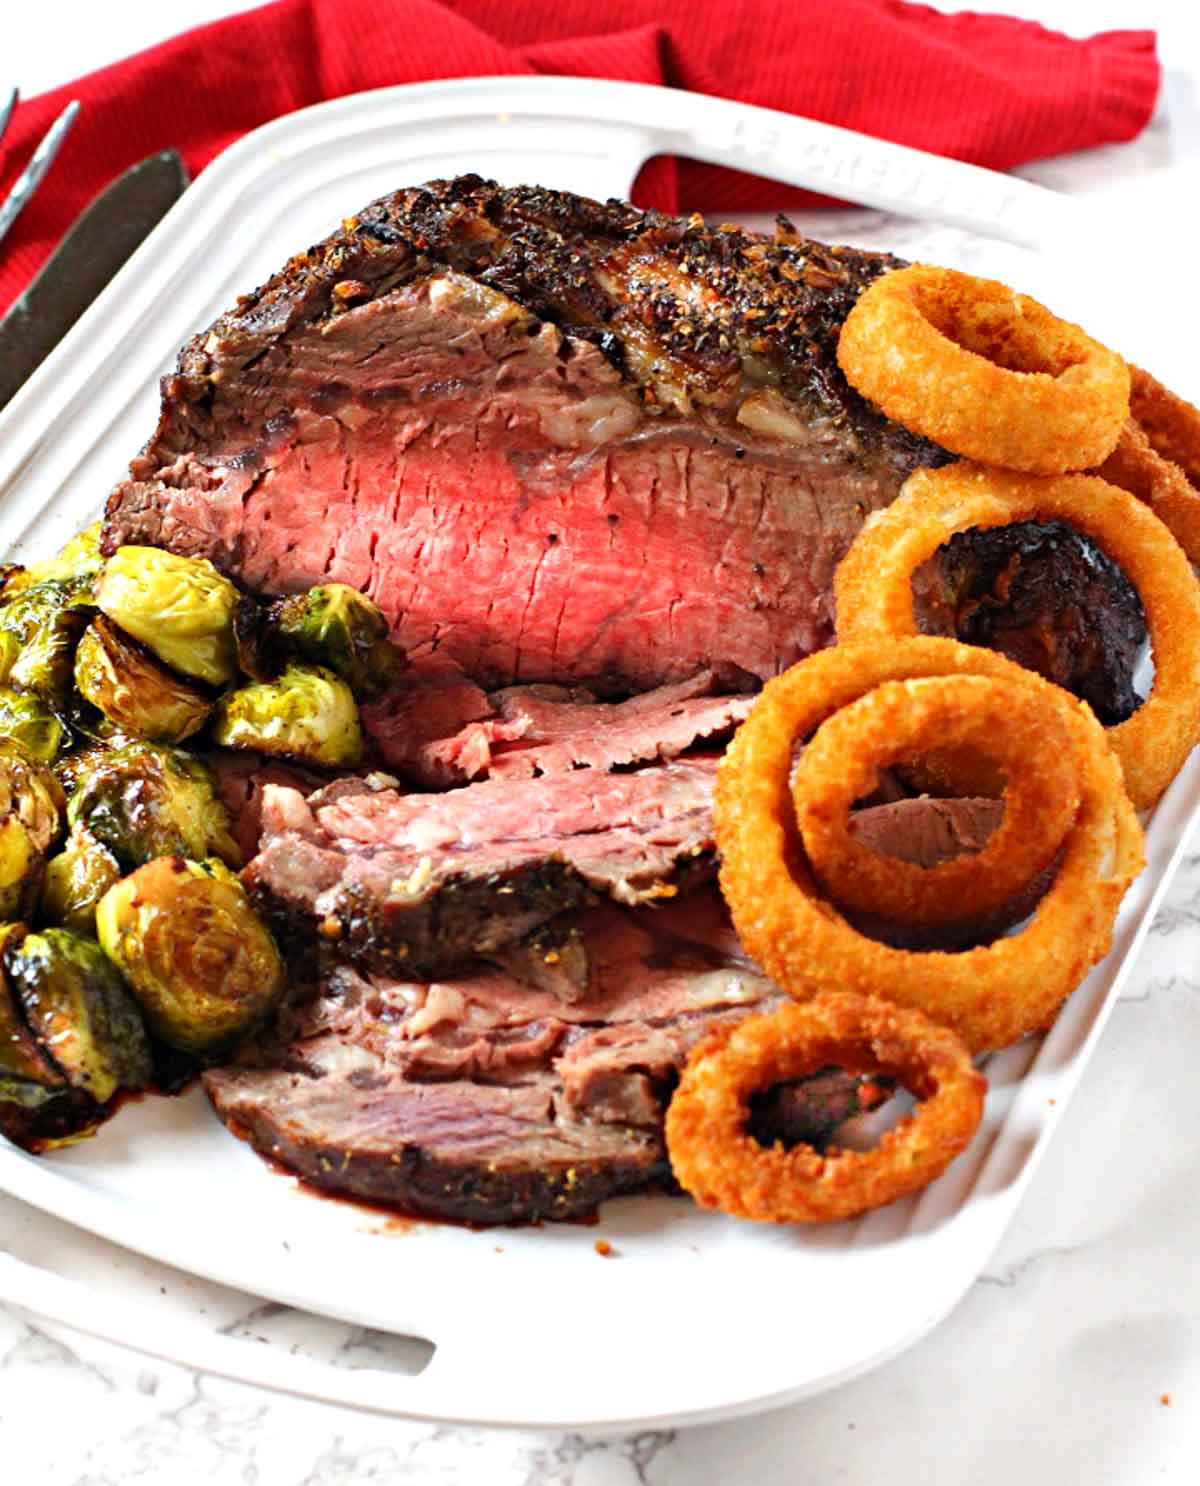
    Boneless prime rib roast cooked and served with brussels sprouts and onion rings

    This Boneless Prime Rib Roast is elegant, yet so very easy. Simply seasoned, cooking a prime rib roast is not as daunting as one would think. A perfect choice for that celebratory meal.

    Boneless prime rib roast cooked and served with brussels sprouts and onion rings

    What a treat to be welcomed into the test kitchen of the National Cattleman’s Beef Association offices. And thank you to Sprouts Farmer’s Market for organizing a group of us for a gala holiday cooking event which was coined as #sproutsholidaymeatup.

    Our mission was to learn the art of the holy grail of beef cuts, Boneless Prime Rib Roast and to be reminded that cooking one is not as complicated as one might suppose.

    The Chefs were so complete with their hands-on prime rib cooking demo that even a novice cook could have walked away with the confidence that a beautiful prime rib dinner is not all that complicated.

    This method to cooking a boneless prime rib roast works because we were in the kitchen with chefs that work with and develop beef recipes all day long. That’s all they do … they’re experts.

    We prepared three separate prime rib roasts, all were wonderfully impressive. And being a pepper fan, the peppery version was my favorite. So I’m sharing this recipe with you.

    This recipe will be my choice for our special New Year's Eve dinner.

    Ingredients For This Recipe

    Mise en Place. With this boneless prime rib, gathering ingredients ahead of time is a breeze. Here’s what you’ll need:

    Ingredients used to make a boneless prime rib roast
    • 4-½ pound to 5 pound boneless ribeye roast
    • 2 tablespoons chopped garlic
    • 2 tablespoons of a ground pepper blend
    • 2 teaspoons dried or fresh thyme
    • 1 can beef broth
    • and the most important = an instant read digital thermometer

    How To Cook A Boneless Prime Rib Roast

    How to cook a boneless rib-eye prime rib roast. Simply topped with chopped garlic and a ground pepper blend
    • Preheat oven to 350 degrees.
    • Simply combine the minced garlic and ground pepper blend in a small bowl.
    • Place the boneless rib eye roast on a roasting pan, fat cap up.
    • Press the pepper blend and garlic over the top of the roast.
    • Roast the prime rib until the instant read thermometer reads 125 degrees.
    • Remove roast from oven, tent with foil for 20 minutes. While the roast is resting, the temperature will rise to 130 – 135 degrees, which is considered medium rare.

    Before we get to this easy boneless rib roast recipe, let’s talk some shop.

    Are Prime Rib and Rib Eye The Same Cut of Meat?

    Yes and No. Prime rib is simply a roast that comes from the rib section of the cow, which is also called a rib roast or a standing rib roast or prime rib roast. Prime Rib is most famous for being cooked with the bone-in. It is sold with ribs #6 through #12 intact.

    This boneless rib roast used for this recipe, is simply the same cut of meat where your butcher has removed the bones from the Prime Rib Roast. It can either be labeled boneless rib roast, and more commonly boneless rib eye roast.

    In addition, this is the same cut of meat that rib eye steaks are cut from. A rib eye steak must be cut from the prime rib before the roast is cooked. The cuts are then sold as ribeye steaks. They can be sold with the bone or boneless.

    Bone In or Boneless Rib Roast

    Anytime you can roast meat with the bones intact, it’s a bonus. The bones give the meat additional flavor.

    However, a boneless rib roast is easier to handle and still very rich in flavor, beefy in flavor, juicy and tender with generous marbling throughout.

    Why Should Prime Rib be Served Medium Rare?

    Boneless Prime Rib Roast Cooking Time: The most important reason is for optimal flavor and tender texture, experts agree prime rib should be served medium-rare which is an internal temperature of 130 – 135 degrees at the thickest part of the roast.

    You’ll need to remove the roast from the oven when it reaches in internal temperature of around 125 degrees. Which is rare.

    Tent the roast with foil and let it rest for 20 – 30 minutes. During this time the internal temperature will rise to a medium rare – 130 – 135 degrees.

    Do not depend on your kitchen timer to determine how long the roast should be cooked. Oven temperatures vary and roasts vary in size.

    It’s imperative that you use a digital read meat thermometer to monitor and achieve the required cooking temperature.

    How To Reheat Prime Rib

    Since the prime rib has been initially cooked to a medium rare state, you’ve got some wiggle room to reheat the sliced meat without drying it out.

    Place a couple of slices of prime rib on a microwave safe plate. Cover the prime rib with a damp paper towel. Depending on how thick you’ve sliced the meat, set the timer for a minute and cook on 50% power.

    Check the prime rib by placing your hand on the paper towel. If you feel it needs more heat, give it more heat by repeating the 50% power level in 15 second increments.

    Don’t over pre-heat it. After all, you’re not trying to cook it, your goal is to warm it to your level of heat satisfaction.

    Another option is simply letting the prime rib come to room temperature to serve. That way you’re guaranteed that beautiful medium rare experience.

    What To Serve With Prime Rib

    Cooking a prime rib roast is usually reserved for special occasions, like Christmas or New Year’s Eve. Or even a special birthday feast.

    So what pairs well with the rich meaty flavor of a prime rib roast?

    Tradition calls for serving prime rib with either au jus, which is included in this recipe below. Or a very popular option, a rich creamy Horseradish Cream Sauce.

    As far as side dishes for Prime Rib, let’s have some fun.

    • Onion Rings: Surprising, delicious and the sweet onion flavor compliments the rich beefy flavor of Prime Rib.
    • Keep the steakhouse vibe and serve with fresh salad greens with Homemade Blue Cheese Dressing.
    • Creamy Scalloped Potatoes = perfect.
    • Mushroom Risotto.
    • Green Vegetable Medley. Elegant and fresh.
    • And for dessert? Summertime event, try this Fresh Peach and Blueberry Pie. Colder weather, check out these Chocolate Mint Brownies.

    Peppery Boneless Rib Roast Recipe

    I hope you give this easy recipe for boneless prime rib roast a try. It’s a special treat that requires minimal effort. A hand full of ingredients and a two-ish hour hands off roast in the oven. Voila. A very special dinner is born.

    Explore More Beef Cuts For Roasting

    • Oven baked tri-tip roast served with potatoes and vegetables.
      Oven Roasted Tri-tip with Rosemary and Thyme
    • A slice of chuck eye roast on a plate served with roasted potatoes.
      Oven Roasted Chuck Eye Roast
    • Pan roasted veal chops with roasted grapes.
      Recipe for Veal Rib Chops, Oven Roasted With Red Grapes
    • A cooked and sliced prime rib roast on a wood cutting board.
      Bone In Prime Rib Roast and Seasoning For A Prime Rib

    And don’t miss my Beef Category. You’ll find tons of great ideas. Including the most popular beef post on my site for Cola BBQ Beef Brisket.

    Culinary School Tip: If you have a guest who likes their prime rib well done, simply simmer some beef broth in a skillet on the stovetop. Slide their slice of prime rib into the simmering broth. It will cook quickly and your guest will be served their well done prime rib in just seconds.

    Boneless prime rib roast cooked and served with brussels sprouts and onion rings
    Print Recipe
    5 from 1 vote

    Peppery Prime Rib Boneless Beef Rib Roast

    Mouth watering Prime Rib Boneless Rib Roast. This rib roast recipe is elegant, yet so very easy.
    Prep Time15 minutes mins
    Cook Time2 hours hrs
    Resting Time20 minutes mins
    Course: Main Course Beef
    Cuisine: American
    Servings: 8
    Calories: 690kcal
    Author: Lea Ann Brown

    Equipment

    • Digital Read Thermometer
    • Roasting pan

    Ingredients

    • 4 pound Rib Eye Roast boneless. 4 – 5 pound roast.
    • 14 ounces beef broth canned
    • 2 teaspoons fresh thyme chopped. Or 1 teaspoon dried thyme.
    • Salt
    • For the Rub:
    • 2 tablespoons pepper seasoning blend a mix of gourmet whole peppercorns.
    • 2 tablespoons minced garlic

    Instructions

    • Heat oven to 350°F. Combine rub ingredients in small bowl; reserve 2 tablespoons of the rub for the au jus. Press remaining rub evenly onto the top surface of beef roast. I like to score the fat cap so the garlic and cracked pepper blend will penetrate the beef.
    • Place roast, fat side up, in shallow roasting pan. Insert ovenproof meat thermometer so tip is centered in thickest part of beef, not resting in fat or touching bone. Do not add water or cover. Roast in 350°F oven until internal temperature reads 120 – 125 degrees in the thickest part of the roast.
    • Remove roast from oven and tent with foil. Let stand for 20 minutes. During this resting time the internal temperature will rise to 130 – 135 degrees for a medium rare rib roast.
    • While roast is resting, combine broth and reserved rub in small saucepan; bring to a boil. Reduce heat; simmer 5 minutes. Stir in thyme; continue simmering 2 minutes.
    • Carve roast into slices. Season with salt, as desired. Serve with au jus or Creamy Horseradish Sauce.

    Notes

    Tip: If you have a guest who likes their prime rib well done, simply simmer some beef broth in a skillet on the stovetop. Slide their slice of prime rib into the simmering broth. It will cook quickly and your guest will be served their well done prime rib in just seconds.
    Look for a jar of gourmet mixed peppercorns. Williams and Sonoma has a blend of 5-peppercorn mix. It’s a Special blend of Malabar black peppercorns, Sarawak white peppercorns, pink peppercorns and green peppercorns. It also contains Jamaican allspice berries to add subtle notes of cinnamon, nutmeg and clove.

    Nutrition

    Calories: 690kcal | Carbohydrates: 2g | Protein: 32g | Fat: 61g | Saturated Fat: 25g | Cholesterol: 137mg | Sodium: 286mg | Potassium: 569mg | Fiber: 1g | Sugar: 1g | Vitamin A: 37IU | Vitamin C: 1mg | Calcium: 37mg | Iron: 4mg

    I have been compensated and provided with product by Sprouts Market for this article. My opinions are my own. Thanks so much to Sprouts for inviting me to a special event hosted by Sprouts Farmers Market and the Colorado Beef Council.

    Colorado Beef Council Ranch Brand Logo

    The offices of the beef council were lines with cattle ranch brand pieces. This one caught my eye. From Thistle Dew Ranch in Texas.

    Chicken in Chipotle Cream Sauce (Chicken Zarape)

    October 10, 2019 By Lea Ann Brown 7 Comments

    Chicken breast wrapped in bacon topped with a tomato salsa served over yellow mexican rice

    Chicken in Chipotle Cream Sauce. Drenched in a sweet and spicy Chipotle Cream Sauce and topped with a zesty tomato salsa. This one pan chicken breast recipe, makes an easy, no fuss, chicken dinner that presents itself a bit on the fancy side.

    If you love cooking the chipotle peppers, try my recipe for Ground Bison Meatballs in Smoky Chipotle Sauce.

    Chicken breast wrapped in bacon topped with a tomato salsa served over yellow mexican rice

    Inspiration for Chicken in Chipotle Cream Sauce

    This chicken in chipotle cream sauce is one I’ve been wanting to make for about five years now. It’s from notes that I wrote down at a Mexican Restaurant here in Denver where I was served this dish.

    The restaurant has since gone out of business but this Mexican chicken recipe lives on in my kitchen.

    This recipe and my recipe for Achiote Chicken is my favorite ways to prepare Mexican style chicken. Plus I’ve been on a bit of a chicken with bacon kick lately.

    This is a recipe that I enjoyed several times and vowed to make in my own kitchen. What took me so long? I have no excuse really. Perhaps I finally grew tired of looking at its name staring back at me on the culinary list I’ve titled, “Must Make Soon”.

    Once I made the commitment last week to actually dive in and prepare it.

    I have to admit it took some planning. As simple as it sounds, I needed to come up with a way to make it easy for us home cooks. After all we don’t have all that restaurant equipment to push out perfectly planned chicken breast meals at the blink of an eye.

    Culinary School taught me that restaurant use sous vide machines and commercial toaster/broiler ovens like a Salamander to finish dishes. A cast iron skillet and our home oven will replace those.

    Chicken in Chipotle Cream Sauce – How to

    Once I decided my cast iron skillet and my oven was the key to the success of this recipe, the rest of a breeze. Here’s the route to take for a no-full chicken dinner:

    • Make the Creamy Chipotle Sauce and set aside.
    • Make the tomato salsa. Chop a few orange and red small tomatoes. Add a bit of fine chopped jalapeno pepper and chopped onion, and a splash of red wine vinegar. A sprinkle of salt and pepper and set aside.
    • Preheat oven to 350 degrees.
    • Wrap two sliced of bacon around two boneless skinless chicken breasts in a criss-cross pattern.
    • Heat your cast iron skillet over medium high heat. Once the skillet is hot, add one tablespoon of oil. Once the oil is shimmering add the bacon wrapped chicken breasts.
    • Add them with the criss-crossed side of the bacon facing up.
    • Once the breasts have browned, using tongs, turn them over and sea the other side.
    • Move the skillet to the oven and cook about 25 minutes, or until instant read thermometer reads an internal temperature of 165 degrees.
    • In the meantime, prepare rice.
    • To plate, add a good scoop of rice to each plate. Snuggle that chicken breast up against the rice. Spoon a good amount of the Creamy Chipotle Sauce over each chicken breast and top with a spoonful of the tomato salsa mixture.

    Simple and oh so flavorful.

    Recipe For Chicken in Chipotle Cream Sauce

    Spicy Mexican Chicken breast wrapped in bacon served with yellow rice and garnished with cilantro. Topped with lemon cream sauce and chopped tomatoes.

    I hope you give this Mexican Chicken Breast Recipe a try, and if you do, please come back and give the recipe a star rating and leave a comment about your experience with the recipe.

    And if you have a favorite spicy Mexican chicken recipe, let me know, I’d love to give it a try.

    More Mexican Chicken Recipes

    One of our favorites is Pollo en Escabeche. Exotic with flavor, it’s a great Mexican chicken recipe to try.

    • Chorizo burgers with cumin lime quick pickles.
      Grilled Chicken Burgers with Chorizo and Cumin-Lime Quick Pickles
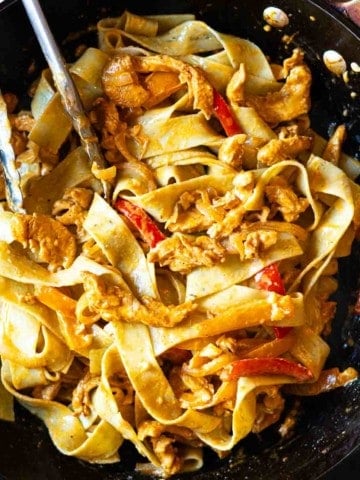
    • Chicken Fajita Pasta in a large skillet.
      Creamy Chicken Fajita Pasta
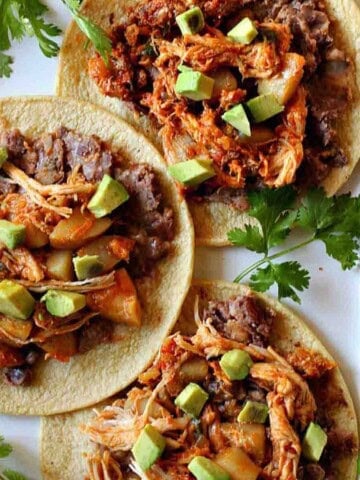
    • Tinga chicken tacos with toppings, served on a white platter.
      Mexican Chicken Tinga With Chorizo
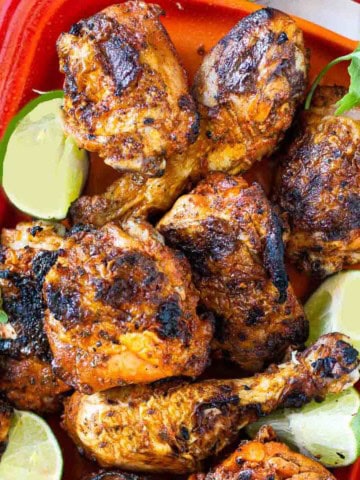
    • Pollo Asado recipe.
      Authentic Pollo Asado Recipe (Mexican Grilled Chicken)

    And if you’re looking for a ton of Mexican Recipes, don’t miss my Mexican Southwest Recipes Category. You’ll find some zesty recipes to liven up your dinner plans. You’ll find the most popular Southwestern chicken recipe on my site, Green Chile Cheese Stuffed Baked Chicken Cutlets.

    If you liked this recipe, please leave a star ⭐⭐⭐⭐⭐ rating in the recipe card below and leave a comment. I always appreciate your feedback and hearing how everything went.

    And, don’t forget to subscribe to my newsletter for more delicious recipes and cooking tips. Make it a delicious day … every day.

    Chicken breast wrapped in bacon topped with a tomato salsa served over yellow mexican rice
    Print Recipe
    5 from 2 votes

    Zarape Chicken, Chicken in Chipotle Cream Sauce

    A one-pan spicy Mexican Chicken Breast Recipe. Chicken breast wrapped in bacon is seared stovetop then transferred to the oven to finish. Topped with Creamy Chipotle Sauce and fresh tomato salsa.
    Prep Time25 minutes mins
    Cook Time25 minutes mins
    Course: Main Course Chicken
    Cuisine: American/Mexican
    Servings: 2
    Calories: 699kcal
    Author: Lea Ann Brown

    Ingredients

    • For The Creamy Chipotle Sauce
    • ½ cup Greek yogurt whole milk
    • ¼ cup mayonnaise
    • 1 canned chipotle pepper in adobo sauce and ½ teaspoon adobo sauce
    • 1 clove garlic peeled
    • 1 teaspoon lime juice
    • 1 teaspoon extra-virgin olive oil
    • 1 teaspoon honey
    • Sea salt and freshly ground black pepper
    • For the salsa topping
    • 5 orange tomatoes cherry tomato size
    • 5 red tomatoes cherry tomato size
    • ½ jalapeno pepper diced, seeds and veins removed to lessen heat
    • 2 tablespoons sweet onion chopped
    • ½ teaspoon red wine vinegar
    • salt and pepper to taste
    • For the chicken
    • 4 slices bacon thick sliced
    • 2 medium chicken breasts boneless, skinless

    Instructions

    • For the Creamy Chipotle Sauce
    • Place the yogurt, mayo, chipotle pepper, garlic, lime juice, olive oil, honey, and salt and freshly ground black pepper in to a food processor. Blend until smooth.
    • For the Salsa Topping
    • Chop tomatoes, onion, jalapeno pepper and add to a small bowl. Stir in the red wine vinegar and salt and pepper. Set aside.
    • For the Chicken:
    • Preheat oven to 350 degrees. Wrap two sliced of bacon around two boneless skinless chicken breasts in a crisscross fashion.
    • Heat your cast iron skillet over medium high heat. Once the skillet is hot, add 1 tablespoon of oil. Once the oil is shimmering add the bacon wrapped chicken breast. Add the chicken breast with the criss-crossed bacon facing up. Once the breasts have browned, turn them over using tongs and sear on the other side.
    • Move the skillet to the oven and cook about 25 minutes or until instant read thermometer reads an internal temperature of 165 degrees.
    • To serve, place the cooked chicken breast on a plate. Scoop a generous amount of the creamy chipotle sauce over the chicken. Top with a big spoonful of the Tomato Salsa. Yellow Rice for a side dish is nice here.

    Nutrition

    Calories: 699kcal | Carbohydrates: 8g | Protein: 59g | Fat: 47g | Saturated Fat: 11g | Cholesterol: 188mg | Sodium: 751mg | Potassium: 994mg | Fiber: 1g | Sugar: 6g | Vitamin A: 106IU | Vitamin C: 9mg | Calcium: 66mg | Iron: 1mg

    Butterscotch Pudding Recipe Made With Scotch

    September 24, 2019 By Lea Ann Brown 3 Comments

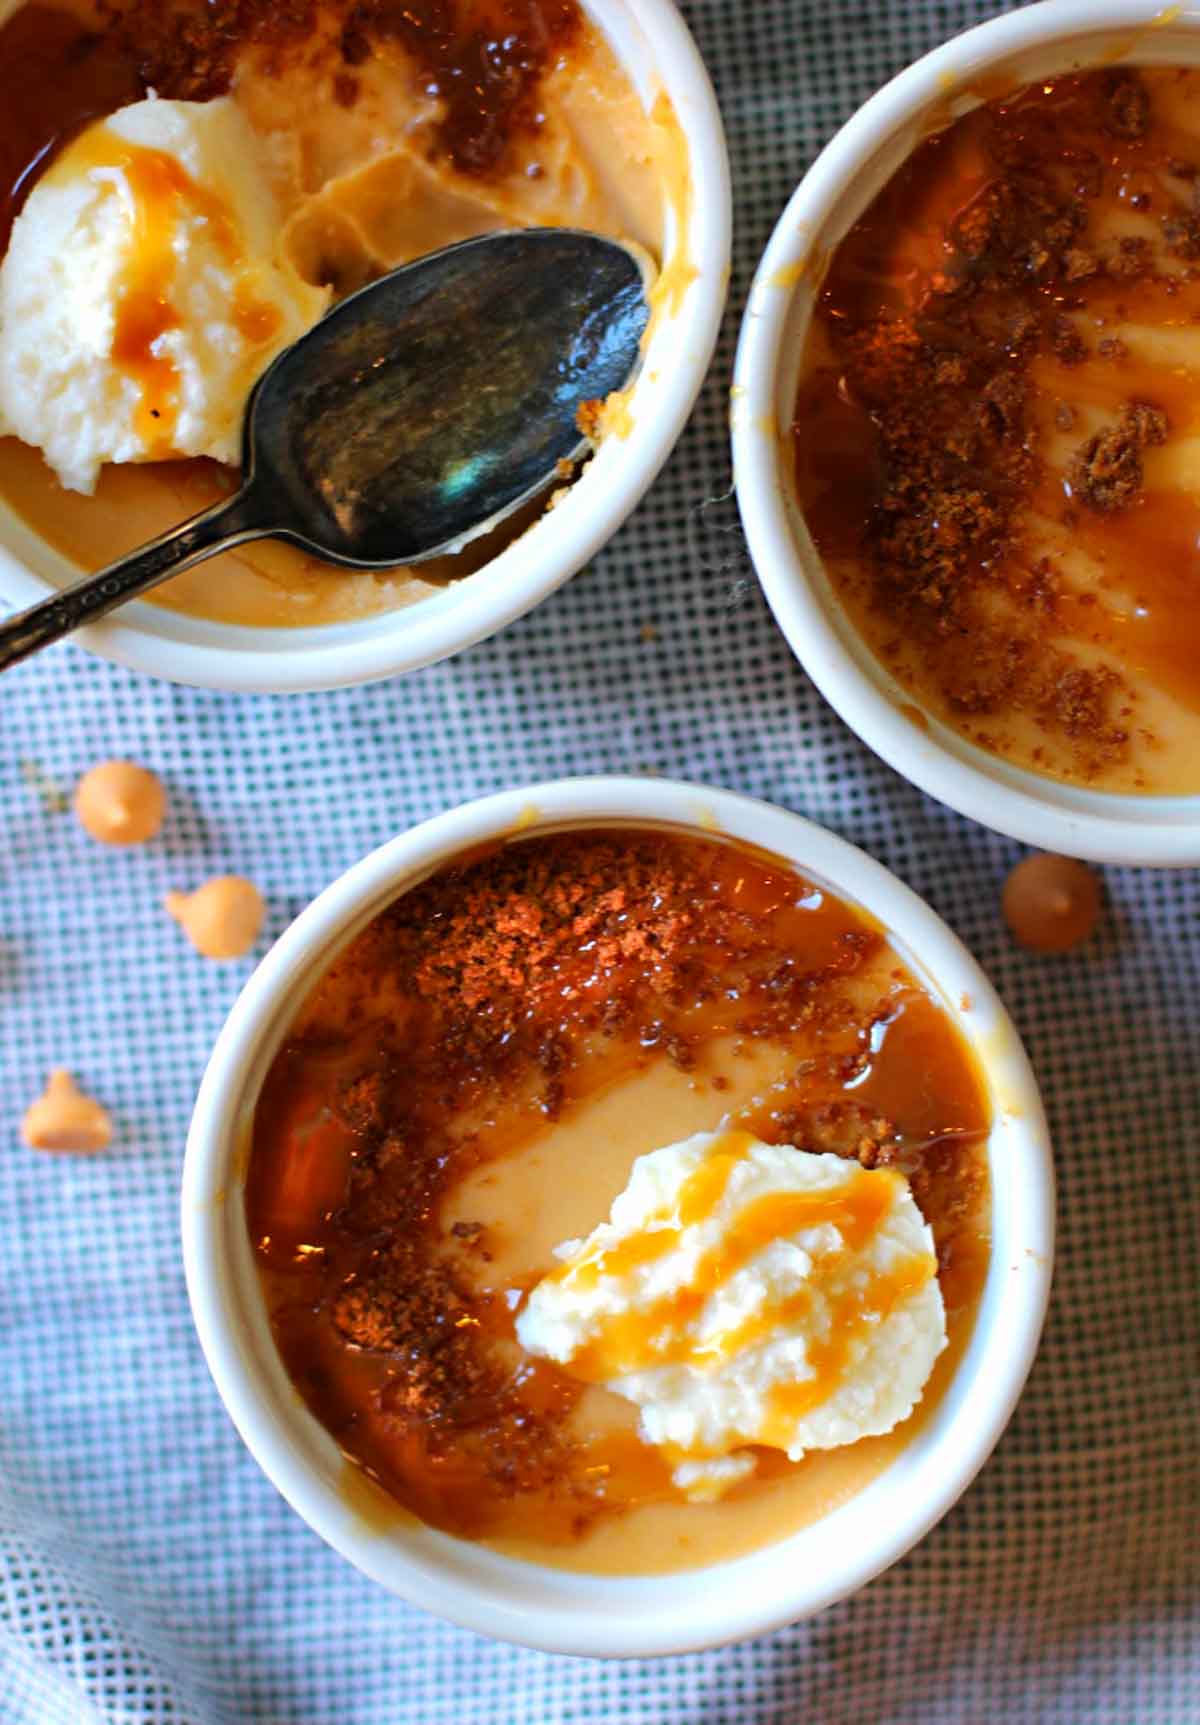
    three stoneware ramekins filled with butterscotch pudding topped with whipped cream

    Homemade Butterscotch Pudding Recipe. A very special recipe using heavy cream, brown sugar, butterscotch chips, and a splash of Scotch Whisky. Luxurious, velvety rich and an unforgettable dessert. Perfect for your next dinner party, as it can be made well ahead of time.

    three stoneware ramekins filled with butterscotch pudding topped with whipped cream

    What is your favorite flavor of Life Saver candy? Cherry? Pineapple? Mine was always Butter Rum. Couldn’t get enough of those little candies when I was a kid. And did you know that Pep-o-Mint was their original flavor?

    So what does this have to do with pudding? The first time I made this homemade butterscotch pudding it took me back to those Life Saver candies. The flavor reminded me very much of that Butter Rum candy.

    Butterscotch Pudding … Perfect Dinner Party Dessert

    I’ve been known to throw a dinner party or two …. and more times than not, my choice for dessert is this old-fashioned show-stopper, homemade butterscotch pudding.

    Why? It seems to go with any type of meal, and it just flat out wins the hearts of everyone. Plus this can be made well ahead of time, actually a full day ahead, leaving time for other tasks the day of your event.

    What is Butterscotch?

    Butterscotch is made stovetop by combining butter, salt and dark brown sugar and cooking it until it just starts to smoke and becomes caramelized. Cooking sugar can be a bit fussy and a little unnerving. It takes practice.

    This recipe removes that nervous factor by using butterscotch chips (Nestle calls them morsels) that are melted into heavy cream. Brown sugar is most certainly a part of this recipe but it’s simply dissolved in water stovetop. And did I mention there’s a splash of Scotch involved?

    Here’s Why This Butterscotch Pudding Recipe Is So Special

    I remember the first time I ever made butterscotch pudding from scratch. I simply could-not believe my tastebuds. The texture was rich, creamy, eggy, and oh so custard-y. And the flavor simply crazy divine.

    Making pudding from scratch is a totally different experience from the boxed pudding we get at the store. After you make this homemade butterscotch pudding you’ll question whether it’s even the same product as boxed pudding.

    • It’s made with heavy cream.
    • There are butterscotch chips melted into that cream.
    • You add a little splash of Scotch.
    • It’s butterscotch pudding without cornstarch for thickening. This recipe doesn’t use cornstarch for thickening, as cream and eggs do the trick quite nicely.
    • And it’s strained so insure that there is absolutely not one lump in this pudding.

    How to Make Butterscotch Pudding From Scratch

    I’m not going to claim that this recipe is super easy to make, but it’s not all that hard either. Once you start the recipe, its hands on, so you’ll need to pay attention until the process is completed.

    Let’s take a look.

    • Before starting the pudding, fill a medium bowl with ice and water. Set a fine mesh sieve in another medium bowl, then set that bowl in the ice water bath.
    • In a small skillet, combine 1 ½ Tablespoons cream with the Scotch, brown sugar, water and salt. Cook over medium low heat until sugar is dissolved.
    • Break the eggs in a medium bowl and whisk.
    • In a heavy saucepan, bring the remaining 3 ½ cups of cream and vanilla to a simmer.
    • Add butterscotch chips to the mixture, remove from heat and let stand until the chips are melted.
    • Very gradually add butterscotch mixture to the egg yolks, whisking constantly.
    • Return the mixture to the saucepan and cook over low heat, about 15 minutes, stirring constantly. Use a heat proof spatula and don’t let this mixture boil.
    • Strain the pudding into the sieve set-up, using the spatula to push the mixture through.
    • Place the pudding into serving bowls, or glasses. Let is sit in the refrigerator for four hours.
    • Garnish with whipped cream, caramel sauce and toffee bits.

    TIP FROM CULINARY SCHOOL.

    We always strained any type of sauce in Culinary School. It was routine practice. In this case here’s the reason. Straining the pudding removes any bits of the egg that may not have completely emulsified in the mixing process. This will eliminate the possibility of lumps in the pudding. Perfect!

    Homemade butterscotch pudding served in small white ramekin bowls topped with whipped cream and caramel sauce.

    Homemade Butterscotch Pudding Recipe

    I hope you give this butterscotch pudding recipe a try. And if you do, please come back and give the recipe a star rating. And leave a comment about your experience with the recipe.

    And if you have a favorite homemade pudding recipe, let me know, I’d love to give it a try.

    More Creamy Dreamy Dessert Recipes

    • Strawberry Tart Recipe with Cream Cheese Filling
    • Cream Cheese Flan
    • Homemade Peach Ice Cream
    • Cherry Delight, Cream Cheese Cherry Dessert

    And if you’re looking for even more dessert recipe ideas, don’t miss my Dessert Category. You’ll find lots of luscious treats.

    three stoneware ramekins filled with butterscotch pudding topped with whipped cream
    Print Recipe
    5 from 1 vote

    Rich and Creamy Butterscotch Pudding

    Homemade Butterscotch Pudding Recipe. A very special recipe using heavy cream, brown sugar, butterscotch chips, and a splash of Scotch. Luxurious, velvet rich and an unforgettable dessert.
    Prep Time10 minutes mins
    Cook Time20 minutes mins
    Resting Time4 hours hrs
    Course: Dessert
    Cuisine: American
    Servings: 6
    Calories: 646kcal
    Author: Lea Ann Brown

    Ingredients

    • 3 ½ cups plus 1 ½ tablespoons heavy cream
    • 2 teaspoons Scotch
    • 1 ½ teaspoons dark brown sugar
    • 1 teaspoon water
    • ½ teaspoon salt
    • 5 large eggs yolks
    • ½ vanilla bean seeds seeds scraped from ½ of a vanilla pod
    • 1 cup butterscotch chips 6 ounces. Like Nestle Butterscotch Morsels from the baking aisle.
    • whipped cream, store-bought caramel sauce, and toffee bits for serving (see note)

    Instructions

    • Fill a medium bowl with ice water. Set a fine mesh sieve in another medium bowl; set the bowl in the ice water bath.
    • In a small skillet, combine 1 ½ tablespoons of the cream with the Scotch, brown sugar, water and salt and cook over moderate heat just until the sugar is dissolved. Let cool slightly.
    • Put the egg yolks in a medium bowl. Whisk well.
    • In a heavy, medium saucepan, bring the remaining 3 ½ cups of cream to a simmer with the vanilla bean seeds. Remove from the heat. I've also used ½ teaspoon of vanilla extract in leu of the vanilla bean seeds.
    • Add the butterscotch chips to the hot cream and let stand until melted, 2 to 3 minutes. Whisk until smooth.
    • Gradually add the hot butterscotch mixture to the egg yolks, whisking constantly. Add slowly so the eggs don't scramble.
    • Return the mixture to the saucepan and cook over low heat, stirring constantly with a heatproof rubber spatula, until thick, about 15 minutes. Do not let it boil.
    • Strain the pudding into the bowl in the ice bath. Once strained, stir in the Scotch/brown sugar mixture.
    • Pour the pudding into glasses and refrigerate until thoroughly set, at least 4 hours or overnight.
    • Serve the pudding with whipped cream and caramel sauce. Sprinkle with some toffee bits for an extra special treat. You can purchase these on the baking aisle.

    Nutrition

    Calories: 646kcal | Carbohydrates: 31g | Protein: 5g | Fat: 56g | Saturated Fat: 34g | Cholesterol: 356mg | Sodium: 365mg | Potassium: 120mg | Sugar: 24g | Vitamin A: 2285IU | Vitamin C: 1mg | Calcium: 110mg | Iron: 1mg

    Butterscotch Pudding Recipe … It’s What’s For Dessert

    Mexican Mac and Cheese with Tomato Sauce

    September 16, 2019 By Lea Ann Brown 29 Comments

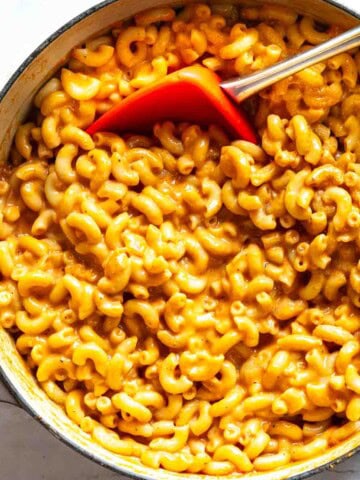
    Mexican mac and cheese cooked stovetop in a Dutch oven.

    Mexican Mac and Cheese with tomato sauce is a robust version of our favorite comfort food. Ready in a flash, this is an easy, one pot mac and cheese side dish for weeknight meals.

    A casserole dish filled with Mexican Macaroni and Cheese topped with sliced tomatoes

    Quick Look: Mexican Mac and Cheese

    • 🧁 Serves: 8
    • ⭐ Features: Cheese ✓ Creamy ✓Slight “heat” ✓
    • ⌛️ Prep Time: 10 minutes
    • 🍪 Cook Time: 20 minutes
    • 🕑 Total Time: 30 minutes
    • 👩‍🍳 Skill Level: Beginner
    • 🏆 Why make THIS version? This is a one pot, stove top mac and cheese recipe that’s wow with flavor.

    SUMMARIZE AND SAVE THIS POST ON

    ChatGPT
    Google AI
    Perplexity
    Claude
    Add As a Trusted Google Source

    What is Mexican Mac and Cheese

    Mexican macaroni and cheese is a creamy, cheese-based pasta dish, flavored with Mexican or Tex-Mex ingredients. This version uses tomato sauce.

    How It’s Different Than Regular Mac and Cheese?

    It differs from traditional American style macaroni and cheese with tomato sauce replacing milk or cream. But not to worry, there’s plenty of cheese involved for a creamy end result.

    Common Mexican Inspired Ingredients Used

    Mexican macaroni and cheese may also contain a single blend chile powder to bring more spicy heat to the dish. Please note: I have not used chili (with an i) seasoning, which is a blend of spices used in Tex-Mex style Chili Recipes.Garlic and onions are also common.

    Table of contents

    • Quick Look: Mexican Mac and Cheese
    • What is Mexican Mac and Cheese
      • How It’s Different Than Regular Mac and Cheese?
      • Common Mexican Inspired Ingredients Used
    • Ingredients You’ll Need
      • Best Pasta Shapes For This Recipe
      • Best Cheeses For Mexican Macaroni and Cheese
      • Spices That Add Flavor Without Overpowering
      • Why Add Vinegar?
    • How To Make Mexican Mac and Cheese
      • Stovetop Option – One Pot
      • Baked Option:
    • Variations on Mexican Macaroni and Cheese
    • Tips For Success – Trouble Shooting
    • What To Serve It With
    • Storage
    • FAQ’s
    • Recipe for Mexican Macaroni and Cheese
      • More Macaroni and Cheese Recipes

    Ingredients You’ll Need

    Ingredients to make Mexican Macaroni and Cheese.

    Best Pasta Shapes For This Recipe

    • Elbow macaroni: In my opinion, elbow macaroni is the traditional pasta shape to make any macaroni and cheese. Any short variety with curves, cups and hollows to trap sauce will work well here. I also love using cavatappi or even shell pasta shapes.

    Best Cheeses For Mexican Macaroni and Cheese

    • I like using Velveeta for this recipe, but you can also pick up American cheese in the deli section. Both are amazing creamy melting cheeses. Pepper Jack, also a good melting cheese adds a bit of heat to the recipe. You can also use shredded cheddar, or Muenster. If your grocery store has a good Mexican produce section, try Queso Asadero and Queso Chihuahua. Both are good smooth Mexican melting cheeses.

    Spices That Add Flavor Without Overpowering

    • New Mexico red chile powder, preferably Chimayo Chile Powder not only brings a little more spicy heat to the dish, but also a noticeable warmth.

    Why Add Vinegar?

    • Adding vinegar to this tomato-based recipe will brighten the flavor and tame the sharp acidic flavor in the tomato sauce. Its an MVP in the kitchen, as important as salt and pepper.

    Mexican Oregano is preferred for this recipe. It's peppery, grassy, earthy flavor is a good compliment for Mexican Food. If you don't have Mexican Oregano, substitute Marjoram. Known for its aroma and delicate flavor, its related to Mexican oregano and will bring a sweet undertone to any recipe.

    How To Make Mexican Mac and Cheese

    Stovetop Option – One Pot

    Step 1 to make Mexican Mac and cheese, cooking onions and garlic.
    1. Step 1: Heat a large skillet over medium high heat. Once hot, add butter. Once butter is melted, add onion and cook until translucent for about 5 minutes. Add garlic and cook until fragrant. About 1 minute. Remove from heat and set aside. Note: I like to undercook the onions just a tad to add a little crunch of texture to the end dish.
    Combining all ingredients to Make Mexican mac and cheese.
    1. Step 2: Return cooked, drained pasta to the pan. Stir in reserved pasta water/bouillon, tomato sauce, and spices. Add the cooked onion and garlic mixture.
    Step 3 to make Mexican macaroni and cheese, stirring all ingredients.
    1. Step 3: Turn the heat down to low, add cheese and stir until cheese is melted and ingredients are well combined. Once combined add the cider vinegar and stir well. Serve immediately for a stove top version, or follow my directions for oven baked topped version.

    Pro Tip: Why is pasta water good for pasta sauce? Don’t throw all of that pasta cooking liquid down the drain, It's liquid gold. It's a must to add to any sauce for any pasta dish. It's high in starch and this salty starchy water helps the sauce cling to the pasta while helping to thicken the sauce. It turns any pasta dish into a luxurious pasta dish.

    Baked Option:

    If you’d like to take the additional time, remove the stovetop mac and cheese to an oven safe casserole pan. Top with sliced tomatoes and sprinkle the tomatoes with a little more cheese. Broil until cheese is melted and just starting to brown. Watch it close, over broiling will cause the pasta to dry out. The featured photo at the top of this post has been prepared this way.

    Variations on Mexican Macaroni and Cheese

    • Protein: Make It A Meal: Many Mexican macaroni and cheese recipes add meat. Make Mexican Mac and Cheese with ground beef by browning beef, then adding onions and garlic the proceed with recipe. Also consider chorizo, or even cooked ground chicken breast to make this a main course entree.
    • Chile Peppers: Add a 4-ounce can of Hatch Green Chile peppers for a more Southwestern feel.
    • Add frozen, thawed sweet corn. Or canned black beans, drained and rinsed. Add these items right before you add the pasta. The heat from the pasta will warm them right up.
    • More Smoky Heat: Add a couple of seeded, deveined canned Chipotle Chile peppers and a bit of the sauce. This will add a wonderful smoky flavor. Be careful, these peppers are spicy hot.
    • Crunch: Mix ¼ panko bread crumbs with 1 tablespoon melted butter. Sprinkle on top of the mac and cheese and broil until it starts to brown. Toasted panko turns my Green Chile Mac and Cheese into a very special treat.

    Tips For Success – Trouble Shooting

    • Cheese sauce isn’t smooth: Did you use packaged grated cheese? Packaged grated cheese has a coating added so it won’t clump in the package. This can also caused the cheese to not melt properly. Buy a block of cheese and grate it yourself. Also, please note, that the instructions call to lower heat before adding cheese. High heat can cause cheese to break and become oily.
    • Over powering or unbalanced spices: Is it too spicy? Add about ¼ cup of milk, half and half or cream. You’ll end up with a creamy Mexican Mac and Cheese that’s less spicy and tomato-y. Also, use Monterey Jack Cheese instead of Pepper Jack. Not spicy enough? Sprinkle in about ½ teaspoon more of the chile powder.
    • Sauce too thick? Again, add about ¼ cup of milk, preferred, due to the fat content to keep it creamy. You can also add a little bit of water, but go slow, you don’t want it to end up soupy. Plain water simply won’t blend as well as using milk that contains a fat content.
    • Creamy at first then dry? Pasta will naturally soak up the moisture in the sauce as it sits. Adding milk with a gentle stir will add moisture.
    • Mushy Macaroni? Simply means that the pasta was over cooked. Omitting the starchy pasta water will compromise the texture of the macaroni.

    What To Serve It With

    Mexican Mac and Cheese will go with about any Mexican Food Entree, but in my opinion, burgers and mac and cheese are matches made in heaven. Try this with my recipe for Southwest Ground Chicken Burgers, or my Hatch Green Chile Cheeseburgers.

    Mac and cheese goes well with grilled steaks, take a look at this recipe for Flank Steak with Chimichurri Sauce, or even grilled chicken like this Pollo Asado Recipe.

    Storage

    • Store any leftovers in an airtight container in the refrigerator for up to 5 days.
    • Reheating preference: I have found that reheating macaroni and cheese dishes work better using the microwave. The 50% power feature is your best friend. Reheat individual servings in 30 second increments until warmed. If the past is dry, stir in a little milk before reheating.
    • Freezing: Freeze in an airtight freezer container for up to three months. Let the mac and cheese thaw in the refrigerator overnight and then reheat individual servings.

    FAQ’s

    Can I Use Salsa or Rotel Instead?

    I’m not crazy about that idea. Using salsa instead of tomato sauce will simply over-power the flavor, and even change the flavor profile. Rotel is a watery tomato product that is quite spicy. You won’t end up with a creamy Mexican Mac and Cheese using Rotel tomatoes.

    Is This Mexican Mac and Cheese Authentic?

    Since macaroni and cheese is a European invention and thus All-American, this recipe could best be described as Mexican-inspired, or Tex Mex.

    Can I Make This Gluten Free?

    Simply replacing the macaroni with Gluten Free macaroni will make this a gluten free recipe. The remaining ingredients are all naturally gluten free.

    Mexican macaroni and cheese with sliced tomatoes on top. Served in a tart pan on a sheet pan grate.

    Recipe for Mexican Macaroni and Cheese

    And if you like a creamy cheesy mac and cheese, tomato combo. Don’t miss my article on Mac and Cheese with Tomatoes. It’s a great recipe.

    More Macaroni and Cheese Recipes

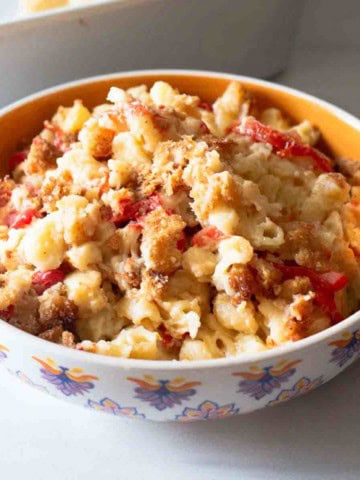
    • White cheddar mac and cheese in an orange bowl.
      Stovetop Mac and Cheese with White Cheddar
    • Macaroni and cheese with tomatoes served in a bowl.
      Gruyere Mac and Cheese with Tomatoes
    • A bowl of beer mac and cheese.
      Easy Stovetop Beer Mac and Cheese
    • A plate of macaroni and cheese made with bachamel sauce.
      Macaroni and Cheese Bechamel Sauce

    And if you’re a pasta fans like us, you won’t want to miss my Pasta category. You’ll find plenty of comfort food goodness. including the most popular macaroni and cheese recipe on my site for Flemings Steakhouse Mac and Cheese. And this Southwestern version of Chipotle Mac and Cheese with Chicken.

    This recipe is adapted from my friend Yvette’s Recipe at Muy Bueno Cookbook.

    If you liked this recipe, please leave a star ⭐⭐⭐⭐⭐ rating in the recipe card below and leave a comment. I always appreciate your feedback and hearing how everything went.

    And, don’t forget to subscribe to my newsletter for more delicious recipes and cooking tips. Make it a delicious day … every day.

    Mexican mac and cheese cooked stovetop in a Dutch oven.
    Print Recipe
    5 from 5 votes

    Easy Stovetop Mexican Macaroni and Cheese with Tomato Sauce

    There's nothing like homemade macaroni and cheese. Throw in a Mexican twist for this feisty version of our favorite comfort food. The whole family will love this Mexican Mac and Cheese recipe. Easy and delicious and a perfect side dish for any Southwestern main course.
    Prep Time10 minutes mins
    Cook Time20 minutes mins
    Total Time30 minutes mins
    Course: Side Dish
    Cuisine: Mexican
    Servings: 8
    Calories: 432kcal
    Author: Lea Ann Brown

    Ingredients

    • 1 Sweet onion chopped
    • 2-4 cloves Garlic minced. Always measure garlic with your heart.
    • 2 Tablespoons Butter salted or unsalted
    • 1 pound Elbow macaroni
    • 1 teaspoon Chicken bouillon or tomato boullion
    • 1 cup reserved pasta cooking water
    • 15 ounces Tomato Sauce
    • 1 teaspoon New Mexico Chile Powder or ancho chile pepper, or 2 – 3 shakes of hot sauce
    • ½ teaspoon Mexican Oregano
    • 8 ounces Grated Pepper Jack Cheese
    • 8 ounces Velveeta cut into chunks
    • 1 teaspoon cider vinegar

    Instructions

    • Heat a large skillet over medium high heat. Once hot, add butter. Once butter is melted, add onion and cook until translucent for about 5 minutes. Add garlic and cook until fragrant. About 1 minute. Remove from heat and set aside.
    • Cook macaroni in salted water according to package instructions. Reserve 1 cup of pasta cooking water before draining. Place the chicken bouillon in the cup of hot pasta water to dissolve.
    • Return drained pasta to the pan. Stir in reserved pasta water/bouillon, butter, tomato sauce, and spices. Add onion and garlic mixture. Turn the heat down to low, add cheese and stir until cheese is melted and ingredients are well combined.
    • Once the cheese is melted and pasta is well mixed, add the cider vinegar and stir. Serve immediately.
    • Optional, and how the dish is pictured: If you'd like to take the additional time, remove the stovetop mac and cheese to an oven safe pan. Top with sliced tomatoes and sprinkle the tomatoes with a little more cheese. Broil until cheese is melted and just starting to brown.

    Video

    Notes

    Tips For Success – Trouble Shooting
    • Cheese sauce isn’t smooth: Did you use packaged grated cheese? Packaged grated cheese has a coating added so it won’t clump in the package. This can also caused the cheese to not melt properly. Buy a block of cheese and grate it yourself. Also, please note, that the instructions call to lower heat before adding cheese. High heat can cause cheese to break and become oily.
    • Over powering or unbalanced spices: Is it too spicy? Add about ¼ cup of milk, half and half or cream. You’ll end up with a creamy Mexican Mac and Cheese that’s less spicy and tomato-y. Also, use Monterey Jack Cheese instead of Pepper Jack. Not spicy enough? Sprinkle in about ½ teaspoon more of the chile powder.
    • Sauce too thick? Again, add about ¼ cup of milk, preferred, due to the fat content to keep it creamy. You can also add a little bit of water, but go slow, you don’t want it to end up soupy. Plain water simply won’t blend as well as using milk that contains a fat content.
    • Creamy at first then dry? Pasta will naturally soak up the moisture in the sauce as it sits. Adding milk with a gentle stir will add moisture.
    • Mushy Macaroni? Simply means that the pasta was over cooked. Omitting the starchy pasta water will compromise the texture of the macaroni.

    Nutrition

    Calories: 432kcal | Carbohydrates: 52g | Protein: 21g | Fat: 16g | Saturated Fat: 9g | Polyunsaturated Fat: 1g | Monounsaturated Fat: 3g | Trans Fat: 0.1g | Cholesterol: 45mg | Sodium: 908mg | Potassium: 465mg | Fiber: 3g | Sugar: 8g | Vitamin A: 891IU | Vitamin C: 6mg | Calcium: 407mg | Iron: 2mg

    Mexican Macaroni and Cheese …It’s What’s for a Side Dish.

    « Previous Page
    Next Page »

    I'm Lea Ann

    Welcome to my Colorado kitchen. If you're a fan of rustic homestyle cuisine, you've come to the right place. I'm a Culinary School Grad with a passion to inspire you to cook as often as you can. I offer reliable, approachable and easy to follow recipes. So grab that skillet and let's cook.

    More about me

    Soup and Stew Recipes

    • Southwest chicken soup with hominy and potatoes.
      Sopa Ranchera, Southwest Chicken Soup
    • Creamy chicken tortilla soup with rotel tomatoes.
      Southwestern Creamy Chicken Tortilla Soup
    • Cowboy chili garnished with grated cheese and jalapeno pepers.
      New Mexico Style Cowboy Chili
    • Ground chicken chile with white beans.
      Giada’s Ground Chicken Chili with White Beans
    • Beef stew with mushrooms served in a skillet.
      Beef Stew With Mushrooms – Crock Pot Method
    • 7-can taco soup with ranch dressing.
      Original 7 Can Taco Soup with Ranch Dressing

    Reader Favorites

    • Super Moist Cheesy Cornbread with Creamed Corn
    • Flemings steakhouse macaroni and cheese in a white bowl.
      Flemings Steakhouse Mac and Cheese
    • A slice of Layered Mexican Casserole with ground beef and corn tortillas.
      Mexican Casserole with Ground Beef and Corn Tortillas
    • Beef Tagliata, thin sliced flank steak served over arugula and cherry tomatoes.
      Beef Tagliata (Italian Steak)
    • Ham and cheese quesadilla made with corn tortillas and topped with a fried egg.
      Crispy Ham and Cheese Corn Tortilla Quesadillas
    • Spinach chicken mushroom skillet dinner.
      Chicken Mushroom and Spinach Skillet

    Footer

    • Contact
    • About
    • Privacy Policy
    • Accessibility Statement
    • ↑ back to top

    Copyright © 2024 Cooking on the Ranch • Powered by Feast+

    Rate This Recipe

    Your vote:


    A rating is required
    A name is required
    An email is required