Cooking On The Ranch

  • Home
  • About
  • Recipe Roundup
  • Contact Me
  • Join Community
menu icon
go to homepage
  • Home
  • Soups and Stews
  • About
  • Recipes
  • Contact Me
    • Facebook
    • Instagram
    • Pinterest
  • search icon
    Homepage link
    • Home
    • Soups and Stews
    • About
    • Recipes
    • Contact Me
    • Facebook
    • Instagram
    • Pinterest
  • ×
    Home

    New Mexico Stacked Enchiladas

    November 15, 2021 By Lea Ann Brown 64 Comments

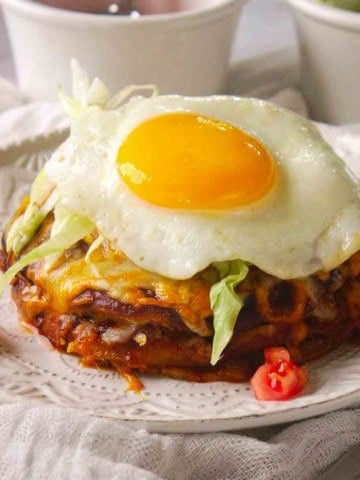
    New Mexico Stacked Enchiladas topped with a fried egg.

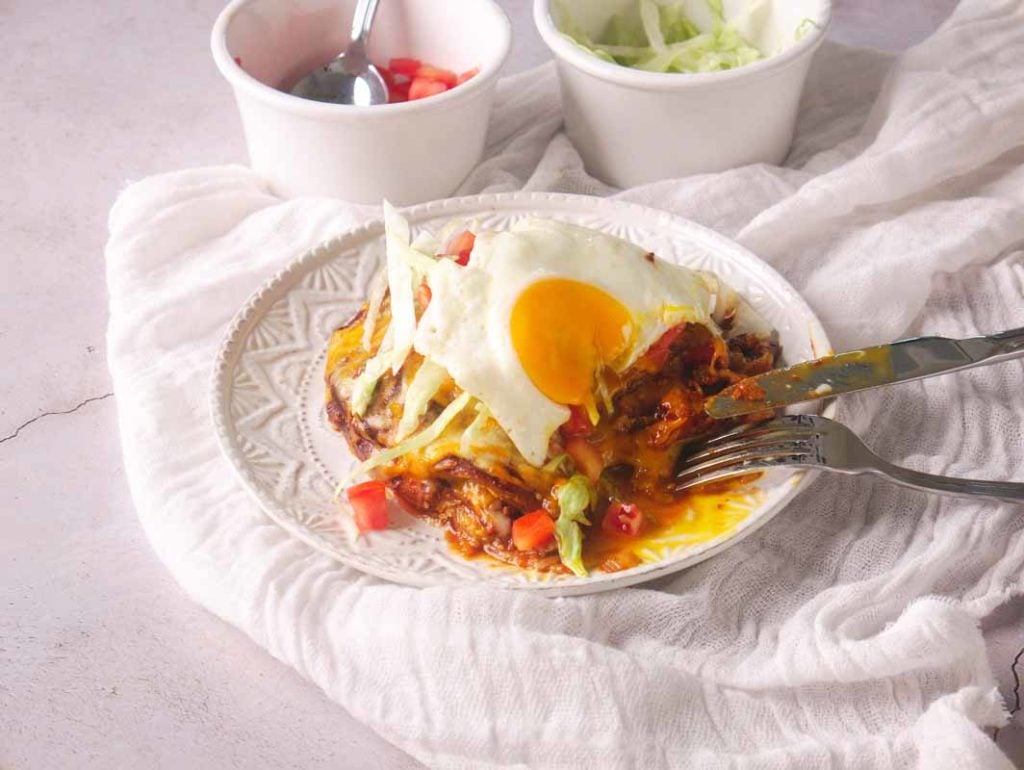
    New Mexico claims ownership to the creation of stacked enchiladas. Instead of rolled, fried tortillas are flat enchiladas, stacked with a mixture of ground beef and melted cheese and red chile sauce. In traditional New Mexico style, the enchiladas are then topped with a fried egg. Stacked enchiladas are guaranteed to bring your taste buds alive with true Southwestern charm.
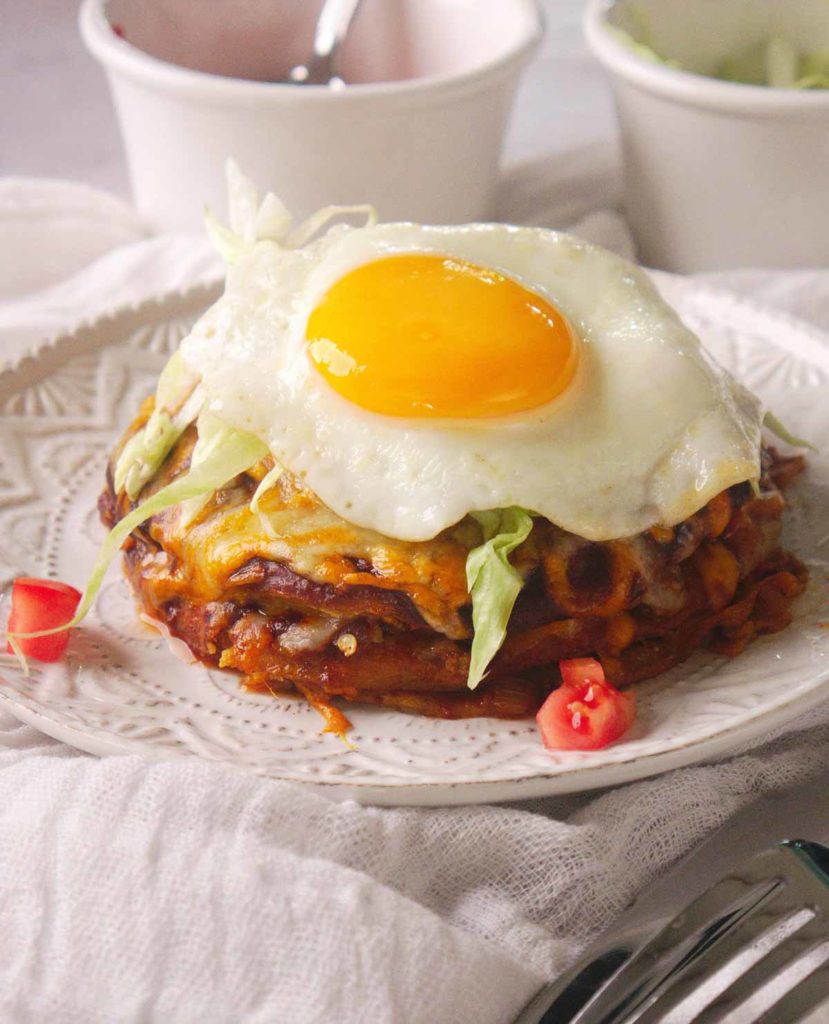
    New Mexico Stacked Enchiladas topped with a fried egg.

    Why Are Stacked Enchiladas Easier?

    Common in New Mexico, stacked enchiladas use the same ingredients as traditional enchiladas like these Pulled Pork Enchiladas Verde, but rather than rolled inside of a corn tortilla, the ingredients are stacked. Which makes for an easier no-fuss, quick-fix experience.

    For this recipe, these New Mexico stacked enchiladas use stand alone corn tortillas that have been fried then layered with enchilada sauce, ground beef and cheese. Once stacked, the enchiladas are then baked long enough to simply melt the cheese and bring the ingredients together.

    The corn tortillas stay crispy in spots and soft and chewy in others by absorbing the sauce and the juices from the ground beef and fresh tomatoes.

    And there’s that ooey-gooey cheesy part. The strong Southwestern flavors of this wonderful creation are truly enhanced when the yolk of the egg mixes in with the other ingredients.

    This recipe is compliments of one of my New Mexico born and raised chef instructors at Culinary School. He referred to them as Santa Fe Enchiladas.

    Being a New Mexico Stacked Enchilada purist, he always tops the dish with a fried egg cooked sunny side up or over medium. His family made stacked enchiladas with ground beef, but these can also be made meatless.

    For the sauce, make your own New Mexico Red Chile Sauce using a medium heat Chimayo chile powder. Or New Mexico Red Chile Sauce made from dried chile peppers. You can also use this Easy enchilada Sauce in place of the Red Chile Sauce.

    Let’s take a look.

    Ingredients You’ll Need:
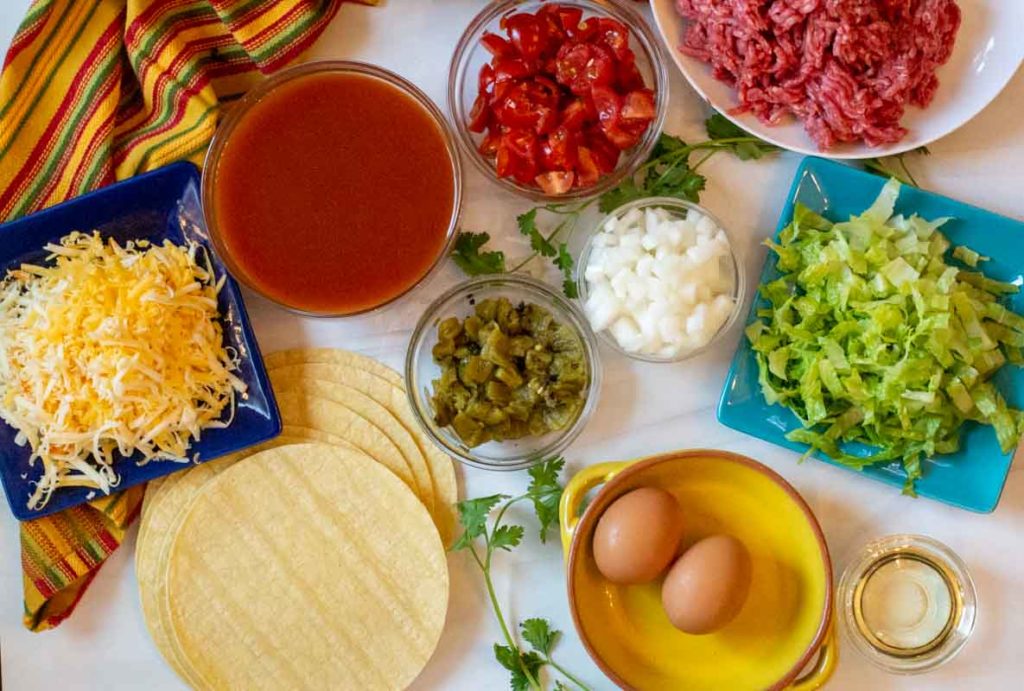
    ingredients to make New Mexico Stacked enchiladas

    Ingredients to Make Stacked Enchiladas

    • Red Chile Sauce or Red Enchilada Sauce
    • Diced fresh tomatoes (optional)
    • Ground Beef: Choose a lean blend. 93-7% works well here.
    • Sweet Onion
    • Shredded Lettuce (for garnish – optional) Iceberg lettuce is a good choice here.
    • Hatch Chile Peppers: Roasted, peeled, and diced
    • Oil for frying tortillas. A neutral oil works well here. Canola and Vegetable oil are good choices.
    • Eggs
    • Yellow Corn Tortillas
    • Shredded Cheese: I like to use a blend of cheddar and white melting cheese. Monterey Jack, Pepper Jack and Muenster are good choices here.

    Ingredient Subs and Substitutions

    • Enchilada Sauce: If you don’t want to make your own homemade enchilada sauce, purchase canned. Purchasing one 19-ounce, or two 10 ounce cans will give you plenty of sauce.
    • Tomatoes: If fresh tomatoes are out of season, use Cherub cherry tomatoes. Don’t substitute canned tomatoes for fresh. Canned tomatoes, even drained will offer too much liquid, causing the tortillas to become soggy. Omit tomatoes in this case.
    • Ground Beef: Substitute ground turkey or ground chicken in place of the ground beef. Shredded chicken will also work like a charm here. Or omit the meat entirely and make these vegetarian stacked enchiladas. You can also substitute black beans for the ground beef.
    • Tortillas: I prefer yellow corn tortillas for this recipe because they’re sturdier and have a more defined corn flavor. You can substitute white corn tortillas if you don’t have yellow.
    • Shredded Cheese: To make this recipe even easier, grab a package of Mexican blend shredded cheese at the grocery store.

    Step by Step Instructions

    Looking around on the web I found several versions of Stacked Enchiladas. Many don’t use ground beef, just cheese and the red chile sauce. We’ll make this version with ground beef.
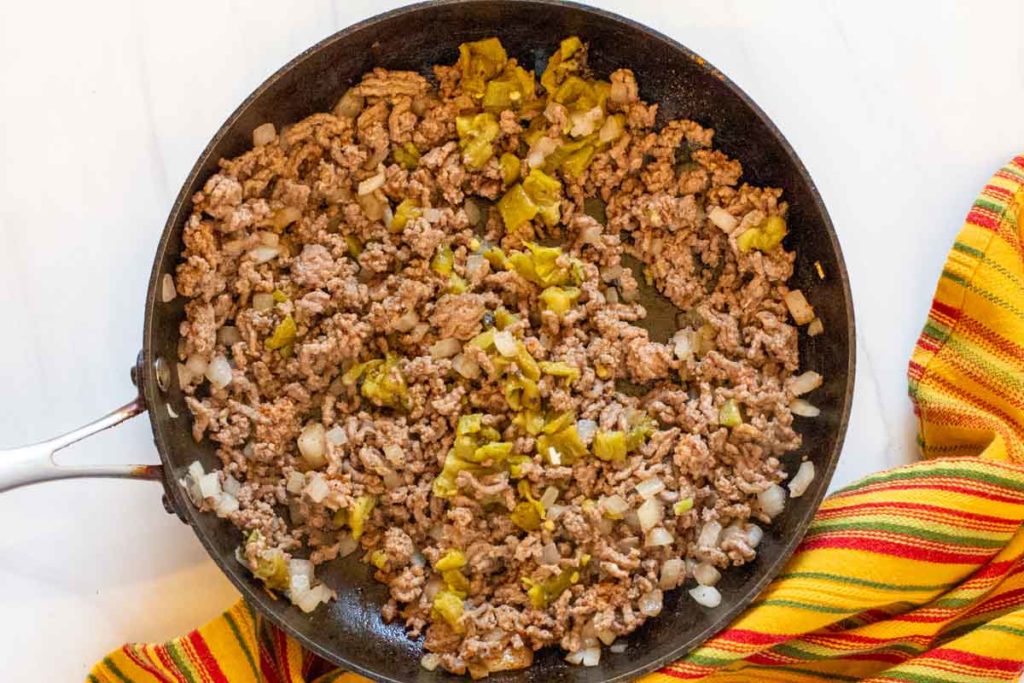
    Browning beef onions and green chile peppers to make stacked enchiladas
    1. Step 1: Brown The Beef With Onions and Chile Peppers: Heat a fry skillet over medium heat. Once the pan is hot, add the ground beef and onions. Add a couple of pinches of chili powder to the ground beef to add a kick of flavor. Cook until ground beef is just starting to lose its pink color. Add the chopped chiles and stir until chiles are warm and ground beef is no longer pink.
    How to fry corn tortillas for stacked enchiladas
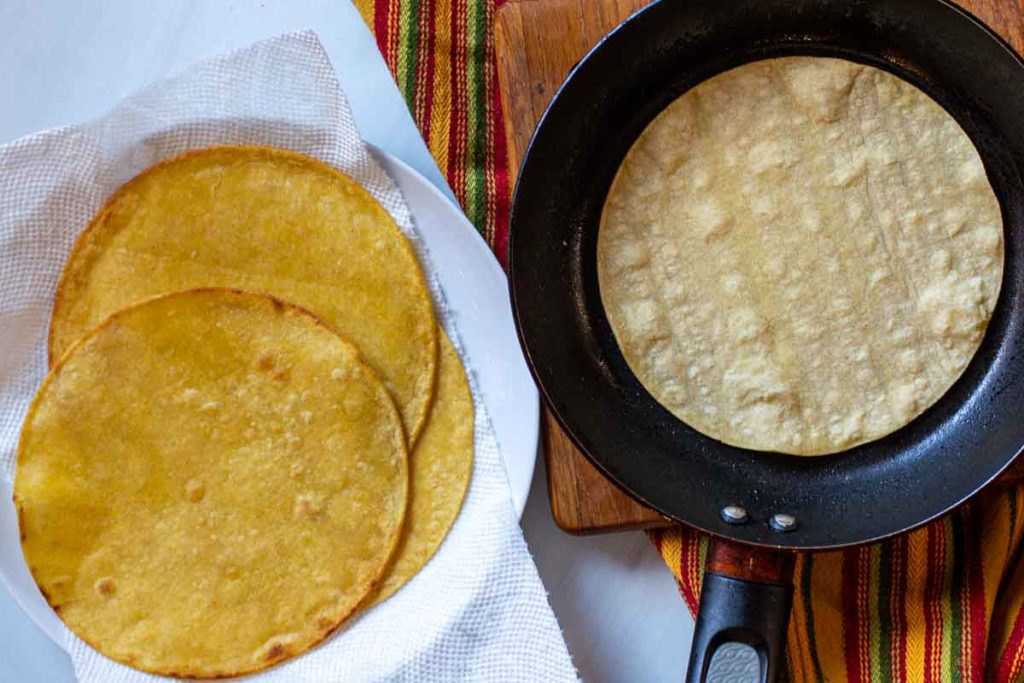
    1. Step 2: How To Fry Corn Tortillas: The corn tortillas for are handled a bit differently than rolled and baked enchiladas. We’ll skip the step of dipping the fried tortilla in the enchilada sauce, and simply fry the corn tortilla. I like to use my omelette pan. Heat the pan on medium high heat. Once hot, add the oil and heat until the oil is shimmering. One by one, place the corn tortillas in the hot oil and cook for 30 seconds. No need turn them. Once you see bubbles starting to form on the tortilla (see photo of the tortilla in the pan above), using a spatula, remove the tortilla to a plate lined with a paper towel. Repeat with the rest of the tortillas.
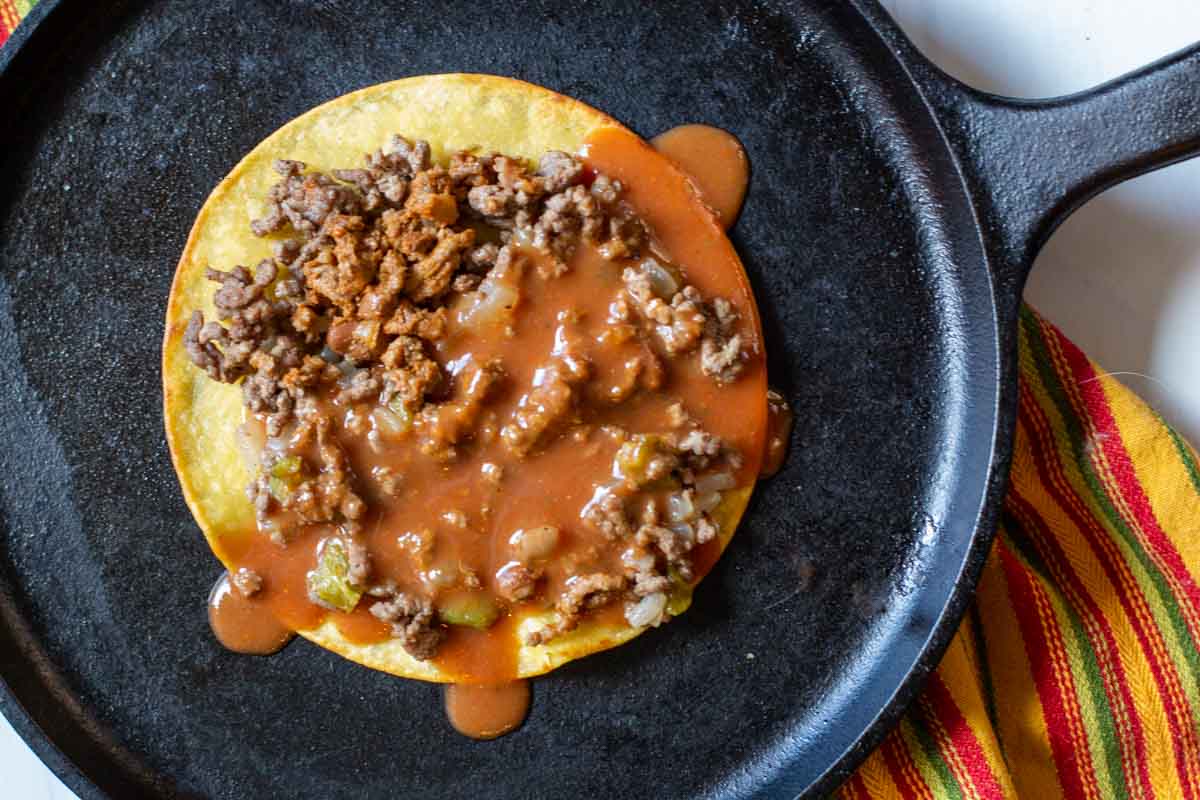
    Placing ground beef on corn tortilla to make stacked enchiladas.
    Adding enchilada sauce to tortillas for stacked enchiladas.
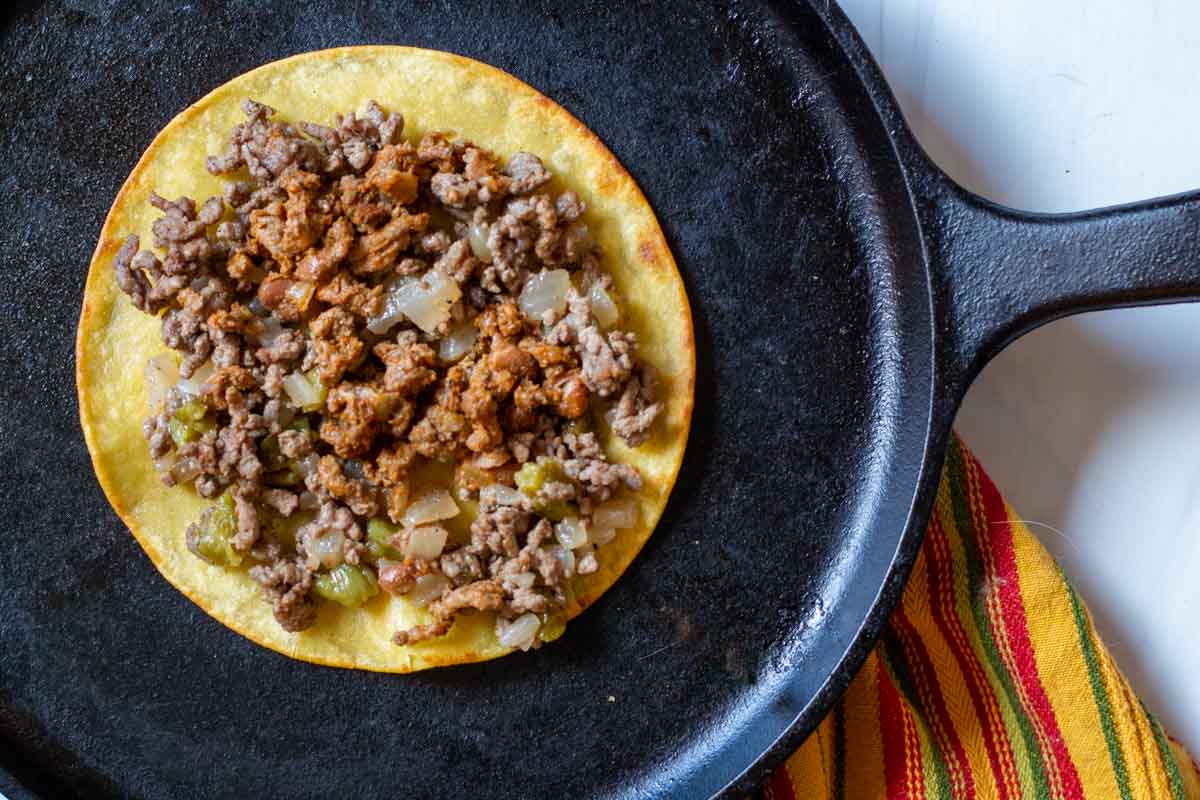
    1. Step 3: Start building the stacked enchiladas.Using an oven proof pan, start by placing enough of the ground beef, onion and chile pepper mix on a corn tortilla. Then add ¼ cup red chile sauce or enchilada sauce.
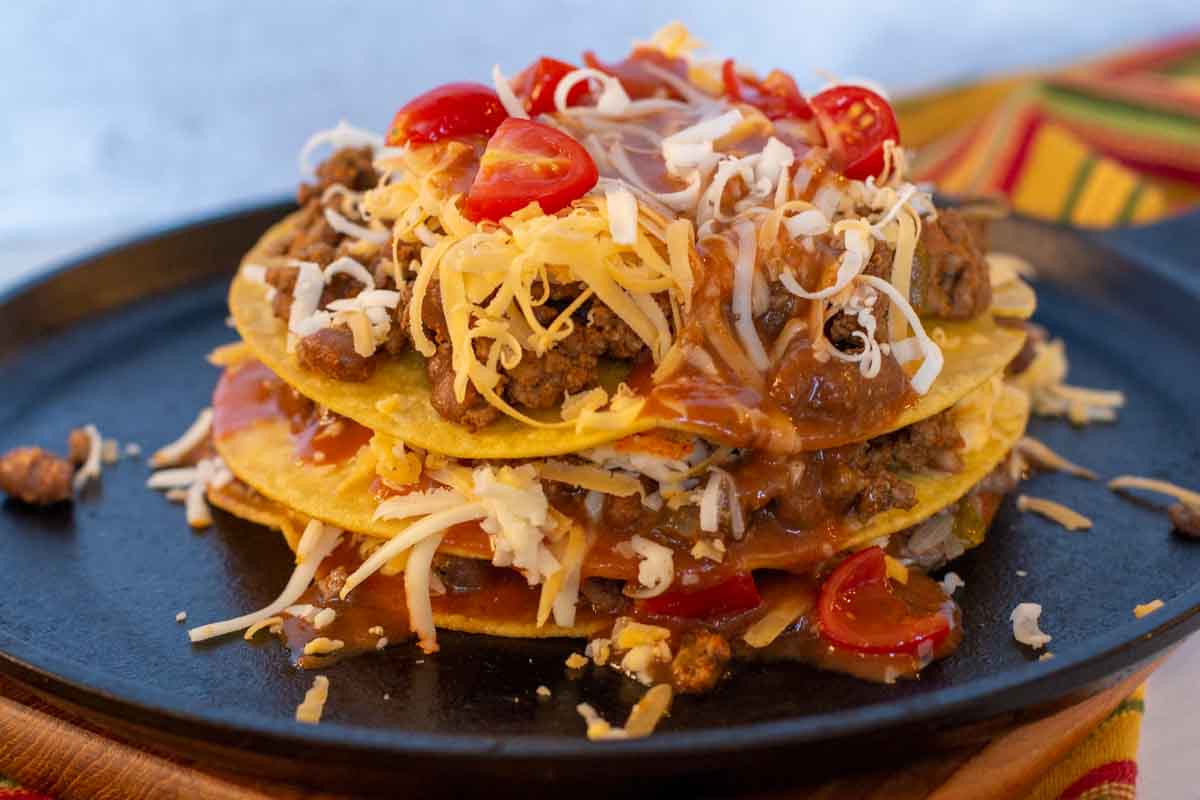
    adding cheese and tomatoes to corn tortillas to make stacked enchiladas
    Stacked enchiladas ready to bake
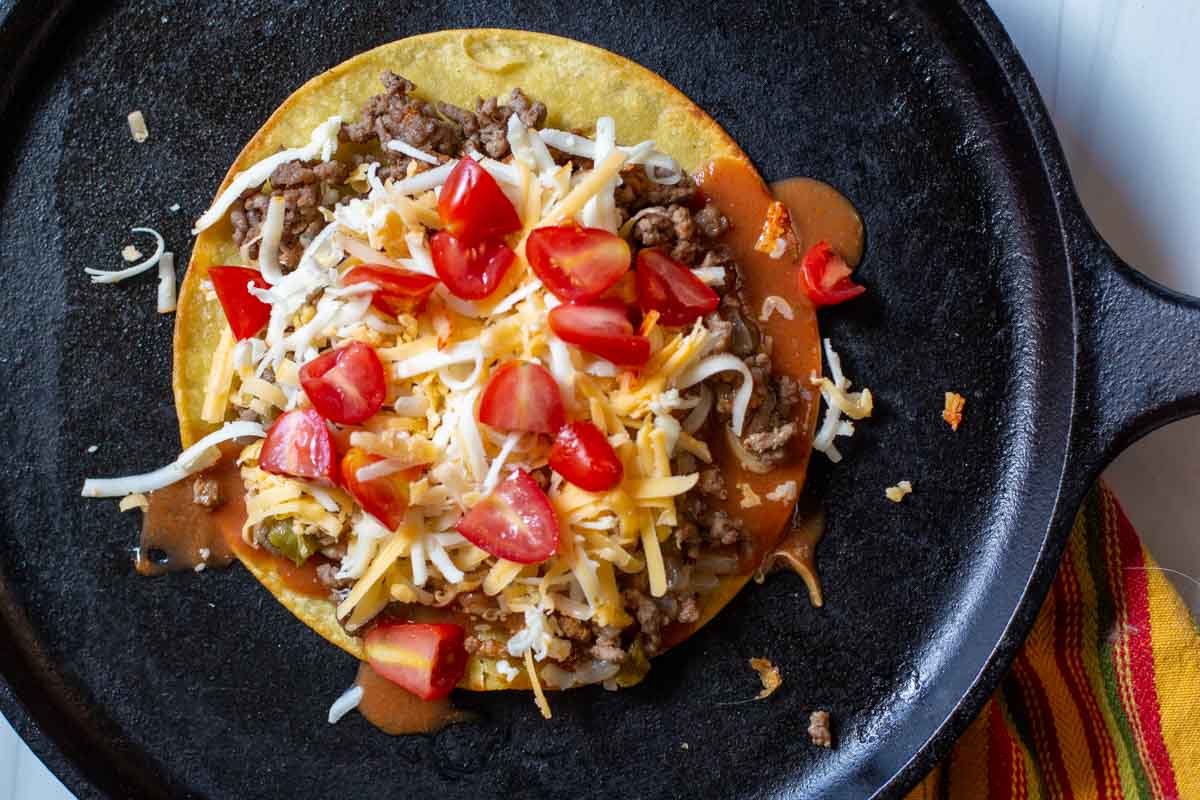
    1. Step 4: Finish by adding a good handful of grated cheese and a sprinkle of chopped tomato. Repeat with one more layer. Add cheese and sauce to the top of the third tortilla. These stacked enchiladas are ready to bake just long enough to melt that cheese. Use a comal or a baking sheet.

    Step 5: In the meantime, fry two eggs to sunny-side up stage.

    Variations

    • Switch things up and add sliced radishes and chopped cilantro.
    • Omit the ground beef and add corn and even black beans to make this a vegetarian stacked enchilada dinner.
    • A drizzle of sour cream will make this a Tex-Mex version.

    FAQ’s

    Why are my tortillas breaking when I remove them from the oil?

    There are two reasons for this. Either your oil is not hot enough, or you’re not cooking them long enough. I always lose or sacrifice a couple of tortillas during this process. Play with the heat until the tortilla fries just enough to be almost crispy in 30 seconds.

    Can I make stacked enchiladas ahead of time?

    I recommend that you assemble and bake these enchiladas when you’re planning on eating them. Storing fried tortillas can turn them soggy or rubbery. If you’re making red chile sauce or homemade enchilada sauce, that piece of this meal most certainly should be prepared ahead of time.

    Can I use another sauce beside red sauce?

    I’m so glad you asked! Try Hatch Green Chile Sauce for a verde experience. A mole sauce would bring this dish to a whole new level of earthiness.

    Recipe for New Mexico Stacked Enchiladas
    Eating New Mexico Stacked Enchiladas with a knife and fork.

    If you’re looking for fresh New Mexico cuisine, I hope you give this Stacked Enchilada recipe a try. They’re a wonderful treat and a great introduction to New Mexico Cuisine.

    Serve this hearty fiesta style meal alongside Salsa and chips. Or with Cowboy Beans. For a lighter side, try my Southwestern Salad.

    Explore More Southwestern Enchilada Recipes
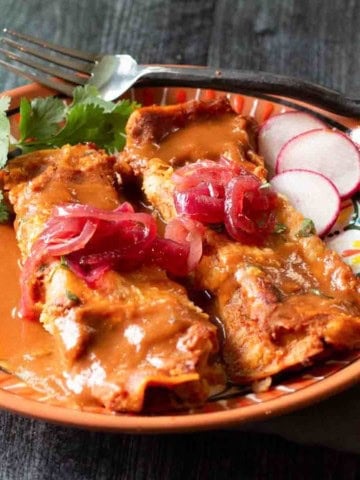
    • Pulled pork enchiladas.
      Cochinita Pibil Pork Enchiladas
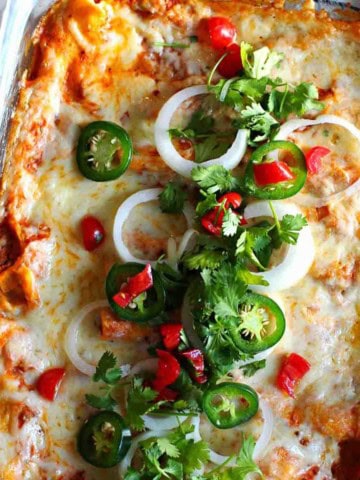
    • Chicken enchiladas made with a creamy red sauce topped with jalapeno peppers and fresh onion.
      Creamy Red Chile Sauce Chicken Enchiladas
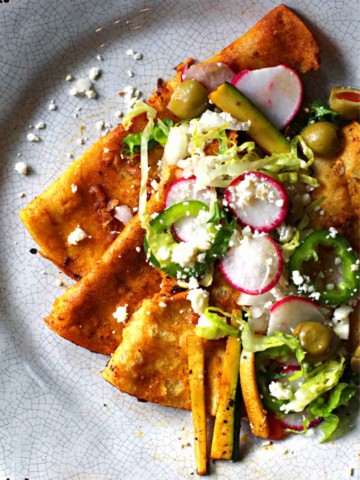
    • Street style folded enchiladas in red chile sauce topped with radish and crunchy vegetables
      Skillet Enchiladas With New Mexico Red Chile Sauce
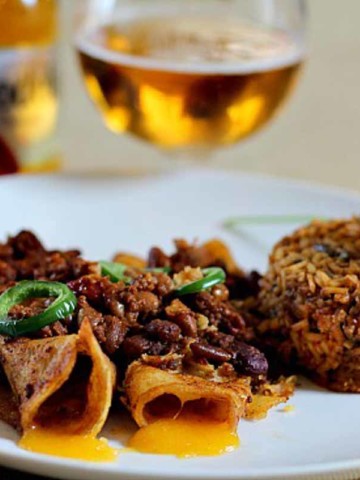
    • Two chile con carne enchiladas served with Mexican rice.
      Truck Stop Enchiladas (Chili Con Carne Enchiladas)

    And if you’ love Mexican food as much as we do, don’t miss my Mexican Food and Southwest Recipes Category. You’ll find lots of fun recipe to spice up your meal plans, including the most popular on my site for Hatch Green Chile with Pork.

    If you’re chile pepper crazed like us, don’t miss my post on Chili vs Chile for more Hatch Green Chile Recipes.

    If you liked this recipe, please leave a star ⭐⭐⭐⭐⭐ rating in the recipe card below and leave a comment. I always appreciate your feedback and hearing how everything went.

    And, don’t forget to subscribe to my newsletter for more delicious recipes and cooking tips. Make it a delicious day … every day.

    New Mexico Stacked Enchiladas topped with a fried egg.
    Print Recipe
    4.95 from 20 votes

    New Mexico Stacked Enchiladas

    New Mexico claims ownership to the creation of Stacked Red Chile Cheese Enchiladas. Perfect for any meal of the day and guaranteed to set your taste buds on fire!
    Prep Time30 minutes mins
    Cook Time20 minutes mins
    Total Time50 minutes mins
    Course: Mexican
    Cuisine: Mexican
    Servings: 2
    Calories: 628kcal
    Author: Lea Ann Brown

    Ingredients

    • 2 cups New Mexico Red Chile Sauce or Enchilada Sauce
    • 1 pound ground beef browned
    • 1 cup sweet onion chopped
    • 4 Hatch green chile peppers roasted, peeled and chopped. Or 1-4 ounce can chopped Hatch chile peppers
    • 2 cups shredded Mexican Blend cheese
    • 2 tomato chopped
    • chopped lettuce for topping
    • 6 yellow corn tortilla
    • ¼ cup vegetable oil canola oil works well here
    • 2 eggs fried over easy or over medium

    Instructions

    • Preheat oven to 350 degrees.
    • Brown ground beef and onion in a fry pan until done. Drain excess grease, stir in the Hatch Green chile and set aside.
    • In a fry pan, heat oil over medium high heat until hot. The oil should be hot enough that the tortillas bubbles as its lowered into the oil. Fry corn tortillas one at a time 30 seconds each. Place tortillas on a plate that's been lined with a paper towel. Place another paper towel on top of the tortillas as you cook them to help keep them warm.
    • To build the enchiladas. In an oven proof dishes, I use my Comal, place one tortilla. Top with ¼ cup ground beef and ¼ cup New Mexico Red Chile Sauce and a good sprinkle of the shredded cheese and fresh tomato. Place a tortilla on top of of that and another layer of the ingredients. Place the third tortilla on top and sprinkle with cheese and sauce. Use three tortillas for each stack.
    • In the meantime, fry two eggs until over easy.
    • Bake or broil until cheese is melted and bubbly. Serve immediately topped with more fresh tomato, chopped lettuce and fried egg. If you want add a dollop of sour cream to the top and diced raw onions (after baking)
    • This served the two of us with plenty of leftovers.

    Video

    Notes

    Tortillas: You can use white corn tortillas for this recipe, but the yellow corn tortillas have a stronger flavor and a stronger structure. They’ll hold up better to frying and the corn flavor will shine when topped with the enchilada sauce and the ground beef. 
    Frying Tortillas: Why are my corn tortillas breaking when I remove them from the oil? There are two reasons for this. Either your oil is not hot enough, or you’re not cooking them long enough. I always lose or sacrifice a couple of tortillas during this process. Play with the heat until the tortilla fries just enough to be almost crispy in 30 seconds.
    Can this recipe be made ahead of time? I recommend that you assemble and bake these enchiladas when you’re planning on eating them. Storing fried tortillas can turn them soggy or rubbery. If you’re making red chile sauce or homemade enchilada sauce, that piece of this meal most certainly should be prepared ahead of time.
    Vegetarian: Omit the ground beef and make this recipe a vegetarian entree.
    Ground Beef Seasoning: If you’d like to add a bit of seasoning to the ground beef, add a couple of pinches of chili powder, or New Mexico red chile powder. A spoonful of taco seasoning will also work here.

    Nutrition

    Calories: 628kcal | Carbohydrates: 34g | Protein: 41g | Fat: 37g | Saturated Fat: 16g | Polyunsaturated Fat: 2g | Monounsaturated Fat: 14g | Trans Fat: 1g | Cholesterol: 197mg | Sodium: 1357mg | Potassium: 1060mg | Fiber: 7g | Sugar: 11g | Vitamin A: 1491IU | Vitamin C: 24mg | Calcium: 736mg | Iron: 5mg

    Stacked Enchiladas …They’re what’s for Dinner.
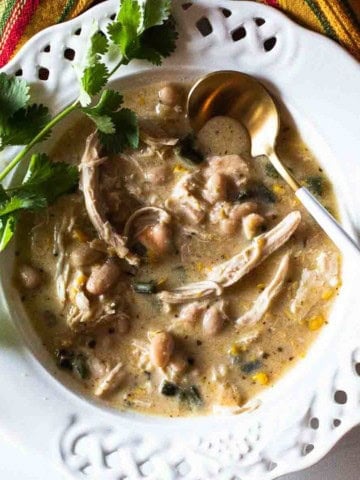
    Southwestern Rotisserie Chicken Soup – 30 Minute Weeknight Meal

    November 10, 2021 By Lea Ann Brown 39 Comments

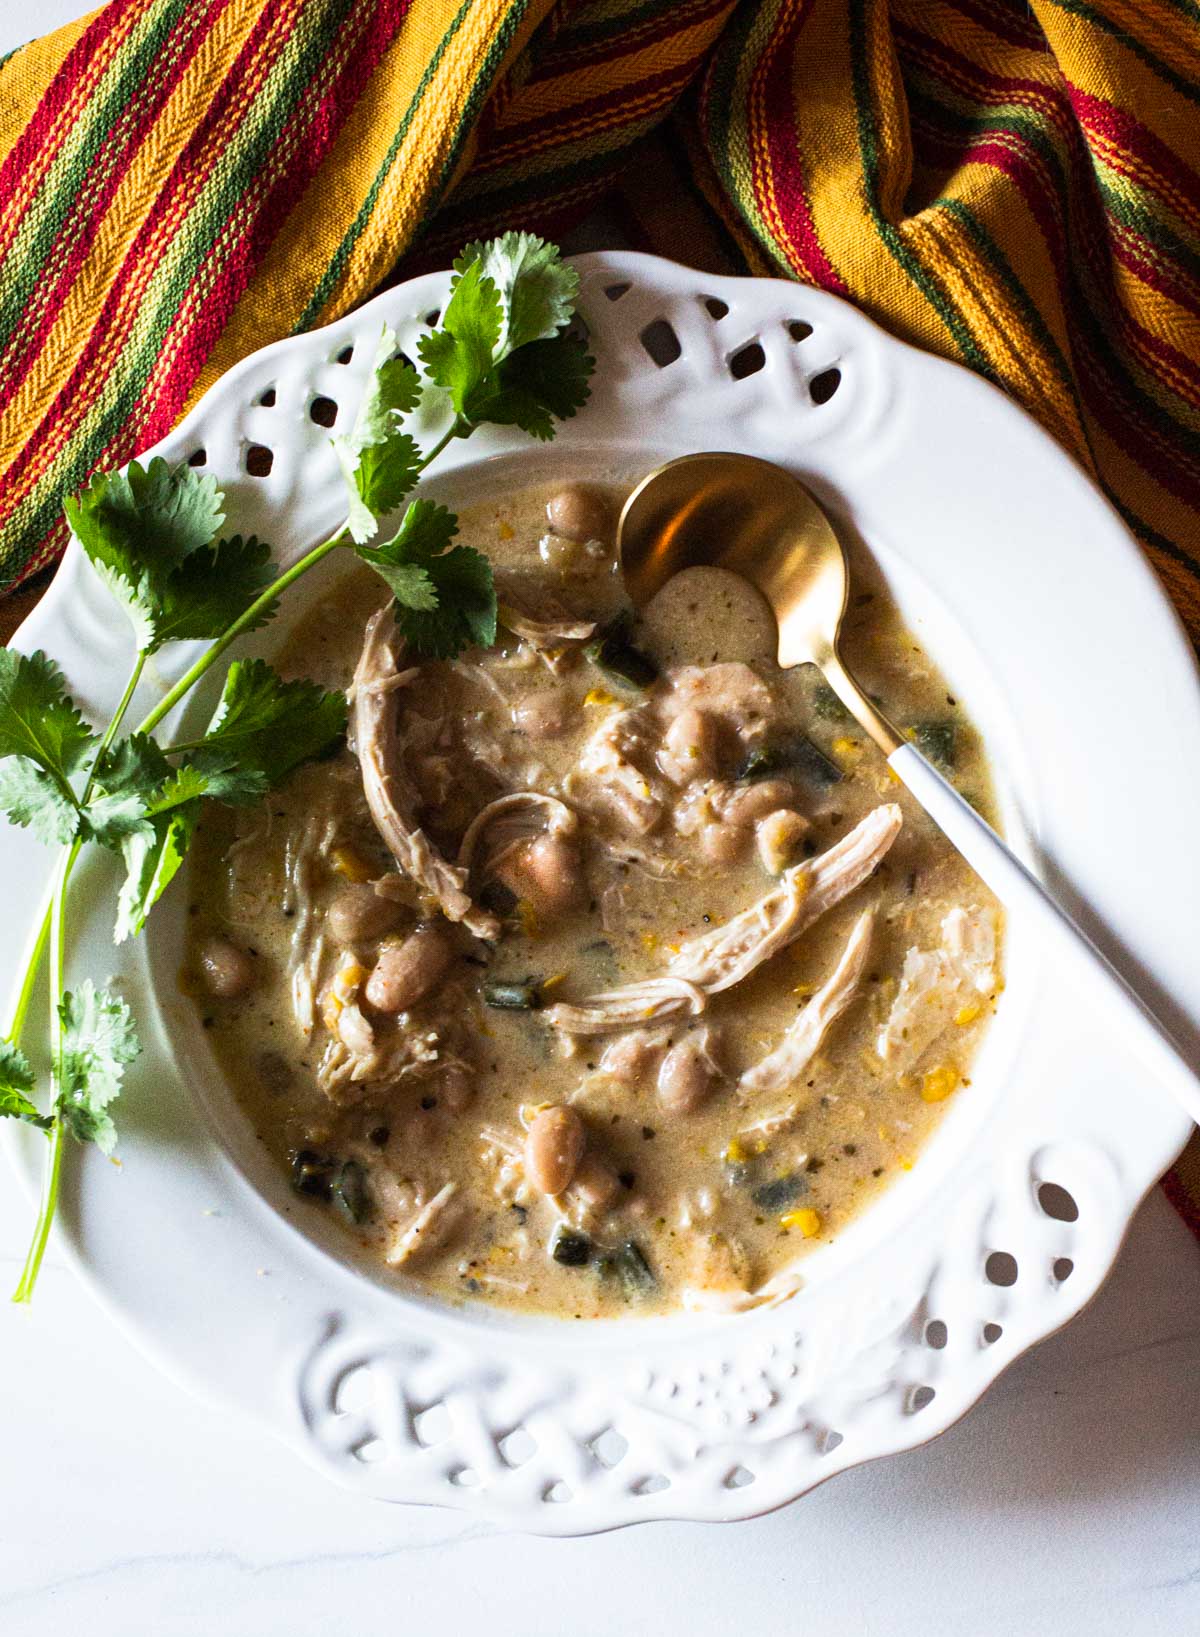
    Rotisserie chicken soup served in a white bowl garnished with cilantro.

    This Rotisserie Chicken Soup is Ready in 30 minutes . Next time you have a left rotisserie chicken, turn it into this rich tasting chicken soup, with a Mexican flair. Chicken soup with rotisserie chicken is absolutely perfect for a weeknight dinner. Using canned beans, and canned creamed corn and warming spices, you’ll simply love the simplicity of this recipe.

    If this recipe has piqued your interest, don’t miss my recipe for Southwest Spicy Chicken and Cabbage Soup. Clean eating never had it so good.

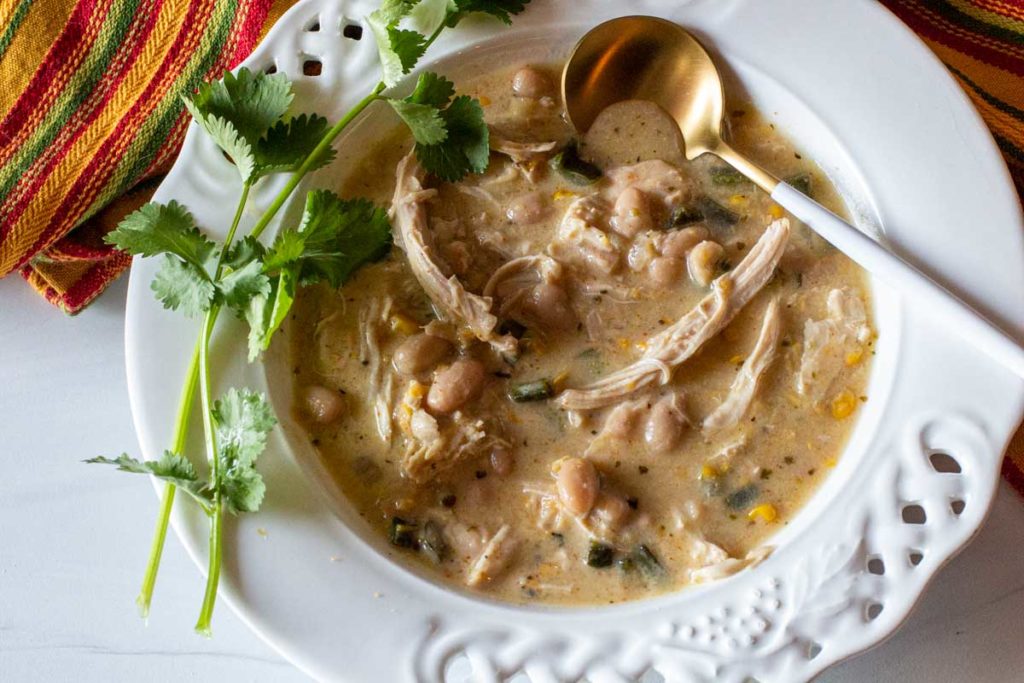
    Rotisserie Chicken Soup garnished with cilantro

    Ready In 30 Minutes

    Let’s take a little time for some rotisserie chicken gratitude and to those responsible for rotisserie chickens in our market. Those people have created a grab and go situation that makes us all happy during a busy work week. And those tasty chickens are great for a quick soup recipe like this Southwestern Rotisserie Chicken Soup.

    Using canned chicken broth, canned corn, and canned beans, the only chopping to do is onion and poblano peppers. It’s easy to remove the meat from a rotisserie chicken = dinner on the table in 30 minutes!

    Why This Southwestern Rotisserie Chicken Soup Recipe Works

    • Chicken soup using rotisserie chicken makes amazing meal. Using leftovers is a life-saver for a quick to the table weeknight meal.
    • This soup is not just a meal, but a comforting and flavorful experience that brings together the rich and robust flavors of the Southwest.
    • This easy-to-make soup is a perfect solution for utilizing leftover rotisserie chicken, transforming it into a hearty and satisfying dish. The combination of cooked chicken, canned beans, creamed corn, and warming spices creates, makes this a quick weeknight dinner that will become a go-to favorite.
    • This is a soup recipe that’s on the table pronto!

    This is a recipe idea I swiped from my friend and neighbor, Rosa. Yes, the same Rosa that shared her very popular red chile sauce recipe with all of us.

    Let’s take a look.

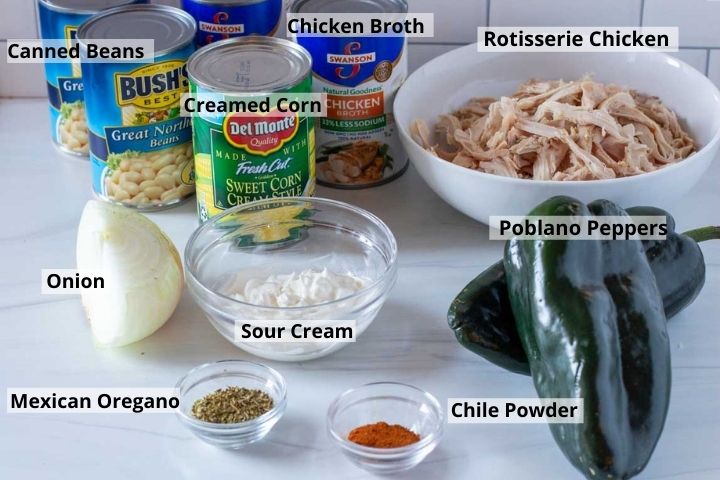
    Ingredients You’ll Need

    ingredients to make rotisserie chicken soup
    • Canned Beans: I like to use Great Northern Beans to keep this a white chicken soup recipe.
    • Canned Creamed Corn: I love this ingredient for this soup. Canned creamed corn adds a touch of sweetness and a touch of creaminess. No need to drain the corn at all.
    • Chicken Broth
    • Poblano Peppers: My go-to pepper for most Mexican food recipes, they’re readily available, mild on the heat scale yet full of earthy flavor.
    • Chile Powder: Please use a single variety chile powder rather than chili powder. Chili powder is a blend of spices whereas chile powder (with an e) is a powder made solely from ground chile peppers. New Mexico ground red chili powder is my choice, but Ancho chile powder will work very well here.
    • Mexican Oregano: Mexican oregano has lemon and citrus flavors which always pair well with spicy Mexican recipes.
    • Salt and pepper: To taste.
    • Sour Cream: Please use full fat. You’ll be more pleased with the creaminess it brings to the soup over a thinner low-fat option.
    • Rotisserie Chicken: Use white and dark meat. When you’re craving something warm and comforting, this White Wine Chicken Potato Vegetable Soup is a delicious way to use leftover rotisserie chicken.

    Ingredient Swaps and Subs

    • Canned Beans: Use any type of canned beans you’d like for this recipe. Cannellini beans are a good white bean substitute for Great Northern, and you can also use canned pinto beans. For fun, try canned yellow or white hominy in place of the beans. It’s always a welcome addition to any Mexican soup.
    • Broth: Vegetable broth would be a good substitute here. I would advise against beef broth, as it would completely change the flavor profile of this creamy rotisserie chicken soup theme. If you’re watching sodium intakes, use a low sodium chicken broth.
    • Poblano Peppers: Fresh jalapeno peppers would be a good substitute here. If you want to tame the heat, remove the veins and seeds from the jalapenos. Then you have a similar heat profile as the poblano peppers. Use 4 jalapenos in place of the poblanos.
    • Oregano: Most people think that you can simply use regular (Mediterranean) oregano in place of Mexican Oregano. You most certainly can, but a better substitute is Marjoram. Known for its aroma and delicate flavor, its related to oregano and will bring a sweet undertone to any recipe.
    • Sour Cream: Substitute Mexican Crema for sour cream. You can find it in the Mexican Section of the produce department.

    Making Rotisserie Chicken Soup – It’s Easy

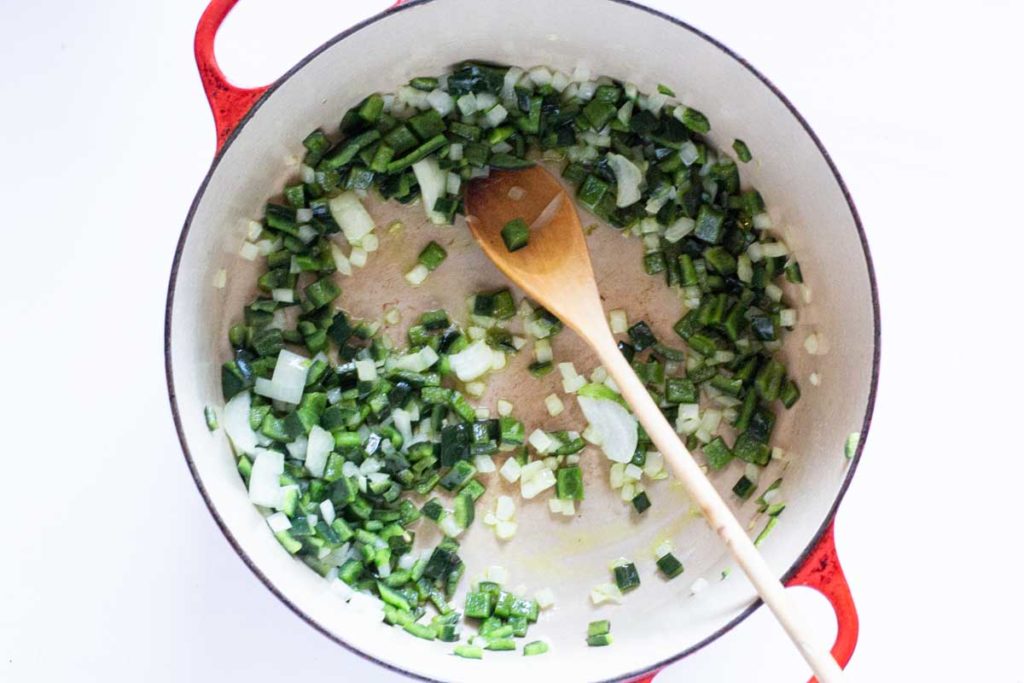
    cooking poblano peppers and onions in a dutch oven.
    1. Step 1: Sautee Vegetables Heat a Dutch oven over medium high heat. One the pan is hot, add 2 Tablespoons of Canola Oil. Once the oil is shimmering, add the chopped poblano peppers and onions. Sautee for about 5 minutes, stirring often.
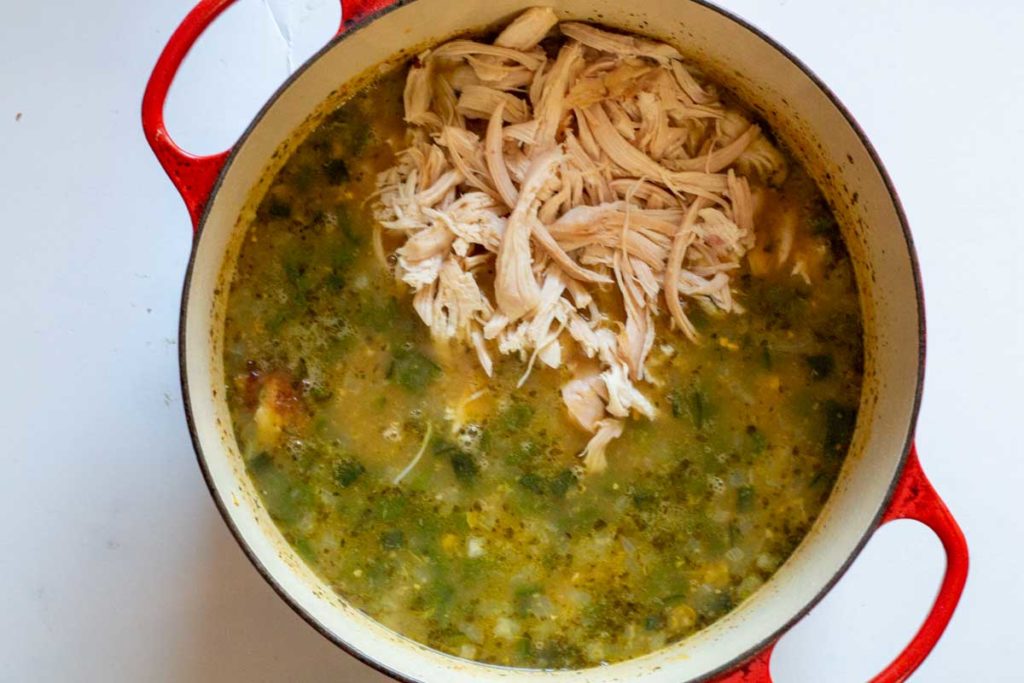
    Adding shredded rotisserie chicken and broth to vegetables for rotisserie chicken soup
    1. Step 2: Add the shredded Rotisserie Chicken meat and the broth.
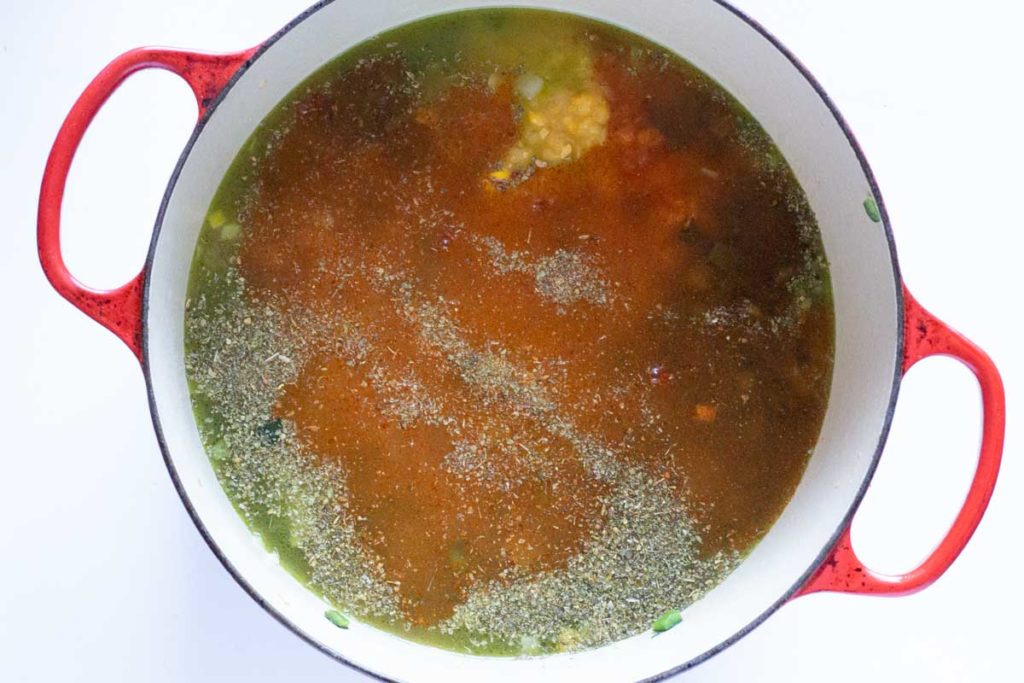
    Adding spices to rotisserie chicken soup
    1. Step 3: Add creamed corn, canned beans, spices and stir. Cook on medium low for about 15 minutes or until flavors are blended and chicken, beans and corn are well heated.

    Voila, diner in a jiff.

    Tips For Success

    • Using That Chicken Carcass: meat attached and lots of flavor in those bones. Chicken stock from rotisserie chicken is easy to make. Just grab a large soup pot and cover the carcass with enough water to cover. Add a handful of chopped carrots, celery and onion. Some parsley is nice here. Rachel Ray has a nice easy recipe, check it out.
    • Use both white and dark meat. That dark meat will bring more flavor to the soup.

    Tips and FAQ’s

    Do I Have To Use Rotisserie Chicken?

    This chicken soup recipe will work very well with quick baked chicken breasts. Just set the oven temp to 350 degrees and place two boneless skinless chicken breasts in a casserole dish sprayed with non-stick spray. Salt and pepper and bake until done. Depending on the size of the chicken breast, it will take about 20 to 30 minutes. Let the chicken cool and cut into bite sized pieces or shred. In the meantime you can be gathering ingredients to prepare the soup.

    Is Rotisserie Chicken Soup Good For You?

    It is. First of all, it’s a good source of lean protein. Especially since you’re removing the skin from the cooked rotisserie chicken. Beans also provide a good source of protein, antioxidants, maintain glucose metabolism, folate which is essential to overall health. And more. Source, Medical News Today.

    Can I Make This Recipe In An Instant Pot?

    You can, but I truly believe it would take longer than cooking stove-top.

    What To Serve It With

    • Pair this with a tossed green salad for a simple balanced meal. And dress it with this very popular recipe for Blue Cheese Dressing.
    • Bread is always a welcome side with soup, try this recipe for Cornbread Made with Creamed Corn. Rich and moist, it’s one of the most popular recipes on my site.

    Freezer and Leftover Tips

    • Storage: If there happens to be any leftovers, after the soup has completely cooled, simply store in the refrigerator in a sealed container. The soup will keep for 5 days.
    • Freezer: Place any leftover soup in a freezer safe container. I like to use freezer safe zip-lock style bags. Just stand the bags up spoon in the soup to about ¾ of the way full. Squeeze the air out, make sure the bag is sealed well and store laying down flat to optimize freezer space. Be sure to label and date the bag.
    • How To Reheat This Soup: You can place the soup into individual bowls and heat in the microwave. The 50% power feature is your best friend. Heat in 30 second increments at 50% power until hot enough to eat. I find it much easier to place the leftover soup in a sauce pan and reheat stove top. Just heat until it comes to a simmer, stirring a few times and serve.
    Chicken soup with rotisserie chicken.

    More Popular Chicken Soup Recipes

    • Chicken poblano soup with hominy.
      Chicken Poblano Soup With Hominy
    • Garbanzo Beans and Chicken soup with white beans.
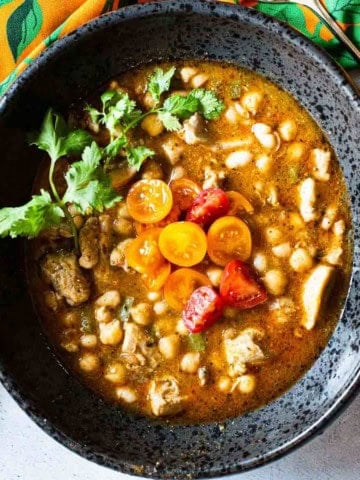
      Southwest Garbanzo Bean Soup With White Beans and Chicken
    • Creamy chicken tortilla soup with rotel tomatoes.
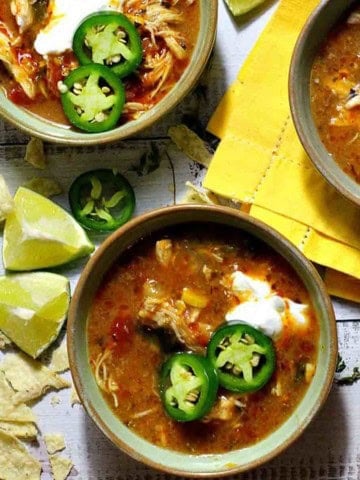
      Southwestern Creamy Chicken Tortilla Soup
    • Chicken cheese soup with poblano peppers garnished with tortilla strips
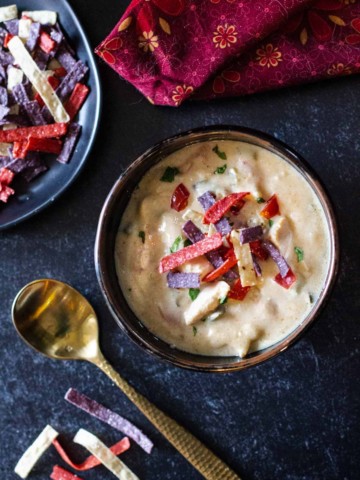
      Cheddar Cheese Soup with Chicken and Poblano Peppers

    And if you’re looking for even more soup recipes, don’t miss my Soup Category. You’ll find lots of great recipes, including one of the most popular chicken soup recipes on my site for Sopa Ranchero, Southwest Chicken Soup.

    And if you're looking for a soup recipe to cook when you don't feel like cooking, check this one out for Taco Soup with Ranch Dressing.

    If you liked this recipe, please leave a star ⭐⭐⭐⭐⭐ rating in the recipe card below and leave a comment. I always appreciate your feedback and hearing how everything went.

    And, don’t forget to subscribe to my newsletter for more delicious recipes and cooking tips. Make it a delicious day … every day.

    Rotisserie chicken soup served in a white bowl garnished with cilantro.
    Print Recipe
    5 from 5 votes

    Southwest Rotisserie Chicken Soup

    Rotisserie Chicken Soup is absolutely perfect for a weeknight dinner. Using canned beans, and canned creamed corn, this Rotisserie Chicken Soup is Ready in 30 minutes
    Prep Time15 minutes mins
    Cook Time15 minutes mins
    Total Time30 minutes mins
    Course: Main Course Chicken
    Cuisine: American/Mexican
    Diet: Gluten Free
    Servings: 6
    Calories: 148kcal
    Author: Lea Ann Brown

    Ingredients

    • 2 Tablespoons Canola Oil
    • 2 poblano peppers chopped
    • ½ sweet onion chopped
    • 3 Cups Rotisserie Chicken shredded or cut into bite sized pieces
    • 2 cans Great Northern Beans 2-15.8 ounce cans, drained
    • 14.75 ounce creamed corn 1 can, not drained
    • 29 ounces chicken broth 2 cans
    • ½ teaspoon Mexican Oregano or marjoram
    • ½ teaspoon Chile powder New Mexico or Ancho
    • Salt and pepper to taste
    • ¼ cup sour cream

    Instructions

    • Heat a Dutch oven over medium high heat. One the pan is hot, add 2 Tablespoons of Canola Oil. Once the oil is shimmering, add the chopped poblano peppers and onions. Sautee for about 5 minutes, stirring often.
    • Add shredded Rotisserie Chicken meat and the broth to the pan.
    • Add creamed corn, canned beans, spices and stir until well blended.
    • Cook on medium low for about 15 minutes or until flavors are blended and chicken, beans and corn are well heated.
    • Stir in the sour cream and serve immediately.

    Notes

    Chicken Breasts: Rotisserie chicken soup will work very well with quick baked chicken breasts. Just set the oven temp to 350 degrees and place two boneless skinless chicken breasts in a casserole dish sprayed with non-stick spray. Salt and pepper and bake until done. Depending on the size of the chicken breast, it will take about 20 to 30 minutes. Let the chicken cool and cut into bite sized pieces or shred. In the meantime you can be gathering ingredients to prepare the soup.
    If there happens to be any leftovers, after the soup has cooled, simply store in the refrigerator in a sealed container. The soup will keep for 5 days.

    Nutrition

    Calories: 148kcal | Carbohydrates: 20g | Protein: 3g | Fat: 8g | Saturated Fat: 2g | Polyunsaturated Fat: 2g | Monounsaturated Fat: 4g | Trans Fat: 1g | Cholesterol: 5mg | Sodium: 788mg | Potassium: 413mg | Fiber: 3g | Sugar: 5g | Vitamin A: 1648IU | Vitamin C: 46mg | Calcium: 49mg | Iron: 2mg

    Rotisserie Chicken Soup … It’s Whats for Dinner

    Brown Rice Mushroom Soup Without Cream

    November 7, 2021 By Lea Ann Brown 19 Comments

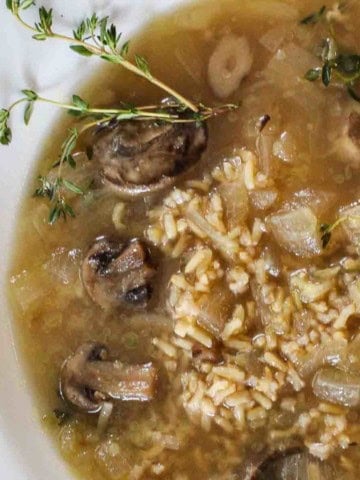
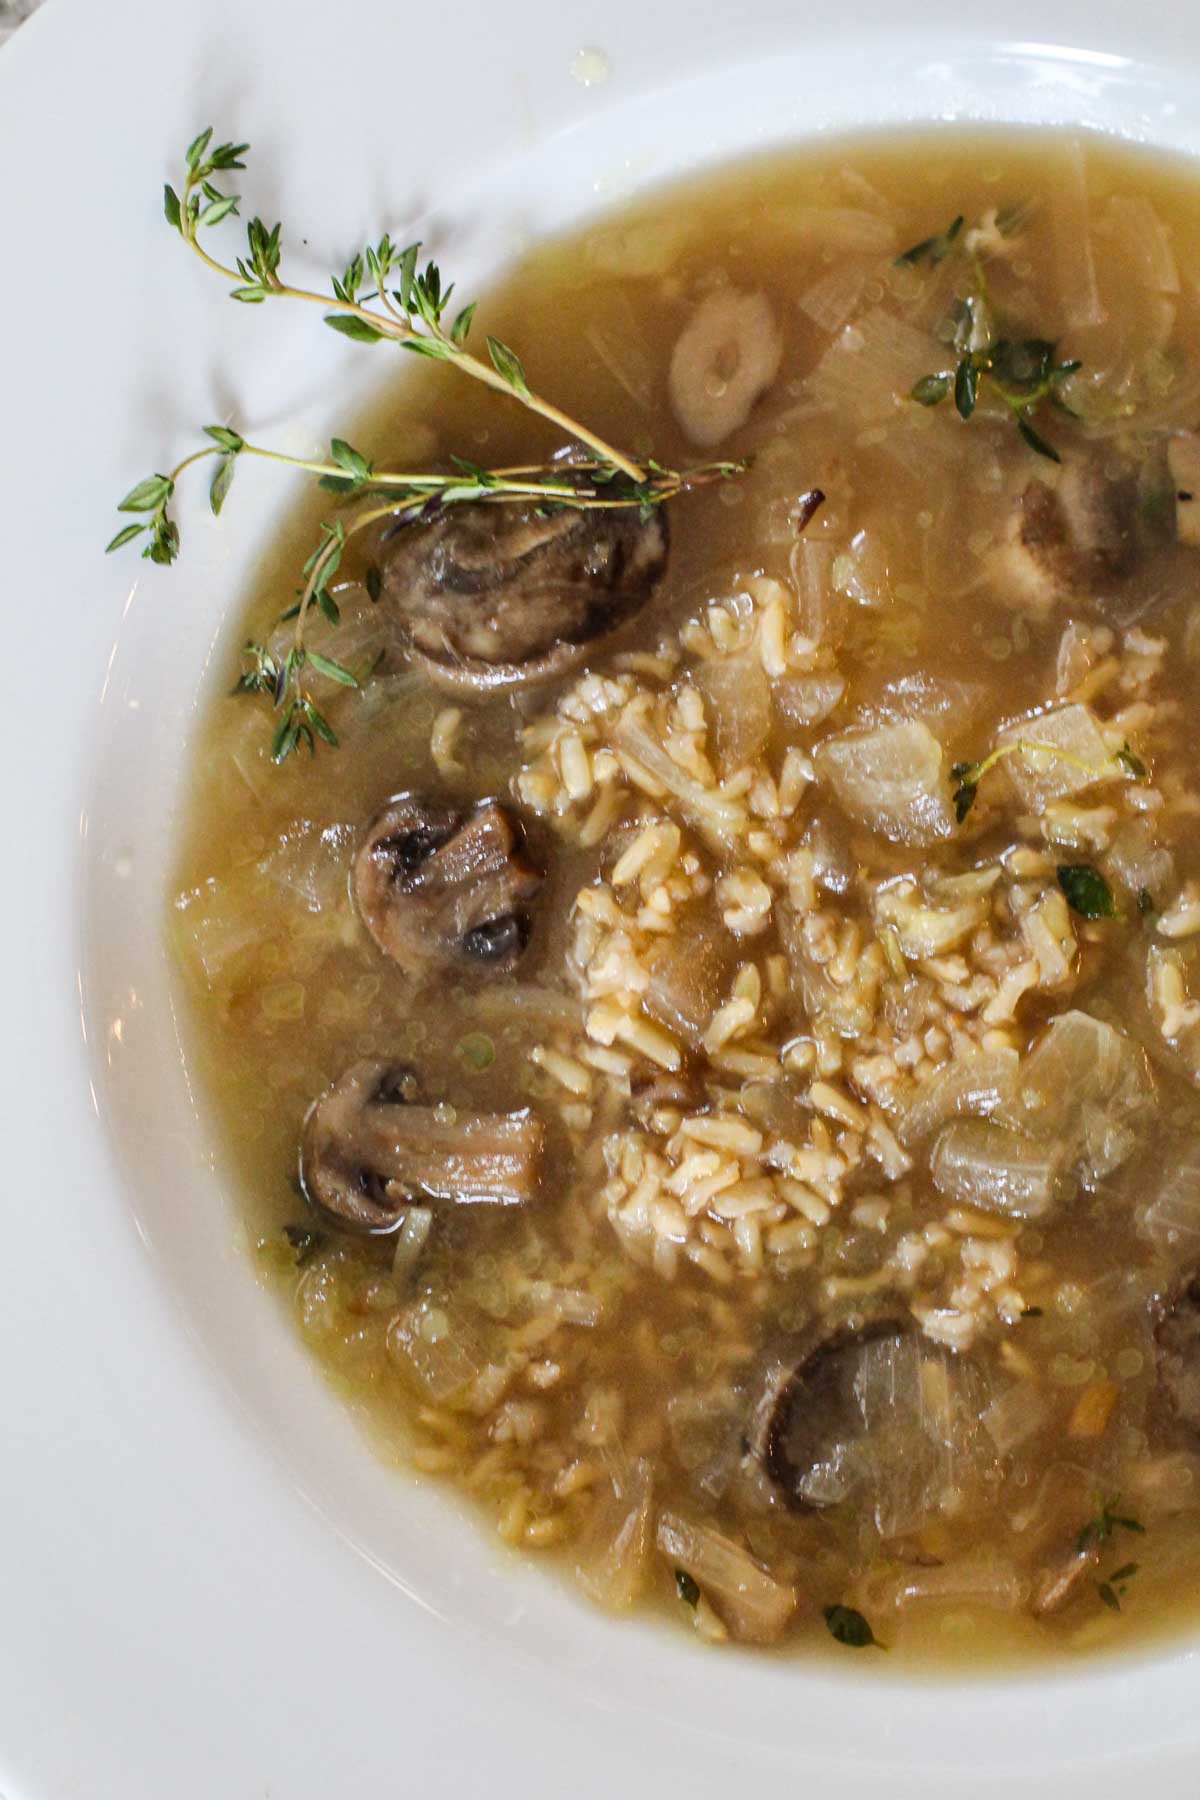
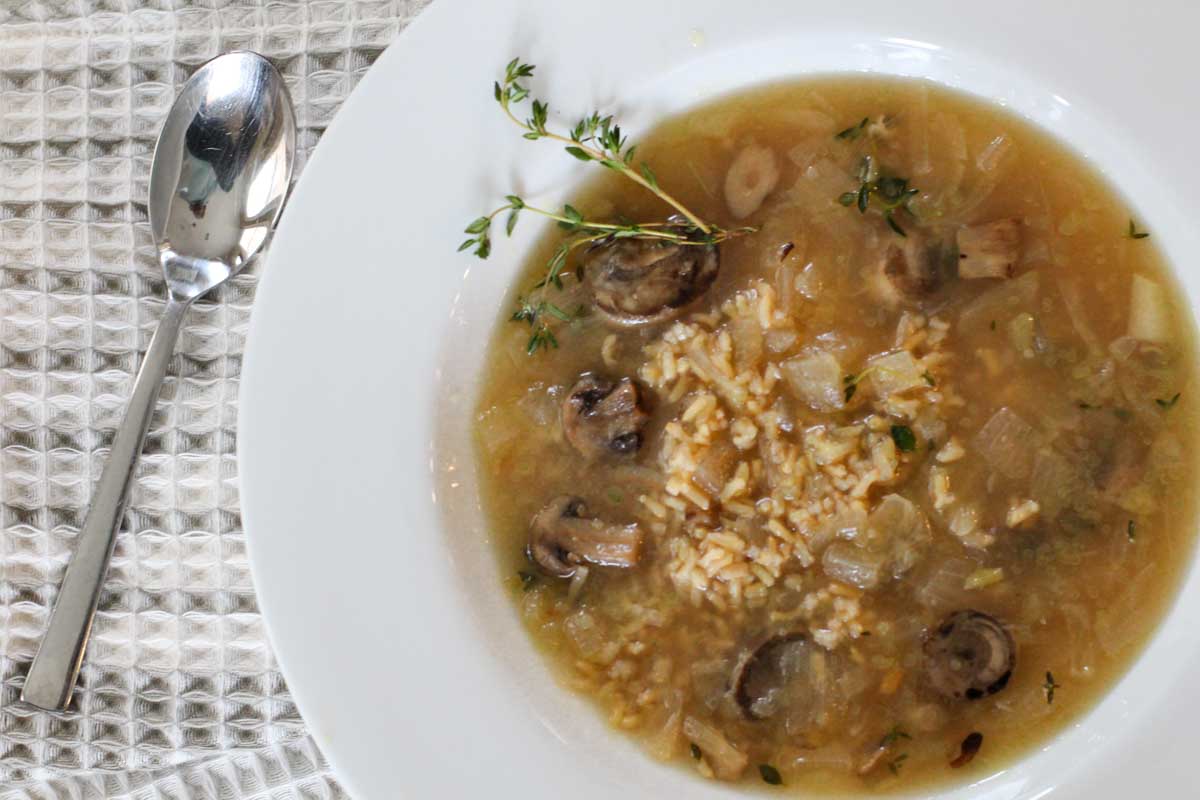
    Brown rice mushroom soup without cream garnished with fresh thyme.

    This is a recipe for easy healthy mushroom soup without cream. Just a simple, brothy luxurious bowl of classic comfort food. The secret weapon that elevates this earthy soup from normal to stardom is a splash of sherry. Sherry is a great partner for fresh thyme to season this soup.

    Country Mushroom Soup without cream and with brown rice and thyme

    This recipe was first published November of 2017 and republished November 2021 with step by step instructions and photos.

    How did it happen? It’s six degrees out right now, but I’m not blaming the deep freeze weather for our sudden glut of soup.

    We’ve eaten soup every day this week, for lunch, for dinner. And this Country Mushroom Soup actually ended up being our favorite for the week.

    This isn’t just your average homemade mushroom soup. With no condensed canned soup, this is a healthy mushroom soup without cream that simply doesn’t skimp on flavor.

    Big chunks of mushrooms, simply seasoned with fresh thyme and healthy with brown rice. It’s one of those brothy soups that makes you feel good about eating it.

    The secret ingredient is a splash of sherry, and if you like mushrooms, a pure delight.

    Sherry is a fortified wine and produced in Jarez, Spain. Sherry elevates a recipe with it’s nutty flavor and smoky back notes.  Don’t hesitate to experiment. It works beautifully with mushrooms, shrimp, crab, or poultry. 

    A relatively easy soup that wows the palate. Let’s take a look.

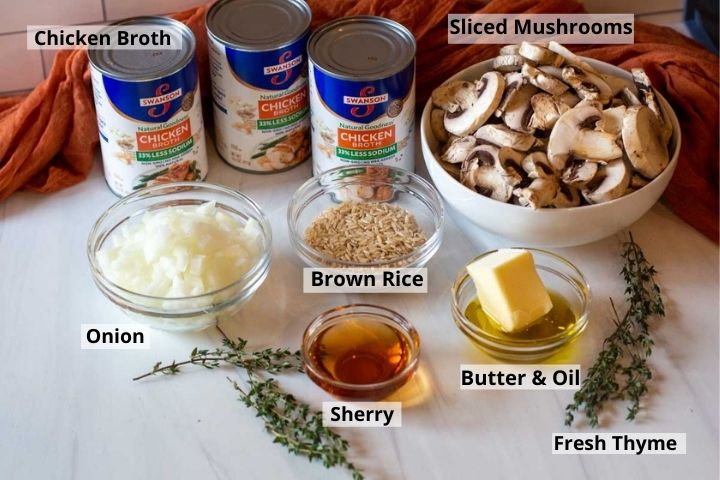
    Ingredients to make mushroom soup without cream

    Ingredients You’ll Need

    • Chicken Broth: Canned chicken broth makes this an easy fix. Homemade chicken stock will make this even tastier.
    • Button Mushrooms: Purchase whole mushrooms, or pre-sliced to save you time.
    • Onion: Use a sweet or yellow onion.
    • Brown Rice
    • Dry Sherry: Dry Sherry is a white wine from Spain. It has a crisp and nutty flavor and adds a wonderful layer of flavor to this soup.
    • Butter and Oil: Use a neutral oil. Canola or vegetable oil works well here.
    • Fresh Thyme

    Ingredient Substitutions

    • Broth: Use vegetable broth to make this a vegetarian mushroom soup.
    • Mushrooms: The best mushrooms for soup: I’ve always used white button mushrooms (Crimini) for this soup, however, mushrooms labeled Baby Bella would work beautifully here.
    • Rice: You most certainly can substitute white rice for brown rice for this soup. Adjust cooking time for white rice according to package directions. However, still toast the rice with the onions before adding broth.
    • Sherry: If you simply don’t have sherry, you can substitute white wine, brandy or dry vermouth. Please don’t use cooking sherry. Buy the real stuff.
    • Fat: This recipe calls for both butter and oil. You can either use all butter or all oil if you wish.
    • Thyme: Fresh is always best, but if you don’t have fresh thyme, you can easily substitute dried thyme. Dried herbs are often more concentrated and potent than fresh, so substitute one teaspoon dried thyme for the 1 tablespoon of fresh.

    Step By Step Instructions

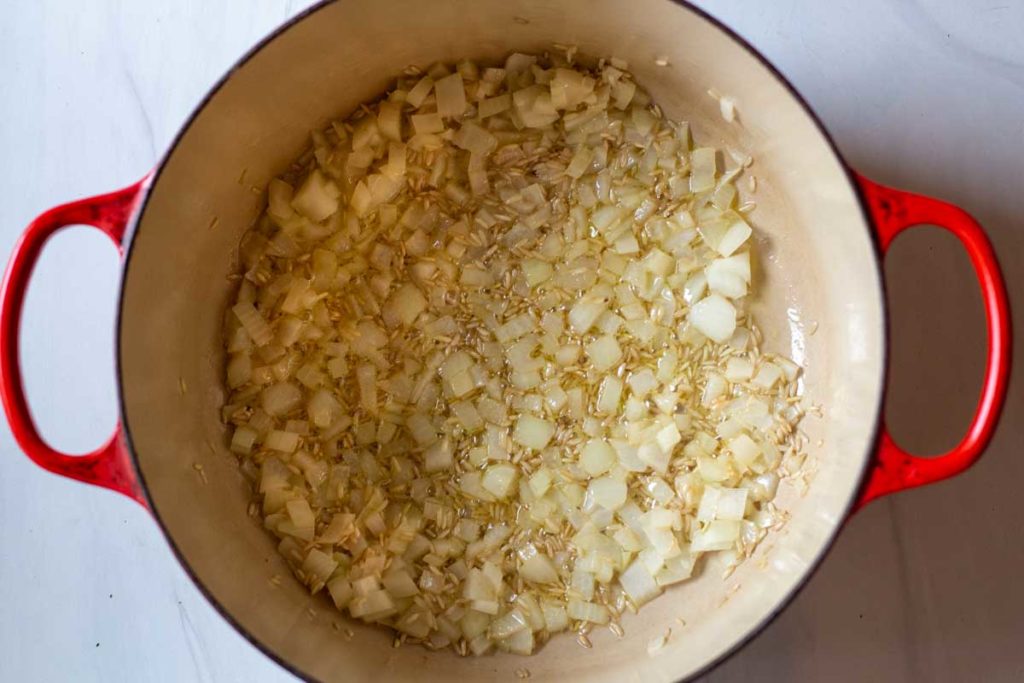
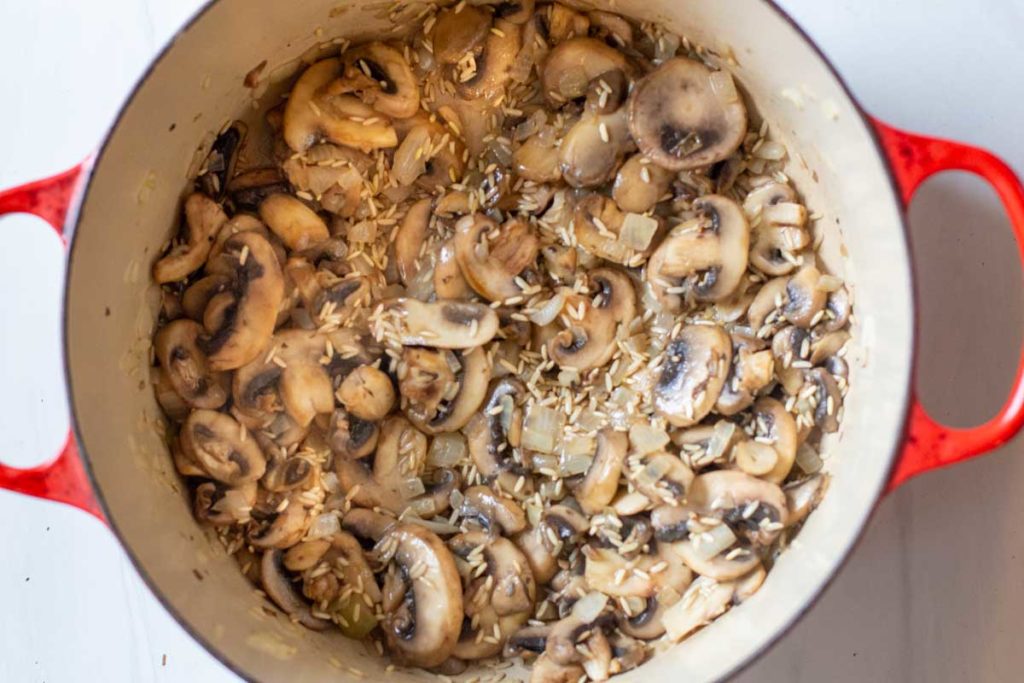
    cooking onions and brown rice for mushroom soup
    1. Step 1: Toast The Brown Rice: Heat a large sauce pan, I use my 6 qt. Le Creuset Dutch Oven, over medium high heat. Once the pan is hot, add the butter and the oil. Once the butter is melted and bubbly, add the chopped onions and brown rice. Toast the onions and brown rice for about six minutes, stirring consistently.
    cooking mushrooms for mushroom soup.
    1. Step 2: Cook The Mushrooms: Add the sliced mushrooms and cook until just starting to brown. Stir consistently. This should take about 5 – 7 minutes.
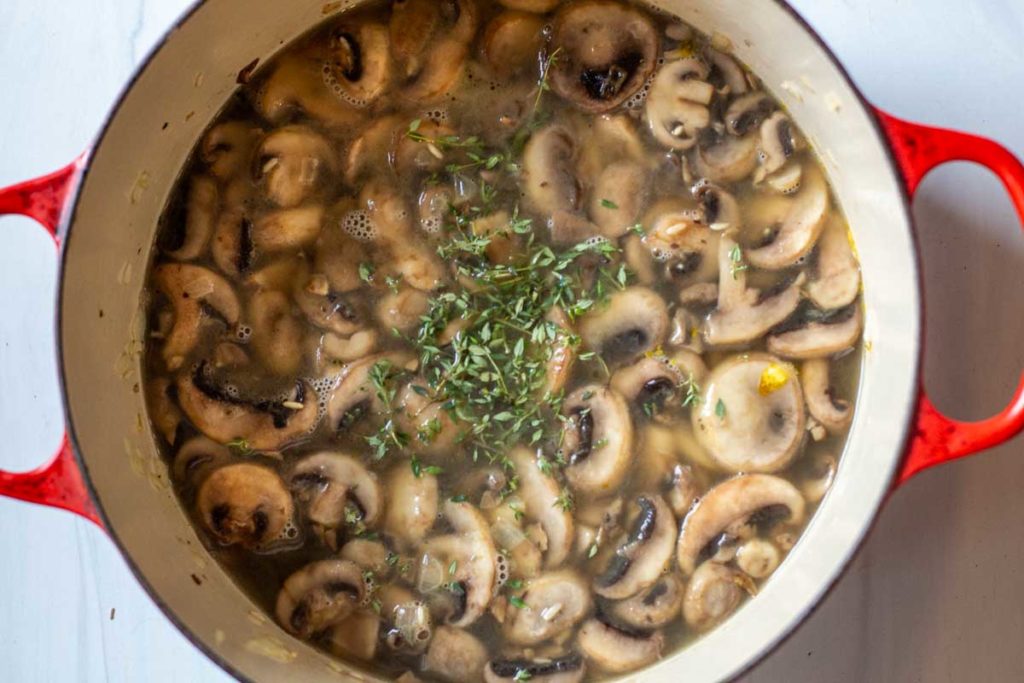
    Adding broth to make mushroom soup without cream.
    1. Step 3: Add the broth and thyme. Cover the pan and let is simmer on low for 25 minutes or until rice is tender. Add sherry and thyme and simmer uncovered for 10 minutes.

    Voila! Done! Easy healthy mushroom soup for a weeknight dinner that feels like a fancy restaurant meal.

    Tips and FAQ’s

    How Do You Brown Mushrooms?

    Please make sure to sautee the mushrooms until they’re starting to brown around the edges. This means that most of the moisture has been cooked from the mushrooms and the texture has changed from spongy to somewhat crisp. This is important because mushrooms are a sponge, and once you add the broth, if the mushrooms are not browned properly, the texture will be a bit rubbery, spongy.

    Why Is This A Healthy Mushroom Soup?

    Mushrooms are low in sodium, naturally fat free, naturally low calorie and loaded with vitamins, minerals and antioxidants. Crimini mushrooms are a source of zinc, which is vital nutrient for our immune system. Source: WebMD And making a mushroom soup without cream, makes this a super nutritious option.

    Is This Mushroom Soup Vegetarian?

    Even though there’s no meat in this soup, you’ll need to switch out Vegetable broth for Chicken Broth to make this a vegetarian mushroom soup.

    Tips For Success:

    • If you’re purchasing whole mushrooms, don’t rinse them with water to clean them. Mushrooms are like a sponge and will soak up the water which will compromise the texture. Use a dry paper towel to wipe the mushrooms clean. To make this soup easier than easy, I usually purchase pre-sliced mushrooms.
    • Working With Fresh Thyme: To make quick work of adding fresh thyme to this recipe. Hold a stalk of thyme at the top, with the leaves pointing up. Simply run your fingers down the stalk pulling the leaves down with your fingers. The leaves will easily come off the stalk

    Storage and Reheating

    • Store any leftovers in an airtight container in the refrigerator for up to 5 days.
    • Reheat stovetop, or in a microwave.
    • Since this is a mushroom soup without cream, this recipe will freeze very easily. Store in a freezer safe container for up to 3 months. Let soup thaw overnight before reheating.

    What To Serve With Country Mushroom Soup

    Soup can be served with bread and a simple tossed salad dressed with Homemade Blue Cheese Dressing or a lighter vinaigrette like this Red Wine Vinegar Dressing. Cornbread Recipe with Creamed Corn is always a good choice here.

    Recipe, Mushroom Soup Without Cream

    Mushroom soup with brown rice garnishes with thyme

    I hope you give this healthy mushroom soup recipe a try. It’s one of the first soup recipes we make as soon as the temperature changes in November. And making this healthier version of mushroom soup without cream will make you feel all healthy inside.

    This soup is dairy free, gluten free, and Whole 30 friendly.

    Explore More Comfort Food Soup Recipes

    • Hamburger potato soup served in an orange bowl.
      Old Fashioned Hamburger Potato Soup
    • Mexican Chorizo Soup Recpie.
      Mexican Chorizo Soup (Sopa Caldosa)
    • Chicken cheese soup with poblano peppers garnished with tortilla strips
      Cheddar Cheese Soup with Chicken and Poblano Peppers
    • Cowboy chili garnished with grated cheese and jalapeno pepers.
      New Mexico Style Cowboy Chili

    I consider soups to be my specialty, so if you’re looking for even more recipes, don’t miss my category for soup recipes. You’ll find lots of mouthwatering recipes, including the most popular on my site for Hatch Green Chili with Pork.

    If you liked this recipe, please leave a star ⭐⭐⭐⭐⭐ rating in the recipe card below and leave a comment. I always appreciate your feedback and hearing how everything went.

    And, don’t forget to subscribe to my newsletter for more delicious recipes and cooking tips. Make it a delicious day … every day.

    Brown rice mushroom soup without cream garnished with fresh thyme.
    Print Recipe
    5 from 14 votes

    Brown Rice Mushroom Soup Without Cream

    This is a recipe for easy brown rice mushroom soup without cream that is also healthy and luxurious.
    Prep Time10 minutes mins
    Cook Time40 minutes mins
    Total Time50 minutes mins
    Course: Soup, Stews and Chilis
    Cuisine: American
    Servings: 4
    Calories: 234kcal
    Author: Lea Ann Brown

    Ingredients

    • 3 tablespoons butter
    • 1 tablespoon olive oil
    • 1 medium onion rough chopped
    • 1 pound button mushrooms wiped clean and sliced
    • 1 Tablespoon fresh thyme leaves of 1 teaspoon dried thyme
    • ½ cup brown rice
    • 6 cups chicken broth
    • ¼ cup dry Sherry
    • Salt and pepper to taste

    Instructions

    • Over medium high heat, heat a dutch oven until just getting hot. Add butter and olive oil. When oil mixture is hot, add onion and brown rice. Toast the onion and rice stirring consistently, about 5 – 6 minutes.
    • Turn the heat down to medium and add the mushrooms. Cook until just browned. About 5 minutes more. Stirring frequently.
    • Add chicken broth and thyme and simmer covered about 25 minutes or until rice is tender.
    • Stir in Sherry and season with salt and pepper. Simmer on low uncovered for 10 minutes.

    Notes

    Canned Broth: If using canned broth, use three 14.5 ounce cans and make up the small difference with water to equal the 6 cups. Add a little more water if needed to make this a brothy soup.
    Browning Mushrooms: Please make sure to sautee the mushrooms until they’re starting to brown around the edges. This means that most of the moisture has been cooked from the mushrooms and the texture has changed from spongy to somewhat crisp. This is important because mushrooms are a sponge, and once you add the broth, if the mushrooms are not browned properly, the texture will be a bit rubbery, spongy.
    Working with Mushrooms: If you’re purchasing whole mushrooms, don’t rinse them with water to clean them. Mushrooms are like a sponge and will soak up the water which will compromise the texture. Use a dry paper towel to wipe the mushrooms clean. To make this soup easier than easy, I usually purchase pre-sliced mushrooms
    Working with Fresh Thyme: To make quick work of adding fresh thyme to this recipe. Hold a stalk of thyme at the top, with the leaves pointing up. Simply run your fingers down the stalk pulling the leaves down with your fingers. The leaves will easily come off the stalk. 

    Nutrition

    Calories: 234kcal | Carbohydrates: 21g | Protein: 7g | Fat: 14g | Saturated Fat: 6g | Cholesterol: 23mg | Sodium: 1589mg | Potassium: 793mg | Fiber: 2g | Sugar: 4g | Vitamin A: 346IU | Vitamin C: 36mg | Calcium: 49mg | Iron: 2mg

    Country Mushroom Soup Without Cream …It’s what’s for Dinner.
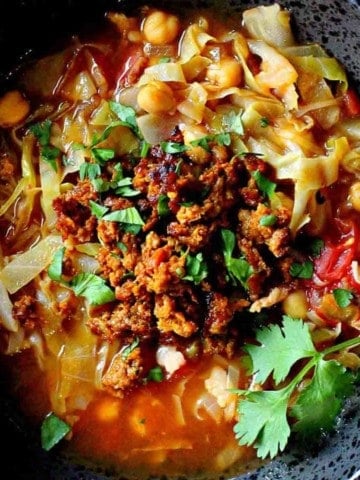
    Gulf Coast Style Oven Baked Rice

    October 31, 2021 By Lea Ann Brown 2 Comments

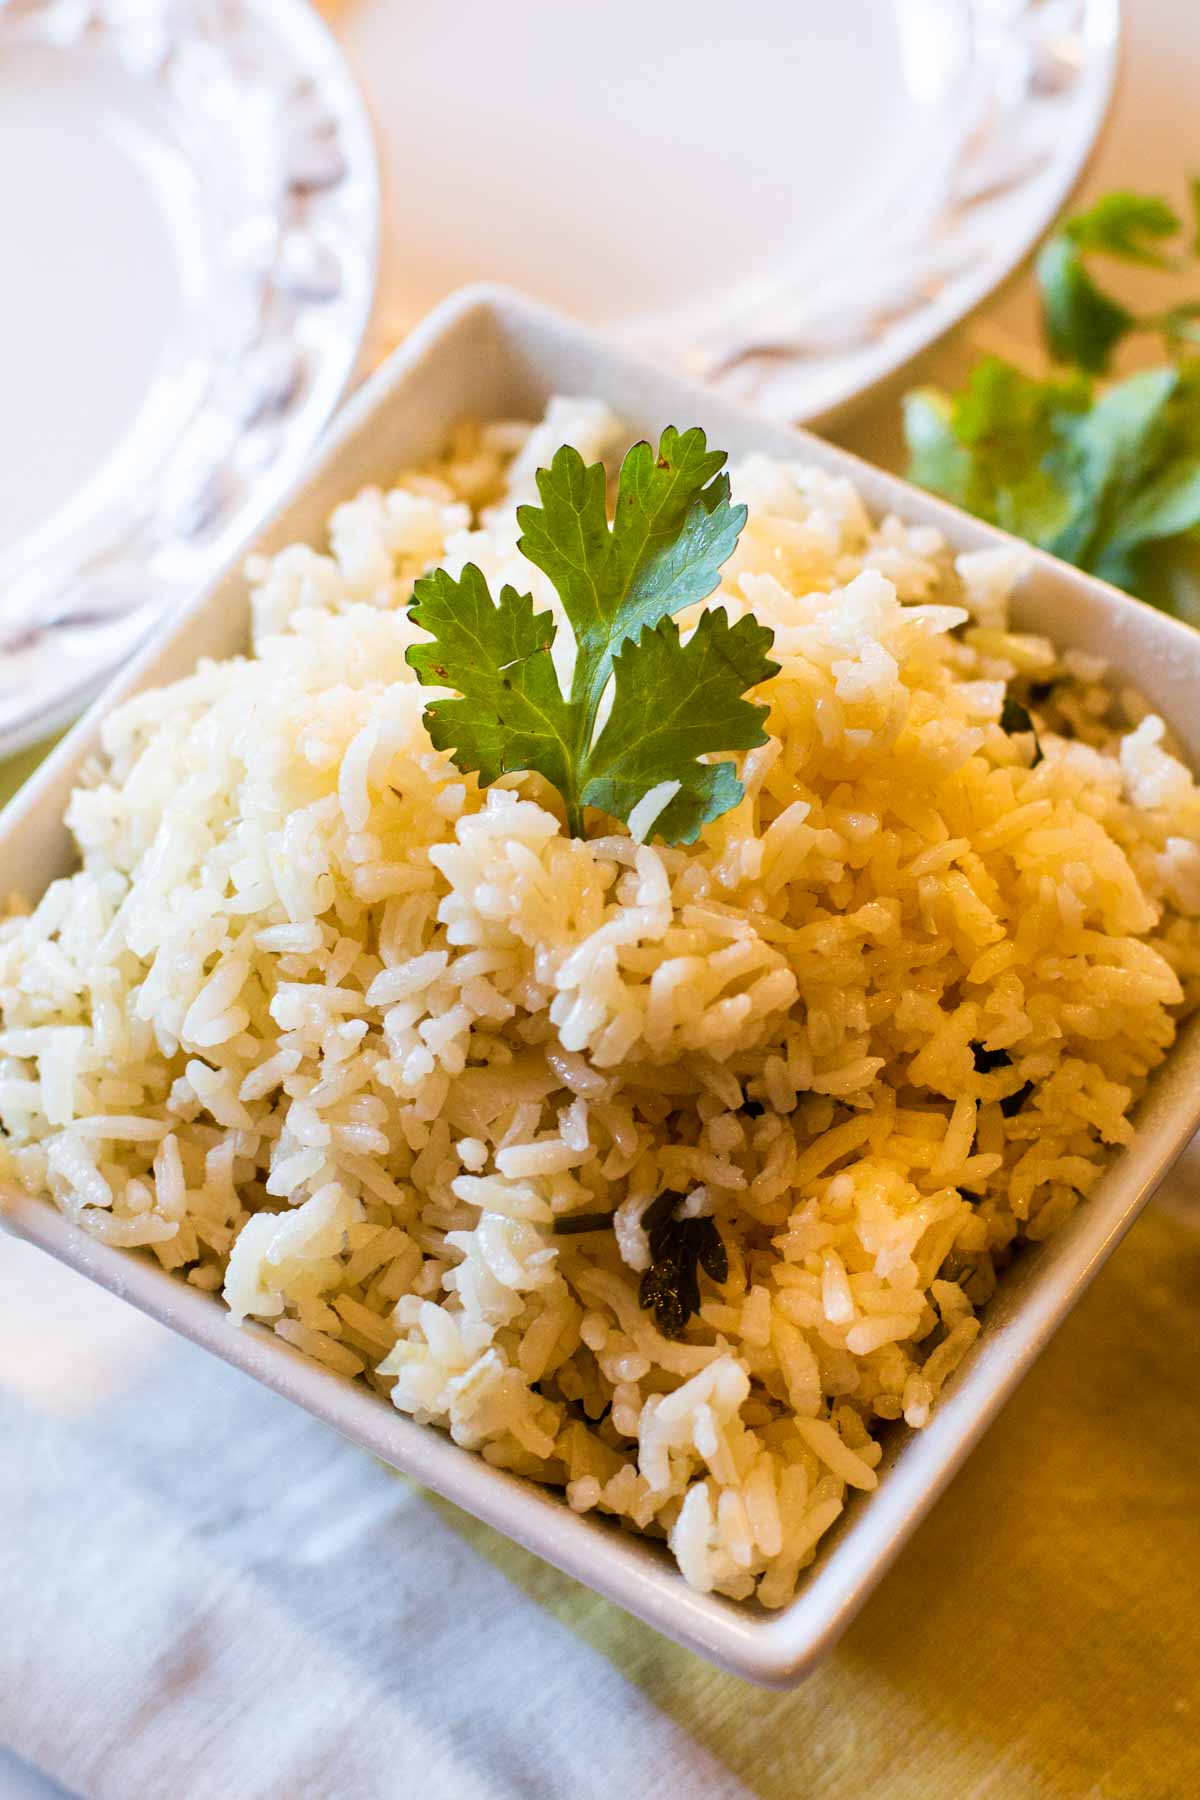
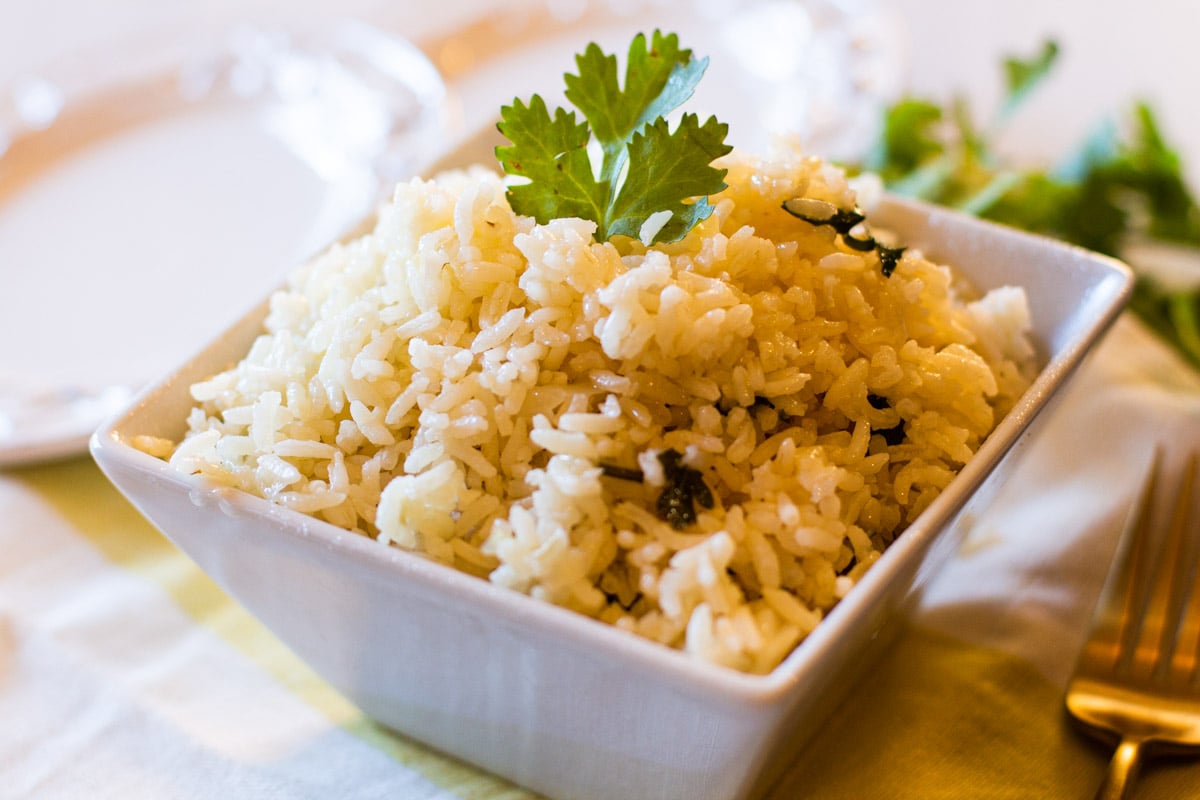
    Oven baked rice in a white serving bowl garnished with parsley.

    This oven baked rice recipe is an easy, foolproof, hands off method to produce rice that’s tender and fluffy in texture. Gulf Coast Style Rice is a more garlicky and traditional Mexican rice recipe than our Tex-Mex tomato-y version labeled “Mexican Rice”, or “Spanish Rice”.

    Spoiler alert: Using chicken broth rather than water to cook the rice brings way more flavor.

    bowl of white rice that's been baked in the oven and garnished with parsley

    Cooking rice on the stove top most certainly works … sometimes. It works if you get the heat level just right. If you have a sauce pan with that perfectly tight fitting lid, and if you have the time to watch it so it cooks perfectly. And without rice stuck to the bottom of the pan, without boiling over, and with no al la dente chewy grains.

    Learning how to bake rice in the oven simplifies the entire rice-cooking process. It’s hands off, easy and gives you more time to tend to those tacos or enchiladas that you’re cooking for dinner.

    I have found oven baked rice just as easy, just as fluffy, just as delicious as using a rice cooker. And if you’re like me, you don’t have much room for one more “kitchen gadget”, like a rice cooker.

    Here’s why it works so well:

    • Sauteeing or “toasting” the raw rice before cooking will allow the grains to cook up light and separate.
    • Using chicken broth rather than water adds more fat and flavor.
    • And the even and surrounding heat of the oven seems to treat each and every one of those little grains of rice with equal attention.

    Once I tried oven baked rice, I’ve never looked back at that stove top. It’s a Rick Bayless recipe, from his cookbook Mexican Everyday, which he has labeled Gulf Coast Style White Rice.

    This is a recipe for oven baked rice is one that I’ve used for years. Let’s take a look.

    Ingredients You’ll Need

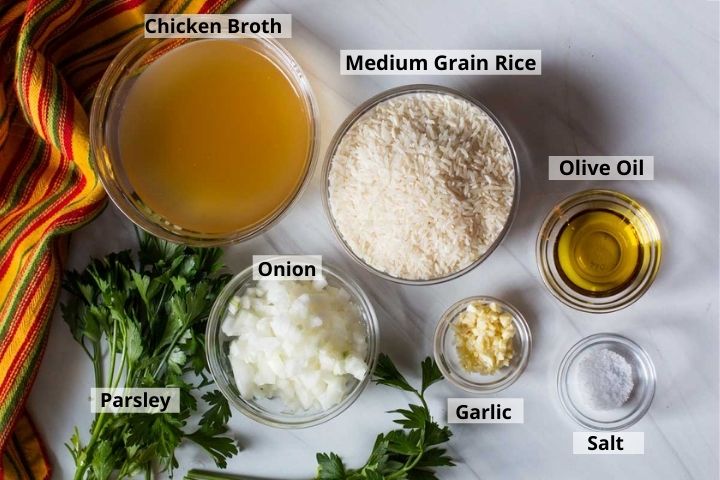
    Ingredients to make oven baked rice
    • Chicken Broth
    • Medium Grain Rice, such as Arborio.
    • Olive oil
    • Salt
    • Garlic
    • Sweet Onion, or yellow onion
    • Parsley

    Ingredients Subs and Substitutions

    • Oil: Want a richer oven baked rice, use butter, duck fat or even Crisco or Lard.
    • Parsley: Switch out parsley with cilantro.
    • Rice: If you don’t have a medium grain, you can substitute a long grain rice such as Jasmine or Basmati. If using long grain rice, increase broth to 2 cups. Don’t use a short grain rice such as a sushi rice product. The end result will be sticky or clumpy.

    How To Cook Rice In The Oven

    Toasting rice and onions for oven rice
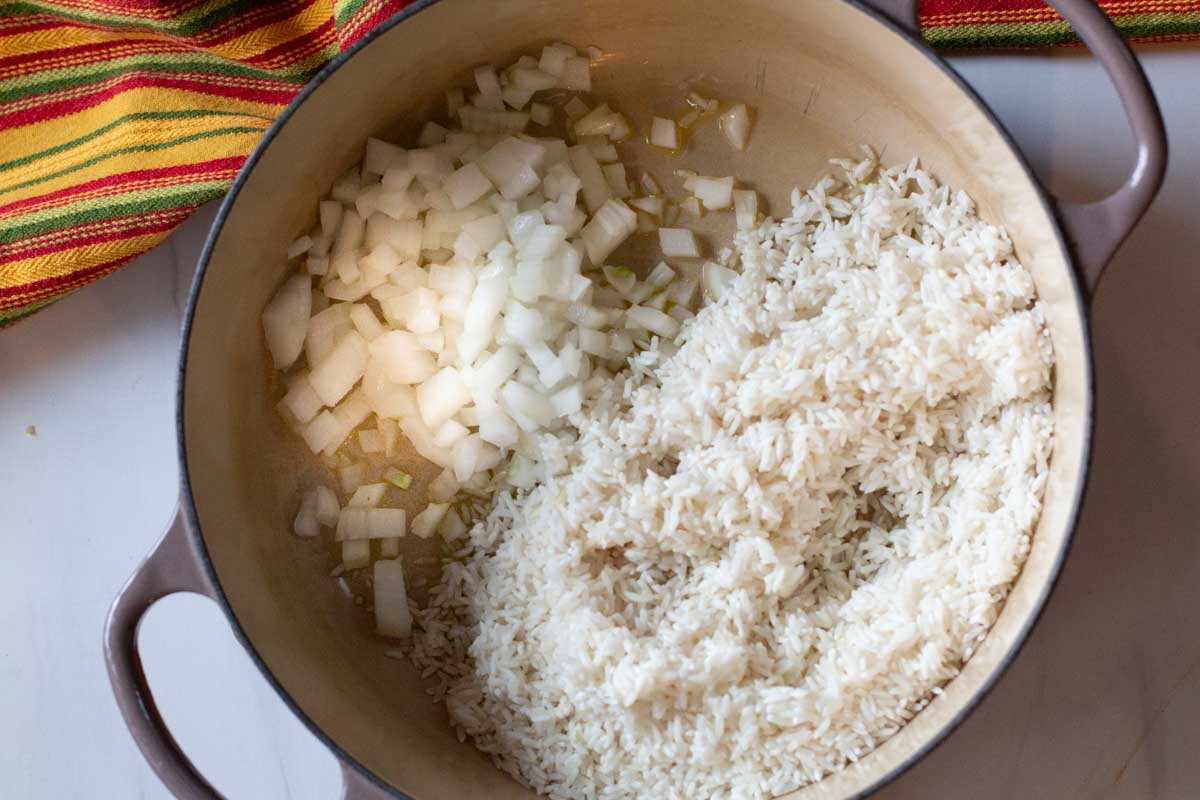
    1. Step 1: Toast the Rice and Onions: I like to use my three-quart Dutch oven. Starting stove top and then transferred to the oven, it eliminates the use of a baking dish. Heat the pan over medium high heat until hot. When the pan is hot, add the oil. Once the oil is shimmering, add the rice and onion. Stir frequently until the grains of rice turn from translucent to milky white, about five minutes. Don’t let the rice brown. Add the garlic, stir and cook until fragrant. About one minute.
    adding chicken broth to oven rice
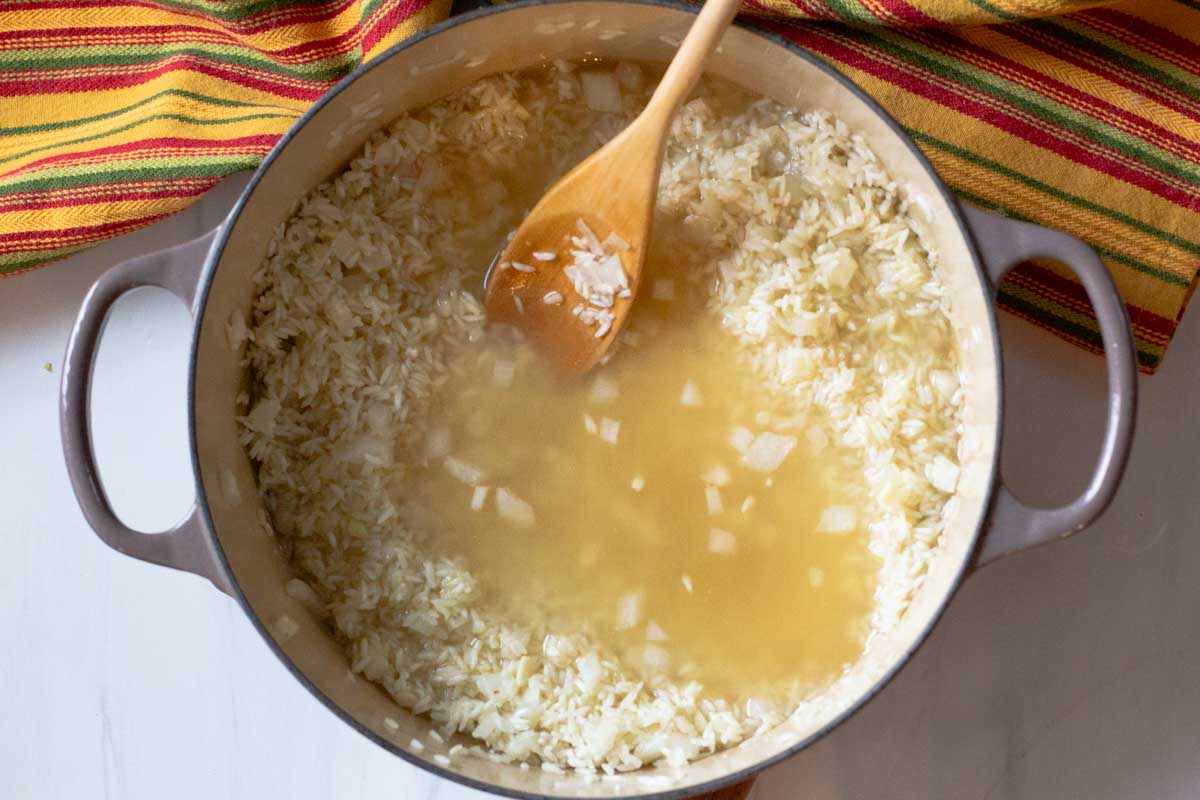
    1. Step 2: Add chicken broth and stir.
    Baked rice garnished with parsley
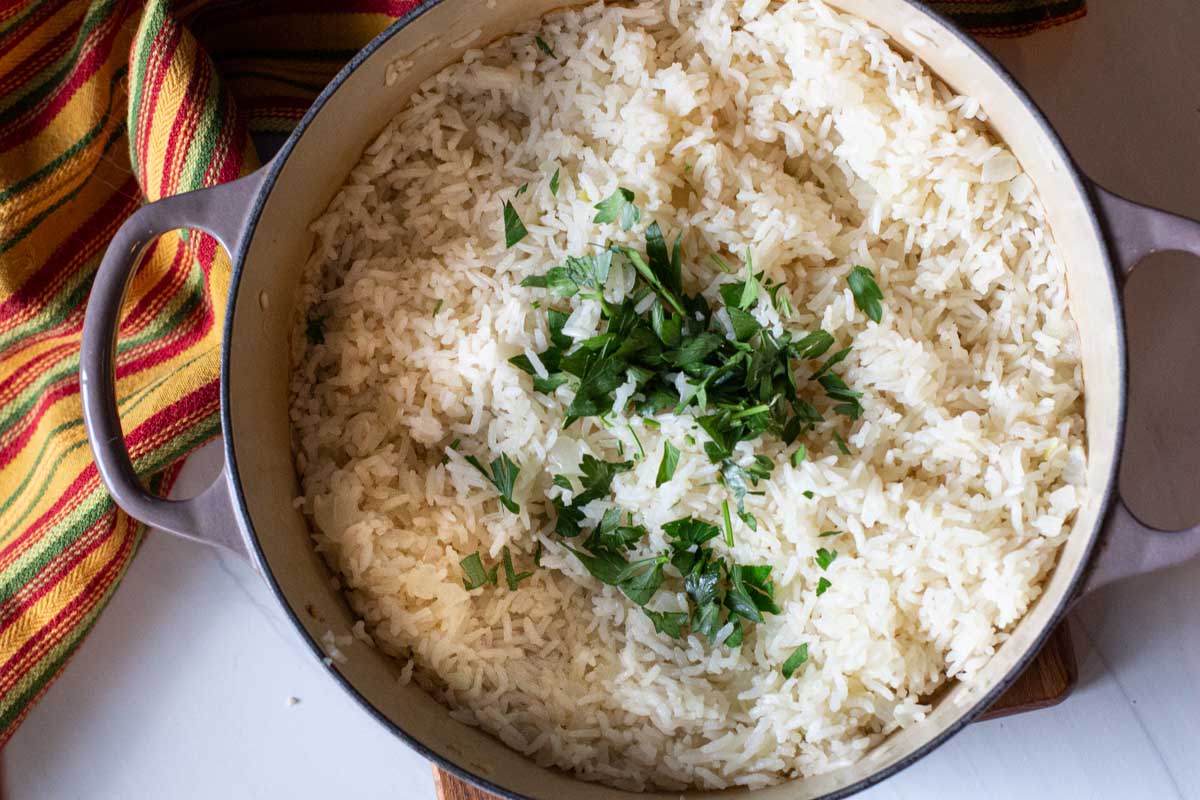
    1. Step 3: Bake and Serve: Cover with a tight fitting lid and bake for 25 minutes. Remove from oven and let stand five minutes. Fluff and garnish with chopped parsley.

    Baked Rice Recipe, FAQ’s

    How Do You Reheat Rice?

    It’s easy. Just place the amount of rice that you wish to reheat in a microwave safe bowl. Break up any lumps with a fork. Sprinkle with a little water and reheat in 15-second increments until rice is heated through.

    Can Rice Be Frozen?

    Absolutely yes. I like to place leftovers in a Ziploc freezer bag so I can press out the air and store in the freezer flat. It will keep in the freezer for a couple of months. Leftover rice makes great fried rice.

    How Long Will Baked Rice Keep In The Refrigerator?

    Up to 4 days.

    How To Add Vegetables to Cooked Rice

    • Adding Vegetables To Baked Rice: Here’s what I like to do. When I start to make this recipe, I put one cup of frozen peas and carrots in a bowl. I use the the frozen peas and carrots that are packaged together and the carrots are small diced. The time they spend outside the freezer while you prepare and cook the rice will be ample to thaw them out enough to add to the rice once its cooked.
    • Once you remove the rice from the oven, let the rice sit for five minutes. Remove lid and pour in the peas and carrots and fluff. Place the lid back on the pan and let it sit for another couple of minutes. The heat from the baked rice will warm the delicate peas and carrots.

    Tips For Making Oven Baked Rice

    • Follow the ratios in the recipe card below, not on the package.
    • I like to use butter instead of oil, it adds a buttery flavor and the higher fat content will keep those individual grains of rice from sticking.
    • If you don’t have a heavy pan with a heavy lid, like a Le Creuset Dutch Oven, cover the pan with foil and then the lid. This will help keep the steam inside the pan, which will benefit the texture of the rice.
    • Always let rice rest for 2 – 3 minutes after you remove it from the oven. Then fluff it with a fork.

    Recipe for Oven Baked Rice, (Gulf Coast Style White Rice)

    Oven baked rice garnished with parsley

    More Mexican Food Side Dishes

    • Mexican Green Rice served in a black serving bowl.
      Toasted Mexican Green Rice (Arroz Verde)
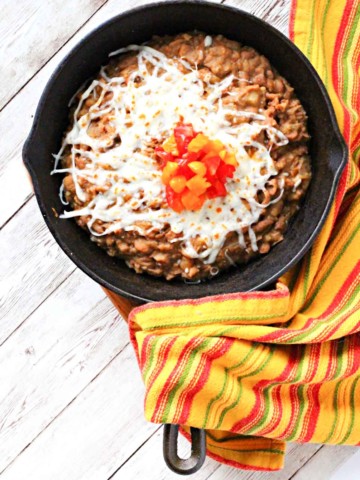
    • Instant pot refried beans served in a cast iron skillet topped with cheese and chopped tomatoes
      Cheesy Mexican Style Instant Pot Refried Beans
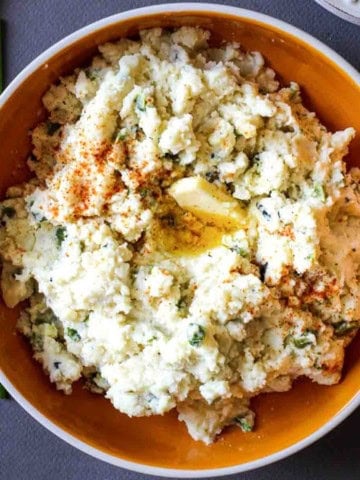
    • A bowl of poblano mashed potatoes with chives.
      Chive Poblano Mashed Potatoes
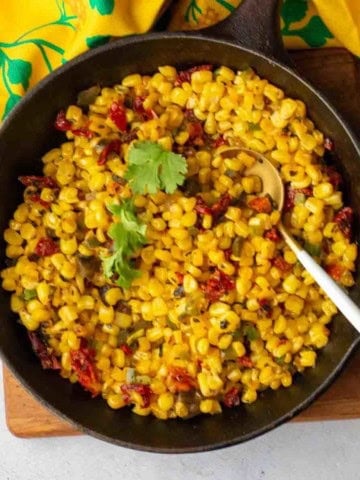
    • Southwest corn with jalapeno peppers.
      Coyote Corn, Southwest Corn With Jalapenos

    And if you’re interested in even more side dish recipes, don’t miss my Side Dish Category. You’ll find lots of great recipes, including another great recipe for Mexican Food, for Mexican Mac and Cheese with Tomato Sauce.

    Oven baked rice in a white serving bowl garnished with parsley.
    Print Recipe
    5 from 1 vote

    Gulf Coast Style Oven Baked Rice

    Baking rice in the oven is an easy, hands off method to produce rice that's tender and fluffy in texture. Your rice side dish for dinner just got a lot easier.
    Prep Time10 minutes mins
    Cook Time30 minutes mins
    resting time5 minutes mins
    Course: Side Dish
    Cuisine: Mexican
    Diet: Gluten Free
    Servings: 6
    Calories: 179kcal
    Author: Lea Ann Brown

    Ingredients

    • 1 ½ Tablespoons Olive or butter, duck fat, or even Crisco or lard.
    • 1 ½ Cups Medium grain rice Arborio
    • 1 small white onion chopped, about 1 cup
    • 2 cloves garlic peeled and fine chopped
    • 1 ¾ cup Chicken both
    • Salt to taste
    • 3 Tablespoons Flat leaf parsley chopped, for garnish or cilantro

    Instructions

    • Preheat oven to 350 degrees and position a rack in the middle of the oven.
    • Set a medium 3-quart ovenproof saucepan over medium heat on the stove top.
    • Once the pan is hot, add the oil. Once the oil is shimmering, add the rice and onion. Stir frequently until the grains of rice turn from translucent to milky-white. About 5 minutes. To keep the overall end appearance white, don't let the rice brown.
    • Add the garlic and stir until fragrant. About 1 minute.
    • Add the chicken broth and about 1 teaspoon salt. Stir a couple of times and let the mixture come to a full boil.
    • Cover the pan and set in the middle of the oven.
    • Bake 25 minutes. Remove from oven and stand 5 minutes.
    • Fluff the rice with a fork and sprinkle with chopped parsley. Serve immediately.

    Notes

    Tips For Success:
    • Follow the ratios in the recipe card below, not on the package.
    • I like to use butter instead of oil, it adds a buttery flavor and the higher fat content will keep those individual grains of rice from sticking.
    • If you don’t have a heavy pan with a heavy lid, like a Le Creuset Dutch Oven, cover the pan with foil and then the lid. This will help keep the steam inside the pan, which will benefit the texture of the rice.
    • Always let rice rest for 2 – 3 minutes after you remove it from the oven. Then fluff it with a fork.

    Nutrition

    Calories: 179kcal | Carbohydrates: 39g | Protein: 4g | Fat: 1g | Saturated Fat: 1g | Polyunsaturated Fat: 1g | Monounsaturated Fat: 1g | Sodium: 255mg | Potassium: 140mg | Fiber: 1g | Sugar: 1g | Vitamin A: 170IU | Vitamin C: 9mg | Calcium: 24mg | Iron: 1mg

    If you liked this recipe, please leave a star ⭐⭐⭐⭐⭐ rating in the recipe card below and leave a comment. I always appreciate your feedback and hearing how everything went.

    And, don’t forget to subscribe to my newsletter for more delicious recipes and cooking tips. Make it a delicious day … every day.

    Oven Baked Rice Recipe … It’s Whats For A Side Dish

    Dorito Taco Salad Made With Catalina Dressing

    October 16, 2021 By Lea Ann Brown 49 Comments

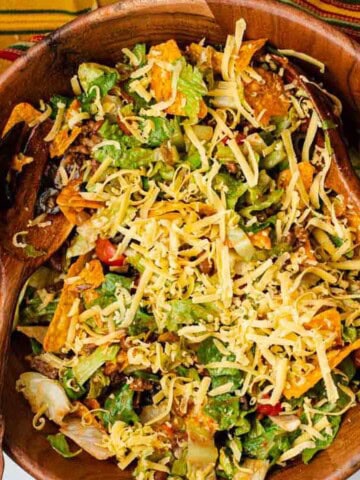
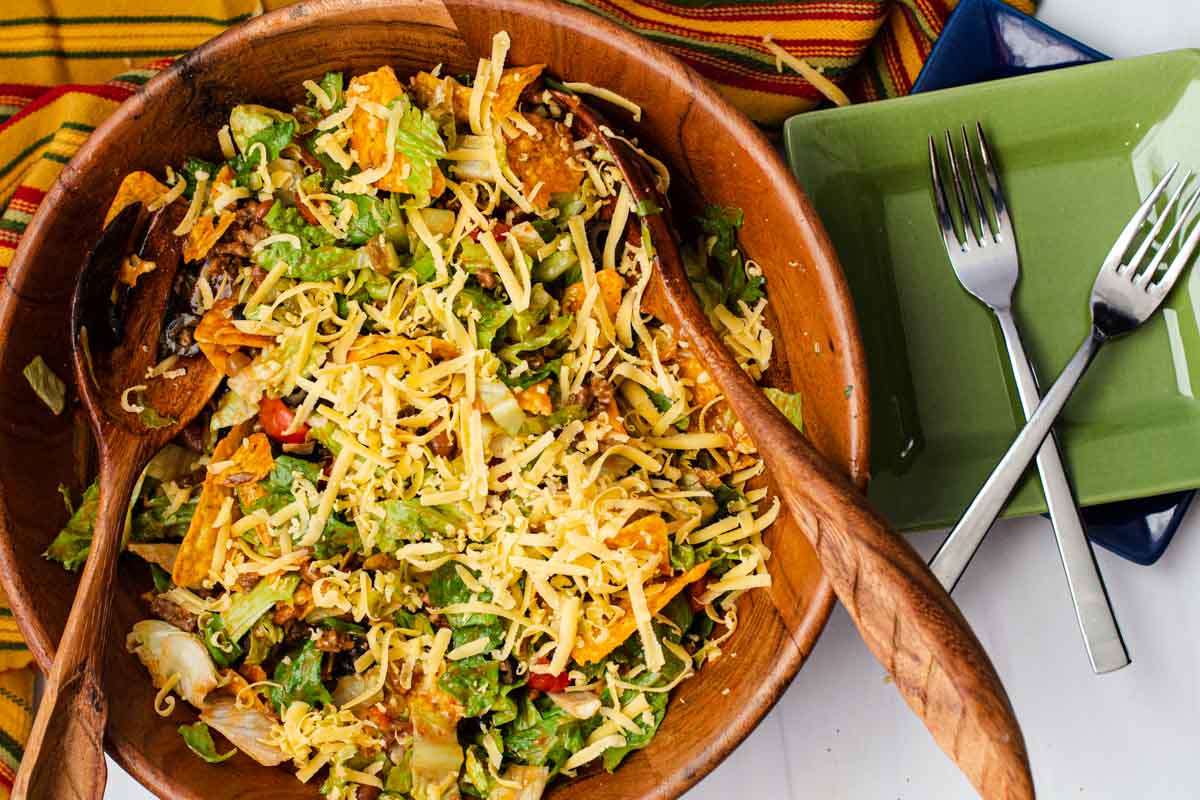
    Original taco salad recipe made with catalina dressing in a wooden salad bowl.

    This Taco salad with Doritos and Catalina Dressing is a family favorite. This is the original taco salad recipe from the 70’s and is most certainly a crowd favorite. This Southwestern Style Mexican dish features ground Beef, fresh lettuce, chili beans and Doritos mixed with a sweet and zingy Catalina dressing.

    Old fashioned taco salad with doritos.

    This Old Fashioned Taco Salad with Catalina Dressing and Doritos (or Fritos) is pure potluck nostalgia in a bowl. Inspired by the original 1970's version, it layers seasoned ground beef, crisp lettuce, chili beans, tomatoes, olives, and crunchy corn chips, all tossed in that unmistakable sweet-and-tangy Catalina dressing.

    It’s a retro crowd-pleaser that disappears fast at family dinners, church suppers, and backyard gatherings. It's simple, bold, and unapologetically classic.

    Flavor and Texture = Spot On

    • Savory
    • Crunchy
    • Creamy
    • A little zippy with Mexican style flavors.

    Why Catalina Dressing Makes This Salad Pop

    This version is the original recipe for taco salad, which I’m assuming we found on a Kraft Catalina Dressing bottle. However we found it, it was a staple because it’s easy and it’s delicious, it makes a large batch and it’s inexpensive to make.

    Catalina dressing is a tomato based dressing that is similar to French dressing but a little darker in color, tangier and a little sweeter. It also get a little kick from a dash of hot sauce or chile powder. It’s sweet flavor brings a wonderful combo of sweet and salty when combined with the chips, ground beef and taco seasoning.

    We love anything taco inspired a our house and this salad fits that bill. It’s one of our favorite taco salad dishes.

    Let’s take a look.

    Ingredients You’ll Need

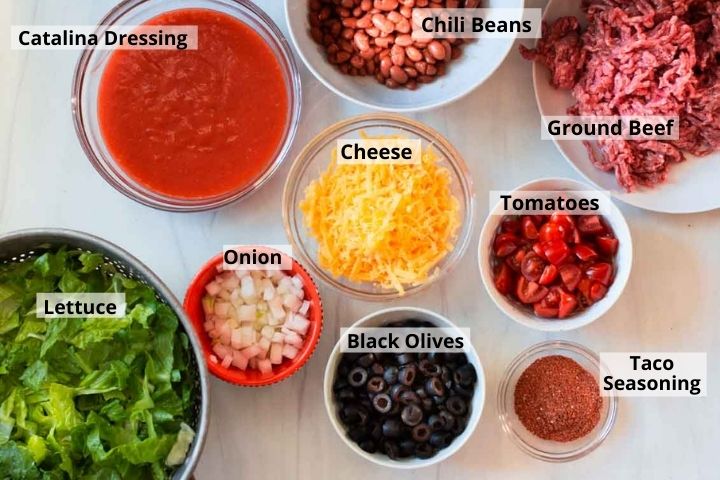
    Ingredients to make taco salad with Doritos
    • Catalina Dressing: I like to make homemade my Catalina Dressing Recipe. You can also purchase bottled Kraft brand at the grocery store. A good substitute is bottled dressing labeled Western Dressing. I have also used French dressing.
    • Canned Beans: Please look for canned beans labeled “beans in chili sauce”, or “ranch style beans” If you can’t find those, a can of pinto beans or red kidney beans, drained, will work.
    • Ground Beef: If you’re opposed to eating beef, ground chicken or turkey will work great in this recipe. You can also make this vegetarian by using a plant based meat substitute.
    • Cheese: I like shredded cheddar for this recipe, but a mix of Monterey Jack or Pepper Jack and cheddar would be good here.
    • Taco Seasoning: I highly recommend using my Homemade Taco Seasoning For Taco Meat, but you can also use store purchased.
    • Lettuce: A mix of Romaine and Iceberg lettuces are good here.

    Chef Tip: I like to purchase Cherub brand tomatoes. Cherubs are a variety of grape tomatoes which have a stronger outer skin and meatier, less watery flesh. They are easier to slice for salads, hold up better during cooking or roasting and are reliable year round with their mild, sweet flavor.

    Variations

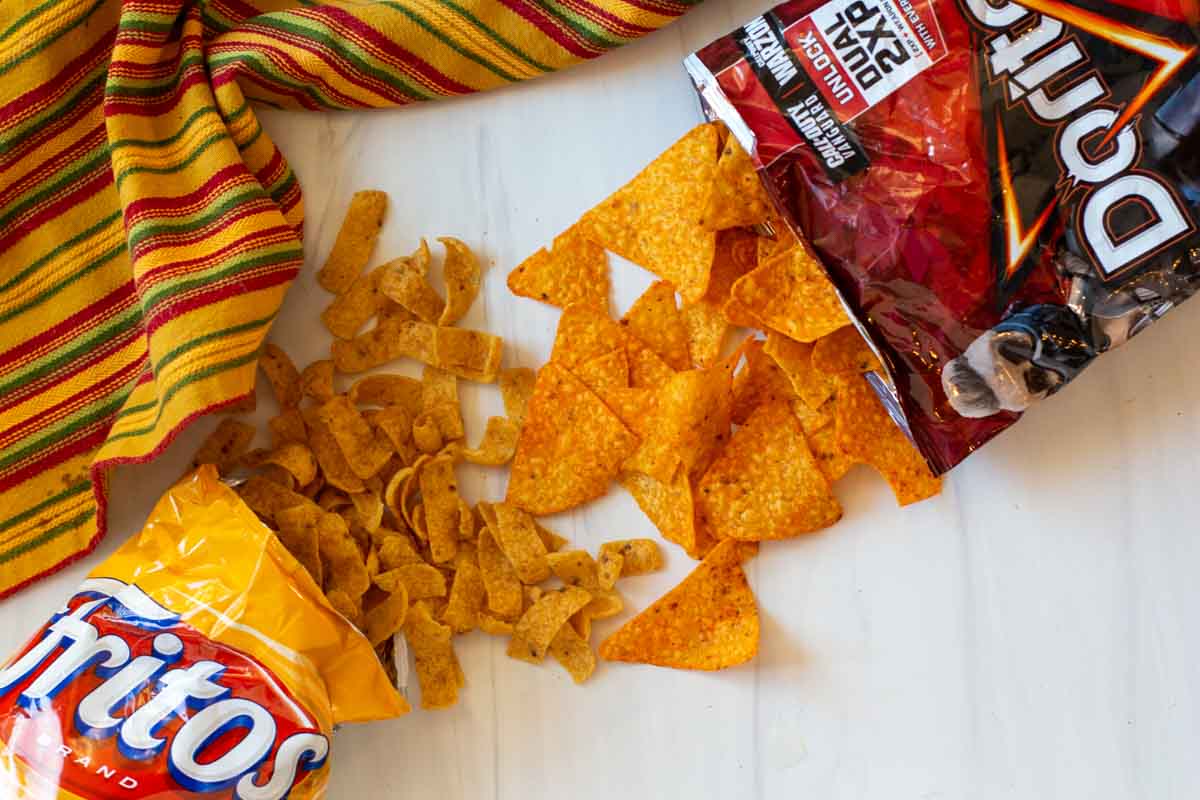
    Packages of Doritos and Fritos with chips coming from the top

    You can use either Doritos or Fritos brand chips for this recipe. I’ve used both when I make this and I simply couldn’t tell which I prefer. Either are good here.

    Dorito Taco Salad With Catalina Dressing, Step by Step Instructions

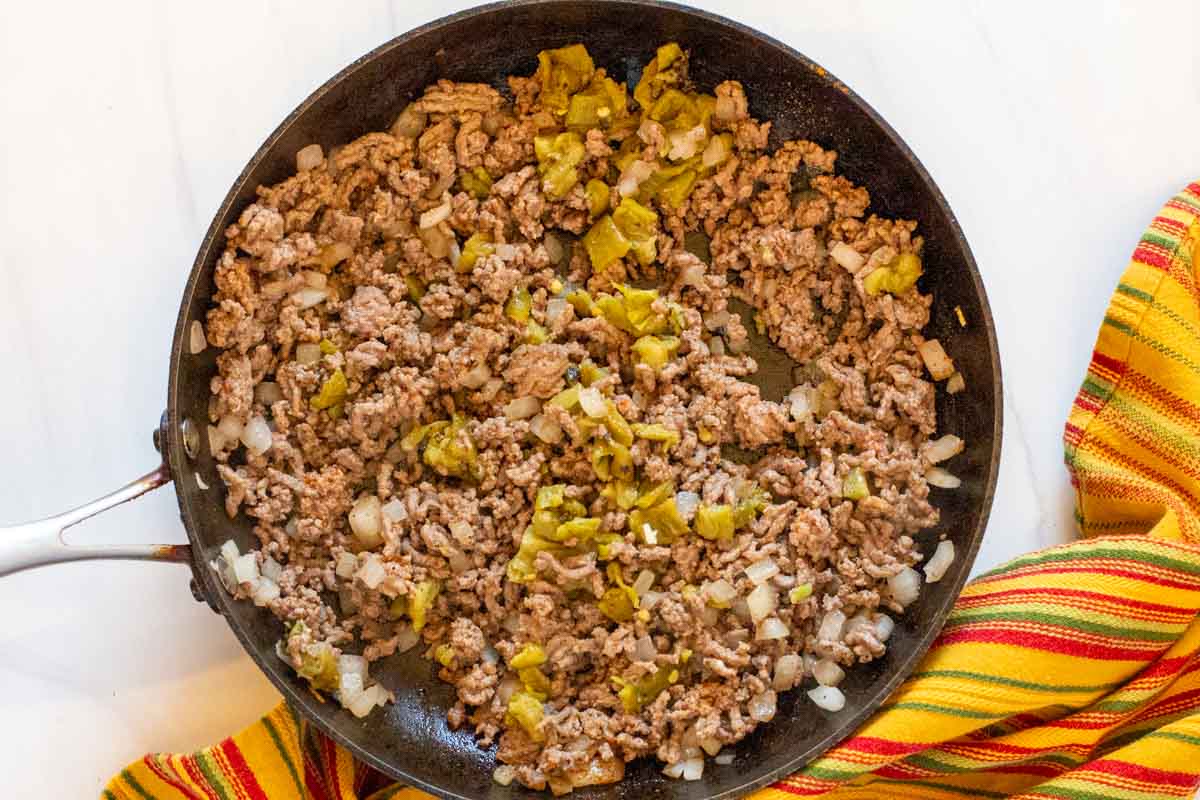
    Browning beef onions and green chile peppers.
    1. Step 1: Brown the ground beef: In a large skillet over medium heat. Add the ground beef and the chopped onion and cook until beef is no longer pink. I snuck some chopped green chile peppers into the mix. The recipe doesn’t call for this, but I just couldn’t help myself. Set aside.
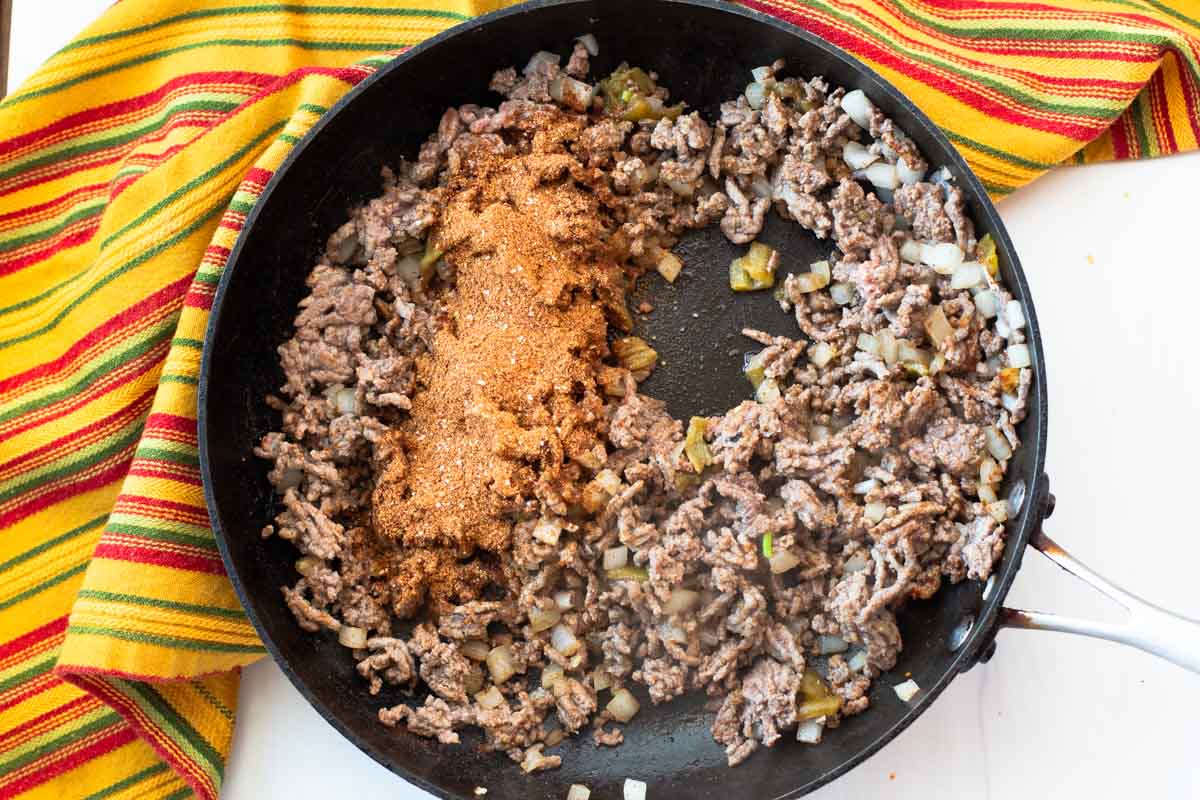
    Adding taco seasoning to browned ground beef.
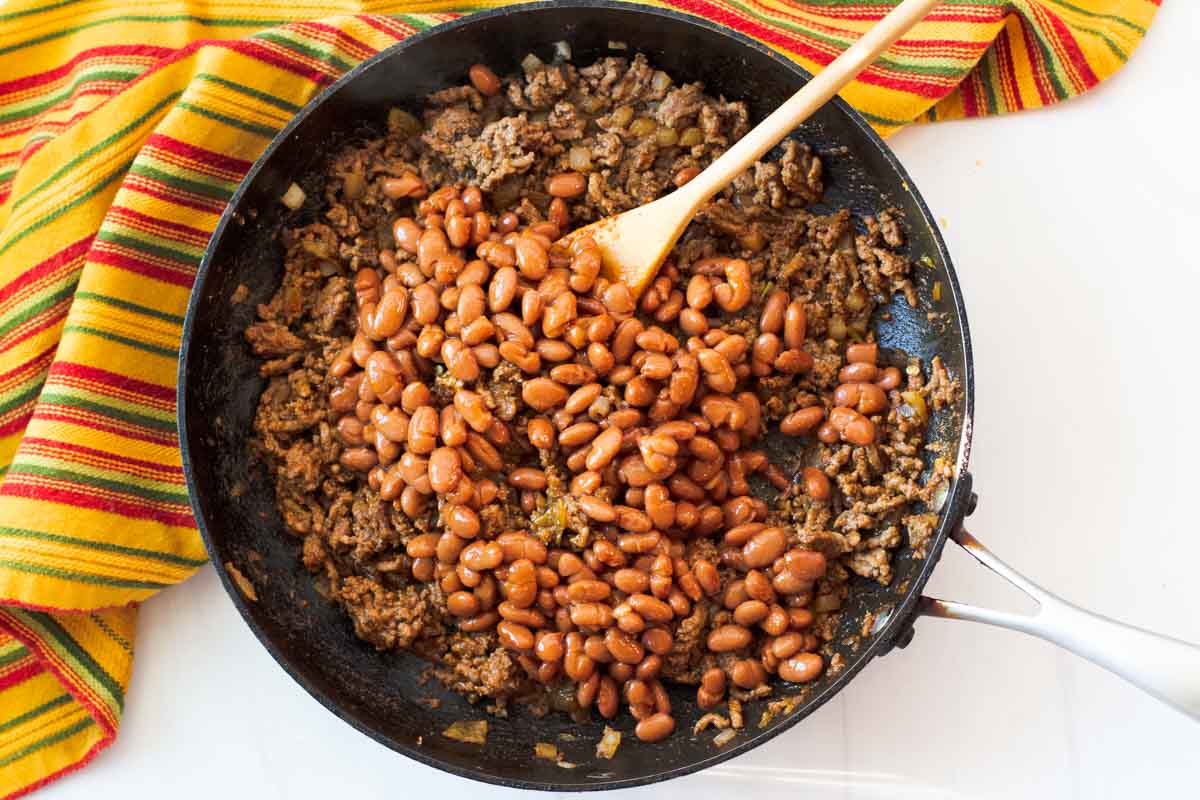
    1. Step 2: Add taco seasoning and ½ cup of water. Stir well and cook for about 15 minutes.
    Adding beans in chile sauce to ground beef
    1. Step 3: Add the beans in chile sauce (undrained and not rinsed) and stir until the beans have blended with the ground beef mixture. Continue cooking until the beans are heated through.
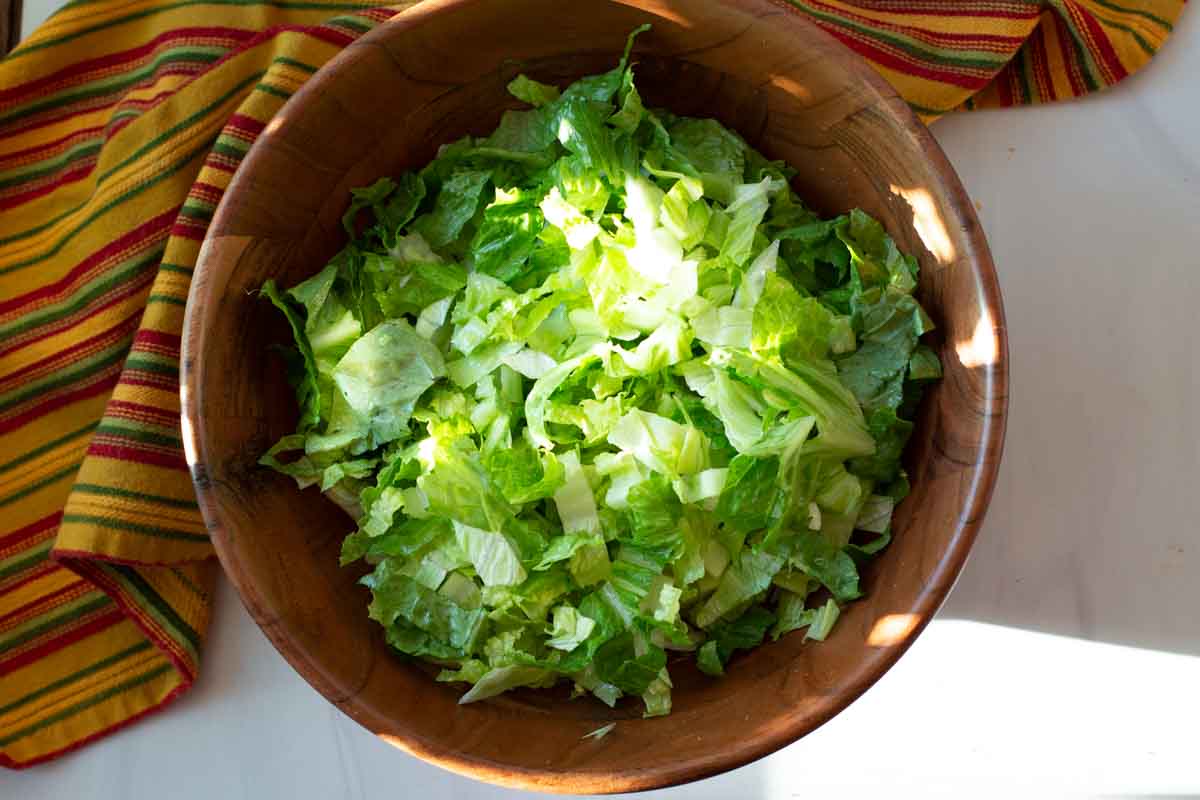
    Chopped romaine lettuce and iceberg lettuce in a large wooden salad bowl.
    1. Step 4: Build that salad: Start by placing the chopped lettuce in your favorite large salad bowl.
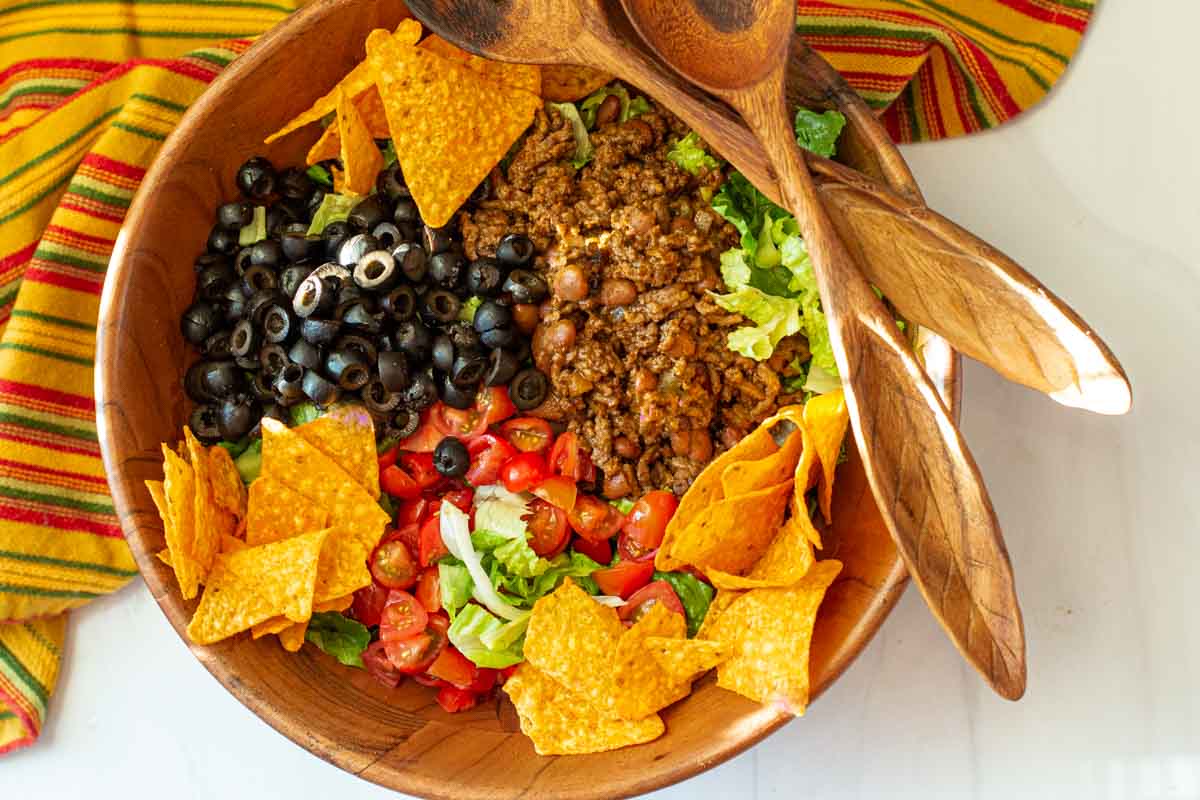
    Making old fashioned catalina taco salad
    1. Step 5: Load up those greens with the ingredients. Browned ground beef meat and bean mix, sliced olives, chopped tomatoes and the taco chips. We like Nacho Cheese flavored Doritos for this recipe.
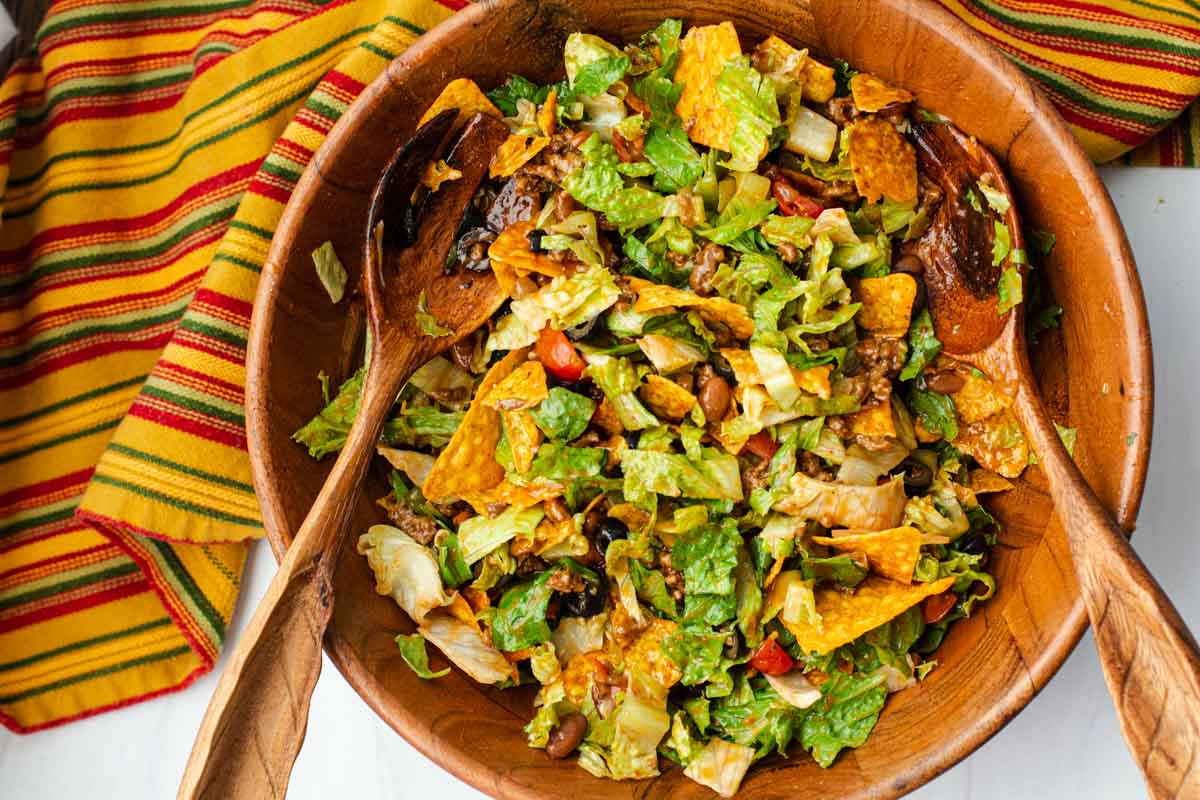
    Old Fashioned taco salad with catalina dressing
    1. Step 6: Add the Catalina Dressing and with salad tongs, mix well until the ingredients are well coated.
    Old fashioned taco salad with doritos
    1. Step 7: Add Cheese: Top the salad with grated cheese and serve immediately.

    Tips For Success

    • Let the beef and bean mixture cool down a bit before adding it with the lettuce. You don’t want it so hot that it will wilt the lettuce.
    • Use a salad spinner or paper towels to dry those salad greens. Removing as much moisture as you can will help keep the lettuce crisp once it’s dressed.
    • Add ons: If you’re looking to embellish this Dorito Salad, try topping it with a dollop of sour cream, guacamole or even fresh cubed avocado.
    • This recipe can easily be double to make a Taco Salad to feed a crowd.
    • Don’t go overboard with the Catalina Dressing. Too much can make the salad soggy
    • You can break up the Doritos, but don’t over crush them. The dressing will slightly soften the chips. If the chips are crushed, you’ll end up with soggy chips.

    How To Make Dorito Taco Salad Ahead?

    Just follow this layering method for prep-ahead. Add the cooled ground beef and bean mixture in a large bowl. Add the salad greens, olives and tomatoes. Refrigerate. Right before serving, add the tortilla chips and the dressing and toss well. Sprinkle on the cheese and serve.

    FAQ’s

    Will This Dorito Taco Salad Keep Well?

    Unfortunately not, once you dress the salad it will not be crunchy the next day. Trying to save leftovers for the next day just doesn’t work well. The vinegar in the dressing will wilt the salad leaves and the tortilla chips will also become soggy.

    What Flavor Of Doritos Should I Use?

    The classic Nacho Cheese is preferred. But use your favorite.

    Can I Make This With Canned Tomatoes

    You’ll be very disappointed if you do. Canned tomatoes are cooked and using them will compromise the fresh texture of this salad.

    Taco Salad With Doritos and Catalina Dressing

    This Taco Salad can be prepared with Doritos or Fritos. And you can still find bottled Catalina Dressing on the salad dressing aisle at your market. But if you can’t find it, I urge you to make Homemade Catalina Dressing. It’s easy.

    The last time I made this Taco salad with Doritos, I was wearing bell bottom jeans which had been split at the hem to insert a flowered cloth panel to make them even more bell bottomed, a tie-dyed t-shirt that I dyed myself and Cat Stevens was playing in the background “Ooo baby baby it’s a wild world”.

    Talk about nostalgia, between this recipe and boxed Kraft Macaroni and Cheese is what I lived on while receiving my higher education.

    Explore More Southwest and Mexican Inspired Salads

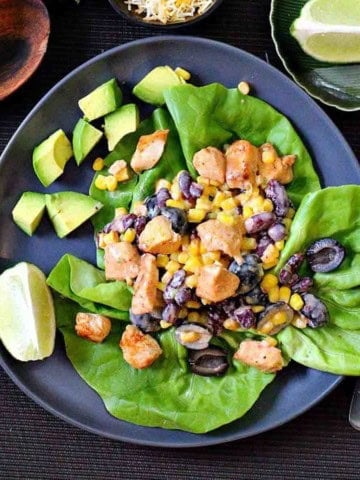
    • A plate of Mexican spicy chicken salad.
      Creamy Southwest Spicy Chicken Salad
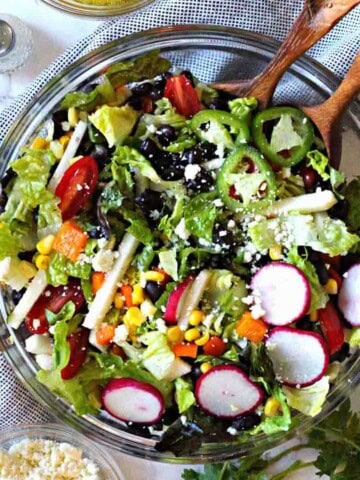
    • Southwestern salad in a clear salad bowl.
      Southwestern Salad with Southwestern Vinaigrette Dressing
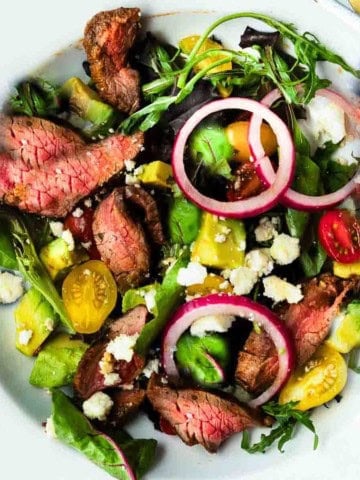
    • Honey glazed skirt steak salad with avocado and pickled onions.
      Honey Glazed Skirt Steak Salad: Recipe and Tips
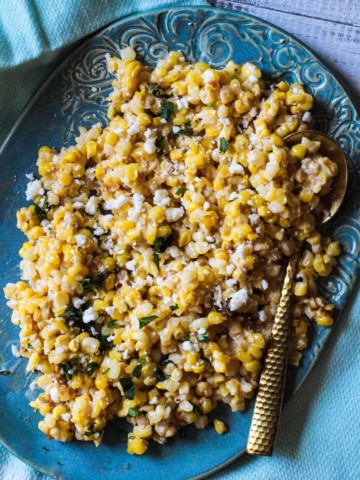
    • Mexican corn salad recipe served on a turquoise platter
      Mexican Corn Salad Recipe with Citrus Aioli

    And if you’re looking for more salad recipes, don’t miss my Salads and Dressings category. You’ll find lots of fresh recipes, including a popular New Mexico dressing from the famous award winning Rancho de Chimayo restaurant for Spicy Ranch Dressing.

    If you liked this recipe, please leave a star ⭐⭐⭐⭐⭐ rating in the recipe card below and leave a comment. I always appreciate your feedback and hearing how everything went.

    And, don’t forget to subscribe to my newsletter for more delicious recipes and cooking tips. Make it a delicious day … every day.

    Original taco salad recipe made with catalina dressing in a wooden salad bowl.
    Print Recipe
    5 from 11 votes

    Original Taco Salad Made with Catalina Dressing

    Taco Salad with Catalina Dressing is an old taco salad recipe from the 70's. Everyone loves a good Mexican salad and this recipe is most certainly a crowd favorite. Ground Beef, fresh lettuce, chili beans and Fritos or Doritos mixed with a sweet and zingy dressing and you've got a winner. This Dorito salad recipe is an old family favorite.
    Prep Time10 minutes mins
    Cook Time20 minutes mins
    Total Time30 minutes mins
    Course: Salads, Salad Dressings and Vinaigrettes
    Cuisine: Southwestern
    Servings: 8
    Calories: 457kcal
    Author: Lea Ann Brown

    Ingredients

    • 1 pound ground beef lean
    • 1 cup Sweet onion chopped
    • 1 package taco seasoning mix or two tablespoons homemade taco seasoning
    • ½ cup water
    • 1 cup fresh tomato diced
    • 2 cups Catalina dressing
    • 15 ounce beans in chili sauce drained but not rinsed
    • 1 ½ cups cheddar cheese grated. We like sharp cheddar here.
    • 9.25 ounce bag Dorito Corn Chips Nacho cheese flavor, or Fritos
    • ½ cup black olives sliced
    • 1 head romaine lettuce rinsed and torn into bite sized pieces. I like to combine romaine and iceberg lettuce here.

    Instructions

    • Brown hamburger and onion in fry pan. Add taco seasoning, and water. Simmer until thick (about 15 ). Stir occasionally so it doesn't stick.
    • Add beans in chili sauce and stir into the meat mixture after it's thickened. If using red navy beans or pinto beans without the sauce, drain before adding to the meat mixture.
    • Place lettuce in a large bowl and add cooled beef and bean mixture. You don't want the beef to be so hot that it will wilt the lettuce.
    • Add taco chips, chopped tomatoes and olives. Mix in enough Catalina Dressing to generously coat the ingredients. Top with grated cheddar cheese.
    • Serve immediately.

    Notes

    Let The Beef Cool: Let the beef and bean mixture cool down a bit before adding it with the lettuce. You don’t want it so hot that it will wilt the lettuce.
    Can This Salad Be Made Ahead Of Time? It can. Just place the salad in a large bowl and add the cooked ground beef bean mixture, olives, tomatoes. Refrigerate and right before serving, add the tortilla chips and the dressing and mix well. Sprinkle on the cheese and serve.
    Will This Dorito Salad Keep? Unfortunately not. Once you dress the salad, trying to save leftovers for the next day just doesn’t work well. The vinegar in the dressing will wilt the salad leaves and the tortilla chips will also become soggy. 
    Dress it up: If you’re looking to embellish this Dorito Salad, try topping it with a dollop of sour cream or guacamole.
    Lettuce tip: Use a salad spinner or paper towels to dry those salad greens. Removing as much moisture as you can will help keep the lettuce crisp once its dressed.
     

    Nutrition

    Calories: 457kcal | Carbohydrates: 26g | Protein: 16g | Fat: 31g | Saturated Fat: 11g | Polyunsaturated Fat: 1g | Monounsaturated Fat: 8g | Trans Fat: 1g | Cholesterol: 63mg | Sodium: 1435mg | Potassium: 439mg | Fiber: 3g | Sugar: 20g | Vitamin A: 7627IU | Vitamin C: 9mg | Calcium: 199mg | Iron: 2mg

    Dorito Taco Salad Made With Catalina Dressing …It’s What’s For Dinner.
    « Previous Page
    Next Page »

    I'm Lea Ann

    Welcome to my Colorado kitchen. If you're a fan of rustic homestyle cuisine, you've come to the right place. I'm a Culinary School Grad with a passion to inspire you to cook as often as you can. I offer reliable, approachable and easy to follow recipes. So grab that skillet and let's cook.

    More about me

    Soup and Stew Recipes

    • Southwest chicken soup with hominy and potatoes.
      Sopa Ranchera, Southwest Chicken Soup
    • Creamy chicken tortilla soup with rotel tomatoes.
      Southwestern Creamy Chicken Tortilla Soup
    • Cowboy chili garnished with grated cheese and jalapeno pepers.
      New Mexico Style Cowboy Chili
    • Ground chicken chile with white beans.
      Giada’s Ground Chicken Chili with White Beans
    • Beef stew with mushrooms served in a skillet.
      Beef Stew With Mushrooms – Crock Pot Method
    • 7-can taco soup with ranch dressing.
      Original 7 Can Taco Soup with Ranch Dressing

    Reader Favorites

    • Super Moist Cheesy Cornbread with Creamed Corn
    • Flemings steakhouse macaroni and cheese in a white bowl.
      Flemings Steakhouse Mac and Cheese
    • A slice of Layered Mexican Casserole with ground beef and corn tortillas.
      Mexican Casserole with Ground Beef and Corn Tortillas
    • Beef Tagliata, thin sliced flank steak served over arugula and cherry tomatoes.
      Beef Tagliata (Italian Steak)
    • Ham and cheese quesadilla made with corn tortillas and topped with a fried egg.
      Crispy Ham and Cheese Corn Tortilla Quesadillas
    • Spinach chicken mushroom skillet dinner.
      Chicken Mushroom and Spinach Skillet

    Footer

    • Contact
    • About
    • Privacy Policy
    • Accessibility Statement
    • ↑ back to top

    Copyright © 2024 Cooking on the Ranch • Powered by Feast+

    Rate This Recipe

    Your vote:


    A rating is required
    A name is required
    An email is required